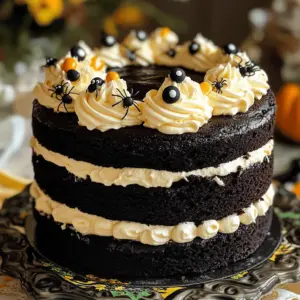
Spooky Black Velvet Halloween Cake
Create a Halloween to remember with this Spooky Black Velvet Halloween Cake! This delicious recipe features rich chocolate flavor, stunning black color, and a fun whipped cream topping adorned with edible glitter and festive decorations. Perfect for your Halloween party or gathering, this cake is sure to impress. Click through to discover the step-by-step instructions and tips to make this treat the highlight of your spooky celebrations!