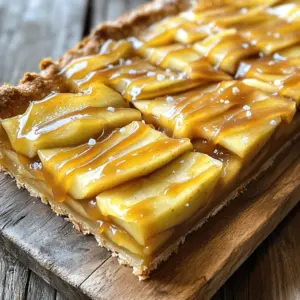
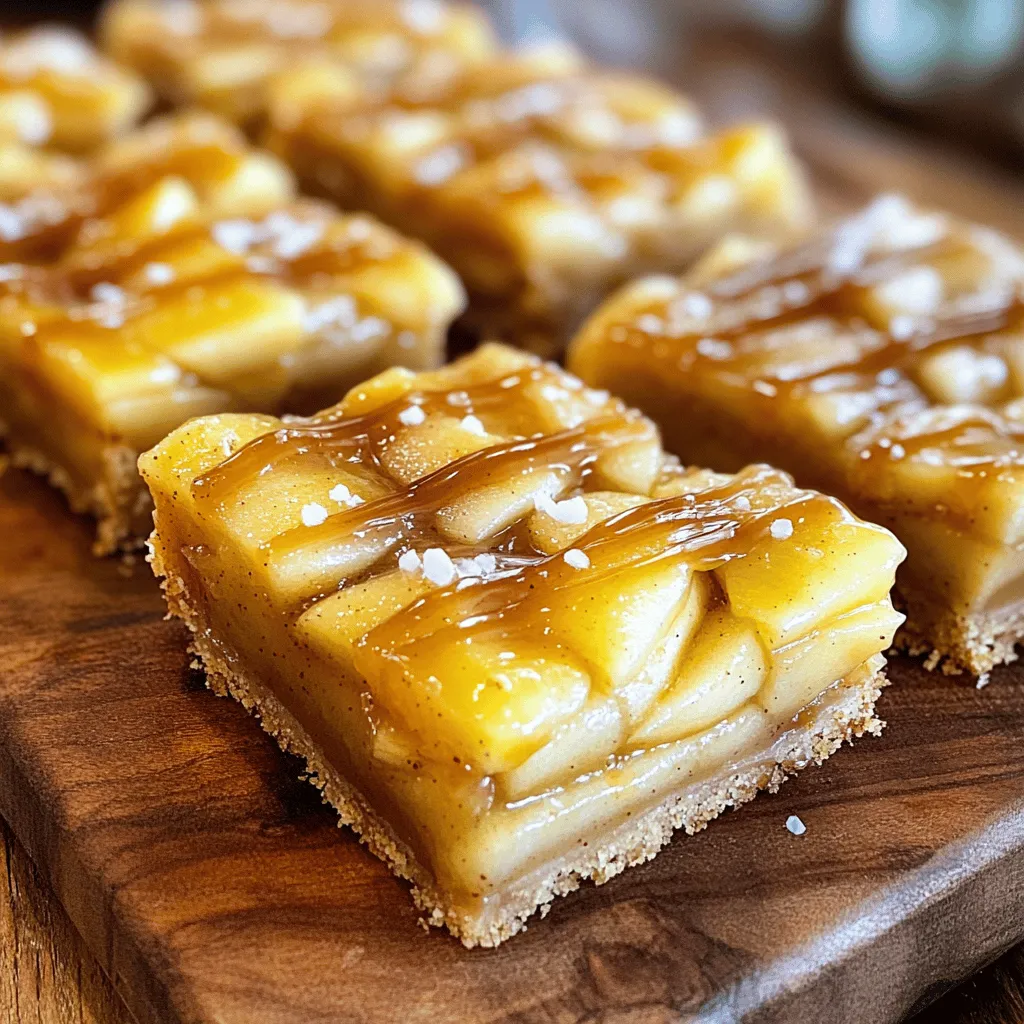
Looking for a dessert that blends sweet and salty in every bite? Salted Caramel Apple Pie Bars hit the mark perfectly. With a buttery crust, juicy apples, and rich homemade caramel, these bars are irresistible. In this post, I’ll guide you through the simple steps to create this delightful treat. Get ready to learn about key ingredients, useful tips, and fun variations. Your taste buds will thank you!
Ingredients
Essential Ingredients for Salted Caramel Apple Pie Bars
To make these bars, gather these key ingredients:
– 2 cups all-purpose flour
– 1/2 cup granulated sugar
– 1/4 teaspoon salt
– 1/2 cup unsalted butter, softened
– 1/4 cup brown sugar
– 1 large egg
– 3 cups thinly sliced apples (about 3 medium apples, preferably Granny Smith)
– 1/2 teaspoon cinnamon
– 1/4 teaspoon nutmeg
– 1/4 cup salted caramel sauce (store-bought or homemade)
– Sea salt for topping
These ingredients work together to create a sweet and savory taste. The apples add a fresh crunch, while the caramel brings a rich, sweet touch. The spices enhance the flavor, making each bite a delight.
Optional Ingredients for Customization
You can customize your bars with these optional ingredients:
– Chopped nuts (like walnuts or pecans) for crunch
– Oats for a chewy texture
– Vanilla extract for added depth
– Dried fruit like raisins or cranberries for sweetness
Adding these can give your bars a unique twist. Feel free to play around with flavors to suit your taste!
Best Apple Varieties to Use
For this recipe, I recommend using Granny Smith apples. They are tart and hold their shape well when baked. Other great options include:
– Honeycrisp for a sweet crunch
– Fuji for a sweeter flavor
– Braeburn for a hint of spice
Choose apples based on your taste. Mixing different types can add depth and fun to your bars!
Step-by-Step Instructions
Preparing the Baking Dish and Oven
First, you need to preheat your oven to 350°F (175°C). This is a key step to get the bars just right. Next, take an 8×8 inch baking dish and line it with parchment paper. Make sure to let some paper hang over the edges. This makes it easy to lift out the bars later.
Making the Crust and Base
In a large bowl, mix 2 cups of all-purpose flour, 1/2 cup of granulated sugar, and 1/4 teaspoon of salt. This combination gives your crust a nice flavor. Now, add in 1/2 cup of softened unsalted butter. Mix it until it looks like coarse crumbs. Next, stir in 1/4 cup of brown sugar and 1 large egg. Keep mixing until the dough sticks together.
Take about 2/3 of this dough and press it into the bottom of your prepared dish. Make sure it is even. Reserve the rest of the dough for later. Bake the crust for 15 to 20 minutes, or until it turns lightly golden. Once baked, set it aside to cool a bit.
Assembling the Apple Filling and Caramel
Now it’s time for the apple filling. In a separate bowl, toss 3 cups of thinly sliced apples with 1/2 teaspoon of cinnamon and 1/4 teaspoon of nutmeg. This gives the apples a warm, spiced flavor. Spread the apple mixture evenly over the baked crust.
Next, drizzle 1/4 cup of salted caramel sauce over the apples. Make sure to cover them well. Finally, crumble the reserved dough over the top. This will create a nice texture when baked.
Return the dish to the oven and bake for another 25 to 30 minutes. You want the top to be golden brown and the apples tender. Once done, let the bars cool completely before lifting them out. Enjoy your delicious creation!
Tips & Tricks
How to Choose the Perfect Apples
When picking apples, look for firm and crisp ones. I love using Granny Smith apples. They are tart and hold up well when baking. You can also try Honeycrisp or Fuji apples for a sweeter taste. Always smell the apples. They should have a nice, fresh scent. Avoid any with bruises or soft spots.
Ensuring Your Crust is Flaky and Delicious
To make your crust flaky, use cold butter. Cut the butter into small pieces before mixing it. Mix the dough just until it comes together. Do not overwork it. This will keep your crust light and flaky. After baking the base, let it cool for a bit. This helps keep the crust from getting soggy when you add the apples and caramel.
Enhancing the Flavor with Additional Spices
Spices can take your bars to the next level. I like to use cinnamon and nutmeg, but you can add more. Try ginger or allspice for a warm kick. You can even add a splash of vanilla extract to the apple mixture. This will give a nice depth of flavor. Just a pinch of sea salt on top brings out all the sweet notes.
Variations
Using Different Types of Apples
You can change up the flavor by using different apples. Granny Smith apples have a tart taste. This tartness balances the sweet caramel. Honeycrisp apples are sweet and crisp. They add a nice texture to the bars. Fuji apples are another great choice. They are sweet and juicy, which makes the bars taste delightful. You can mix different apple types too. This gives a more complex flavor to your bars.
Gluten-Free or Alternative Flour Options
If you need a gluten-free option, try using almond flour or oat flour. Almond flour gives a nutty flavor. Oat flour keeps the bars soft and chewy. You can also use a gluten-free all-purpose blend. Just make sure it has xanthan gum for the best texture. When you use these flours, the bars may need a bit more moisture. Add a splash of water or milk to help with this.
Vegan Adaptations for Salted Caramel Apple Pie Bars
To make these bars vegan, swap the butter for coconut oil or vegan butter. Use a flax egg instead of a regular egg. To make a flax egg, mix one tablespoon of ground flaxseed with three tablespoons of water. Let it sit for a few minutes until it thickens. For caramel, use a vegan caramel sauce or make your own with coconut milk. These changes keep the bars tasty while fitting a vegan diet.
Storage Info
Best Practices for Storing Leftovers
To keep your salted caramel apple pie bars fresh, store them in an airtight container. Place parchment paper between layers to avoid sticking. This method keeps the bars soft and tasty. You can keep them at room temperature for up to three days. If you want them to last longer, refrigerate them for up to a week.
How to Reheat for Optimal Flavor
To enjoy your bars warm, reheating is key. Preheat your oven to 350°F (175°C). Place the bars on a baking sheet. Cover them loosely with foil to prevent drying out. Heat for about 10 minutes. For a quick option, use the microwave. Heat for about 15-20 seconds. This warms them up and softens the caramel.
Freezing Instructions for Long-Term Storage
Freezing is a great way to save your salted caramel apple pie bars for later. First, let the bars cool completely. Then, wrap each bar in plastic wrap. Place the wrapped bars in a freezer-safe bag or container. They can stay frozen for up to three months. When ready to eat, thaw them in the fridge overnight. Reheat as mentioned before for the best taste.
FAQs
Can I use store-bought caramel sauce?
Yes, you can use store-bought caramel sauce. It saves time and still tastes good. Look for a high-quality brand that is creamy and rich. If you want a quick fix, this is a great option. Just pour it over the apples before adding the topping.
How do I make salted caramel from scratch?
To make salted caramel from scratch, you need sugar, butter, and cream. Here’s a simple way to do it:
– In a saucepan, heat 1 cup of sugar over medium heat.
– Stir until it melts and turns golden brown.
– Add 6 tablespoons of butter and stir until melted.
– Slowly pour in 1/2 cup of heavy cream, stirring constantly.
– Add a pinch of sea salt. Let it cool before using.
This method gives you a fresh caramel flavor that is hard to beat!
What can I serve with Salted Caramel Apple Pie Bars?
Salted caramel apple pie bars pair well with many things. Here are some ideas:
– Vanilla ice cream adds creaminess.
– Whipped cream makes it light and fluffy.
– A drizzle of extra salted caramel enhances the flavor.
– A scoop of cinnamon ice cream gives a nice spice kick.
These options make every bite even more enjoyable!
In this article, we explored how to make salted caramel apple pie bars. We discussed essential and optional ingredients, ideal apple types, and gave step-by-step instructions. I shared tips for a perfect crust, flavor boosts, and variations to fit dietary needs. Storing and reheating were also covered.
These bars are not just tasty; they can be adapted to suit your preferences. Try them out and enjoy a sweet treat!