Are you ready to elevate your snack game? Refrigerator pickled okra is a crunchy and tangy delight that adds zest to meals or stands alone as a tasty treat. In this guide, I’ll share everything you need, from fresh ingredients to step-by-step instructions. Plus, I’ll offer tips for the perfect crunch and variations for extra flavor. Let’s dive into the world of pickling and transform okra into your new favorite snack!
Ingredients
Fresh Okra
To start, you need fresh okra. Look for bright green pods that are firm to the touch. About 1 pound will work well. Trim the stems but leave the tips intact. This keeps the texture crunchy. Fresh okra gives the best flavor and crunch.
Brine Components
The brine makes the pickling magic happen. You’ll need:
– 1 cup distilled white vinegar
– 1 cup water
– 2 tablespoons kosher salt
– 1 tablespoon sugar
This mix balances tang and sweetness. The vinegar adds a nice zing, while the sugar softens the sharpness. Salt helps preserve the okra and enhances the taste.
Seasoning and Flavor Enhancers
Flavor is key in pickling. For this recipe, gather:
– 2 cloves garlic, sliced
– 1 teaspoon black peppercorns
– 1 teaspoon mustard seeds
– 1 teaspoon red pepper flakes (optional for heat)
– 1 bay leaf
Garlic brings depth, while the mustard seeds add a unique crunch. Black peppercorns give a warm spice, and red pepper flakes can kick up the heat! The bay leaf rounds out the flavors nicely.
Using these ingredients, you’ll create a crunchy and tangy delight. Try this full recipe for the best results!
Step-by-Step Instructions
Preparing the Brine
To start, gather your ingredients for the brine. You need distilled white vinegar, water, kosher salt, and sugar. Combine these in a medium saucepan. Heat it over medium heat while stirring. You want the salt and sugar to dissolve fully. This step is key for flavor. Once dissolved, take it off the heat and let it cool a bit.
Sterilizing Jars
Next, you must prepare your jars. Sterilization is crucial to keep your pickles fresh. Wash two 16-ounce glass jars well. Rinse them with hot water. You can also run them through the dishwasher. Just ensure they are clean and dry before you fill them.
Packing the Okra
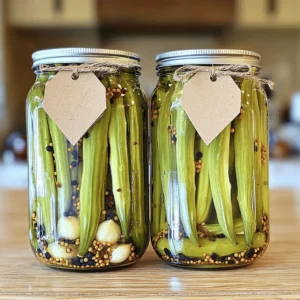
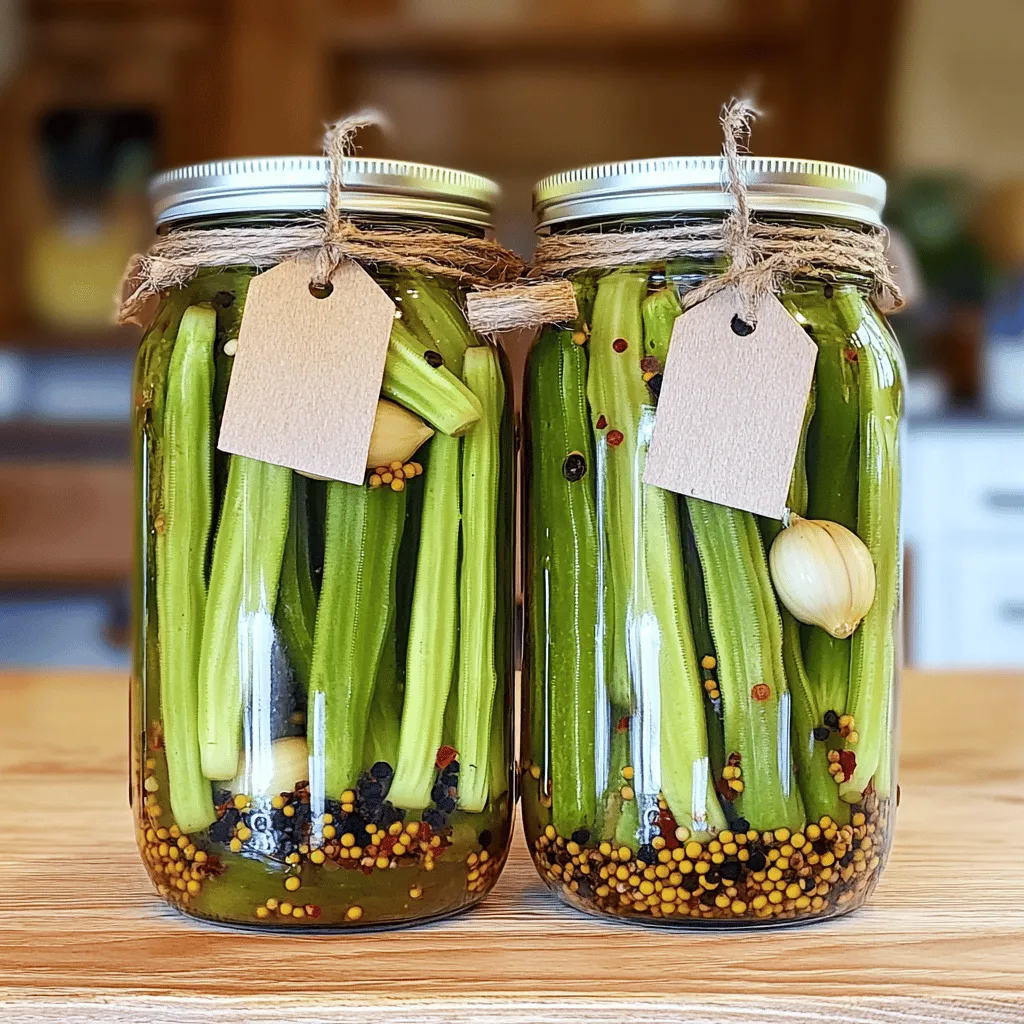
Now it’s time to pack the okra. Take your fresh, trimmed okra and stand them upright in the jars. Make sure they fit snugly but do not crush them. This keeps them crunchy. Next, divide the sliced garlic, black peppercorns, mustard seeds, red pepper flakes, and bay leaf evenly between the jars. Once the okra is in place, pour the cooled brine over it. Make sure the okra is fully submerged. Seal the lids tightly. Let them cool to room temperature. Store them in the fridge for at least 24 hours. You can eat them after a day, but they taste even better after a week!
Tips & Tricks
Ensuring Crunchy Okra
To keep your okra crunchy, start with fresh, young pods. Older okra can turn soft. Trim the stems, but leave the pods whole. Packing them tightly in jars helps maintain their shape. Pour the cooled brine over the okra quickly. This helps keep the crunch intact.
Best Practices for Sterilization
Always sterilize your jars before pickling. Wash them in hot, soapy water. Rinse well to remove soap. You can also run them through the dishwasher for a deep clean. After washing, place the jars in a hot oven for 10 minutes to ensure they’re dry and sterile. This step prevents any unwanted bacteria.
Flavor Enhancement Suggestions
Want to amp up the flavor? Try adding dill seeds or coriander for a fresh twist. You can also toss in a few slices of fresh ginger for a zing. If you like it spicy, add more red pepper flakes or even fresh chili peppers. Experiment with herbs like thyme or oregano to find your perfect blend.
For the full recipe, check out the detailed instructions and enjoy making your pickled okra!
Variations
Heat Levels: Adjusting Spiciness
You can change the heat of your pickled okra easily. If you like it spicy, add more red pepper flakes. For a milder touch, reduce the flakes or skip them. You can also try adding sliced jalapeños or a dash of hot sauce. This gives you control over the spice level.
Additional Flavor Profiles
Experiment with different spices to create unique flavors. For a savory kick, add dill or coriander seeds. If you prefer a more herbal taste, try adding fresh thyme or oregano. This adds depth to your pickles and makes them more exciting.
Alternative Vegetables for Pickling
Don’t limit yourself to just okra! You can use other vegetables too. Try pickling carrots, cucumbers, or green beans. Each veggie brings its own crunch and taste. Mix and match for a colorful jar of pickled goodness. You can find the full recipe in this article to guide your pickling adventure.
Storage Info
How to Store Pickled Okra
Store your refrigerator pickled okra in a cool place. The best spot is your fridge. Use clean glass jars with tight lids. Make sure the okra is fully submerged in the brine. This keeps it fresh and crunchy.
Shelf Life and Freshness Tips
Refrigerator pickled okra lasts for about two months. After that, the taste and texture may change. To enjoy the best flavor, eat it within four weeks. Always check the jar for any signs before eating.
Signs of Spoilage
Look for any changes in color or smell. If the okra looks dull or has an off smell, it may be bad. You might also see mold or bubbles in the jar. If any of these happen, throw it away. Safety first!
For the full recipe, check out the details above.
FAQs
How long do I need to refrigerate pickled okra before eating?
You should refrigerate pickled okra for at least 24 hours. This time allows the flavors to soak in. If you can wait a week, that’s even better! The taste will grow richer and more complex.
Can I use frozen okra for this recipe?
It’s best to use fresh okra for this recipe. Frozen okra can lose its crunch during freezing. If you must use frozen, thaw it first and drain any excess water. This can help maintain some crunch.
What are the health benefits of pickled okra?
Pickled okra holds many health perks. It is low in calories but high in fiber. This fiber aids digestion and keeps you full. Okra also contains vitamins like A and C, which support your immune system. The vinegar in the pickles may even help with blood sugar control.
How to troubleshoot common pickling issues?
If your pickled okra is too salty, try adding more water to the brine. If it’s too soft, check your brining time. You may have kept it too long in the brine. For off flavors, ensure your jars and ingredients are clean and fresh. Always taste as you go!
This article covered how to make pickled okra, including ingredients, instructions, and tips. Fresh okra, brine components, and seasoning create tasty picks. I also shared steps for brining, sterilizing jars, and packing okra. Remember to ensure your okra stays crunchy and consider variations in spice and flavors. Store your pickled okra properly for the best shelf life. Enjoy the health benefits and fun of pickling as you experiment with different ingredients and techniques. Happy pickling!