Ready to bite into fall? These Pumpkin Pie Cake Pops are the perfect treat. Soft, sweet, and packed with pumpkin flavor, they’re simple to make and a hit at any gathering. With just a few key ingredients and easy steps, you can whip up these delightful little bites in no time. Let’s dive into the delicious world of pumpkin pie cake pops and elevate your autumn snacking!
Ingredients
Main Ingredients
– 1 box yellow cake mix
– 1 cup canned pumpkin puree
– 3 eggs
– 1/3 cup vegetable oil
– 1 tablespoon pumpkin pie spice
– 1 teaspoon vanilla extract
To make pumpkin pie cake pops, you start with some simple, tasty items. The yellow cake mix gives a soft base. The canned pumpkin puree brings that lovely fall flavor. You also need eggs for structure. Vegetable oil keeps the cake moist. Pumpkin pie spice adds warmth and depth. Lastly, vanilla extract rounds out the flavors.
Frosting and Coating
– 1 cup cream cheese frosting
– 1 cup white chocolate chips
– 1 tablespoon coconut oil
For the coating, cream cheese frosting is key. It sticks the crumbled cake together. White chocolate chips melt down to create a sweet shell. Adding coconut oil to the chocolate helps it flow better when you dip. This combo makes the pops look great and taste amazing.
Optional Toppings
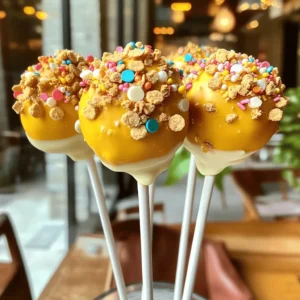
– Sprinkles
– Crushed graham crackers
You can dress up your cake pops with sprinkles or crushed graham crackers. Sprinkles add color and fun. Crushed graham crackers give a nod to traditional pumpkin pie crust. These toppings let you personalize your treats. Get creative and make them your own!
For the full recipe, check out the details above.
Step-by-Step Instructions
Preparing the Cake
– Preheat your oven to 350°F (175°C).
– Grease a 9×13 inch baking pan or line it with parchment paper.
– In a large bowl, mix 1 box of yellow cake mix, 1 cup of canned pumpkin puree, 3 eggs, 1/3 cup of vegetable oil, 1 tablespoon of pumpkin pie spice, and 1 teaspoon of vanilla extract. Mix until smooth.
Baking the Cake
– Pour the batter into the prepared baking pan. Spread it evenly.
– Bake for about 25-30 minutes. Check doneness with a toothpick. It should come out clean.
– Let the cake cool completely in the pan. Then, transfer it to a wire rack.
Forming Cake Pops
– Once cooled, crumble the cake into a large bowl until it’s fine.
– Gradually add 1 cup of cream cheese frosting. Mix with your hands or a spatula. Make sure it’s moist and holds together.
– Scoop small portions and roll them into balls, about 1 inch in diameter. Place them on a lined baking sheet.
– Chill the cake balls in the fridge for about 30 minutes to firm up.
Coating the Cake Pops
– Melt 1 cup of white chocolate chips and 1 tablespoon of coconut oil in a microwave-safe bowl. Heat in 30-second intervals, stirring well after each.
– Remove the cake pops from the fridge. Dip the tip of a lollipop stick in the melted chocolate. Insert it into the center of each cake pop.
– Dip each cake pop fully into the melted chocolate. Let excess chocolate drip off.
– Decorate by rolling them in sprinkles or crushed graham crackers while the chocolate is still wet.
– Place the finished cake pops upright in a styrofoam block or rice-filled container.
– Allow the chocolate to harden for about 10-15 minutes at room temperature or in the fridge.
You can find the full recipe for these delightful treats above!
Tips & Tricks
Perfecting the Cake Pops
To make great cake pops, start with the right mix. The cake should feel moist but not too wet. If it crumbles too much, add more frosting. If it’s too sticky, add some cake mix. Aim for a dough-like texture.
Cooling times matter too. After baking, let the cake cool completely. This step helps the cake firm up. If you rush this, your pops may fall apart. Chill your rolled balls for about 30 minutes. This helps them stay round when dipped in chocolate.
Chocolate Melting Tips
Melting chocolate can be tricky. You want it smooth, not burnt. Use a microwave-safe bowl to melt. Heat in 30-second bursts. Stir between each burst to avoid burning. If you see any lumps, keep stirring until smooth.
You can also use a double boiler. Fill a pot with water and bring it to a simmer. Place a heat-safe bowl on top, making sure it doesn’t touch the water. This method heats slowly and reduces the risk of burning.
Decoration Ideas
Get creative with toppings! You can use sprinkles, crushed graham crackers, or even nuts. For a fun touch, try adding colored sprinkles for a festive look. Use seasonal options too, like orange zest or cinnamon sugar.
Think about themed decorations. For Halloween, add little candy eyes. For Thanksgiving, use leaf-shaped sprinkles. Each season brings a chance to mix it up!
Try these tips to make your pumpkin pie cake pops even better. For the full recipe, check the detailed instructions above.

Variations
Flavor Adjustments
You can easily change the taste of your pumpkin pie cake pops. Adding spices can boost flavor. Try mixing in cinnamon, nutmeg, or ginger for a warm kick. If you want a twist, use a different cake mix. Spice cake or chocolate cake mixes work well too. They will give your pops a unique taste.
Dietary Modifications
If you have dietary needs, you can still enjoy these treats. For gluten-free options, choose a gluten-free cake mix. You can also make them vegan. Use a plant-based cake mix and swap eggs for applesauce. This way, everyone can join in on the fun without worry.
Themed Cake Pops
Make your cake pops fit any occasion! For Halloween, use fun decorations like candy eyes or spooky sprinkles. You can even dip them in orange chocolate for a festive look. For Thanksgiving, consider adding fall-themed decorations like leaf sprinkles or edible glitter. These themed cake pops will surely impress your guests.
For the complete recipe and step-by-step guide to making these delicious pumpkin pie cake pops, check out the Full Recipe.
Storage Info
Short-Term Storage
To keep your pumpkin pie cake pops fresh, store them in the fridge. Use an airtight container to avoid moisture loss. Place parchment paper between layers to prevent sticking. This method helps maintain flavor and texture, keeping them tasty for up to a week.
Long-Term Storage
For long-term storage, you can freeze the cake pops. Wrap each pop in plastic wrap and place them in a freezer bag. They can last up to three months in the freezer. To thaw, remove them from the freezer and let them sit at room temperature for about 30 minutes. This helps them keep their shape and taste.
Shelf Life
How long do cake pops last? When stored properly, they last about a week in the fridge. In the freezer, they hold their quality for three months. Check for signs of spoilage, like a change in smell or mold. If you notice any, it’s best to toss them. Enjoy your pumpkin pie cake pops for as long as possible! For the full recipe, check the earlier section.
FAQs
Can I make these pumpkin pie cake pops ahead of time?
Yes, you can prepare these cake pops ahead of time. Make the cake and form the pops. After rolling them into balls, chill the pops in the fridge. Once firm, wrap them in plastic wrap. Store them in the fridge for up to three days before coating. This saves time on the day you plan to serve them.
What can I use instead of cream cheese frosting?
If you want an alternative to cream cheese frosting, try using buttercream. It is sweet and smooth. You could also use chocolate ganache for a rich flavor. If you need a dairy-free option, coconut cream works well. Just whip it until fluffy for a nice texture.
How do I achieve a smooth chocolate coating?
To get a smooth chocolate coating, start with good-quality chocolate. Melt it slowly in the microwave or double boiler. Stir often to avoid burning. Dip each cake pop quickly and let the excess drip off. If needed, tap gently on the side of the bowl. This gives a nice, even layer.
You learned how to make tasty pumpkin pie cake pops using simple ingredients. We covered the steps from mixing the batter to decorating with fun toppings. You also picked up tips for storing your treats.
Now, get creative with flavors and decorations. Enjoy sharing them at parties or holidays. Remember, the fun is not just in making them, but in sharing the joy they bring. Happy baking!