![For the perfect pumpkin cake pops, you need simple ingredients that blend well together. Here’s what you’ll need: - 1 cup pumpkin puree - 1 1/2 cups all-purpose flour - 1 cup granulated sugar - 1/2 cup brown sugar - 1/2 cup vegetable oil - 3 large eggs - 1 teaspoon vanilla extract - 1 teaspoon baking powder - 1/2 teaspoon baking soda - 1 teaspoon ground cinnamon - 1/2 teaspoon ground nutmeg - 1/4 teaspoon ground cloves - 1/2 teaspoon salt - 8 oz cream cheese, softened - 2 cups white chocolate chips (for coating) - Sprinkles or crushed pecans for decoration These ingredients create a moist cake that’s full of flavor. Pumpkin puree gives a rich, warm taste, while the spices add a cozy touch. The cream cheese blends perfectly with the cake to make the pops smooth and creamy. For the coating, white chocolate chips melt beautifully to create a sweet shell. You can explore the [Full Recipe] for a detailed guide. Happy baking! First, preheat your oven to 350°F (175°C). While it heats, grease and flour a 9x13 inch baking pan. This helps the cake come out easily. In a large mixing bowl, combine the pumpkin puree, granulated sugar, brown sugar, vegetable oil, eggs, and vanilla extract. Whisk these wet ingredients well until smooth and blended. Next, take another bowl and whisk together the dry ingredients. Combine the all-purpose flour, baking powder, baking soda, ground cinnamon, ground nutmeg, ground cloves, and salt. Mixing these separately helps ensure even flavor and texture in your cake. Now, gradually add the dry mixture to the wet ingredients. Mix until just combined. Be careful not to overmix. Pour the batter into your prepared baking pan, spreading it evenly. Bake for 30-35 minutes. Check if it’s done by inserting a toothpick into the center. If it comes out clean, your cake is ready. Let it cool completely in the pan. Once cooled, crumble the cake into a large bowl until it resembles fine crumbs. Add the softened cream cheese to the crumbled cake and mix thoroughly. You want it to be smooth and well combined. Then, roll the mixture into small balls, about 1 inch in diameter. Place these on a parchment-lined baking sheet. Chill them in the refrigerator for at least 1 hour. This helps them firm up, making them easier to dip later. To make your pumpkin cake pop base perfect, start with the right baking method. First, ensure your oven is preheated to 350°F (175°C). This helps the cake rise evenly. Use a greased and floured 9x13-inch pan. This way, the cake comes out easily. Do not overmix the batter. When you combine wet and dry ingredients, mix until just blended. Overmixing can make your cake tough. A gentle hand keeps it light and fluffy. Melting chocolate is key for a great coating. Use a microwave-safe bowl and heat the chocolate chips in 30-second bursts. Stir in between heating until smooth. This prevents burning and clumping. For coating your cake pops, dip each one in the melted chocolate. Allow any excess chocolate to drip off. This gives a nice finish and avoids a thick layer. Get creative with toppings! You can use sprinkles, crushed pecans, or even a drizzle of chocolate. Each option adds its own charm and flavor. For a fun display, use colorful stands. You can also place your cake pops in a foam block or a cup filled with rice. This keeps them upright and shows off their beauty. Find the full recipe for more detailed steps and enjoy making your pumpkin cake pops! {{image_2}} You can change your cake pops' taste in many fun ways. Adding spices makes a big difference. For instance, try adding ginger or allspice for a warm kick. You can also mix in some orange zest for a fresh twist. When it comes to coatings, white chocolate is popular, but don’t stop there! Dark chocolate gives a rich flavor, while milk chocolate is sweet and creamy. You could even drizzle different types of chocolate on top for a fancy look. Each choice offers a new taste adventure. If you need gluten-free cake pops, use gluten-free flour. This swap works well and keeps the cake moist and tasty. Just make sure the other ingredients, like baking powder, are also gluten-free. For vegan cake pops, swap eggs with flaxseed meal or applesauce. Use a plant-based cream cheese for the filling. You can also choose dairy-free chocolate for coating. These changes keep your treats yummy while meeting dietary needs. Check out the Full Recipe for all the details on making these delightful pumpkin cake pops! To keep your pumpkin cake pops fresh, store them in the fridge. Place them in an airtight container. This helps maintain their moisture and flavor. If you stack them, add parchment paper between layers. This prevents them from sticking together. For long-term storage, you can freeze cake pops. First, chill them in the fridge for about an hour. Then, wrap each pop in plastic wrap. Place them in a freezer-safe bag or container. They can last up to three months in the freezer. When you're ready to enjoy, thaw them in the fridge overnight. These pumpkin cake pops stay fresh for about a week in the fridge. After that, they may dry out. Look for signs they have gone bad. If they smell off or have a slimy texture, it’s best to toss them. Always check before you bite! For more details on making these tasty treats, check the Full Recipe. To keep your cake pops from cracking, follow these tips: - Cool the cake completely before crumbling. Warm cake can lead to cracks. - Chill the cake balls for at least an hour. This helps them hold their shape. - Dip them slowly in the melted chocolate. Swirl gently to avoid breaking. - Use a thin coat of chocolate. A thick layer can add weight and cause cracks. Maintaining a smooth finish is key. If you see cracks, you can cover them with sprinkles or nuts. Yes, you can use store-bought cake mix for your pumpkin cake pops. This shortcut saves time and effort. Just choose a spice or yellow cake mix for best results. Using a mix changes the flavor slightly. It may taste less homemade but is still delicious. Add pumpkin puree and spices to enhance the flavor profile. Pumpkin cake pops fit many occasions. They shine at fall gatherings and Halloween parties. Their cute shape makes them fun for kids and adults alike. Serve them at Thanksgiving as a fun dessert. They are also great for birthdays or fall festivals. Their festive look and flavor make them a perfect treat for any celebration. We’ve covered how to make delicious pumpkin cake pops from scratch. We started with the essential ingredients and detailed step-by-step instructions. I shared baking tips to avoid common mistakes and suggested fun variations to keep things fresh. Remember, proper storage keeps your cake pops at their best longer. As you try these recipes, have fun exploring your creativity. Enjoy every bite of your tasty treats!](https://stirredrecipes.com/wp-content/uploads/2025/07/a8c7080e-92cd-45b9-b3a8-b86c1fdc4902.webp)
Craving a sweet, seasonal treat? You’re in the right place! In this easy recipe for Pumpkin Cake Pops, I’ll guide you through every step. From mixing the ingredients to rolling those scrumptious bites, you’ll discover how simple it is to bring fall flavors to your kitchen. Perfect for parties or cozy gatherings, these cake pops will delight everyone. Let’s get started on your new favorite snack!
Ingredients
For the perfect pumpkin cake pops, you need simple ingredients that blend well together. Here’s what you’ll need:
– 1 cup pumpkin puree
– 1 1/2 cups all-purpose flour
– 1 cup granulated sugar
– 1/2 cup brown sugar
– 1/2 cup vegetable oil
– 3 large eggs
– 1 teaspoon vanilla extract
– 1 teaspoon baking powder
– 1/2 teaspoon baking soda
– 1 teaspoon ground cinnamon
– 1/2 teaspoon ground nutmeg
– 1/4 teaspoon ground cloves
– 1/2 teaspoon salt
– 8 oz cream cheese, softened
– 2 cups white chocolate chips (for coating)
– Sprinkles or crushed pecans for decoration
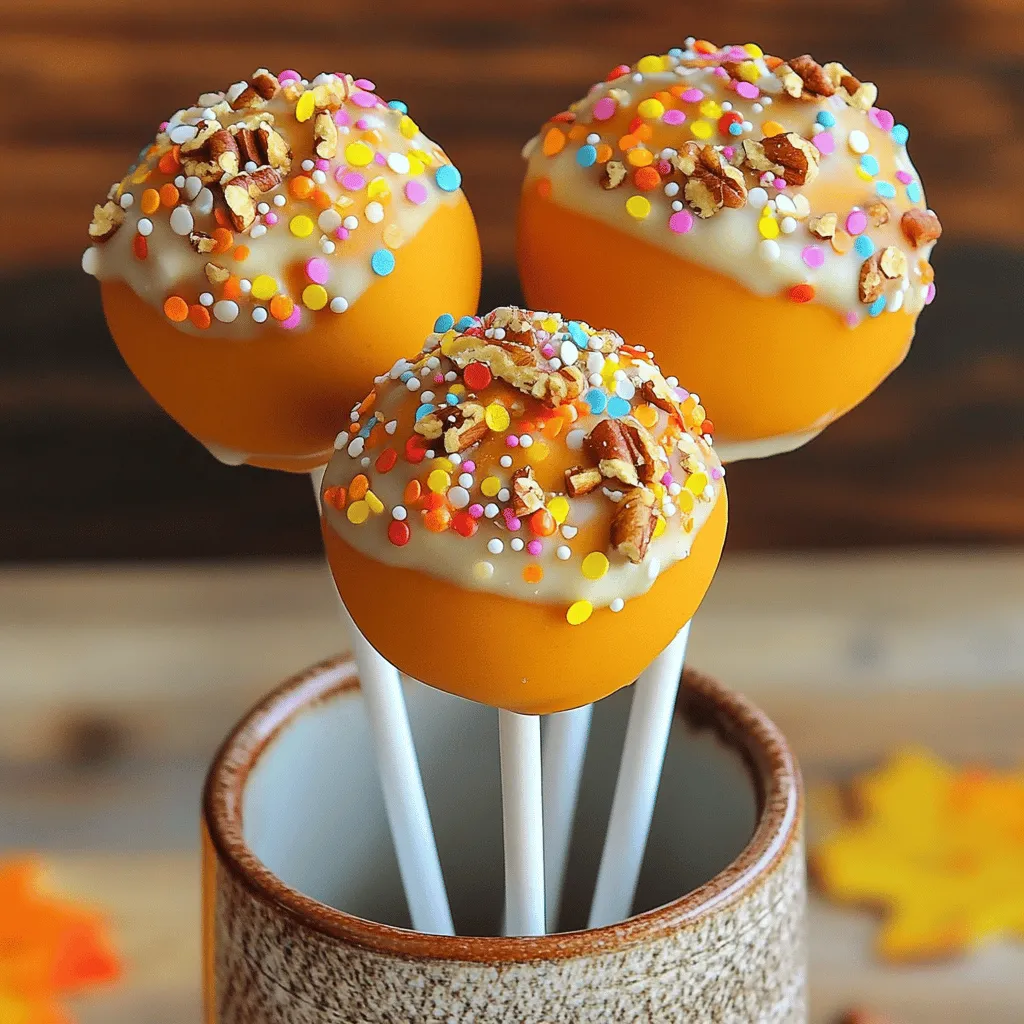
These ingredients create a moist cake that’s full of flavor. Pumpkin puree gives a rich, warm taste, while the spices add a cozy touch. The cream cheese blends perfectly with the cake to make the pops smooth and creamy. For the coating, white chocolate chips melt beautifully to create a sweet shell.
You can explore the [Full Recipe] for a detailed guide. Happy baking!
Step-by-Step Instructions
Prepping the Batter
First, preheat your oven to 350°F (175°C). While it heats, grease and flour a 9×13 inch baking pan. This helps the cake come out easily. In a large mixing bowl, combine the pumpkin puree, granulated sugar, brown sugar, vegetable oil, eggs, and vanilla extract. Whisk these wet ingredients well until smooth and blended.
Mixing Dry Ingredients
Next, take another bowl and whisk together the dry ingredients. Combine the all-purpose flour, baking powder, baking soda, ground cinnamon, ground nutmeg, ground cloves, and salt. Mixing these separately helps ensure even flavor and texture in your cake.
Baking and Cooling the Cake
Now, gradually add the dry mixture to the wet ingredients. Mix until just combined. Be careful not to overmix. Pour the batter into your prepared baking pan, spreading it evenly. Bake for 30-35 minutes. Check if it’s done by inserting a toothpick into the center. If it comes out clean, your cake is ready. Let it cool completely in the pan. Once cooled, crumble the cake into a large bowl until it resembles fine crumbs.
Forming Cake Pops
Add the softened cream cheese to the crumbled cake and mix thoroughly. You want it to be smooth and well combined. Then, roll the mixture into small balls, about 1 inch in diameter. Place these on a parchment-lined baking sheet. Chill them in the refrigerator for at least 1 hour. This helps them firm up, making them easier to dip later.
Tips & Tricks
Baking Tips
To make your pumpkin cake pop base perfect, start with the right baking method. First, ensure your oven is preheated to 350°F (175°C). This helps the cake rise evenly. Use a greased and floured 9×13-inch pan. This way, the cake comes out easily.
Do not overmix the batter. When you combine wet and dry ingredients, mix until just blended. Overmixing can make your cake tough. A gentle hand keeps it light and fluffy.
Dipping Tips
Melting chocolate is key for a great coating. Use a microwave-safe bowl and heat the chocolate chips in 30-second bursts. Stir in between heating until smooth. This prevents burning and clumping.
For coating your cake pops, dip each one in the melted chocolate. Allow any excess chocolate to drip off. This gives a nice finish and avoids a thick layer.
Decoration Suggestions
Get creative with toppings! You can use sprinkles, crushed pecans, or even a drizzle of chocolate. Each option adds its own charm and flavor.
For a fun display, use colorful stands. You can also place your cake pops in a foam block or a cup filled with rice. This keeps them upright and shows off their beauty.
Find the full recipe for more detailed steps and enjoy making your pumpkin cake pops!
Variations
Flavor Variations
You can change your cake pops’ taste in many fun ways. Adding spices makes a big difference. For instance, try adding ginger or allspice for a warm kick. You can also mix in some orange zest for a fresh twist.
When it comes to coatings, white chocolate is popular, but don’t stop there! Dark chocolate gives a rich flavor, while milk chocolate is sweet and creamy. You could even drizzle different types of chocolate on top for a fancy look. Each choice offers a new taste adventure.
Dietary Variations
If you need gluten-free cake pops, use gluten-free flour. This swap works well and keeps the cake moist and tasty. Just make sure the other ingredients, like baking powder, are also gluten-free.
For vegan cake pops, swap eggs with flaxseed meal or applesauce. Use a plant-based cream cheese for the filling. You can also choose dairy-free chocolate for coating. These changes keep your treats yummy while meeting dietary needs.
Check out the Full Recipe for all the details on making these delightful pumpkin cake pops!
Storage Info
Storing Cake Pops
To keep your pumpkin cake pops fresh, store them in the fridge. Place them in an airtight container. This helps maintain their moisture and flavor. If you stack them, add parchment paper between layers. This prevents them from sticking together.
For long-term storage, you can freeze cake pops. First, chill them in the fridge for about an hour. Then, wrap each pop in plastic wrap. Place them in a freezer-safe bag or container. They can last up to three months in the freezer. When you’re ready to enjoy, thaw them in the fridge overnight.
Shelf Life
These pumpkin cake pops stay fresh for about a week in the fridge. After that, they may dry out. Look for signs they have gone bad. If they smell off or have a slimy texture, it’s best to toss them. Always check before you bite!
For more details on making these tasty treats, check the Full Recipe.
FAQs
How do I prevent my cake pops from cracking?
To keep your cake pops from cracking, follow these tips:
– Cool the cake completely before crumbling. Warm cake can lead to cracks.
– Chill the cake balls for at least an hour. This helps them hold their shape.
– Dip them slowly in the melted chocolate. Swirl gently to avoid breaking.
– Use a thin coat of chocolate. A thick layer can add weight and cause cracks.
Maintaining a smooth finish is key. If you see cracks, you can cover them with sprinkles or nuts.
Can I use store-bought cake mix for pumpkin cake pops?
Yes, you can use store-bought cake mix for your pumpkin cake pops. This shortcut saves time and effort. Just choose a spice or yellow cake mix for best results.
Using a mix changes the flavor slightly. It may taste less homemade but is still delicious. Add pumpkin puree and spices to enhance the flavor profile.
What occasions are best for serving pumpkin cake pops?
Pumpkin cake pops fit many occasions. They shine at fall gatherings and Halloween parties. Their cute shape makes them fun for kids and adults alike.
Serve them at Thanksgiving as a fun dessert. They are also great for birthdays or fall festivals. Their festive look and flavor make them a perfect treat for any celebration.
We’ve covered how to make delicious pumpkin cake pops from scratch. We started with the essential ingredients and detailed step-by-step instructions. I shared baking tips to avoid common mistakes and suggested fun variations to keep things fresh. Remember, proper storage keeps your cake pops at their best longer. As you try these recipes, have fun exploring your creativity. Enjoy every bite of your tasty treats!
![For the perfect pumpkin cake pops, you need simple ingredients that blend well together. Here’s what you’ll need: - 1 cup pumpkin puree - 1 1/2 cups all-purpose flour - 1 cup granulated sugar - 1/2 cup brown sugar - 1/2 cup vegetable oil - 3 large eggs - 1 teaspoon vanilla extract - 1 teaspoon baking powder - 1/2 teaspoon baking soda - 1 teaspoon ground cinnamon - 1/2 teaspoon ground nutmeg - 1/4 teaspoon ground cloves - 1/2 teaspoon salt - 8 oz cream cheese, softened - 2 cups white chocolate chips (for coating) - Sprinkles or crushed pecans for decoration These ingredients create a moist cake that’s full of flavor. Pumpkin puree gives a rich, warm taste, while the spices add a cozy touch. The cream cheese blends perfectly with the cake to make the pops smooth and creamy. For the coating, white chocolate chips melt beautifully to create a sweet shell. You can explore the [Full Recipe] for a detailed guide. Happy baking! First, preheat your oven to 350°F (175°C). While it heats, grease and flour a 9x13 inch baking pan. This helps the cake come out easily. In a large mixing bowl, combine the pumpkin puree, granulated sugar, brown sugar, vegetable oil, eggs, and vanilla extract. Whisk these wet ingredients well until smooth and blended. Next, take another bowl and whisk together the dry ingredients. Combine the all-purpose flour, baking powder, baking soda, ground cinnamon, ground nutmeg, ground cloves, and salt. Mixing these separately helps ensure even flavor and texture in your cake. Now, gradually add the dry mixture to the wet ingredients. Mix until just combined. Be careful not to overmix. Pour the batter into your prepared baking pan, spreading it evenly. Bake for 30-35 minutes. Check if it’s done by inserting a toothpick into the center. If it comes out clean, your cake is ready. Let it cool completely in the pan. Once cooled, crumble the cake into a large bowl until it resembles fine crumbs. Add the softened cream cheese to the crumbled cake and mix thoroughly. You want it to be smooth and well combined. Then, roll the mixture into small balls, about 1 inch in diameter. Place these on a parchment-lined baking sheet. Chill them in the refrigerator for at least 1 hour. This helps them firm up, making them easier to dip later. To make your pumpkin cake pop base perfect, start with the right baking method. First, ensure your oven is preheated to 350°F (175°C). This helps the cake rise evenly. Use a greased and floured 9x13-inch pan. This way, the cake comes out easily. Do not overmix the batter. When you combine wet and dry ingredients, mix until just blended. Overmixing can make your cake tough. A gentle hand keeps it light and fluffy. Melting chocolate is key for a great coating. Use a microwave-safe bowl and heat the chocolate chips in 30-second bursts. Stir in between heating until smooth. This prevents burning and clumping. For coating your cake pops, dip each one in the melted chocolate. Allow any excess chocolate to drip off. This gives a nice finish and avoids a thick layer. Get creative with toppings! You can use sprinkles, crushed pecans, or even a drizzle of chocolate. Each option adds its own charm and flavor. For a fun display, use colorful stands. You can also place your cake pops in a foam block or a cup filled with rice. This keeps them upright and shows off their beauty. Find the full recipe for more detailed steps and enjoy making your pumpkin cake pops! {{image_2}} You can change your cake pops' taste in many fun ways. Adding spices makes a big difference. For instance, try adding ginger or allspice for a warm kick. You can also mix in some orange zest for a fresh twist. When it comes to coatings, white chocolate is popular, but don’t stop there! Dark chocolate gives a rich flavor, while milk chocolate is sweet and creamy. You could even drizzle different types of chocolate on top for a fancy look. Each choice offers a new taste adventure. If you need gluten-free cake pops, use gluten-free flour. This swap works well and keeps the cake moist and tasty. Just make sure the other ingredients, like baking powder, are also gluten-free. For vegan cake pops, swap eggs with flaxseed meal or applesauce. Use a plant-based cream cheese for the filling. You can also choose dairy-free chocolate for coating. These changes keep your treats yummy while meeting dietary needs. Check out the Full Recipe for all the details on making these delightful pumpkin cake pops! To keep your pumpkin cake pops fresh, store them in the fridge. Place them in an airtight container. This helps maintain their moisture and flavor. If you stack them, add parchment paper between layers. This prevents them from sticking together. For long-term storage, you can freeze cake pops. First, chill them in the fridge for about an hour. Then, wrap each pop in plastic wrap. Place them in a freezer-safe bag or container. They can last up to three months in the freezer. When you're ready to enjoy, thaw them in the fridge overnight. These pumpkin cake pops stay fresh for about a week in the fridge. After that, they may dry out. Look for signs they have gone bad. If they smell off or have a slimy texture, it’s best to toss them. Always check before you bite! For more details on making these tasty treats, check the Full Recipe. To keep your cake pops from cracking, follow these tips: - Cool the cake completely before crumbling. Warm cake can lead to cracks. - Chill the cake balls for at least an hour. This helps them hold their shape. - Dip them slowly in the melted chocolate. Swirl gently to avoid breaking. - Use a thin coat of chocolate. A thick layer can add weight and cause cracks. Maintaining a smooth finish is key. If you see cracks, you can cover them with sprinkles or nuts. Yes, you can use store-bought cake mix for your pumpkin cake pops. This shortcut saves time and effort. Just choose a spice or yellow cake mix for best results. Using a mix changes the flavor slightly. It may taste less homemade but is still delicious. Add pumpkin puree and spices to enhance the flavor profile. Pumpkin cake pops fit many occasions. They shine at fall gatherings and Halloween parties. Their cute shape makes them fun for kids and adults alike. Serve them at Thanksgiving as a fun dessert. They are also great for birthdays or fall festivals. Their festive look and flavor make them a perfect treat for any celebration. We’ve covered how to make delicious pumpkin cake pops from scratch. We started with the essential ingredients and detailed step-by-step instructions. I shared baking tips to avoid common mistakes and suggested fun variations to keep things fresh. Remember, proper storage keeps your cake pops at their best longer. As you try these recipes, have fun exploring your creativity. Enjoy every bite of your tasty treats!](https://stirredrecipes.com/wp-content/uploads/2025/07/a8c7080e-92cd-45b9-b3a8-b86c1fdc4902-300x300.webp)