If you crave a fulfilling dish that warms the soul, look no further than Japanese Katsu Bowls with Tonkatsu Sauce. This dish combines crispy, juicy protein with a savory sauce, all served over fluffy rice. In this guide, I’ll share everything you need to create the perfect katsu bowl at home, from the essential ingredients to expert tips. Let’s get cooking and delight your taste buds!
Ingredients
List of Ingredients
– 2 boneless chicken thighs (or pork loin if preferred)
– 1 cup panko breadcrumbs
– 1/2 cup all-purpose flour
– 2 large eggs
– Salt and pepper to taste
– Vegetable oil (for frying)
– 2 cups cooked jasmine rice
– 1 cup shredded cabbage
– 2 green onions, sliced
– Pickled ginger (for garnish)
– 1/4 cup tonkatsu sauce (store-bought or homemade)
When I prepare my katsu bowls, I love using fresh chicken thighs. They give a juicy bite. If you prefer pork, that works too! I always use panko breadcrumbs. They provide a great crunch. The flour and eggs help the breadcrumbs stick.
Don’t forget about the rice! Jasmine rice is my go-to for this dish. It has a mild flavor that pairs well with the katsu. I also add shredded cabbage for some crispiness and freshness. Green onions add a nice pop of color and flavor.
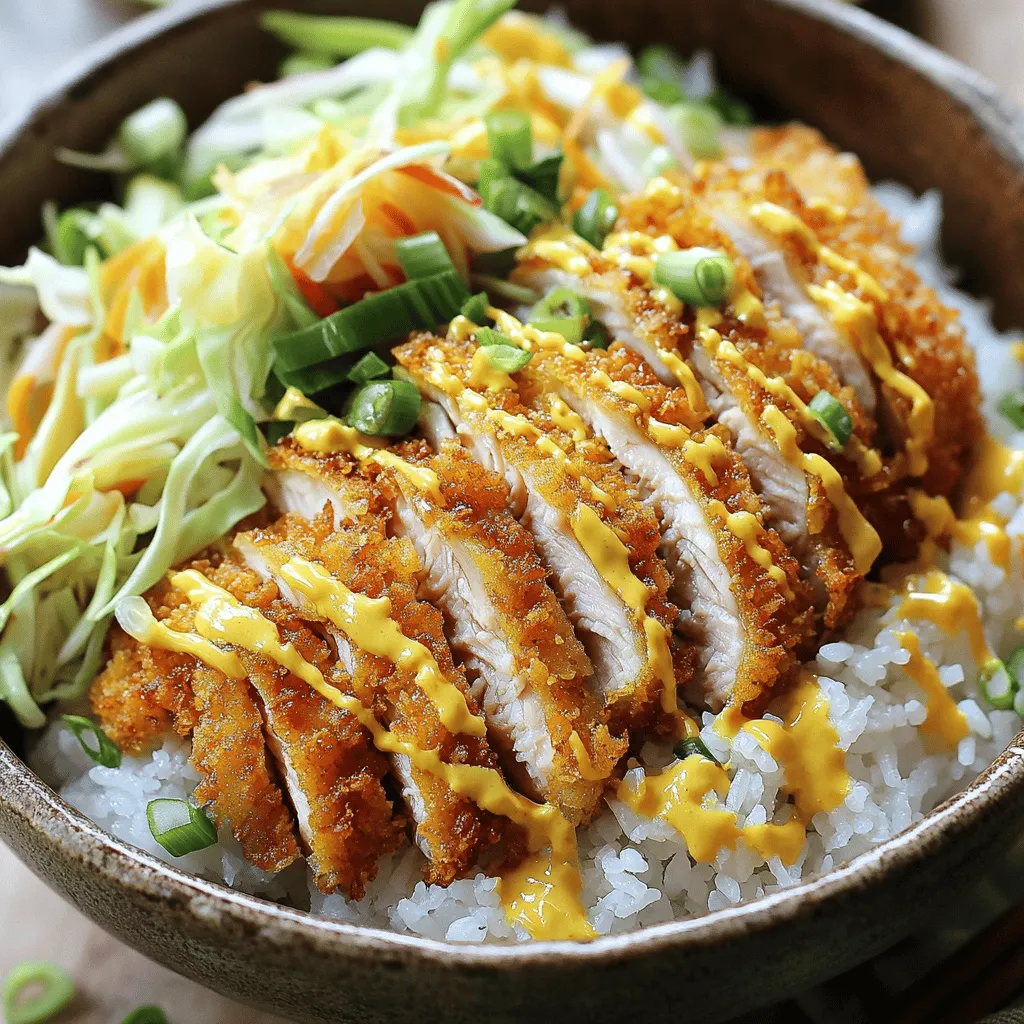
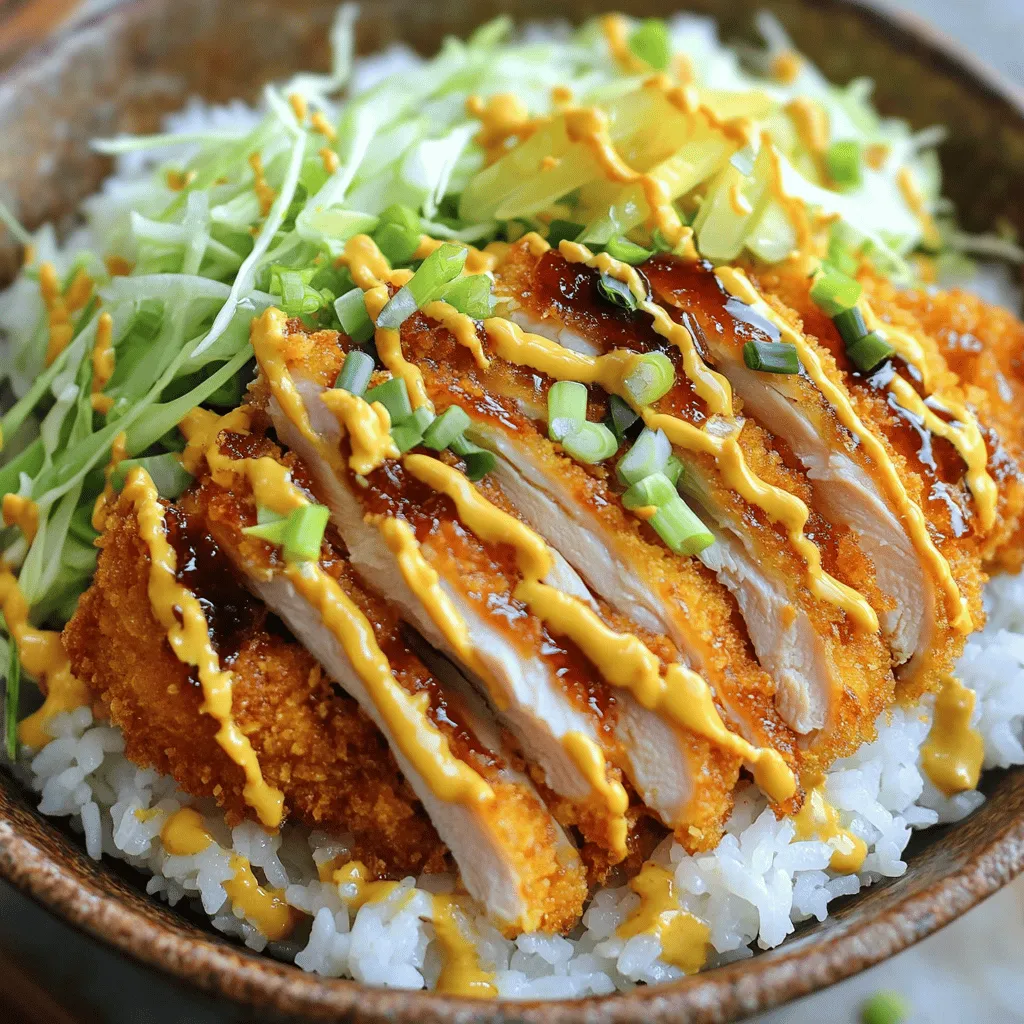
For garnish, I like to use pickled ginger. It adds a tangy kick that lifts the dish. Lastly, the star of the show is the tonkatsu sauce. It’s sweet, savory, and pairs perfectly with the crispy katsu.
You can find the full recipe with detailed steps and tips to make this dish shine. Enjoy the process and the delicious outcome!
Step-by-Step Instructions
Preparing the Chicken
Start with two boneless chicken thighs or pork loin. Season them with salt and pepper on both sides. This simple step adds flavor. If you use pork, season it the same way. Coating the meat is key for the crispy texture. A good coat helps the panko stick better and gives crunch.
Dredging and Frying
Next, set up your dredging station. You need three bowls. Put flour in one, beaten eggs in the second, and panko breadcrumbs in the last. Now, take one piece of chicken. Dust it with flour first, then dip it into the eggs. Finally, coat it well with panko. Repeat this for the second piece.
For frying, heat about 1/4 inch of vegetable oil in a large skillet. Aim for medium-high heat, around 350°F (175°C). To test if the oil is hot enough, drop a few breadcrumbs in. If they sizzle, it’s ready. Carefully add the chicken. Cook for about 5-7 minutes on each side. Look for a golden brown color. Check the internal temperature; it should reach 165°F (74°C). After frying, put the chicken on paper towels to drain the oil.
Assembling the Katsu Bowls
Now it’s time to assemble your katsu bowls. Start with about 1 cup of cooked jasmine rice in each serving bowl. Next, place your sliced chicken on top. Add a handful of shredded cabbage for crunch. Drizzle tonkatsu sauce over everything to enhance the flavor. It adds a sweet and savory touch. Finish with sliced green onions and a bit of pickled ginger on the side for extra zing. Enjoy your meal! For the full recipe, check the details above.
Tips & Tricks
Perfecting the Katsu Texture
To get that perfect crispiness, use panko breadcrumbs. They are lighter than regular crumbs. This lightness helps create a crunchy outer layer. Make sure to press the breadcrumbs onto the meat. This ensures they stick well while frying.
Controlling oil temperature is key for great katsu. Use a thermometer to check the oil’s heat. Aim for about 350°F (175°C). If the oil is too hot, the coating may burn. If it’s too cool, the katsu will soak up too much oil. Frying in small batches helps keep the temperature steady.
Making Homemade Tonkatsu Sauce
You can make a tasty tonkatsu sauce at home. Here are the simple ingredients you need:
– 1/4 cup ketchup
– 2 tablespoons soy sauce
– 1 tablespoon Worcestershire sauce
– 1 tablespoon sugar
– 1 teaspoon Dijon mustard
– A pinch of garlic powder
Mix these ingredients in a bowl. Stir until smooth. That’s it! Your sauce is ready in minutes.
Serving Suggestions
Katsu bowls taste great with sides that add color and crunch. Try serving with:
– Steamed broccoli
– Edamame
– Miso soup
These sides bring balance to your meal. For drinks, consider pairing with green tea or a light beer. These drinks enhance the flavors and give an authentic touch to your katsu experience. Enjoy your delicious bowl!
Variations
Alternative Proteins
You can switch up the meat in your katsu bowl. For a vegetarian option, use eggplant or tofu. Both become crispy and delicious when coated in panko and fried. For vegans, tofu is the best choice. It absorbs flavors well. For meat lovers, consider using beef or shrimp for katsu. Each protein brings its own unique taste to the dish.
Flavor Profile Adjustments
Want a kick? Add spicy mayo or chili oil to your tonkatsu sauce. This gives the dish a fun twist. You can also mix in sriracha or wasabi for extra heat. If you run out of tonkatsu sauce, use soy sauce mixed with a bit of sugar and vinegar. This creates a similar sweet and salty flavor.
Bowl Toppings
Toppings can make your katsu bowl even better. Try adding avocado slices for creaminess. You can also sprinkle sesame seeds for a nutty crunch. Fresh herbs like cilantro or basil provide a burst of color and flavor. Seasonal garnishes like radish or cherry tomatoes can brighten your dish. These touches make your katsu bowl visually appealing and tasty.
Storage Info
Storing Leftovers
To keep your katsu bowls fresh, store them in the fridge. Place the chicken and rice in separate containers. This helps keep the chicken crispy and the rice fluffy. Use airtight containers to avoid moisture. Glass containers work well for this. Make sure to cool everything to room temperature before sealing them.
Reheating Tips
When you reheat your katsu, aim for the best taste. Use an oven or an air fryer to keep the chicken crispy. Preheat your oven to 375°F (190°C). Place the chicken on a baking sheet for about 10 minutes. For the rice, add a splash of water and cover it. This will help the rice stay moist. Microwave the rice for one to two minutes, checking often.
Freezing Options
If you want to freeze your katsu chicken and rice, do it carefully. Wrap each piece of chicken tightly in plastic wrap. Then, place them in a freezer bag. Keep the rice in a separate container. For thawing, move the chicken to the fridge overnight. Reheat as detailed above. Cooked rice can be reheated straight from the freezer. Just add a little water in a microwave-safe dish and heat. Enjoy your katsu bowl later!
FAQs
How to make authentic tonkatsu sauce?
To make authentic tonkatsu sauce, you need a few key ingredients. The main components include:
– Worcestershire sauce
– Soy sauce
– Ketchup
– Sugar
– Mirin (sweet rice wine)
– Mustard
These ingredients blend to create a rich, tangy sauce. Mix them well for the best flavor. You can adjust sweetness or acidity to suit your taste.
Can I use another type of meat?
Yes, you can use other meats. While chicken and pork are popular, you can try:
– Beef: Use thin slices for a different texture.
– Tofu: Firm tofu works well for a vegan option.
– Eggplant: Breaded and fried eggplant provides a tasty vegetarian dish.
Feel free to experiment with proteins that you enjoy.
What to serve with katsu bowls?
Katsu bowls are great on their own, but pairing them with sides enhances the meal. Consider these options:
– Miso soup: A warm, savory addition.
– Edamame: Light and healthy.
– Pickled vegetables: They add a nice crunch and tang.
– Japanese salad: A fresh side with sesame dressing.
These sides balance the rich flavors of the katsu.
How long does katsu chicken last in the fridge?
Katsu chicken lasts about 3 to 4 days in the fridge. Make sure to store it in an airtight container. This keeps it fresh and safe to eat. If you see any signs of spoilage, it’s best to discard it.
Where to find the best katsu bowls?
Finding great katsu bowls can be a fun adventure. Look for restaurants known for Japanese cuisine. Some popular spots include:
– Local ramen shops: Many serve katsu bowls.
– Japanese izakayas: They often feature this dish.
– Food trucks: You might find unique katsu variations.
Ask friends or check online reviews for recommendations. Enjoy exploring!
In this blog post, we explored making katsu bowls with easy ingredients and steps. You learned how to prepare chicken or pork, with tips for frying and serving. We also discussed variations, including vegetarian options, and storing leftovers effectively.
Katsu bowls offer great taste with many choices. Enjoy creating and customizing this dish for yourself or others. Happy cooking!
