Are you ready to make crunchy and flavorful garlic dill pickles at home? This simple recipe transforms fresh cucumbers into tangy bites you’ll love. With easy steps and common ingredients, you’ll enjoy a snack that’s perfect for any meal. Join me as I share tips for adding depth to your pickles while ensuring they stay crisp and tasty. Let’s dive into the world of homemade garlic dill pickles!
Ingredients
Overview of Required Ingredients
To make crunchy garlic dill pickles, gather these key items:
– 1 pound small cucumbers (preferably pickling cucumbers)
– 4 cups water
– 1 cup distilled white vinegar
– 3 tablespoons kosher salt
– 4 garlic cloves, peeled and smashed
– 2 tablespoons sugar
– 2 teaspoons dill seeds
– 1 teaspoon black peppercorns
– 1 teaspoon mustard seeds
– 1/2 teaspoon red pepper flakes (optional for heat)
– Fresh dill sprigs (for garnish)
These ingredients work together to create a tangy and crisp pickle. The cucumbers are the stars of this recipe, soaking up the brine to get full flavor.
Optional Ingredients for Enhancing Flavor
You can add some extra zing with optional ingredients:
– A few slices of jalapeño for spice
– A pinch of turmeric for color
– Fresh herbs like thyme or bay leaves
These additions can help you customize your pickles to match your taste. Feel free to experiment and find what you love!
Substitutions for Common Allergens or Preferences
If you have allergies or dietary needs, there are easy swaps:
– Use sea salt instead of kosher salt if needed.
– Substitute apple cider vinegar for a milder taste.
– If you’re avoiding sugar, try honey or a sugar substitute.
These substitutions help you enjoy garlic dill pickles while keeping them safe for everyone. Remember, the key is to keep the basic balance of ingredients to ensure great flavor!
Step-by-Step Instructions
Preparation of Cucumbers
Start by rinsing the cucumbers under cold water. This helps remove dirt. Trim the ends of each cucumber to prepare them for pickling. You can slice them into spears or keep them whole. Whole cucumbers hold more crunch.
Making the Brine
In a large saucepan, mix the water, vinegar, kosher salt, and sugar. Heat this over medium heat. Stir until the salt and sugar dissolve completely. Once done, remove the pan from the heat. Let the brine cool to room temperature. This step is key for great flavor.
Jar Preparation and Packing
While the brine cools, prepare your jars. Sterilize a quart-sized mason jar or two pint-sized jars. Boil them in water for 10 minutes or run them through a hot dishwasher cycle. This keeps your pickles safe to eat.
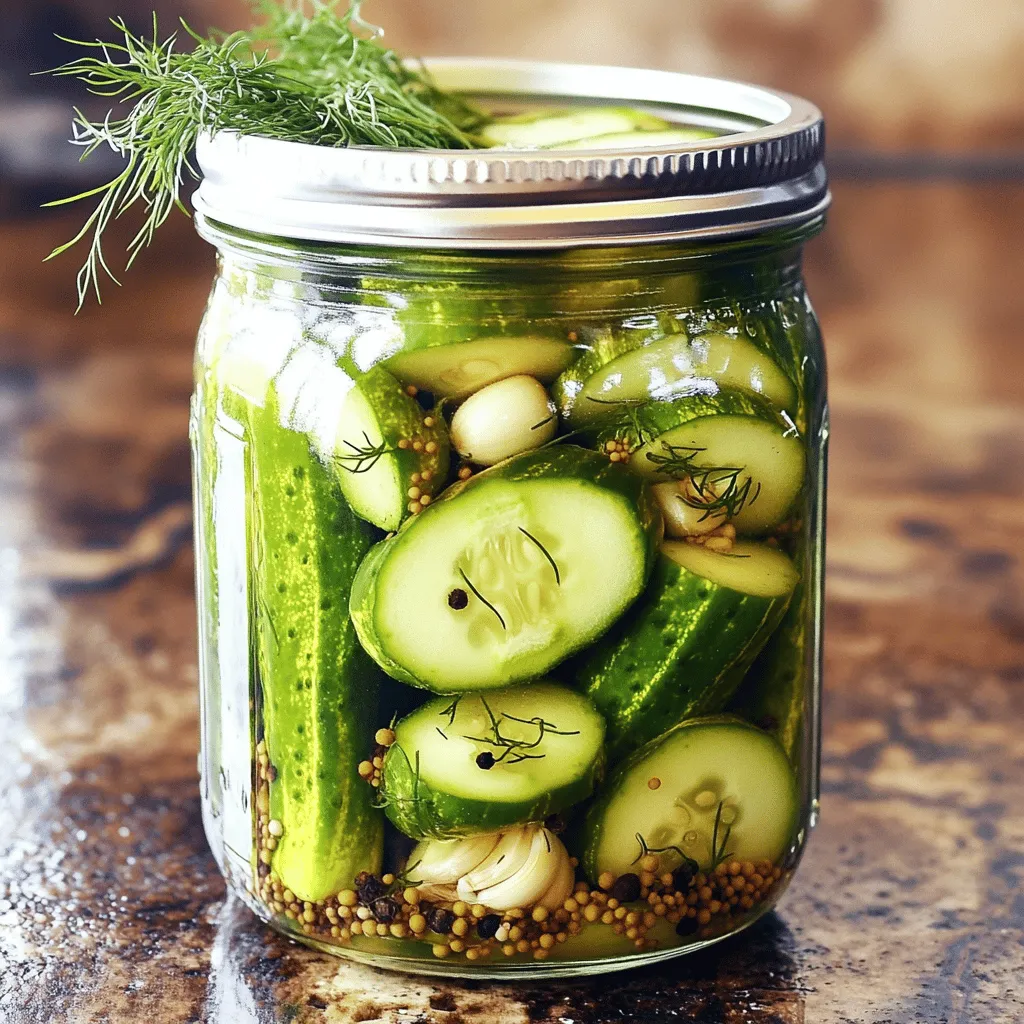
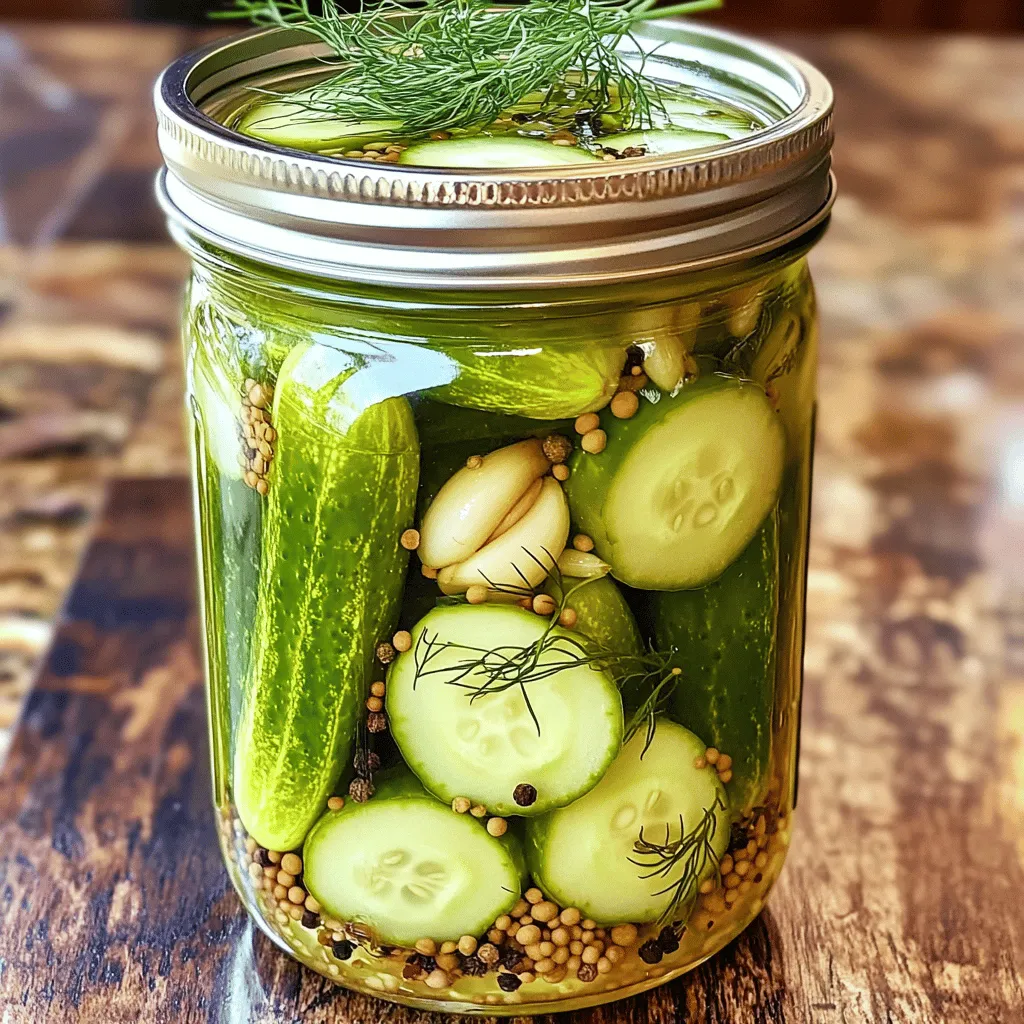
Now, add the smashed garlic cloves, dill seeds, black peppercorns, mustard seeds, and optional red pepper flakes to the bottom of the jar(s). Carefully pack the cucumbers into the jar, laying them on top of the spices.
Next, pour the cooled brine over the cucumbers. Make sure they are fully submerged. Top with fresh dill sprigs and seal the jar(s) with a lid. Place the pickles in the fridge for at least 24 hours. This time allows the flavors to meld together. Enjoy the full recipe for a delightful treat!
Tips & Tricks
Ensuring Crunchy Texture
To keep your pickles crunchy, choose firm cucumbers. Look for pickling cucumbers, as they are crispier. Always soak them in cold water for a few hours before pickling. This step helps them stay firm in the brine. Avoid overcooking your brine. High heat can soften the cucumbers. Once you pack the cucumbers in jars, make sure the brine covers them completely. This helps with that perfect crunch.
Flavor Development Timeframe
After making your garlic dill pickles, let them sit for at least 24 hours. This waiting time allows the flavors to mix well. The longer you wait, the better the taste. You can start tasting them after one day, but they will get even better after a week. If you can wait a bit longer, they will burst with flavor!
Best Practices for Sterilizing Jars
Sterilizing your jars keeps your pickles safe to eat. Boil your jars in water for 10 minutes to sterilize them. You can also run them through a hot dishwasher cycle. Make sure your jars are completely dry before adding the cucumbers. A clean environment stops bacteria from ruining your delicious pickles. Always use new lids to ensure a good seal.
Variations
Spicy Garlic Dill Pickles
Want to add some heat? You can make spicy garlic dill pickles. Just add more red pepper flakes to your brine. Start with one teaspoon and taste. You can always add more! You can also add sliced jalapeños for extra spice. This gives your pickles a fun kick that many enjoy.
Sweet Garlic Dill Pickles
If you like sweet and sour, try sweet garlic dill pickles. You can add more sugar to the brine. Start with an extra tablespoon. This will balance the vinegar’s bite with sweetness. Some people even add a splash of apple cider vinegar for a twist. This variation is perfect for those who want a different flavor.
Adding Seasonal Herbs
You can also mix in seasonal herbs to your pickles. Fresh herbs like thyme, oregano, or basil can enhance the taste. Just toss a few sprigs into the jar with the cucumbers. Dill is classic, but experimenting with other herbs keeps things exciting. You can create unique flavors with simple changes!
For more ideas, check the Full Recipe. Enjoy exploring these variations!
Storage Info
Refrigeration Guidelines
After making your garlic dill pickles, store them in the fridge. The cold slows down spoilage. Keep the jar tightly sealed to keep the pickles fresh. This way, they stay crunchy and flavorful. It’s best to consume them within a few weeks for optimal taste.
How Long Do Garlic Dill Pickles Last?
If you store your garlic dill pickles correctly, they can last up to three months in the fridge. The longer they sit, the more flavorful they become. However, it’s best to enjoy them within the first month for that fresh crunch. Always check for any off smells or mold before eating.
Freezing and Canning Tips
Freezing pickles is not recommended. They lose their crunch and taste once thawed. Instead, can them for long-term storage. Use sterilized jars and a proper canning process. This way, you can keep your garlic dill pickles for a year or more. Make sure to follow safe canning practices to prevent spoilage. For the full recipe, refer to the section above.
FAQs
What are the health benefits of garlic dill pickles?
Garlic dill pickles offer many health benefits. First, they are low in calories. This makes them a great snack choice. They also contain probiotics. Probiotics help your gut stay healthy. Garlic adds more benefits. It can boost your immune system. Dill has antioxidants. These help fight inflammation. Overall, these pickles support digestion and health.
Can I use regular cucumbers instead of pickling cucumbers?
You can use regular cucumbers, but pickling cucumbers work best. Pickling cucumbers are smaller and crunchier. They have fewer seeds, making them ideal for pickling. Regular cucumbers might be softer and less crisp. If you choose regular cucumbers, look for firm ones. You want them to hold their shape during pickling.
How do I know if my pickles are safe to eat?
Check your pickles for signs of spoilage. If they smell bad or look cloudy, discard them. If you see bubbles or foam, they may not be safe. A good pickle should be firm and crisp. If they feel mushy, throw them out. Always store pickles in the fridge after opening. This keeps them fresh longer.
Making garlic dill pickles is easy and fun. We covered the key steps, from choosing ingredients to ensuring a crunchy texture. You learned how to prepare brine and pack jars right. Don’t forget the flavor options and storage tips for long-lasting pickles.
By following these steps, you can enjoy tasty pickles at home. Explore the variations to find your favorite. This guide gives you the tools needed for success. Happy pickling!
