Salads

Mexican Street Corn Pasta Salad Flavorful Fresh Dish
If you crave a dish that’s both tasty and refreshing, you’re in for a treat! This Mexican Street Corn Pasta Salad combines fun flavors and
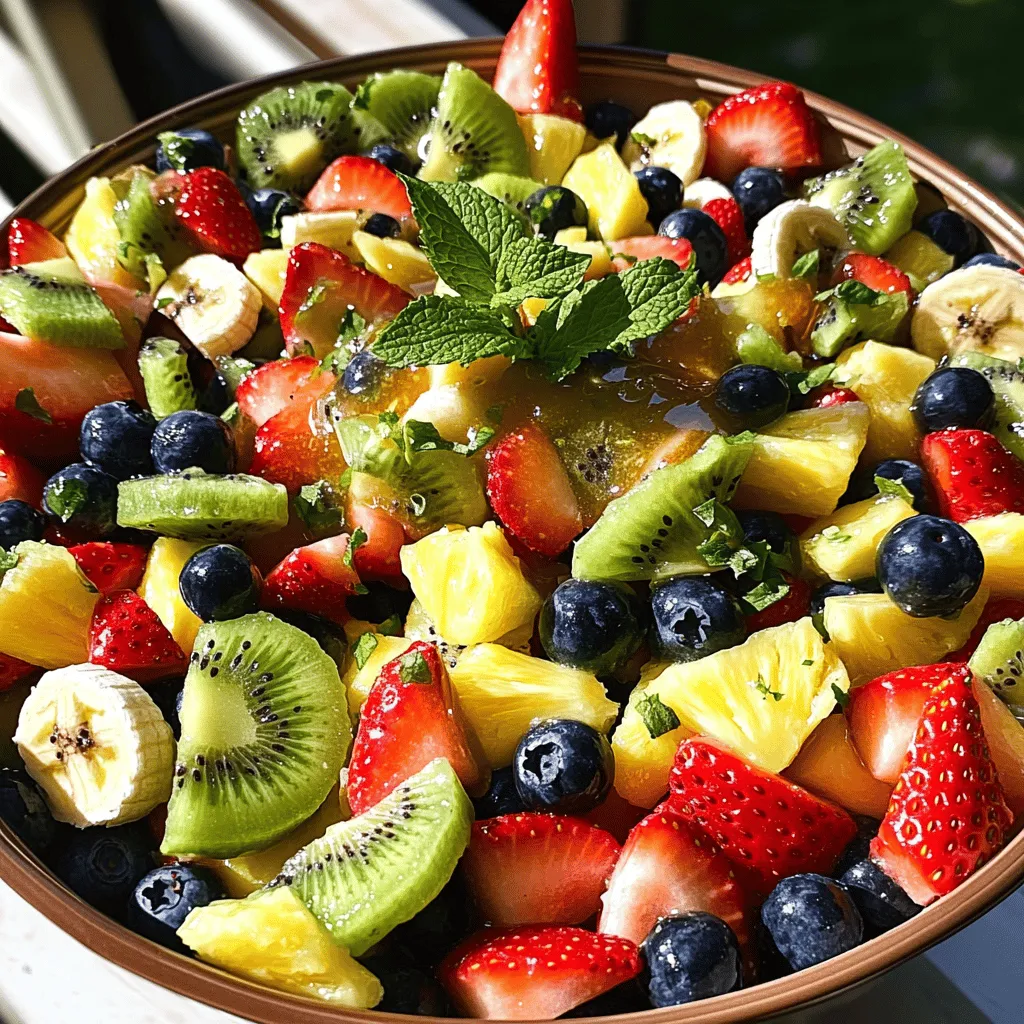
Honey Lime Fruit Salad Fresh and Flavorful Delight
Craving a refreshing treat? My Honey Lime Fruit Salad is the answer! Bursting with vibrant flavors, this salad combines fresh fruits like strawberries and kiwi,
![To make a tasty Mediterranean orzo pasta salad, gather these fresh ingredients: - 1 cup orzo pasta - 1 cup cherry tomatoes, halved - 1 cucumber, diced - 1/2 red onion, finely chopped - 1/2 cup Kalamata olives, pitted and sliced - 1/2 cup feta cheese, crumbled - 1/4 cup fresh parsley, chopped - 1/4 cup olive oil - 2 tablespoons lemon juice - 1 teaspoon dried oregano - Salt and pepper to taste Using fresh ingredients makes a big difference in taste. Look for bright, firm cherry tomatoes. Choose a cucumber that feels crisp. For olives, select rich Kalamata ones for depth. Quality feta cheese should be creamy and tangy. Fresh parsley adds a pop of color and flavor. Always use extra virgin olive oil for the best taste. You can swap some ingredients if needed. If you can't find orzo, try any small pasta like couscous. For a dairy-free option, use a vegan feta or skip it. If you dislike Kalamata olives, green olives work well. Use lemon zest if you want more lemon flavor. You can also add bell peppers or artichokes for a twist. This salad is versatile and lets you play with flavors. For the complete recipe, check out the Full Recipe section. Start by boiling water in a big pot. Add one cup of orzo pasta to the pot. Cook it for about 8 to 10 minutes. Stir it now and then to keep it from sticking. When it’s done, drain the orzo and rinse it with cold water. This cools it down and stops the cooking. While the orzo cooks, chop your veggies. Dice one cucumber and halve one cup of cherry tomatoes. Finely chop half a red onion. Slice half a cup of Kalamata olives and crumble half a cup of feta cheese. Finally, chop a quarter cup of fresh parsley. Having all the veggies ready makes mixing easier. In a small bowl, whisk together the dressing. Start with a quarter cup of olive oil. Add two tablespoons of lemon juice for a zesty kick. Then, mix in one teaspoon of dried oregano. Don't forget to add salt and pepper to taste. This dressing brings all the flavors together. In a large bowl, combine the cooled orzo with all the chopped veggies. Add the crumbled feta cheese and fresh parsley. Pour the dressing over this mix. Toss everything gently to coat well. Let the salad sit for at least 15 minutes. This resting time helps the flavors blend. You can serve it chilled or at room temperature. For extra flair, add more parsley on top if you like. For the complete recipe, refer to the [Full Recipe]. To make your Mediterranean Orzo Pasta Salad taste amazing, use fresh ingredients. Fresh herbs, like parsley, really boost the flavor. You can also add a pinch of red pepper flakes for heat. If you love garlic, try adding minced garlic to the dressing. A touch of honey or agave syrup can balance the acidity of the lemon juice. Serve this salad as a side dish or main meal. It pairs well with grilled chicken or fish. You can also enjoy it on its own as a light lunch. For a colorful plate, add some sliced bell peppers or avocado. Garnish with extra feta or parsley for a pretty look. Store any leftover salad in an airtight container. Keep it in the fridge for up to three days. If you want to keep it fresh longer, separate the dressing from the salad. Mix them just before serving. This keeps the orzo and veggies from getting soggy. {{image_2}} You can change many parts of your Mediterranean Orzo Pasta Salad. Swap orzo pasta with quinoa for a gluten-free option. Substitute cherry tomatoes with diced bell peppers for a sweeter taste. If you want crunch, try adding radishes instead of cucumbers. You can also use goat cheese in place of feta for a tangy flavor. Each swap keeps the salad fresh and fun. Want to make your salad heartier? Add protein to your dish. Chickpeas are an excellent choice for a plant-based boost. Grilled chicken or shrimp also work well and add protein without changing the flavor much. You can even toss in canned tuna for a quick fix. These additions will turn your salad into a complete meal. Herbs bring your Mediterranean Orzo Pasta Salad to life. Fresh basil adds a sweet, aromatic touch. You can also use mint for a refreshing twist. If you like a stronger flavor, try dill or tarragon. Mix in these herbs with the parsley for a bright and bold taste. They enhance the overall flavor and make the salad even more enjoyable. For the full recipe, check out the recipe section. You'll find all the ingredients and steps to create this vibrant dish. To keep your Mediterranean Orzo Pasta Salad fresh, store it in an airtight container. Make sure to let it cool to room temperature first. This helps keep the flavors bright and the texture nice. Leftovers can last in the fridge for about 3 to 5 days. Always check for off smells or changes in texture before eating. I recommend using glass containers with tight lids. They help keep your salad fresh and tasty. You can also use plastic containers, but make sure they are BPA-free. Label the container with the date you made the salad. This way, you won't forget how long it's been in the fridge. You can freeze this pasta salad if you want to save some for later. However, the texture of the vegetables may change. To freeze, place the salad in a freezer-safe container. Make sure to leave some space at the top for expansion. You can freeze it for up to 3 months. When you're ready to eat, just thaw it in the fridge overnight. Enjoy it cold or at room temperature. For the full recipe, check back for easy steps! To make Mediterranean Orzo Pasta Salad, cook 1 cup of orzo pasta. Follow the package instructions. Once cooked, drain and rinse it under cold water. In a large bowl, mix the cooled orzo with halved cherry tomatoes, diced cucumber, finely chopped red onion, sliced Kalamata olives, crumbled feta cheese, and chopped fresh parsley. Next, whisk olive oil, lemon juice, dried oregano, salt, and pepper in a small bowl. Pour this dressing over the salad and toss gently. Let it sit for at least 15 minutes to blend the flavors. Yes, you can make this salad ahead of time. Prepare it a few hours or even a day before serving. Just keep it in the fridge. The flavors will deepen and taste even better after sitting. If you want, wait to add the dressing until you’re ready to serve. This keeps everything fresh and crisp. No, Mediterranean Orzo Pasta Salad is not gluten-free. Orzo is a type of pasta made from wheat. If you need a gluten-free option, you can use gluten-free pasta. Look for brands that offer gluten-free orzo. This way, you can still enjoy a tasty salad without any gluten. You can add many things to this salad! Try adding grilled chicken or shrimp for protein. You could also mix in bell peppers or spinach for more veggies. Artichoke hearts and sun-dried tomatoes add a nice twist too. Experiment with your favorite ingredients to make it your own! Mediterranean Orzo Pasta Salad lasts about 3 to 5 days in the fridge. Store it in an airtight container. If you notice any signs of spoilage, like an off smell or color, it’s best to throw it away. Always trust your senses when it comes to food safety. - 1 cup orzo pasta - 1 cup cherry tomatoes, halved - 1 cucumber, diced - 1/2 red onion, finely chopped - 1/2 cup Kalamata olives, pitted and sliced - 1/2 cup feta cheese, crumbled - 1/4 cup fresh parsley, chopped - 1/4 cup olive oil - 2 tablespoons lemon juice - 1 teaspoon dried oregano - Salt and pepper to taste 1. Cook the orzo pasta according to package instructions. Drain and rinse under cold water to cool. 2. In a large bowl, combine the cooled orzo, cherry tomatoes, cucumber, red onion, Kalamata olives, feta cheese, and fresh parsley. 3. In a small bowl, whisk together the olive oil, lemon juice, dried oregano, salt, and pepper to create the dressing. 4. Pour the dressing over the orzo and vegetable mixture, tossing gently to coat everything evenly. 5. Taste and adjust seasoning if necessary. Let the salad sit for at least 15 minutes to allow the flavors to meld. 6. Serve chilled or at room temperature, garnishing with additional parsley if desired. First, cook the orzo pasta and rinse it. Next, mix in the chopped veggies, olives, and feta. Then, whisk up the dressing. Pour it over the salad and toss. Let it sit for a bit, then serve. It’s simple and fresh! This salad is a healthy choice. It has fiber from the pasta and veggies. The olives and olive oil provide healthy fats. Feta cheese adds protein and calcium. Each serving is about 250 calories. It’s perfect for a light lunch or dinner! We just covered how to make a tasty Mediterranean Orzo Pasta Salad. You learned about key ingredients, their quality, and helpful substitutes. I explained the step-by-step process from cooking the pasta to making the dressing. You got useful tips for enhancing flavor and storing leftovers. Lastly, we discussed easy variations to make the salad your own. Enjoy creating this salad and sharing it with friends. It's a fresh dish that’s fun to customize and perfect for any meal.](https://stirredrecipes.com/wp-content/uploads/2025/05/8fde9d15-a24a-4f9c-9bcf-af521001ca1a.webp)
Mediterranean Orzo Pasta Salad Fresh and Healthy Meal
Looking for a fresh and healthy meal that’s easy to make? Look no further! This Mediterranean Orzo Pasta Salad is packed with vibrant flavors and
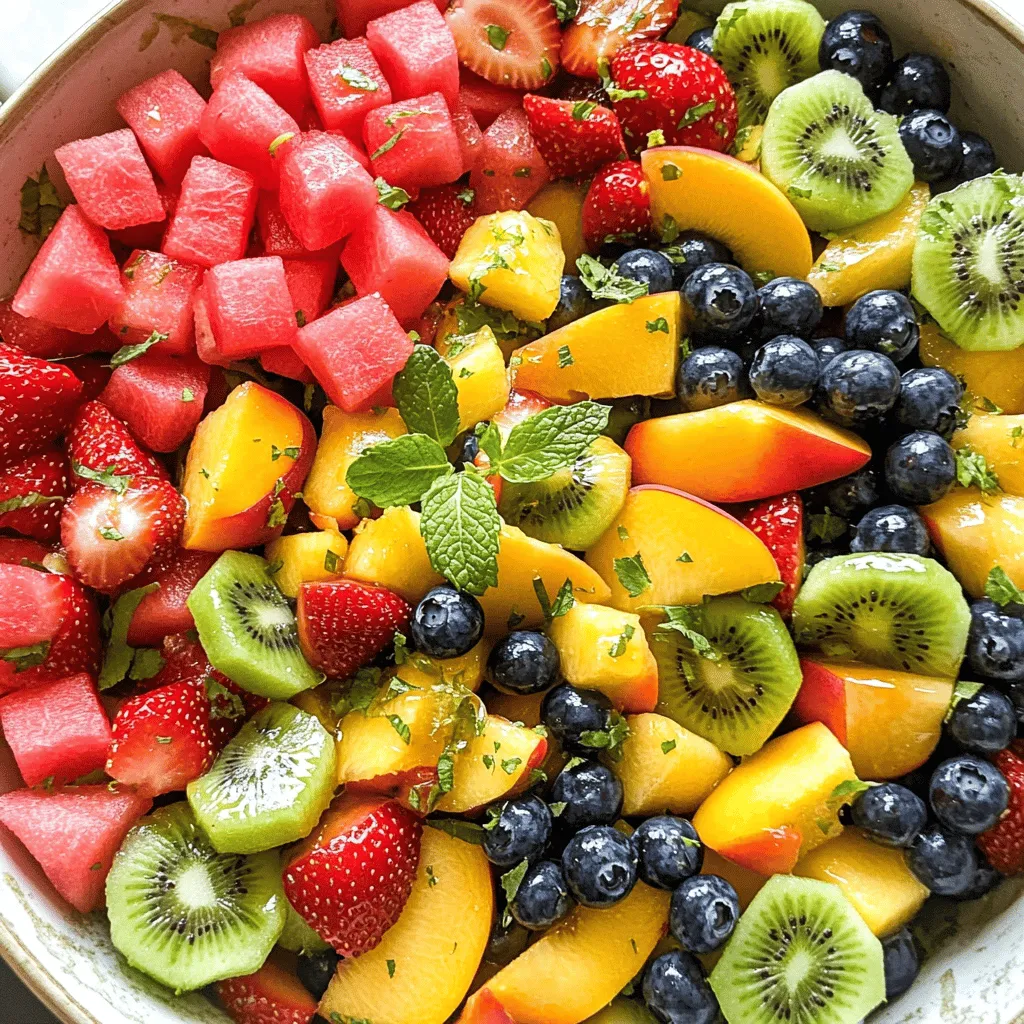
Summer Fruit Salad Refreshing and Healthy Recipe
Looking for a way to stay cool and healthy this summer? A fresh summer fruit salad is the perfect solution! Bursting with sweet watermelon, juicy
![To make Easy Mexican Coleslaw, gather these simple ingredients: - Green cabbage (4 cups, finely shredded) - Red cabbage (1 cup, finely shredded) - Carrot (1 cup, grated) - Red onion (1/2 cup, thinly sliced) - Corn kernels (1 cup, fresh or canned) - Cilantro (1/2 cup, chopped) - Jalapeño (1, minced) - Mayonnaise (1/4 cup) - Lime juice (2 tablespoons) - Honey (1 tablespoon) - Ground cumin (1 teaspoon) - Salt and pepper (to taste) Each ingredient adds its own flavor and texture. The green and red cabbage bring crunch and color. Carrots add sweetness, while red onion gives a nice bite. Corn adds a pop of sweetness, and cilantro gives freshness. The jalapeño adds heat; you can remove the seeds for less spice. The dressing combines mayonnaise, lime juice, honey, and cumin. This blend ties all the flavors together. For a full experience, check out the Full Recipe. These ingredients work well together and make a tasty side for any meal! 1. Combine all vegetables in a large mixing bowl. Start by adding 4 cups of finely shredded green cabbage, 1 cup of finely shredded red cabbage, 1 cup of grated carrot, 1/2 cup of thinly sliced red onion, 1 cup of corn kernels, 1/2 cup of chopped cilantro, and 1 minced jalapeño to a large mixing bowl. This colorful mix makes your coleslaw vibrant and fresh. 2. Whisk together dressing ingredients in a small bowl. In a separate bowl, whisk together 1/4 cup of mayonnaise, 2 tablespoons of lime juice, 1 tablespoon of honey, 1 teaspoon of ground cumin, and salt and pepper to taste. This dressing adds zing and creaminess to your coleslaw. 3. Mix dressing with vegetables and adjust seasoning. Pour the dressing over your vegetable mix. Toss everything well so the veggies get fully coated. Taste your coleslaw and adjust the seasoning if needed. You can add more salt, pepper, or lime juice to enhance the flavor. 4. Refrigerate to allow flavors to meld. After mixing, cover your coleslaw and pop it in the fridge for at least 30 minutes. This chilling time helps the flavors blend beautifully. Trust me, the wait is worth it! For more detailed instructions, check out the Full Recipe. Enjoy making this easy and tasty Easy Mexican Coleslaw! Choosing fresh vegetables is key for great coleslaw. Look for bright colors and crisp leaves. Avoid any wilted or brown spots. Fresh veggies make your dish pop with flavor. Adjusting for spice is easy with jalapeños. If you want less heat, remove the seeds. For more heat, keep the seeds in or add more jalapeños. You can also try adding hot sauce for a kick. Chilling time is very important. After mixing, cover your coleslaw and let it chill for at least 30 minutes. This lets the flavors blend well. The longer it sits, the better it tastes. For more details, check the Full Recipe. {{image_2}} You can easily adjust this coleslaw to fit your taste. If you want a vegan option, swap out the mayonnaise for a plant-based version. Many brands offer tasty dairy-free mayo that works just as well. You can also use avocado for creaminess. Adding different vegetables can keep things fresh. Try using bell peppers for a sweet crunch or radishes for a spicy kick. Fruits like pineapple or mango can add sweetness and a tropical twist. Don't forget about the dressing! You can play around with flavors. Try adding a bit of salsa for a zesty kick or swap lime juice for orange juice for a sweeter note. These small changes can make a big difference. For the full recipe, check out the Easy Mexican Coleslaw section. Enjoy making it your own! To keep your Easy Mexican Coleslaw fresh, store it in a sealable container. This helps to lock in the flavors. Glass or BPA-free plastic containers work well. Make sure the lid fits tightly. This prevents air from getting in, which can make the coleslaw soggy. You can store leftover coleslaw in the fridge for up to three days. The flavors will get better as it sits. However, it may lose some crunch over time. If you want to keep it longer, consider freezing it. But note that the texture may change once thawed. For best results, enjoy your coleslaw fresh. You can find the Full Recipe above for more details on preparation. How long does Easy Mexican Coleslaw last in the fridge? Easy Mexican coleslaw stays fresh for about three days in the fridge. After that, it may lose its crunch. If you see any signs of spoilage, throw it away. Can I make this coleslaw ahead of time? Yes, you can make this coleslaw ahead of time. I recommend preparing it a few hours before serving. Chilling helps the flavors blend well. Just give it a stir before serving. What can I serve with Mexican coleslaw? Mexican coleslaw pairs well with tacos, grilled chicken, or fish. You can also serve it as a side for BBQs. It adds a nice crunch to any meal. How to make the coleslaw spicier? To kick up the heat, add more jalapeño or use hot sauce. You can also mix in diced serrano peppers for extra spice. Always taste as you go to find your perfect heat level. Can I use different types of cabbage? Yes! You can use Napa cabbage or savoy cabbage instead of green or red. Each type brings its own flavor and texture. Feel free to mix and match to suit your taste. For the full recipe, check out the [Full Recipe]. In this blog post, we explored how to make Easy Mexican Coleslaw. You learned about key ingredients like green and red cabbage, carrots, and spices. We covered step-by-step prep, tips for the perfect texture, and ways to customize your dish. We also looked at proper storage methods to keep your coleslaw fresh. Coleslaw is versatile and fun to make. Try different veggies and dressings to make it your own. Enjoy your tasty creation!](https://stirredrecipes.com/wp-content/uploads/2025/05/5a672b5a-8f9b-46e1-8d87-2e29c6a89d24.webp)
Easy Mexican Coleslaw Quick and Flavorful Recipe
Get ready to spice up your meals with my Easy Mexican Coleslaw! This quick and flavorful recipe combines crunchy vegetables and zesty dressing for a
Grinder Pasta Salad Flavorful and Simple Recipe
If you love fresh flavors and simple meals, you need to try my Grinder Pasta Salad. This dish combines tasty ingredients that come together effortlessly.
![- 2 cups elbow macaroni - 1 cup cherry tomatoes, halved - 1 cup corn (fresh, frozen, or canned) - 1/2 cup red bell pepper, diced - 1/2 cup red onion, finely chopped For a great Mexican Macaroni Salad, start with these main ingredients. The elbow macaroni gives a nice base. Cherry tomatoes add sweetness and color. Corn brings a pop of texture. Red bell pepper gives crunch, and red onion adds a sharp flavor. - 1/2 cup black olives, sliced - 1 cup shredded cheese (cheddar or Mexican blend) - 1/4 cup fresh cilantro, chopped You can add optional ingredients for more flavor. Black olives give a briny taste. Cheese adds creaminess and richness. Fresh cilantro offers a burst of herbal flavor that brightens the dish. - 1/2 cup mayonnaise - 1 tablespoon lime juice - 1 tablespoon taco seasoning - Salt and pepper to taste The dressing is key to this salad. Mayonnaise gives a creamy base. Lime juice adds a tangy kick. Taco seasoning brings a mix of spices that tie everything together. Don’t forget to add salt and pepper to balance the flavors. Check out the [Full Recipe] for step-by-step guidance on making this colorful dish. First, boil the elbow macaroni in salted water. Cook it until it is al dente. This usually takes about 7 to 9 minutes. Drain the macaroni and rinse it under cold water. Rinsing stops the cooking and cools it down. Next, you will combine all the main ingredients in a large bowl. Add the cooked macaroni, cherry tomatoes, corn, red bell pepper, red onion, and black olives. Don’t forget the shredded cheese! Make sure everything is evenly mixed. This helps all the flavors blend together. In a separate small bowl, whisk together mayonnaise, lime juice, and taco seasoning. Add salt and pepper to taste. This dressing gives the salad a zesty kick. Once smooth, pour the dressing over the salad mixture. Toss gently to coat all the ingredients. This step is key for flavor. For an extra touch, fold in chopped cilantro for a fresh pop. For the full recipe, check out the instructions above. To make your Mexican macaroni salad even better, try adding diced avocado. The avocado gives a creamy texture that pairs well with the other ingredients. I also suggest using fresh lime juice instead of bottled. It adds a zesty kick that brightens the whole dish. Getting the perfect al dente pasta is key. Cook the elbow macaroni in salted water until it has a slight bite. This makes the salad more enjoyable. When cutting your veggies, keep them in small, even pieces. This helps mix them well with the pasta and dressing. Garnishing your salad can make it look even more appealing. Try adding extra cilantro or a sprinkle of cheese on top. You can also pair your salad with proteins like grilled chicken or shrimp. This makes it a hearty meal that everyone will love. For the full recipe, check out the section above! {{image_2}} To make this dish suitable for vegetarians or vegans, you can swap out the mayonnaise. Use vegan mayo for a creamy base without animal products. You can also add chickpeas to boost the protein content. Chickpeas add a nice texture and flavor. They also help make the salad more filling. Do you like spice? Consider adding jalapeños to your salad. You can chop them up and mix them in for a kick. If you want more heat, try using hot sauce. A few dashes can really amp up the flavor. For a cheesy twist, look for spicy cheese blends. These can add both heat and creaminess to your dish. Using local vegetables can give your salad a fresh twist. Think about adding seasonal produce from your area. Fresh corn or bell peppers from a nearby market can enhance the taste. You might also explore regional cheeses or spices. Different flavors can take your salad to a whole new level. To keep your Mexican macaroni salad fresh, store any leftovers in an airtight container. This helps prevent the salad from absorbing other flavors in the fridge. I recommend eating the salad within 3 to 5 days for the best taste and quality. Always check for any signs of spoilage before serving. You can freeze this salad, but be careful to keep the texture. First, place the salad in a freezer-safe container. Leave some space at the top, as it will expand when frozen. Avoid freezing for more than 2 months, as the quality will start to decline. When you are ready to eat the salad, thaw it in the fridge overnight. To refresh it, mix in a bit of fresh mayonnaise and lime juice. Taste the salad and adjust seasoning if needed. This helps bring back the bright flavors after storage. For the full recipe, you can check the recipe section above. You can store Mexican macaroni salad in the fridge for about 3 to 5 days. Make sure to keep it in an airtight container. If you see any signs of spoilage, like a sour smell or mold, throw it away. Yes, you can make this salad a day in advance. This allows the flavors to blend nicely. Just cover it well and keep it in the fridge. When you're ready to serve, give it a quick stir. If it seems dry, add a little more dressing. If you want a mayo alternative, you have a few tasty options: - Greek yogurt for creaminess - Sour cream for a tangy kick - Avocado for a smooth texture - Hummus for a unique flavor Each option will change the taste a bit but still keeps your salad delicious. For the full recipe, check out the complete details. Mexican macaroni salad is a fun dish to make and enjoy. We covered the key ingredients, from elbow macaroni to tasty dressings. You can mix in optional items like cheese or olives for added flavor. Remember to follow my tips for texture and serving ideas. You can make this dish your own with various twists. With simple storage tips, you can savor it for days. Now, it's time to whip up your own version and impress your friends and family!](https://stirredrecipes.com/wp-content/uploads/2025/05/d3098110-ef21-4354-8886-a3ec0a05c6fa.webp)
Mexican Macaroni Salad Tasty and Colorful Dish
Looking for a fun twist on a classic dish? Mexican macaroni salad is your answer! Packed with colorful ingredients and zesty flavors, this dish is
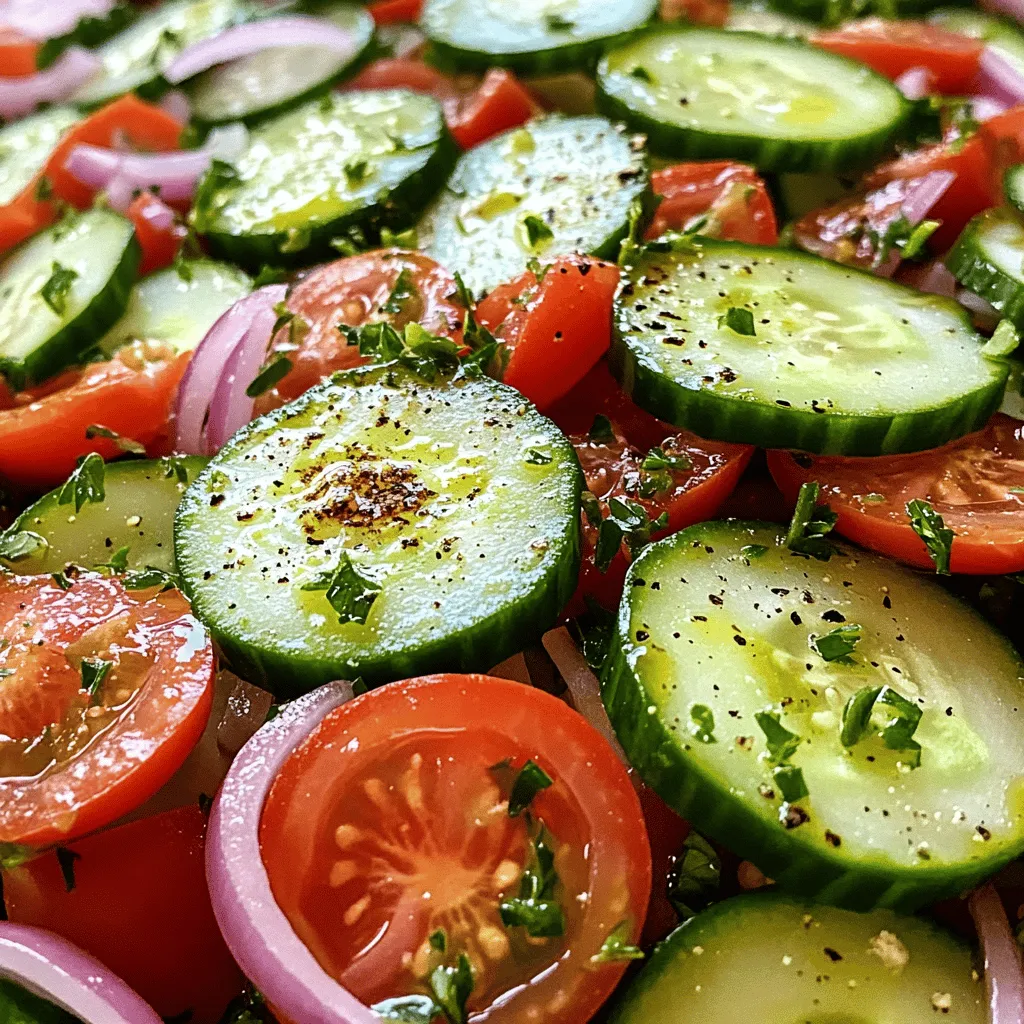
Marinated Cucumbers, Onions, and Tomatoes Delight
Are you ready to elevate your salad game? In this Marinated Cucumbers, Onions, and Tomatoes Delight, I’ll share a simple and tasty recipe that bursts
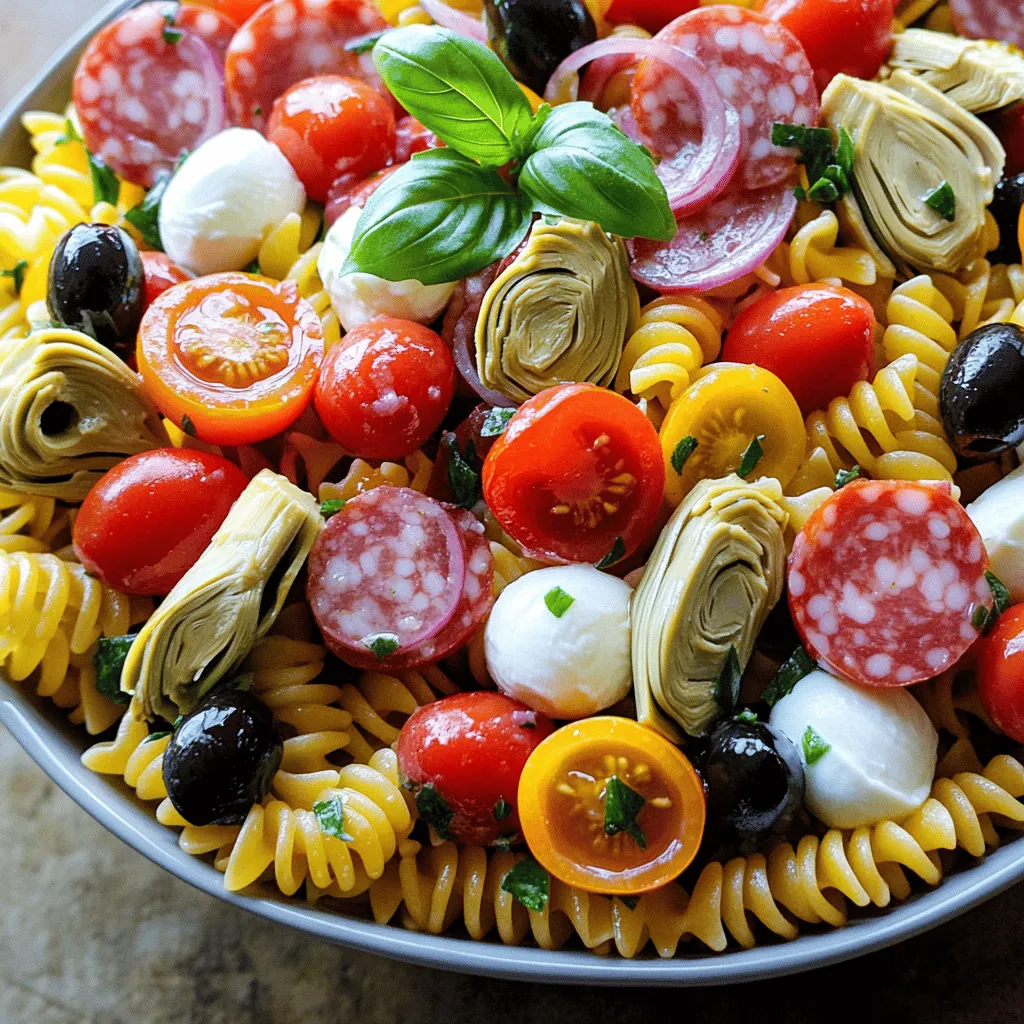
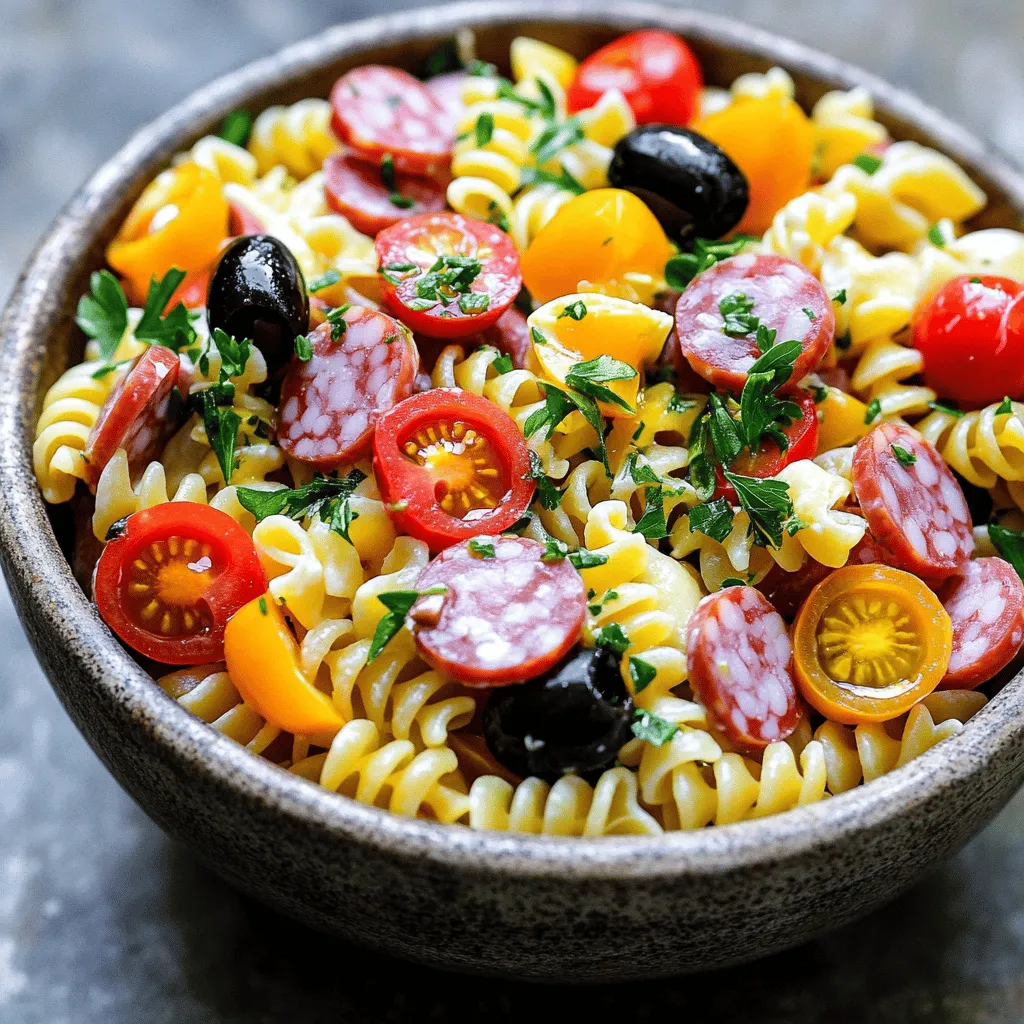
Easy Italian Antipasto Pasta Salad Tasty and Quick Meal
Looking for a quick and tasty meal? This Easy Italian Antipasto Pasta Salad is exactly what you need! Packed with fresh flavors and simple ingredients,
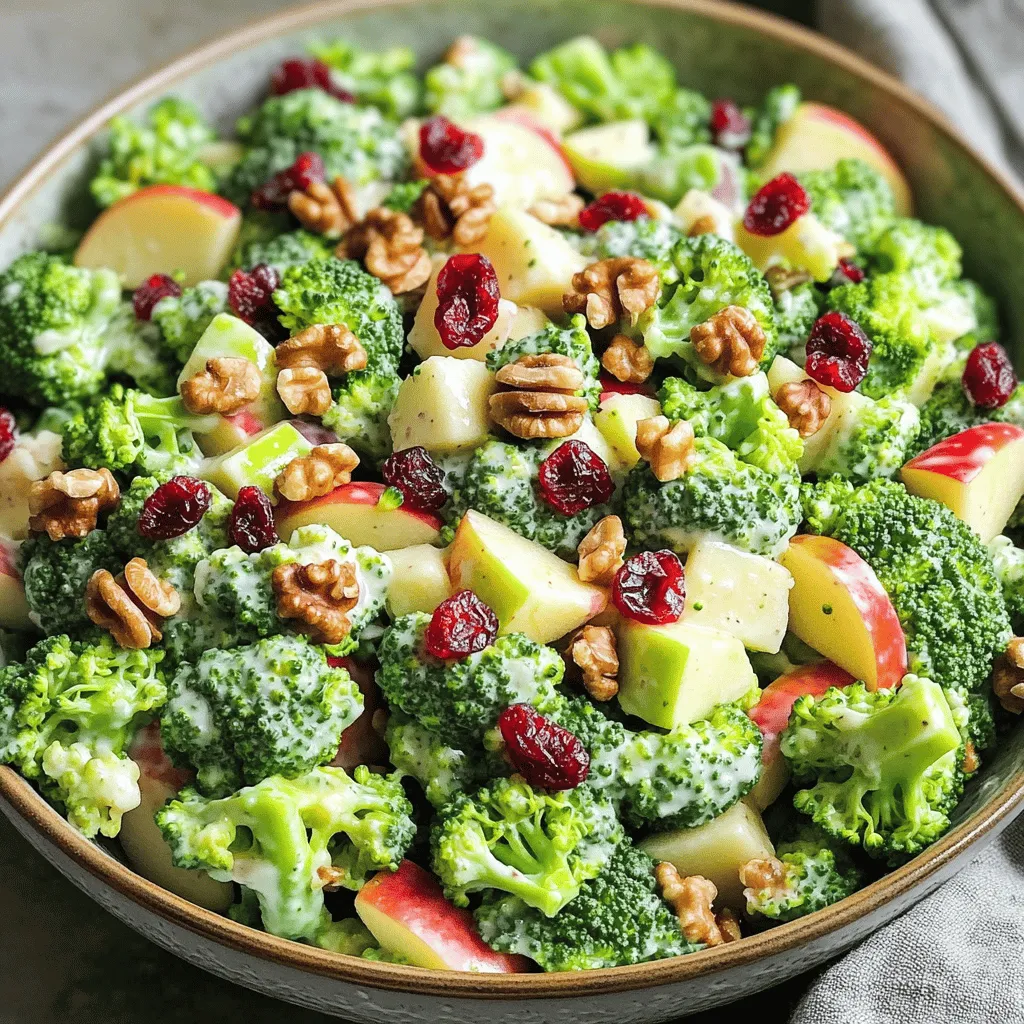
Honeycrisp Apple Broccoli Salad Flavorful Fresh Mix
Ready to elevate your salad game? My Honeycrisp Apple Broccoli Salad brings fresh flavors and crunch to your table. With crisp broccoli, sweet Honeycrisp apples,