Salads
20-Minute Kid-Friendly Supreme Pizza Pasta Salad
Looking for a quick meal that kids will love? This 20-Minute Kid-Friendly Supreme Pizza Pasta Salad is the perfect answer! Packed with tasty ingredients like

Strawberry Balsamic Vinaigrette Fresh and Simple Recipe
Are you ready to elevate your salads with a burst of flavor? This Strawberry Balsamic Vinaigrette is fresh, simple, and perfect for any dish. With
Easy Blueberry Vinaigrette Fresh and Flavorful Recipe
If you’re craving a fresh and flavorful dressing, try my Easy Blueberry Vinaigrette! Packed with vibrant blueberries and simple ingredients, this vinaigrette is perfect for
Non-Sandwich Lunch Ideas for a Flavorful Meal
Tired of the same old sandwich for lunch? You’re not alone! Let’s explore exciting non-sandwich lunch ideas that burst with flavor and nutrition. From colorful
Feta Chicken Salad Fresh and Flavorful Recipe
Looking to liven up your meals? This Feta Chicken Salad is fresh, flavorful, and easy to make! Packed with juicy chicken, crisp veggies, and tangy
![To make a great Parmesan vinaigrette, you need a few key items: - 1/2 cup grated Parmesan cheese - 1/4 cup Greek yogurt - 2 tablespoons apple cider vinegar - 1 tablespoon Dijon mustard - 1 tablespoon honey - 1/4 cup extra virgin olive oil - Salt and pepper to taste - 1 teaspoon garlic powder - 1 teaspoon dried Italian herbs (optional) These ingredients create a creamy, tangy dressing that works on many salads. The grated Parmesan cheese gives it a rich flavor that you will love. Greek yogurt adds creaminess without too much fat. Apple cider vinegar adds a nice tang, while Dijon mustard gives depth. Honey balances the flavors with a touch of sweetness. Extra virgin olive oil helps to blend everything together smoothly. Garlic powder brings a warm, savory note. Optional herbs can add even more flavor, making this vinaigrette truly your own. Now, let's talk about what you're eating. Here’s a quick look at the nutrition in this dressing: - Calories per serving: About 80 - Fat: 7 grams - Protein: 2 grams - Carbohydrates: 3 grams This vinaigrette is a smart choice for salads. The Greek yogurt adds protein, while the olive oil provides healthy fats. Parmesan cheese is rich in calcium, which is great for bones. Using this dressing can make your meals more enjoyable without a lot of calories. It is full of flavor and good for you too! For the complete recipe, check out the [Full Recipe]. Combining core ingredients Start by gathering your ingredients. You will need: - 1/2 cup grated Parmesan cheese - 1/4 cup Greek yogurt - 2 tablespoons apple cider vinegar - 1 tablespoon Dijon mustard - 1 tablespoon honey - 1/4 cup extra virgin olive oil - Salt and pepper to taste - 1 teaspoon garlic powder - 1 teaspoon dried Italian herbs (optional) In a mixing bowl, combine the Parmesan cheese, Greek yogurt, apple cider vinegar, Dijon mustard, and honey. Use a whisk to blend these ingredients until smooth and creamy. Emulsifying the dressing Now it’s time to emulsify! Slowly drizzle in the extra virgin olive oil while you whisk. This step helps to blend the oil into the mixture, creating a smooth dressing. Keep whisking until the oil is fully mixed in. Adjusting the seasoning Add the garlic powder, salt, and pepper to the bowl. If you want extra flavor, mix in the Italian herbs. Whisk everything together until it is fully combined. Taste the vinaigrette and adjust the seasoning if needed. If it feels too thick, add a tablespoon of water to thin it out. Importance of chilling After preparing the vinaigrette, transfer it to an airtight container. Chill it in the fridge for at least 30 minutes. Chilling helps the flavors blend together and taste even better. Serving suggestions for salads This vinaigrette pairs well with many salads. Drizzle it over a garden salad, a Caesar salad, or even roasted vegetables. You can also use it as a dip for fresh veggies. Presentation tips Serve the vinaigrette in a small glass carafe next to your salad. Garnish with a sprinkle of extra Parmesan cheese and a sprig of fresh herbs. This makes your dish look extra special! To make a great vinaigrette, whisking is key. Use a steady hand and a large bowl. This helps mix air into the dressing. A good whisk can make a smooth, creamy texture. If you find your vinaigrette too thick, add a splash of water. This will help achieve the right consistency. Using fresh ingredients improves the taste a lot. Fresh Parmesan has a bold flavor. Fresh garlic gives a nice kick. These simple ingredients make your vinaigrette shine. One common mistake is over-whisking or under-whisking. Too much whisking can lead to a broken vinaigrette. Not enough whisking leaves your dressing separated. Find a balance for the best texture. Another mistake is not letting the flavors meld. After you make your vinaigrette, let it sit for at least 30 minutes. This allows the tastes to mix well. Also, check your ingredients. Using old or expired items can ruin your dressing. Freshness matters for a tasty vinaigrette. Always check dates on your ingredients. For a detailed guide on making this dressing, check out the Full Recipe. {{image_2}} You can give your Parmesan vinaigrette a bright twist with lemon. Use fresh lemon juice instead of apple cider vinegar. This adds a zesty flavor that wakes up your taste buds. Ingredients substitution: - Replace apple cider vinegar with 2 tablespoons of fresh lemon juice. - Add 1 teaspoon of lemon zest for extra brightness. Preparation method: 1. Follow the same steps as the full recipe. 2. Whisk in the lemon juice and zest after combining the other ingredients. 3. Adjust the salt and pepper to balance the tartness. Balsamic vinegar adds depth to the vinaigrette. It gives a sweet and tangy taste that pairs well with salads. Unique twists on the traditional recipe: - Swap apple cider vinegar for balsamic vinegar. - Consider adding a teaspoon of maple syrup for extra sweetness. Ingredients and steps: 1. Use the full recipe but switch the vinegar. 2. Mix in the maple syrup with the other ingredients. 3. Whisk until smooth, and taste to adjust flavors. Don’t be afraid to try different cheeses in your vinaigrette. Each cheese gives a unique flavor. Experimenting with different cheese types: - Try feta for a tangy twist. - Blue cheese can add a bold flavor. Adjustments in recipe: 1. Use the same amount of cheese as the Parmesan in the full recipe. 2. If using a crumblier cheese, you may need less oil for the right texture. 3. Taste and adjust seasoning as needed for balance. To keep your Parmesan vinaigrette fresh, store it in an airtight container. Glass jars work great for this. Make sure the lid is tight. This helps prevent air and moisture from spoiling the dressing. You can keep it in the fridge. The vinaigrette stays good for up to one week. If you notice any changes in smell or color, it might be time to toss it. Look for signs that your vinaigrette has gone bad. If you see mold or a change in texture, it’s best to throw it out. A sour smell is another clear sign of spoilage. If the dressing separates, it’s not a big issue. Just give it a good shake before using. However, if it smells off, don’t take chances. Always discard any vinaigrette that seems questionable. You can keep Parmesan vinaigrette in the fridge for about one week. Store it in an airtight container to keep it fresh. If you notice any change in smell or color, it’s best to toss it out. For the best taste, use it within three to five days. The flavors develop well when it chills, so let it sit for at least 30 minutes before using. Yes, you can use mayonnaise if you want a creamier texture. Mayonnaise will add richness, but it may change the flavor profile. Greek yogurt gives a tangy taste, while mayonnaise is milder. If you choose mayonnaise, you might want to add a touch of lemon juice for some acidity. This will keep the vinaigrette fresh and bright. Parmesan vinaigrette goes well with many salads. Here are some tasty combinations: - Caesar salad: The classic choice, rich in flavors. - Mixed greens: A simple salad of greens and veggies. - Caprese salad: Fresh tomatoes and mozzarella with a twist. - Pasta salad: Adds creaminess to cold pasta dishes. - Roasted vegetable salad: Great with warm, roasted veggies. Feel free to explore your own combinations! For a full recipe, refer to the section above. Parmesan vinaigrette is simple and tasty. We explored key ingredients, nutrition facts, and preparation steps. I shared tips on perfecting your vinaigrette and avoiding common mistakes. You can even try tasty variations like lemon or balsamic versions. Remember to store your dressing properly and check for spoilage. With these insights, you can create a delicious salad topper. Enjoy crafting your own vinaigrette—it adds flavor and fun to every meal!](https://stirredrecipes.com/wp-content/uploads/2025/07/c9e8466e-8c56-4d3b-bbb2-096d29aab49b.webp)
Parmesan Vinaigrette Fresh and Tangy Dressing Guide
If you’re looking for a quick, fresh dressing that packs a flavor punch, you’ve landed in the right spot! My Parmesan Vinaigrette is both tangy
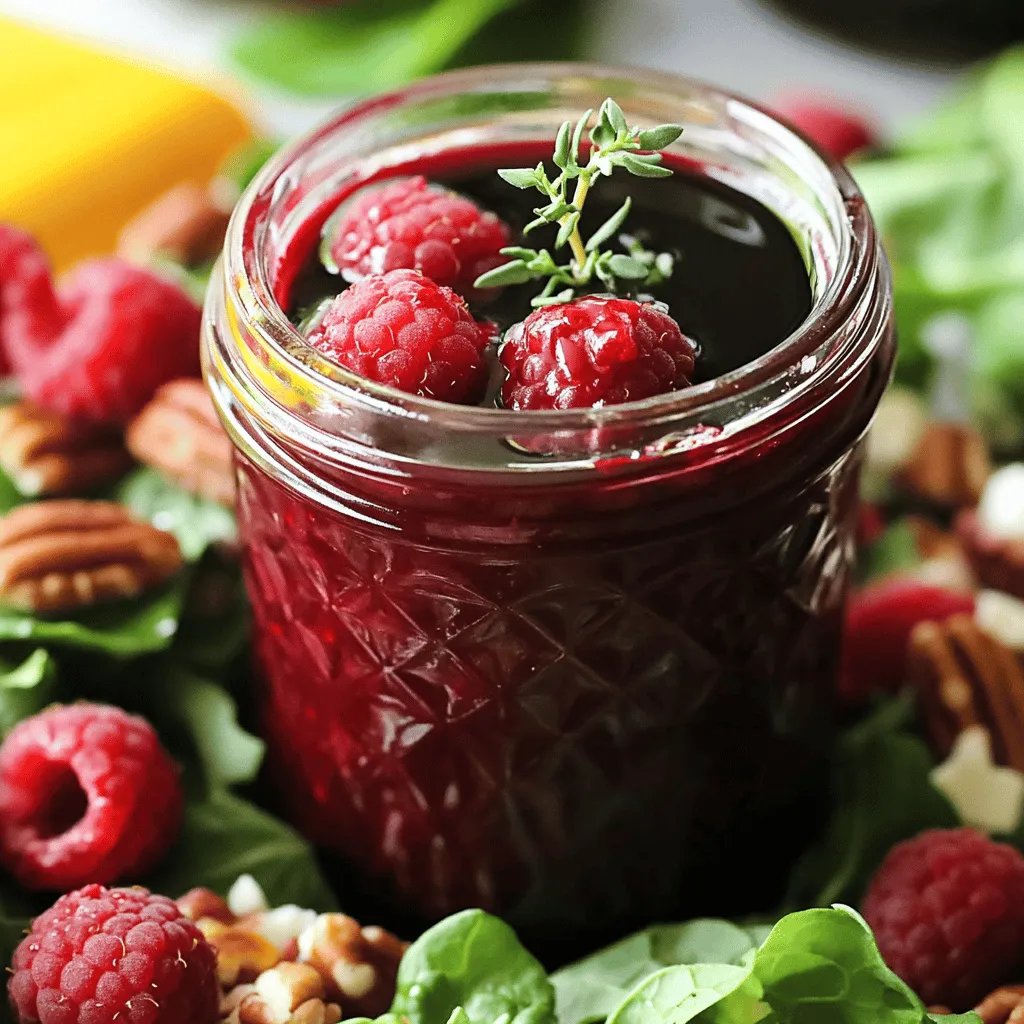
Raspberry Balsamic Vinaigrette Salad Dressing Delight
Are you ready to elevate your salads with a burst of flavor? In this post, I’ll show you how to make a delightful Raspberry Balsamic
![The base of our Easy Fresh Tomato Vinaigrette is simple and flavorful. You need: - 3 medium ripe tomatoes, diced - 1/4 cup extra-virgin olive oil - 2 tablespoons apple cider vinegar These fresh tomatoes bring a burst of sweetness. The olive oil adds richness, while apple cider vinegar gives a tangy kick. To enhance this dressing, add a few more ingredients: - 1 tablespoon Dijon mustard - 1 garlic clove, minced - 1 teaspoon honey (optional for sweetness) Dijon mustard adds depth and creaminess. Garlic gives it a nice zing, and honey balances the acidity if you prefer a sweeter taste. Seasoning elevates the flavor. You will need: - Salt and freshly ground black pepper to taste - Fresh basil leaves, chopped (for garnish) Salt and pepper bring out the natural flavors. Fresh basil adds a fragrant touch, making your vinaigrette look and taste fresh. For the Full Recipe, check the detailed steps to create this vibrant sauce. - Add diced tomatoes to a medium bowl. - Sprinkle with salt to release juices. Start by chopping your tomatoes. I like to use ripe ones for the best taste. Place the diced tomatoes into a bowl. Then, sprinkle salt over them. This step is key. The salt helps the tomatoes release their juices. Let them sit for about five minutes. This waiting time enhances the flavor of the tomatoes. - Whisk olive oil, vinegar, mustard, garlic, and honey. - Combine until well mixed. Next, grab a small bowl. In it, whisk together olive oil and apple cider vinegar. Add Dijon mustard, minced garlic, and honey. If you want a bit of sweetness, use the honey. Whisk until the mixture is smooth and creamy. This vinaigrette brings a nice balance of tangy and sweet flavors. - Pour vinaigrette over tomatoes. - Gently toss and adjust seasoning. - Allow the vinaigrette to sit for flavor melding. Now, pour the vinaigrette over your tomatoes. Gently toss them together. This mixes the flavors nicely. Taste and adjust the seasoning with more salt or pepper if needed. Let the vinaigrette sit for about ten minutes. This waiting allows the flavors to meld. For a touch of fresh flavor, fold in chopped basil just before serving. You can find the full recipe above for more details on preparation. To make your Easy Fresh Tomato Vinaigrette shine, let it rest for at least 10 minutes. This time allows the flavors to blend beautifully. You will notice a big difference in taste. High-quality extra-virgin olive oil makes a huge impact too. It adds depth and richness that lower-quality oils can’t match. Always choose the best you can find. Your vinaigrette deserves it! Serve your vinaigrette in a clear glass jar or bowl. This way, you can show off the vibrant colors of the tomatoes and basil. A little garnish can go a long way. Add a basil sprig on top for a pop of green. It makes the dish look fresh and inviting. This small touch can impress your guests! Fresh tomatoes are packed with vitamins. They provide vitamin C, potassium, and antioxidants. These nutrients are great for your health! Olive oil is also a star player. It has healthy fats that can support heart health. Plus, this vinaigrette is low in calories. You can enjoy it without guilt. It’s a delicious way to add flavor and nutrition to your meals! {{image_2}} You can easily change this sauce. Swap tomatoes for other fresh veggies, like cucumbers or bell peppers. Each option gives a new taste and texture. You can also add herbs like oregano or parsley. Fresh herbs add a bright flavor that lifts the sauce. Adjust the sweetness to fit your taste. You can increase or decrease honey based on what you like. If you prefer a tangy twist, try different vinegars. Balsamic or red wine vinegar can add depth and a unique flavor profile. Consider adding capers or shallots for an extra twist. Capers bring a salty kick, while shallots add a mild onion flavor. If you want some heat, sprinkle in red pepper flakes. This gives the vinaigrette a spicy bite that pairs well with summer dishes. For more ideas, check out the Full Recipe. To keep your Easy Fresh Tomato Vinaigrette fresh, store it properly. - Place it in an airtight container in the fridge. - Use it within a week for the best taste and freshness. - Freezing this vinaigrette is not a good idea. - The texture changes when frozen, making it less enjoyable. - It’s best enjoyed fresh to savor all the flavors. - When using leftovers, shake or whisk the vinaigrette well. - If the flavor seems dull, add a splash of vinegar. - This little trick gives it a nice flavor boost. Enjoy your Easy Fresh Tomato Vinaigrette as a delightful summer sauce! For the complete recipe, check out the [Full Recipe]. Easy Fresh Tomato Vinaigrette lasts about one week in the fridge. Store it in an airtight container. The flavors will stay fresh for a good while, but it’s best to use it in that time frame. After a week, the taste might change, and the texture could become watery. Yes, you can make this vinaigrette in advance. Just prepare it a few hours before you plan to serve. Making it ahead of time allows the flavors to blend better. If you want to prep it even earlier, you can store it for up to three days. Just remember to give it a good stir before serving. Yes, this vinaigrette is very versatile. It is gluten-free and vegan. You can enjoy it on salads, grilled veggies, or even as a dip. If you're watching carbs, this vinaigrette fits that diet too. The ingredients are simple and healthy, making it a great choice for many eating styles. This blog post highlighted how to make a fresh tomato vinaigrette with simple steps. We started with fresh ingredients, then moved to making the vinaigrette, and ended with tips and variations. Remember, allow your vinaigrette to rest for flavor and present it well. Enjoy the health benefits and delicious taste of your creation. With these ideas, you can customize the vinaigrette to fit your taste. Keep it fresh and tasty for the best results. Happy cooking!](https://stirredrecipes.com/wp-content/uploads/2025/07/c9f11df3-091a-4635-ac2d-aec285d3b99f.webp)
Easy Fresh Tomato Vinaigrette Flavorful Summer Sauce
Summer is the perfect time for fresh flavors, and nothing beats an Easy Fresh Tomato Vinaigrette! This vibrant sauce is quick to make and bursting
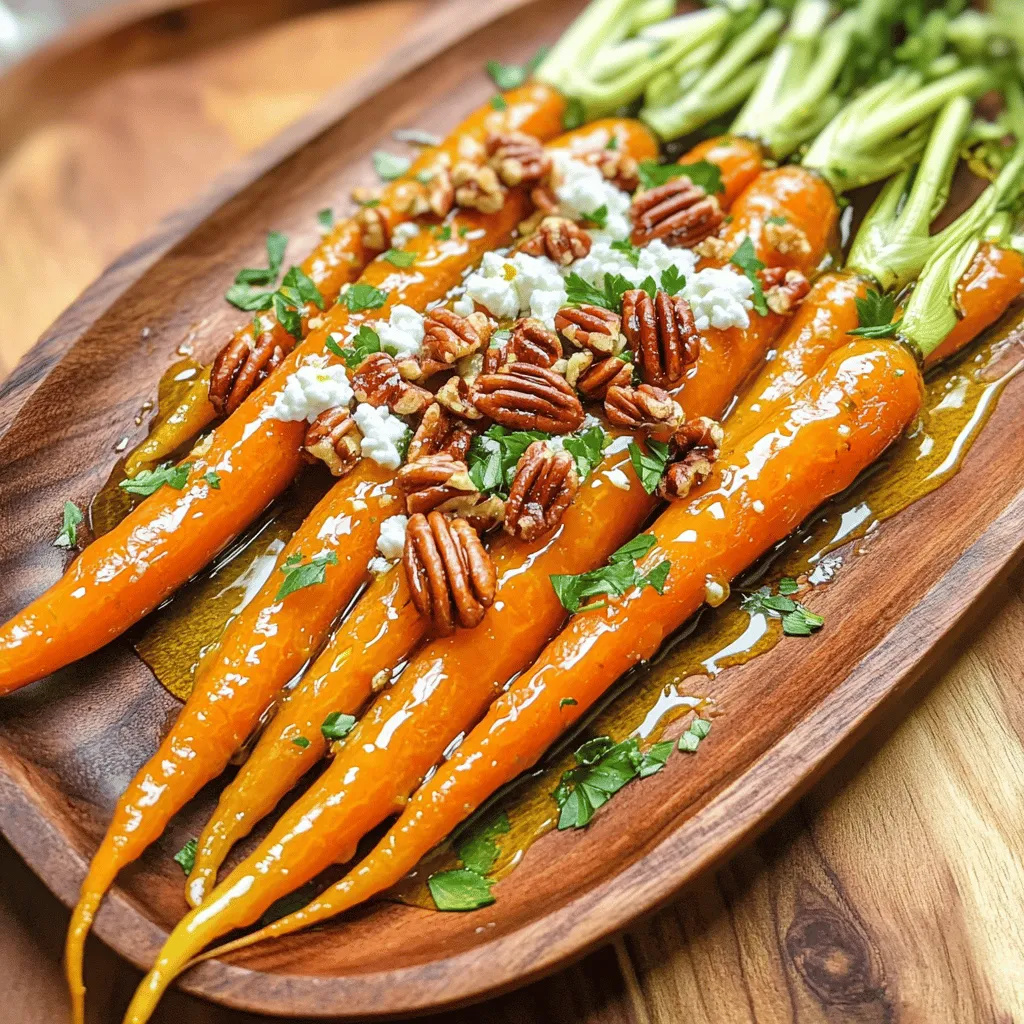
Roasted Carrots with Candied Pecans and Goat Cheese Delight
If you’re looking for a delightful side dish that combines sweet and savory flavors, you’ve found it! My Roasted Carrots with Candied Pecans and Goat
![To make dilled string beans, gather these simple ingredients: - 1 pound fresh string beans, trimmed - 2 tablespoons olive oil - 2 cloves garlic, minced - 1 lemon, zested and juiced - 1 tablespoon fresh dill, chopped (plus more for garnish) - 1 teaspoon Dijon mustard - Salt and pepper to taste Fresh string beans are low in calories and high in fiber. They support digestion and keep you full. They also provide vitamins A, C, and K. Garlic adds flavor and may help lower blood pressure. Olive oil brings healthy fats, which are great for your heart. Lemon juice brightens the dish and adds vitamin C. Dill has antioxidants that can help with digestion and reduce inflammation. When you choose string beans, look for bright green color. They should be firm and crisp. Avoid any that have brown spots or are wilted. If you can, smell them. Fresh string beans should have a sweet, grassy scent. Buy them when they are in season for the best taste. For the best flavor, try to use them within a few days of buying. To make dilled string beans, start with fresh and crisp string beans. Trim the ends to remove any tough parts. You will need a large pot for boiling, a bowl for ice water, and a skillet for cooking. Gather all your ingredients and tools before you begin. This makes the process smooth and fun. 1. Boil Water: Fill a large pot with water and add a good amount of salt. Turn the heat on high and wait for it to boil. 2. Blanch Beans: When the water is boiling, add your trimmed string beans. Cook them for 3-4 minutes. You want them bright green and just tender. 3. Ice Bath: After blanching, drain the beans right away. Quickly transfer them to a bowl of ice water. This stops the cooking. Once they are cool, drain them again. 4. Sauté Garlic: In a large skillet, pour in 2 tablespoons of olive oil. Heat it over medium heat. Add 2 cloves of minced garlic. Stir it for about 1 minute. You want it fragrant but not brown. 5. Heat the Beans: Add the blanched string beans to the skillet. Toss them in the garlic oil for 2-3 minutes until they are warm. 6. Mix Dressing: In a small bowl, combine the lemon zest, lemon juice, chopped dill, Dijon mustard, salt, and pepper. Mix it well. 7. Dress the Beans: Pour the lemon-dill dressing over the string beans. Toss them to coat evenly. Cook for 1 more minute. 8. Final Steps: Remove the skillet from heat. Taste the beans and adjust the seasoning if needed. Transfer the dilled string beans to a serving dish. For a finishing touch, sprinkle some extra fresh dill on top. This adds color and flavor. Your dilled string beans are now ready to enjoy. Follow the full recipe for even more details and tips! Blanching string beans helps keep their bright color and crisp texture. Start by boiling water in a large pot. Add salt to the water; this adds flavor. Once boiling, drop in the string beans. Blanch them for 3-4 minutes. They should look bright green and slightly tender. After blanching, quickly move the beans to a bowl of ice water. This stops the cooking. It also locks in their color. Drain the beans once cool. This method gives you the best results. You can easily adjust the flavor of your dilled string beans. Add more lemon juice for a tangy kick. If you love garlic, increase the minced garlic to three cloves. For a spicy twist, try adding red pepper flakes. Fresh herbs can also enhance the dish. Consider adding parsley or chives along with dill. Experiment with different mustards too. A whole grain mustard gives a nice texture. You can also use honey mustard for sweetness. These simple tweaks can create a unique flavor profile. Avoid overcooking the string beans during blanching. They should stay bright green and crisp. If they turn dull, they will lose flavor. Another mistake is skipping the ice bath. This step is crucial for stopping the cooking process. Be careful not to drown the string beans in dressing. You want them coated, not swimming. Lastly, don’t forget to taste and adjust seasoning. A pinch of salt or extra dill can make a big difference. For the complete recipe, follow the [Full Recipe]. Enjoy making these delightful dilled string beans! {{image_2}} You can change the flavor of your dilled string beans easily. Try using fresh herbs like basil or parsley instead of dill. Each herb gives a unique taste. For a spicy kick, add red pepper flakes. You can also use lemon thyme for a citrusy twist. Experimenting with different flavors can make the dish new each time. You can cook string beans in different ways. Roasting gives them a nice, crispy texture. To roast, toss the beans with olive oil and seasoning. Spread them on a baking sheet and roast at 425°F for about 15-20 minutes. This method enhances their natural sweetness. Sautéing is quick and keeps them tender. Just heat oil in a pan and cook the blanched beans for a few minutes. Choose the method based on the texture you enjoy most. Dilled string beans make a great side dish. Serve them with grilled chicken or fish for a light meal. You can also add them to a salad for extra crunch. Try pairing them with quinoa or rice for a heartier option. For special occasions, place the beans on a platter and sprinkle with extra dill. This makes the dish look appealing and fresh. Explore these ideas to enjoy your dilled string beans in various ways! To keep your dilled string beans fresh, store them in an airtight container. Place the beans in the container and seal it tightly. You can keep them in the fridge for up to three days. If you want them to last longer, freezing is a great option. Freezing dilled string beans is simple. Start by blanching them as you did in the recipe. After cooling the beans in ice water, drain them well. Spread them on a baking sheet in a single layer. This step helps keep them from sticking together. Freeze them for about an hour, then transfer the beans to a freezer-safe bag. Remove as much air as possible before sealing. They can stay frozen for up to six months. When you are ready to enjoy your frozen string beans, reheat them gently. You can use a microwave or sauté them in a skillet. For the microwave, place them in a bowl with a splash of water. Cover and heat for one to two minutes. If you use a skillet, add a little olive oil and heat over medium for about three to four minutes. This method helps keep their crispness and flavor intact. Enjoy your tasty dilled string beans again! To prepare string beans, I recommend blanching. First, bring a pot of salted water to a boil. Add the string beans and cook for 3-4 minutes. This keeps them bright green and crisp. After that, plunge them into ice water. This stops the cooking and helps retain color. Finally, drain them well and they are ready to use. This method gives you a nice texture and flavor. Yes, you can make dilled string beans ahead of time. Prepare the dish and let it cool. Store it in an airtight container. Keep it in the fridge for up to three days. When you are ready to serve, just reheat gently in a skillet. This dish tastes great even after a day or two. The flavors continue to meld, making it even more tasty. Dill and string beans offer many health benefits. String beans are low in calories and high in fiber. They also provide vitamins A, C, and K. Dill has antioxidants and may help with digestion. It can add flavor without extra calories or salt. Together, they make a healthy, tasty side dish. Enjoying dilled string beans is a smart choice for your meals. In this blog post, we explored making dilled string beans. We covered key ingredients, their benefits, and tips for fresh selection. You learned step-by-step cooking instructions and flavor enhancements. We discussed best practices for blanching and common mistakes to avoid. Variations offered creative twists while storage tips ensured you enjoy leftovers. Dilled string beans can be a healthy, tasty side for any meal. Try these tips, and you’ll impress everyone at the table!](https://stirredrecipes.com/wp-content/uploads/2025/07/46b232e9-760f-4ead-9b74-a9fe605cdf72.webp)
Dilled String Beans Delightful and Simple Recipe
Are you ready to elevate your side dish game? My Dilled String Beans recipe is both delightful and straightforward. With fresh string beans and vibrant