Dinner
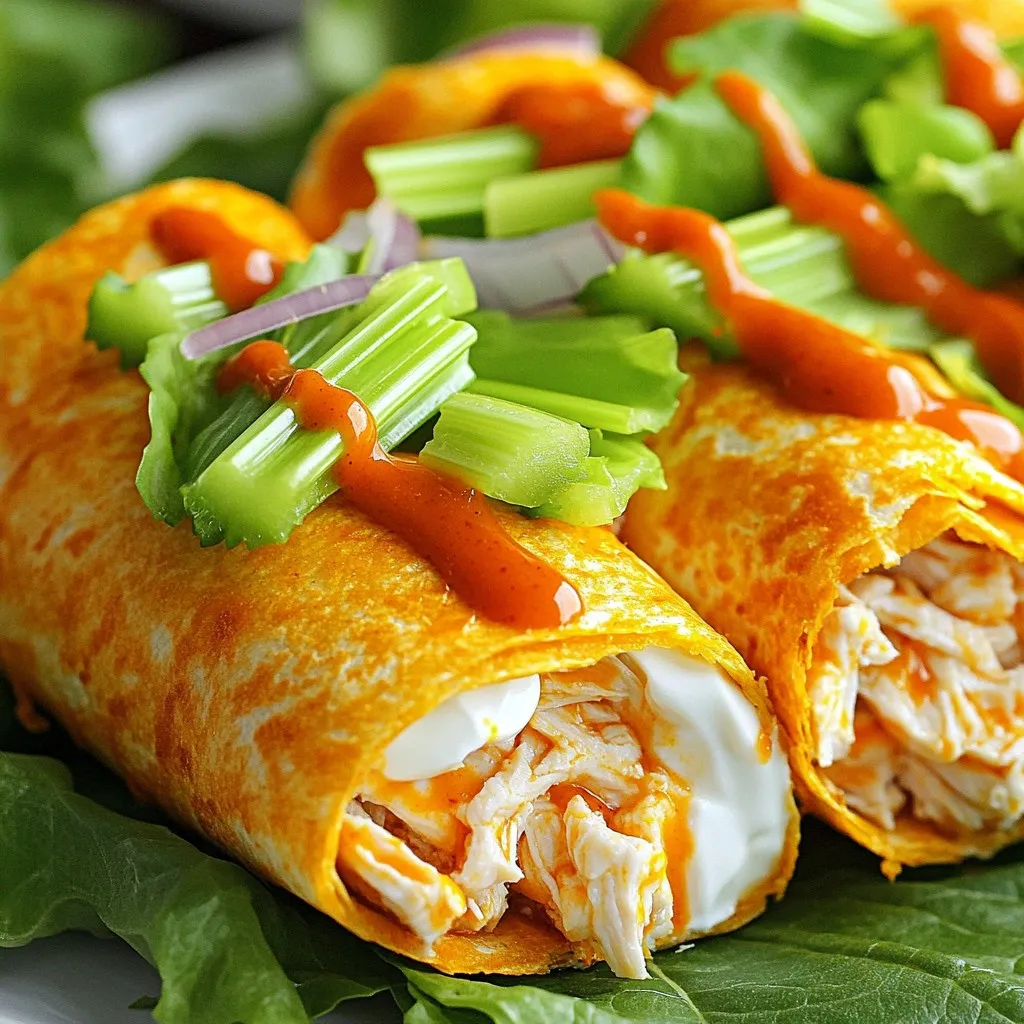
Air Fryer Buffalo Chicken Wraps Quick and Tasty Meal
Looking for a quick and tasty meal? Air Fryer Buffalo Chicken Wraps are your solution! These wraps are crunchy, spicy, and super easy to make.

One Pot Creamy Lemon Chicken Orzo Simple and Tasty
Craving a meal that’s both simple and delicious? You’re in the right place! In this post, I’ll guide you through making One Pot Creamy Lemon
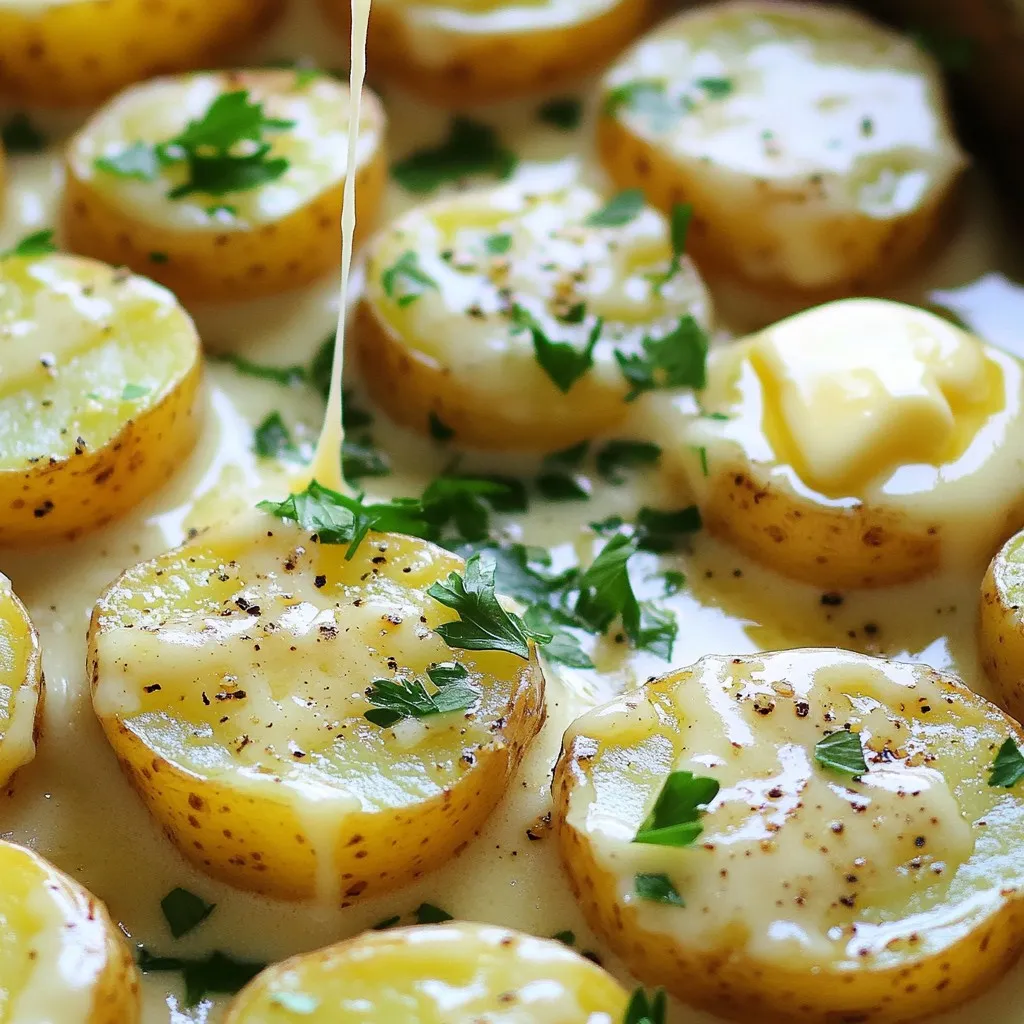
Creamy Garlic Parmesan Potatoes Slow Cooker Delight
Are you ready to transform your meals with a delicious side dish? Creamy Garlic Parmesan Potatoes cooked in a slow cooker will be your new
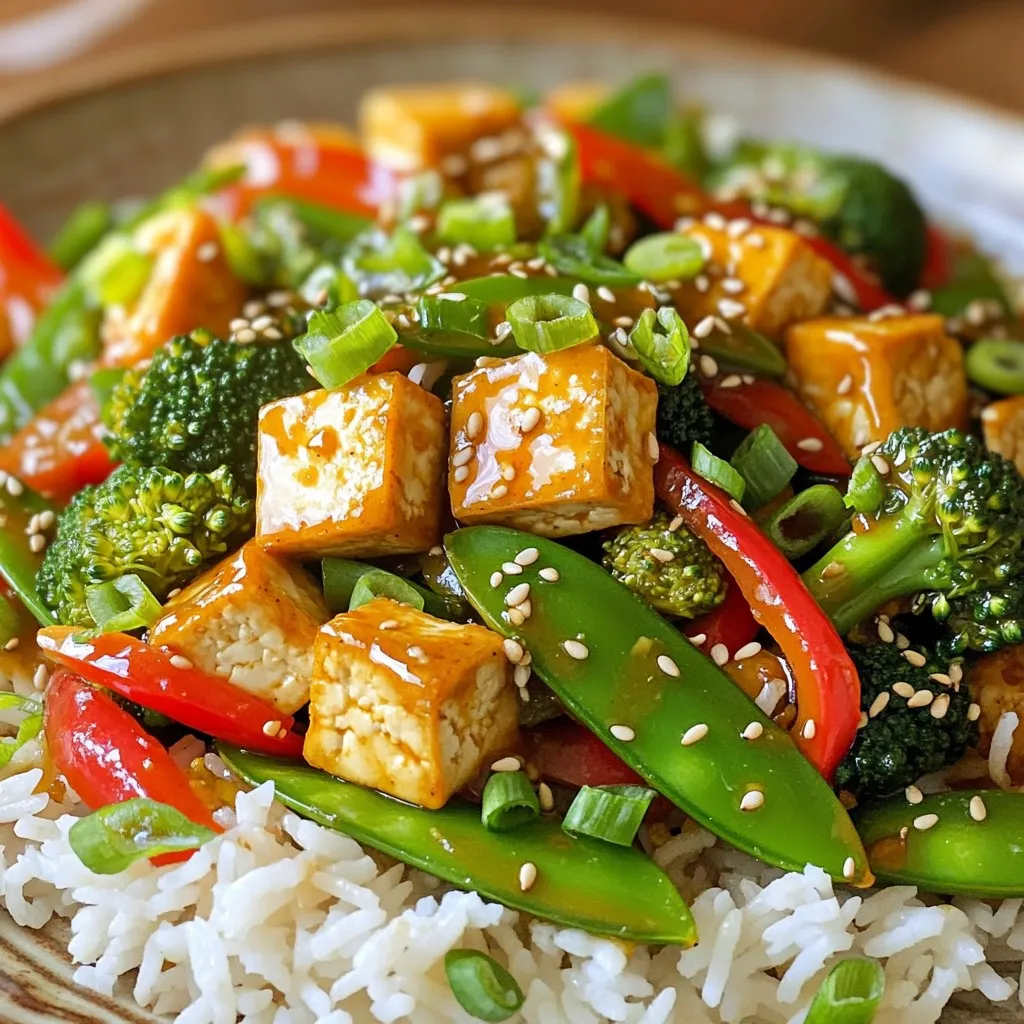
Minute Crispy Tofu Chili Garlic Stir-Fry Delight
Are you ready to elevate your weeknight dinners? This Minute Crispy Tofu Chili Garlic Stir-Fry packs bold flavors into a quick, delicious meal. Using fresh
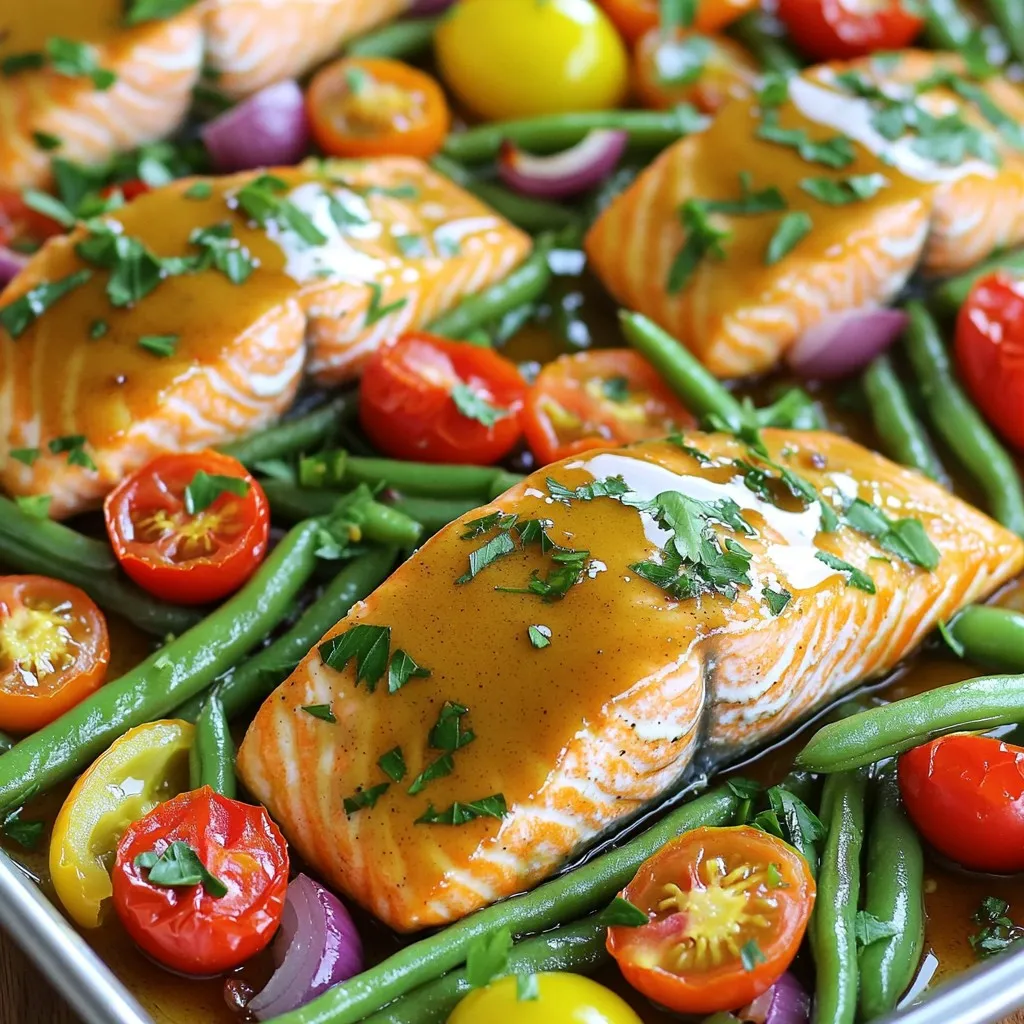
Sheet Pan Maple Dijon Salmon & Veggies Delight
Looking for a simple yet delicious dinner idea? Try my Sheet Pan Maple Dijon Salmon & Veggies Delight! This one-pan meal brings together tender salmon
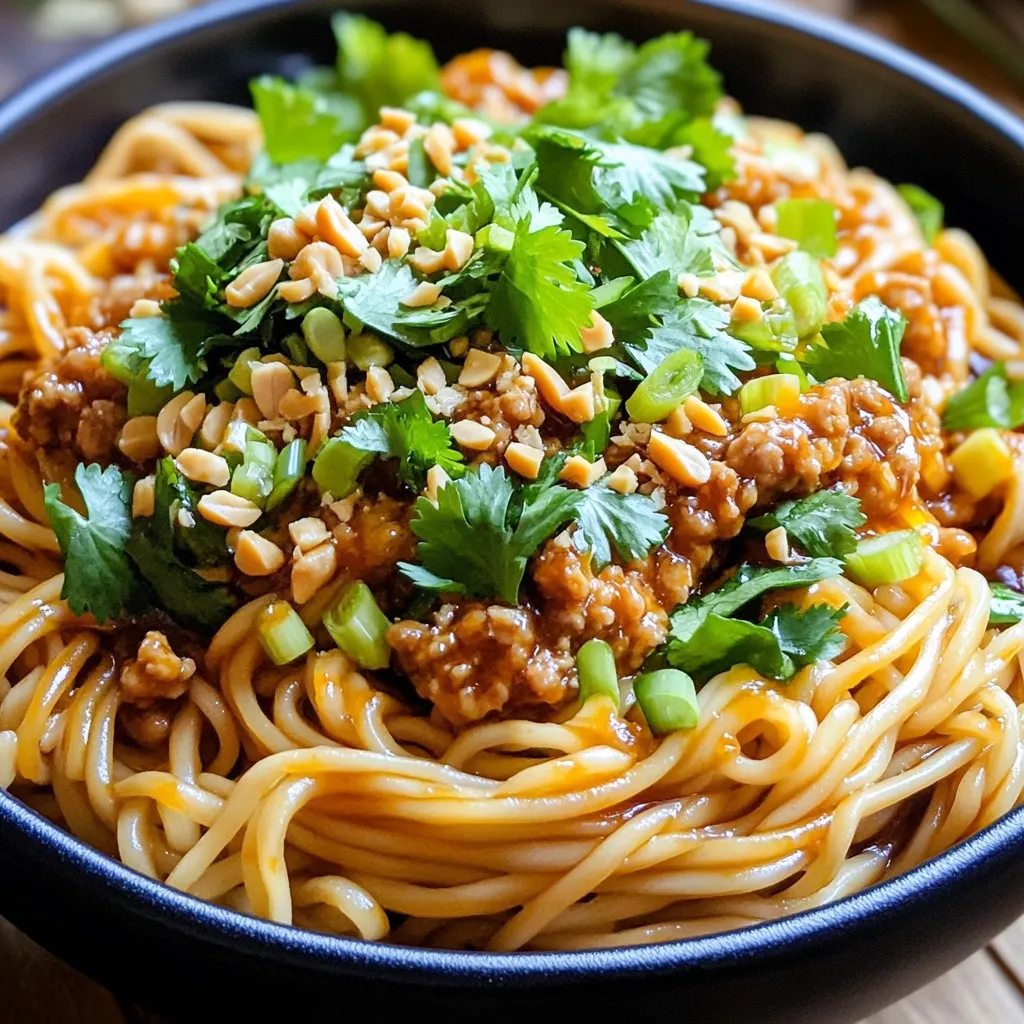
Better-Than-Takeout Spicy Dan Dan Noodles Delight
Craving a spicy, satisfying meal that beats takeout? Let me introduce you to Better-Than-Takeout Spicy Dan Dan Noodles. This dish is packed with flavor, simple
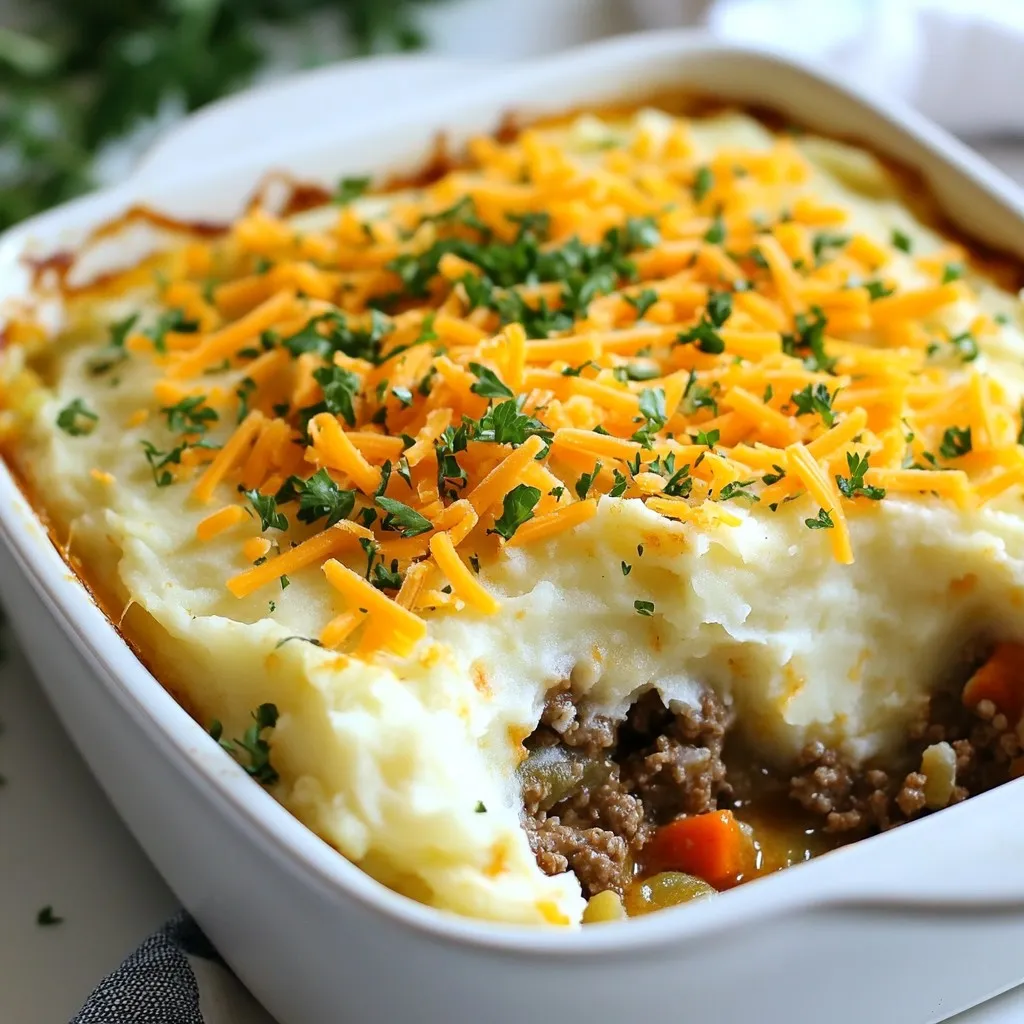
Easy Shepherd’s Pie Casserole Flavorful and Comforting Dish
If you’re craving something hearty and warming, this Easy Shepherd’s Pie Casserole is for you. With layers of savory ground meat, fresh veggies, and creamy
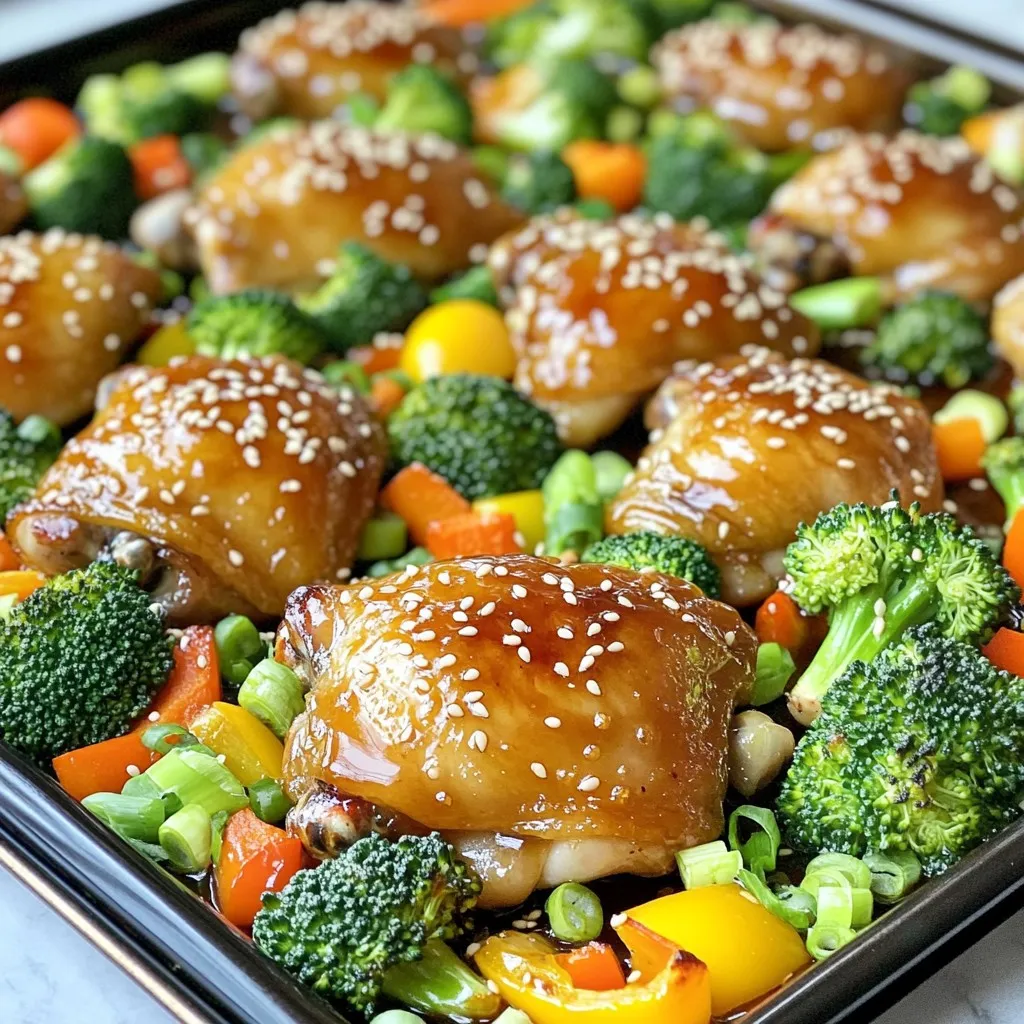
Savory Sheet Pan Honey Garlic Chicken Thighs Delight
Are you craving a delightful meal that’s easy to make? Look no further! My Savory Sheet Pan Honey Garlic Chicken Thighs Delight is your answer.
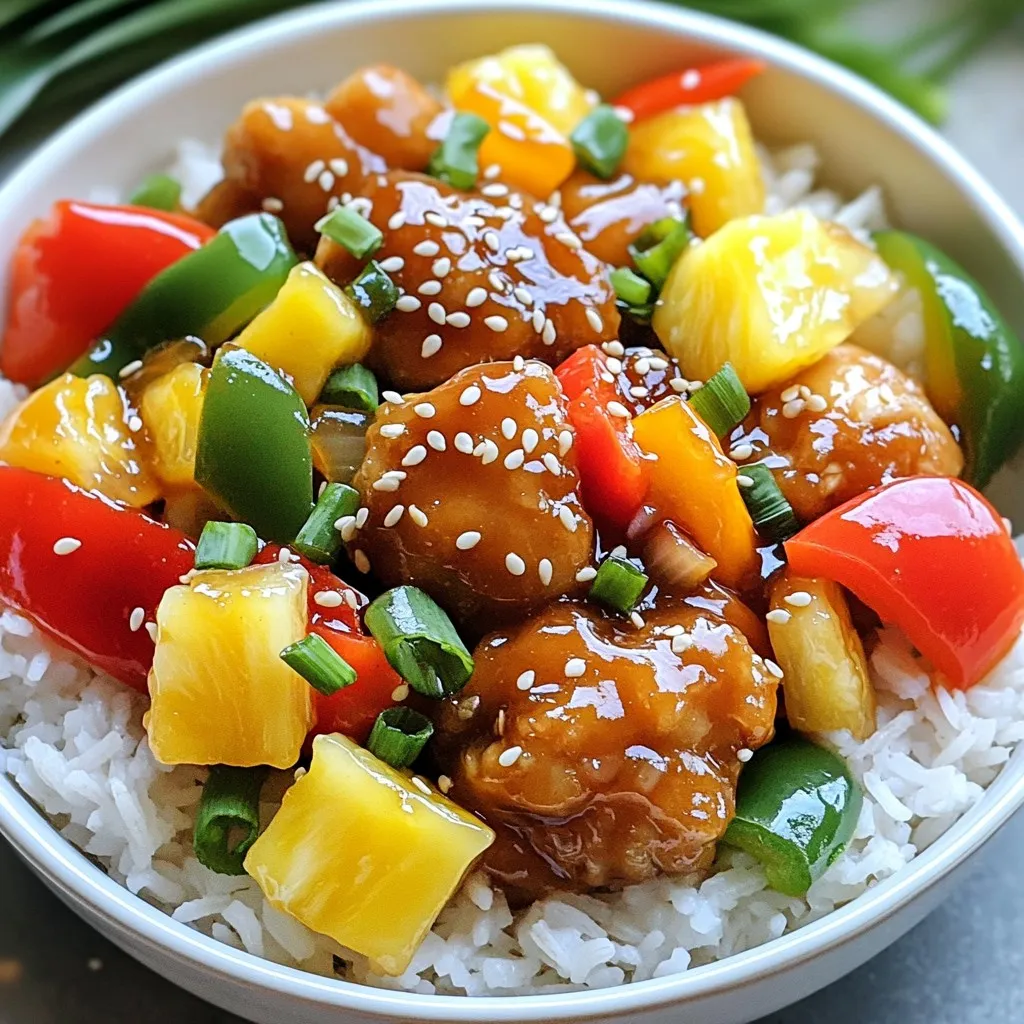
Sweet and Sour Chicken Bowls Better Than Takeout
Are you tired of takeout that doesn’t live up to your cravings? Let’s make Sweet and Sour Chicken Bowls that beat any restaurant version! In
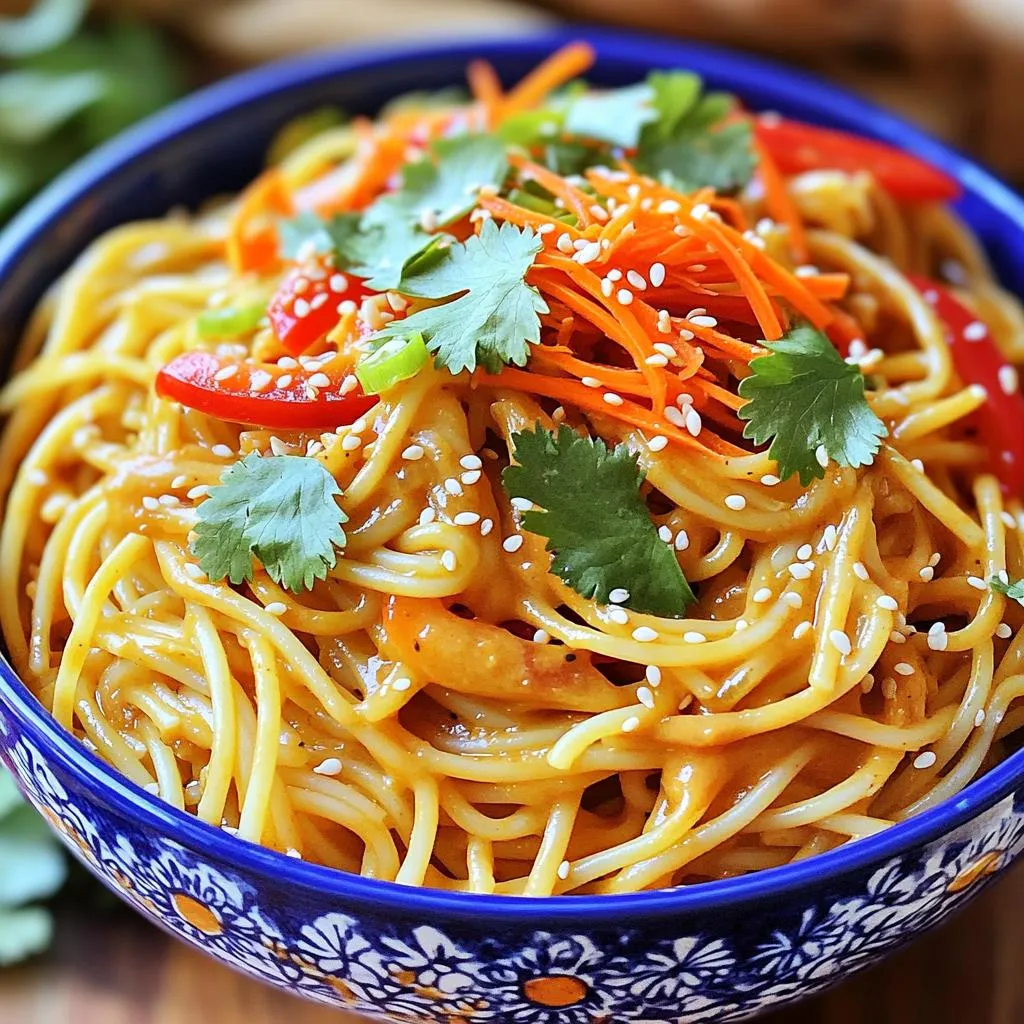
Spicy Sesame Peanut Noodles Flavorful and Easy Recipe
Are you ready to elevate your dinner game? This Spicy Sesame Peanut Noodles recipe is packed with flavor and super easy to make. With creamy