Dinner
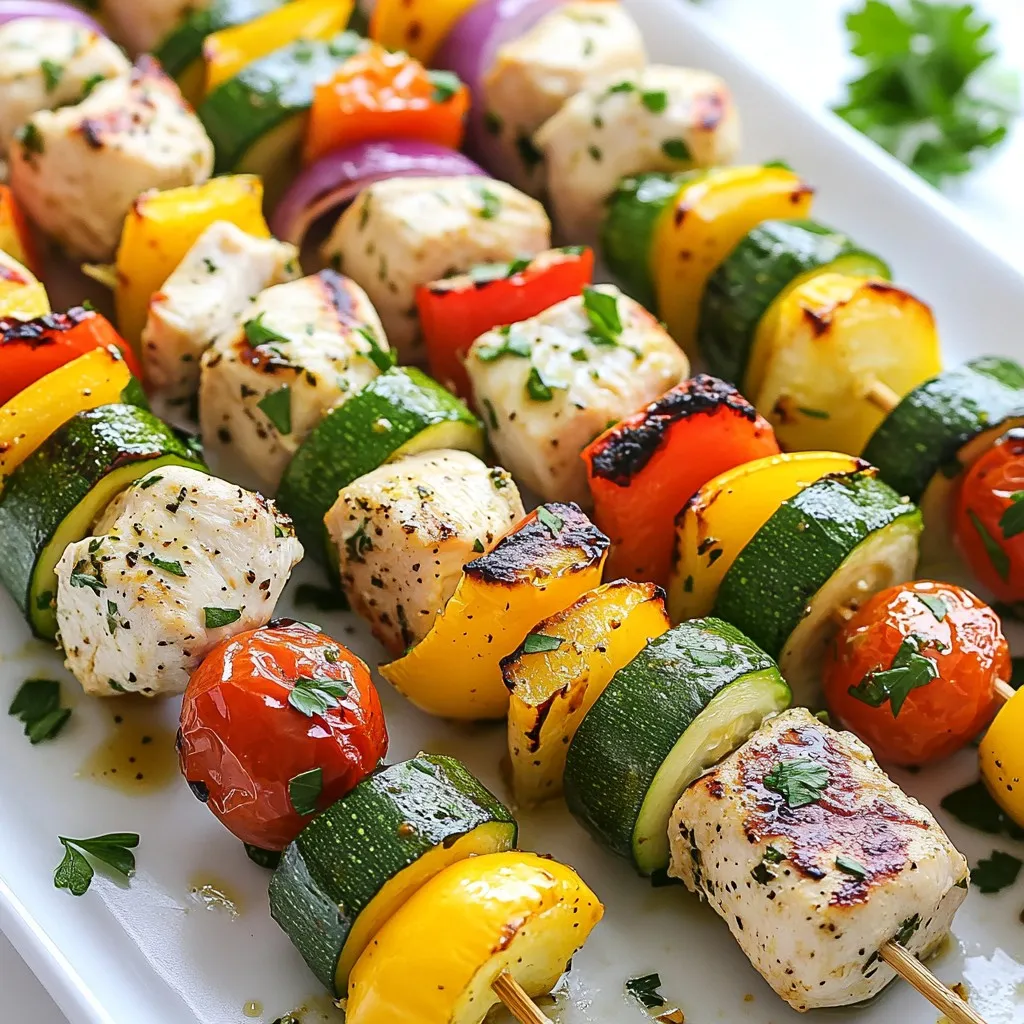
Sheet Pan Chicken Kabobs Easy and Flavorful Meal
Looking for an easy, delicious meal? You’ll love these Sheet Pan Chicken Kabobs! This simple recipe combines juicy chicken and fresh veggies, all roasted to
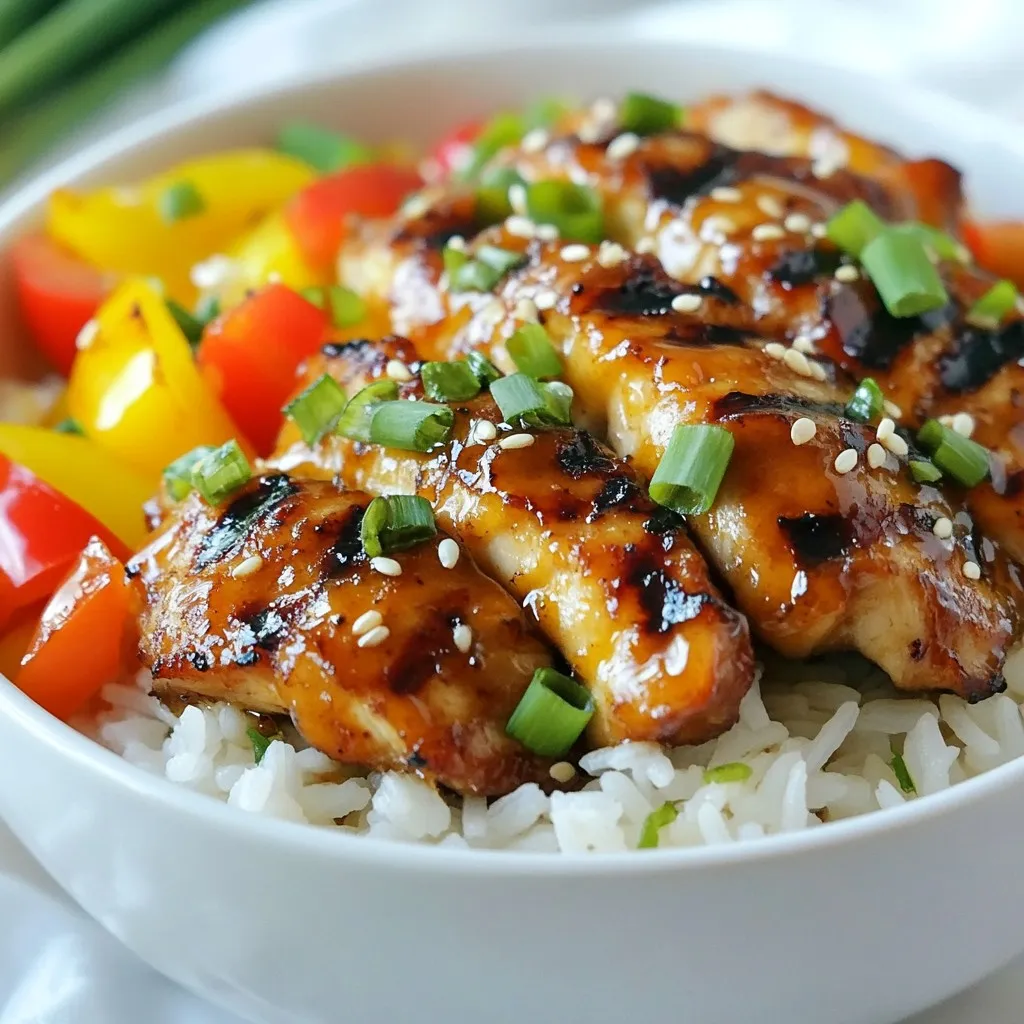
Honey BBQ Chicken Rice Flavorful and Easy Dish
Are you ready for a delightful meal that’s both simple and bursting with flavor? In this post, you’ll discover how to make Honey BBQ Chicken
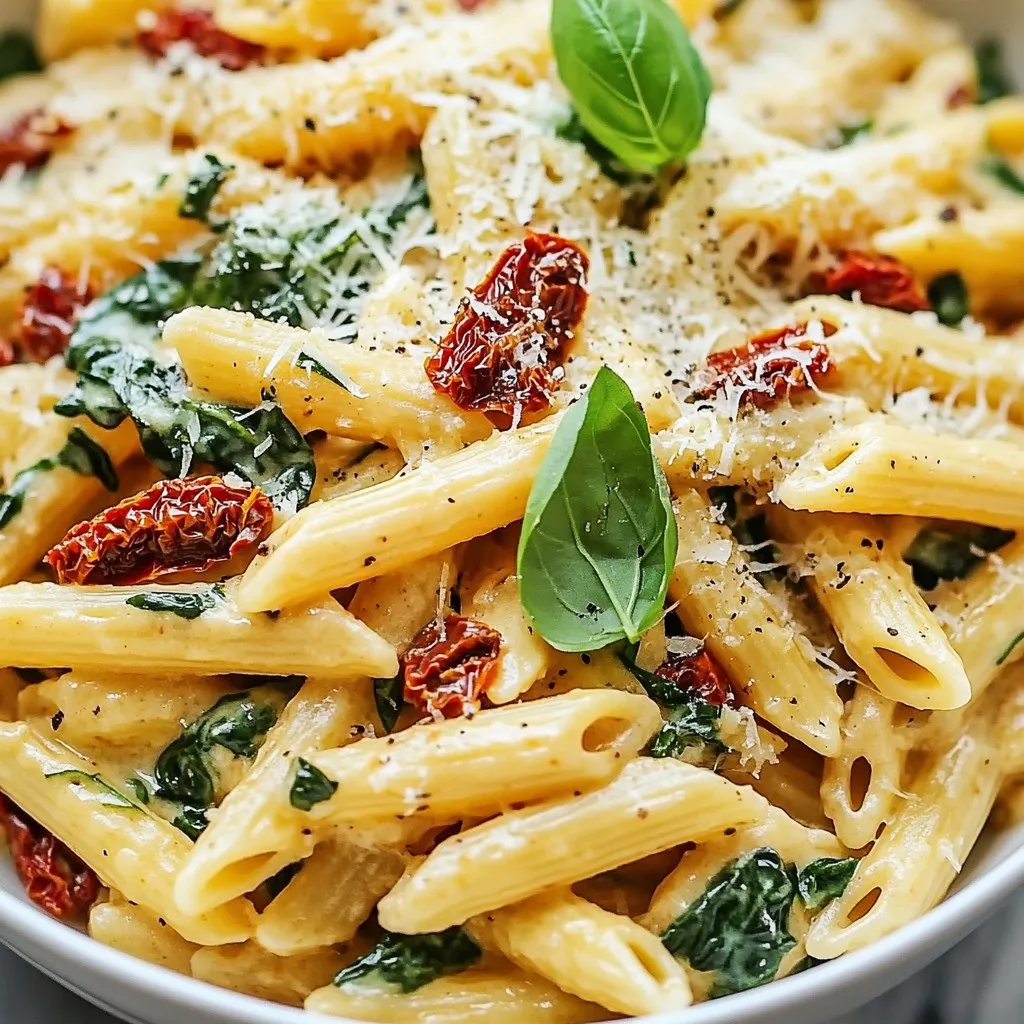
One-Pan Sun-Dried Tomato Pasta Quick and Tasty Meal
Looking for a quick and tasty meal? One-Pan Sun-Dried Tomato Pasta is your answer! I’ll guide you through a simple recipe that uses pantry staples

Crockpot Butternut Squash Chicken Stew Comfort Dish
Cozy up with my Crockpot Butternut Squash Chicken Stew! This dish combines tender chicken thighs, sweet butternut squash, and fresh veggies, creating warm comfort in

Garlic Parmesan Chicken Bake Easy Weeknight Recipe
Weeknight dinners don’t have to be boring! My Garlic Parmesan Chicken Bake brings you a delicious meal with minimal effort. This dish combines juicy chicken
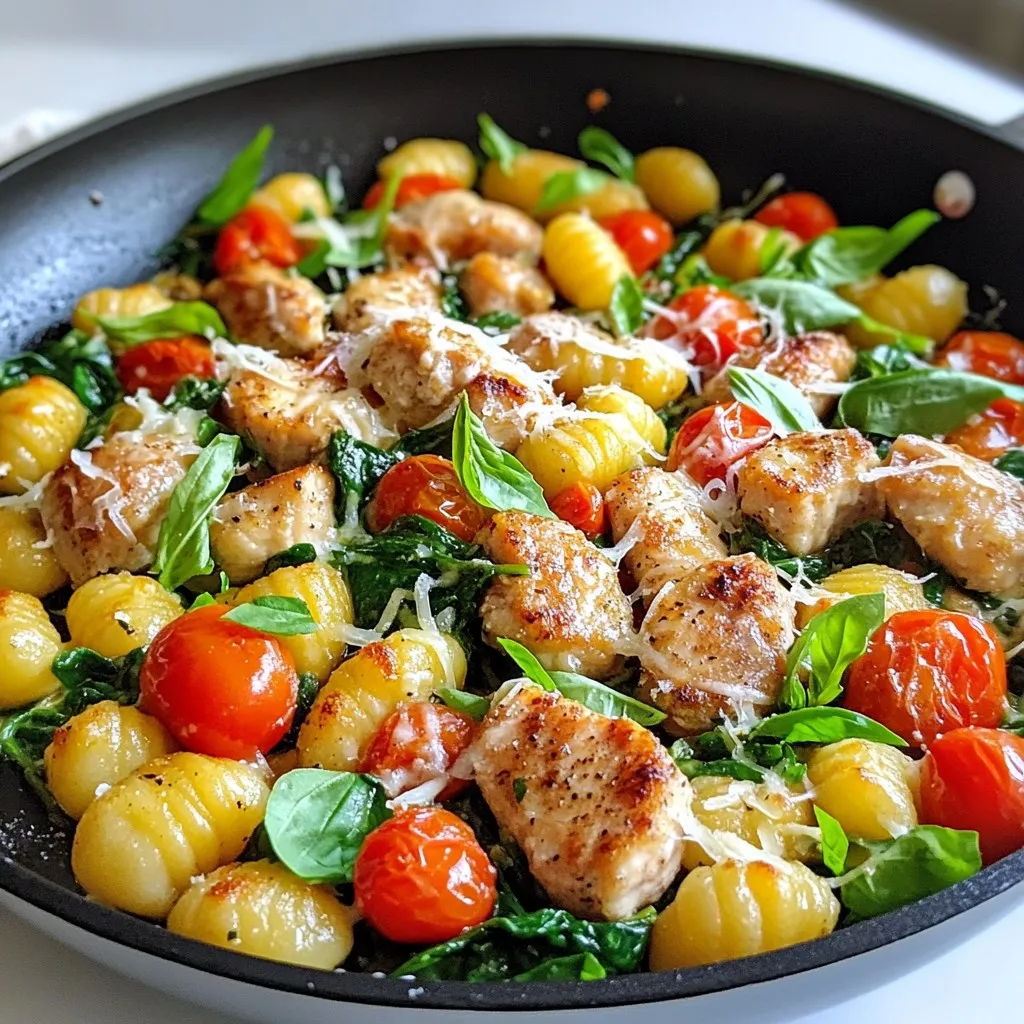
Minute Garlic Chicken Gnocchi Skillet Recipe Delight
Looking for a quick and delicious meal? I’ve got you covered with my Minute Garlic Chicken Gnocchi Skillet Recipe Delight! This dish is not only
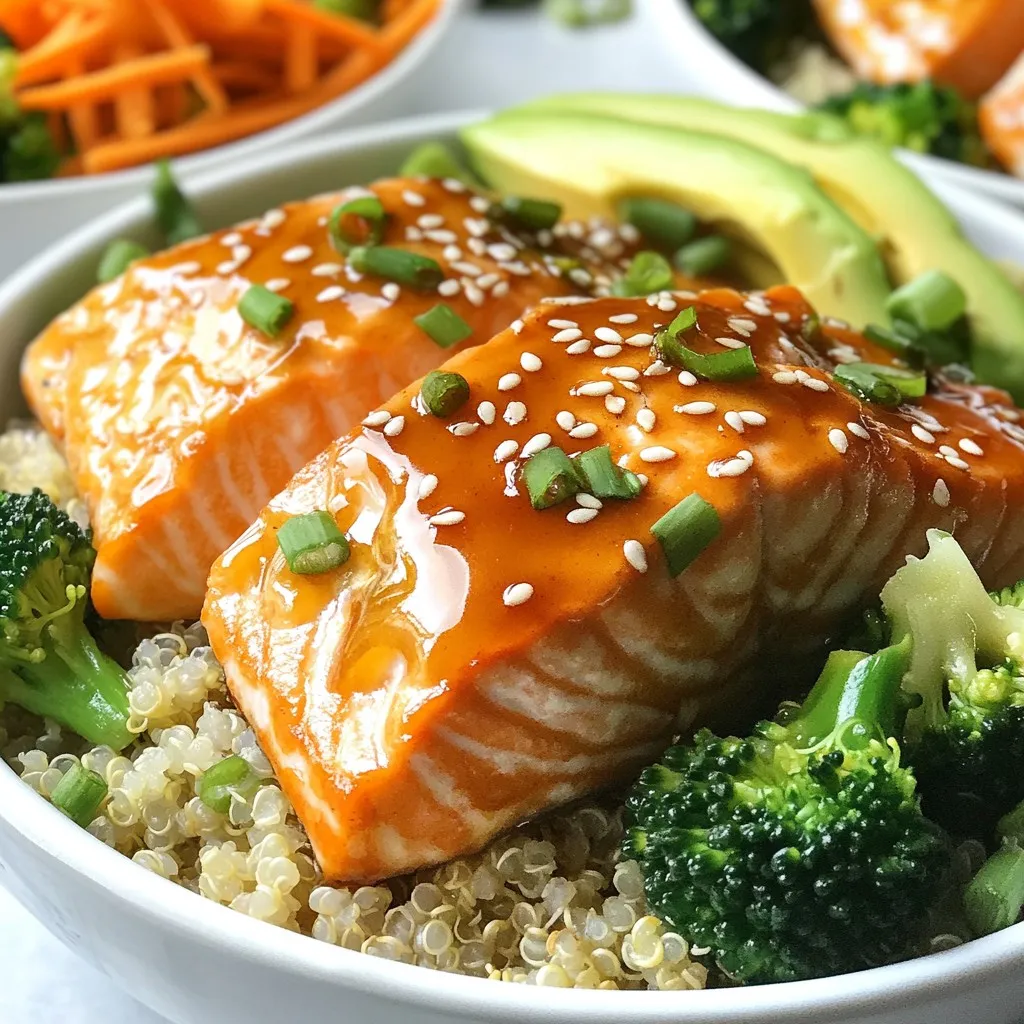
Honey Garlic Salmon Bowls Flavorful and Healthy Meal
If you’re looking for a quick and healthy meal, let me introduce you to Honey Garlic Salmon Bowls. This dish packs flavor and nutrition in
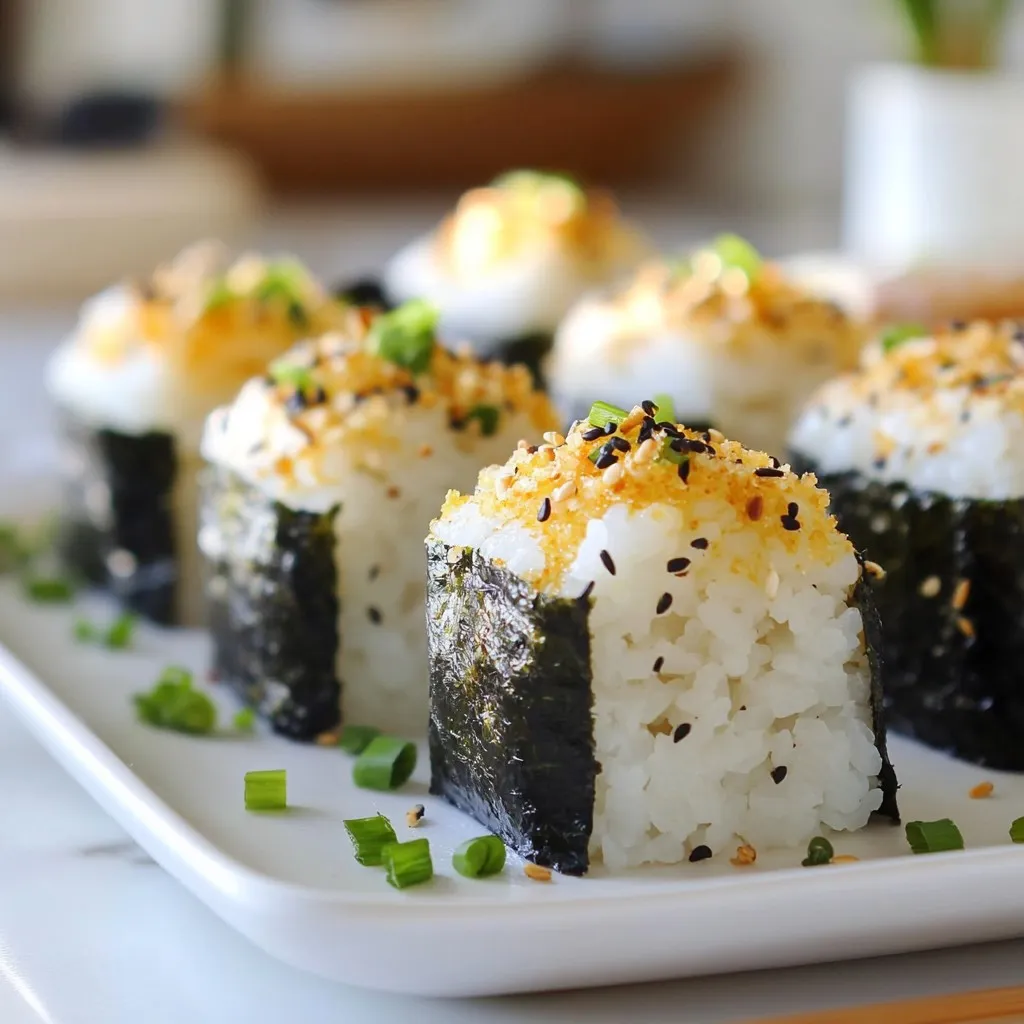
Chicken Onigiri Delightful and Nutritious Recipe
Are you ready to elevate your lunch game? Chicken Onigiri is a tasty and fun treat that packs flavor in every bite. This delightful recipe
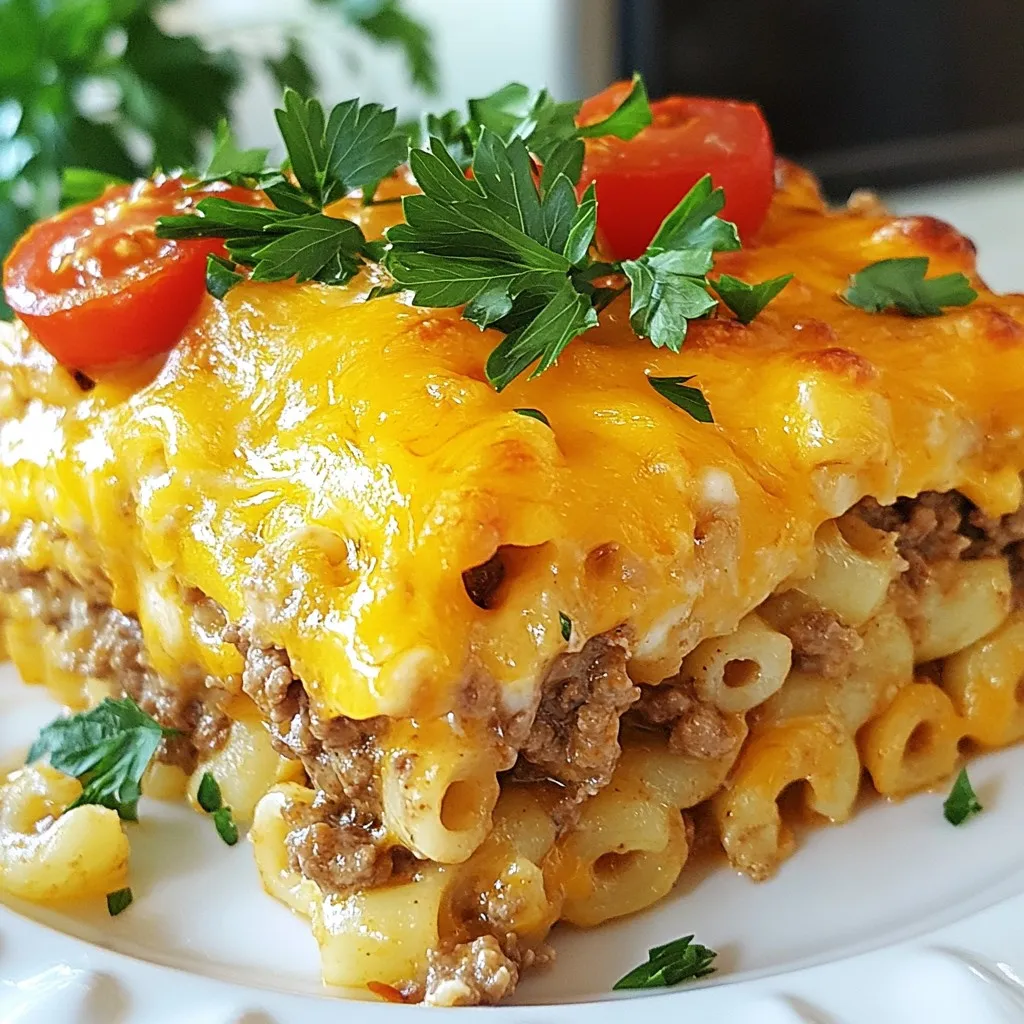
Cheeseburger Casserole Irresistible Family Meal Idea
Looking for a meal that your family will love? Try my cheeseburger casserole! This dish is packed with flavor and comfort. It’s simple to make