Dinner

- 8 oz elbow macaroni - 2 cups sharp cheddar cheese, shredded - 1 cup mozzarella cheese, shredded - 1/2 cup cream cheese, softened - 2 cups whole milk - 1/4 cup unsalted butter - 1/4 cup all-purpose flour - 1 teaspoon garlic powder - 1 teaspoon onion powder - 1/2 teaspoon paprika - Salt and pepper to taste - 1/2 cup breadcrumbs (for topping) - 1 tablespoon fresh parsley, chopped (for garnish) - 9x13 inch baking dish - Large saucepan - Whisk - Cooking pot The ingredients for creamy baked mac and cheese create a rich, cheesy dish you’ll love. The elbow macaroni serves as the perfect base. Sharp cheddar cheese adds a strong flavor. Mozzarella cheese brings creaminess and stretch, while cream cheese ties it all together. You need whole milk to create a smooth sauce. Butter and flour make a roux, which thickens the sauce. The garlic and onion powders give a nice savory taste. Paprika adds a hint of warmth and color. Salt and pepper balance the flavors. For texture, breadcrumbs on top create a crispy finish. Chopped parsley makes for a lovely garnish. Make sure you have a large saucepan for cooking. A whisk helps blend the ingredients smoothly. The 9x13 inch baking dish fits everything perfectly as it bakes. {{ingredient_image_1}} - Cook 8 oz elbow macaroni until al dente. - Drain and set aside. To cook the macaroni, bring a pot of salted water to a boil. Add the macaroni and stir. Follow the package instructions. Al dente means the pasta is firm but cooked. Drain it well to avoid sogginess. - Create a roux with 1/4 cup butter and 1/4 cup flour. - Whisk in 2 cups whole milk and cook until thickened. - Incorporate 1/2 cup cream cheese and spices. In a large saucepan, melt the butter over medium heat. Once melted, add the flour. Stir constantly for 1-2 minutes to make a roux. Slowly pour in the milk while whisking to keep it smooth. Cook this mixture for about 5-7 minutes until it thickens. Lower the heat and add the cream cheese. Stir until smooth. Add 1 teaspoon garlic powder, 1 teaspoon onion powder, 1/2 teaspoon paprika, and salt and pepper to taste for flavor. - Fold in 2 cups shredded cheddar and 1 cup shredded mozzarella. - Mix in the cooked macaroni. - Transfer to a greased 9x13 inch baking dish and top with 1/2 cup breadcrumbs. - Bake until golden and bubbly. Gently fold the cheddar and mozzarella into the cheese sauce until melted. Combine the macaroni with the cheese sauce, stirring well. Pour the mixture into the baking dish. Evenly sprinkle breadcrumbs on top for a nice crunch. Bake in a preheated oven at 350°F (175°C) for 20-25 minutes. Look for a golden brown top and bubbly edges. Enjoy your creamy baked mac and cheese! Using a mix of cheeses makes your mac and cheese extra creamy. I love using sharp cheddar and mozzarella together. Sharp cheddar gives a strong flavor, while mozzarella adds that meltiness we crave. Cream cheese also plays a key role. It brings a smooth texture that ties everything together. For milk, whole milk is best for creaminess. It adds a rich flavor that low-fat milk can't match. If you want a little twist, you can mix in some heavy cream. This will make your dish even richer and creamier. Bake your mac and cheese for 20 to 25 minutes. This gives the top a nice crisp while the inside stays gooey. You want that golden brown look on top. It shows your dish is done and ready. After removing it from the oven, let it cool for 5 to 10 minutes. This step helps the cheese set and makes serving easier. If you cut it too soon, it might be too runny. Pair your baked mac and cheese with a fresh salad. A simple green salad with a light vinaigrette works well. You can also serve it with garlic bread for a filling meal. Garnish your dish with fresh parsley. It adds a pop of color and freshness. For some extra fun, try adding crispy bacon bits or chopped green onions on top. Pro Tips Use Fresh Cheese: Freshly shredded cheese melts better and provides a creamier texture compared to pre-shredded cheese, which often contains anti-caking agents. Breadcrumb Variations: For added flavor, consider mixing herbs or spices into the breadcrumbs, or use panko for an extra crunchy topping. Make Ahead: You can prepare the mac and cheese, assemble it in the baking dish, cover it, and refrigerate it for up to 24 hours before baking. Just add a few extra minutes to the baking time if baking from cold. Experiment with Cheese: Feel free to mix in different types of cheese like Gruyère or fontina for a unique flavor twist. {{image_2}} You can mix different cheeses to make this dish unique. Try gouda or fontina for a twist. These cheeses melt well and add rich flavors. For a vegan option, use cashew cream and nutritional yeast. They give a cheesy taste without dairy. You can boost the flavor by adding proteins. Bacon, chicken, or shrimp work great. Just cook them first, then mix them in. To add nutrition, toss in some veggies like broccoli or spinach. They add color and taste, making the dish even better. Spices can make a big difference in your mac and cheese. Try adding a pinch of cayenne or black pepper for heat. You can also use herbs like thyme or basil for freshness. These simple changes can elevate your dish from good to great! To keep your creamy baked mac & cheese fresh, let it cool first. Once it cools, place it in an airtight container. I recommend using glass or BPA-free plastic containers. These help keep moisture in and prevent drying out. When you want to enjoy leftovers, the best method is the oven. Preheat your oven to 350°F (175°C). Place the mac & cheese in a baking dish. Add a splash of milk to keep it creamy. Cover it with foil to trap steam. Heat for about 20 minutes. If you use the microwave, heat in short bursts. Stir between heating to keep it moist. Yes, you can freeze baked mac & cheese! To freeze, let it cool fully. Then, transfer it into a freezer-safe container. Make sure to label it with the date. To thaw, move it to the fridge overnight. When ready to bake, preheat your oven to 350°F (175°C). Reheat as mentioned above for the best results. This way, you will taste the creamy goodness again! To keep your mac and cheese creamy, use enough cheese and milk. Start with a good amount of sharp cheddar and mozzarella. I suggest using whole milk for a rich flavor. Always stir your cheese sauce well. If it looks thick, add a splash of milk. This helps it stay smooth and creamy. Yes, you can make it ahead! Cook the macaroni and cheese sauce, then mix them together. Pour it into your baking dish and cover it. You can store it in the fridge for up to two days. When ready to bake, just pop it in the oven. Add a few extra minutes to the cooking time if it's cold from the fridge. If you need a pasta swap, try these options: - Fusilli - Penne - Shells These shapes work well and hold cheese nicely. You can even use gluten-free pasta if needed. Each choice gives your dish a fun twist! This blog post covered how to make creamy baked mac and cheese. We discussed the key ingredients, step-by-step instructions, and tips for the perfect dish. I shared ways to customize the recipe with different cheeses and add-ins. You can also learn how to store and reheat leftovers effectively. Baked mac and cheese is a classic comfort food. With the right ingredients and techniques, you can make it your own. Enjoy this dish with family and friends, and feel free to experiment with flavors!
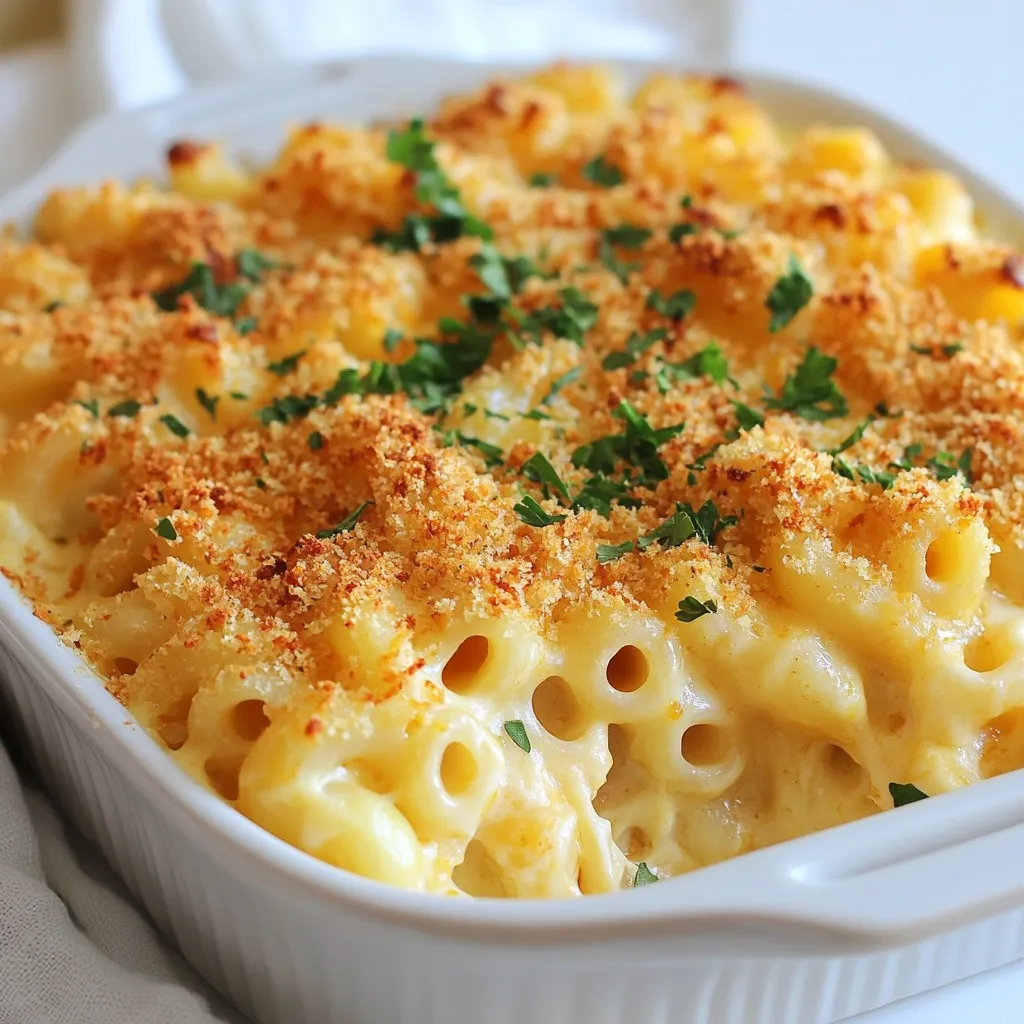
Creamy Baked Mac & Cheese Delightful Cheesy Dish
Get ready for the ultimate comfort food: Creamy Baked Mac & Cheese! This delightful cheesy dish will bring joy to your table. With a blend
- 1 pound ground chicken - 12 small corn tortillas - 1 cup shredded cheddar cheese - 1 cup shredded lettuce - 1 cup diced tomatoes - ½ cup sour cream The main ingredients for mini baked chicken tacos are simple yet flavorful. The ground chicken serves as the base, and I love its versatility. You can season it to your taste. Corn tortillas are perfect for these mini tacos. They hold the filling well and add a nice crunch. The cheese melts beautifully, adding richness. Fresh lettuce and diced tomatoes provide a crisp contrast to the hearty filling. - 1 tablespoon olive oil - 1 small onion, finely chopped - 2 cloves garlic, minced - 1 teaspoon ground cumin - 1 teaspoon chili powder - Salt and pepper to taste For seasoning, I use olive oil to sauté the onion and garlic. This step builds a strong flavor in the chicken. Ground cumin and chili powder give the filling its warmth. I add salt and pepper to balance the taste. These spices make the chicken delicious and fragrant. You can adjust them based on your own preferences. - Fresh cilantro for garnish I like to finish the tacos with fresh cilantro. It adds a burst of color and flavor. You can also use sour cream for creaminess. Adding some extra vegetables, like avocado or bell peppers, can make them even better. These garnishes enhance the look and taste of your mini tacos. Enjoying them fresh adds to the fun! {{ingredient_image_1}} 1. Sautéing onions and garlic Start by heating olive oil in a large skillet over medium heat. Add finely chopped onion and minced garlic. Sauté until the onion turns translucent, about 3-4 minutes. This step builds a flavorful base for your chicken. 2. Cooking ground chicken with spices Next, add one pound of ground chicken to the skillet. Use a spatula to break it apart. Cook until the chicken is browned and no longer pink, which takes about 5-7 minutes. Stir in one teaspoon of ground cumin, one teaspoon of chili powder, salt, and pepper to taste. Mix well to blend the spices into the chicken evenly. Remove from heat and let it cool slightly. 1. Softening tortillas While the chicken cools, wrap twelve small corn tortillas in a damp paper towel. Microwave them for about 30 seconds. This softens the tortillas, making them easier to shape. 2. Forming tortilla cups Lightly grease a muffin tin to prevent sticking. Take one softened tortilla and place it in a muffin cup. Gently press it down to form a taco shell shape. Repeat this for the remaining tortillas. 1. Filling tortilla cups Spoon the chicken mixture into each tortilla cup. Fill them generously, making sure each cup has enough chicken. Next, sprinkle shredded cheddar cheese on top of the chicken in each cup. 2. Baking until crispy and golden Preheat your oven to 375°F (190°C). Place the muffin tin in the oven and bake for about 15-20 minutes. Keep an eye on them until the tortillas are crispy and the cheese is melted and bubbly. Once done, remove them from the oven and let them cool for a few minutes. Carefully lift the taco cups out from the muffin tin. To enhance the flavor, always season the chicken while cooking. Use ground cumin and chili powder for a tasty kick. Fresh herbs like cilantro can add a burst of freshness at the end. To avoid dryness, do not overcook the chicken. Cook it just until it turns brown and is no longer pink. This keeps the filling juicy and tender. Forming taco cups can be tricky, but it’s easy once you know how. Use a greased muffin tin to hold the tortillas in shape. Don't forget to warm the tortillas in a damp paper towel. This makes them soft and easy to mold. To ensure crispy tortillas, bake them at 375°F for 15-20 minutes. Check to see they are golden and crunchy. For the best side dishes, think fresh and colorful. Serve with a simple salad or some guacamole for a nice contrast. You can get creative with serving. Try adding a spicy salsa or a zesty lime wedge to each plate. This adds fun and flavor for your guests. Pro Tips Use Fresh Ingredients: Fresh vegetables and herbs enhance the flavor of your tacos significantly. Opt for ripe tomatoes and fresh cilantro for the best taste. Customize the Spices: Feel free to adjust the spice levels by adding more chili powder or even a few jalapeños for a kick. Tailor it to your heat preference! Make Ahead: You can prepare the chicken mixture in advance and store it in the fridge. Just assemble and bake the taco cups when you're ready to serve. Experiment with Fillings: Experiment with different proteins like beef or turkey, or make it vegetarian by using black beans or lentils for a delicious twist. {{image_2}} You can easily swap the ground chicken for other proteins. Ground turkey works great and has a similar taste. If you want beef, try using lean ground beef. Both options give your tacos a different flair. For a vegetarian twist, consider using black beans or lentils. These options are hearty and full of flavor. You can also add chopped veggies like bell peppers or zucchini. They add crunch and nutrition. Changing the spices can give your tacos a fresh taste. For a zestier option, use taco seasoning instead of cumin and chili powder. You can also try smoked paprika for a smoky flavor. Experiment with different spice blends to find what you love. Toppings can change everything! Instead of just cheese, add sliced jalapeños for heat. Avocado or guacamole adds creaminess. You can also mix in corn or black olives for extra texture. If you need gluten-free options, use corn tortillas. They are naturally gluten-free and perfect for this recipe. Check labels to ensure your tortillas meet gluten-free standards. For a low-carb alternative, use lettuce wraps instead of tortillas. This swap cuts carbs while still giving you that taco feel. You can also use cauliflower tortillas, which are tasty and healthy. To keep your mini baked chicken tacos fresh, store them properly. You can keep them in the fridge or freezer. - Refrigerator Tips: Place tacos in an airtight container. They last about 3 days. - Freezer Tips: Wrap tacos in plastic wrap, then foil. They can last up to 2 months. For best results, use glass or plastic containers with tight lids. They help keep the tacos moist and tasty. When it’s time to eat leftovers, reheating is key to keeping the texture nice. - Best Methods: The oven is best for even heating. Preheat it to 350°F (175°C) and bake for about 10-15 minutes. This keeps the tortillas crisp. - Microwave Method: You can use a microwave, but it might make the tortillas soft. Heat for 30 seconds, then check if they are warm. Knowing how long tacos last helps you avoid waste. - Fridge Life: In the fridge, they last about 3 days. - Freezer Life: In the freezer, they last up to 2 months. Signs of Spoilage: Check for changes in smell or color. If the tacos look or smell off, it’s best to throw them away. To make mini baked chicken tacos, follow these steps: 1. Preheat your oven to 375°F (190°C). 2. Heat a tablespoon of olive oil in a large skillet over medium heat. 3. Add one small finely chopped onion and two minced garlic cloves. Sauté until the onion looks clear. 4. Add one pound of ground chicken. Cook until it's browned, about 5-7 minutes. 5. Mix in one teaspoon of ground cumin, one teaspoon of chili powder, salt, and pepper. Stir well and remove from heat. 6. Wrap 12 small corn tortillas in a damp paper towel. Microwave them for 30 seconds to soften. 7. Grease a muffin tin. Place each tortilla in a cup, pressing down to form a shell. 8. Fill each shell with the chicken mixture and top with one cup of shredded cheddar cheese. 9. Bake for 15-20 minutes, until the tortillas are crispy and cheese is bubbly. 10. Let cool for a few minutes before lifting them out of the muffin tin. Yes, you can use various types of tortillas. Here are some options: - Flour tortillas: These are softer and great for a different texture. - Whole wheat tortillas: A healthier choice that adds fiber. - Lettuce wraps: Perfect for a low-carb option. - Baked tortilla chips: For a crunchy twist. Each type changes the flavor and crunch, allowing you to customize. Mini baked chicken tacos pair well with many sides and drinks. Here are some ideas: - Side dishes: Serve with Mexican rice, refried beans, or corn salad. - Salads: A fresh cilantro lime salad adds brightness. - Drinks: Enjoy with a cold soda, iced tea, or a fruity mocktail. These options enhance your meal and make it even more enjoyable. In this post, we explored making mini baked chicken tacos, starting with essential ingredients. I shared tips on prepping the chicken filling, forming the tortilla cups, and ensuring everything bakes to a crisp. Techniques for enhancing flavor and keeping the tortillas crispy were also covered. As you create your tacos, feel free to experiment with different proteins and toppings to match your taste. Enjoy these fun bites with your favorite sides. Happy cooking!
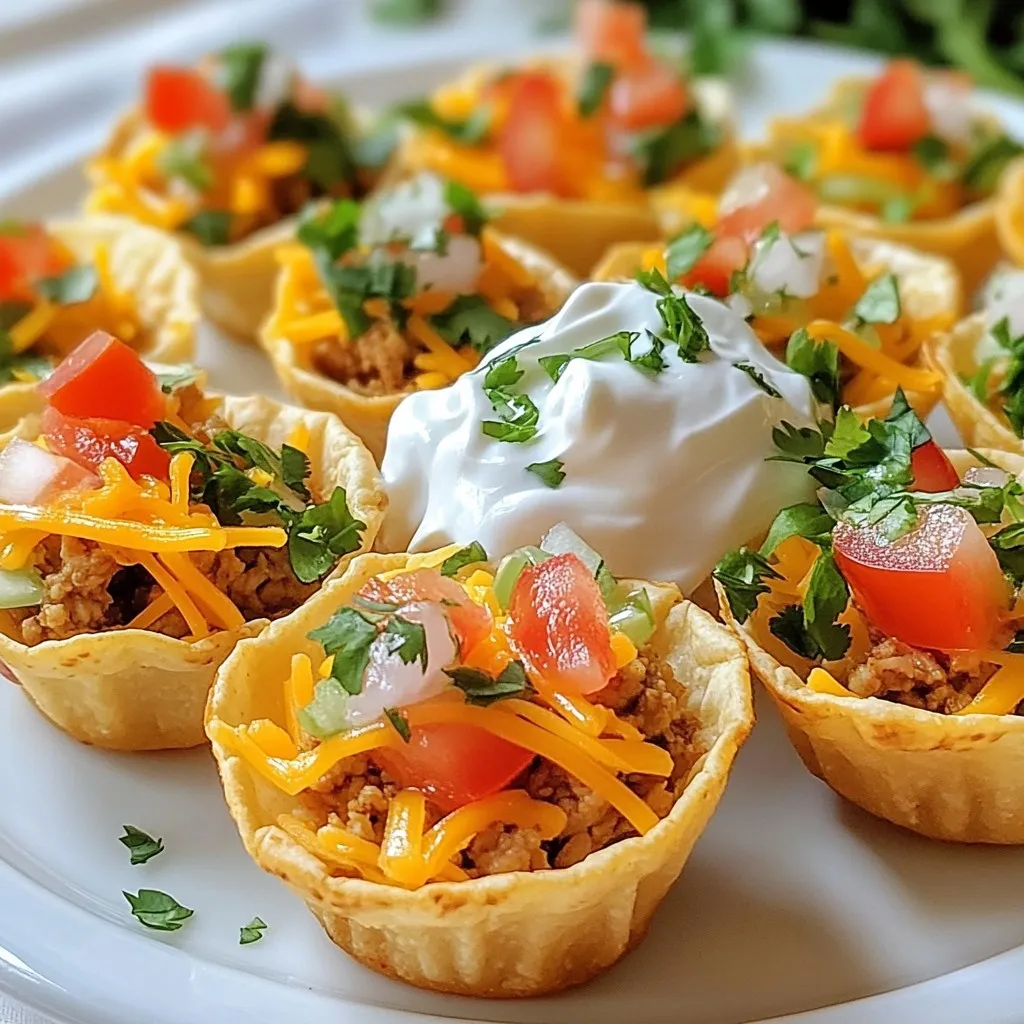
Mini Baked Chicken Tacos Flavorful and Easy Recipe
Looking for a fun and tasty meal? Mini baked chicken tacos are your answer! They’re easy to make and packed with flavor. In this recipe,
To make delicious taco stuffed peppers, gather these simple ingredients: - 4 large bell peppers (any color) - 1 lb ground turkey or beef - 1 cup cooked rice (white or brown) - 1 can (15 oz) black beans, rinsed and drained - 1 cup corn (fresh, frozen, or canned) - 1 packet taco seasoning (or homemade) - 1 cup salsa - 1 cup shredded cheese (cheddar, Monterey Jack, or your choice) - 2 tablespoons olive oil - Salt and pepper to taste - Fresh cilantro or parsley for garnish These ingredients come together to create a meal that is tasty and filling. The bell peppers add sweetness and crunch. The ground turkey or beef gives protein, while the beans and corn add fiber and flavor. Taco seasoning brings that classic taste we all love. The cheese melts into a creamy topping that makes each bite delightful. You can switch up the cheese to suit your taste. Using fresh herbs like cilantro or parsley makes the dish look nice and adds a fresh flavor. Don't worry if you want to make it your own. You can mix in different veggies or spices. Just be sure to have fun with it! {{ingredient_image_1}} - Preheat your oven to 375°F (190°C). - Take your bell peppers and cut off the tops. Remove the seeds and membranes inside. - Drizzle the outside with olive oil. Sprinkle some salt and pepper for flavor. - Place peppers upright in a baking dish. - In a large skillet, brown 1 pound of ground turkey or beef over medium heat. - Break the meat apart as it cooks for about 5-7 minutes. Drain any extra fat. - Add 1 packet of taco seasoning, 1 cup of cooked rice, 1 can of rinsed black beans, and 1 cup of corn. - Mix well and cook for 3-4 more minutes until hot. - Spoon the meat mixture evenly into each bell pepper. Pack it tightly. - Pour the remaining 1 cup of salsa over the top of each filled pepper. - Cover the baking dish with foil. Bake for 25 minutes. - Remove the foil and sprinkle 1 cup of shredded cheese on top. - Return to the oven and bake uncovered for another 10 minutes, until the cheese is melted. These steps will help you create a delicious and fun meal. Enjoy your tasty taco stuffed peppers! You can make taco stuffed peppers your own. Here are some easy swaps: - Ground meat options: Use ground chicken, pork, or a mix of meats. - Vegetables: Add chopped onions, diced zucchini, or spinach for more nutrition. - Spices: Spice it up with cumin, paprika, or chili powder for extra kick. Choosing the right cheese can change the flavor. Here are some great picks: - Recommended types: Cheddar and Monterey Jack melt well and taste great. - Vegan cheese options: Try almond-based mozzarella or cashew cheese for a dairy-free delight. Meal prep helps save time. Here are some tips: - Preparation: You can stuff the peppers a day ahead. Just cover and refrigerate. - Reheating: Warm them in the oven at 350°F (175°C) for about 15 minutes. Pro Tips Choose Colorful Peppers: Select a variety of bell pepper colors to create a visually appealing dish that is also packed with different nutrients. Customize Your Filling: Feel free to get creative with the filling! Add diced tomatoes, jalapeños, or even some avocado for extra flavor and texture. Make Ahead: Prepare the stuffed peppers in advance and store them in the refrigerator. Bake them just before serving for a quick and easy meal. Experiment with Cheese: Try different types of cheese like pepper jack or feta to enhance the flavor profile of your taco stuffed peppers. {{image_2}} You can make taco stuffed peppers vegetarian easily. Instead of meat, use beans or lentils. Black beans work well for protein and flavor. You can also mix in chickpeas or lentils for a hearty bite. Add more veggies like zucchini or bell pepper chunks in the filling. This keeps it colorful and packed with nutrients. If you want a low-carb option, try cauliflower rice. It mimics cooked rice but has fewer carbs. You can also use zucchini. Spiralize or shred zucchini and mix it in with the filling. Both options keep the dish light and delicious without losing the taco taste. To boost flavor, try adding different sauces or spices. A splash of lime juice brightens up the dish. You can also add chipotle sauce for a smoky kick. Experiment with spices like cumin or paprika. Each twist adds a unique taste to the stuffed peppers. To store leftover taco stuffed peppers, let them cool first. Place them in an airtight container. You can keep them in the fridge for up to three days. If you want to keep them fresh, cover them tightly. This way, they won’t dry out or absorb other smells. Freezing stuffed peppers is easy. First, let them cool completely. Wrap each pepper in plastic wrap. Then, place them in a freezer bag. You can freeze them for up to three months. Just remember to label the bag with the date. This will help you keep track of how long they’ve been in there. When you’re ready to eat your stuffed peppers, there are a few ways to reheat them. You can use the oven, microwave, or stovetop. For the oven, preheat it to 350°F (175°C). Place the peppers in a baking dish and cover them with foil. Bake for about 20 minutes. For the microwave, heat them on high for about 2-3 minutes. If you use the stovetop, place them in a skillet with a lid and heat on low until warm. Enjoy your tasty meal! When picking bell peppers, look for large ones. They should be firm and bright. Avoid any that feel soft or have dark spots. Choose any color you like—red, yellow, or green. They all taste great. Yes, you can prepare taco stuffed peppers ahead of time. Stuff the peppers and cover them. Store them in the fridge for up to 24 hours. When you're ready to cook, just bake them as usual. Your stuffed peppers are done when they are tender. The cheese should be melted and bubbly. You can also check the filling's temperature. It should reach 165°F (74°C) for safety. You can serve taco stuffed peppers with a side salad or rice. Guacamole and sour cream are great toppings too. Chips and salsa make a fun snack on the side. Enjoy! Taco stuffed peppers are tasty, fun, and easy to make. You learned how to prepare the ingredients, cook the filling, and bake them perfectly. I shared tips for customizing and storing these stuffed peppers. Experiment with different meats, cheeses, or veggies to suit your taste. You can create a dish everyone will love. Remember to enjoy the process and make it your own! Happy cooking!
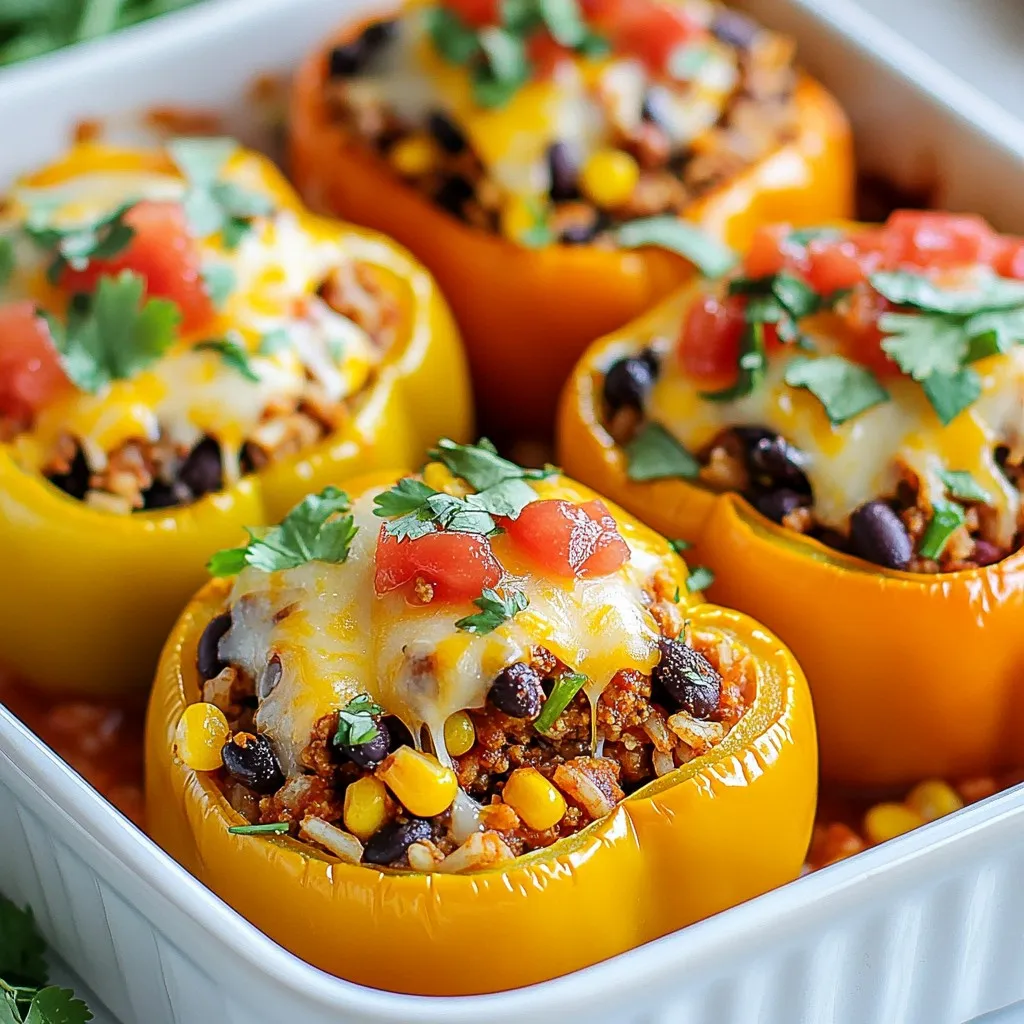
Taco Stuffed Peppers Flavorful and Easy Dinner Recipe
Looking for a fun and easy dinner idea? Taco stuffed peppers are your answer! This vibrant dish combines the flavors of tacos with healthy bell
- 4 boneless, skinless chicken breasts - 1 cup breadcrumbs (preferably Italian seasoned) - 2 cups marinara sauce (homemade or store-bought) - 2 cups shredded mozzarella cheese - 1 teaspoon garlic powder - 1 teaspoon dried oregano - Fresh basil leaves, for garnish - 2 eggs (for coating) - 1/2 cup grated Parmesan cheese - Salt and pepper, to taste For this recipe, I focus on fresh and simple items. The chicken breasts are the star. They come out juicy and tender. I like using Italian seasoned breadcrumbs. They add a nice flavor. Marinara sauce gives it a rich taste. I often use store-bought sauce, but homemade is great too! The cheese is key. I use shredded mozzarella for that gooey melt. A sprinkle of grated Parmesan on top adds a nice crunch. For seasoning, garlic powder and oregano bring warmth and depth. Fresh basil leaves are perfect for garnish. They smell amazing and add color. This list keeps the dish easy and tasty. It’s great for busy nights or family meals. Each ingredient plays a role in making this chicken Parmesan a hit. {{ingredient_image_1}} First, preheat your oven to 375°F (190°C). This step is key for even cooking. While the oven heats, season your chicken breasts. Use salt, pepper, garlic powder, and dried oregano. Rub the spices on both sides. This adds great flavor. Next, set up your dredging station. In a shallow bowl, place the two beaten eggs. This will help the coating stick. In another bowl, mix breadcrumbs with grated Parmesan cheese. This mixture gives the chicken a tasty crunch. Now, it’s time to coat the chicken. Dip each breast into the egg first. Let the extra egg drip off. Then, coat it well in the breadcrumb mixture. Press the coating on the chicken for even coverage. After that, place the coated chicken in the baking dish. Bake the chicken in the oven for 25-30 minutes. Check that it is cooked through. The coating should be golden brown and crispy. Once baked, take the chicken out of the oven. Spoon marinara sauce evenly over each piece. Then, sprinkle shredded mozzarella cheese on top. This will melt into a gooey layer of goodness. Return the chicken to the oven for another 10-12 minutes. Keep an eye on it. The cheese should be bubbly and golden. After baking, let the chicken rest for a few minutes before serving. This helps keep it juicy. To get a nice, even coating on your chicken, make sure to follow these steps: - Dredging: Dip each chicken breast in the beaten eggs first. Shake off the extra egg before coating it in the breadcrumb mix. This helps the crumbs stick. - Press Down: After coating in breadcrumbs, press down firmly to ensure they stick well. This gives a thicker, crunchy layer. - Spray Oil: Lightly spray the coated chicken with oil before baking. This helps achieve a crispy texture. Want to boost the flavor? Here are some great tips: - Herbs and Spices: Add more herbs like thyme or parsley to the breadcrumbs. You can also mix in some chili flakes for a kick. - Sauce Choice: Homemade marinara sauce tastes fresh and flavorful. It’s easy to make with just tomatoes, garlic, and herbs. Store-bought marinara is fine too, but look for high-quality brands without added sugar. Presentation matters! Here’s how to serve your dish: - Plating: Place the chicken on a large platter. Drizzle extra marinara sauce on top for color. Sprinkle more Parmesan and add fresh basil on top for a gourmet look. - Side Dishes: Pair it with a simple salad or garlic bread. Roasted veggies or pasta also make great sides. Enjoy! Pro Tips Use Panko Breadcrumbs: For an extra crispy coating, consider using panko breadcrumbs instead of regular breadcrumbs. They create a lighter and crunchier texture. Marinara Sauce Options: If you have time, try making your own marinara sauce for a fresher taste! Simple ingredients like tomatoes, garlic, and basil can elevate the dish. Let Chicken Rest: Allow the chicken to rest for a few minutes after baking. This helps the juices redistribute, keeping the chicken moist and flavorful. Cheese Variations: Feel free to mix different cheeses! Adding provolone or fontina cheese can give a unique flavor and creaminess to your chicken parmesan. {{image_2}} For a twist on the classic, you can change the breading. - Panko breadcrumbs add extra crunch. They are light and crisp. - Gluten-free options work great too. Use crushed cornflakes or gluten-free breadcrumbs. These changes keep the dish delicious and cater to different diets. Mix up the toppings to make your chicken parmesan unique. - Different cheese options can surprise your taste buds. Try provolone or gouda for a rich flavor. - Adding vegetables like spinach or bell peppers boosts nutrition. Layer them before the cheese for a colorful dish. These toppings can enhance both flavor and presentation, making your meal more exciting. The sauce can change the whole dish. - White sauce variations like alfredo can offer a creamy twist. It pairs well with the chicken. - Spicy marinara options can kick up the heat. Add red pepper flakes or fresh jalapeños for a fiery touch. Experimenting with sauces keeps every bite fresh and interesting. After you make Oven Baked Chicken Parmesan, let it cool. Place leftovers in an airtight container. Store it in the fridge for up to four days. To reheat, use the oven for best results. Preheat it to 350°F (175°C). Bake for about 20 minutes or until hot. You can freeze cooked chicken Parmesan. Wrap each piece in plastic wrap and then foil. Place them in a freezer bag. This helps prevent freezer burn. Thaw chicken in the fridge overnight before reheating. You can also use the microwave for quicker thawing, but it may change the texture. In the fridge, cooked chicken lasts about four days. If you freeze it, it can last up to three months. Look for signs of spoilage, like a bad smell or slimy texture. Discard any chicken that looks or smells off. Always trust your senses when it comes to food safety. Yes, you can use frozen chicken breasts. Just remember to thaw them first. To thaw, place the chicken in the fridge overnight. If you're short on time, you can also use the microwave. Cook them right after thawing to ensure safety. You can make this recipe healthier by using less cheese. Try using low-fat mozzarella and Parmesan. You can also bake without breading for fewer calories. Add more veggies, like spinach or zucchini, to boost nutrients. You can use several sauces in place of marinara. Try pesto, Alfredo, or even a homemade tomato sauce. If you want a kick, use a spicy marinara or salsa. Each option adds its unique flavor. To check if the chicken is cooked, use a meat thermometer. The internal temperature should reach 165°F (75°C). Also, the juices should run clear when you cut into it. Look for a golden brown coating, which is a good sign too. You now have all you need to make a delicious chicken dish. We covered the main ingredients, step-by-step instructions, and some handy tips and tricks. Remember to experiment with flavors and textures for a twist on the classic recipe. Storing leftovers correctly keeps your meal fresh longer. Don't hesitate to try variations or alternative ingredients to fit your taste. Enjoy every bite and share your culinary success. Let this meal impress your family and friends!
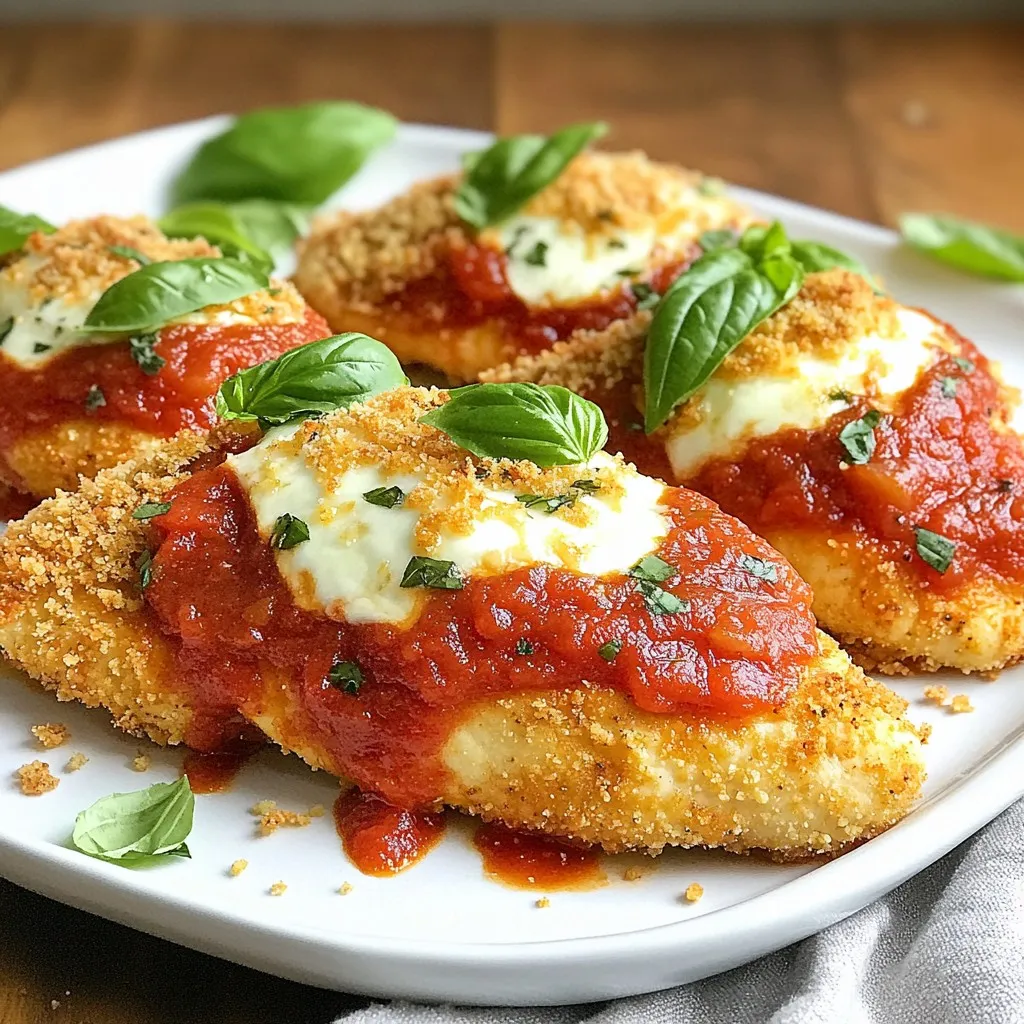
Oven Baked Chicken Parmesan Quick and Tasty Recipe
Welcome to my quick and tasty recipe for Oven Baked Chicken Parmesan! If you’re looking for a simple way to prepare a classic dish, you’re
- 2 cups cooked chicken, shredded - 1 cup shredded mozzarella cheese - 1/2 cup cream cheese, softened - 1 clove garlic, minced - 1 tablespoon fresh parsley, chopped (or 1 teaspoon dried) - 4 large tortillas (flour or whole wheat) - 1 cup spinach leaves - 1/4 teaspoon red pepper flakes (optional) - Salt and pepper to taste - Olive oil for brushing You need a few simple tools to make these wraps. Gather: - A medium bowl for mixing - A skillet for cooking - A spatula for flipping - A knife for slicing - A cutting board for prep Choosing fresh ingredients makes a big difference. Here are some tips: - Chicken: Look for cooked chicken that is moist and tender. - Cheese: Choose mozzarella that is fresh, not pre-shredded. - Garlic: Pick firm garlic cloves with no sprouting. - Spinach: Select bright green leaves. Avoid wilted or yellowed ones. - Tortillas: Check for soft and flexible tortillas, not dry or cracked. By following these tips, you ensure your Cheesy Garlic Chicken Wraps taste their best! {{ingredient_image_1}} To start, gather your ingredients. You will need cooked chicken, mozzarella cheese, cream cheese, minced garlic, and parsley. In a medium bowl, combine 2 cups of shredded chicken, 1 cup of mozzarella cheese, and 1/2 cup of softened cream cheese. Add 1 clove of minced garlic and 1 tablespoon of chopped parsley. Mix everything well until it’s smooth. Season the mixture with salt and pepper. If you like heat, add 1/4 teaspoon of red pepper flakes. This cheesy garlic chicken mixture is packed with flavor. Next, lay out a large tortilla flat on a clean surface. Spread a generous amount of the cheesy chicken mixture in the center. Leave about 1 inch of space on the edges. Then, add a small handful of fresh spinach leaves on top of the mixture. This adds a nice crunch and color. Now, fold the sides of the tortilla inward. Roll it up tightly from the bottom to the top. Repeat this with the rest of the tortillas and filling. You will have a stack of tasty wraps ready to cook. Now it’s time to cook your wraps. Preheat a skillet over medium heat. Brush the outside of each wrap lightly with olive oil. Place the wraps seam-side down in the skillet. Cook them for 3 to 4 minutes on each side. You want them to be golden brown and the cheese melted. Once cooked, remove the wraps from the skillet. Let them cool slightly before slicing them in half diagonally. Enjoy your delicious Cheesy Garlic Chicken Wraps! To get a nice, golden wrap, heat your skillet well. Use medium heat to avoid burning. Brush the outside of the wraps with olive oil. This helps them crisp up nicely. Cook the wraps seam-side down first. This keeps the filling inside. Flip them carefully after 3 to 4 minutes. You want them golden, not dark brown. Add some spice for more kick. Try using red pepper flakes in the mixture. You can also mix in some diced jalapeños for heat. Fresh herbs like cilantro or basil can boost taste too. A squeeze of fresh lime juice adds brightness. You can even use a sprinkle of your favorite seasoning blend for an extra layer of flavor. Don’t overfill your wraps. Too much filling makes them hard to roll. Use just enough so you can fold them without spilling. Also, avoid cooking at too high a heat. This can burn the outside while leaving the inside cold. Finally, let them cool for a minute after cooking. This helps the cheese set and makes slicing easier. Pro Tips Use Leftover Chicken: This recipe is perfect for utilizing leftover roasted or rotisserie chicken, adding flavor and saving time. Customize Your Cheese: Feel free to mix and match different cheeses like cheddar or pepper jack for a unique flavor twist. Make It Veggie-Friendly: Substitute the chicken with grilled veggies or a plant-based protein for a delicious vegetarian option. Serving Suggestions: Serve with a side of marinara or ranch dipping sauce for an extra flavor boost! {{image_2}} You can switch up the protein in your wraps. Try using cooked turkey or ham instead of chicken. Both of these meats add a nice flavor. If you want a vegetarian option, use black beans or chickpeas. They bring protein and fiber to the meal. You can also use tofu for a plant-based choice. Just make sure to season it well. Adding vegetables boosts the flavor and nutrition. You can try bell peppers, onions, or mushrooms. These veggies add crunch and color. Zucchini or grated carrots work well too. For a fresh touch, add some diced tomatoes or avocados. They make the wraps taste even better. Spinach is already a great choice, but you can mix in kale or arugula too. While mozzarella is a classic choice, you can explore other cheeses. Cheddar adds a sharp flavor. Pepper jack gives a spicy kick. If you want something creamier, try cream cheese or goat cheese. You can also mix in feta for a tangy taste. Use whatever cheese you love most. This way, your wraps can be unique and tasty every time. To keep your Cheesy Garlic Chicken Wraps fresh, store them in an airtight container. This helps lock in flavor and moisture. If you have leftover wraps, let them cool down first. Once cooled, place them in the container and refrigerate. They can stay good for about three days. Before eating, check for any signs of spoilage to stay safe. If you want to save these wraps for later, freezing works great. First, wrap each one tightly in plastic wrap or foil. This prevents freezer burn. Next, place the wrapped wraps in a freezer-safe bag or container. Label it with the date. You can freeze them for up to three months. When you're ready to eat, thaw them in the fridge overnight. To reheat your wraps, use a skillet for the best results. Heat it over medium heat. Place the wrap seam-side down in the skillet. Cook for about 3-4 minutes on each side until warm. Check that the cheese is melted and everything is hot. You can also use a microwave, but this may make the wrap soft instead of crispy. If you want a crispy wrap, the skillet is the way to go! You can make Cheesy Garlic Chicken Wraps healthier by using whole wheat tortillas. Whole wheat adds more fiber and nutrients. Swap cream cheese for Greek yogurt for less fat and more protein. You can also add more fresh veggies, like bell peppers or cucumbers, to boost nutrients. Reducing cheese or using a low-fat version can help too. Finally, use grilled chicken instead of fried for a leaner option. Yes, you can make these wraps ahead of time. Prepare the cheesy chicken mixture and store it in the fridge for up to 2 days. Assemble the wraps just before cooking for the best taste. If you want to store assembled wraps, wrap them tightly in plastic. Keep them in the fridge for up to 1 day. Just remember to cook them thoroughly before serving. Cheesy Garlic Chicken Wraps pair well with many sides. A fresh salad adds a nice crunch and color. You can serve them with baked sweet potato fries for a tasty contrast. Try adding some salsa or guacamole for extra flavor. A side of roasted veggies also complements the wraps nicely. Feel free to mix and match to find your favorite combinations! In this post, we covered how to make Cheesy Garlic Chicken Wraps from start to finish. We discussed the ingredients, necessary tools, and tips for fresh selections. You learned important steps for preparation, assembly, and cooking. Additionally, we explored ways to make the wraps golden, enhance their flavor, and avoid common mistakes. You can also experiment with different proteins, veggies, and cheeses. With proper storage and reheating tips, you can enjoy these wraps later. Dive into your kitchen and enjoy this tasty meal!
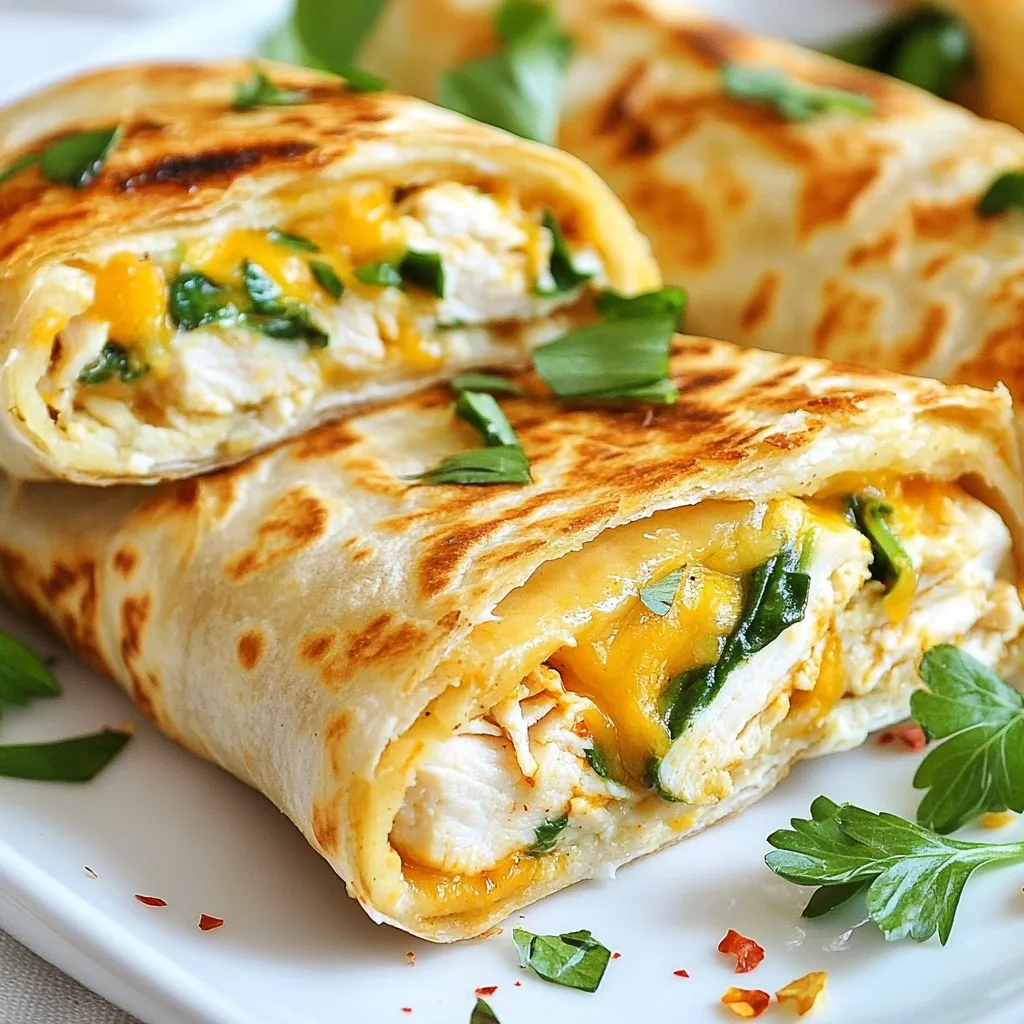
Cheesy Garlic Chicken Wraps Tasty and Quick Meal
Looking for a tasty and quick meal? You’ve come to the right place! Cheesy garlic chicken wraps are simple to make and full of flavor.
- 4 boneless, skinless chicken breasts - 1 tablespoon olive oil - Salt and pepper to taste - 1 cup sliced pepperoncini peppers (jarred) - 1 cup chicken broth - 1 cup heavy cream - 1 tablespoon garlic, minced - 1 teaspoon onion powder - 1 teaspoon Italian seasoning - 1 cup shredded mozzarella cheese - Fresh parsley, chopped for garnish The main ingredients create a perfect mix. The chicken breasts are the star of the dish. They soak up flavors and stay juicy. Pepperoncini adds a tangy kick that shines through. Heavy cream gives the sauce its rich and creamy texture. I recommend using salt and pepper to taste. These will enhance the chicken's natural flavor. Onion powder and Italian seasoning add depth to the dish. Garlic brings a fresh aroma that makes you hungry. For garnishes, sprinkle chopped parsley on top. This adds a fresh touch and color. You can also add extra slices of pepperoncini for more zing. For side dishes, garlic bread pairs well. A fresh green salad adds crunch and balance. These options turn your meal into a feast. {{ingredient_image_1}} First, take your chicken breasts. Season both sides with salt and pepper. This adds great flavor. Next, heat a large skillet over medium heat. Add one tablespoon of olive oil. Once the oil is hot, place the chicken in the skillet. Sear the chicken for about 5-7 minutes on each side. Look for a golden brown color. This step seals in the juices. When cooked, remove the chicken and set it aside. In the same skillet, add minced garlic. Sauté it for about 30 seconds. You want it to smell nice but not burn. Then, pour in one cup of chicken broth. Bring it to a gentle simmer. Be sure to scrape up any browned bits from the bottom. This adds flavor. Now, stir in one cup of heavy cream. Add the sliced pepperoncini, onion powder, and Italian seasoning. Mix everything well. Let this sauce simmer for about 3-4 minutes. You want it to thicken slightly. Return the chicken to the skillet. Spoon the creamy sauce over the top. Now, sprinkle one cup of shredded mozzarella cheese on the chicken. Cover the skillet and let it cook for another 3-4 minutes. The cheese should be melted and bubbly at this point. Finally, garnish with chopped fresh parsley before serving. This adds a nice touch and color. Enjoy your creamy pepperoncini chicken! To cook juicy chicken, start with good seasoning. Use salt and pepper on both sides. This helps the chicken stay moist and tasty. Sear the chicken breasts in hot olive oil. Cook for about 5-7 minutes on each side. Look for a golden brown color. This adds flavor and keeps the juices inside. After searing, always set the chicken aside before making the sauce. This step helps prevent overcooking. For a creamy sauce, use heavy cream as your base. Start with chicken broth in the pan. This adds depth to the flavor. Scrape any brown bits from the pan. These bits add extra taste to your sauce. Stir in the cream and let it simmer. This thickens the sauce just right. If you want it thicker, cook a bit longer. If it’s too thick, add a splash of broth. Always taste as you go for the best results. Serve your creamy pepperoncini chicken directly from the skillet. This makes for a rustic and inviting look. Top with fresh chopped parsley for color and flavor. You can add some extra pepperoncini slices for a kick. Pair the dish with garlic bread or a fresh salad. This balances the richness of the chicken. Enjoy your meal with family or friends for a delightful dining experience! Pro Tips Use Fresh Ingredients: For the best flavor, opt for fresh garlic and high-quality chicken. Fresh ingredients elevate the dish significantly. Adjust Spice Level: If you prefer a spicier dish, add some crushed red pepper flakes or use hotter pepperoncini peppers in the recipe. Thicken the Sauce: For a creamier sauce, let it simmer longer to reduce it further, or whisk in a bit of grated Parmesan cheese for extra richness. Meal Prepping: This dish is perfect for meal prep! Cook a batch and store it in individual containers for an easy weeknight dinner. {{image_2}} You can swap out chicken for other proteins. Try using turkey or pork for a change. Both work well in this dish. If you prefer beef, thinly sliced steak is a great option. Each protein will add a unique flavor. Just adjust the cooking time as needed. Adding vegetables is a fun twist. Bell peppers, zucchini, or spinach mix well with this dish. You can sauté them with garlic before adding the cream. This adds color and nutrition. Use about one cup of veggies for balance. They will cook tender and soak up the sauce. If you like it hot, add more pepperoncini. For a milder taste, reduce the amount. You can also use different peppers. Jalapeños or banana peppers bring heat or sweetness. Adjust based on your spice tolerance. Taste the sauce as you go for the best results. To keep your creamy pepperoncini chicken fresh, store it in an airtight container. Allow the dish to cool to room temperature before sealing it. This helps avoid moisture buildup. You can keep the leftovers in the fridge for up to three days. When you are ready to eat, just take it out and enjoy! Reheat the creamy pepperoncini chicken on the stove for the best taste. Use a medium heat and add a splash of chicken broth to keep it moist. Stir gently until heated through. You can also microwave it for a quick meal. Just cover it loosely and heat for 1-2 minutes. Check for warmth before serving. If you want to save more, freezing is a great option. First, let the chicken cool completely. Then, place it in a freezer-safe container. You can also use freezer bags. Make sure to remove as much air as possible. This helps prevent freezer burn. The dish can stay frozen for up to three months. When you’re ready to eat, thaw it in the fridge overnight and reheat as mentioned earlier. Yes, you can make Creamy Pepperoncini Chicken Skillet ahead of time. Cook the chicken and sauce as usual. Allow it to cool before storing it in the fridge. This dish keeps well for about three days. When you’re ready to eat, reheat the skillet on low heat until warm. You may need to add a splash of chicken broth to keep it creamy. This chicken dish pairs well with several sides. Here are some great options: - Garlic bread - Steamed rice - Mashed potatoes - Fresh green salad These sides enhance the meal's flavor and add variety to your plate. They help soak up the tasty sauce, too. To make this recipe gluten-free, follow these steps: - Use gluten-free chicken broth. - Check the labels on all ingredients for hidden gluten. - Avoid any sauces or mixes that contain wheat. By using these swaps, you can enjoy this creamy delight without worry. You can create a delicious Creamy Pepperoncini Chicken Skillet using fresh ingredients. This dish's key components, helpful tips, and variations make it a fun option. I shared step-by-step instructions to guide you through cooking. You can impress others with your cooking skills and enjoy a tasty meal. Remember to try different proteins and veggies to keep it fresh. Store your leftovers properly to savor them later. Enjoy while exploring this fun recipe, and bring joy to your kitchen!
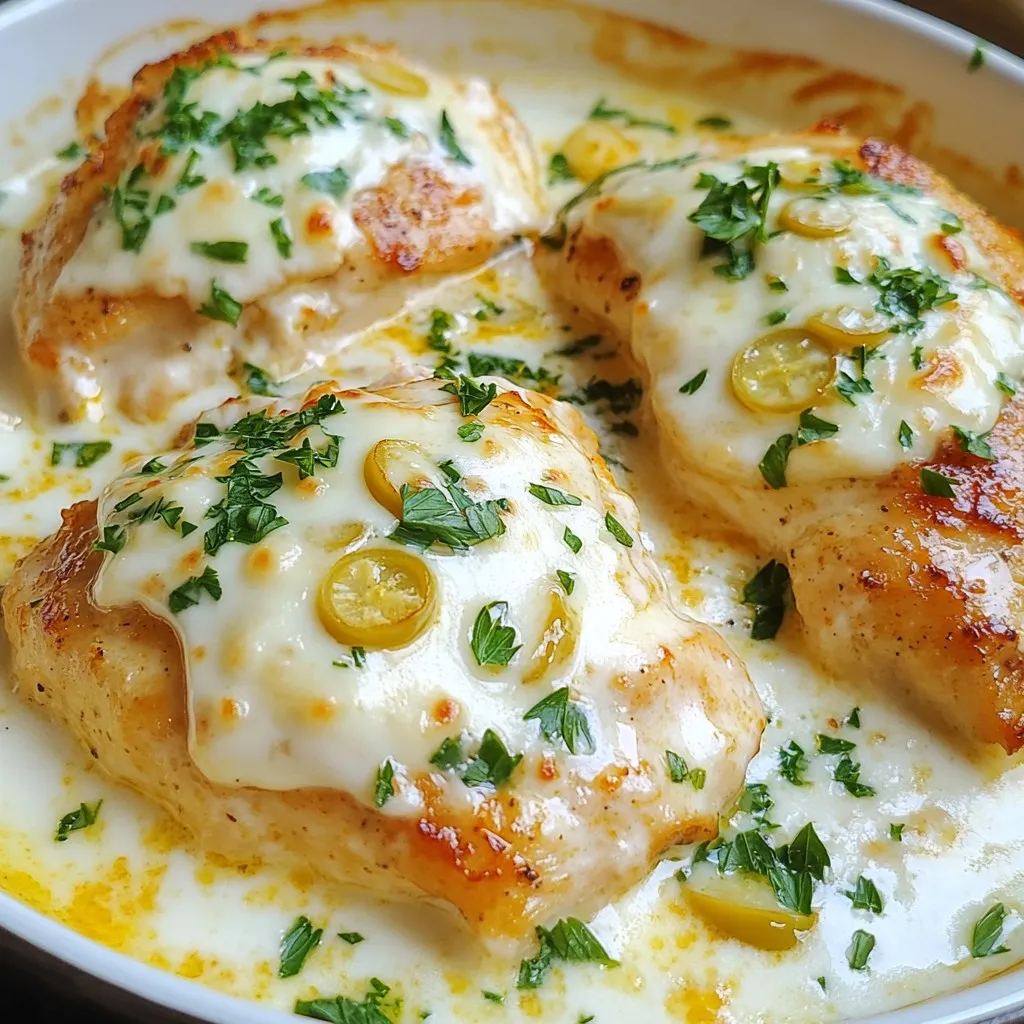
Creamy Pepperoncini Chicken Skillet Flavorful Delight
If you crave a meal that bursts with flavor, you’re in the right place! My Creamy Pepperoncini Chicken Skillet is the perfect weeknight dish. It’s
To make Chicken Alfredo Flatbread, we need a few simple ingredients. Each one adds flavor and texture to our dish. Here’s what you will need: - Large flatbread (store-bought or homemade) - Cooked chicken breast, shredded - Alfredo sauce (store-bought or homemade) - Shredded mozzarella cheese - Grated Parmesan cheese - Fresh baby spinach - Garlic powder - Italian seasoning - Salt and pepper - Fresh basil leaves for garnish Each ingredient plays a key role. The flatbread acts as a base, holding everything together. The cooked chicken gives protein and heartiness. Alfredo sauce adds creaminess and rich flavor. Cheeses like mozzarella and Parmesan melt beautifully, creating a wonderful texture. Fresh spinach adds a touch of color and nutrition. Garlic powder and Italian seasoning boost the flavor. Finally, salt and pepper enhance everything. This mix of ingredients makes the Chicken Alfredo Flatbread both tasty and filling. You can find most of these items at any grocery store. If you want to make it special, try using homemade Alfredo sauce. It’s easy and makes a big difference. {{ingredient_image_1}} First, set your oven to 400°F (200°C). This step is key. A hot oven helps the flatbread cook evenly. Next, place your flatbread on a baking sheet. I like to use parchment paper. It makes cleanup easy. Now, spread the Alfredo sauce on the flatbread. Leave a small border around the edges. Sprinkle garlic powder and Italian seasoning on the sauce. This adds great taste. Then, evenly place the shredded chicken on top. Add the fresh baby spinach next. This gives color and nutrients. Finally, cover everything with mozzarella and Parmesan cheese. Make sure the cheese covers the chicken and spinach well. Season with salt and pepper for extra flavor. Put the flatbread in the oven. Bake it for 12-15 minutes. You want the cheese to melt and bubble. The edges of the flatbread should be crispy. After baking, take it out and let it cool for a minute. Then, slice it up. Don’t forget to garnish with fresh basil leaves! To make the best Alfredo sauce, use high-quality ingredients. Fresh cream and real butter create a rich taste. If you want to make it from scratch, start with butter. Melt it in a pan, then add cream. Stir and let it simmer gently. Add garlic powder and Parmesan cheese for flavor. Mix until the cheese melts, then season with salt and pepper. This sauce pairs perfectly with the flatbread. You can use any flatbread you like, but some are better than others. A large, thin flatbread works best for this recipe. Look for whole wheat or gluten-free options for a healthy twist. Store-bought flatbreads save time, but homemade flatbreads add a personal touch. If you have time, try making your own. It’s simple and fun! If you don't have all the ingredients, don’t worry! You can switch things up. For the chicken, use turkey or even sautéed mushrooms for a vegetarian option. If you don’t have Alfredo sauce, use a creamy ranch dressing instead. Swap mozzarella for cheddar or gouda cheese, which adds a new flavor. Fresh spinach can be replaced with kale or arugula for a different taste. Be creative with what you have! Pro Tips Use Fresh Ingredients: Opt for fresh spinach and high-quality cheeses for a more vibrant flavor and appealing texture. Customize Your Toppings: Feel free to add other toppings like sun-dried tomatoes, mushrooms, or bell peppers for extra flavor and nutrition. Watch the Baking Time: Keep an eye on the flatbread while baking to ensure it doesn't overcook; every oven behaves slightly differently. Let It Rest: Allow the flatbread to cool for a minute after baking to let the cheese set slightly; this makes slicing easier. {{image_2}} To make a vegetarian version, skip the chicken. Use extra veggies instead. You can add roasted bell peppers, mushrooms, or even artichokes. These toppings give your flatbread a great taste. Add a bit more cheese for creaminess. Fresh spinach still works well here. If you love heat, spice up your Chicken Alfredo Flatbread. Add sliced jalapeños or red pepper flakes. You can also use spicy Alfredo sauce. This will give your flatbread a nice kick. The creamy sauce balances the spice, making each bite exciting. Get creative with your toppings! Try adding sun-dried tomatoes or olives. Cooked bacon bits can add a nice crunch too. You can even mix different cheeses like gouda or feta. Each topping brings new flavors. Experimentation makes cooking fun and personal! After you enjoy your Chicken Alfredo Flatbread, store any leftovers in an airtight container. Place it in the fridge. Leftovers will stay fresh for up to three days. If you want to keep it longer, consider freezing it. To reheat your flatbread, use an oven for the best results. Preheat your oven to 350°F (175°C). Place the flatbread on a baking sheet. Heat it for about 10 minutes, or until the cheese melts again. You can also use a microwave if you're in a hurry. Just cover it with a damp paper towel and heat for 1-2 minutes. The oven method keeps it crispier. If you want to freeze your Chicken Alfredo Flatbread, wrap it tightly in plastic wrap. Then, place it in a freezer-safe bag. It can last up to two months in the freezer. When you're ready to eat it, thaw it in the fridge overnight. Reheat it in the oven as described above for the best taste. Yes, you can make Chicken Alfredo Flatbread ahead of time. Prepare the flatbread up to the baking step. Store it in the fridge for up to a day. When you are ready to eat, bake it as directed. This saves time and still tastes great! You can serve many sides with this dish. A fresh salad works well. Garlic bread adds a nice touch. You might also try some grilled veggies. These sides balance the creamy flavors of the flatbread. You can change the recipe to fit your taste. Swap chicken for shrimp or veggies. Use different cheeses like cheddar or Gouda. Add spices, like red pepper flakes, for heat. Fresh herbs like parsley or oregano can brighten the dish too. This blog post covered how to make Chicken Alfredo Flatbread. We discussed the essential ingredients, from large flatbread to fresh basil. I provided easy steps to prepare, layer, and bake your dish. You learned tips for perfecting your Alfredo sauce and different variations you can try, like vegetarian options. Incorporating these ideas, you can create a tasty meal everyone will enjoy. Remember, cooking is all about having fun and being creative.
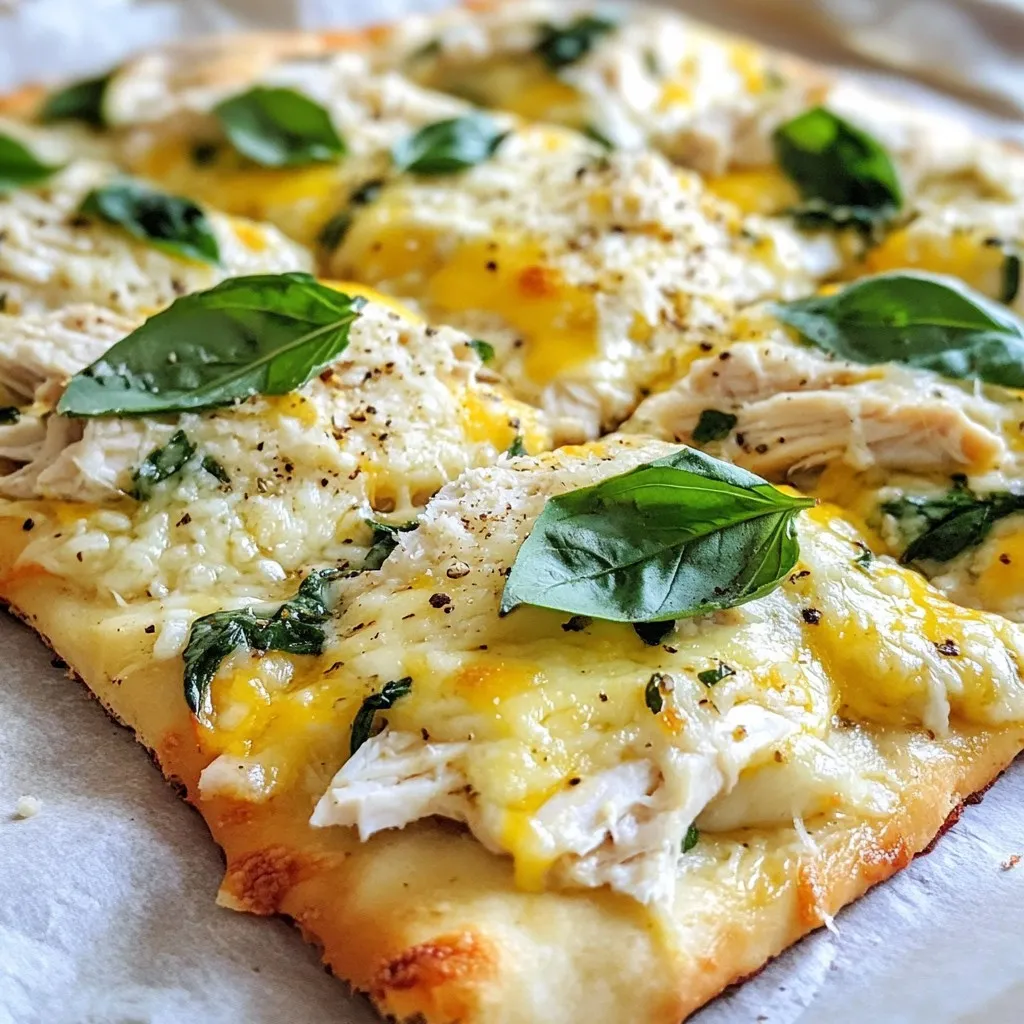
Chicken Alfredo Flatbread Flavorful and Easy Recipe
If you crave a delicious meal that’s quick and easy, try Chicken Alfredo Flatbread! This dish packs creamy flavor and tender chicken on a crispy
To make Millionaire Gnocchi, you need: - 1 lb potato gnocchi (store-bought or homemade) - 2 tablespoons olive oil - 1 cup heavy cream - 1 cup freshly grated Parmesan cheese - 1 tablespoon garlic, minced - 1 teaspoon fresh thyme, chopped (or 1/2 teaspoon dried thyme) - 1 cup spinach, roughly chopped - 1/2 cup sun-dried tomatoes, chopped - 1/4 teaspoon red pepper flakes (optional) - Salt and pepper to taste - Fresh basil leaves, for garnish If you want to switch things up, try these: - Substitute gnocchi with pasta or zucchini noodles for a lighter dish. - Use coconut milk instead of heavy cream for a dairy-free option. - Replace Parmesan with nutritional yeast for a vegan twist. - Spinach can be swapped for kale or arugula for different flavors. - Sun-dried tomatoes can be replaced with roasted peppers for a fresh taste. Choosing the right ingredients makes a big difference. Here are some tips: - Use fresh, high-quality olive oil for the best flavor. - Grate your own Parmesan cheese for a richer taste. Pre-grated cheese lacks flavor. - Select firm and bright spinach. Avoid wilted or yellow leaves. - Choose sun-dried tomatoes packed in oil, as they add more flavor. - Fresh herbs like thyme enhance the dish. Dried herbs work, but fresh is best. By focusing on these quality ingredients, your Millionaire Gnocchi will shine on your table! {{ingredient_image_1}} Start by boiling a large pot of salted water. Once it bubbles, add your gnocchi. Cook until they float to the top, about 2-3 minutes. This shows they are done! Drain the gnocchi and set them aside while you make the sauce. In a big skillet, heat olive oil over medium heat. Add minced garlic and cook for one minute. Watch closely so it doesn’t burn. Next, pour in the heavy cream. Let it simmer gently. Stir in grated Parmesan cheese until it melts. This makes your sauce creamy and rich. Now, add chopped thyme, spinach, and sun-dried tomatoes. If you like heat, toss in red pepper flakes. Mix well until the spinach wilts and everything combines nicely. Gently fold the cooked gnocchi into the sauce. Make sure each piece is coated well. Add salt and pepper to taste. Let it simmer for 2-3 minutes. This helps the gnocchi soak in all those wonderful flavors. When ready, take the skillet off the heat. Serve in shallow bowls and garnish with fresh basil leaves. A sprinkle of extra Parmesan cheese adds a nice touch. Enjoy your delicious Millionaire Gnocchi! To get the best texture for your gnocchi, follow these steps: - Use fresh gnocchi if you can. - Cook it in salted boiling water. - Only boil until it floats, about 2-3 minutes. - Drain gently to avoid breaking them. - Toss with a little olive oil to keep them from sticking. These tips help ensure your gnocchi is soft yet firm, just right for the sauce. You can change the sauce to match your taste. Here are some ideas: - For a spicy kick, add more red pepper flakes. - Swap spinach with kale for a heartier flavor. - Use different herbs like basil or rosemary for a fresh twist. - Substitute Parmesan with feta or goat cheese for a tangy taste. These variations let you personalize the dish and keep it exciting. How you serve the dish makes it even more special. Try these tips: - Use shallow bowls for an elegant look. - Drizzle some sauce on top for extra flair. - Sprinkle more Parmesan cheese to impress your guests. - Garnish with fresh basil leaves for color. These simple steps make your Millionaire Gnocchi look as good as it tastes! Pro Tips Choose Quality Gnocchi: For the best flavor and texture, opt for high-quality store-bought gnocchi or make your own from scratch using fresh potatoes. Enhance Flavor with Fresh Herbs: Fresh herbs like basil or parsley can elevate your dish. Add them at the end of cooking for a burst of freshness. Adjust Creaminess: If you prefer a lighter sauce, substitute half of the heavy cream with chicken or vegetable broth for a delicious, creamy yet lighter version. Make it Vegetarian: Skip the Parmesan cheese or use a vegan alternative to make this dish suitable for a vegetarian or vegan diet. {{image_2}} You can easily make Millionaire Gnocchi vegetarian. Skip the meat and add more veggies. Try mushrooms or zucchini for extra flavor. You can also use cream cheese instead of Parmesan for a different taste. Fresh herbs like basil or parsley can brighten the dish. Want to add protein? Chicken or shrimp works great in this dish. Cook them in the skillet before adding garlic. This adds a nice depth of flavor. You can also use chickpeas for a plant-based option. Just toss them in when you add the spinach. Seasonal ingredients can change the taste. In spring, add asparagus or peas for fresh crunch. In fall, use pumpkin or butternut squash for a cozy feel. During summer, cherry tomatoes or bell peppers can lighten the dish. Always feel free to mix and match based on what you have. After enjoying your Millionaire Gnocchi, store any leftovers in an airtight container. Make sure the gnocchi is cool before sealing. This helps keep the moisture in check. Store it in the fridge for up to three days. For best flavor, try to eat it within two days. When you're ready to enjoy leftovers, reheat them gently. You can use a skillet over low heat. Add a splash of heavy cream or water to help rehydrate the dish. Stir often to avoid sticking. You can also microwave it in 30-second bursts. Stir in between to warm evenly. To freeze, let the cooked gnocchi cool completely. Place them in a single layer on a baking sheet. Once frozen, transfer them to a freezer-safe bag. Remove air to prevent freezer burn. You can freeze them for up to three months. To reheat, cook straight from frozen in a skillet with sauce. Millionaire Gnocchi is a rich and creamy pasta dish. It features soft potato gnocchi, heavy cream, and lots of cheese. The dish combines flavors like garlic, thyme, spinach, and sun-dried tomatoes. This mix gives it a luxurious taste that feels special, perfect for any dinner. Yes, you can use store-bought gnocchi. It saves time and is still tasty. Just cook it according to the package instructions. If you want to try homemade gnocchi, it can add a nice touch. Both options work well in this recipe. To make Millionaire Gnocchi gluten-free, choose gluten-free gnocchi. Many brands offer this option. Check the labels to ensure they fit your needs. The rest of the ingredients are naturally gluten-free, so you can enjoy this dish worry-free. You learned about the key ingredients and how to create delicious millionaire gnocchi. We covered cooking steps, tips for perfect texture, and fun variations. Having options like vegetarian adjustments or protein adds flavor and fun. Storing leftovers correctly keeps your dish fresh for later. Remember, you can make this dish your own while enjoying it with friends and family. Get creative, trust your taste, and enjoy every bite!
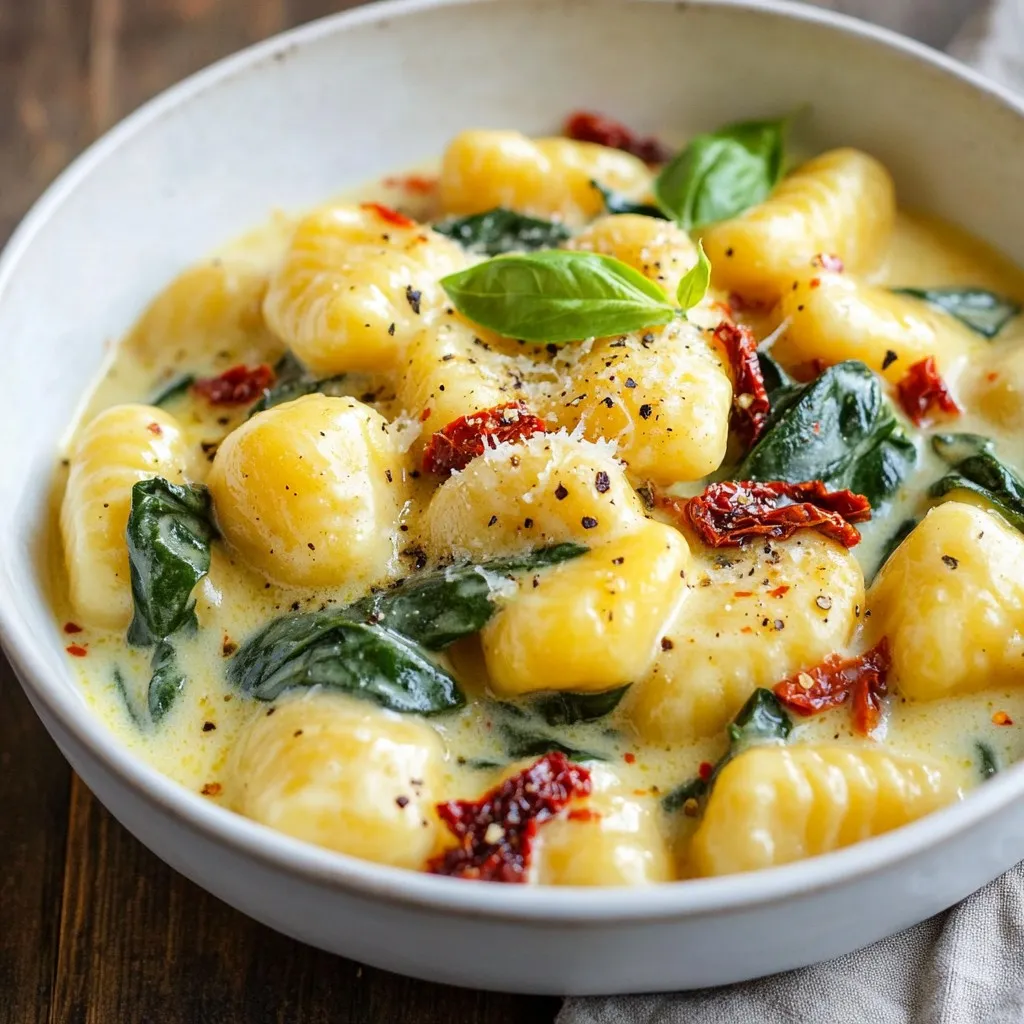
Millionaire Gnocchi Flavorful and Easy Dinner Recipe
Are you ready to impress your family with a quick and tasty dinner? This Millionaire Gnocchi recipe combines rich flavors with easy steps, making it
- 4 boneless, skinless chicken breasts - 4 tablespoons unsalted butter - 4 cloves garlic, minced - 1 teaspoon onion powder - 1 teaspoon Italian seasoning - ½ cup grated Parmesan cheese - Salt and pepper to taste - Fresh parsley, chopped (for garnish) The main star of this dish is the chicken. You want four boneless and skinless breasts. This makes cooking quick and easy. The butter adds richness and flavor. I use four tablespoons of unsalted butter. Garlic is a must for that amazing taste. You need four cloves, minced finely. Next, we have seasonings. Onion powder brings a sweet note. Italian seasoning adds herby goodness. Use one teaspoon of each. Don’t forget salt and pepper to taste. Lastly, Parmesan cheese is key for a cheesy, savory finish. You will need half a cup, grated. For a lovely touch, use fresh parsley as a garnish. It adds color and freshness to the dish. These simple ingredients come together to create a delightful meal. {{ingredient_image_1}} Flattening the Chicken Start by flattening the chicken breasts. Use a meat mallet or a rolling pin. Aim for about half an inch thick. This helps the chicken cook fast and evenly. Seasoning the Chicken Next, season both sides of the chicken. Use salt, pepper, onion powder, and Italian seasoning. Make sure to coat them well. This adds great flavor to the chicken. First Cooking Phase Heat 2 tablespoons of butter in a large skillet over medium-high heat. Once the butter melts, add the seasoned chicken breasts. Cook for about 3-4 minutes on each side. Look for a golden brown color. If you have many pieces, cook them in batches. This will prevent overcrowding. Transferring Cooked Chicken After cooking, transfer the chicken to a plate. Keep it warm while you make the sauce. This way, it stays juicy and tasty. Sautéing the Garlic In the same skillet, add the remaining 2 tablespoons of butter. Then, add the minced garlic. Sauté for about 1-2 minutes. The garlic should be fragrant and slightly golden. Be careful not to burn it. Combining Chicken with Sauce Lower the heat and return the chicken to the skillet. Spoon the garlic butter over the chicken. Right away, sprinkle the grated Parmesan cheese on top. Cover the skillet for 1-2 minutes. This will melt the cheese, making it bubbly and delicious. How to Flatten Chicken Properly To flatten chicken, place it between two sheets of plastic wrap. Use a meat mallet or a rolling pin. Gently pound the chicken until it is about half an inch thick. This step helps the chicken cook evenly and quickly. It also makes the chicken tender and juicy. Ensuring Even Cooking Cook chicken breasts in batches if your skillet is small. This prevents overcrowding, which can cause the chicken to steam instead of sear. Make sure to turn the chicken only once during cooking. This gives you a nice golden crust. Additional Seasonings to Consider Feel free to add a pinch of paprika or crushed red pepper for some heat. You could also use fresh herbs like thyme or rosemary for a fragrant twist. These small changes can elevate the dish and add depth. Substitutions for Parmesan Cheese If you don’t have Parmesan cheese, try Pecorino Romano or Grana Padano. Both offer a similar flavor and can work well in this recipe. You could also use nutritional yeast for a dairy-free option. Avoid Overcrowding the Skillet Cooking too many chicken pieces at once can lead to uneven cooking. Always leave some space in the skillet. This helps steam escape and ensures a crispy exterior. Keeping Chicken Warm Once the chicken is cooked, transfer it to a warm plate. Cover it with foil to keep it warm while you prepare the garlic butter sauce. This way, your chicken stays juicy and hot until serving. Pro Tips Flatten for Even Cooking: Ensure the chicken breasts are evenly flattened to about half an inch thick. This technique promotes uniform cooking and helps the chicken to cook faster. Use Fresh Garlic: For the best flavor, opt for fresh minced garlic instead of garlic powder. Fresh garlic will provide a stronger and more aromatic taste to the dish. Don’t Overcrowd the Pan: Cook the chicken in batches if necessary. Overcrowding can lower the pan's temperature, leading to steaming instead of searing, which prevents that delicious golden-brown crust. Let Cheese Melt Properly: Cover the skillet after adding the Parmesan cheese to allow it to melt evenly. This will ensure a delightful cheesy topping that enhances the dish's flavor. {{image_2}} You can change the cheese to fit your taste. Try mozzarella for a milder flavor. Feta adds a tangy twist that pairs well with garlic. For a sharper taste, consider using aged cheddar. You can also swap the chicken for other proteins. Thinly sliced pork or turkey works great. If you want a meatless option, use firm tofu or tempeh. These swaps keep the dish tasty and fun. If you prefer baking, you can make an oven-baked version. Preheat your oven to 400°F (200°C). After seasoning the chicken, place it in a baking dish. Pour melted butter and garlic over the chicken. Bake for about 20-25 minutes until cooked through. Grilling is another fun option. Marinate the chicken with garlic and spices. Then, grill each piece for about 6-8 minutes per side. This method gives you a nice smoky flavor. Minute Garlic Parmesan Chicken pairs well with many side dishes. Consider serving it with roasted veggies for a healthy touch. Mashed potatoes or rice complement the flavors nicely. For garnishing, fresh parsley adds color and flavor. You can also sprinkle extra Parmesan on top for a cheesy kick. Lemon wedges are a great addition, too, giving a fresh zing. How to Store Leftovers After you enjoy your Minute Garlic Parmesan Chicken, let the leftovers cool. Place them in an airtight container. This helps keep the chicken fresh. You can also cover the dish tightly with plastic wrap. Shelf Life in the Fridge In the fridge, your leftovers stay good for about three days. Make sure to check for any off smells or changes in texture before eating. If it looks or smells funny, it's best to throw it away. Best Practices for Freezing To freeze the chicken, let it cool completely first. Wrap each piece in plastic wrap and then place them in a freezer bag. This keeps the chicken from freezer burn. You can store it for up to three months. Thawing Tips When you're ready to eat frozen chicken, the best way is to thaw it in the fridge overnight. This keeps it safe and tasty. If you're in a hurry, you can use the microwave on the defrost setting, but eat it right away after. Methods for Reheating Chicken You can reheat the chicken in a few ways. The oven works well; place it on a baking sheet and heat at 350°F (175°C) for about 15-20 minutes. You can also use the microwave for quick reheating, but it may dry out the chicken a bit. Ensuring Food Safety Always check that the chicken is hot all the way through. A good rule is to heat it to 165°F (74°C). This keeps you safe from any foodborne illnesses. Enjoy your delicious leftovers safely! It takes about 20 minutes to cook Minute Garlic Parmesan Chicken. The prep time is 10 minutes. Cooking the chicken takes about 10 minutes. You will cook it for 3-4 minutes on each side. This gives you a quick and tasty meal. Yes, you can use frozen chicken breasts. However, you need to thaw them first. Thawing allows the chicken to cook evenly. You can thaw it overnight in the fridge or use the microwave. Once thawed, follow the recipe as usual. Garlic Parmesan Chicken pairs well with many sides. Here are some great options: - Steamed broccoli - Mashed potatoes - Rice pilaf - Garlic bread - Side salad These sides add flavor and balance to your meal. Enjoy experimenting with different combinations! This blog post covers everything you need to know about making Minute Garlic Parmesan Chicken. You learned about the key ingredients, step-by-step cooking instructions, and useful tips. We explored variations to keep your meals fresh and exciting. Proper storage and reheating methods ensure you enjoy every bite later. In conclusion, this dish is simple, tasty, and versatile. You can adapt it to suit your tastes and preferences, making it a favorite in your home. Enjoy cooking this delicious meal!
Minute Garlic Parmesan Chicken Quick and Tasty Meal
Looking for a quick and tasty meal? Minute Garlic Parmesan Chicken is the answer! This dish combines juicy chicken, rich garlic, and savory Parmesan in
- 2 salmon fillets, skin removed - 1 cup orzo pasta - 4 cups low-sodium vegetable broth - Juice and zest of 1 lemon - 2 cloves garlic, minced - 1 cup cherry tomatoes, halved - 2 cups baby spinach - 3 tablespoons olive oil - Fresh dill or parsley for garnish (optional) This dish shines with fresh and vibrant ingredients. The salmon fillets are the star, bringing rich flavor and healthy fats. Orzo pasta adds a delightful texture and heartiness. Using low-sodium vegetable broth keeps the base light and allows the other flavors to pop. Lemon juice and zest brighten the dish, giving it a zesty kick. Garlic adds depth, making every bite savory. Cherry tomatoes burst with sweetness, balancing the dish beautifully. Fresh baby spinach not only adds color but also boosts nutrition. Olive oil enriches the flavors and keeps everything moist. A sprinkle of dill or parsley at the end makes for a lovely presentation. This ingredient list ensures you create a meal that is not only tasty but also visually appealing. Each component plays a role in making One Skillet Salmon Lemon Orzo a dish you will want to make again and again! {{ingredient_image_1}} First, heat 2 tablespoons of olive oil in a large skillet over medium heat. While the oil warms, season the salmon fillets with salt and pepper. Once the oil is hot, place the salmon in the skillet, skin-side down. Cook for 4-5 minutes on each side until the salmon is cooked through and has a nice golden color. Then, remove the salmon from the skillet and set it aside. In the same skillet, add 1 tablespoon of olive oil and the minced garlic. Cook the garlic for about 1 minute until it smells great. Next, add the orzo pasta to the skillet. Stir the orzo for 1-2 minutes. This toasting method makes the orzo extra tasty. Now, pour in the vegetable broth, lemon juice, and lemon zest. Bring this mix to a gentle simmer. Cook for about 10-12 minutes, stirring often. You want the orzo to be tender and soak up most of the broth. After that, stir in the cherry tomatoes and baby spinach. Cook for 2-3 minutes until the spinach wilts and the tomatoes soften. Finally, flake the cooked salmon into large chunks and gently fold it into the skillet with the orzo and veggies. Adjust the seasoning with more salt and pepper if needed. How to achieve perfect salmon To cook salmon well, use medium heat. Start with skinless fillets. Season with salt and pepper. Heat two tablespoons of olive oil in a skillet. Place salmon in the oil and cook for four to five minutes on each side. Look for a golden color and flaky texture. Remove it when it’s cooked through but still moist. Best way to cook orzo Orzo cooks like rice, but with a twist. First, toast it in olive oil with minced garlic for one to two minutes. This step adds a nice flavor. Then, add broth and lemon juice. Stir it well and let it simmer for ten to twelve minutes. This keeps the orzo soft and full of taste. Adjusting seasoning Taste is key. Always taste your dish before serving. If it needs a boost, add more salt or pepper. A touch of lemon juice can also brighten the flavors. Don’t be afraid to tweak it until it feels just right. Using fresh vs. dried herbs Fresh herbs bring a bright flavor. I recommend using fresh dill or parsley for this dish. If you don’t have fresh herbs, dried ones work too. Just use less, as dried herbs are stronger. Add them at the end of cooking to keep their flavor. Plating ideas Serve this dish in shallow bowls. This gives it a cozy look. Use a spoon to gently place orzo, spinach, and salmon together. It makes it easy to see all the colorful ingredients. Garnishing tips Garnish your dish with fresh herbs. A sprinkle of dill or parsley adds color. Include a lemon wedge on the side for a fresh touch. This not only looks good but also adds more flavor when squeezed over the dish. Pro Tips Fresh Ingredients: Always use fresh salmon and seasonal vegetables for the best flavor and nutrition. Lemon Zest Magic: Don't skip the lemon zest; it adds a vibrant aroma and enhances the overall zestiness of the dish. Toasting Orzo: Toasting the orzo in the skillet for a minute or two before adding liquid brings out a nutty flavor. Perfect Spinach: Add the spinach towards the end of cooking to retain its bright color and nutrients. {{image_2}} - Alternative fish options: You can swap salmon for trout or cod. Both fish cook well and offer great taste. If you prefer something meatier, try chicken breast. - Gluten-free orzo options: If you need a gluten-free dish, try rice or quinoa instead of orzo. These grains absorb flavors nicely and create a hearty meal. - Adding different vegetables: You can mix in bell peppers, zucchini, or asparagus. Each veggie brings its own flavor and color to the dish. - Spices and seasoning alternatives: If you want to change the taste, try adding paprika, oregano, or red pepper flakes. These spices can give your dish a unique twist. - Make-ahead storage: You can prepare the orzo and veggies ahead of time. Store them in an airtight container in the fridge for up to three days. Just add the salmon when you're ready to serve. - Freezing suggestions: If you want to freeze your dish, let it cool first. Place it in a freezer-safe container. It will last up to three months. When ready to eat, thaw it overnight in the fridge and reheat. To store leftovers, let the dish cool down first. Place the salmon lemon orzo in an airtight container. This keeps it fresh and safe. You can store it in the fridge for up to three days. If you want to enjoy it later, eat it within this time frame for the best taste. For freezing, use a freezer-safe container. Make sure to leave some space for the dish to expand. You can freeze the salmon lemon orzo for up to three months. When you’re ready to eat, thaw it in the fridge overnight. Reheat it gently in a skillet over low heat. Add a splash of broth or water to help it warm evenly. Always follow food safety tips. Wash your hands before cooking and after handling raw fish. If the dish smells off or changes color, it may be spoiled. Throw it away if you see any signs of spoilage. Enjoy your meals safely! Yes, you can use frozen salmon. Just make sure to thaw it first. Place the salmon in the fridge overnight. If you are short on time, you can also run it under cold water. When cooking, add a couple of minutes to the cooking time. This way, you still get that nice golden crust. Tips for cooking with frozen fish: - Pat the salmon dry after thawing. This helps it brown better. - Season it well with salt and pepper for flavor. - Cook it on medium heat to ensure it cooks evenly. Orzo is a type of pasta that looks like rice. It’s made from wheat and is very versatile in dishes. You can cook orzo in boiling water, just like other pasta. It usually takes about 8-10 minutes to cook until it’s tender. Explanation and cooking methods: - Use a big pot of salted water for boiling. - Stir the orzo occasionally to prevent sticking. - Drain it and toss it with a bit of olive oil to keep it from clumping. You can tell when salmon is done by looking at its color and texture. It should be opaque and flake easily with a fork. The internal temperature should reach 145°F (63°C). Signs of perfectly cooked salmon: - The flesh turns from bright pink to pale pink. - It should not look raw in the center. - Press it gently; it should feel firm but not hard. This blog post shared a simple recipe for salmon with orzo. I guided you through each ingredient and preparation step. We covered tips for perfect cooking and flavor boosts. You learned about variations and meal prep, too. As you try this dish, remember to experiment with flavors and ingredients. With practice, you'll create a tasty, healthy meal that you love. Enjoy the cooking process and share your tasty results!
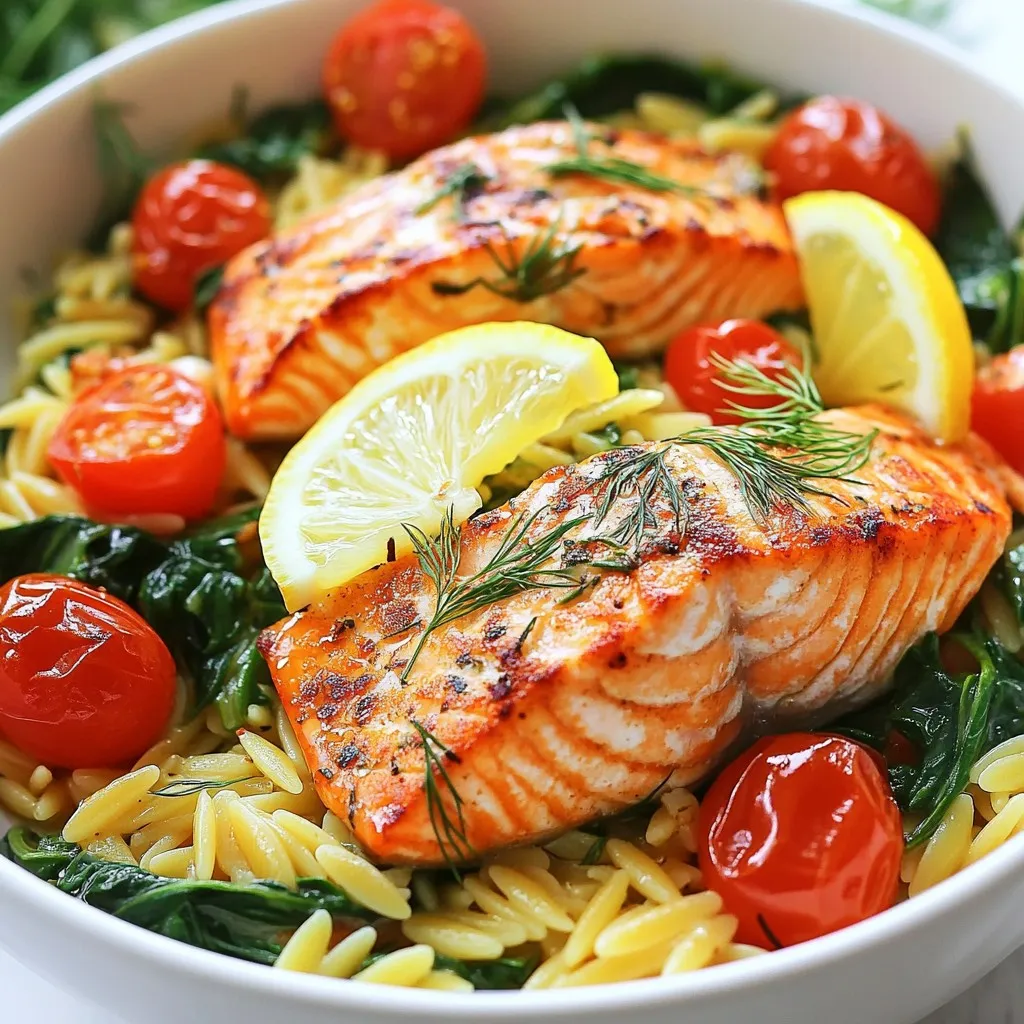
One Skillet Salmon Lemon Orzo Flavorful Dish
Are you ready to whip up a delicious meal in just one skillet? My One Skillet Salmon Lemon Orzo is a perfect blend of fresh