Dinner
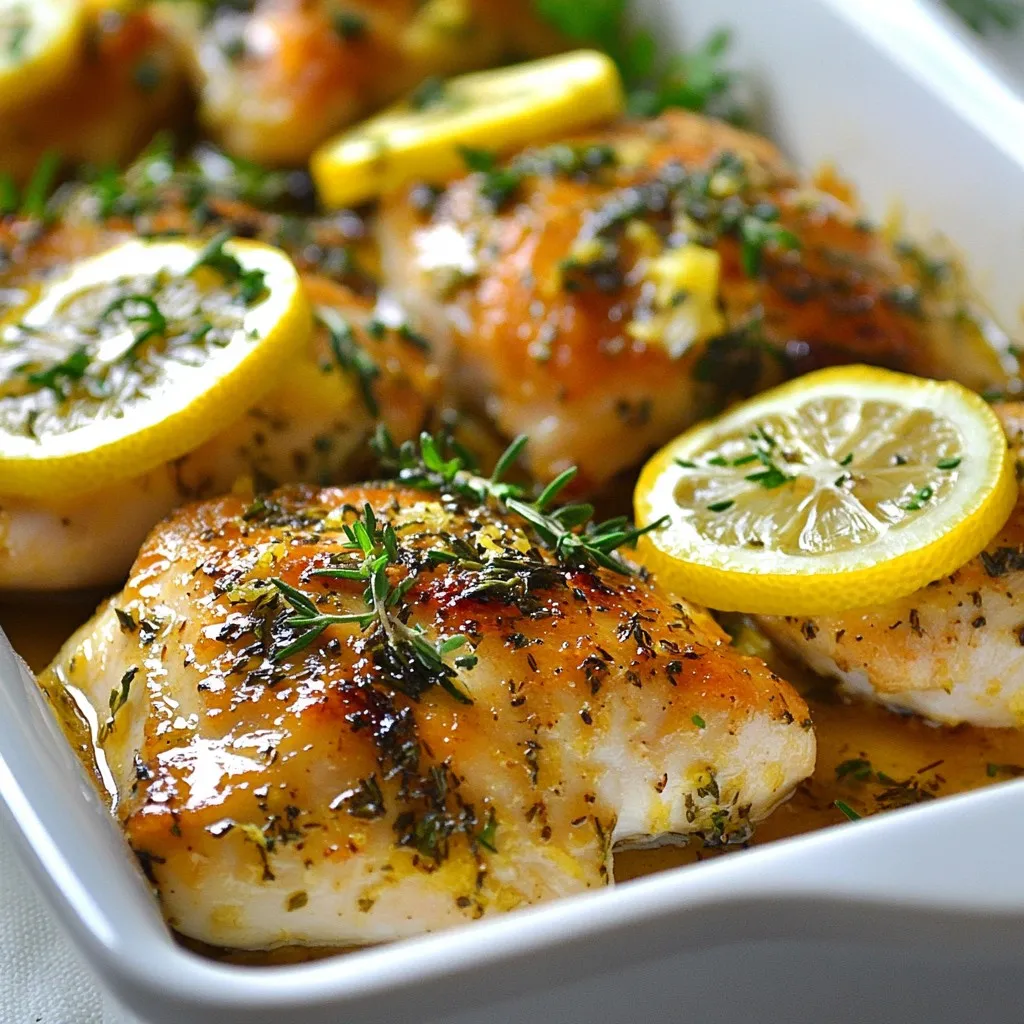
Lemon Baked Chicken Juicy and Flavorful Delight
Welcome to a simple yet delicious recipe: Lemon Baked Chicken. This dish is juicy, flavorful, and easy to make. You only need a few fresh
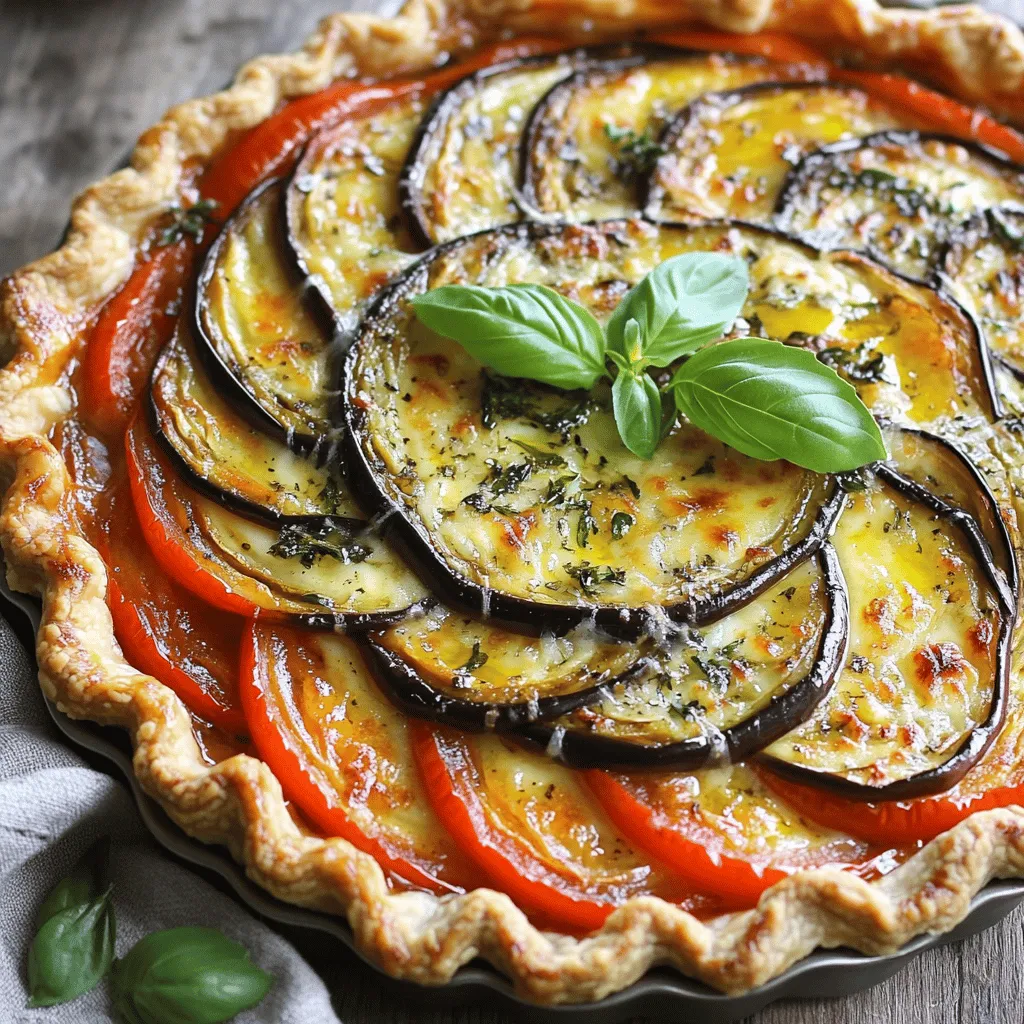
Eggplant Tomato Pie Flavorful and Simple Delight
Welcome to the delicious world of Eggplant Tomato Pie! If you’re seeking a dish that’s simple yet bursting with flavor, you’ve come to the right
![To make the best chicken fried steak, you need some key items: - 4 beef cubed steaks (about 4 ounces each) - 1 cup buttermilk - 1 cup all-purpose flour - 1 teaspoon garlic powder - 1 teaspoon onion powder - 1 teaspoon paprika - 1 teaspoon black pepper - 1/2 teaspoon cayenne pepper (optional for heat) - 1 teaspoon salt - 1 egg, beaten - Vegetable oil for frying These ingredients come together to create a dish that is crispy and full of flavor. The buttermilk helps to tenderize the meat and adds a tangy taste. The flour and spices create a crunchy coating that makes every bite satisfying. If you don’t have buttermilk, you can use plain yogurt or milk mixed with vinegar. This will give you a similar tangy flavor. For those who need gluten-free options, try using rice flour or a gluten-free all-purpose blend. These alternatives work well and still give you that crispy texture. When serving chicken fried steak, think about delicious sides. Mashed potatoes are a classic choice. They are creamy and pair well with the steak. Coleslaw adds a nice crunch and freshness. Don't forget the gravy! A rich, creamy gravy drizzled over the steak takes the dish to the next level. You can make it from scratch or use a store-bought option for ease. For the full recipe, check out [Full Recipe]. To start, marinate the cubed steaks in buttermilk. This step is key for flavor and tenderness. Let them soak for at least one hour. For the best results, try to marinate overnight. While the steaks soak, prepare the coating. In a shallow dish, mix one cup of all-purpose flour with: - 1 teaspoon garlic powder - 1 teaspoon onion powder - 1 teaspoon paprika - 1 teaspoon black pepper - 1/2 teaspoon cayenne pepper (optional) - 1 teaspoon salt Whisk these together until well combined. This mixture gives your Chicken Fried Steak a great taste. Now, it’s time to cook. Heat about 1/4 inch of vegetable oil in a large skillet over medium-high heat. Wait until the oil gets hot. Next, take the marinated steaks from the buttermilk. Let the extra buttermilk drip off. Dip each steak into the egg mixture, then coat it well with the seasoned flour. Press down to make sure it sticks. Carefully place the breaded steaks in the hot oil. Fry them for about 3-4 minutes on each side. Look for a golden brown color and ensure they are cooked through. Once cooked, transfer the steaks to a paper towel-lined plate. This step helps drain any extra oil. For plating, use a warm plate to serve the Chicken Fried Steak. Garnish with chopped parsley for a pop of color. Pair it with creamy gravy and mashed potatoes or coleslaw for a classic touch. This meal not only tastes great but also looks inviting. If you want the full recipe, check out the [Full Recipe]. Marination is key. Soak your cubed steaks in buttermilk for at least one hour. For the best results, let them marinate overnight. This process makes the meat tender and flavorful. When coating the steaks, use a shallow dish. Whisk flour with garlic powder, onion powder, paprika, black pepper, and salt. If you want some heat, add cayenne pepper. After marinating, dip each steak in an egg mixture. Then, coat it well with the flour mix. Press down to help the coating stick. Avoid overcrowding your frying pan. If you add too many steaks at once, they won’t fry evenly. This leads to soggy spots instead of a crispy crust. Make sure your oil is hot enough. If not, the coating absorbs too much oil. Heat the oil to medium-high before frying. You can test it by dropping a small bit of flour in. If it sizzles, you’re ready to cook. To add more heat, mix in extra cayenne pepper or try hot sauce. Start with a pinch and taste as you go. This way, you can find the right level for your taste. If you want less spice, balance flavors with a little sugar or honey. This helps to tone down the heat while still keeping the dish delicious. Remember, cooking is all about finding your perfect blend! For the complete recipe, refer to the Full Recipe. {{image_2}} You can enjoy chicken fried steak in different ways. - Oven-baked Chicken Fried Steak: This method is great for a healthier option. Preheat your oven to 425°F. Instead of frying, place the coated steaks on a baking sheet. Spray them lightly with cooking oil. Bake for about 20 minutes, flipping halfway through. This gives a crispy texture without the extra oil. - Air fryer method for a healthier option: The air fryer is another smart choice. Preheat it to 400°F. Arrange the breaded steaks in a single layer. Cook for about 10-12 minutes, flipping halfway. This method cuts down on fat while keeping the taste. Spice up your chicken fried steak with unique flavors. - Incorporating cheese or herbs in the coating: You can mix shredded cheese, like cheddar, into the flour. Fresh herbs like parsley or thyme can also add a nice twist. This makes the coating even more flavorful. - Different spice blends for a flavor twist: Try adding different spices to the mix. Cajun seasoning brings heat and depth. A bit of Italian seasoning can add a fresh taste. Experimenting with spices can change your dish completely. Chicken fried steak has many regional styles. - Southern-style vs. Western-style Chicken Fried Steak: Southern-style is often richer, with a thick, creamy gravy. Western-style may be lighter, using less oil and simpler seasonings. Each style has its own loyal fans. - Popular restaurant interpretations: Many restaurants put their spin on this classic dish. Some might use different cuts of meat or fancy sauces. You can try these versions for new and exciting flavors. With these variations, you can make chicken fried steak your own. The full recipe is just the beginning! To keep your Chicken Fried Steak fresh, place it in an airtight container. This method helps to lock in moisture. You can store it in the fridge for up to three days. If you want to save it longer, freeze the steak. Wrap each piece tightly in plastic wrap, then place it in a freezer bag. This way, it can last up to three months. When reheating, aim to keep the steak crispy. The best method is using an oven. Preheat it to 350°F (175°C). Place the steak on a baking sheet and heat for about 15 minutes. This helps restore the texture. If you're in a hurry, you can use a microwave. Just heat it in short bursts to avoid sogginess. Chicken Fried Steak lasts about three days in the fridge. After that, it may spoil. Look for signs like a bad smell or a slimy texture. If you see these signs, it's best to throw it away. Always trust your senses; they are your best guide for food safety. For more detailed steps, check the Full Recipe. The best cuts for chicken fried steak are beef cubed steaks. These cuts come from the round or chuck, which are tough but become tender when cooked. They usually weigh about 4 ounces each. Using cubed steaks ensures that the meat stays juicy and flavorful. Each piece has a nice texture, which works well with the crispy coating. Yes, you can make chicken fried steak ahead of time. You can marinate the steaks in buttermilk the night before. This gives them more flavor and tenderness. After frying, let them cool. Store them in the fridge in an airtight container. When you're ready to eat, reheat them in the oven at 350°F. This keeps the coating crispy. To check if chicken fried steak is done, use a meat thermometer. The internal temperature should reach 145°F. This ensures the meat is safe to eat. If you cut into the steak, the juices should run clear, not pink. This also shows that the steak is cooked well. Classic sides for chicken fried steak include: - Mashed potatoes - Creamy gravy - Coleslaw - Green beans - Corn on the cob You can also try creative pairs like sweet potato fries or a fresh salad. These sides add color and balance to your meal. Yes, you can make chicken fried steak without buttermilk. If you don't have it, use regular milk mixed with vinegar. Combine 1 cup of milk with 1 tablespoon of vinegar. Let it sit for 5 minutes to sour. You can also use plain yogurt or sour cream mixed with a little water for a similar effect. This keeps the steak moist and flavorful. In this post, we covered how to make Chicken Fried Steak. Key ingredients include beef cubed steaks, buttermilk, and spices. We explored variations, cooking techniques, and recommended sides. Remember, proper marination and cooking methods are vital for great flavor. With tips to avoid common mistakes, you can enjoy this dish at its best. Experiment with different cooking styles or add unique flavors to make it your own. Whether baking, frying, or using an air fryer, Chicken Fried Steak can impress any crowd. Enjoy cooking and savor each bite!](https://stirredrecipes.com/wp-content/uploads/2025/06/bb649bee-4c5f-4282-a6aa-4688264e7850.webp)
Amazing Chicken Fried Steak Flavorful and Easy Recipe
Are you ready to dive into the world of amazing Chicken Fried Steak? This flavorful dish is comfort food at its finest. With a simple
Melt in Your Mouth Chicken Easy and Tasty Recipe
If you crave delicious, tender chicken, you’re in the right place! My Melt in Your Mouth Chicken recipe promises a tasty meal with simple steps.
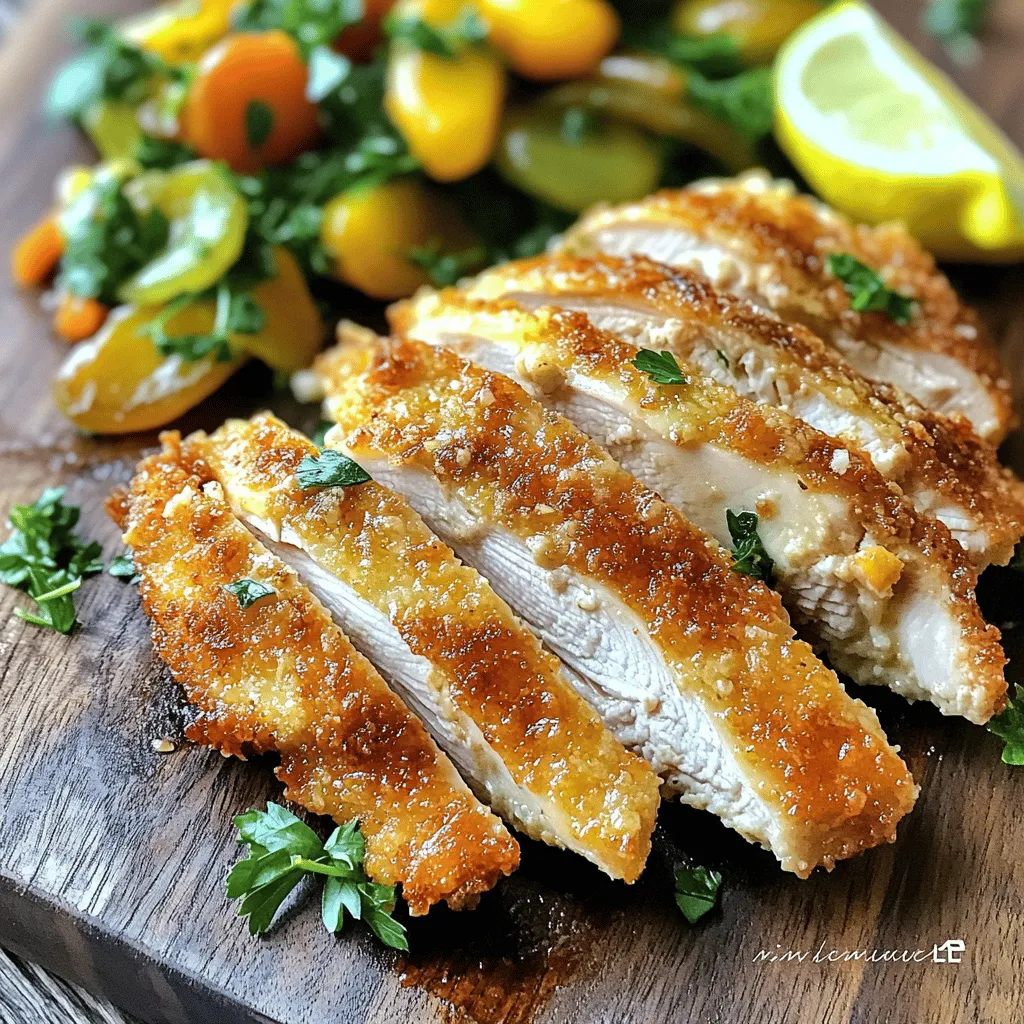
Dominican Pica Pollo Crispy Chicken Delight
If you crave a dish bursting with flavor and crunch, Dominican Pica Pollo is your answer. This crispy chicken delight is loved for its juicy
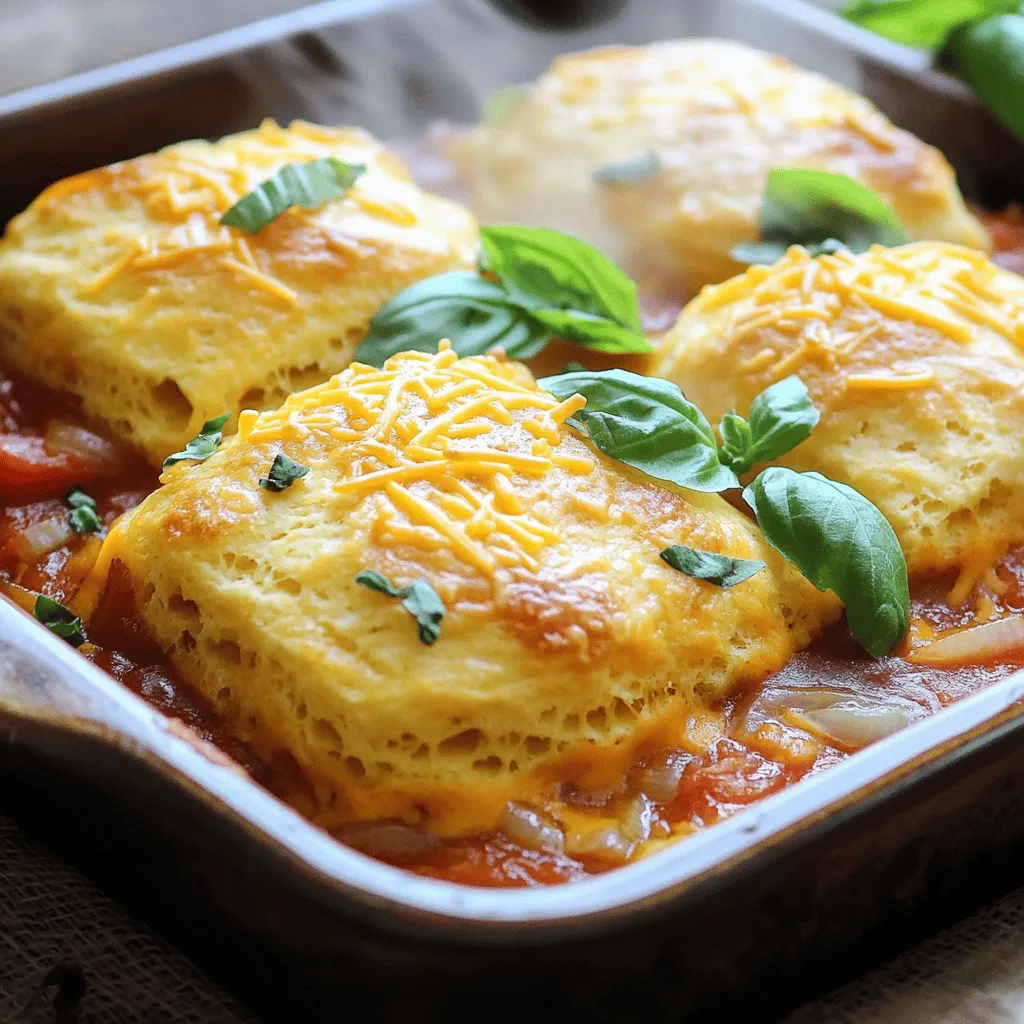
Tomato Cobbler Simple Comfort Food Delight
Tomato cobbler is a simple joy, perfect for any meal. It blends fresh, ripe tomatoes with a cheesy, flaky topping. In this guide, I’ll share
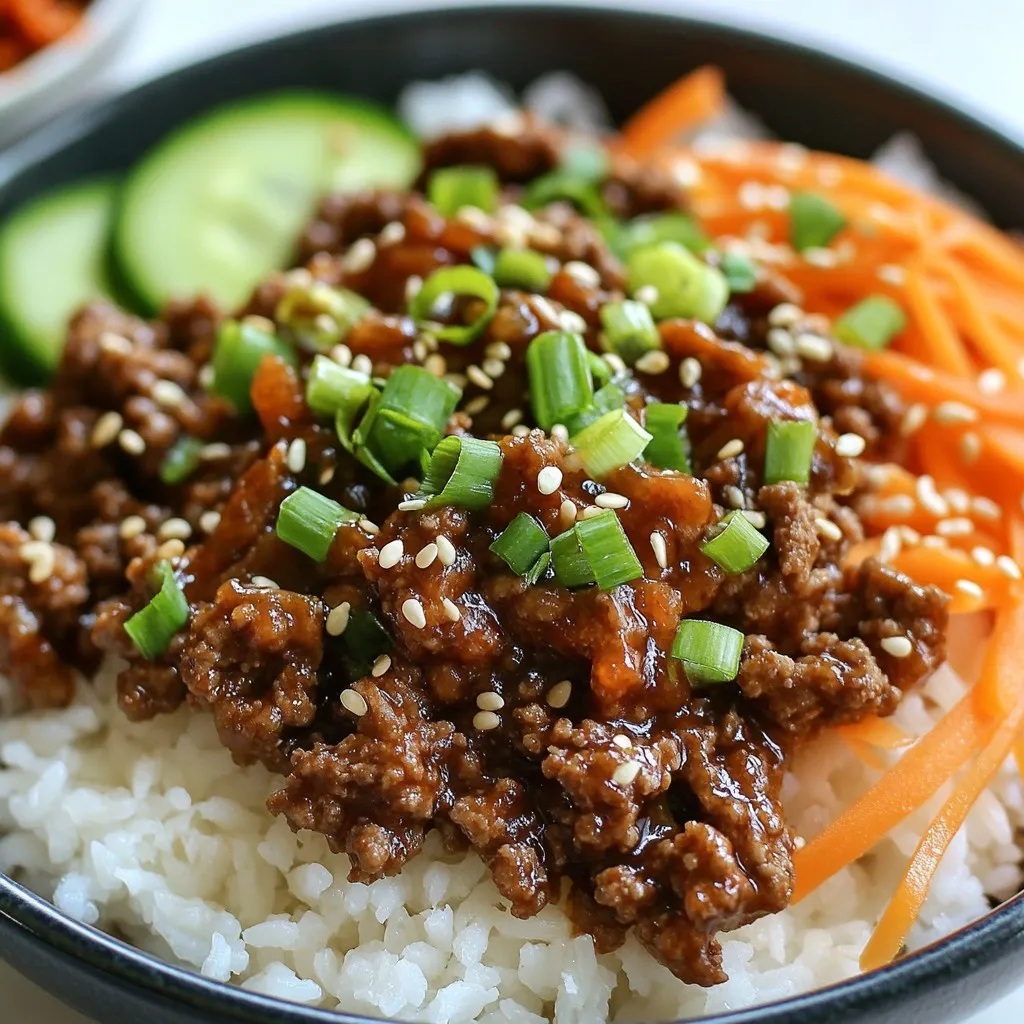
Korean Ground Beef Bowls Flavorful and Simple Meal
Looking for a quick and tasty meal? These Korean Ground Beef Bowls are savory, sweet, and super easy to make. You just need a few
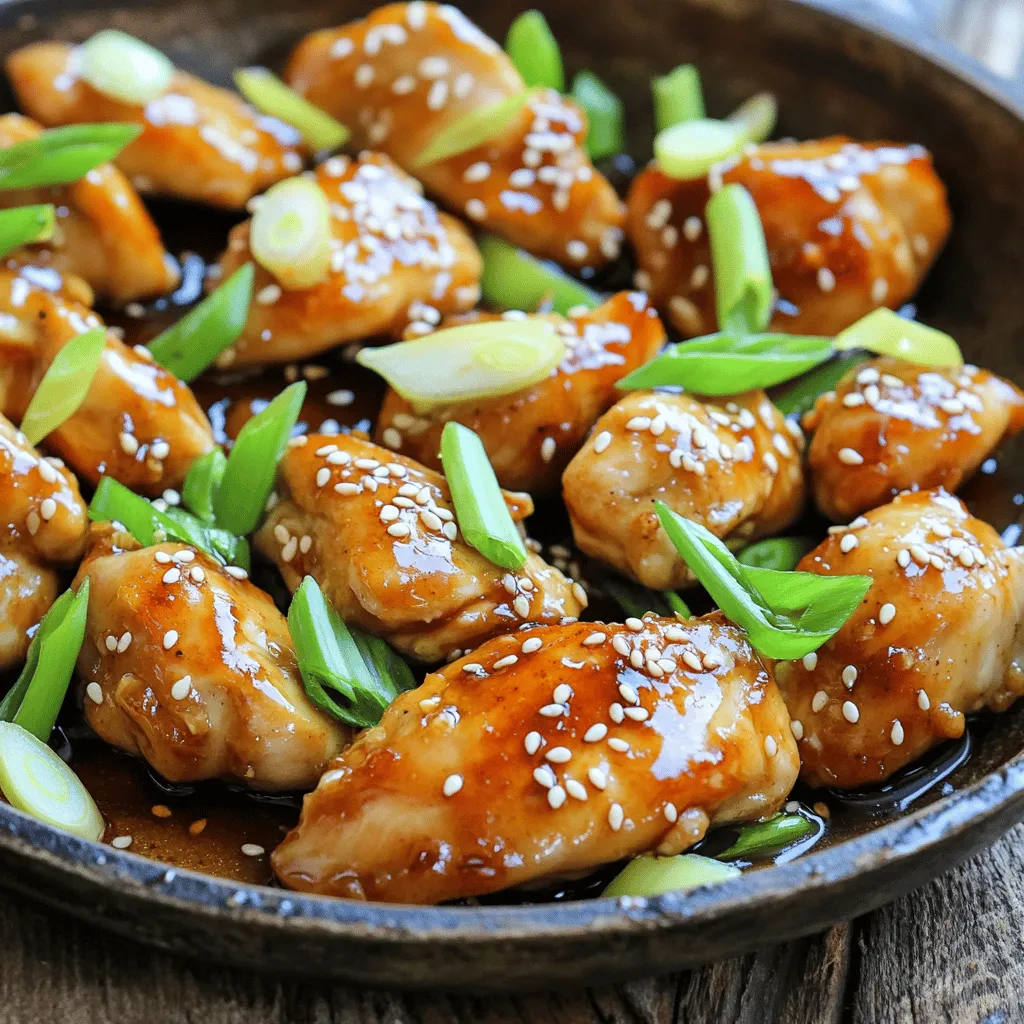
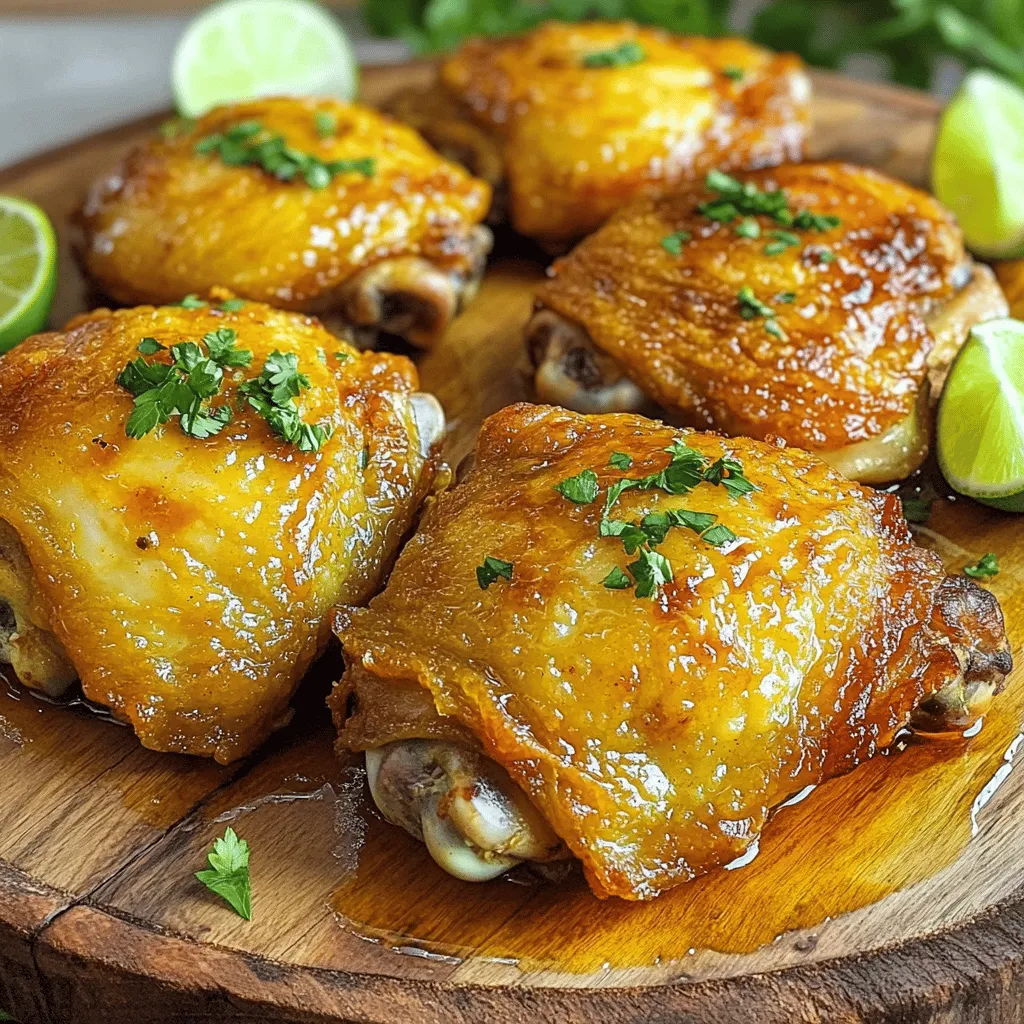
Honey Garlic Chicken Simple and Tasty Dinner Recipe
Are you craving a quick, delicious meal? Honey Garlic Chicken is the answer! This easy recipe brings sweet, savory flavors that even picky eaters will
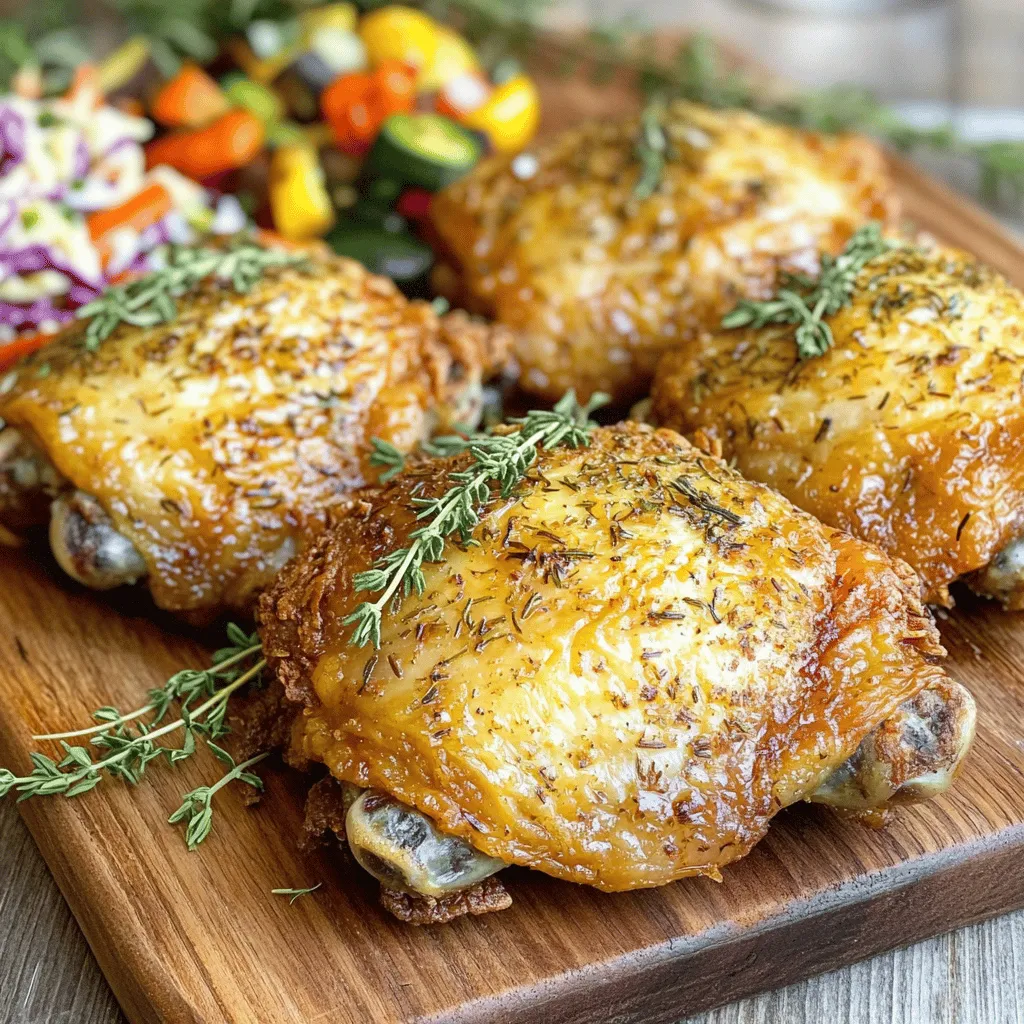
Oven Fried Chicken Crispy and Flavorful Delight
Looking for a tasty way to enjoy crispy chicken without frying? You’re in the right spot! My Oven Fried Chicken recipe is a delicious blend
![For this recipe, use: - 4 pieces of chicken (legs and thighs) These parts give you tender meat and crispy skin. They absorb flavor well and cook evenly. You will need: - 2 cups all-purpose flour - 1 tablespoon garlic powder - 1 tablespoon onion powder - 1 tablespoon paprika - 1 teaspoon cayenne pepper (adjust to taste) - 1 teaspoon dried thyme - Salt and pepper to taste These spices add depth to your chicken. The paprika adds a nice color and flavor, while the cayenne gives it a kick. For marinating, you will need: - 2 cups buttermilk Buttermilk helps the chicken stay juicy. It also helps the flour stick during frying. Marinate the chicken for at least 4 hours or overnight for the best taste. This step is key for making your Southern fried chicken truly special. Check out the Full Recipe for complete instructions. Start by gathering your chicken pieces. I like to use legs and thighs for their juicy flavor. Place the chicken in a large bowl. Pour in the buttermilk until all pieces are covered. The buttermilk helps tenderize the chicken and adds flavor. Cover the bowl and refrigerate for at least 4 hours. For best results, marinate overnight. This step makes the chicken extra juicy. While the chicken marinates, prepare the flour mixture. In a separate bowl, combine the all-purpose flour, garlic powder, onion powder, paprika, cayenne pepper, thyme, salt, and pepper. Mix well until everything is blended. This mixture gives your chicken its crispy coating. You can adjust the cayenne pepper to make it spicier or milder, based on your taste. Once the chicken has marinated, it’s time to dredge. Remove each piece from the buttermilk, letting the excess drip off. Next, coat the chicken in the flour mixture. Press the flour onto the chicken to make a thick layer. Shake off any extra flour before frying. Now, heat about 1 inch of vegetable oil in a deep skillet over medium-high heat. The oil should reach about 350°F (175°C). Carefully place the coated chicken in the hot oil, skin-side down. Fry the chicken in batches if needed to avoid crowding. Cook for about 12-15 minutes on each side. The chicken should turn golden brown and reach an internal temperature of 165°F (74°C). Once cooked, transfer the chicken to a wire rack or a plate with paper towels. This helps drain any extra oil. Let the chicken rest for a few minutes before serving. Enjoy your savory Southern fried chicken with your favorite sides! For the complete recipe, check out the [Full Recipe]. To get that crunchy coating, start with a good marinate. Soak your chicken in buttermilk. This helps tenderize the meat and adds flavor. After marinating, use a thick flour mix. Combine flour with spices like garlic powder and paprika. Dredge the chicken well, pressing the flour onto the meat. This ensures the coating sticks nicely during frying. One big mistake is not letting the chicken rest after frying. If you cut into it right away, the juice will run out and make it dry. Another error is overcrowding the pan. Fry the chicken in batches to keep the oil hot. This helps achieve that perfect golden brown color. Lastly, don’t skip the buttermilk marination. It’s vital for flavor and texture. The right oil temperature is key. Heat the oil to 350°F (175°C). If it's too low, the chicken will soak up oil and turn greasy. If it’s too high, the outside cooks too fast while the inside stays raw. Use a thermometer for accuracy. Fry in small batches to keep the temperature steady. This way, you’ll get perfectly cooked, crunchy fried chicken every time. For a full recipe with all the details, check out the [Full Recipe]. {{image_2}} I love adding a kick to my Southern fried chicken. To make it spicy, use cayenne pepper. You can add more than the recipe calls for if you like heat. You can also mix in some hot sauce with the buttermilk. This gives the chicken a deep flavor. It makes each bite exciting and bold. Not in the mood to fry? Try oven-baked Southern chicken! You still get that crunch but without the oil. Coat the chicken like usual, then place it on a baking sheet. Bake at 425°F (220°C) for about 40 minutes. Flip the pieces halfway for even cooking. You still enjoy juicy chicken with a crispy skin! If you need gluten-free chicken, swap the flour. Use a gluten-free all-purpose mix instead. You can also use almond flour or cornstarch for a different texture. The taste stays great, and you won't miss the regular flour. Enjoy every bite without worry! For more details on making this dish, check out the Full Recipe. To keep your leftover fried chicken fresh, let it cool down first. Place it in an airtight container. If you don’t have a container, wrap it tightly in plastic wrap. You can store it in the fridge for up to four days. If you want it to last longer, freezing is the way to go. For the best taste when reheating, use the oven. Preheat it to 375°F (190°C). Place the chicken on a baking sheet lined with foil. Heat for about 20 minutes or until it warms through. This method keeps the skin crispy and the meat juicy. You can also use an air fryer. Set it to 350°F (175°C) and heat for about 10 minutes. To freeze fried chicken, wrap each piece in plastic wrap. Then, place them in a freezer bag. Remove as much air as you can before sealing. This keeps the chicken fresh and prevents freezer burn. You can freeze the chicken for up to three months. When ready to eat, thaw it in the fridge overnight before reheating. For the full recipe, check out the details above! The best oil for frying Southern fried chicken is vegetable oil. It has a high smoke point. This means it can handle high heat without burning. Other good options are peanut oil and canola oil. These oils do not change the flavor of the chicken, so it stays tasty. I recommend marinating the chicken for at least 4 hours. If you have time, marinate it overnight. This allows the buttermilk to soak in and tenderize the meat. The longer it sits, the better the flavor. Remember to keep it in the fridge while it marinates. Yes, you can use chicken breasts for Southern fried chicken. They will cook faster than thighs or legs. Make sure to cut them into even pieces to ensure even cooking. Keep an eye on the cooking time, so they don't dry out. Southern fried chicken goes well with many sides. Here are some tasty options: - Cornbread - Coleslaw - Collard greens - Mashed potatoes - Macaroni and cheese These sides complement the chicken's crispy, juicy goodness. They also add a nice variety to your meal. For the full recipe, check out the detailed steps above! In this post, we covered how to make Southern fried chicken, focusing on ingredients, steps, and tips. You learned how the right chicken, seasoning, and marinating boost flavor. The frying process ensures a crispy coating, while our variations offer fun twists. Lastly, proper storage keeps your leftovers fresh. Enjoying this meal can be simple and fun. Follow these steps, and you’ll impress everyone with your cooking!](https://stirredrecipes.com/wp-content/uploads/2025/06/a03edc82-ff64-4847-9880-478c5e62139c.webp)
Savory Southern Fried Chicken Crunchy and Juicy Bite
Do you crave the crunch and juiciness of Southern fried chicken? You’re not alone! This dish is a beloved classic, and with the right steps,