Dinner
![To make Chicken Zucchini Casserole, you will need the following ingredients: - 2 large zucchinis, sliced into thin rounds - 2 cups cooked chicken, shredded or diced - 1 cup cherry tomatoes, halved - 1 cup shredded mozzarella cheese - 1 cup ricotta cheese - 1 cup shredded Parmesan cheese - 2 cloves garlic, minced - 1 teaspoon dried oregano - 1 teaspoon dried basil - ½ teaspoon red pepper flakes (adjust for heat preference) - Salt and pepper to taste - 1 tablespoon olive oil - Fresh basil leaves for garnish (optional) For substitutions, feel free to use different vegetables. Broccoli or bell peppers work well. You can swap the chicken for turkey or even use beans for a vegetarian option. If you do not have specific cheeses, try using any cheese you have on hand. This dish is flexible and forgiving, so get creative! You can check out the Full Recipe for more details on preparation and cooking times. To start, you need to prep the zucchinis and chicken. Slice the zucchinis into thin rounds. Use two large ones for best results. If you have leftover chicken, shred or dice it into small pieces. This makes it easier to mix later. Next, let’s sauté the garlic and zucchini. In a large skillet, heat one tablespoon of olive oil over medium heat. Add two minced garlic cloves and cook for about one minute until fragrant. Then, add the sliced zucchinis and cook for about five to seven minutes. Stir often. You want them to be slightly tender. Season with salt, pepper, a teaspoon of dried oregano, and a teaspoon of dried basil. After seasoning, remove the skillet from heat. Now, it’s time to assemble layers in the casserole dish. Grab a large mixing bowl. Combine the cooked chicken, sautéed zucchini, one cup of halved cherry tomatoes, and half of the shredded mozzarella and Parmesan cheese. Mix well until everything is combined. In a separate bowl, mix one cup of ricotta cheese with half a teaspoon of red pepper flakes and a pinch of salt. Grease a 9x13 inch casserole dish and spoon half of the chicken-zucchini mixture as the bottom layer. Spread half of the ricotta mixture on top. Then, sprinkle half of the remaining mozzarella cheese over that. Repeat these layers with the rest of the chicken-zucchini mixture, ricotta cheese, and finally top with the last of the mozzarella and Parmesan cheeses. Cover the casserole with foil. Place it in your preheated oven at 375°F (190°C). Bake it for 25 minutes. After that, remove the foil. Bake for an additional 15 to 20 minutes. You want the cheese to be bubbly and lightly golden. For tips, keep an eye on the casserole during the last few minutes. This helps you achieve that perfect bubbly, golden top. When serving, you can pair this dish with a simple green salad or garlic bread. These sides add freshness and balance the meal. For presentation, I suggest portioning the casserole into squares. This makes it easy to serve and looks nice on the plate. If you want to add a finishing touch, garnish with fresh basil leaves. This adds color and a nice aroma. For the full recipe, you can refer to the beginning of this article. - Overcooking zucchini: Zucchini cooks fast. If you cook it too long, it turns mushy. I suggest sautéing it for just 5-7 minutes until it is slightly tender. This keeps it firm and tasty in the casserole. - Skipping the resting time: After baking, let the casserole sit for 10 minutes. This helps it set and makes serving easier. If you skip this step, it may fall apart on your plate. - Additional seasoning options: You can add more spices to boost flavor. Try garlic powder, onion powder, or even a sprinkle of smoked paprika. These can add a unique twist to your dish. - Adding more vegetables: Feel free to mix in other veggies. Bell peppers, spinach, or mushrooms work great. Adding these can increase the flavor and nutrients in your casserole. Plus, it makes the dish more colorful and appealing! For the full recipe, check out the [Full Recipe]. {{image_2}} You can make your Chicken Zucchini Casserole unique by changing the protein. You can use turkey instead of chicken. This switch keeps the dish lean while still tasty. You could also try a vegetarian version. Swap the chicken for cooked lentils or chickpeas. These options add protein and flavor without meat. Cheese is another area for fun. Instead of mozzarella, experiment with cheddar or gouda. Each cheese can change the taste and texture of your casserole. Mixing cheeses can also bring out new flavors. Adding seasonal vegetables enhances the dish. In summer, bell peppers or eggplants work great. They add color and nutrients. In fall, you might add butternut squash for sweetness. These veggies blend well with zucchini and chicken. Herbs can also change your casserole's flavor. Instead of dried oregano and basil, try fresh thyme or parsley. Fresh herbs can give your dish a bright taste. Experiment with different herbs to find your favorite blend. You can easily make this dish your own. For more ideas, check the Full Recipe for inspiration! To keep your chicken zucchini casserole fresh, use airtight containers. Glass containers work well since they don't stain. Avoid plastic wrap for long-term storage. Store leftovers in the fridge for up to three days. When reheating, use a microwave or an oven. If using a microwave, cover the dish to keep moisture in. If using the oven, preheat to 350°F (175°C) and cover with foil. This helps the casserole stay soft and creamy. You can freeze the casserole for later. To do this, let it cool completely first. Then, place it in a freezer-safe container. Wrap it tightly with plastic wrap and then foil. This prevents freezer burn. You can freeze it for up to three months. When ready to eat, move it to the fridge to thaw overnight. Reheat in the oven at 350°F (175°C) until hot throughout, about 30-40 minutes. Enjoy the flavors just like fresh from the oven! Baking the chicken zucchini casserole takes about 40 to 45 minutes. First, you cover it with foil and bake for 25 minutes. Then, you remove the foil and bake it for another 15 to 20 minutes. This method helps the cheese become bubbly and golden without drying out the dish. Yes, you can make this dish ahead of time. Prepare the casserole up to the baking step, then cover and refrigerate it for up to 24 hours. When ready to bake, let it sit at room temperature for about 30 minutes. Then, bake it as instructed. This makes meal prep easy and saves time during busy days. You can serve many side dishes with chicken zucchini casserole. Here are some tasty options: - A simple green salad with vinaigrette - Garlic bread for a crunchy side - Steamed broccoli or green beans for added veggies - Quinoa or rice to soak up the flavors These sides complement the casserole and make a complete meal. For a full experience, check out the Full Recipe for more details. In this article, we covered the key ingredients and steps to make chicken zucchini casserole. You learned how to prepare, bake, and serve this dish, along with valuable tips and variations. Remember to avoid overcooking the zucchini and consider trying different proteins or veggies for a twist. Enjoying this wholesome meal not only fills your stomach but also brings great flavor to your table. I hope these tips make your cooking easier and more delicious!](https://stirredrecipes.com/wp-content/uploads/2025/06/1e372208-d724-4709-82b1-d81b73b62d47.webp)
Chicken Zucchini Casserole Flavorful and Easy Recipe
Looking for a dish that’s both easy and packed with flavor? You’ll love this Chicken Zucchini Casserole! It’s a perfect meal for busy nights when
. After you enjoy your oven roasted zucchini and squash, store any leftovers in the fridge. Place them in an airtight container. Properly sealed, they can last for up to three days. Keeping them cold slows down spoilage. If you see any moisture, use a paper towel to absorb it. This helps maintain the texture. You can reheat your veggies in two simple ways: the oven or the microwave. For the oven, preheat it to 350°F (175°C). Spread the veggies on a baking sheet for even heating. Heat for about 10-15 minutes or until warm. For the microwave, place the vegetables in a microwave-safe dish. Heat in 30-second intervals until warm. Stir in between to ensure even heating. Freezing is great for longer storage. Start by letting the roasted zucchini and squash cool completely. Spread them in a single layer on a baking sheet and freeze for 1-2 hours. Once frozen, transfer the veggies to a freezer-safe bag. Remove as much air as possible to prevent freezer burn. They can last up to three months in the freezer. To thaw, place them in the fridge overnight or use the microwave. Enjoy them later in soups, salads, or as a side dish. For the full recipe and more tips, check out the Full Recipe section. Roasting zucchini and squash takes about 20 to 25 minutes at 425°F (220°C). For a softer texture, you can roast them longer. For a firmer bite, aim for 20 minutes. Keep an eye on them. Stir halfway through cooking for even roasting. This helps them brown nicely on all sides. Yes, you can use many other vegetables. Carrots, bell peppers, and asparagus work well. Feel free to mix seasonal veggies based on what you have. The key is to cut them into similar sizes. This ensures even cooking. Try using a mix of colors for a more vibrant dish. Seasoning can change the whole dish. I like to use garlic powder, dried oregano, and smoked paprika. These add a great depth of flavor. You can also try fresh herbs like thyme or rosemary. For a spicy kick, add red pepper flakes. Experiment with flavors you love. Yes, this recipe is vegan-friendly. It uses only plant-based ingredients. You don’t need to worry about animal products here. This makes it perfect for everyone. Enjoy it as a side dish or on its own. You can find the full recipe above for easy reference. Roasting zucchini and squash is simple and fun. You learned about necessary ingredients, easy steps, and smart tips for the best results. You can add new flavors or adjust cooking times to suit your taste. This dish is not only tasty but also healthy and versatile. You can try different veggies and seasonings each time. Feel free to store or freeze leftovers for later. Enjoy this delicious recipe, your way, any day!](https://stirredrecipes.com/wp-content/uploads/2025/06/bd7b868a-6425-41d9-a512-12cb123e5e6b.webp)
Oven Roasted Zucchini and Squash Simple Flavor Boost
Are you ready to elevate your veggie game? Oven-roasted zucchini and squash bring simple flavors to life with just a few ingredients. This dish is
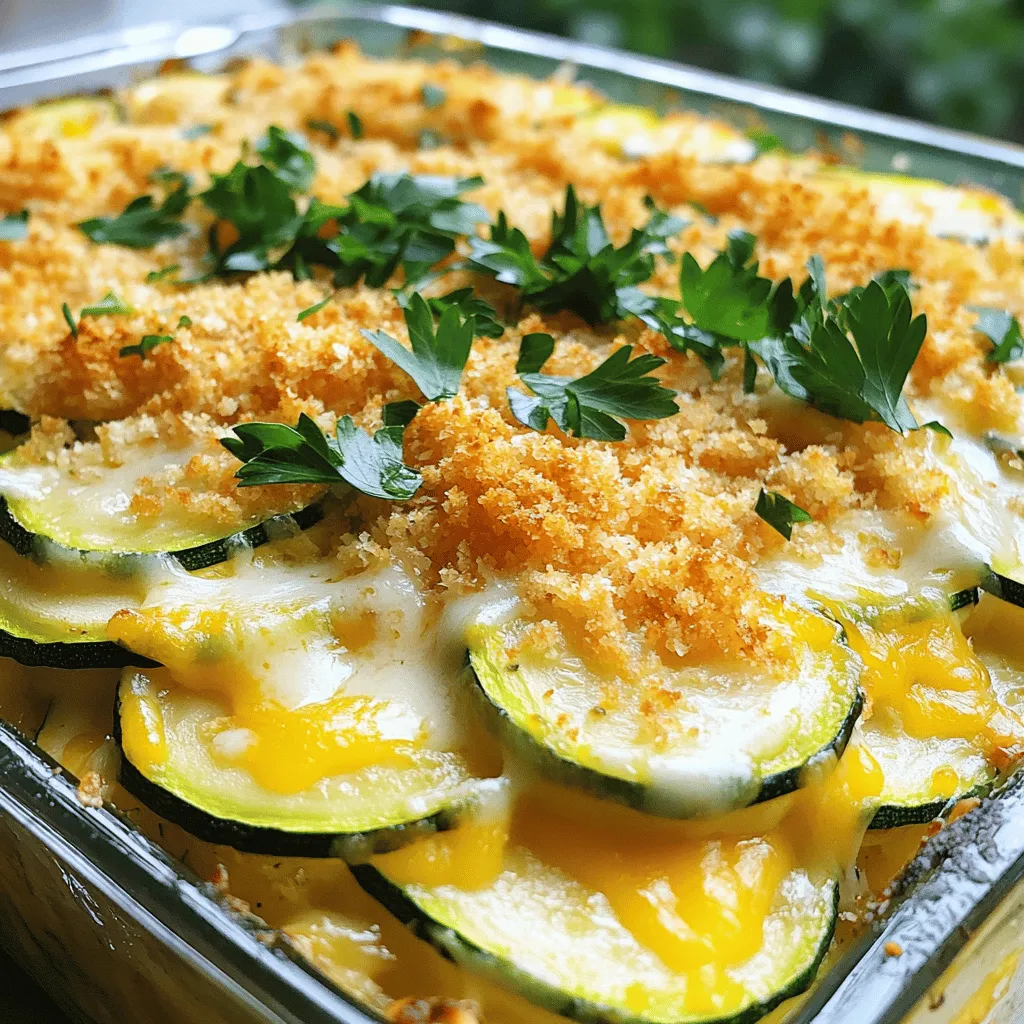
Easy Scalloped Zucchini Flavorful and Healthy Dish
Are you looking for a tasty way to enjoy zucchini? This Easy Scalloped Zucchini dish is packed with flavor and super healthy. You’ll love how

Garlic Butter Chicken Rich and Flavorful Recipe
Ready to elevate your dinner game? This Garlic Butter Chicken recipe packs rich flavor in every bite. You’ll love how simple it is to prepare
![- Corn (4 cups, about 6 ears) - Zucchini (2 medium, diced) - Onion (1 medium, chopped) - Garlic (2 cloves, minced) Fresh corn gives this chowder sweet and bright flavors. I always choose ears with plump kernels. Look for shiny, green husks. The zucchini adds a nice texture and lightness. I like to dice them into small pieces. Onion brings depth, and garlic adds warmth. Together, they create a great base for our chowder. - Vegetable broth (4 cups) - Heavy cream or coconut milk (1 cup for dairy-free) The broth gives our chowder its heartiness. I use vegetable broth for a rich flavor. If you want a creamy texture, add heavy cream. For a dairy-free option, coconut milk works well. It adds a hint of sweetness and richness. - Smoked paprika (1 teaspoon) - Dried thyme (1 teaspoon) - Salt and pepper to taste - Olive oil (2 tablespoons) - Fresh basil leaves for garnish Seasoning is key to a great chowder. Smoked paprika adds a warm, earthy taste. Dried thyme brings a lovely herbal note. I suggest adding salt and pepper to suit your taste. Olive oil brings all the flavors together. Finally, fresh basil leaves add a bright finish. This final touch not only looks good but also enhances the aroma. For the complete recipe, check out the Full Recipe link! - Heat olive oil in a large pot over medium heat. - Add the chopped onion and sauté for about 5 minutes. Stir often until the onion turns clear. - Next, add minced garlic and cook for 1 minute. The smell will fill your kitchen! - Now, stir in diced zucchini and fresh corn. Cook for 3-5 minutes. - The zucchini should soften a bit. - Pour in the vegetable broth and bring it to a gentle boil. This will blend all the flavors. - Use an immersion blender to blend about half of the chowder. This gives it a nice texture. - If you don’t have an immersion blender, carefully transfer half to a regular blender. Then, mix it back into the pot. - Finally, stir in heavy cream or coconut milk, smoked paprika, dried thyme, salt, and pepper. - Let the chowder simmer for 5-10 minutes. Adjust the seasoning to your taste for the best flavor. For the complete recipe, refer to the [Full Recipe]. Enjoy your delicious and creamy chowder! How to choose the freshest corn: When picking corn, look for bright green husks. The kernels should feel plump and firm. If you can, peel back the husk slightly to see the kernels. They should be moist and shiny. Fresh corn has a sweet smell. Try to buy it from local farmers' markets for the best taste. Tips on adjusting thickness and creaminess: If your chowder is too thick, add more vegetable broth. For a creamier texture, stir in extra heavy cream or coconut milk. Blending some of the chowder gives it a nice, smooth feel. Leave some chunks for a bit of texture. This balance makes each spoonful delightful. Dairy-free options for cream: To make this chowder dairy-free, use coconut milk. It adds creaminess without the dairy. Almond milk can also work, but it might change the flavor slightly. Alternative herbs and spices for flavor enhancement: If you want to switch things up, try fresh cilantro or parsley instead of basil. You can also use curry powder for a warm twist. A pinch of chili powder can add some heat. Experiment with what you like best! For the full recipe, check out the Sunny Summer Corn and Zucchini Chowder. {{image_2}} You can add protein to your chowder for a heartier dish. Shrimp works great in this recipe. Cook the shrimp separately and add them to the chowder just before serving. This keeps them tender and juicy. Chicken is another tasty option. Use cooked and shredded chicken for a quick mix-in. Just stir it in during the last few minutes of cooking. If you prefer vegan dishes, consider using beans or lentils. Both add protein and texture. Chickpeas are a great choice. They blend well and pair nicely with the flavors of corn and zucchini. Adding extra veggies can boost the flavor and nutrition of your chowder. Spinach is an easy choice. Just stir in a handful during the last few minutes of cooking. It wilts quickly and adds a nice green color. Carrots are another good option. Chop them small and add them with the zucchini. They will cook through and add a touch of sweetness. You might also try diced potatoes. They make the chowder thicker and heartier. Add them early in the cooking process to ensure they soften up. Always adjust your recipe based on what is in season. Fresh produce will give your chowder the best taste. For a summer twist, try adding fresh herbs like dill or cilantro. These will brighten up your dish and make it shine. Check out the Full Recipe for more ideas on how to make this chowder your own! After enjoying your chowder, store leftovers in the fridge. Use an airtight container to keep it fresh. The chowder will stay good for 3 to 4 days. If you want to save it for later, freezing is a great option. Pour the cooled chowder into freezer-safe containers. Leave some space at the top for expansion. You can freeze it for up to 3 months. When it’s time to eat the chowder again, reheat it slowly. Use the stovetop for best results. Place it in a pot over low heat and stir often. This method keeps the flavors rich. If the chowder seems too thick, add a splash of broth or water. Stir until it reaches your desired consistency. Enjoy your warm, savory bowl of chowder! For the full recipe, check out the details above. To make this chowder vegan, simply swap heavy cream for coconut milk. This will keep it rich and creamy. Use vegetable broth to ensure everything stays plant-based. You can also add extra veggies for flavor and texture. Consider adding mushrooms or bell peppers for a heartier dish. Yes, you can use frozen corn! It works well and saves time. Just make sure to thaw it before adding it to the chowder. Frozen corn often tastes sweet and delicious, making it a great substitute. You can skip the step of cutting fresh corn off the cob. To thicken the chowder, you have a few options. Blending part of the mixture helps create a smooth texture. You can also add a cornstarch slurry. Mix one tablespoon of cornstarch with two tablespoons of cold water. Stir this into the chowder and cook until it thickens. This blog post covered how to make a delicious Summer Corn and Zucchini Chowder. We discussed fresh ingredients, including corn, zucchini, and onion. You learned the steps to prepare the chowder, from sautéing to blending. We also shared tips for perfecting the dish and possible ingredient substitutions. Finally, we explored variations and storage methods. Cooking can be fun and rewarding. Enjoy experimenting with this chowder, and make it your own!](https://stirredrecipes.com/wp-content/uploads/2025/06/2c69dde6-2df2-4d6a-aca3-fd754108ac12.webp)
Savory Summer Corn and Zucchini Chowder Delight
Summer brings fresh produce that inspires delicious meals. One of my favorites is the Summer Corn and Zucchini Chowder. It’s creamy, flavorful, and packed with

Tasty Alice Springs Chicken Easy Recipe to Try
Looking to spice up your dinner routine? You’ve stumbled upon the perfect dish! This Tasty Alice Springs Chicken recipe brings together juicy chicken, smoky flavors,

The Best Air Fryer Chicken Breasts Crispy and Juicy
Looking for the perfect air fryer chicken breasts? You’re in the right place! This recipe guarantees juicy, crispy chicken every time. With a few simple

Grandma’s 2-Step Tomato Pie Simple and Tasty Dish
If you’re looking for a dish that’s simple and packed with flavor, you’ll love Grandma’s 2-Step Tomato Pie. This recipe combines fresh ingredients to create

Baked Crunchy Hot Honey Chicken Flavorful Dinner Idea
Craving a quick and tasty dinner? Baked Crunchy Hot Honey Chicken packs a punch! This dish is perfect for busy nights and impresses family and

Cheese and Tomato Quiche Flavorful Easy Dish
Are you craving a simple yet tasty dish? My Cheese and Tomato Quiche is your answer! This delightful recipe combines fresh cherry tomatoes, creamy cheeses,