Dinner
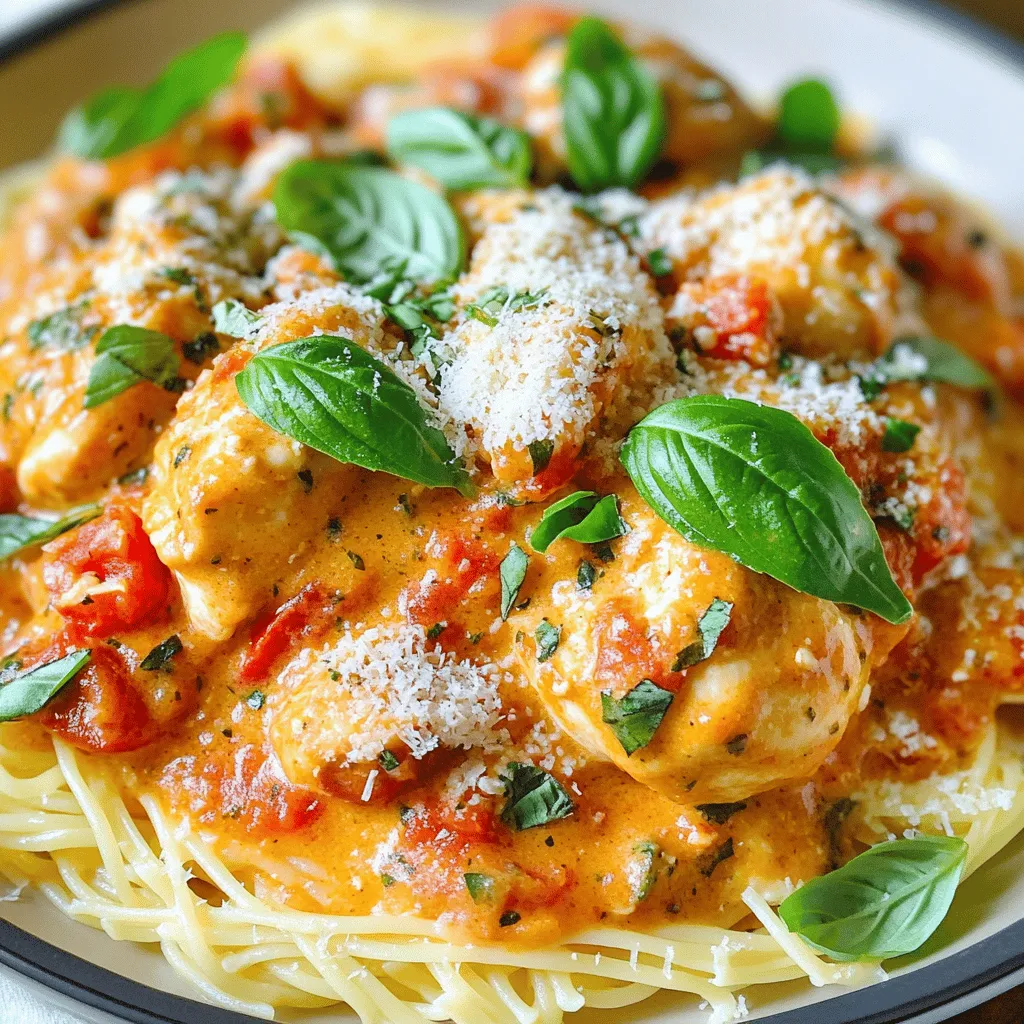
Slow Cooker Creamy Tomato Basil Chicken Delight
Get ready to wow your taste buds with my Slow Cooker Creamy Tomato Basil Chicken Delight! This simple yet rich dish combines juicy chicken with
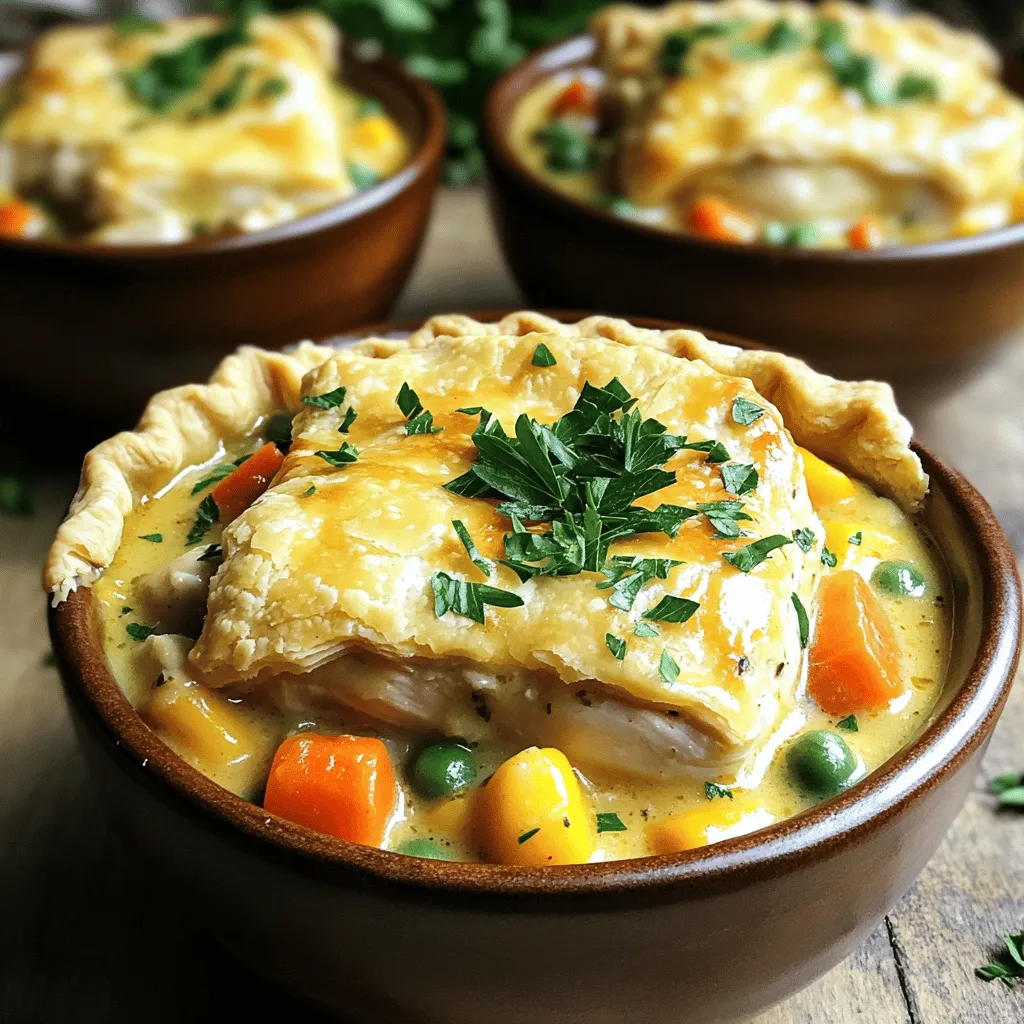
Satisfying Slow Cooker Chicken Pot Pie Recipe
Craving comfort food that’s easy and tasty? My Satisfying Slow Cooker Chicken Pot Pie recipe is just what you need! With tender chicken, fresh veggies,
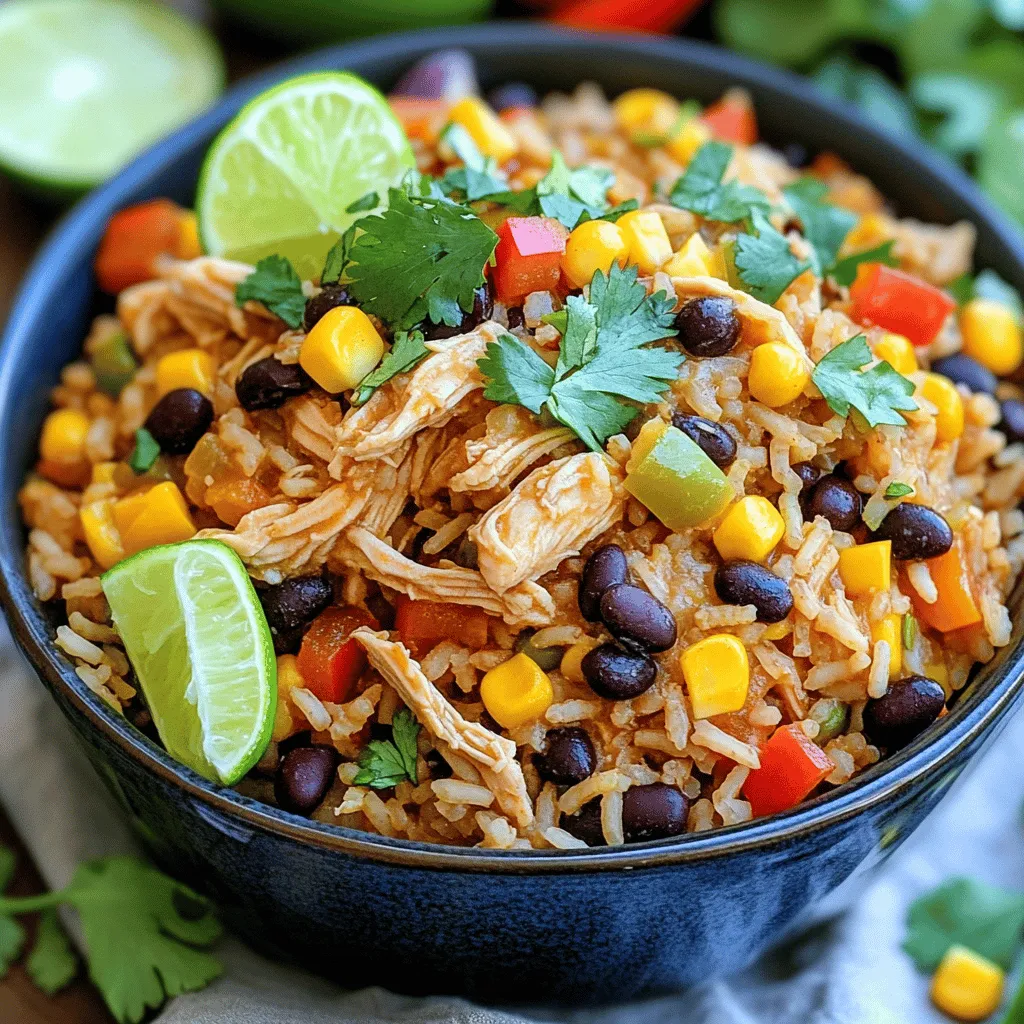
Crock Pot Southwest Chicken and Rice Flavorful Dish
Looking for a quick, tasty meal? My Crock Pot Southwest Chicken and Rice is perfect! It brings together tender chicken, hearty rice, and vibrant veggies
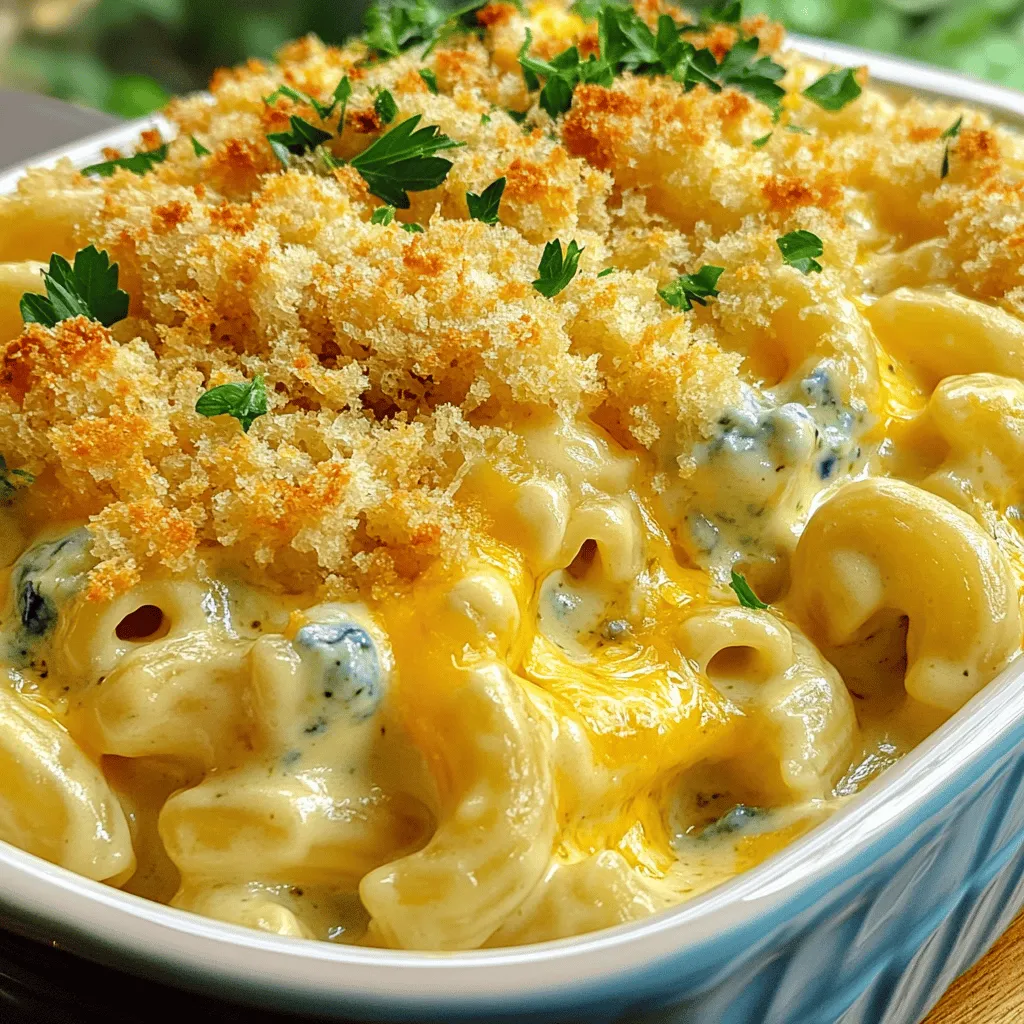
Savory Slow Cooker Four Cheese Mac and Cheese Delight
Craving a cheesy comfort food that’s easy to make? You’ve found it! My Slow Cooker Four Cheese Mac and Cheese Delight brings together creamy cheeses

Mexican Tacos Simple and Flavorful Taco Guide
Welcome to your ultimate guide on Mexican tacos! If you want to create simple and flavorful tacos that impress, you’ve come to the right place.
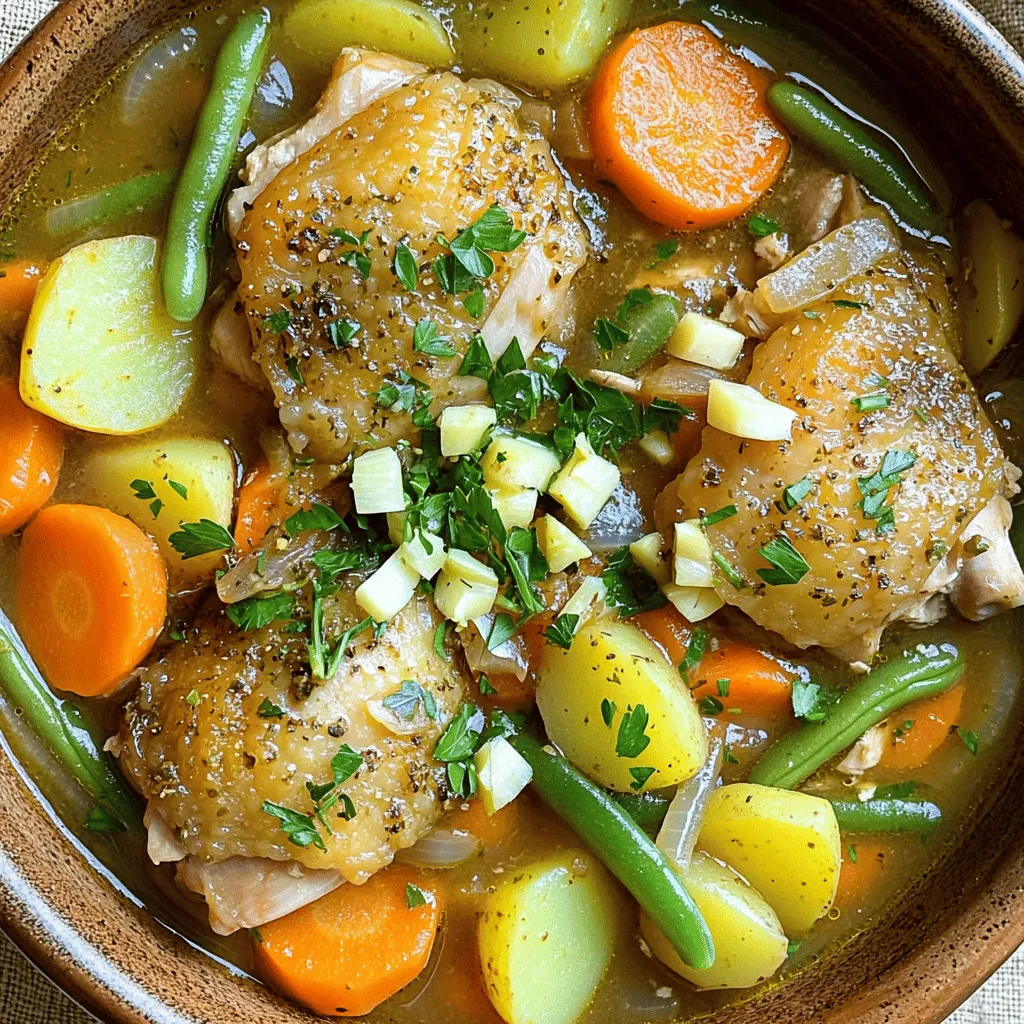
Savory Slow Cooker Chicken Stew Easy Comfort Meal
Want a warm, filling meal? Try my Savory Slow Cooker Chicken Stew! This dish is perfect for busy days. With just a few simple steps,
. Enjoy cooking this delightful meal! Start with chopping the onion, garlic, and ginger. These add depth to the dish. Use a sharp knife for clean cuts. This will help release their flavors. Next, cut the chicken into bite-sized pieces. This ensures even cooking and easy serving. Thighs work best here. They stay juicy and tender. In your slow cooker, layer the onion, garlic, and ginger mix first. This creates a fragrant base. Next, add the chicken pieces on top. Season them with a pinch of salt to enhance flavor. Now, prepare the sauce. In a separate bowl, mix the tomato sauce, coconut milk, and spices. Stir until it is well combined. Pour this mixture over the chicken and onion. Finally, add the stick of butter on top. Do not stir. The butter will melt and create a rich sauce as it cooks. You can cook on low or high settings. Cooking on low takes about 6-8 hours. This allows flavors to meld beautifully. If you’re short on time, use the high setting for 3-4 hours. In both cases, cook until the chicken is tender. It should easily shred apart with a fork. This method ensures you get a rich and creamy butter chicken that you will love. For the full recipe, check out the previous section! To make your butter chicken even better, start with the spices. Adjust the chili powder to fit your taste. If you love heat, add more. For a milder dish, use less. You can also add fresh herbs like cilantro or mint. These will brighten the flavors. Adding more ingredients can deepen the taste. Toss in some diced tomatoes or bell peppers. For a richer sauce, mix in more coconut milk. This will create a creamier texture. Feel free to play with these ideas and find your favorite mix. Sometimes the sauce can get too thick. If this happens, simply add a splash of coconut milk. Stir well and let it cook a bit longer. This will help thin it out while keeping the flavor. To avoid dry chicken, start with good-quality chicken thighs. They stay moist during cooking. Also, do not overcook them. Check the chicken at the end of the cooking time. If it feels tough, it may need less time next time. Serve your butter chicken with basmati rice or warm naan. Both soak up the sauce well. You can also add a side of steamed vegetables for balance. For drinks, a light white wine pairs well. Try a Sauvignon Blanc or a Riesling. If you prefer non-alcoholic options, serve it with mango lassi or a cool soda. These drinks will enhance your meal experience. {{image_2}} You can switch the chicken thighs for chicken breasts. Chicken breasts are leaner, but they may dry out faster. If you want a juicier meal, stick to thighs. For a vegetarian twist, try chickpeas or tofu. Both options soak up the rich sauce well. Do you like it spicy or mild? To make it milder, reduce the chili powder. You can also add more sugar to balance the heat. If you want more spice, add fresh chili or cayenne pepper. Feel free to explore other herbs like curry leaves or fresh mint for a fun twist. For a creamy sauce, stick with coconut milk. If you want a lighter option, use yogurt instead. Greek yogurt gives a nice texture. For non-dairy choices, almond or cashew milk works well too. Each option changes the flavor slightly, so choose what you prefer. For the complete recipe, check out the Full Recipe section above! After you enjoy your Slow Cooker Indian Butter Chicken, store leftovers in airtight containers. Glass or plastic containers work well. Allow the dish to cool before sealing it. This helps keep the chicken fresh. It can last in the fridge for 3 to 4 days. To reheat, use a microwave or a stovetop. If using a microwave, cover the dish to keep moisture in. Stir halfway through heating for even warmth. On the stovetop, heat over low heat and stir often. You can freeze leftovers for up to 3 months. Just make sure to use a freezer-safe container. Butter chicken is quite versatile. You can repurpose it in many ways! Try it in a quesadilla with cheese. Mix it with pasta for a creamy twist. Or, use it as a filling for wraps. You can also top a baked potato with it for a unique meal. Enjoy experimenting with these ideas! Indian Butter Chicken is a rich and creamy dish. It comes from North India. The dish features tender chicken in a spiced tomato sauce. The main flavors come from butter, cream, and spices like garam masala. The taste is both savory and slightly sweet. You can enjoy it with rice or naan. Yes, you can prepare it ahead of time. You can chop the onions, garlic, and ginger. Cut the chicken into bite-sized pieces. Mix the sauce ingredients and store them in the fridge. When you're ready, just add everything to the slow cooker. After cooking, store leftovers in the fridge for up to four days. Common sides include basmati rice and naan bread. You can also add a fresh salad for crunch. Other great options are roasted vegetables or raita. Raita is a yogurt-based side that cools the heat of the spices. Yes, this recipe is great for meal prep. You can make a big batch and store it in containers. Divide it into portions for easy meals during the week. Reheat it in the microwave or on the stove. It stays tasty for several days in the fridge. Absolutely! You can easily change the amount of chicken or sauce. If you want more servings, double the ingredients. For fewer servings, cut them in half. Just keep the same ratios for the spices and sauce. For the complete details, check the Full Recipe section. It will guide you step-by-step to make this delicious dish. Slow Cooker Indian Butter Chicken offers a blend of rich flavors and easy preparation. We discussed key ingredients like chicken, spices, and coconut milk. You learned step-by-step instructions for perfect results and tips to enhance the dish. Storage methods and variations allow for creativity. This recipe is perfect for meal prep or cozy dinners. With its versatility, you can enjoy this tasty dish again and again. Embrace the delicious flavors and make this dish your own!](https://stirredrecipes.com/wp-content/uploads/2025/08/f7eb7126-6a01-4499-aa7a-f0e4b92a5254.webp)
Slow Cooker Indian Butter Chicken Flavorful Dinner Delight
Are you ready to discover a dinner that’s full of rich flavors and warmth? My Slow Cooker Indian Butter Chicken is a game-changer. You’ll love
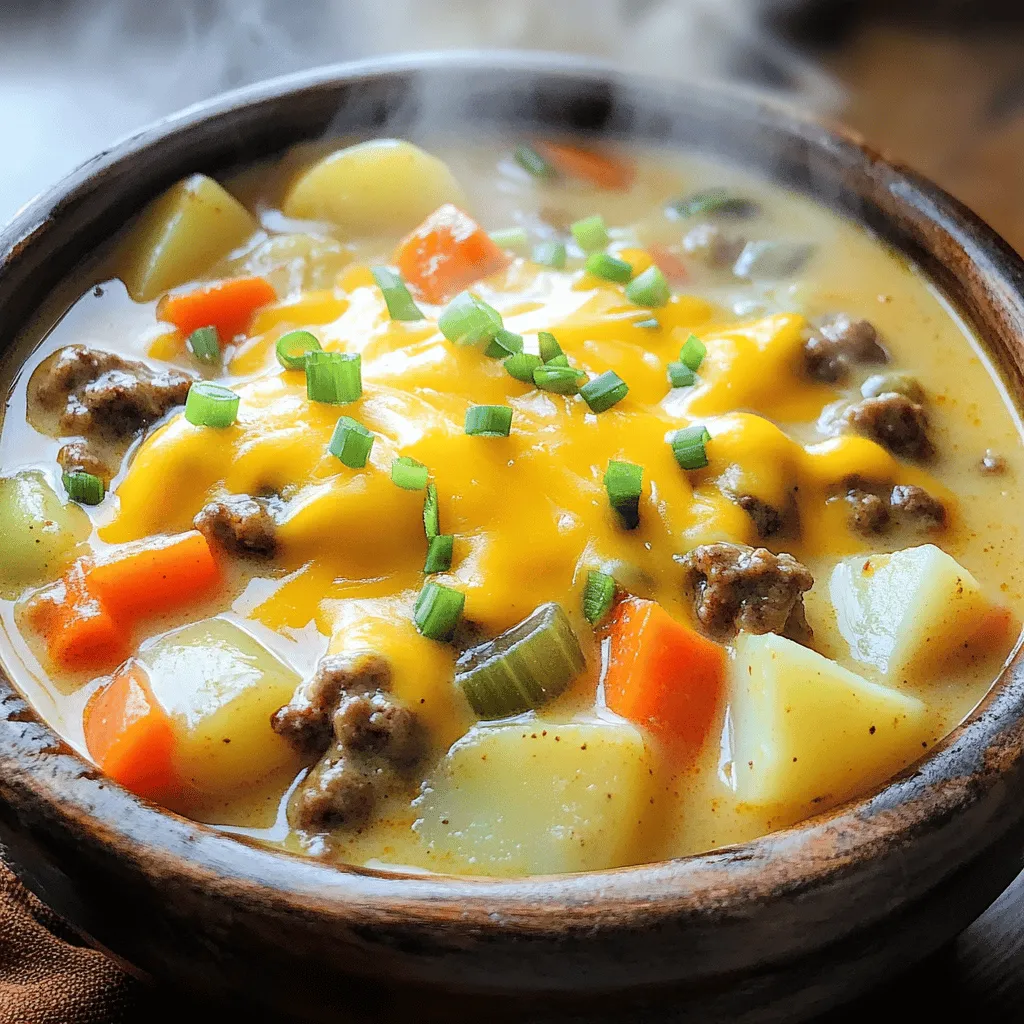
Crock Pot Cheeseburger Soup Simple and Tasty Meal
Crock Pot Cheeseburger Soup is the ultimate simple and tasty meal for busy nights. This creamy, hearty soup brings the classic cheeseburger flavors to your
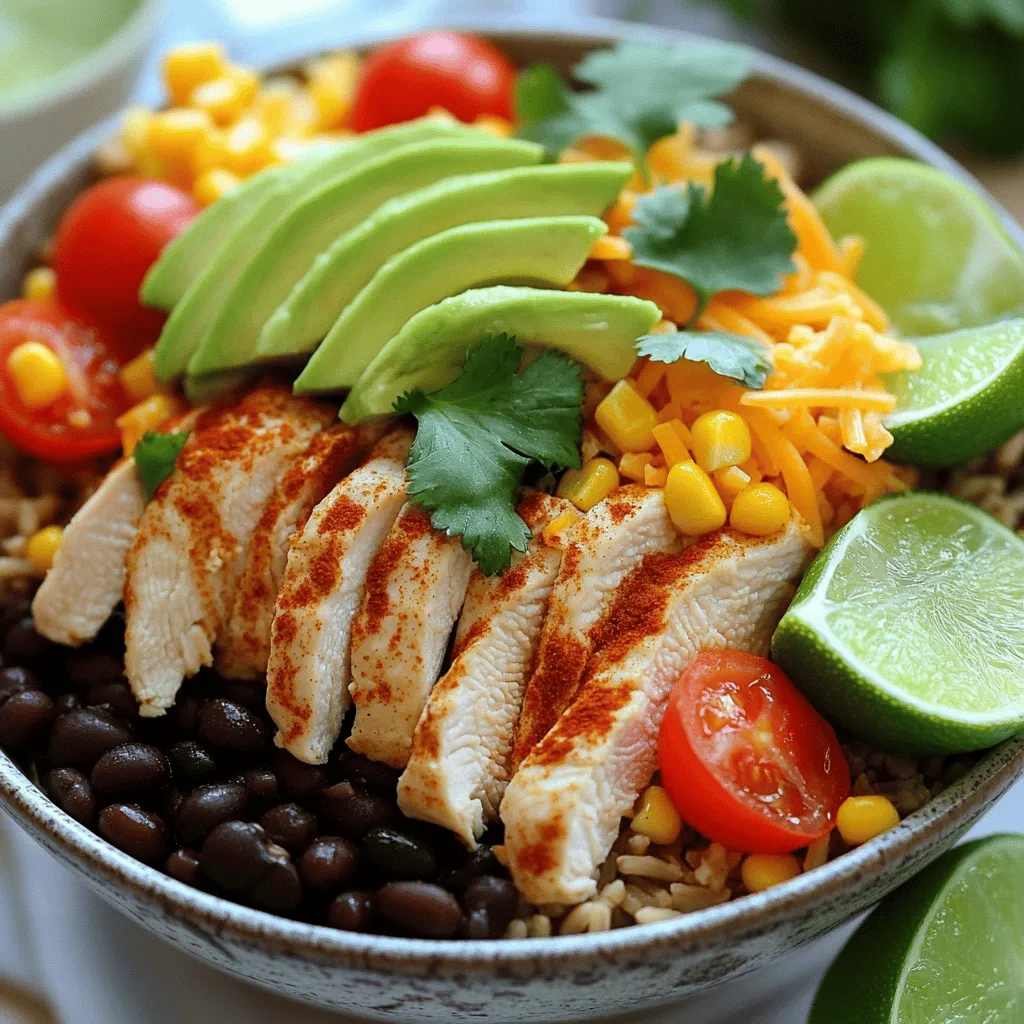
Chicken Burrito Bowl Flavorful and Fresh Meal Idea
Looking for a fresh and tasty meal idea? Try a Chicken Burrito Bowl! This dish combines juicy chicken, fluffy rice, and colorful veggies for a

Mini Baked Chicken Tacos Flavorful and Easy Recipe
Looking for a fun and tasty meal? Mini baked chicken tacos are your answer! They’re easy to make and packed with flavor. In this recipe,