Dinner
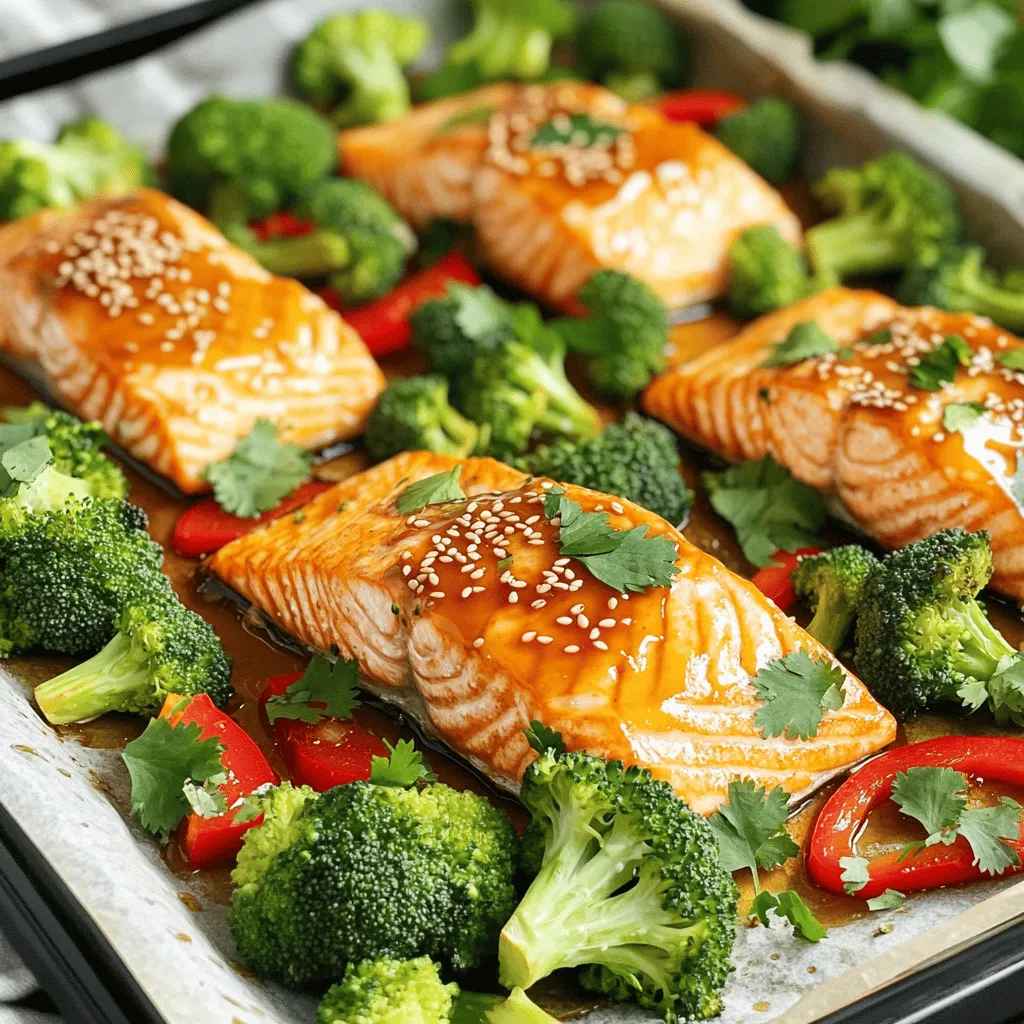
Sheet Pan Honey Garlic Salmon Flavorful Easy Dinner
Looking for a quick and tasty dinner? Try my Sheet Pan Honey Garlic Salmon! This dish is packed with flavor and easy to make. With
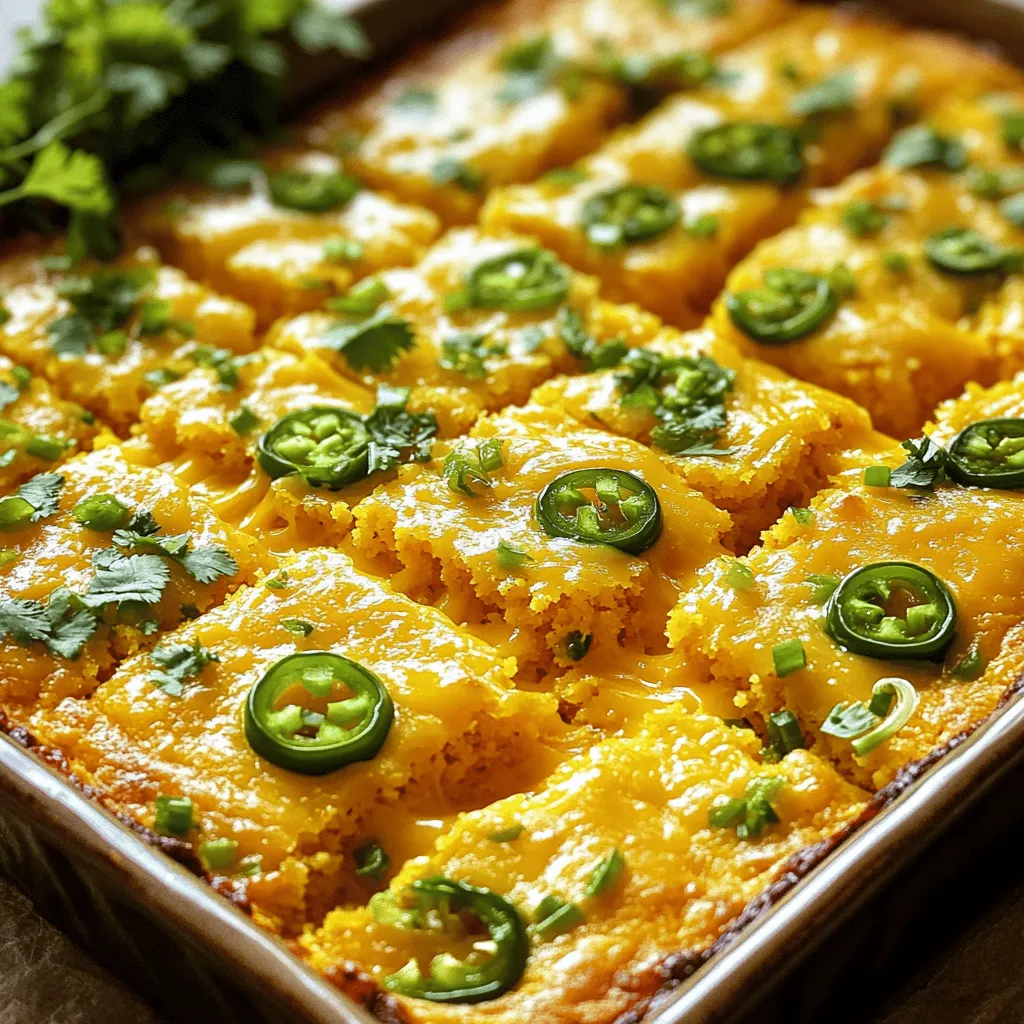
Cheesy Jalapeño Cornbread Casserole Savory Delight
Welcome to a world of flavor with my Cheesy Jalapeño Cornbread Casserole! This dish is an easy way to spice up your meals. It’s cheesy,
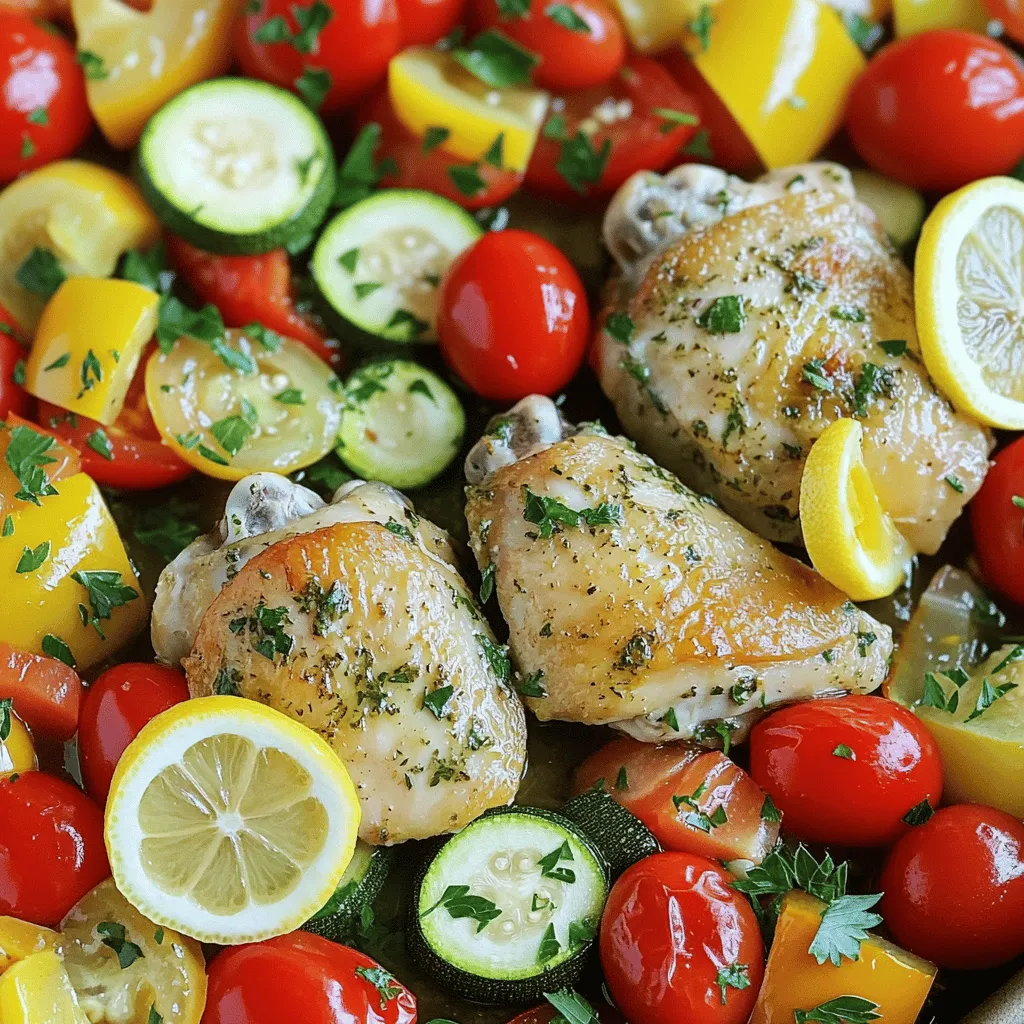
One-Pan Lemon Herb Chicken and Veggies Simple Dish
Looking for a quick and tasty dinner? My One-Pan Lemon Herb Chicken and Veggies recipe is both simple and delicious. You’ll find juicy chicken thighs
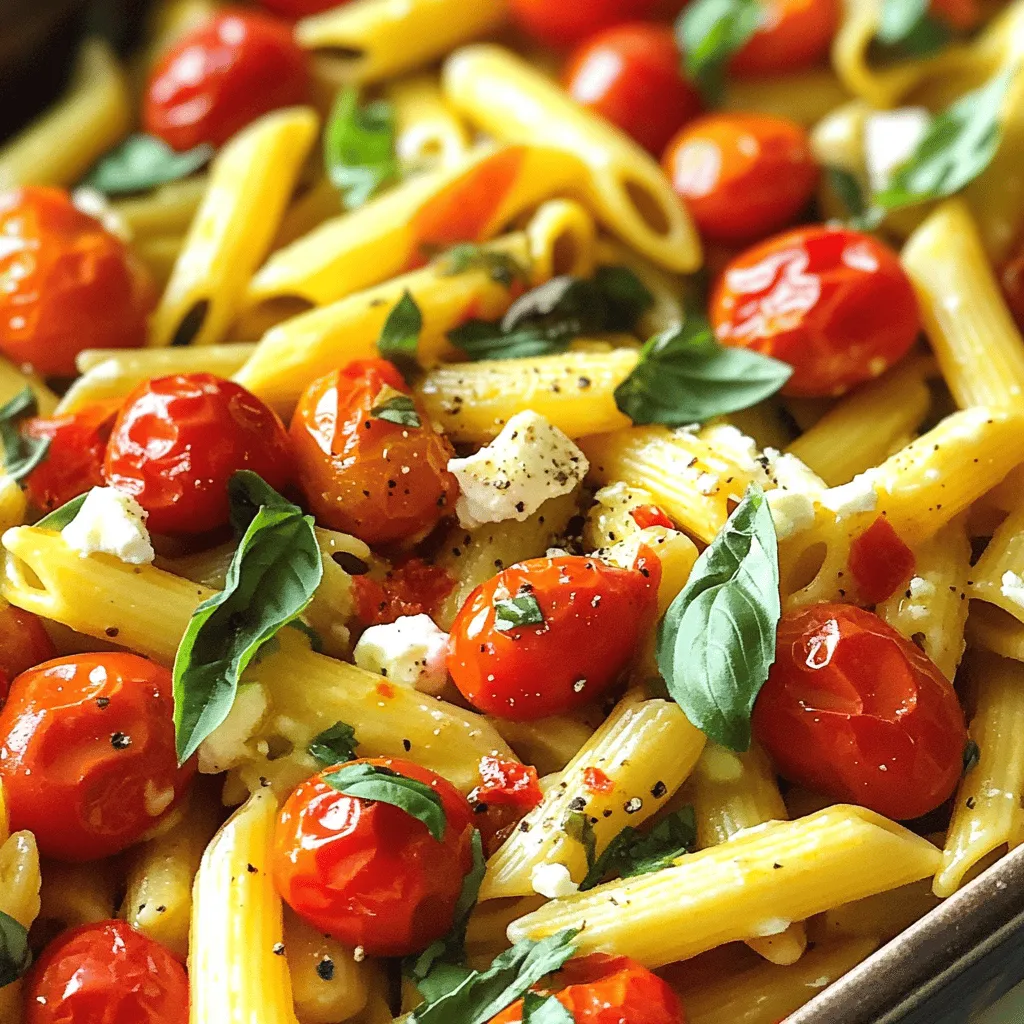
TikTok Baked Feta Pasta Quick and Tasty Dish
If you’re looking for a quick and tasty dish, you’ve landed in the right spot! TikTok Baked Feta Pasta has taken the food world by

Cowboy Butter Chicken Linguine Tasty and Simple Meal
Craving a meal that delivers big flavor with minimal effort? Let me introduce you to Cowboy Butter Chicken Linguine! This tasty dish combines tender chicken,
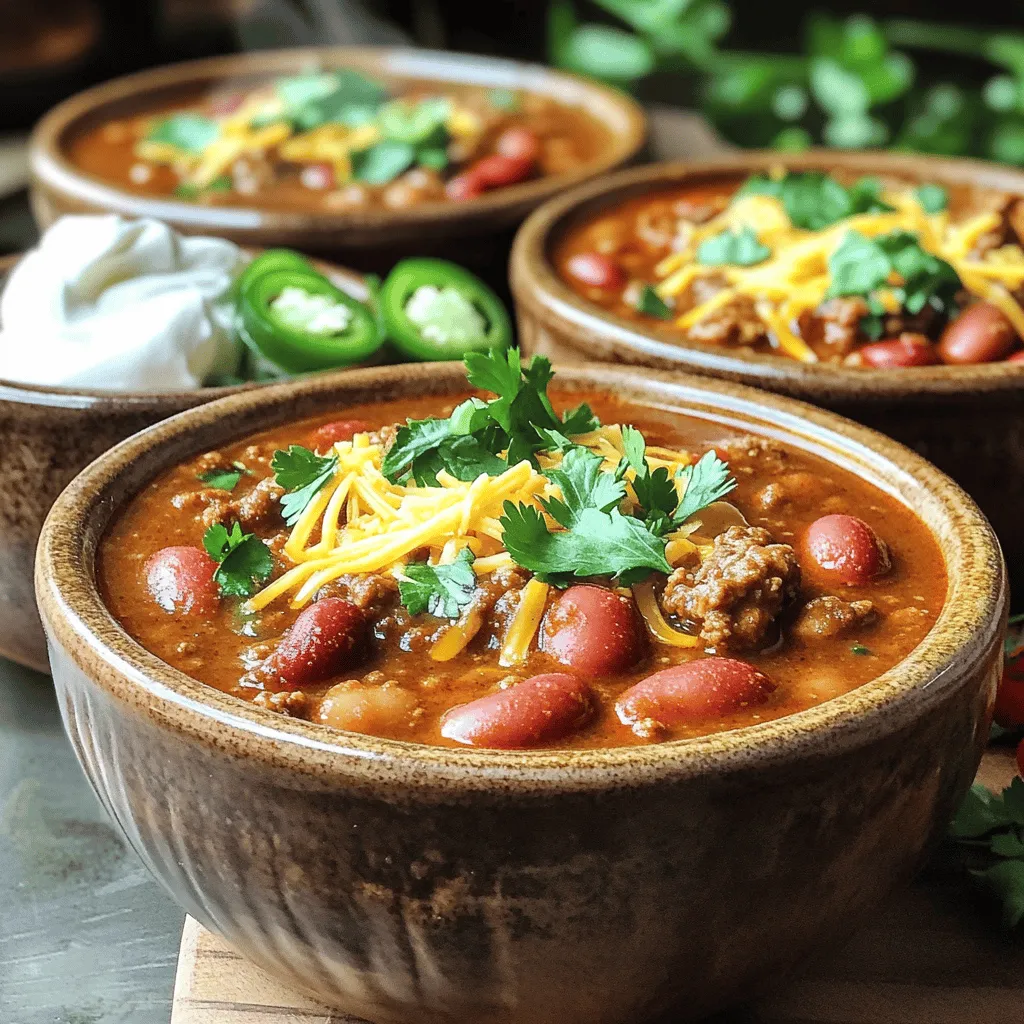
Texas Style Beef Chili Flavorful and Satisfying Dish
Get ready to dive into the rich, hearty world of Texas Style Beef Chili! This mouthwatering dish bursts with flavor and will warm your soul.
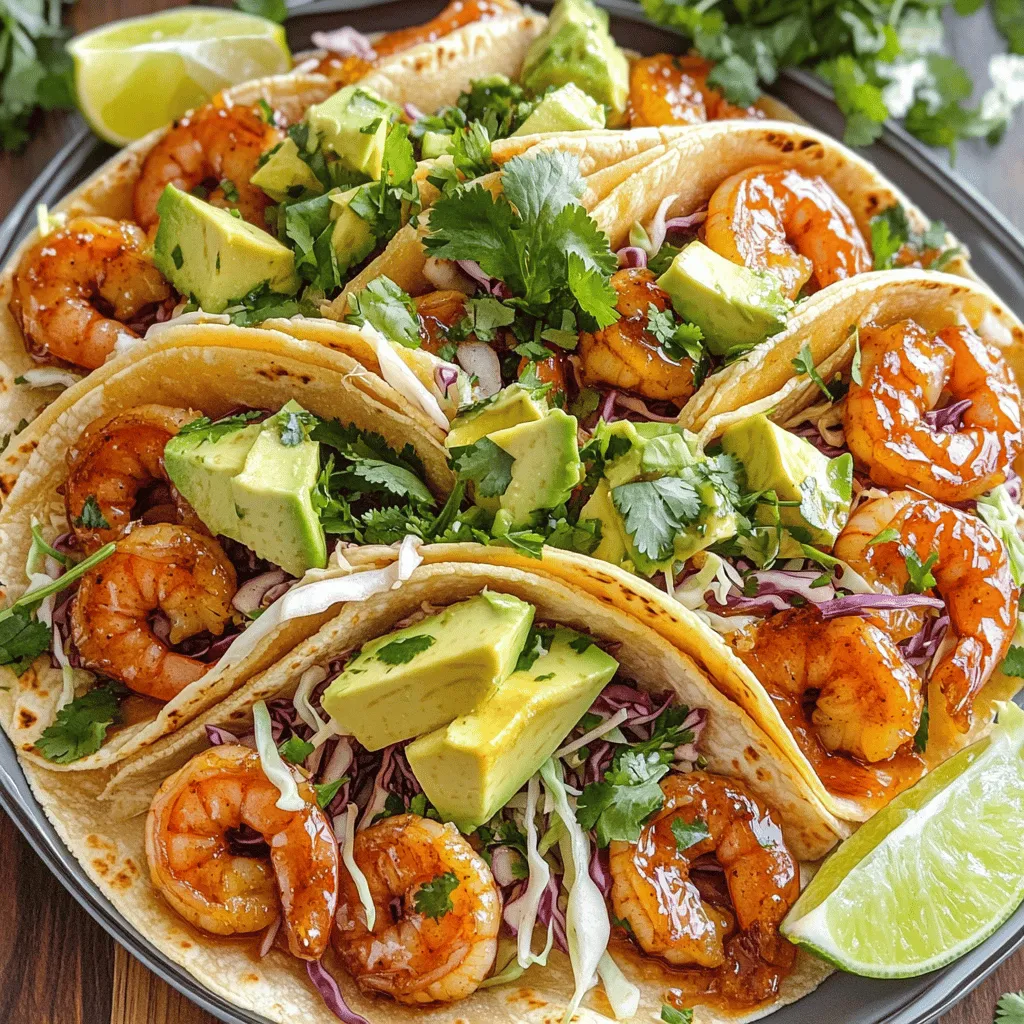
Spicy Honey Garlic Shrimp Tacos Flavorful Delight
Craving a burst of flavor? Let’s spice things up with my Spicy Honey Garlic Shrimp Tacos! These tasty bites combine sweet, savory, and a kick
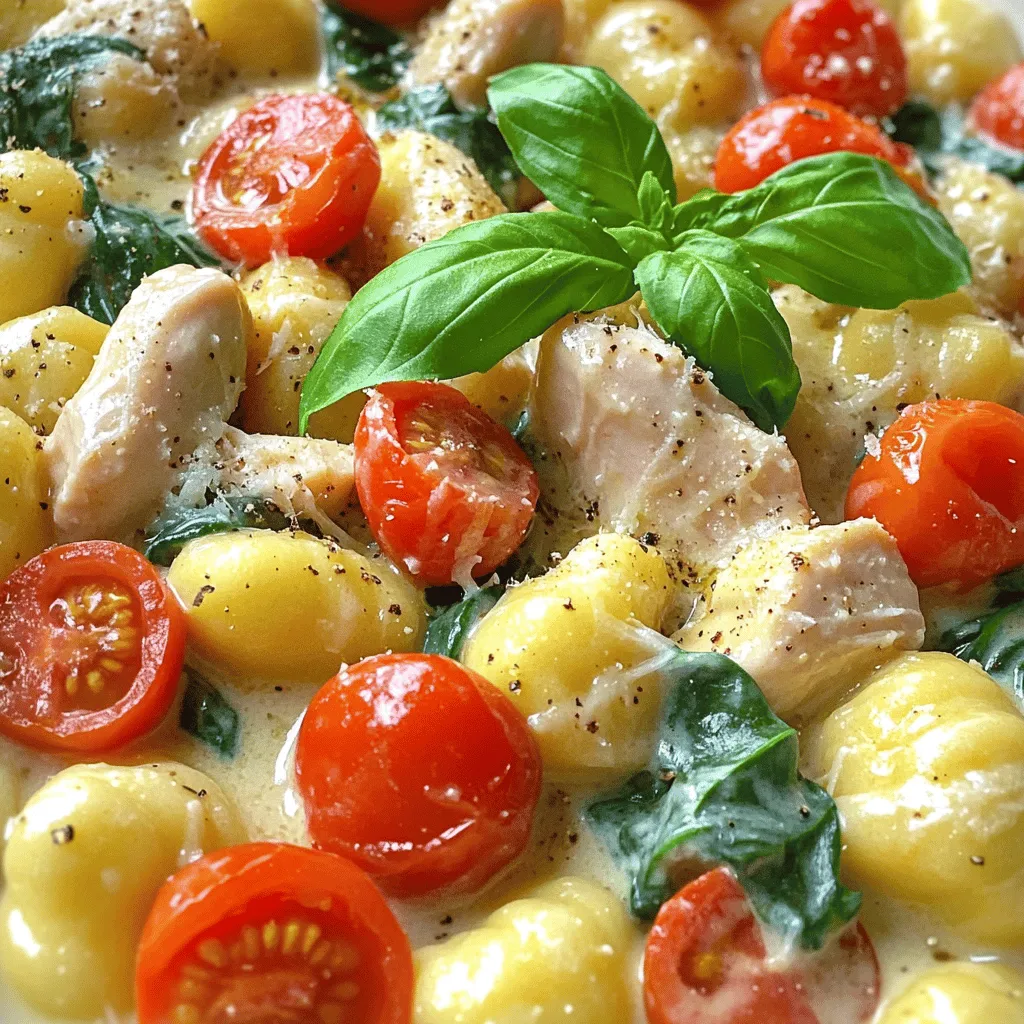
Creamy Tuscan Chicken Gnocchi Flavorful Dinner Delight
Are you ready to elevate your dinner game? Creamy Tuscan Chicken Gnocchi combines tender chicken, pillowy gnocchi, and fresh vegetables, all brought together in a

Gordon Ramsay’s Beef Stroganoff Simple and Delicious Dish
Gordon Ramsay’s Beef Stroganoff is more than just a meal—it’s a culinary adventure you can embark on right in your kitchen! This recipe is simple
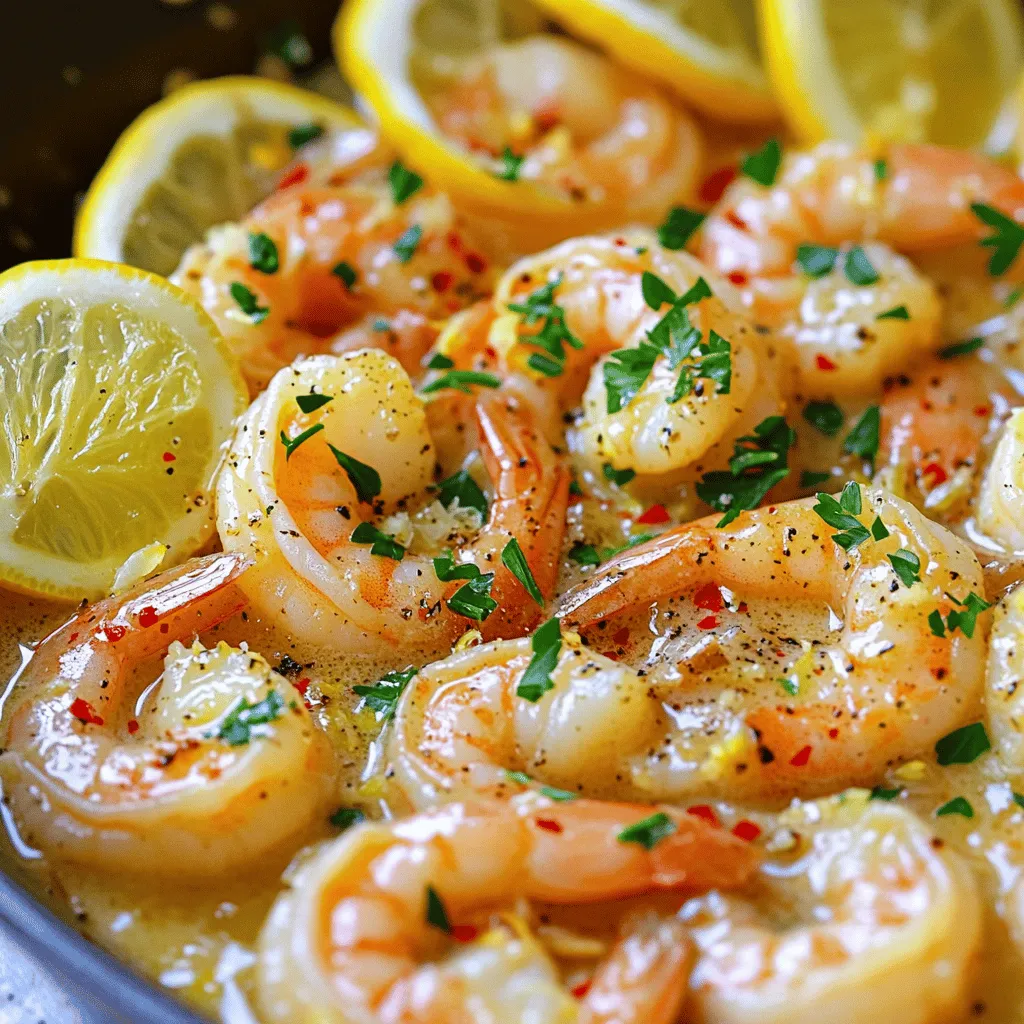
Lemon Garlic Butter Shrimp Skillet Quick and Savory Meal
Looking for a quick and tasty meal? You’ve found it! This Lemon Garlic Butter Shrimp Skillet combines fresh ingredients with bold flavors in just minutes.