Dinner

- 1 pound large shrimp, peeled and deveined - 2 tablespoons olive oil - 3 cloves garlic, minced - Zest and juice of 2 limes - 1 teaspoon smoked paprika - 1 teaspoon cumin - Salt and pepper to taste - 8 small corn tortillas - 1 cup red cabbage, finely shredded - 1 ripe avocado, sliced - Fresh cilantro leaves, for garnish - Lime wedges, for serving Fresh shrimp should look clear and feel firm. Check for a slight sea smell. If you can, buy shrimp from local markets. For veggies, choose bright and crisp cabbage. Avoid any that look wilting or brown. Lime plays a big role in this dish. Its zest adds a bright note. The juice gives a tangy kick that brings all the flavors together. Lime also helps balance the spices, making each bite fresh and zesty. To make the shrimp super tasty, we need to marinate them. First, grab a mixing bowl. Add 1 pound of peeled and deveined shrimp. Then, pour in 2 tablespoons of olive oil. Next, add 3 minced garlic cloves, the zest and juice of 2 limes, 1 teaspoon of smoked paprika, and 1 teaspoon of cumin. Don’t forget to sprinkle in some salt and pepper too. Mix everything well until the shrimp are fully coated. Let them sit for about 15-20 minutes to soak up all that flavor. Cooking shrimp is easy when you know how. Heat a non-stick skillet over medium-high heat. Once hot, place the marinated shrimp in a single layer. Cook them for 2-3 minutes on each side. Look for that lovely pink color. When they turn pink and opaque, they are done. Remove them from heat to keep them juicy. Warming corn tortillas makes them soft and tasty. Use another skillet or a flat griddle for this. Heat the tortillas for about 30 seconds on each side. They should be warm and flexible. If you prefer, you can use flour tortillas instead. Now comes the fun part! Grab a warm tortilla and place some cooked shrimp in the center. Add a handful of finely shredded red cabbage on top. Next, add a few slices of ripe avocado. This adds creaminess and balances the flavors. To finish, sprinkle fresh cilantro leaves over everything. For a zesty kick, serve with lime wedges on the side. Enjoy your zesty lime shrimp tacos! To cook shrimp well, keep these tips in mind: - Use fresh shrimp: Freshness is crucial. Buy shrimp from a trusted source. - Don’t overcook: Shrimp cooks fast. Aim for 2-3 minutes per side. They should turn pink. To boost flavor, try these enhancements: - Add spices: A pinch of chili powder or cayenne can kick it up. - Experiment with citrus: Mix in orange or grapefruit juice for variety. Pair your tacos with tasty sides and drinks: - Cilantro rice: This adds a nice touch. It’s simple to make. - Margaritas: A classic drink that goes well with shrimp tacos. For presentation, follow these tips: - Use colorful plates: Bright colors make your dish pop. - Garnish well: Fresh cilantro and lime wedges add eye appeal. Make your tacos unique with these topping ideas: - Alternative toppings: Try mango salsa or pineapple for sweetness. - Vegetarian option: Use grilled veggies or black beans instead of shrimp. - Spicy kick: Add jalapeños or a spicy sauce for heat. With these tips, you’ll create delicious Zesty Lime Shrimp Tacos that everyone will love! {{image_2}} You can switch up your shrimp tacos with different proteins. Try fish, chicken, or tofu for a new taste. Each protein brings its own flavor. For instance, fish adds a light touch, while chicken gives a hearty bite. Regional shrimp tacos vary by location. In Baja, people love their shrimp tacos with creamy sauces. In the Caribbean, they use fresh mango salsa. These local twists make each bite special. If you need gluten-free options, use corn tortillas. They are naturally gluten-free and full of flavor. You can also try lettuce wraps for a fresh crunch. For low-carb versions, skip the tortillas. Serve the shrimp over a bed of greens. This keeps the meal light and healthy while still being delicious. To change the flavor profile, consider adding fresh herbs. Cilantro, mint, or dill can brighten the dish. For a spicy kick, add jalapeños or hot sauce. Adjust spices according to your taste. Want it bolder? Add more paprika or cumin. If you prefer milder flavors, reduce the spices. This way, you can make the tacos just how you like them! To keep your shrimp fresh, store them in an airtight container. Make sure the shrimp cool down first. Place a paper towel in the container to absorb moisture. This helps keep them from getting soggy. For tortillas, wrap them in foil or plastic wrap. Store them in the fridge to maintain softness. To reheat shrimp, use a skillet over medium heat. This method keeps the shrimp juicy. Cook for about two minutes, just until warm. For tortillas, heat them in a dry skillet for about 30 seconds on each side. This will make them warm and pliable again. Avoid microwave reheating. It can make the tortillas tough. You can freeze leftover tacos for later. Wrap each taco tightly in plastic wrap. Then, place them in a freezer bag, removing as much air as possible. To thaw, place them in the fridge overnight. For cooking from frozen, reheat in a skillet. This keeps the shrimp juicy and the tortillas soft. Yes, you can use frozen shrimp. Just make sure to thaw them first. Place the shrimp in the fridge overnight. If you're short on time, run them under cold water for about 10-15 minutes. After thawing, pat the shrimp dry. This helps the marinade stick better. If you don't have lime juice, you can use lemon juice. Lemon adds a nice tang. Another option is vinegar, such as apple cider or white wine vinegar. Both will give a different taste but still work well. Shrimp cook quickly. Look for a pink color and a firm texture. They should curl into a nice "C" shape. If they turn too tight, they may be overcooked. You can prep the shrimp ahead of time. Marinate the shrimp and store it in the fridge for up to 4 hours. You can also chop the veggies and warm the tortillas just before serving. This keeps everything fresh and tasty. In this blog post, I explored how to make tasty shrimp tacos. We began with the key ingredients, emphasizing freshness, especially for shrimp and veggies. Next, I shared step-by-step instructions for marinating and cooking shrimp, warming tortillas, and assembling your tacos. I provided tips for perfecting your tacos, including serving suggestions and customization ideas. Lastly, I covered variations, storage, and reheating options. By following these steps, you’ll end up with delicious shrimp tacos that impress. Enjoy experimenting with flavors and make them your own!
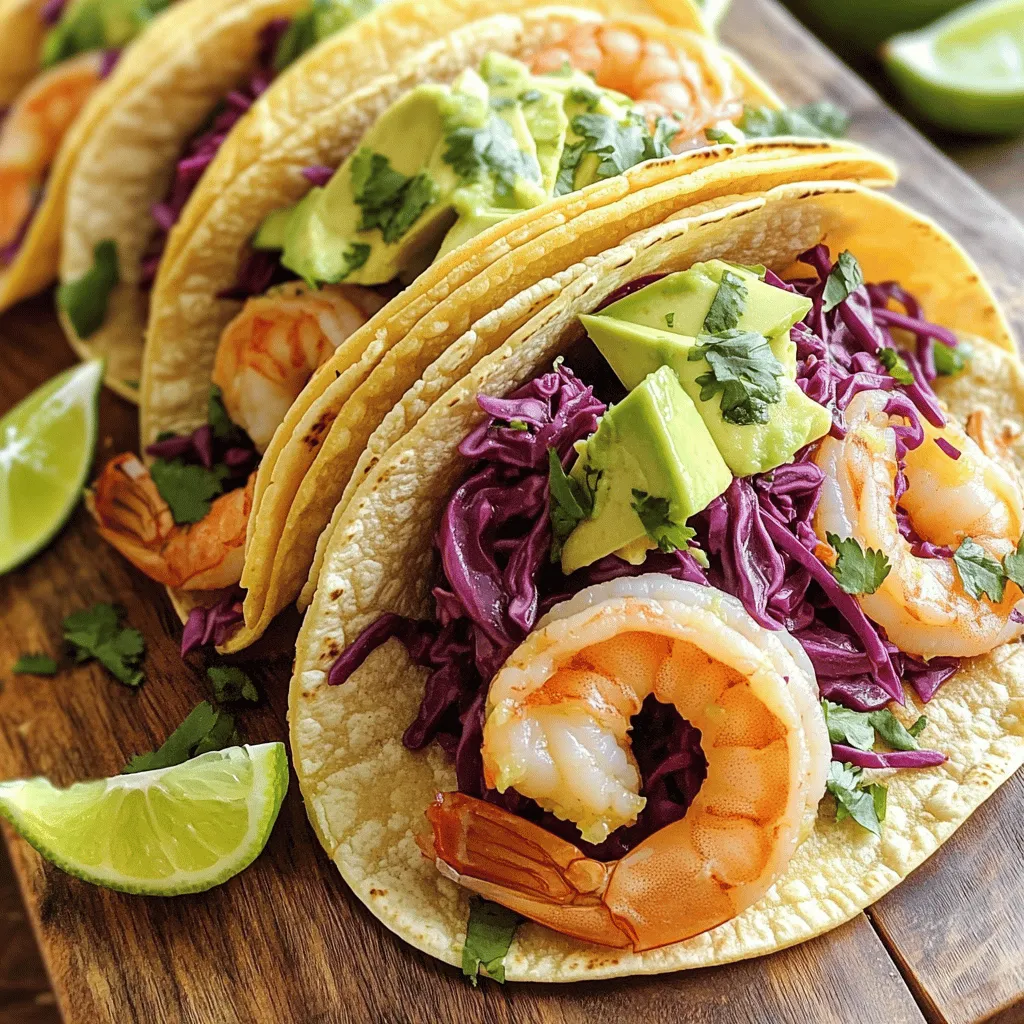
Zesty Lime Shrimp Tacos Flavorful and Easy Recipe
Looking for a tasty meal that’s easy to make? You’re in the right place! In this article, I’ll show you how to whip up zesty
- 4 salmon fillets - 1 bunch asparagus, trimmed - 3 tablespoons Dijon mustard - 2 tablespoons honey - 2 tablespoons olive oil - 2 cloves garlic, minced - Zest and juice of 1 lemon - Salt and pepper to taste - Fresh dill or parsley for garnish When making Lemon Dijon Salmon, you need fresh salmon fillets. Choose fillets that are bright and firm. Look for a nice pink color and avoid any discoloration. The asparagus should be bright green and crisp. Trim the ends for the best texture. The Dijon mustard gives a tangy flavor that pairs well with honey's sweetness. This mix brings a lovely balance to the dish. Olive oil adds richness and helps the salmon stay moist. Minced garlic packs a punch and brings warmth to each bite. Lemon zest and juice brighten the whole dish. They add a fresh taste that makes the salmon shine. A sprinkle of salt and pepper brings out all the flavors. Fresh dill or parsley makes a lovely garnish. It adds a pop of color and herbal notes that enhance the meal. Gather these ingredients, and you are ready to create a flavorful delight! First, preheat your oven to 400°F (200°C). This step helps the salmon cook evenly. Next, grab a baking dish. You want one that fits your salmon fillets well. Lightly grease it with some olive oil to avoid sticking later. In a small bowl, whisk together the Dijon mustard, honey, olive oil, minced garlic, lemon zest, and lemon juice. Mix until all the ingredients blend nicely. The mixture should be smooth and a bit runny. If it feels too thick, add a touch more olive oil. This sauce gives the salmon a great flavor. Now it's time to season the salmon. Sprinkle salt and pepper on both sides of each fillet. Place them in your prepared baking dish. Next, spread the Dijon honey mixture on top of each fillet. Then, take the trimmed asparagus and arrange it around the salmon. Drizzle some olive oil over the asparagus and sprinkle it with salt and pepper. Put the dish in your preheated oven. Bake for 12-15 minutes. Keep an eye on it. The salmon should flake easily with a fork when it’s done. The asparagus should be tender but not mushy. If you want to be sure it's cooked, you can check with a fork or a thermometer. The ideal internal temperature for salmon is 145°F (63°C). When choosing salmon, look for bright, shiny skin. The flesh should feel firm and spring back when pressed. Avoid salmon with a dull color or a strong fishy smell. For cooking, you can grill or pan-sear salmon if you want a crisp skin. These methods add great flavor and texture. To trim asparagus, hold each spear and bend it until it snaps. This point is where the tough part ends. Discard the woody ends, and keep the tender parts. For tender asparagus, cook it until bright green and just tender. A quick steam or sauté works well to maintain its crunch. To amp up the flavor, add spices like paprika or fresh herbs like thyme. These will give your dish a new twist. If you want to change the marinade, try using a sweet soy sauce or a spicy chili paste. These options can give your salmon a whole new taste experience. {{image_2}} What are good alternatives to salmon? If you want to switch it up, you can use other fish like trout or cod. Both have a mild taste that pairs well with lemon and mustard. What different vegetables can I use? You can swap asparagus for green beans, broccoli, or zucchini. Each adds a unique flavor and texture to the dish. What happens if I use different mustards? You can use whole grain mustard for a crunchier texture. Yellow mustard works too, but it has a milder taste. What sweetener options can I try? Instead of honey, you can use maple syrup or agave nectar. This will change the flavor but keep it sweet. Can I grill instead of bake? Yes! Grilling gives the salmon a smoky flavor and nice grill marks. Just cook it for about 6-8 minutes on each side. What skillet methods can I use? You can pan-sear the salmon in olive oil over medium heat. Cook it for 4-5 minutes per side for a crispy outside. After cooking Lemon Dijon Salmon with Asparagus, let it cool first. Place the leftovers in an airtight container. This helps keep the salmon and asparagus fresh. Store it in the fridge if you plan to eat it soon. For longer storage, you can freeze the leftovers. Wrap the salmon and asparagus tightly in plastic wrap. Then, put them in a freezer-safe bag. This will help prevent freezer burn. When reheating salmon, it’s best to do it gently. Preheat your oven to 350°F (175°C). Place the salmon on a baking sheet. Cover it with foil to keep it moist. Heat for about 10-15 minutes. Check if it’s warm throughout. For asparagus, you can place it in the microwave. Heat in short bursts. This way, you won’t overcook it. You want it to stay crisp, not mushy. Leftovers can last in the fridge for about 3 days. Make sure to check for signs of spoilage. If it smells off or looks discolored, it’s best to toss it out. In the freezer, the salmon can stay good for up to 3 months. Keep an eye on it for freezer burn. If you see ice crystals, it’s time to use it or discard it. You can pair Lemon Dijon Salmon with a variety of side dishes. Here are some tasty options: - Rice: Jasmine or basmati rice works well. - Quinoa: This adds a nice nutty flavor. - Mashed Potatoes: Creamy mashed potatoes balance the dish. - Salad: A fresh green salad adds crunch and color. - Roasted Vegetables: Carrots or bell peppers complement the salmon. For drinks, a light white wine or sparkling water is great. Yes, you can use mild fish like: - Tilapia: It cooks quickly and has a light flavor. - Cod: This fish has a flaky texture and holds up well. - Trout: It has a rich taste and pairs nicely with lemon. When using these fish, adjust cooking times. Cook tilapia and cod for about 10-12 minutes. Trout can take around 12-15 minutes. To check if your salmon is done, look for these visual cues: - The salmon should change from translucent to opaque. - It should flake easily with a fork. The ideal internal temperature for salmon is 145°F (63°C). Use a meat thermometer for accuracy. This ensures your meal is safe and tasty. This post covered a simple, tasty Lemon Dijon Salmon recipe. We explored important ingredients like salmon, asparagus, Dijon mustard, and honey. I provided clear steps for baking and added tips for freshness and flavor. You can also try variations with different fish or cooking methods. Remember, store leftovers properly for later enjoyment. With these insights, you can create a delicious meal for any occasion! Enjoy the cooking process and share this recipe with others who love good food.
Lemon Dijon Salmon with Asparagus Flavorful Delight
Ready for a flavor-packed meal? This Lemon Dijon Salmon with Asparagus is a treat for your taste buds! With fresh salmon, crisp asparagus, and a
To make these tasty meatballs, you need a few key items: - 1 pound ground beef - ½ pound ground turkey - 1 cup breadcrumbs - 1 large egg - 3 cloves garlic, minced - 1 teaspoon ginger, minced - ½ cup green onions, sliced These meats provide a nice mix of flavor. The breadcrumbs keep them moist and give them a good texture. The garlic and ginger add a nice kick to the dish. To boost the flavor, use: - 1 tablespoon soy sauce - 1 tablespoon sesame oil - 1 cup sweet chili sauce - 1 tablespoon rice vinegar - 1 teaspoon sriracha (optional for extra heat) - Salt and pepper to taste Soy sauce and sesame oil add depth to the meatballs. Sweet chili sauce brings sweetness and heat, while rice vinegar gives brightness. Sriracha is for those who like it hot! To finish off your dish, use: - Fresh cilantro for garnish Garnish with cilantro for a fresh touch. Serve these meatballs with rice or noodles for a complete meal. They also work well as appetizers at parties! To make the meatball mix, start with a large bowl. Add 1 pound of ground beef and ½ pound of ground turkey. Then, toss in 1 cup of breadcrumbs and 1 large egg. Next, add 3 cloves of minced garlic and 1 teaspoon of minced ginger. Include ½ cup of sliced green onions, 1 tablespoon of soy sauce, and 1 tablespoon of sesame oil. Season with salt and pepper to taste. Use your hands to mix everything together. Be gentle; overmixing can make them tough. Roll the mixture into 1-inch meatballs and place them on a baking sheet. Browning the meatballs adds extra flavor. Heat a non-stick skillet over medium heat. Place a few meatballs in the skillet, about 3-4 at a time. Cook them for about 3-4 minutes, turning until they are brown all over. If you prefer a quicker method, you can skip this step and move to the slow cooking. In a separate bowl, mix together 1 cup of sweet chili sauce, 1 tablespoon of rice vinegar, and 1 teaspoon of sriracha for a kick. Once your meatballs are browned, transfer them to the slow cooker. Pour the sweet chili sauce mixture over the meatballs, making sure they are well coated. Cover the slow cooker and set it to low for 4-6 hours or high for 2-3 hours. When the meatballs are cooked through and tender, gently stir them to coat in the sauce. For a fresh touch, garnish with chopped cilantro before serving. To get the best meatball texture, mix your ingredients well. Use your hands, but don’t overmix. Overmixing can make meatballs tough. A good mix binds the meat and keeps them juicy. Aim for a mixture that holds together but is not too dense. For great sauce flavor, balance is key. Combine sweet chili sauce, rice vinegar, and sriracha for a kick. Taste test as you mix; adjust to your liking. Adding soy sauce and sesame oil deepens the flavor. Fresh cilantro at the end adds a burst of freshness. If you're short on time, use the high setting for 2-3 hours. This still gives tender meatballs. For more flavor, cook on low for 4-6 hours. This longer time allows flavors to meld better. Either way, check that your meatballs reach 165°F for safety. {{image_2}} You can switch up the protein in these meatballs. Instead of beef and turkey, try chicken or pork. Ground chicken gives a lighter taste. Ground pork adds richness and flavor. You can also use plant-based meats for a vegan option. The texture and taste may change, but they can still be delicious. You control the heat in your meatballs. If you like spice, add more sriracha. You could also mix in some crushed red pepper flakes. For a mild version, leave out the sriracha entirely. Taste the sauce first and adjust it to your liking. Everyone can enjoy their bowl of meatballs, no matter the heat level. While sweet chili sauce is great, you can try other sauces too. Teriyaki sauce adds a sweet and savory touch. A peanut sauce gives a nutty flavor that pairs well. You can even serve the meatballs with a tangy BBQ sauce. Each sauce brings a new twist to the dish. Experiment to find your favorite! Once you enjoy your sweet chili meatballs, store leftovers in an airtight container. This keeps them fresh. Make sure to let them cool before sealing. They will stay good in the fridge for up to three days. Label your container to remember when you made them. When you are ready to eat your leftovers, you can reheat them in several ways. The microwave is quick and easy. Heat them on medium for about one to two minutes. Stir halfway through for even heat. You can also reheat them on the stove. Just add a splash of water or sauce to keep them moist. If you want to save meatballs for later, freezing is a great option. Place them in a single layer on a baking sheet. Freeze for about an hour until firm. Then, transfer them to a freezer bag. Remove air from the bag to avoid freezer burn. They will last for up to three months in the freezer. When ready to use, thaw them overnight in the fridge. Then, reheat as usual. Yes, you can use pre-made meatballs. They save time and still taste great. Just choose a brand you like. Heat them in your slow cooker with the sweet chili sauce. Cook on low for about 4 hours. This method works well for busy days. To make the recipe gluten-free, swap regular breadcrumbs for gluten-free ones. Also, use gluten-free soy sauce. Many brands offer this option. Check labels to ensure they are safe. This way, you can enjoy the dish without worry. Sweet chili meatballs pair well with several sides. Try serving them with rice or noodles. You can also add steamed broccoli or a fresh salad. These options balance the sweet and spicy flavors nicely. Leftovers can last in the fridge for up to four days. Keep them in an airtight container. Reheat in the microwave or on the stove. Ensure they reach a safe temperature before eating. Enjoy your tasty meatballs again! This blog post covered how to make sweet chili meatballs. We explored the main and extra ingredients that add great flavor. I shared step-by-step instructions for preparing and cooking the meatballs. You also learned tips for the best texture and sauce taste. We discussed variations to customize your meal and how to store leftovers. Remember, sweet chili meatballs are fun and easy to make. Enjoy experimenting with flavors and sharing them with friends!
Slow Cooker Sweet Chili Meatballs Flavorful Dish
Are you ready to make dinner time special? My Slow Cooker Sweet Chili Meatballs are bursting with flavor and easy to prepare! You can enjoy
- 8 oz (about 225g) pasta of choice (e.g., penne, fusilli) - 2 cups fresh broccoli florets - 1 cup sharp cheddar cheese, shredded - 1 cup heavy cream - 1/2 cup vegetable broth - 1/2 cup grated Parmesan cheese - 2 cloves garlic, minced - 1 tablespoon olive oil - Salt and pepper to taste - 1/4 teaspoon crushed red pepper flakes (optional) - Fresh parsley for garnish If you don’t have sharp cheddar, use mild cheddar or even gouda. For a lighter dish, swap heavy cream with half-and-half or coconut milk. You can use chicken broth instead of vegetable broth for extra flavor. If you want a gluten-free meal, choose gluten-free pasta. To add more greens, feel free to mix in spinach or peas. Always select fresh broccoli. Look for bright green florets and firm stems. When choosing cheese, pick blocks of cheese over pre-shredded for better melting. High-quality pasta cooks better and holds the sauce well. Use fresh garlic for the best taste. It adds a strong flavor that elevates the dish. Start by boiling salted water in a large pot. Add 8 oz of your favorite pasta. Cook it until it is al dente, which usually takes about 8-10 minutes. With just 3 minutes left, toss in 2 cups of fresh broccoli florets. This cooks the broccoli perfectly without losing its bright color. When done, drain the pasta and broccoli. Save 1/2 cup of the pasta water for later. In the same pot, heat 1 tablespoon of olive oil over medium heat. Add 2 cloves of minced garlic and sauté them for about 1 minute. The garlic should smell amazing, but be careful not to burn it. Next, pour in 1/2 cup of vegetable broth and 1 cup of heavy cream. Stir the mixture and bring it to a gentle simmer. Gradually add the reserved pasta water until it reaches the creaminess you like. Now, lower the heat. Stir in 1 cup of sharp cheddar cheese and 1/2 cup of grated Parmesan cheese. Mix until it melts and becomes smooth. Season with salt, pepper, and crushed red pepper flakes if you want a little heat. Finally, add the cooked pasta and broccoli to the sauce, tossing gently to coat everything in that creamy goodness. To get that creamy texture, start with heavy cream. This thick cream gives the sauce its rich feel. Add vegetable broth for extra flavor and to thin the sauce. When mixing in the cheeses, turn the heat down. This helps them melt smoothly without clumping. If the sauce is too thick, add a bit of the reserved pasta water. This water helps achieve the right creaminess. Broccoli cooks fast. To keep it bright and crisp, add it to the pasta pot during the last three minutes of cooking. This way, the broccoli stays tender but not mushy. If you cook it too long, it loses its green color and crunch. Keep an eye on the clock to time it just right. For leftovers, let the pasta cool before storing it. Place it in an airtight container. The pasta will keep well in the fridge for up to three days. To reheat, do it slowly on low heat. You can add a splash of heavy cream or pasta water to help restore creaminess. Avoid reheating in the microwave, as it can dry out the dish. {{image_2}} You can make this dish heartier by adding protein. Chicken and shrimp work great. For chicken, use cooked, shredded meat. Add it to the sauce when you mix in the cheese. For shrimp, cook them in the same pot as the garlic. Sauté them until they turn pink. Then, add the sauce and pasta. You’ll have a filling meal that everyone will love. If you want a vegetarian twist, skip the meat. You can add other veggies instead. Peas, bell peppers, or spinach add color and flavor. Just sauté them along with the garlic. Toss them in with the pasta and sauce. This makes the dish fresh and fun while keeping it meat-free. Want to change the flavor? Try different cheeses! Swap the sharp cheddar for gouda or mozzarella. This will give a new taste and texture. You can also mix cheese types for depth. Add a touch of cream cheese for extra creaminess. Each choice brings its own charm, making every meal unique. To store your creamy broccoli cheddar pasta, let it cool first. Place the pasta in an airtight container. This keeps it fresh and prevents drying. You can store it in the fridge for up to three days. Make sure to label the container with the date. This helps you remember when you made it. When you’re ready to enjoy leftovers, reheat them gently. You can use the microwave or a pot on the stove. If using a microwave, place the pasta in a bowl. Add a splash of water or broth to keep it moist. Heat in short bursts, stirring in between. If reheating on the stove, use low heat. Stir often to avoid burning the cheese. You can freeze creamy broccoli cheddar pasta, but it may change texture. To freeze, let it cool completely. Transfer the pasta to a freezer-safe container. Seal tightly to prevent freezer burn. It can last up to three months in the freezer. When ready to eat, thaw it overnight in the fridge. Reheat as mentioned above for the best results. Yes, you can prepare this dish ahead of time. Cook the pasta and broccoli as usual. Then, store them in the fridge. Keep the cheese sauce separate to maintain creaminess. When ready to eat, reheat the sauce and mix everything together. You can use many pasta types for this dish. I suggest penne or fusilli for good sauce clinging. Other shapes like shells or rotini also work well. Just pick your favorite pasta and enjoy! Yes, you can swap heavy cream for half-and-half or whole milk. The sauce will be lighter, but still tasty. If you want a non-dairy option, try cashew cream or coconut milk. Adjust seasonings to balance flavors. To make this dish gluten-free, use gluten-free pasta. Many brands offer great options that taste good. Just check the package for cooking times. The rest of the ingredients are gluten-free, so you’re all set! You learned how to make Broccoli Cheddar Pasta from scratch. We covered key ingredients and helpful tips. You saw how to cook, combine, and store your dish. Remember, you can add proteins or spice things up with different cheeses. Focus on preventing overcooked broccoli and achieving creamy sauce. With these steps, you can enjoy a tasty meal anytime. Now, take this knowledge and create a dish that impresses your family and friends. Your cooking journey just got a whole lot better!
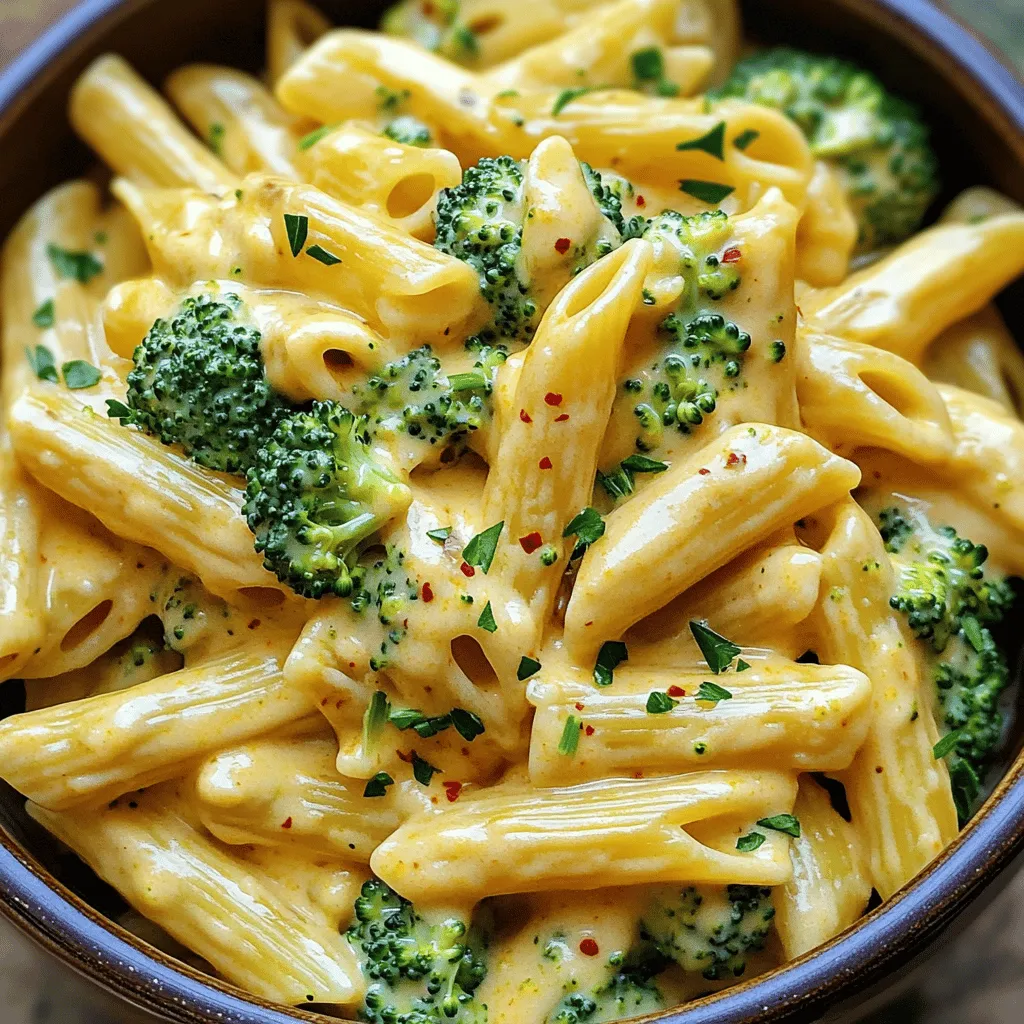
Creamy Broccoli Cheddar Pasta Quick and Tasty Meal
Looking for a quick and tasty meal? You’ll love this creamy broccoli cheddar pasta! It’s packed with flavor and comes together in no time. Whether
- 4 salmon fillets - 2 cups broccoli florets - 1 bell pepper, sliced - 1 tablespoon olive oil - 1/4 cup low-sodium soy sauce - 2 tablespoons honey or maple syrup - 1 tablespoon rice vinegar - 2 cloves garlic, minced - 1 teaspoon fresh ginger, grated - Sesame seeds - Chopped green onions - Salt and pepper to taste When I make teriyaki salmon and broccoli, I love how simple the ingredients are. You only need fresh salmon, bright veggies, and a few pantry staples. The main stars are the salmon and broccoli. I choose salmon fillets that look fresh and firm. For the broccoli, I use florets that are bright green. I also like to add a bell pepper for extra color and crunch. Olive oil helps to bring all the flavors together. The teriyaki sauce is what makes this dish shine. I mix soy sauce with honey or maple syrup for sweetness. Rice vinegar adds a nice tang, while garlic and ginger give the sauce depth. Together, they create a rich flavor that coats the salmon and veggies perfectly. For garnish, I sprinkle sesame seeds and chopped green onions. They add a nice crunch and fresh taste. I also season with salt and pepper to make everything pop. Gathering these ingredients makes cooking this meal fun and easy. You can find most of them at your local store. - Preheat oven to 400°F (200°C). - Prepare the sheet pan with parchment paper. This helps with easy cleanup. - In a small bowl, whisk together: - 1/4 cup low-sodium soy sauce - 2 tablespoons honey or maple syrup - 1 tablespoon rice vinegar - 2 cloves garlic, minced - 1 teaspoon fresh ginger, grated This sauce adds a sweet and tangy flavor to your salmon. - Place 4 salmon fillets on one side of the prepared sheet pan. - Season with salt and pepper. - Brush generously with teriyaki sauce. - On the other side, add: - 2 cups broccoli florets - 1 sliced bell pepper - Drizzle 1 tablespoon of olive oil over the veggies. - Season them with salt and pepper. - Pour the remaining teriyaki sauce over the vegetables and toss to coat. - Bake for 15-20 minutes. - Check when the salmon flakes easily with a fork. - Ensure the broccoli is tender and bright green. - Let the dish sit for a couple of minutes. - Serve hot and garnish with sesame seeds and chopped green onions for extra flavor. - Use fresh ingredients for the best taste. Fresh salmon and bright broccoli make a big difference. - Customize the teriyaki sauce to fit your taste. You can add more honey for sweetness or more garlic for a punch. - To check salmon doneness, look for the color change. Cook until it turns opaque and flakes easily with a fork. - For perfectly cooked broccoli, you want it bright green and tender. Avoid overcooking to keep it crisp. - Involve children in meal prep with simple tasks. Let them brush the teriyaki sauce on the salmon. - They can help wash and cut vegetables with a safe knife. Cooking together makes it fun and teaches them skills. {{image_2}} You can change up the veggies in this dish. Try using snap peas for a sweet crunch. Carrots add a nice color and flavor too. You might also like to add zucchini or asparagus. Just chop them into bite-sized pieces. This way, they cook well with the salmon and broccoli. Feel free to mix and match your favorites. The teriyaki sauce pairs well with many veggies. Not in the mood for salmon? You can use tilapia or cod instead. These fish cook well and have a mild taste. If you want a vegetarian option, try tofu. Use firm tofu for the best results. Press it to remove water, then cut it into cubes. Coat the tofu in the teriyaki sauce like you do the salmon. It will soak up all that great flavor. To make this dish gluten-free, use tamari instead of soy sauce. Tamari is a gluten-free soy sauce that tastes great. Check the labels on honey and rice vinegar to ensure they are gluten-free too. This way, everyone can enjoy the tasty teriyaki salmon and broccoli without worries. To keep your teriyaki salmon and broccoli fresh, store leftovers in the fridge. First, let the dish cool down to room temperature. Then, place it in an airtight container. This helps to lock in the flavor and moisture. I recommend using glass containers. They are sturdy and do not retain odors. To reheat the salmon and broccoli, use your oven or microwave. For the oven, preheat it to 350°F (175°C). Place the leftovers on a baking sheet. Cover it with foil to keep moisture in. Heat for about 10-15 minutes, or until warm. If using a microwave, place the food in a microwave-safe dish. Heat it in short bursts of 30 seconds. Stir in between to ensure even heating. When stored correctly, your teriyaki salmon and broccoli will last about 3 to 4 days in the fridge. Make sure to check for any off smells or changes in color before eating. If you do not plan to eat it within that time, freeze it. Properly stored, it can last up to three months in the freezer. Yes, you can use frozen salmon. Just thaw it fully before cooking. Place the salmon in the fridge overnight or use cold water to speed up thawing. This helps the fish cook evenly. You can serve teriyaki salmon with rice or quinoa. Both add a nice base to soak up the sauce. You might also try a side salad for extra crunch and freshness. Salmon is done when it flakes easily with a fork. The center should look opaque and not translucent. You can also use a food thermometer; it should read 145°F (63°C) for safe eating. Yes, you can meal prep teriyaki salmon and broccoli. Cook the dish, let it cool, and store it in airtight containers. It will last for up to three days in the fridge. Just reheat before eating! This blog post covered a simple teriyaki salmon and broccoli dish. We went through the ingredients you'll need and the step-by-step instructions for making it. The tips and tricks section shared ways to enhance flavor and ensure perfect cooking. Variations showed you can adapt this recipe easily. Finally, I shared storage info and answered FAQs for your convenience. With easy preparation and cooking, you can enjoy a tasty meal that's nutritious and fun to make!
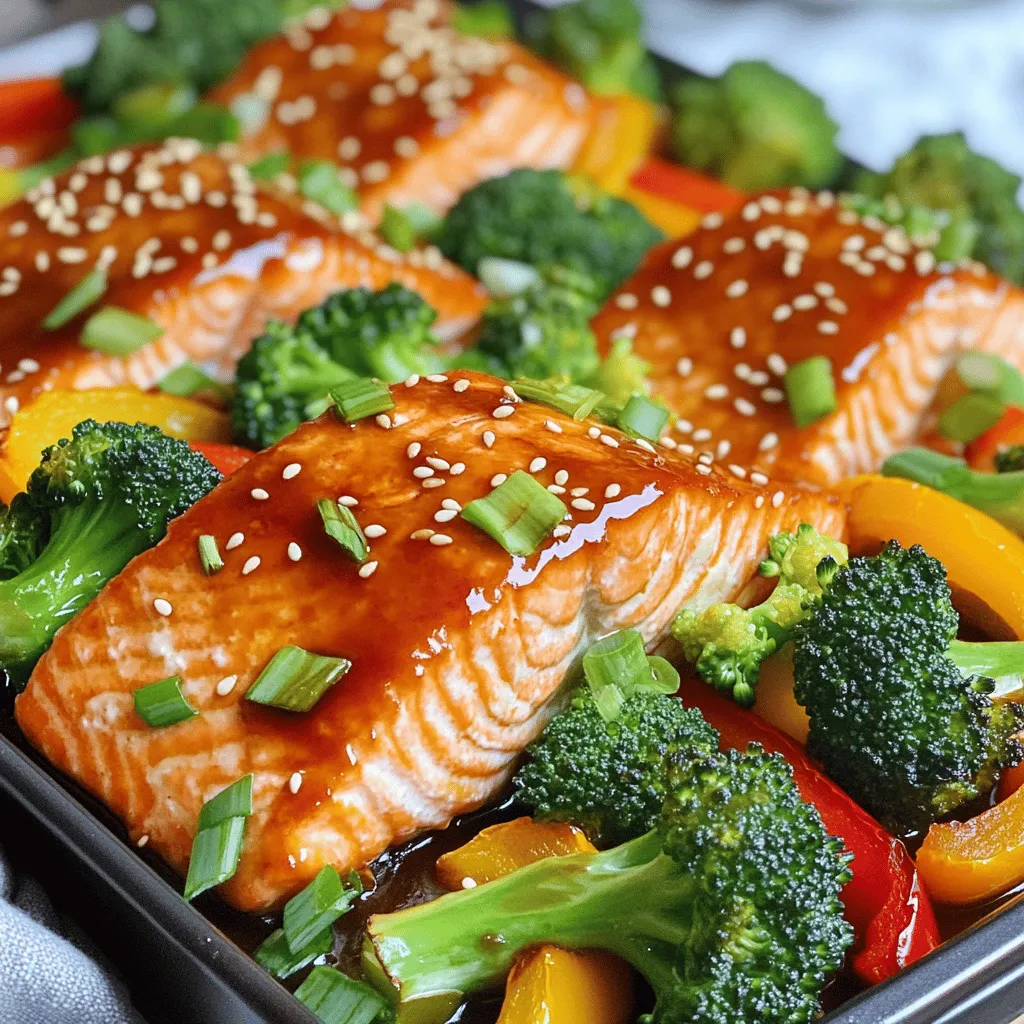
Teriyaki Salmon & Broccoli Sheet Pan Tasty Delight
Looking for a quick and tasty dinner idea? This Teriyaki Salmon & Broccoli Sheet Pan dish is perfect for you! With just a few easy
- 1 block (14 oz) firm tofu, pressed and cubed - ¼ cup honey (or maple syrup for a vegan option) - 3 tablespoons soy sauce (low sodium) - 3 cloves garlic, minced - 1 tablespoon fresh ginger, minced - 2 tablespoons vegetable oil - 1 tablespoon rice vinegar - 1 cup broccoli florets - 1 cup cooked brown rice (or quinoa) - 2 green onions, sliced - Sesame seeds for garnish To make Sticky Honey Garlic Tofu Bowls, you need simple yet powerful ingredients. Tofu is the star of the dish. It absorbs flavors well, making it a great canvas for the sweet and tangy sauce. Honey or maple syrup adds a touch of sweetness. If you want a vegan option, choose maple syrup. Soy sauce brings the umami punch that makes this dish truly savory. Garlic and ginger add warmth and depth. For extra texture and flavor, you’ll need vegetable oil to fry the tofu until it’s crispy. Rice vinegar brightens the dish and balances the sweetness. Broccoli florets add color and nutrients. You can also use brown rice or quinoa as a hearty base. For garnishing, green onions give a fresh crunch. A sprinkle of sesame seeds adds a nice finish. Each ingredient plays a role in creating a balanced, tasty meal. Gather all these ingredients, and you’ll be ready to create a delicious and healthy meal. - Pressing the Tofu: Start by removing excess moisture from the tofu. Wrap it in a clean kitchen towel and place a heavy item on top. Let it sit for at least 15 minutes. This helps the tofu absorb flavors better. - Cutting into Cubes: Once pressed, take the tofu out of the towel. Cut it into bite-sized cubes. Aim for pieces about 1-inch in size. This ensures even cooking. - Coating with Cornstarch: In a mixing bowl, toss the cubed tofu with cornstarch. Make sure each piece is coated evenly. This step is key for achieving crispy tofu. - Frying the Tofu: Heat vegetable oil in a large non-stick skillet over medium-high heat. Add the tofu cubes gently. Fry them for about 8-10 minutes, turning occasionally until they are golden brown and crispy. Once done, remove the tofu from the skillet and set it aside. - Sautéing Garlic and Ginger: In the same skillet, lower the heat to medium. Add minced garlic and ginger. Sauté them for 1-2 minutes until they become fragrant. This step builds flavor in your sauce. - Combining Sauce Ingredients: Pour in honey or maple syrup, soy sauce, rice vinegar, and sesame oil. Stir everything together. Let it simmer for 2-3 minutes until it thickens slightly. - Timing for Tenderness: Toss in the broccoli florets into the skillet with the sauce. Cook for an additional 3-4 minutes. You want the broccoli tender but still bright green. - Combining with Sauce: After the broccoli cooks, return the crispy tofu to the skillet. Gently mix everything together, cooking for an extra minute to combine the flavors. - Layering Ingredients in Bowls: Take your bowls and add the cooked brown rice (or quinoa) as the base. Then, spoon the sticky honey garlic tofu and broccoli mixture on top. - Garnishing for Presentation: Finish by topping your bowls with sliced green onions and a sprinkle of sesame seeds. This adds flavor and makes your dish look beautiful. Tips for Crispy Tofu To get crispy tofu, start by pressing it well. Remove the extra moisture. I usually let it sit for at least 15 minutes. After pressing, cut the tofu into cubes. Toss these cubes in cornstarch. This helps create that perfect crunch when frying. Heat oil in a non-stick skillet. Fry the tofu until golden brown on all sides. This usually takes about 8-10 minutes. Alternatives to Tofu If you want to skip tofu, you can try tempeh. It has a nice texture and absorbs flavors well. Chickpeas are another great option. They add protein and a different taste. You can even use seitan for a chewy bite. Each option brings its own flavor, so feel free to experiment. Adjusting Sweetness The honey gives the sauce a sweet touch. If you want less sweetness, use less honey. Maple syrup is a great vegan substitute. It adds a rich flavor while keeping it sweet. If you prefer a tangy twist, add a bit more rice vinegar. This balances the sweetness nicely. Adding Spice To kick up the heat, add red pepper flakes or sriracha. Start with a small amount and taste as you go. If you want depth, consider adding a dash of sesame oil. It adds warmth and a nutty taste. Spice adjustments can really make the dish your own. Best Sides These sticky honey garlic tofu bowls pair well with steamed vegetables. Broccoli, carrots, and snap peas are great choices. You can also serve them with a fresh salad. A simple cucumber salad adds a nice crunch. Meal Prep Ideas These bowls are perfect for meal prep. Cook a large batch of brown rice or quinoa. Divide it into containers for the week. Store the tofu and sauce separately to keep things fresh. You can quickly reheat and enjoy a healthy meal any day! {{image_2}} You can make this dish vegan by swapping honey for maple syrup. Maple syrup gives a similar sweetness with a unique flavor. It's a great choice for plant-based eaters. You can also add more veggies. Try bell peppers, carrots, or snap peas. They bring color and nutrients to the bowl. Plus, they taste great with the sauce. If you want a different protein, tempeh works well. It has a firm texture and absorbs flavors nicely. Another option is chickpeas. They are packed with protein and fiber. You can use them instead of tofu for a hearty meal. Simply sauté them in the sauce for added flavor. For a gluten-free dish, use tamari instead of soy sauce. Tamari has a rich taste and is gluten-free. It makes the sauce just as tasty. You can also change the grain. Instead of brown rice, try quinoa or cauliflower rice. Both options keep the dish light and healthy. To keep your sticky honey garlic tofu fresh, store it in an airtight container. This way, it stays moist and flavorful. Place the tofu and broccoli mixture in the container, along with the cooked brown rice or quinoa. - Shelf Life: When stored properly, the dish lasts about 3 to 4 days in the fridge. Always check for any signs of spoilage before eating. Reheating your tofu bowls can be simple. Use a microwave for quick heat or a skillet for better texture. - Best Methods for Reheating: For the microwave, place the tofu bowls in a safe dish, cover lightly, and heat for about 1 to 2 minutes. Stir halfway through to ensure even heating. For the skillet, add a splash of water or oil and heat on medium. Stir occasionally until warm. - Retaining Texture and Flavor: To keep the tofu crispy, reheat it in a skillet rather than the microwave. This method revives the crunch and flavor. Freezing your sticky honey garlic tofu bowls is great for meal prep. It allows you to enjoy this dish later. - Freezing Portions: Divide the tofu bowls into single servings. Place them in freezer-safe containers or bags. Remember to remove as much air as possible to prevent freezer burn. - Thawing and Reheating: When ready to eat, move a portion from the freezer to the fridge for about 6 to 8 hours to thaw. Reheat using the instructions above for the best results. You can use several tasty options instead of tofu. Here are some good choices: - Tempeh: A firm soy product with a nutty flavor. - Chickpeas: Canned or cooked, they add protein and fiber. - Cauliflower: Roast it for a hearty, low-calorie option. - Seitan: A wheat-based meat substitute that has a chewy texture. - Portobello mushrooms: Great for a meaty bite. These alternatives can work well in this recipe. Each will bring its own flavor and texture. Yes, you can make it low-carb. Here are some substitutes: - Replace brown rice with cauliflower rice for fewer carbs. - Use zucchini noodles instead of rice or quinoa. - Add more non-starchy veggies like bell peppers or spinach. These swaps will keep your meal tasty while reducing carbs. Meal prep is simple with this recipe. Here are some tips: - Store tofu and sauce separately from the rice or quinoa. This keeps everything fresh. - Use airtight containers to keep the meal fresh longer. - Cook a big batch of tofu and sauce for the week. - Pre-portion servings for easy grab-and-go meals. These steps make it easy to enjoy your Sticky Honey Garlic Tofu Bowls anytime. Serving this dish can be fun and creative. Here are some ideas: - Serve in deep bowls for a cozy feel. - Top with extra green onions or sesame seeds for crunch. - Pair with a side salad or steamed veggies for color. - Add a drizzle of sriracha for heat. These ideas can help make your meal look and taste even better! This blog post provides a clear guide to making Sticky Honey Garlic Tofu Bowls. We discussed key ingredients like tofu, honey, soy sauce, and garlic. I shared step-by-step instructions to prepare and cook the dish, including tips for perfecting tofu and enhancing the sauce. You can explore variations for different diets and find storage tips for leftovers. I hope this recipe inspires you to create a delicious meal. Enjoy your cooking adventure!
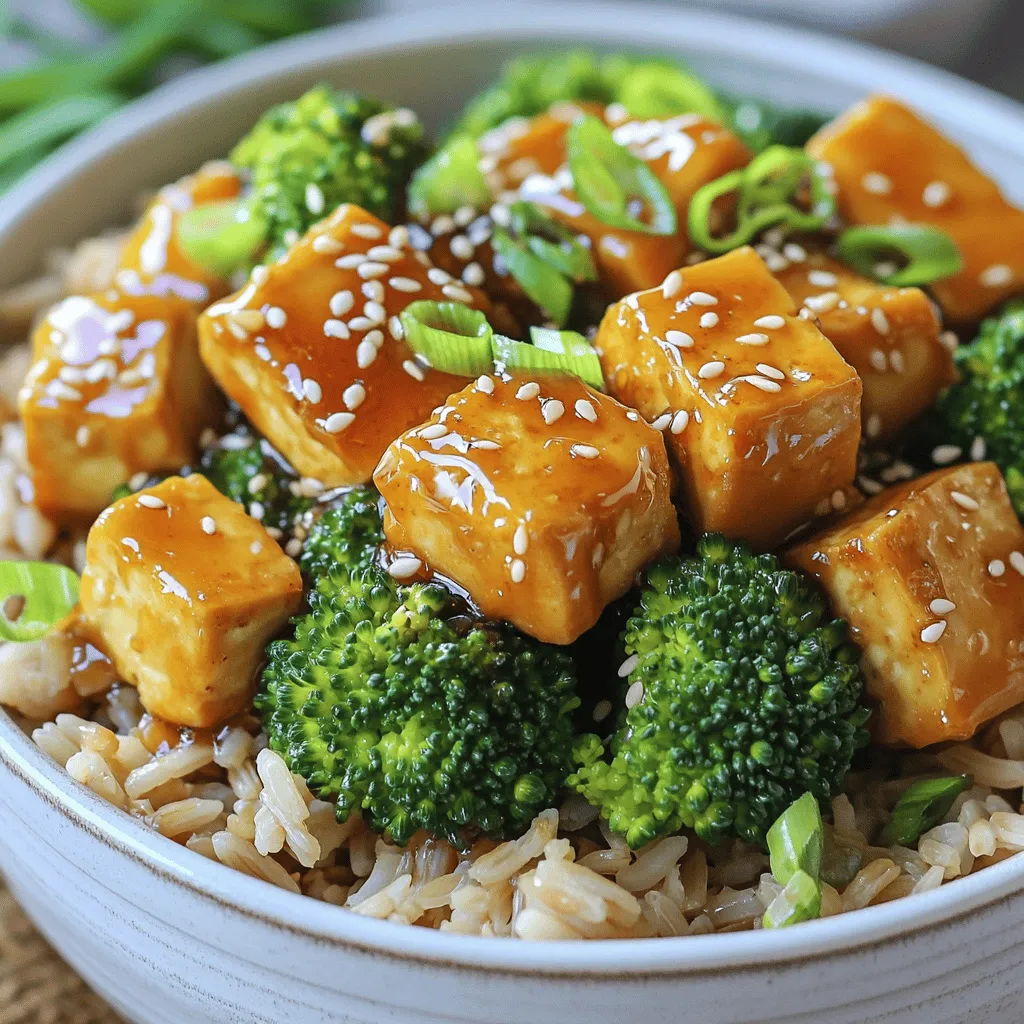
Sticky Honey Garlic Tofu Bowls Flavorful and Healthy Meal
If you crave a tasty meal that’s both healthy and satisfying, you’re in the right place! Sticky Honey Garlic Tofu Bowls are packed with flavor
For this tasty dish, you will need: - 1 lb Brussels sprouts, trimmed and halved - 2 tablespoons miso paste (white or yellow) - 3 tablespoons pure maple syrup - 2 tablespoons olive oil - 1 tablespoon soy sauce (or tamari for gluten-free) - 1 cup pecans, roughly chopped - 1 teaspoon garlic powder - Salt and pepper to taste You can add a few extra touches: - 1 teaspoon black sesame seeds (for garnish) If you want to mix it up, try these: - Use coconut aminos instead of soy sauce for a soy-free option. - Swap pecans with walnuts or almonds for a different crunch. - Maple syrup can be replaced with agave nectar for a vegan option. First, gather your ingredients. You need: - 1 lb Brussels sprouts, trimmed and halved - 2 tablespoons miso paste - 3 tablespoons pure maple syrup - 2 tablespoons olive oil - 1 tablespoon soy sauce - 1 cup pecans, roughly chopped - 1 teaspoon garlic powder - Salt and pepper to taste Next, preheat your oven to 400°F (200°C). This step is crucial for even cooking. In a large bowl, whisk together the miso paste, maple syrup, olive oil, soy sauce, garlic powder, salt, and pepper. Make sure it’s smooth and well mixed. Now, add the halved Brussels sprouts to the bowl. Toss them well in the miso mixture. You want every sprout to be coated evenly. This will give them a nice flavor. Spread the Brussels sprouts on a lined baking sheet. Make sure they are in a single layer. This helps them roast evenly. Now sprinkle the chopped pecans on top. They will add a great crunch. Put the baking sheet in the oven. Roast for 20 to 25 minutes. Stir halfway through to ensure they cook well. You want them to be tender and golden brown. When they are done, take them out and let them cool for a few minutes. These Miso Maple Brussels Sprouts are perfect for any meal. They make a great side dish for roasted meats or a hearty grain bowl. If you like, sprinkle some black sesame seeds on top. They add a pop of flavor and color. Serve them warm and enjoy the tasty goodness! To get the best roasted Brussels sprouts, follow these tips. First, make sure the oven is at 400°F (200°C). This heat helps the sprouts become tender and golden. Spread the Brussels sprouts in a single layer on the baking sheet. This gives them space to cook evenly. To add extra crunch, mix in the pecans halfway through roasting. One common mistake is overcrowding the baking sheet. If you pile the sprouts too close, they will steam instead of roast. Another mistake is not checking on them. Stir the sprouts halfway through cooking to avoid burning. Lastly, don’t skip the salt and pepper. They bring out the sweet and salty flavors in this dish. You can boost the flavor of your Miso Maple Brussels Sprouts in many ways. Try adding a squeeze of lemon juice before serving for a bright taste. For a spicy kick, add a pinch of red pepper flakes to the miso mix. If you love herbs, fresh thyme or rosemary can add a nice touch. Each of these options will make your dish even more special. {{image_2}} You can make this dish vegan by using tamari instead of soy sauce. Tamari is gluten-free, so it works for those with gluten issues. Both white and yellow miso pastes are vegan-friendly. Add-ins can elevate the flavor. Try adding chopped apples or cranberries for sweetness. You can also mix in some cooked quinoa for texture and extra nutrition. In fall, swap Brussels sprouts for roasted butternut squash. In spring, try asparagus. These swaps keep the dish fresh and exciting throughout the year. After enjoying your Miso Maple Brussels Sprouts, let them cool. Place leftovers in an airtight container. Store them in the fridge for up to four days. This keeps them fresh and tasty. To reheat, use the oven for best results. Preheat your oven to 350°F (175°C). Spread the sprouts on a baking sheet. Heat for about 10-15 minutes. This helps revive their flavor and crispness. You can also use a microwave if you’re in a hurry. Heat them in 30-second bursts, stirring in between, until warm. If you want to save some for later, freezing works well. Cool the Brussels sprouts completely first. Then, spread them on a baking sheet in a single layer. Freeze for about an hour. After that, transfer them to a freezer bag. Remove as much air as possible. They can last up to three months in the freezer. When ready to eat, thaw in the fridge overnight and reheat as mentioned. Yes, you can use different nuts. Almonds or walnuts work well too. They will add a nice crunch. You can even try sunflower seeds for a nut-free option. Just chop them roughly and sprinkle them on top like the pecans. These Brussels sprouts go great with many dishes. You can serve them with roasted chicken or grilled fish. They also pair well with rice or quinoa for a veggie meal. If you like, add a salad for extra freshness. For crispier Brussels sprouts, roast them for 25-30 minutes. Be sure to stir them halfway through. This helps them brown nicely and get that crunchy texture. If you want more crunch, leave them in longer but watch closely. In this blog post, I covered the key elements for making delicious Miso Maple Brussels Sprouts. We explored essential ingredients, cooking steps, and serving ideas. I offered tips to enhance your dish and shared how to store any leftovers. You can even adapt the recipe based on your diet or preferences. Remember, experimenting leads to great flavors. Enjoy the process and have fun with your cooking!
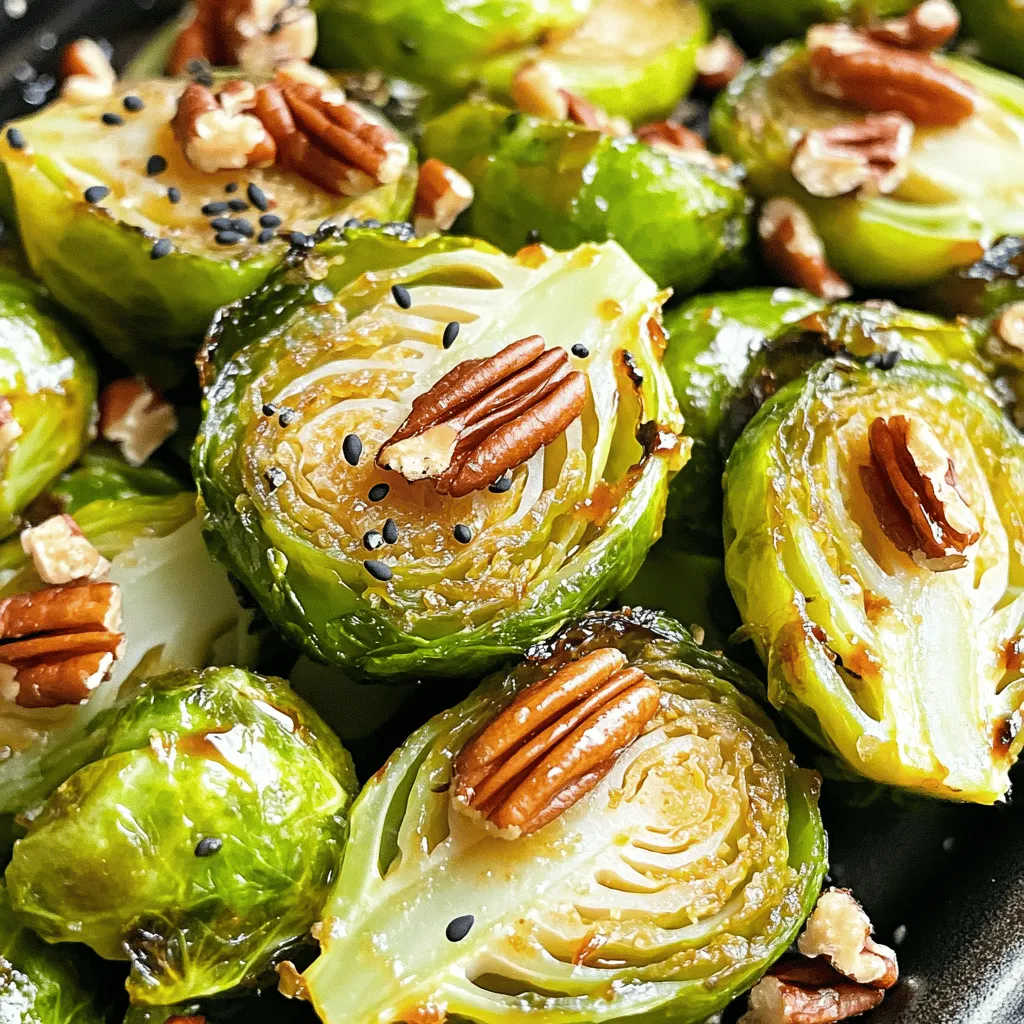
Miso Maple Brussels Sprouts with Pecans Delightful Dish
Are you ready to try a dish that’s full of flavor? Miso Maple Brussels Sprouts with Pecans is a tasty way to enjoy this healthy
- 2 lbs beef chuck, cut into 1-inch cubes - 4 cups beef broth - 3 medium carrots, sliced - 3 medium potatoes, diced - 1 large onion, chopped - 3 garlic cloves, minced - 2 tablespoons tomato paste - 1 teaspoon dried thyme - 1 teaspoon dried rosemary - 1 bay leaf - Salt and pepper to taste - 2 tablespoons olive oil - Fresh parsley, chopped (for garnish) Gathering the right ingredients is key to making a tasty beef stew. First, select high-quality beef chuck. This cut is perfect for stew as it becomes tender during cooking. Look for bright red meat with good marbling. Next, get fresh vegetables. Carrots, potatoes, onions, and garlic add flavor and texture. Choose firm carrots and smooth potatoes for the best taste. For seasoning, you need tomato paste, thyme, rosemary, and a bay leaf. These add depth to the stew. Use fresh herbs if you can find them. They give a bright taste. Don't forget salt and pepper. Seasoning at each step builds flavor. Lastly, have olive oil for browning the beef and garnishing parsley for a fresh finish. Each ingredient plays a role in creating a warm and comforting beef stew. First, cut the beef chuck into 1-inch cubes. This size helps it cook evenly. Next, chop your vegetables. Slice the carrots and dice the potatoes. Finally, chop the onion and mince the garlic. Having everything ready makes cooking smooth and fast. Start by browning the beef cubes. Heat 2 tablespoons of olive oil in a large pot over medium heat. Add the beef and sprinkle with salt and pepper. Cook until brown on all sides, about 5 to 7 minutes. Once done, remove the beef from the pot and set it aside. Now, in the same pot, add the chopped onion. Sauté it for about 3 to 4 minutes until it turns translucent. Add the minced garlic and cook for another minute. This step adds a nice depth of flavor. Next, stir in 2 tablespoons of tomato paste, 1 teaspoon of dried thyme, and 1 teaspoon of dried rosemary. Cook for a minute to blend the flavors. Now, return the browned beef to the pot. Pour in 4 cups of beef broth. Add the sliced carrots, diced potatoes, and 1 bay leaf. Bring this mixture to a boil. Once boiling, reduce the heat to low. Cover the pot with a lid and let it simmer. Cook for about 1.5 to 2 hours, or until the beef is tender. Stir occasionally and taste. Add more salt and pepper if needed. When the stew is done, remove the bay leaf. Before serving, garnish with freshly chopped parsley. This adds a nice pop of color. Enjoy your comforting, hearty beef stew! To make your beef stew tender, cook it low and slow. Aim for 1.5 to 2 hours of simmering. This helps break down the meat fibers. Always stir occasionally to prevent sticking. This also helps blend the flavors well. For a richer taste, add a splash of red wine. It adds depth to the stew. You can also include more vegetables like peas or green beans. This boosts the nutrition and flavor while adding color. Serve your beef stew in deep bowls. Pair it with crusty bread for dipping. This makes for a comforting meal. For a homestyle look, sprinkle fresh parsley on top. It adds a nice touch and brightens the dish. {{image_2}} You can change the cut of beef for your stew. Try using brisket or round. These cuts can give different flavors and textures. You can also swap out vegetables. Peas or celery can add a new taste. Just make sure to adjust cooking times based on what you choose. If you need gluten-free options, pick gluten-free broth. This makes your stew safe for everyone. For a paleo diet, skip the potatoes. Instead, add sweet potatoes or more carrots. This keeps the stew tasty and friendly for paleo eaters. Want a spicy kick? Add some red pepper flakes or a dash of hot sauce. This gives warmth and depth to your stew. If you crave something heartier, try adding dumplings. They soak up the stew’s flavor and make each bite a treat. To cool your beef stew, let it sit at room temperature for about 30 minutes. This helps it cool down safely. After that, transfer it to airtight containers. I recommend glass or BPA-free plastic containers. They keep the stew fresh and are easy to reheat. Avoid leaving the stew out for more than two hours to prevent bacteria growth. You can reheat beef stew in several ways. The stovetop is my favorite. Just pour it into a pot and heat over medium heat. Stir often to heat evenly. You can also use a microwave. Pour the stew into a microwave-safe bowl and cover it. Heat in short bursts, stirring in between. To keep the flavor, add a splash of broth if it seems thick. Beef stew lasts about 3-4 days in the fridge. Make sure it's in an airtight container. If you freeze it, it can last up to 3 months. For best taste, use it within a month. When reheating frozen stew, let it thaw in the fridge overnight. This keeps the texture and flavor better. To thicken beef stew, you have a few options. You can use flour or cornstarch. - Flour: Mix flour with a bit of beef broth to form a paste. Stir this into the stew near the end of cooking. - Cornstarch: Mix cornstarch with cold water. Add this mixture to the stew and cook for a few more minutes. Both methods will help you achieve that rich, hearty texture. Yes, you can! Slow cooking is a great way to make beef stew. - Adjustments needed: Brown the beef first for more flavor. Then, add all the ingredients to the slow cooker. - Recommended cooking times: Cook on low for 6-8 hours or on high for 4-5 hours. This will make the beef very tender and the flavors will blend well. Beef stew pairs well with many side dishes. Here are some ideas: - Side dishes: Try serving it with crusty bread, mashed potatoes, or a fresh salad. - Pairing wines: A good red wine like Merlot or Cabernet Sauvignon complements the stew nicely. These options will make your meal even more enjoyable. This blog post covered how to make a delicious beef stew. We explored key ingredients, including beef, vegetables, and spices. I shared step-by-step instructions for preparing and cooking the stew. We discussed tips for perfecting your recipe and suggested variations for different tastes. Finally, I provided storage info and answered common questions. Remember, a well-made stew brings warmth and comfort. Try these methods, and enjoy a hearty meal with family or friends. Cooking should always be fun and rewarding!
Easy Homestyle Beef Stew Comforting and Hearty Recipe
Craving something warm and filling? My Easy Homestyle Beef Stew is your answer! This comforting dish combines tender beef, fresh veggies, and savory broth to
- 2 cups sushi rice - 2 ½ cups water - 1 teaspoon salt - 1 tablespoon rice vinegar - 1 tablespoon sugar - 1 chicken breast, cooked and shredded - 2 tablespoons soy sauce - 1 teaspoon sesame oil - 1 green onion, finely chopped - 1 sheet nori (seaweed), cut into strips - Optional: sesame seeds for garnish Sushi rice is sticky and perfect for shaping. It holds the onigiri together. Water cooks the rice to the right texture. Salt adds flavor to the rice. Rice vinegar gives the rice a slight tang. Sugar balances the vinegar's taste. Cooked chicken is the filling. It brings protein and heartiness. Soy sauce gives the chicken a savory boost. Sesame oil adds richness and a nutty taste. Green onion provides a fresh crunch. Nori is the seaweed that wraps the onigiri. It adds flavor and makes it easy to hold. Sesame seeds are optional but add a nice crunch. Choose sushi rice that is short-grain for the best texture. Look for rice that is clean and shiny. Use fresh chicken breast for the best taste. If possible, buy organic or free-range chicken. Check soy sauce for quality; go for low-sodium if you prefer. Fresh green onions should be bright and firm. Pick nori that is dark and crisp for the best flavor. When selecting sesame seeds, choose light-colored ones for a fresher taste. {{ingredient_image_1}} Start by rinsing the sushi rice under cold water. Rinsing removes excess starch. This step ensures fluffy rice. Keep rinsing until the water runs clear. In a rice cooker or pot, add the rinsed rice and water. Add salt for flavor. Cook according to the rice cooker instructions. If using a pot, bring it to a boil. Cover, reduce heat, and simmer for about 18 minutes. The water should be absorbed when done. Mix rice vinegar and sugar in a small bowl. Stir until the sugar dissolves. Once the rice is cooked, transfer it to a large bowl. Gently fold in the vinegar mixture using a wooden paddle or spatula. Let it cool slightly. In a bowl, combine shredded chicken, soy sauce, sesame oil, and chopped green onion. Mix well until the chicken is coated in sauce. This adds a savory flavor to your filling. Wet your hands slightly to prevent sticking. Take about 1/3 cup of rice and flatten it in your palm. Place a spoonful of the chicken mixture in the center. Carefully fold the rice around the filling. Shape it into a triangle or oval. Repeat until all rice and filling are used. Cut a strip of nori and wrap it around the base of each onigiri. Wrapping adds flavor and makes it easier to hold. If you like, sprinkle sesame seeds on top for extra crunch. To shape onigiri, start with wet hands. This keeps the rice from sticking. Take about 1/3 cup of rice and press it into a disc. Place a spoonful of chicken in the center. Fold the rice around the filling. You can form a triangle or oval shape. Press gently but firmly. This makes sure your onigiri holds together. To keep rice from sticking, rinse it first. Wash sushi rice under cold water until clear. This removes extra starch. When forming the onigiri, wet your hands. This simple trick helps the rice slide easily. If you find the rice is still sticky, add a little more water to your hands. Serve your chicken onigiri with soy sauce for dipping. You can add pickled vegetables on the side. They give a nice crunch and flavor. For a fun twist, try serving with a salad. A simple cucumber salad pairs well. You can even serve your onigiri for lunch with fruit. They make a great snack or picnic food too! Pro Tips Rinse the Rice: Always rinse sushi rice thoroughly to remove excess starch, which helps achieve the perfect sticky texture for onigiri. Cool the Rice: Let the seasoned rice cool slightly before shaping to prevent burns and ensure it holds together better when forming onigiri. Moisten Your Hands: Lightly wet your hands while shaping the onigiri to prevent the rice from sticking, making it easier to form perfect shapes. Customize the Filling: Feel free to experiment with different fillings such as tuna, pickled vegetables, or tofu to create unique flavor combinations. {{image_2}} You can change the filling in your chicken onigiri to keep things fun. Try using cooked shrimp, tuna, or even teriyaki beef. Each option adds a new flavor. Mix and match your favorites. You can also use leftovers, like roast chicken or grilled veggies. If you want a meat-free meal, there are great fillings for vegetarians and vegans. Use cooked mushrooms, avocado, or tofu. You can also add pickled vegetables for a tangy kick. These options are tasty and full of nutrients. Just make sure to use vegan-friendly sauces. Adding extra flavors can make your onigiri even better. Use a dash of chili oil for heat. You can also mix in herbs like cilantro or mint for freshness. Try sprinkling furikake on top for a savory twist. It adds color and crunch. These small changes can make a big difference in taste. You can store leftover onigiri in an airtight container. Keep them in the fridge for up to two days. If you want to enjoy them later, wrap each onigiri in plastic wrap. This helps keep them fresh and prevents them from drying out. To freeze onigiri, first, let them cool completely. Then, wrap each one tightly in plastic wrap. Place the wrapped onigiri in a freezer bag. You can freeze them for up to one month. Make sure to label the bag with the date to track freshness. To reheat frozen onigiri, take them out of the freezer. Let them thaw in the fridge overnight. You can also reheat them in the microwave. Place onigiri on a microwave-safe plate. Cover with a damp paper towel to keep them moist. Heat for about 30 seconds, checking for warmth. If needed, add more time in short bursts. Enjoy the flavors as if they were fresh! The best rice for onigiri is sushi rice. This rice is sticky and holds shape well. It has a short grain that keeps the onigiri together. Look for good quality sushi rice at your local store. Yes, you can make onigiri without nori. If you don’t like nori, skip it. The onigiri will still taste great. You can serve it plain or add sesame seeds for crunch. Onigiri last about 1 to 2 days in the fridge. Store them in an airtight container. To keep them fresh, wrap them in plastic wrap. They taste best when eaten fresh. Yes, you can use different proteins for the filling. Try tuna, salmon, or tofu. Each protein adds a unique flavor. Be creative and mix flavors that you enjoy. Serve onigiri as a snack or lunch. They are great for picnics or bento boxes. You can add pickled vegetables or a side salad for a complete meal. Enjoy your tasty onigiri with friends or family! Making onigiri is fun and satisfying. We covered the key ingredients, preparation steps, and tips for success. I shared ways to create perfect shapes and enhance flavors with various fillings. Don't forget the storage tips to save leftovers for later. Onigiri is a tasty dish you can customize. With practice, you'll impress everyone with your skills. Enjoy making and sharing this delicious Japanese snack!
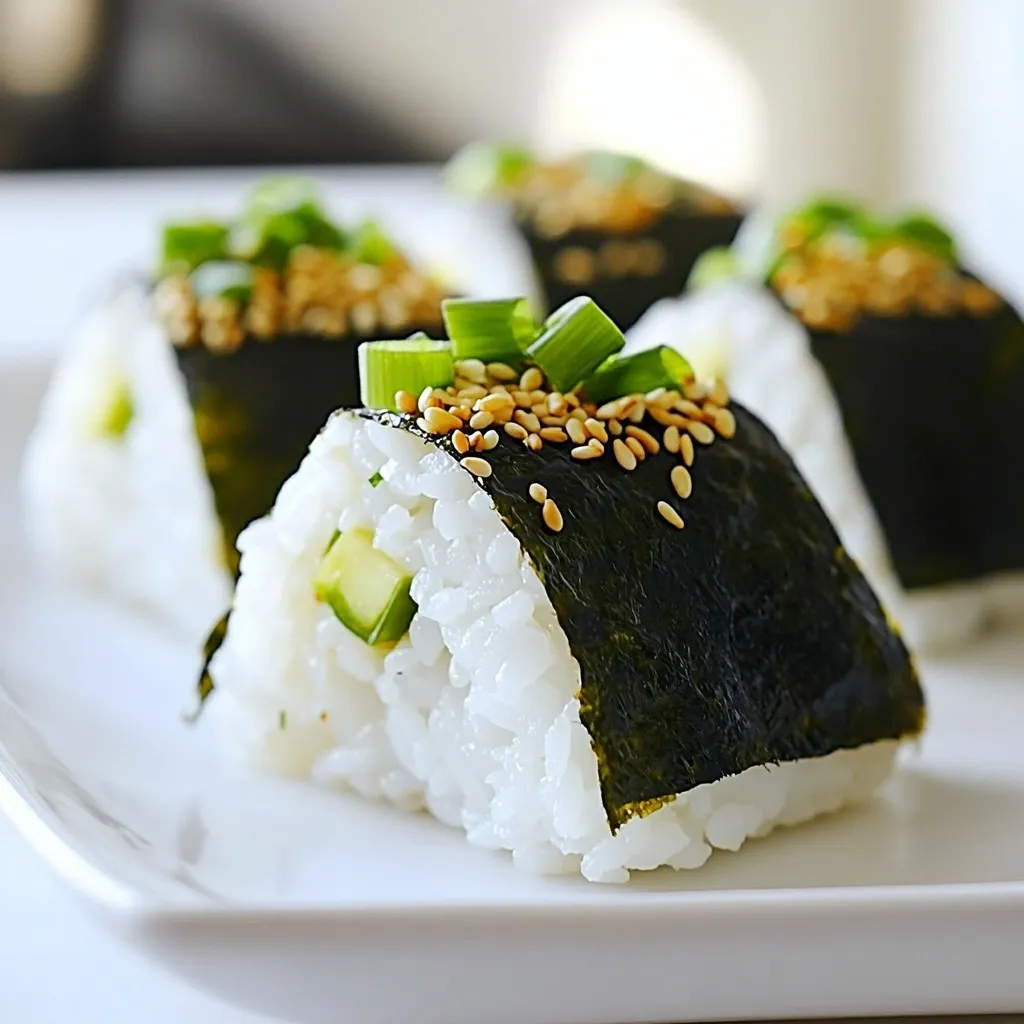
Chicken Onigiri Quick and Easy Recipe Guide
Are you ready to create delicious Chicken Onigiri at home? This quick and easy recipe guide will walk you through each simple step. You will
- 8 oz linguine or spaghetti - 12 large sea scallops, patted dry - 4 tablespoons unsalted butter - 4 cloves garlic, minced - 1 teaspoon red pepper flakes (adjust to taste) - 1 lemon, zested and juiced - ¼ cup fresh parsley, chopped - Salt and pepper to taste - Grated Parmesan cheese (for serving, optional) This dish shines with a few key ingredients. The linguine or spaghetti forms the base of the meal. Choose your favorite pasta type. The sea scallops are the stars, providing a sweet and tender bite. Freshness is key. Unsalted butter gives a rich flavor, while garlic adds depth. The red pepper flakes give a slight kick. Lemon brightens the dish with its zest and juice. Fresh parsley adds color and freshness. Finally, Parmesan cheese adds a savory finish if you choose to include it. You can swap linguine or spaghetti for gluten-free pasta if needed. For scallops, shrimp or chicken can work, but adjust cooking times. Use olive oil instead of butter for a lighter option. If you want more heat, add more red pepper flakes. Fresh herbs like basil can replace parsley for a different flavor. Enjoy experimenting with these options! First, boil a large pot of salted water. Add 8 ounces of linguine or spaghetti. Cook it until it is al dente, following the package directions. This usually takes about 8-10 minutes. Remember to save 1 cup of pasta water before draining the pasta. Set the drained pasta aside in a bowl. While the pasta cooks, get your scallops ready. Use 12 large sea scallops and pat them dry with a paper towel. Season them well with salt and pepper on both sides. This step is key for flavor. Next, heat 2 tablespoons of unsalted butter in a large skillet over medium-high heat. When the butter is melted and bubbling, add the scallops. Sear them for about 2-3 minutes on each side. You want them golden brown and opaque in the center. Once done, remove the scallops from the pan and set them aside. In the same skillet, lower the heat to medium. Add the remaining 2 tablespoons of butter. Once melted, toss in 4 cloves of minced garlic and 1 teaspoon of red pepper flakes. Sauté this mixture for about 1 minute. The garlic should smell great but be careful not to burn it. Now, it's time to bring it all together. Add the drained pasta to the skillet with the garlic butter. Pour in the reserved pasta water, along with the juice and zest of 1 lemon. Toss everything well to coat the pasta with the sauce. Now, gently fold in the seared scallops and ¼ cup of chopped parsley. Stir everything together, cooking for an additional minute. Adjust the flavor with salt and pepper if needed. Serve the pasta hot, adding grated Parmesan cheese if you like. Enjoy your meal! When choosing scallops, look for ones that smell clean and fresh. They should have a light ocean scent, not a strong fishy smell. Fresh scallops feel firm and slightly moist. They should also have a shiny, translucent appearance. Avoid scallops that look dull or dry. If possible, buy them from a trusted fish market or a reliable grocery store. Ask the staff when they arrived; fresh is best! Searing scallops gives them a nice golden crust. Start with dry scallops; pat them with a paper towel. This helps them sear better. Heat your skillet until it’s hot. Add butter and wait for it to bubble. Place the scallops in the skillet without crowding. Cook them for about 2-3 minutes on each side. You want them to be golden brown and opaque in the center. Do not move them around too much; let them sit for a good sear! The red pepper flakes add heat, but you can change that. If you like it milder, use less or skip it. You can also try adding black pepper for a different flavor. For a kick, add more red pepper flakes or a dash of hot sauce. Always taste as you go. You want to make it right for your taste buds! {{image_2}} You can switch up the pasta for this dish. Instead of linguine or spaghetti, try fettuccine or penne. These shapes hold sauce well and offer a nice bite. Whole wheat pasta adds fiber and a nutty flavor. For a lighter option, use zucchini noodles or spaghetti squash. These choices keep the dish fresh and fun. Want to make your pasta more exciting? Toss in some veggies! Spinach or cherry tomatoes work great. Add peas for a pop of color and sweetness. For extra protein, mix in shrimp or chicken. If you love heat, add more red pepper flakes or a dash of hot sauce. Each add-in makes your dish unique! If you need a gluten-free dish, swap regular pasta for gluten-free options. Many brands offer rice or corn-based pasta. Check labels to ensure they fit your needs. You can also explore spiralized veggies as a base. This keeps the meal light and flavorful while meeting dietary needs. Store any leftover garlic butter scallop pasta in an airtight container. Let it cool first. Place it in the fridge. It will stay fresh for up to three days. If you want to keep it longer, consider freezing it. To reheat, place the pasta in a skillet on low heat. Add a splash of water or broth. This helps keep it moist. Stir gently until warm. You can also microwave it. Use a microwave-safe dish and cover it. Heat in short bursts, stirring in between. To freeze, first cool the pasta completely. Then, portion it into freezer-safe bags. Remove excess air and seal tightly. You can freeze it for up to two months. When ready to eat, thaw overnight in the fridge before reheating. Scallops cook quickly. You should sear them for about 2-3 minutes on each side. When they turn golden brown, they are ready. The center should look opaque. Overcooking can make them tough, so watch them closely. Yes, you can use frozen scallops. Just make sure to thaw them fully before cooking. Pat them dry to remove excess moisture. This step helps them sear better and get that nice golden color. You can try many sauces with scallop pasta. A creamy Alfredo or a light lemon butter sauce works well. You could also use a spicy marinara for a kick. Experimenting with different sauces can add fun flavors to your dish. In this blog post, we covered key ingredients for scallop pasta and how to prepare it. I shared tips for selecting fresh scallops and perfecting their sear. You learned about pasta variations and dietary options too. Remember, cooking is all about experimentation. Use these tips to create your own delicious version of scallop pasta. Enjoy your cooking journey and don't hesitate to try new things!
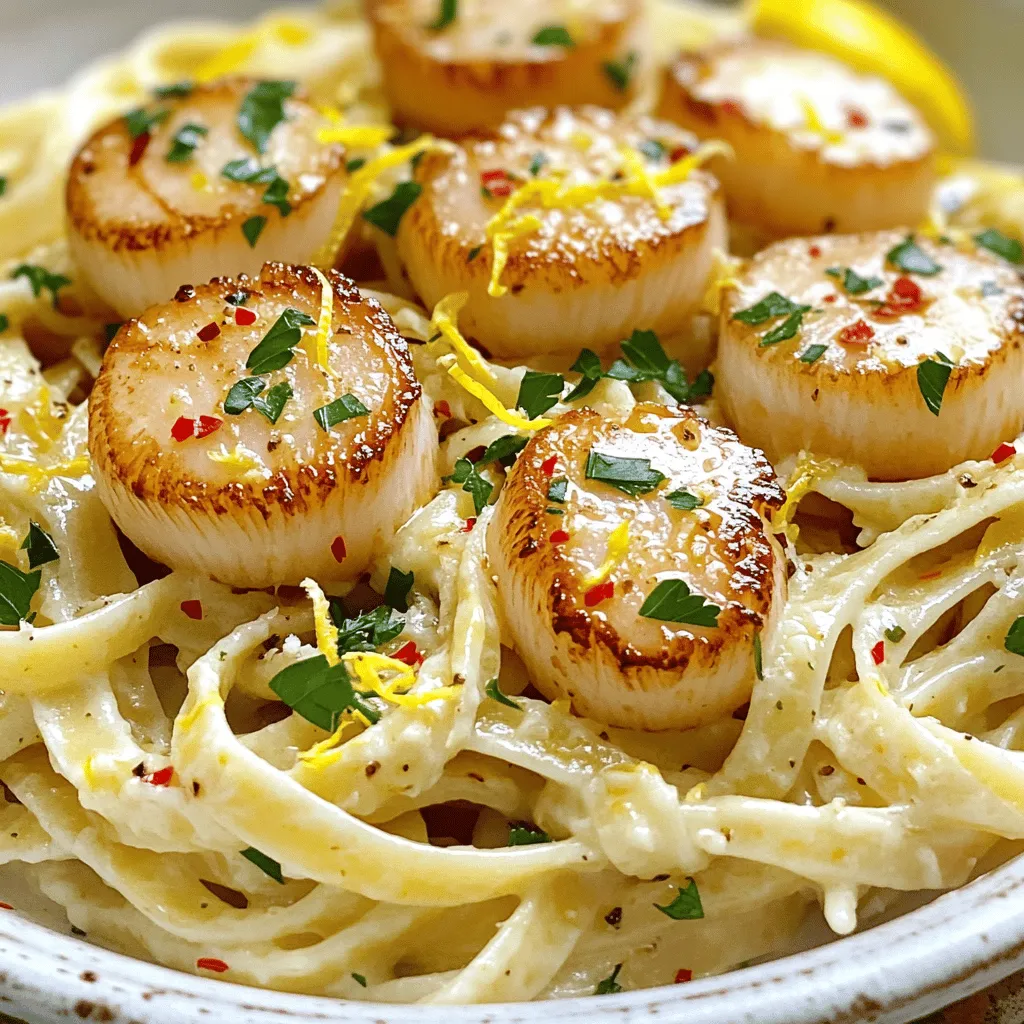
Garlic Butter Scallop Pasta Quick and Tasty Recipe
Craving a quick, delicious meal? Garlic Butter Scallop Pasta is a tasty choice! In this post, I’ll share how to make this dish easily. You’ll