Dinner
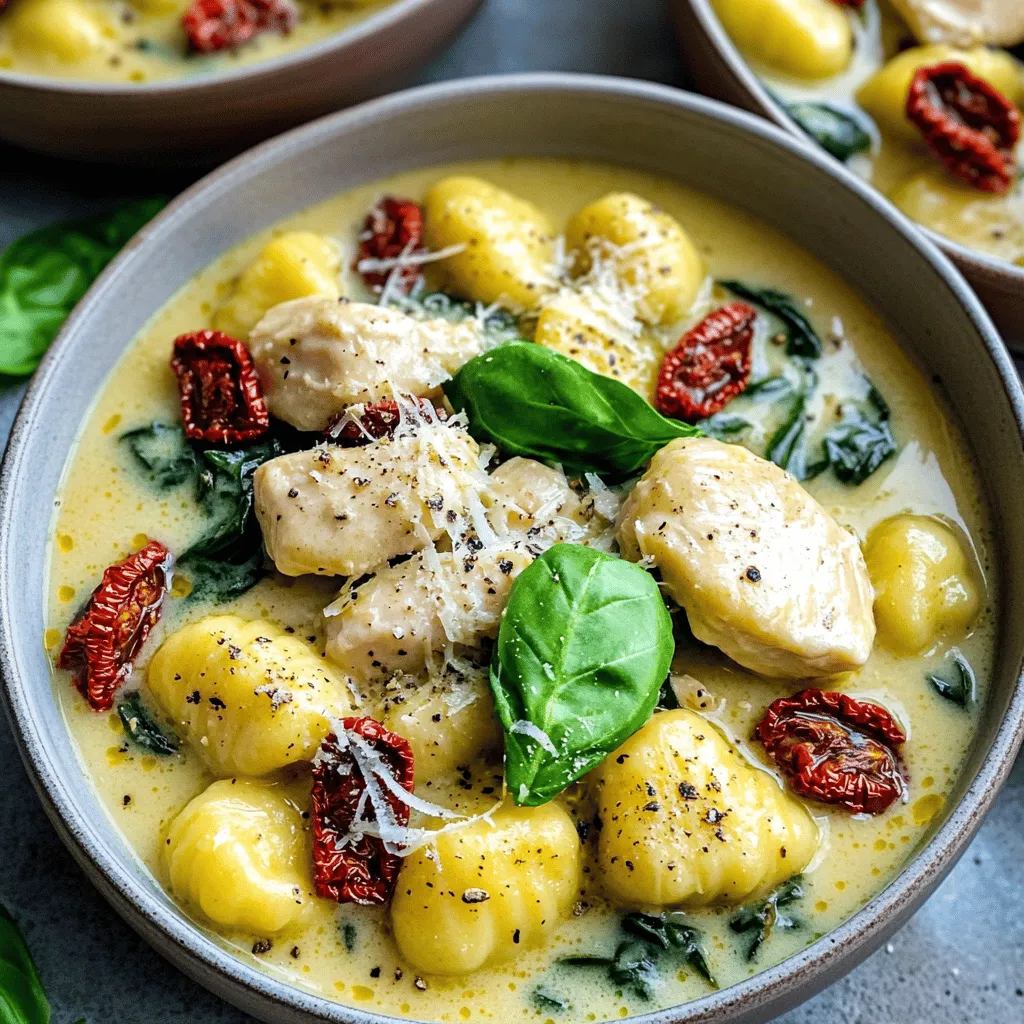
One Pot Creamy Tuscan Chicken Gnocchi Delight
Welcome to your new favorite dish: One Pot Creamy Tuscan Chicken Gnocchi Delight! This simple recipe combines tender chicken and fluffy gnocchi in a rich,
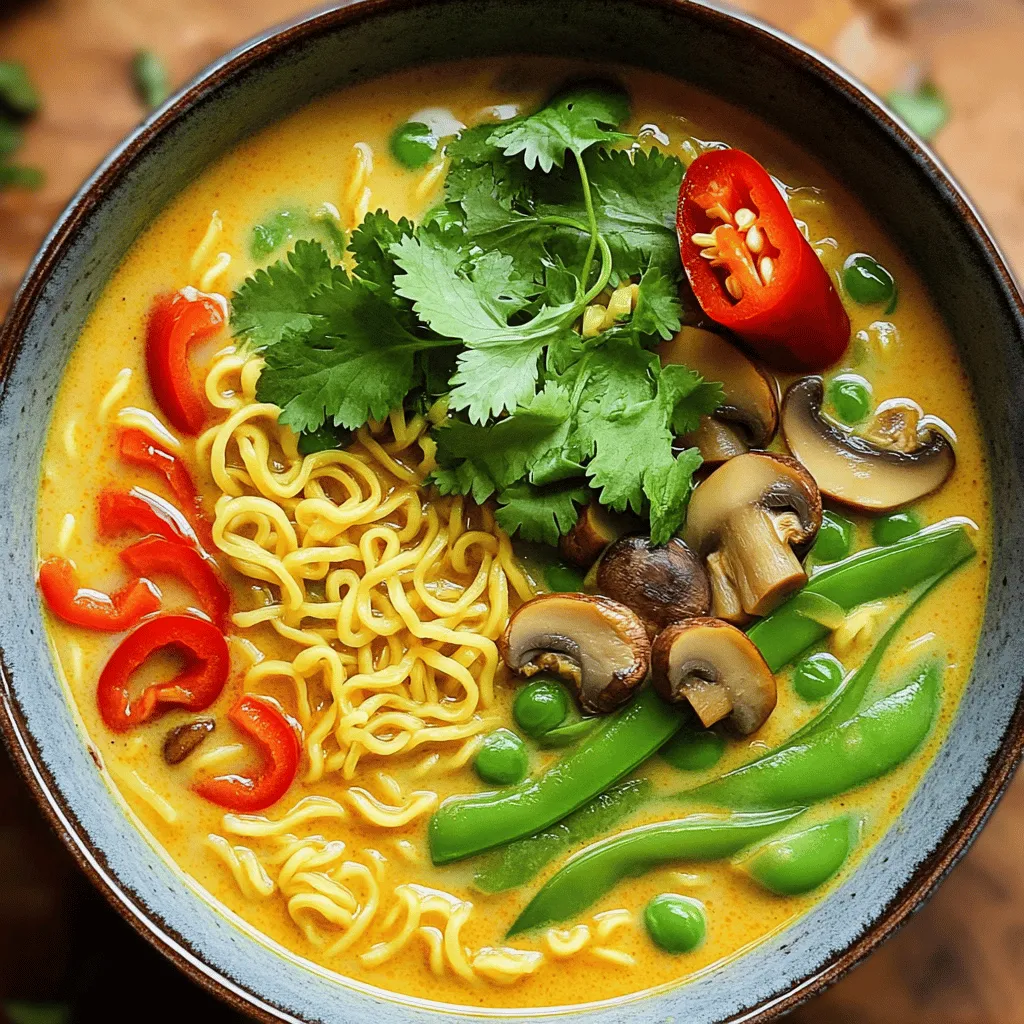
Minute Coconut Curry Ramen Tasty and Quick Meal
Are you ready to whip up a bowl of deliciousness in just minutes? My Minute Coconut Curry Ramen is quick, tasty, and perfect for busy
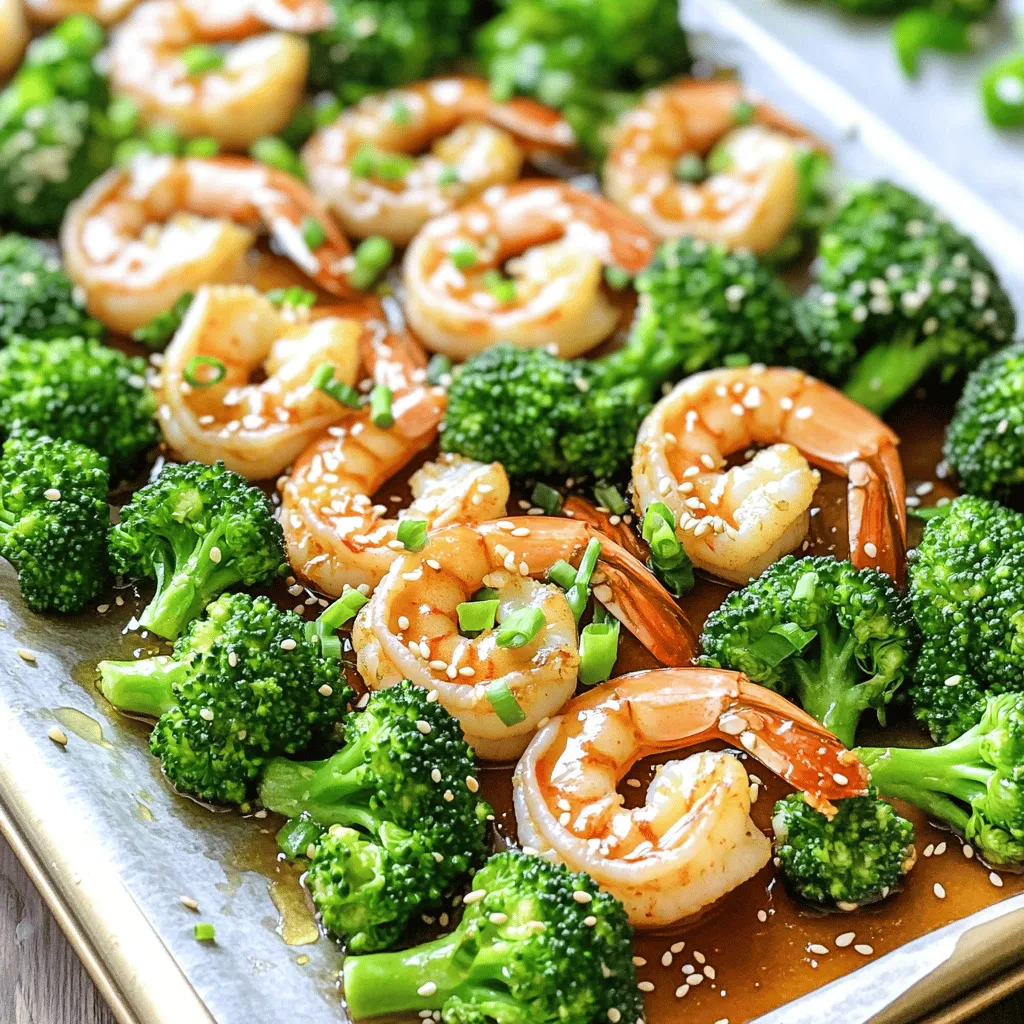
Sheet Pan Honey Garlic Shrimp & Broccoli Delight
Welcome to a tasty adventure with my Sheet Pan Honey Garlic Shrimp & Broccoli Delight! This simple dish comes together quickly and bursts with flavor.
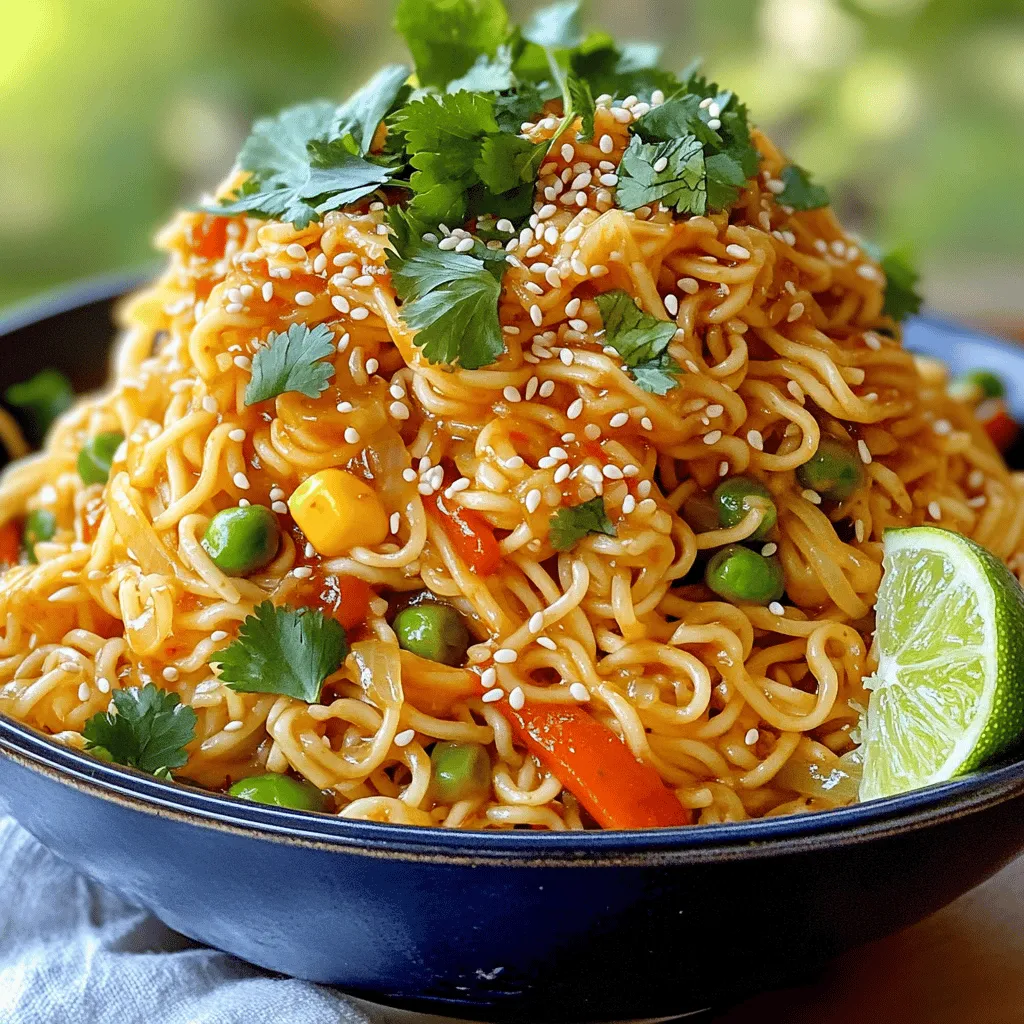
Garlic Chili Crisp Egg Noodles Flavorful Quick Dish
Welcome to my kitchen! Today, we’re making Garlic Chili Crisp Egg Noodles, a quick and tasty dish you’ll love. This recipe brings bold flavors right
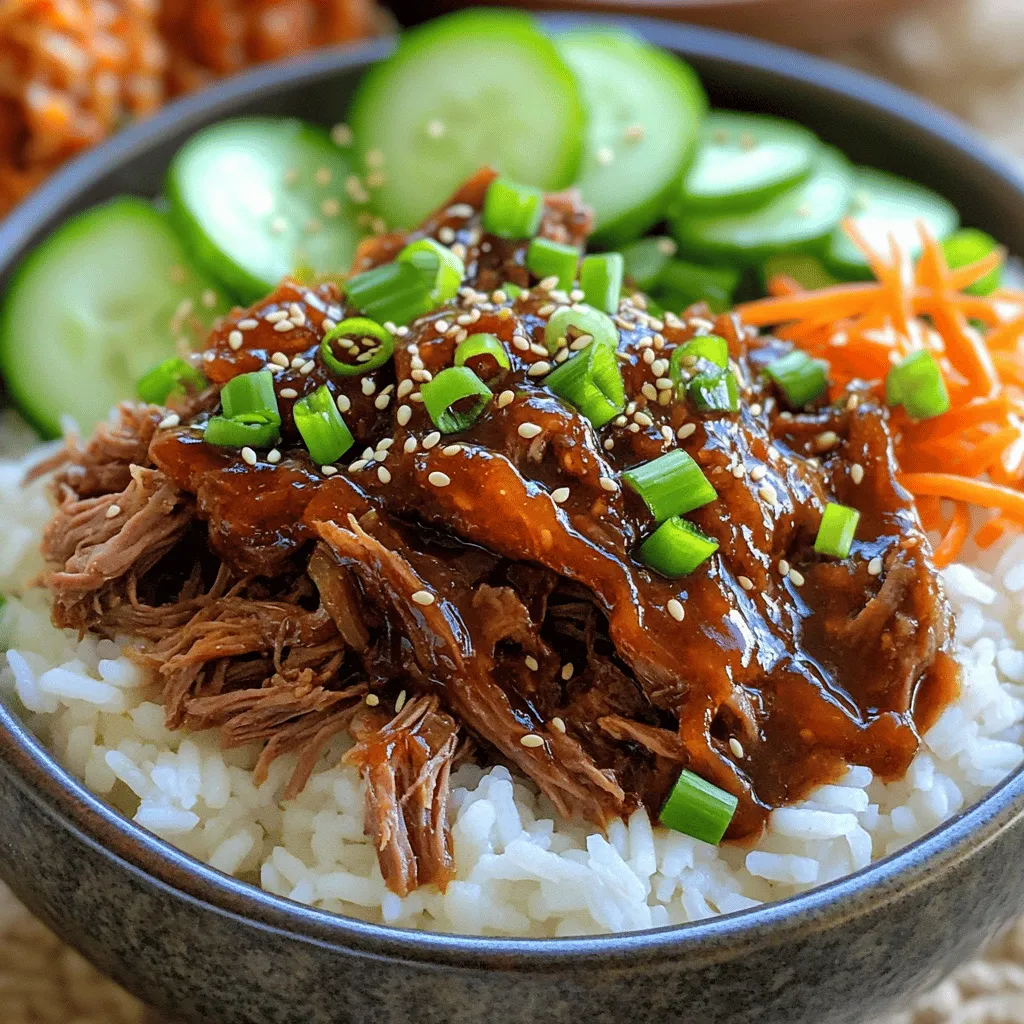
Slow Cooker Korean BBQ Beef Bowls Flavorful Delight
Are you ready to impress your taste buds? Dive into the world of Slow Cooker Korean BBQ Beef Bowls! This dish features tender beef chuck
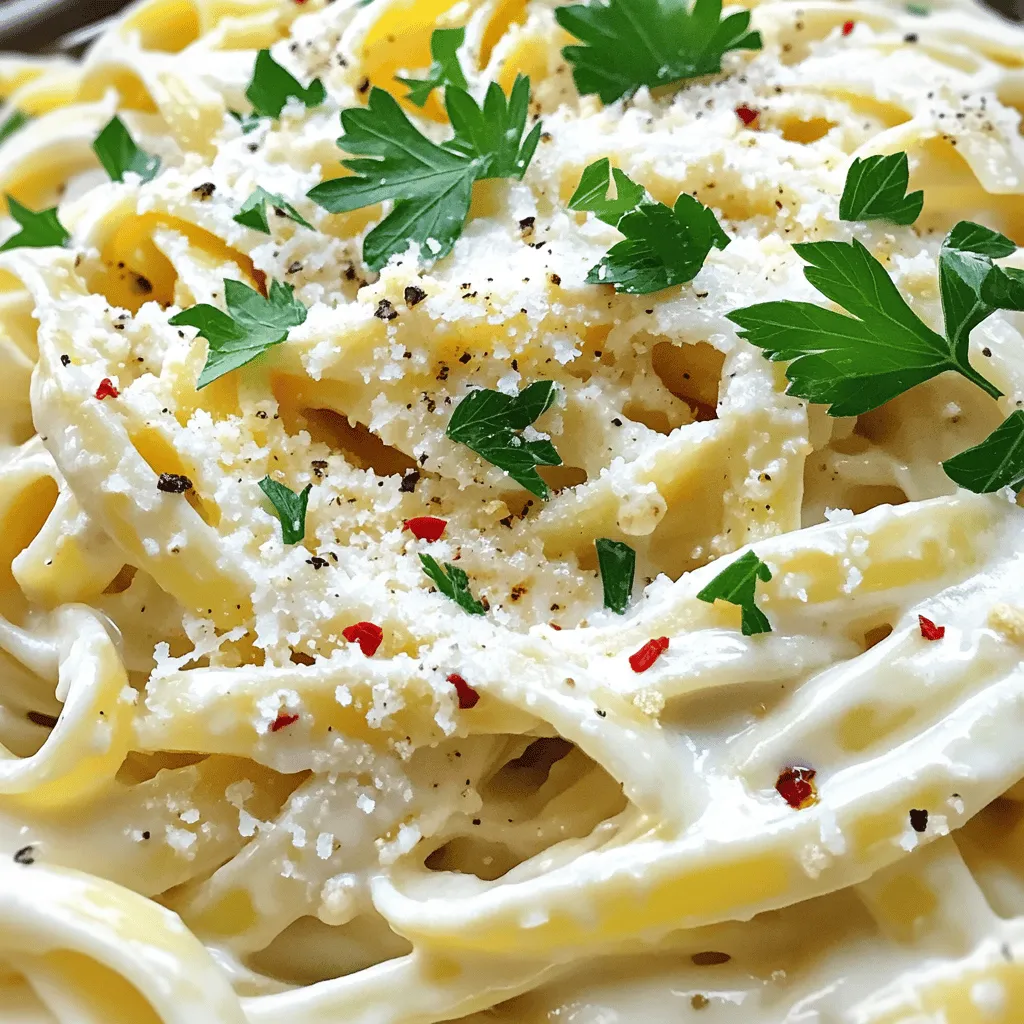
Whipped Cottage Cheese Alfredo Pasta Creamy Delight
Are you ready to enjoy a creamy pasta dish without the guilt? My Whipped Cottage Cheese Alfredo Pasta offers a delicious twist on classic Alfredo
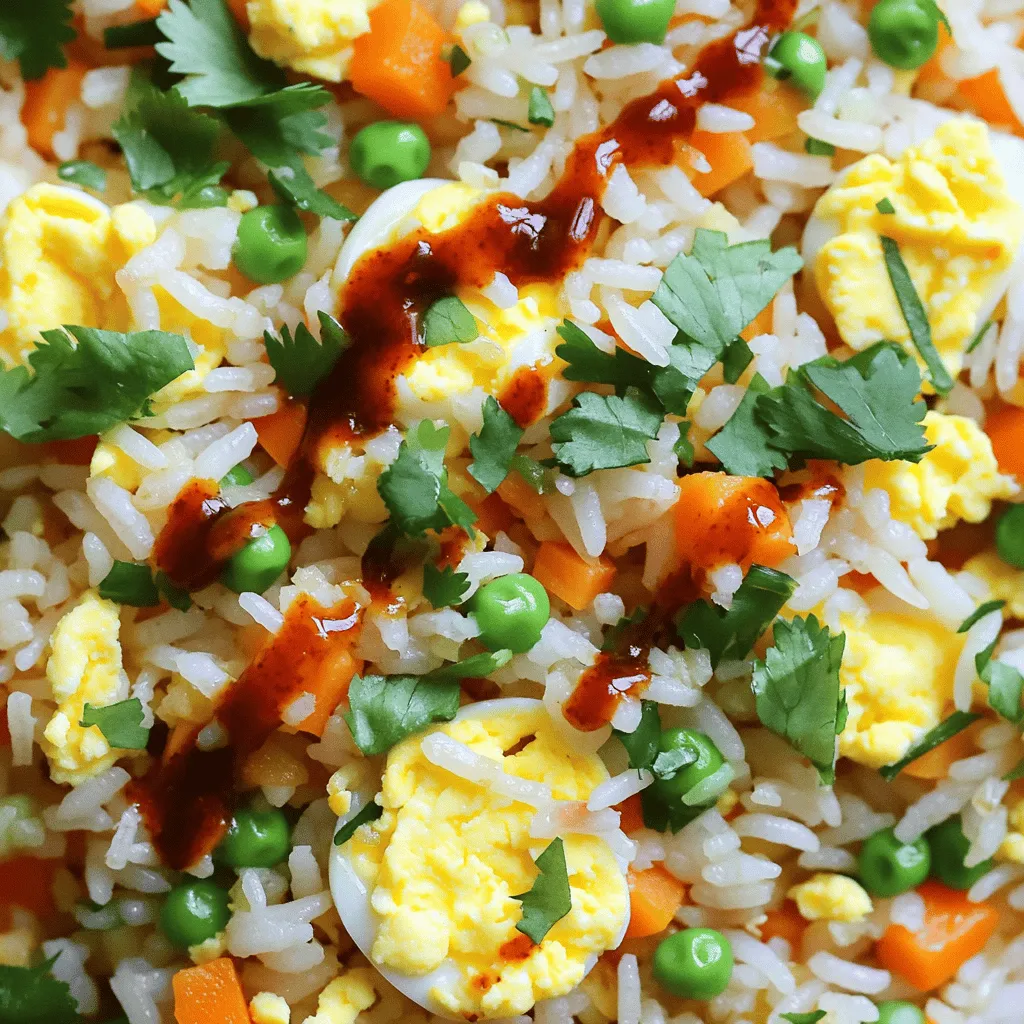
Minute Chili Crisp Egg Fried Rice Simple and Tasty
Are you craving a quick and tasty meal? Look no further than Minute Chili Crisp Egg Fried Rice! This recipe combines fluffy jasmine rice, soft
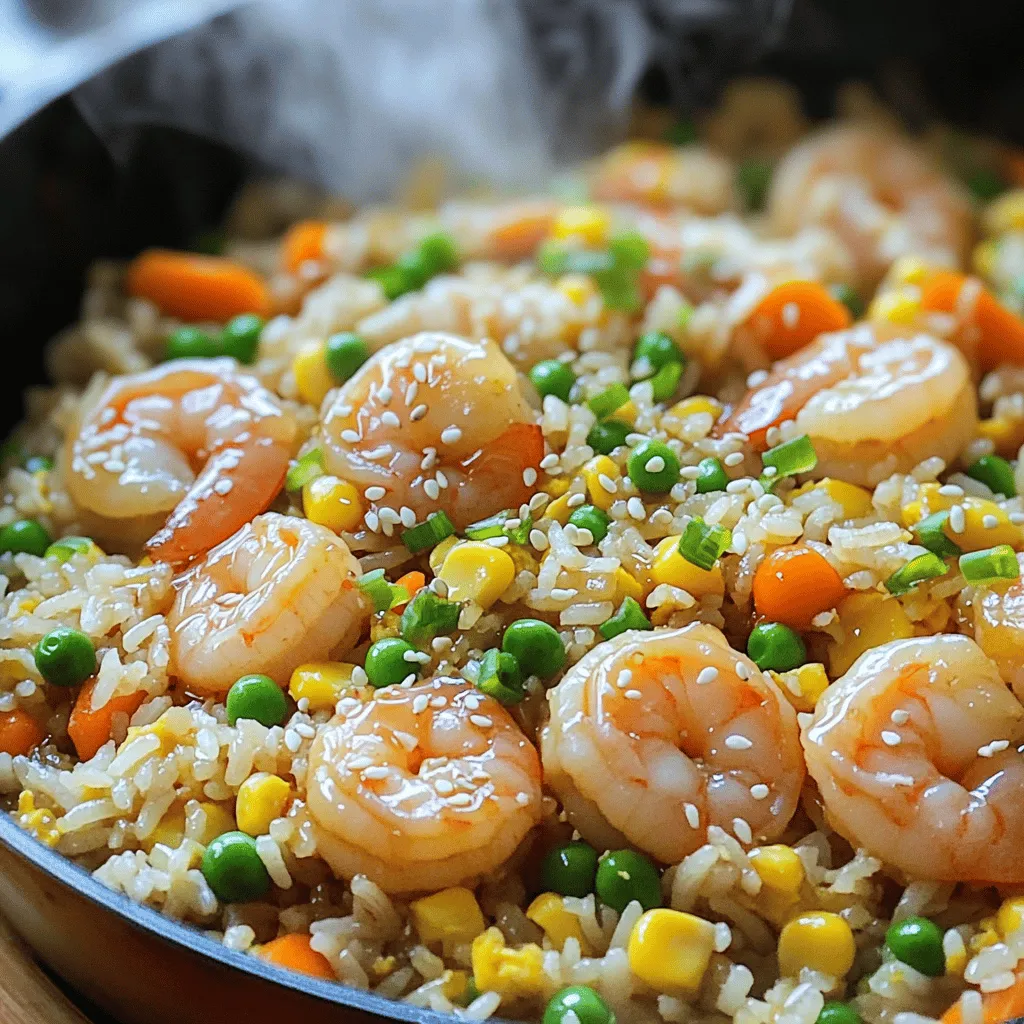
Honey Garlic Shrimp Fried Rice in 15 Minutes Delight
Craving a quick and tasty dinner? Honey Garlic Shrimp Fried Rice in 15 minutes is simple and delicious! With fresh shrimp, vibrant veggies, and a
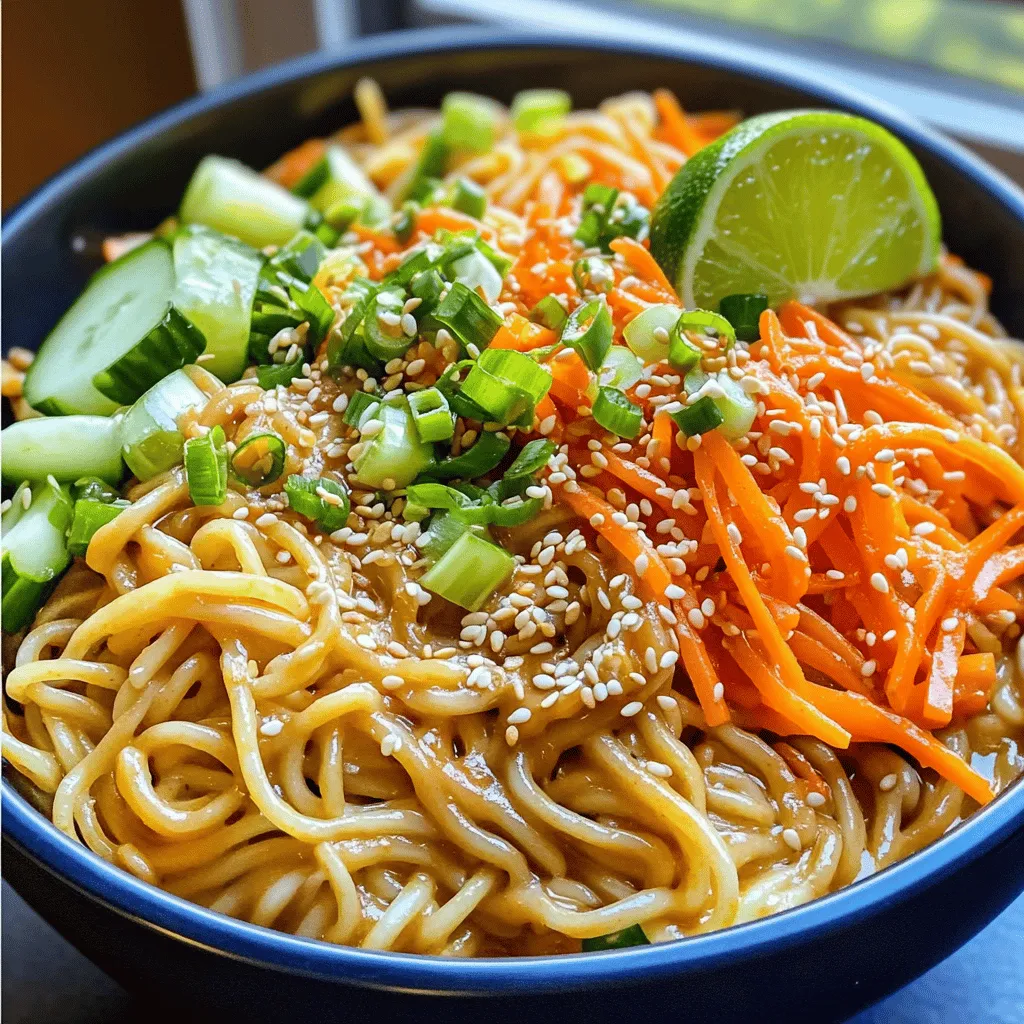
Spicy Sesame Peanut Noodles Delightful and Easy Recipe
Are you craving a quick, delightful meal that’s better than takeout? Look no further! My Spicy Sesame Peanut Noodles recipe combines simple ingredients with bold
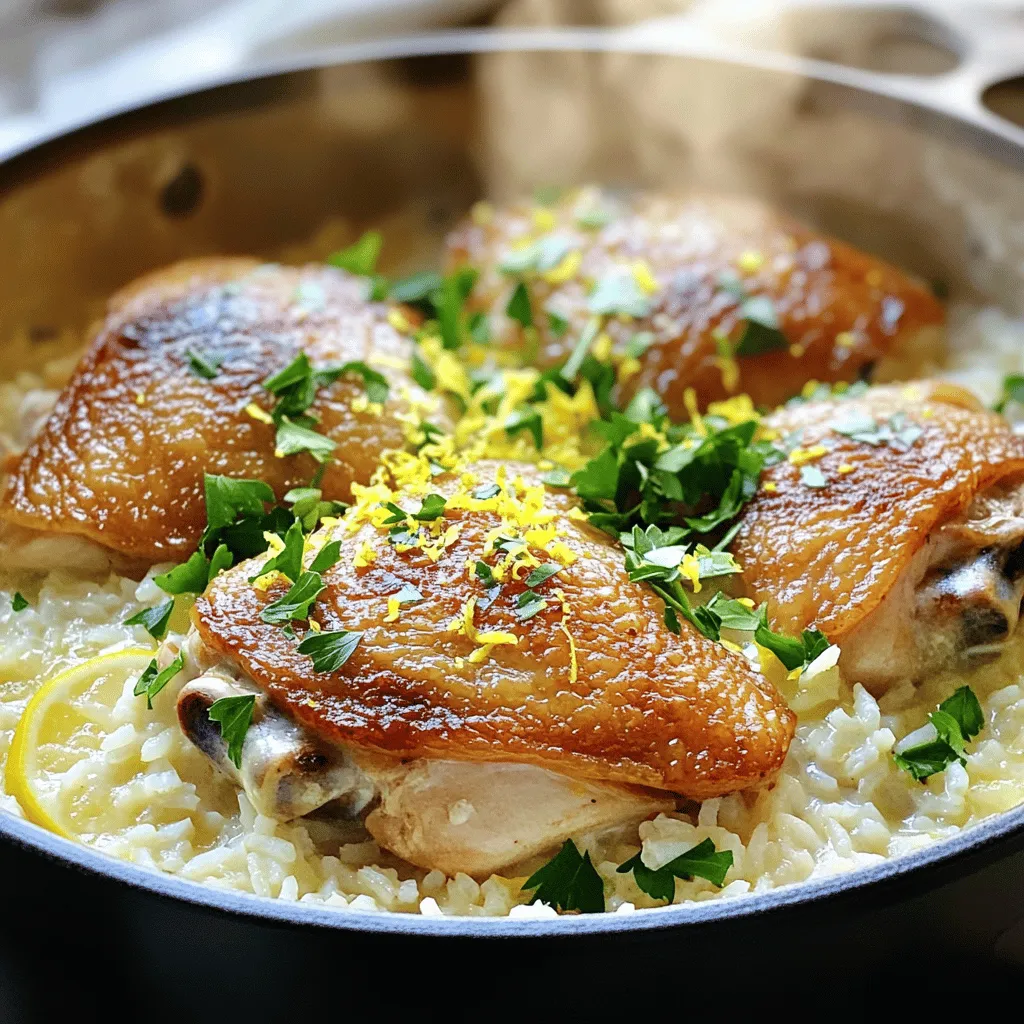
Creamy Lemon Garlic Chicken and Rice One Pot Meal
Craving a quick, flavorful meal that’s easy to make? Look no further! This Creamy Lemon Garlic Chicken and Rice One Pot Meal is your answer.