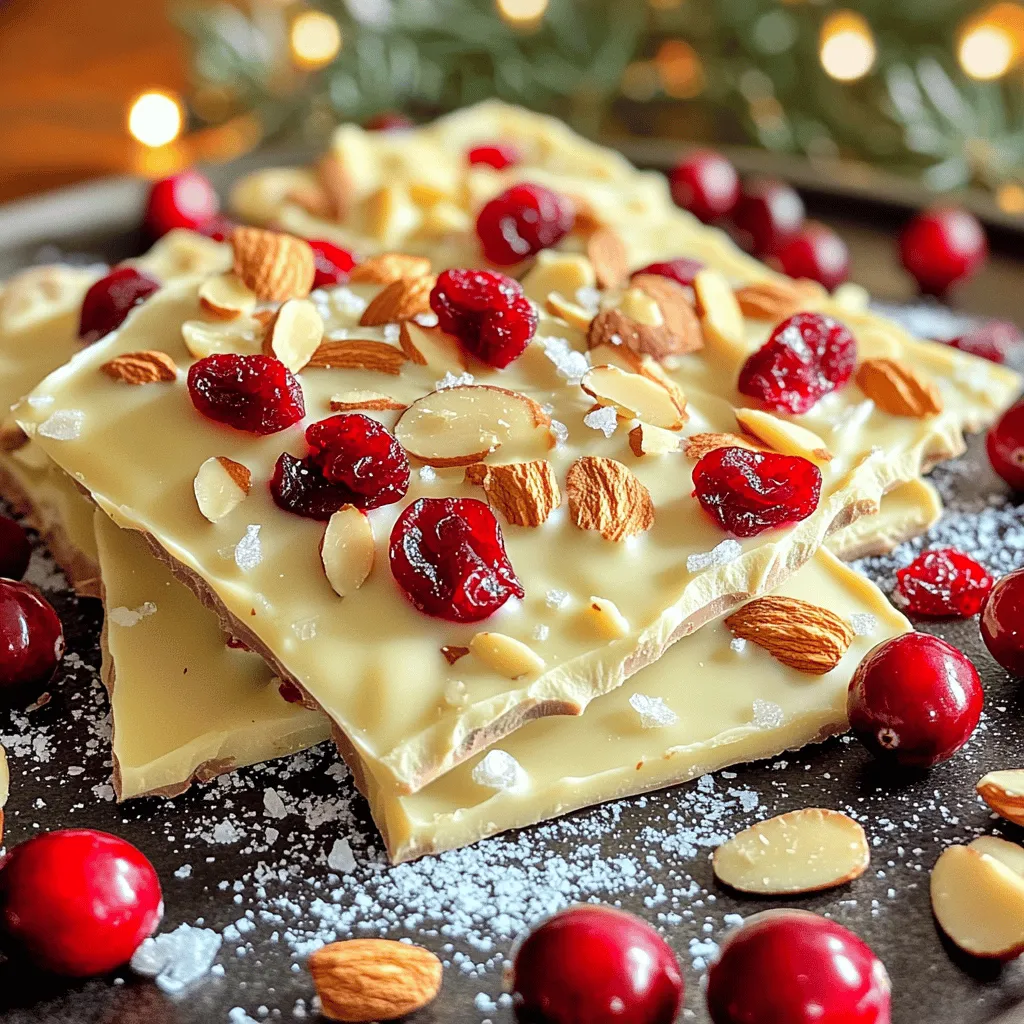
Desserts

To make the Caramel Apple Gingerbread Trifles, gather these ingredients: - 1 batch of gingerbread cake (store-bought or homemade) - 2 cups apples, peeled, cored, and diced - 1 tablespoon lemon juice - 1 cup caramel sauce (store-bought or homemade) - 1 cup heavy whipping cream - 2 tablespoons powdered sugar - 1 teaspoon vanilla extract - 1 teaspoon ground cinnamon - 1 tablespoon butter - Optional: chopped nuts (like pecans or walnuts) for garnish You can swap some ingredients if needed: - Use apple pie filling instead of fresh apples for a quicker option. - Substitute maple syrup for caramel sauce for a different taste. - Opt for coconut cream in place of heavy cream for a dairy-free option. - Use gluten-free gingerbread mix if you need a gluten-free cake. Add fun touches to your trifles with these garnishes: - Sprinkle chopped nuts on top for crunch. - Drizzle extra caramel sauce for a sweet finish. - Add a dusting of cinnamon for color and flavor. - Top with a thin slice of apple for a pretty look. Start by melting one tablespoon of butter in a medium saucepan over medium heat. Add two cups of diced apples, one tablespoon of lemon juice, and one teaspoon of ground cinnamon. Cook them for about five to seven minutes. The apples should soften but still keep their shape. Once done, take them off the heat and let them cool. This step adds a warm, spiced flavor to your trifles. You can use a store-bought gingerbread cake or make it from scratch. If making your own, bake according to your recipe or package instructions. Once baked, let it cool completely. After cooling, crumble the gingerbread cake into small pieces. This creates a perfect base for the layers in your trifle. In a mixing bowl, combine one cup of heavy whipping cream, two tablespoons of powdered sugar, and one teaspoon of vanilla extract. Use an electric mixer to whip the cream until soft peaks form. Be careful not to overwhip, as this can turn your cream grainy. This fluffy cream will add richness to your dessert. Grab clear dessert cups or bowls for a beautiful display. Start with a layer of crumbled gingerbread cake at the bottom. Next, add a layer of the sautéed apples. Drizzle some caramel sauce over the apples. Repeat this layering until the cups are nearly full. The layers create a stunning visual that makes your trifles inviting. Once assembled, cover the trifles and refrigerate them for at least one hour. This chilling time allows the flavors to meld together nicely. When ready to serve, top each trifle with a generous dollop of whipped cream and drizzle with more caramel sauce. For an extra touch, consider adding chopped nuts like pecans or walnuts on top. This will add crunch and a delightful contrast to the creamy layers. Layering is key to making your trifle look great. Start with crumbled gingerbread cake at the bottom. This gives a solid base. Then, add a layer of sautéed apples. Follow this with a drizzle of caramel sauce. Repeat these layers until you reach the top of your cup. Finish with a generous dollop of whipped cream. This creates a beautiful contrast of colors and textures. Use clear cups to show off those lovely layers. If you have leftover trifles, storing them is simple. Cover each cup with plastic wrap. This keeps them fresh. Place them in the fridge. Enjoy them within two days for the best taste. If the whipped cream starts to separate, give it a quick whip before serving again. For extra flavor, think about adding nuts. Chopped pecans or walnuts bring a nice crunch. You can also sprinkle a bit of extra cinnamon on top. This enhances the warm flavors. If you want to add a bit of zest, try a touch of orange zest. The citrus brightens every bite and pairs well with apples and caramel. {{image_2}} You can swap apples for other fruits in this recipe. Pears work well and add a nice twist. Their sweet taste pairs perfectly with gingerbread. You can also try diced peaches or even berries for a fruity zing. Each fruit brings its own flavor, making your trifle unique. If you need a gluten-free option, use a gluten-free gingerbread mix. Many brands offer tasty blends that work well. You can also mix gluten-free flour with spices to create your gingerbread. Just ensure you follow the same steps for baking and crumbling the cake. It will still taste great! To make dairy-free whipped cream, use coconut cream instead of heavy cream. Chill a can of coconut milk overnight. Scoop out the solid part and whip it with powdered sugar. You can also use almond or oat-based whipped toppings. Both options are delicious and will keep your dessert creamy. After you enjoy your caramel apple gingerbread trifles, you may have some left. Store them in the fridge. Make sure to cover them tightly with plastic wrap or a lid. This keeps the flavors fresh and helps prevent them from drying out. Enjoy them within three days for the best taste. Use clear, airtight containers for your trifles. This way, you can still see those beautiful layers. Glass jars or plastic containers work well. Just ensure they are deep enough to hold the layers without spilling. You can freeze the trifles if you want to save them for later. However, the whipped cream will not freeze well. To freeze, assemble the trifles without the whipped cream. Cover them tightly in plastic wrap or use freezer-safe containers. When you are ready to enjoy, let them thaw in the fridge overnight. Then, top with whipped cream just before serving. You can prepare these trifles up to one day ahead. Just layer all the ingredients, cover them, and place them in the fridge. This gives the flavors time to mix. However, I recommend adding whipped cream just before serving for the best texture. Yes, store-bought gingerbread works great! It saves time and still tastes delicious. Just crumble it into small pieces for layering. If you want a homemade taste, you can bake your own gingerbread, but store-bought is a fantastic option. You can get creative with toppings. Here are some ideas: - Chopped nuts like pecans or walnuts for crunch. - A sprinkle of cinnamon to enhance flavor. - Extra caramel sauce for a sweet touch. - Whipped cream for a rich finish. The best caramel sauce depends on your taste. You can use homemade caramel for a richer flavor. However, a good-quality store-bought caramel sauce is also a quick and tasty option. Just ensure it’s smooth and not too thick for easy drizzling. You learned about the key ingredients for making delicious Caramel Apple Gingerbread Trifles. We explored ingredient swaps, tasty garnishes, and easy step-by-step instructions. I shared tips for layering, storing leftovers, and suggested flavor pairings. You discovered variations, including gluten-free and dairy-free options. We also covered storage info and answered common questions. These trifles are simple yet tasty, perfect for any occasion. Enjoy making them and delight your friends and family!
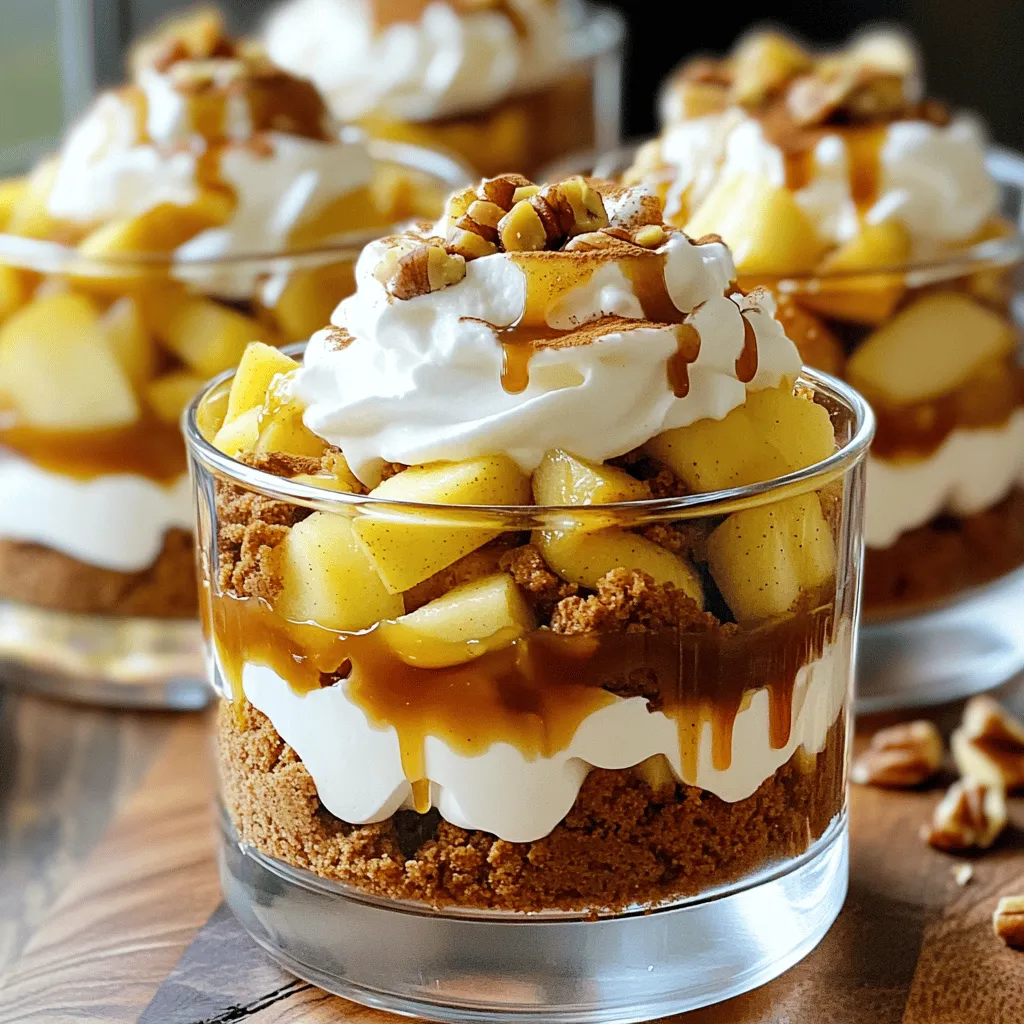
Caramel Apple Gingerbread Trifles Delightful Dessert
Are you craving a dessert that blends warm spices and sweet apples? Let’s make Caramel Apple Gingerbread Trifles! This delightful treat layers rich gingerbread, spiced
To make Cinnamon Apple Bread, gather these main ingredients: - 2 cups all-purpose flour - 1 teaspoon baking powder - 1/2 teaspoon baking soda - 1 teaspoon ground cinnamon - 1/2 teaspoon salt - 1/2 cup granulated sugar - 1/4 cup brown sugar, packed - 1/2 cup unsalted butter, melted - 1 large egg - 1 teaspoon vanilla extract - 1 cup apples, peeled and diced (about 2 medium apples) - 1/4 cup walnuts or pecans, chopped (optional) These ingredients bring sweetness and warmth. The combination of apples and cinnamon is simply perfect. You can add these optional ingredients for extra flavor and texture: - 1/4 cup walnuts or pecans, chopped - 1/4 teaspoon nutmeg (for a spicy kick) Adding nuts gives a nice crunch. Nutmeg adds a warm spice that complements the cinnamon. If you need alternatives, here are some ideas: - Use whole wheat flour instead of all-purpose flour for a healthier option. - Swap granulated sugar with coconut sugar for a lower glycemic index. - Replace unsalted butter with coconut oil for a dairy-free choice. - Use flaxseed meal mixed with water as an egg substitute for a vegan option. These substitutions can help you adjust the recipe to fit your needs. Cooking should be fun and flexible! Start by preheating your oven to 350°F (175°C). This way, your bread bakes evenly. Grease a 9x5 inch loaf pan with non-stick spray or butter. Make sure the entire pan is coated well. This helps the bread slide out easily after baking. In a medium bowl, mix together the dry ingredients. Combine 2 cups of all-purpose flour, 1 teaspoon of baking powder, 1/2 teaspoon of baking soda, 1 teaspoon of ground cinnamon, and 1/2 teaspoon of salt. Whisk them well to blend. This step ensures your bread rises correctly and has a nice flavor. In a large mixing bowl, add 1/2 cup of granulated sugar, 1/4 cup of packed brown sugar, and 1/2 cup of melted unsalted butter. Mix these ingredients until they are well blended. Next, crack in 1 large egg and pour in 1 teaspoon of vanilla extract. Whisk everything together until smooth. This mixture provides moisture and sweetness to the bread. Now, gradually add the dry ingredients to the wet mixture. Stir gently until just combined. Be careful not to overmix; a few lumps are okay. This keeps the bread light and fluffy. Fold in 1 cup of peeled and diced apples and 1/4 cup of chopped nuts if you want extra flavor. Ensure they are evenly mixed throughout the batter. Pour the batter into your prepared loaf pan. Use a spatula to smooth the top. Place the pan in the oven and bake for 50-60 minutes. To check if it's done, insert a toothpick into the center. If it comes out clean, your bread is ready. The smell in your kitchen will be delightful. After baking, take the loaf out of the oven. Let it cool in the pan for about 10 minutes. Then, transfer it to a wire rack to cool completely. While the bread cools, prepare the glaze. In a small bowl, whisk together 1 cup of powdered sugar, 2 tablespoons of milk, 1/2 teaspoon of vanilla extract, and 1/2 teaspoon of ground cinnamon. Drizzle this glaze over the cooled bread, letting it flow down the sides. Enjoy the warm, tasty treat! To get the right texture in your cinnamon apple bread, follow these steps: - Choose the Right Apples: Use firm apples like Granny Smith or Honeycrisp. They hold their shape well. - Don’t Overmix: When you combine the wet and dry ingredients, mix just until you see no flour. Overmixing can make the bread tough. - Check Oven Temperature: Make sure your oven is at the right temperature. An oven thermometer helps with this. To keep your bread fresh, store it properly: - Cool Completely: Let the bread cool on a wire rack before storage. This prevents sogginess. - Wrap It Up: Use plastic wrap or foil to cover the bread tightly. This keeps it moist. - Room Temperature: Store it at room temperature for up to three days. If you need it longer, freeze it. This bread is tasty on its own, but here are some great serving ideas: - Warm Slices: Serve warm slices with butter for a cozy treat. - Add Glaze: Drizzle extra glaze over each slice for a sweet touch. - Pair with Ice Cream: A scoop of vanilla ice cream on warm bread makes a lovely dessert. - Garnish: Add a sprinkle of cinnamon or a few apple slices to make it look nice. {{image_2}} You can boost the flavor of your cinnamon apple bread with some fun add-ins. Here are a few ideas: - Dried Fruits: Add raisins or cranberries for a sweet twist. - Spices: Try adding nutmeg or ginger for a warm kick. - Zest: A bit of orange or lemon zest can brighten the flavor. - Nuts: Chopped walnuts or pecans add a nice crunch. These options let you customize your bread to your taste. Experiment with different combinations to find your favorite! While the glaze in the recipe is tasty, you can change it up to suit your style. Here are some alternatives: - Maple Glaze: Swap out the milk for pure maple syrup and skip the cinnamon. - Cream Cheese Glaze: Mix cream cheese with powdered sugar and a bit of milk for a rich topping. - Chocolate Drizzle: Melt dark or white chocolate and drizzle it over the bread for a sweet surprise. These glazes can add a fun twist and make your bread even more special. If you need a gluten-free version, it’s easy to adapt this recipe. Use gluten-free all-purpose flour instead of regular flour. Make sure it has xanthan gum for proper texture. Also, check that your baking powder and baking soda are gluten-free. With these changes, you can enjoy the same delicious flavors without the gluten! To keep leftover cinnamon apple bread fresh, wrap it tightly in plastic wrap. This helps keep moisture in. You can also place it in an airtight container. Store it at room temperature for up to three days. If you want to keep it longer, consider freezing. To freeze the bread, let it cool completely first. Wrap it in plastic wrap, then in aluminum foil. This double wrapping helps prevent freezer burn. You can freeze it for up to three months. When you are ready to enjoy it, just thaw it in the fridge overnight. To reheat, slice the bread for quick warming. Place slices in a toaster or toaster oven. Heat for about three to five minutes. If you prefer, you can warm the whole loaf in a preheated oven at 350°F for about 10 to 15 minutes. This method brings back the fresh-baked taste. Yes, you can use many apple types. Sweet apples like Fuji or Honeycrisp add great flavor. Tart apples like Granny Smith give a nice contrast. Mixing apple types can also bring out unique tastes. Just make sure to peel and dice them before adding to the batter. To check if the bread is done, insert a toothpick into the center. If it comes out clean, the bread is ready. If it has wet batter on it, bake a little longer. The bread should be golden brown on top. It should spring back when lightly pressed. Cinnamon apple bread pairs well with many things. You can serve it warm with butter for a simple treat. Cream cheese adds a nice tangy flavor. A scoop of vanilla ice cream on the side is a tasty choice too. You can also enjoy it with a cup of coffee or tea. Yes, you can make this recipe vegan. Replace the egg with a flax egg or applesauce. Use a plant-based butter instead of regular butter. For the milk in the glaze, use almond, soy, or oat milk. This way, you can enjoy this sweet bread without animal products. In this article, we explored the key ingredients needed for delicious Cinnamon Apple Bread. We covered step-by-step instructions for preparing, mixing, and baking. You learned helpful tips to achieve the best texture and ways to store your bread for freshness. We also discussed tasty variations, such as gluten-free options. Remember, baking is personal. Don’t hesitate to make it your own by adding flavors you love. Happy baking!
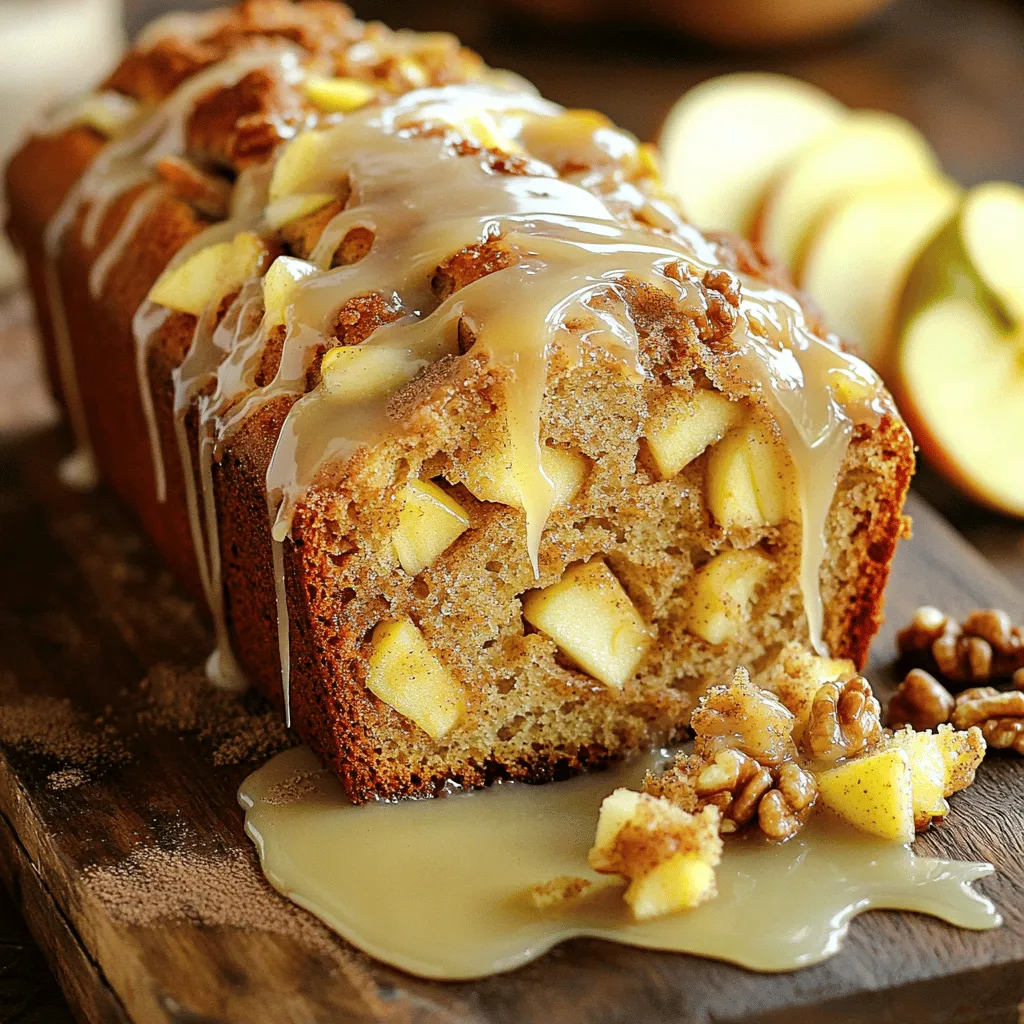
Cinnamon Apple Bread with Glaze Warm and Tasty Treat
Get ready to enjoy a cozy treat with my Cinnamon Apple Bread with Glaze! This warm, sweet loaf combines the rich flavors of cinnamon and
- 1 cup rolled oats - 1/2 cup pumpkin puree - 1/4 cup vanilla protein powder - 1/4 cup almond butter or peanut butter - 1/4 cup maple syrup - 1 teaspoon pumpkin pie spice - 1/4 teaspoon salt - 1/4 cup mini chocolate chips (optional) - 1/4 cup chopped walnuts or pecans (optional) To make pumpkin pie protein balls, gather these simple ingredients. Each one plays a key role in flavor and texture. Rolled oats serve as the base. They add fiber and a chewy bite. Pumpkin puree gives a rich, autumn flavor. It also keeps the balls moist. Vanilla protein powder adds protein, making these treats great for a snack. You can swap it with any flavor you like. Nut butter adds healthy fats and creaminess. Choose almond or peanut butter based on your taste. Maple syrup brings sweetness. It pairs well with pumpkin spice, which gives that classic pumpkin pie flavor. Salt balances the sweetness. You can skip it, but it adds depth to the taste. Mini chocolate chips and chopped nuts are optional but fun! They add extra texture and flavor. If you want a crunchy bite, include nuts. If you love chocolate, go for the chips. Now you are ready to create these tasty, no-bake protein balls! To start, grab a mixing bowl. Combine 1 cup of rolled oats and 1/4 cup of vanilla protein powder. Stir them well to mix evenly. Next, add in 1/2 cup of pumpkin puree, 1/4 cup of almond or peanut butter, 1/4 cup of maple syrup, 1 teaspoon of pumpkin pie spice, and 1/4 teaspoon of salt. Mix everything together until it forms a sticky and uniform mixture. You might find using your hands helps to combine it well. Once your mixture is ready, you can add in some fun ingredients. Fold in 1/4 cup of mini chocolate chips and 1/4 cup of chopped walnuts or pecans if you want. Then, using your hands, roll the mixture into small balls, about 1 inch in diameter. Place each ball on a parchment-lined baking sheet to keep them from sticking. Now it’s time to let them firm up. Refrigerate the protein balls for at least 30 minutes. This helps them hold their shape. After they are chilled, you can serve them cold or at room temperature. Enjoy your tasty and healthy treat! To make the best pumpkin pie protein balls, you need the right mix. The mix should be sticky but not too wet. If it feels too dry, add a splash of maple syrup. This will help bind the ingredients together. I like to use my hands to mix. This way, I can feel the texture and ensure everything blends well. Mixing with your hands helps you get an even consistency. When you do this, it makes rolling the balls much easier. You can adjust the sweetness by adding more maple syrup. If you prefer a less sweet taste, cut back on the syrup. Everyone has different tastes, so feel free to play around with it! For serving, I love to use a rustic bowl or a wooden platter. It adds a cozy touch to any table. You can also sprinkle some pumpkin spice on top for a nice look. This gives a great visual appeal and adds extra flavor. When storing the protein balls, use an airtight container. This keeps them fresh longer. You can place them in the fridge for quick snacks. If you want to take them on the go, pack a few in a small container. They make a perfect treat anytime! {{image_2}} You can easily change up the flavor of your pumpkin pie protein balls. This makes them fun and tasty. - Add cocoa powder: Mixing in cocoa powder gives you a chocolate twist. This adds richness to the flavor. Just a few tablespoons will do. - Include dried fruit: You can toss in some dried fruit for natural sweetness. Raisins or cranberries work well. This adds chewiness and a burst of flavor. If you have nut allergies, don’t worry. You can still enjoy these protein balls with a few changes. - Substitute nut butter: Use sunflower seed butter instead of almond butter or peanut butter. This keeps the creamy texture without nuts. - Omit nuts: You can skip the nuts altogether. This makes the recipe safe for those with nut allergies. Feel free to experiment with these variations to make the perfect treat for you! To keep your pumpkin pie protein balls fresh, use airtight containers. This helps to lock in moisture and flavor. You can use glass or plastic containers with tight lids. Store them in the fridge to maintain their taste and texture. They will stay good for about a week when refrigerated. If you want to save some for later, freezing works great. To freeze, place the protein balls on a baking sheet first. Make sure they don’t touch each other. Freeze them for about two hours. Once firm, transfer the balls to a freezer bag. This way, they won’t stick together. They can last up to three months in the freezer. When you're ready to eat them, take out what you need. Let the protein balls thaw in the fridge for a few hours or at room temperature. This keeps them tasty and easy to enjoy. To make these protein balls vegan, you can easily swap out a few ingredients. Here are some substitutes you can use: - Replace almond butter with a nut-free option like sunflower seed butter. - Use maple syrup as your sweetener. It is already vegan. - Choose a plant-based protein powder. Look for options made from peas or brown rice. These changes keep the taste delicious while making them suitable for a vegan diet. Yes, you can use different protein powder flavors! Here are some great options: - Chocolate protein powder adds a rich taste. - Cinnamon protein powder can enhance the fall flavor. - Unflavored protein powder allows the pumpkin and spices to shine. Feel free to experiment and find your favorite flavor combination! Pumpkin pie protein balls can last about a week in the fridge. To keep them fresh: - Store them in an airtight container. - If you want to keep them longer, freeze them. They can last up to three months when frozen. For best taste, let them thaw in the fridge overnight before enjoying! In this post, we explored how to make tasty pumpkin pie protein balls. We covered the key ingredients, steps for mixing and rolling, and tips for storage. You can even customize these snacks with flavors or nut-free versions. These protein balls are easy to make and perfect for a healthy boost. Enjoy them as a snack or a quick breakfast option! Make them today for a delicious treat that fits your diet.
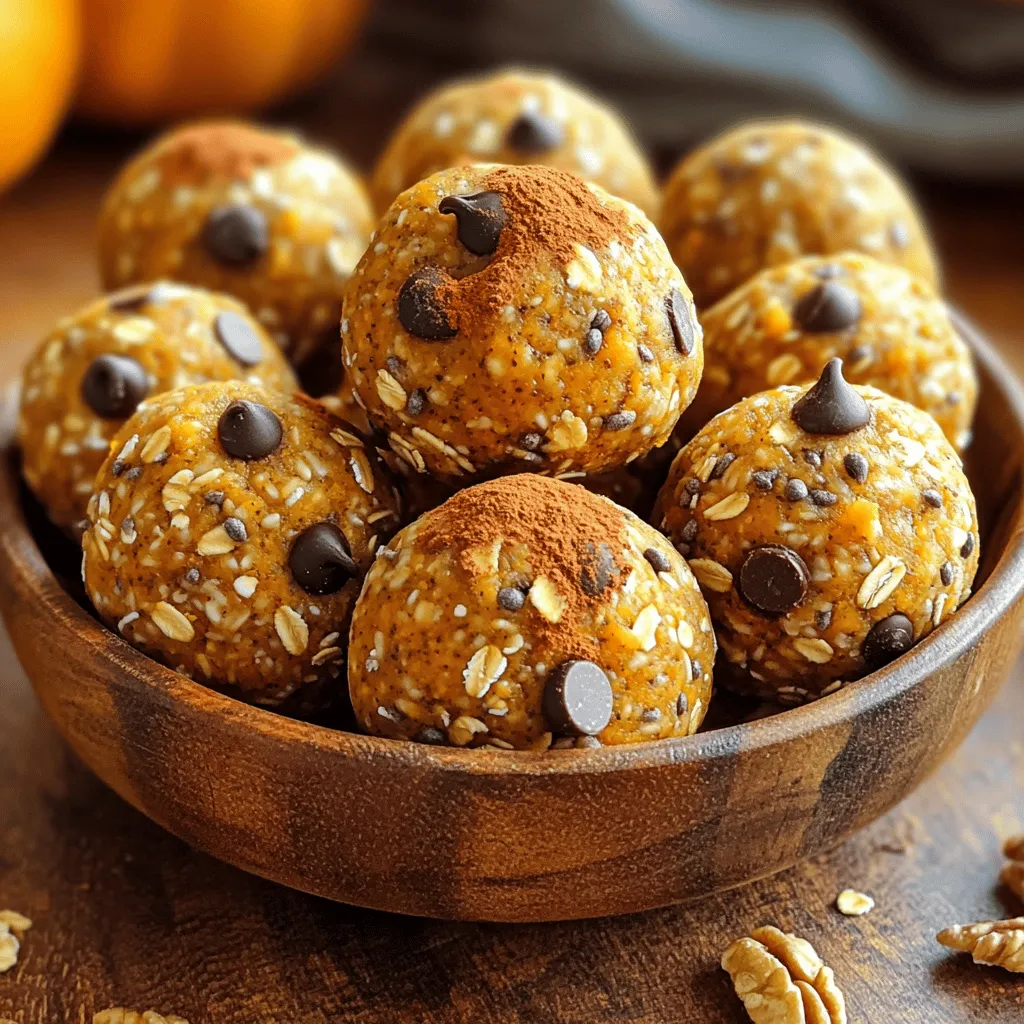
Pumpkin Pie Protein Balls No Bake Easy and Tasty Treat
Looking for a quick, healthy snack that tastes like fall? These no-bake pumpkin pie protein balls are easy to whip up and packed with flavor.
- 1 cup unsalted butter, melted - 2 cups granulated sugar - 4 large eggs - 1 teaspoon vanilla extract - 1 cup all-purpose flour - ¾ cup unsweetened cocoa powder - ½ teaspoon salt - 1 teaspoon baking powder The brownie base gives a rich, fudgy texture. The melted butter and sugar blend well for a moist bite. Eggs add structure, while cocoa powder brings that chocolatey flavor. Each ingredient plays a key role in making the brownies stand out. - 16 oz cream cheese, softened - ½ cup granulated sugar - 1 large egg - 1 teaspoon vanilla extract The cheesecake layer adds a creamy contrast to the brownies. Softened cream cheese whips up smooth and fluffy. Sugar sweetens it just right, and the egg helps it bake perfectly. Vanilla extract enhances the flavor, making it irresistible. - 2 cups apples, peeled and diced (preferably Granny Smith) - 1 tablespoon lemon juice - ½ teaspoon cinnamon - 2 tablespoons brown sugar - ½ cup homemade or store-bought caramel sauce The apple filling brings a fresh crunch. Granny Smith apples work best for their tartness. Lemon juice keeps the apples bright and prevents browning. Cinnamon adds warmth, while brown sugar gives a hint of caramel flavor. The caramel sauce ties it all together, making each bite a delight. To make the brownie batter, start by preheating your oven to 350°F (175°C). Grease a 9x13 inch baking pan and line it with parchment paper. This helps with easy removal. In a large bowl, mix 1 cup of melted unsalted butter with 2 cups of granulated sugar until combined. Next, add 4 large eggs one at a time, mixing well after each. Stir in 1 teaspoon of vanilla extract for flavor. In another bowl, whisk together 1 cup of all-purpose flour, ¾ cup of unsweetened cocoa powder, ½ teaspoon of salt, and 1 teaspoon of baking powder. Gradually add this dry mix to the wet ingredients. Stir until just combined. For the cheesecake layer, take 16 ounces of cream cheese and beat it in a bowl until smooth. Add ½ cup of granulated sugar, 1 large egg, and 1 teaspoon of vanilla extract. Mix until the mixture is creamy and well combined. Set this aside for later. Now, let's put everything together. Pour half of the brownie batter into the prepared pan. Spread it out evenly. Next, layer the cheesecake mixture over the brownie batter. Smooth it out to cover the whole surface. In a separate bowl, mix 2 cups of peeled and diced Granny Smith apples with 1 tablespoon of lemon juice, ½ teaspoon of cinnamon, 2 tablespoons of brown sugar, and ½ cup of caramel sauce. Toss until the apples are well coated. Distribute this apple filling on top of the cheesecake layer. Finally, pour the remaining brownie batter over the apples, spreading gently to cover them. Place the pan in the oven and bake for 35-40 minutes. Check for doneness by inserting a toothpick near the center. It should come out with moist crumbs, not wet batter. Once done, let the brownies cool in the pan for about 30 minutes. Use the parchment paper to lift them out and cool on a wire rack completely. For extra flavor, drizzle more caramel sauce on top before slicing them into squares. Enjoy your delicious caramel apple cheesecake brownies! For the best brownie texture, use unsalted butter. Melt it gently to keep it smooth. Add sugar and blend well. This creates a rich base. To ensure a fudgy brownie, do not overmix the batter. Just mix until you don't see any dry flour. Bake until the top looks set but still soft. This keeps the center moist and chewy. I love using Granny Smith apples for this recipe. Their tartness balances the sweet caramel and cheesecake. Choose firm apples that are not too soft. Fresh apples add crunch and flavor. Peel and dice them into small pieces. This helps them cook evenly and blend well in the layers. To achieve a creamy cheesecake layer, start with softened cream cheese. Let it sit at room temperature. This makes mixing easier and smoother. Beat it until there are no lumps. Add sugar and mix just until combined. Overmixing can add air, leading to cracks during baking. Use a spatula to spread it gently over the brownie layer. This keeps it silky and delicious. {{image_2}} You can add nuts for a nice crunch in your brownies. Chopped walnuts or pecans work great. Just fold in about 1 cup of nuts into the brownie batter. This adds flavor and texture. If you want a nut-free option, skip this step. Toppings can change how your brownies taste. Try adding chocolate chips on top before baking. You can also sprinkle some sea salt for a sweet and salty mix. For a fruity twist, add more apple slices on top. This makes your dessert look great and adds flavor. You can change the flavors in the cheesecake layer too. Instead of vanilla, try almond extract for a nutty taste. You can also add lemon zest for a bright flavor. If you like chocolate, mix in some melted chocolate for a rich twist. These swaps make each batch unique and fun to make! To keep your caramel apple cheesecake brownies fresh, place them in an airtight container. This protects them from air and moisture. You can store them at room temperature for up to three days. If you want to keep them longer, refrigeration is a good option. Just make sure they are completely cool before storing. If you want to save your brownies for later, freezing is a great choice. First, cut the brownies into squares. Wrap each piece in plastic wrap tightly. Then, place the wrapped brownies in a freezer-safe bag or container. They can last up to three months in the freezer. When you're ready to eat them, thaw them in the fridge overnight. To enjoy your leftover brownies warm, preheat your oven to 350°F (175°C). Place the brownies on a baking sheet. Cover them loosely with foil to keep them from drying out. Heat for about 10-15 minutes. You can also microwave a single square for about 15-20 seconds for a quick treat. Just watch it closely to avoid overheating. Yes, you can! While I recommend Granny Smith apples for their tartness, other apples work too. Fuji or Honeycrisp adds sweetness and a nice texture. Just pick apples that hold their shape when baked. Check the brownies after 35 minutes. Insert a toothpick into the center. If it comes out with moist crumbs, they are ready. If the toothpick has wet batter, bake for a few more minutes. Keep an eye on them to avoid overbaking. Absolutely! You can bake these brownies a day in advance. Just let them cool, then cover them tightly with plastic wrap. They will stay fresh and tasty in the fridge. For clean cuts, use a sharp knife. First, make sure the brownies are completely cool. If you want perfect squares, dip the knife in warm water before cutting. Wipe the knife clean between cuts for neat edges. You now have a great recipe for Caramel Apple Cheesecake Brownies. We covered all the ingredients, from the brownie base to the creamy cheesecake layer and sweet apple filling. You learned step-by-step how to make these treats, with tips to get the texture just right. Try out some variations to make the recipe your own. Don’t forget the storage tips for keeping your brownies fresh. Enjoy your baking, and share these delicious brownies with friends or family. You’ll impress everyone with this tasty dessert!
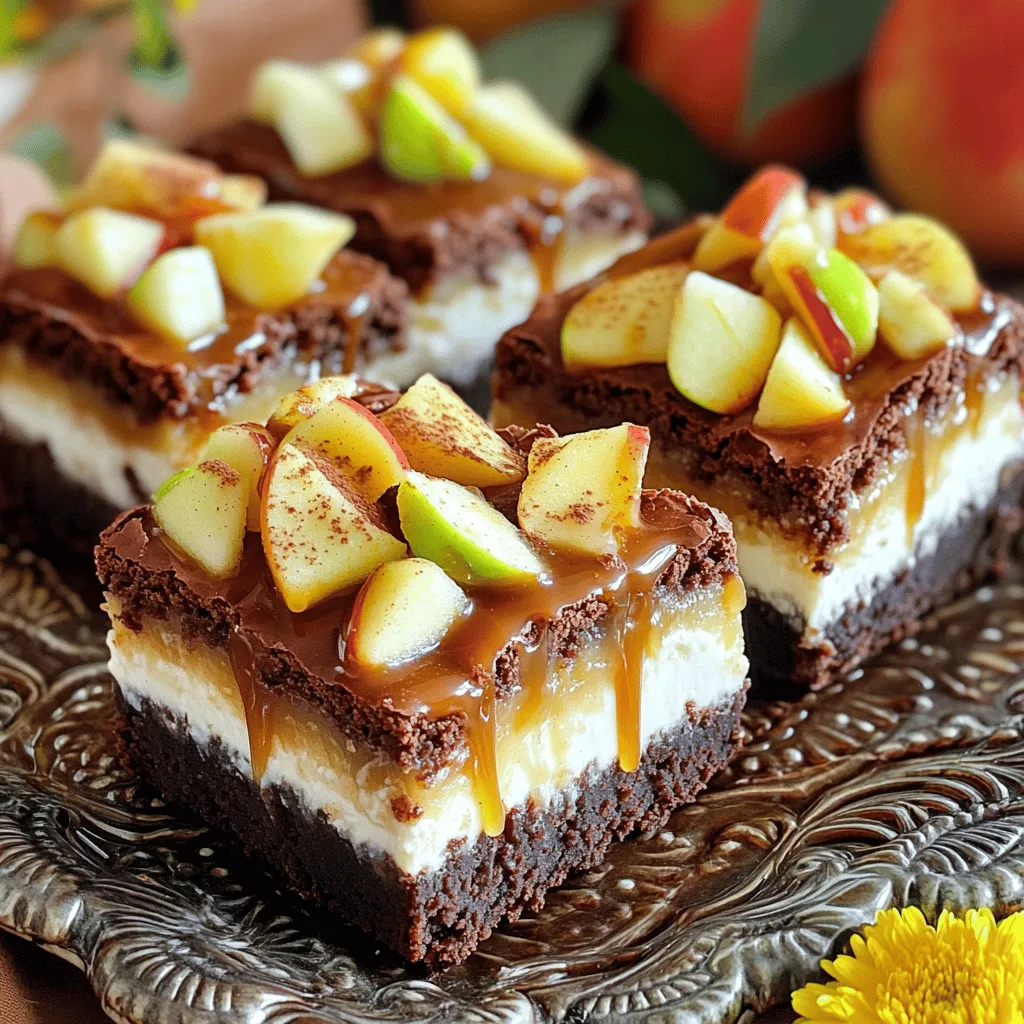
Caramel Apple Cheesecake Brownies Delightful Treat
Are you ready to dive into a dessert that blends rich brownies with creamy cheesecake and tart apples? My Caramel Apple Cheesecake Brownies are a
- Oreo cookies (24 cookies): These are the base for our crust and give a great flavor. - Unsalted butter (1/4 cup): This binds the crushed cookies together, making a firm crust. - Cream cheese (1 package, 8 oz): Use softened cream cheese for a smooth filling. It adds richness to the bars. - Granulated sugar (1/2 cup): This sweetens the filling and balances the flavors. - Vanilla extract (1 teaspoon): This enhances the overall flavor, adding warmth to the dessert. - Whipped topping (1 tub, 8 oz): It gives the cheesecake a light, fluffy texture. Look for Cool Whip or similar brands. - Optional garnishes: You can add extra cookie crumbs on top and drizzle chocolate sauce for a fun finish. These ingredients come together to create a dreamy treat. Each one plays a key role in making these bars delicious and enjoyable. To start, take 24 Oreo cookies and crush them finely. You can use a food processor or a zip-top bag with a rolling pin. Next, mix the crushed cookies with 1/4 cup of melted unsalted butter. Stir until the mixture is well combined. Now, press this crumb mixture firmly into the bottom of an 8x8 inch baking dish. This will form a solid crust. Place the dish in the freezer for about 15 minutes to help it set. In a mixing bowl, beat 1 package of softened cream cheese until it is smooth. This step is key for a creamy filling. Gradually add 1/2 cup of granulated sugar and 1 teaspoon of vanilla extract. Mix until fully combined. Now, gently fold in 1 tub of whipped topping until the mixture is smooth and creamy. This adds lightness to the filling. For extra crunch, fold in 1/2 cup of crushed Oreo cookies into the cheesecake mixture. This adds texture. Next, spread the cheesecake filling evenly over the chilled Oreo crust. Use a spatula to smooth the top. Finally, cover the dish with plastic wrap and refrigerate for at least 4 hours. This chilling time is vital for the filling to set properly. Softened cream cheese is key for a smooth filling. Cold cream cheese can lead to lumps. Let it sit at room temperature for about 30 minutes. This helps it blend well with sugar and vanilla. When folding in the whipped topping, use a gentle motion. This keeps the mixture fluffy. Start by adding a small amount of whipped topping to the cream cheese mix. Stir it in to lighten the cream cheese. Then, add the rest slowly, folding carefully. You can play with flavors to make your bars unique. A splash of peppermint extract works great for a minty twist. You can also try almond or hazelnut extract for something new. For the best chocolate drizzle, use high-quality chocolate sauce. Warm it slightly to make it easier to drizzle. A squeeze bottle can help you control the flow for a pretty design. Serve your bars on a chilled platter. This keeps them fresh and firm. Top with extra Oreo crumbs for a fun touch. A drizzle of chocolate on top makes them look fancy. For creative plating, try slicing the bars into different shapes. You can cut them into triangles or squares. Add fresh fruit or mint leaves for color. These little details make your dessert pop! {{image_2}} You can mix things up with different cookie types. Mint Oreos add a fresh twist. Peanut butter Oreos bring a nutty taste. You can also swap the vanilla extract for almond. Almond gives a nice, warm flavor. Experimenting with flavors can make each bar special. If you're gluten-free, use gluten-free Oreo cookies. They work great in this recipe. For dairy-free options, try vegan cream cheese. Coconut whipped cream can replace the whipped topping. These swaps keep the bars delicious for everyone. Need more bars? Simply double the recipe. Use a larger dish to hold more filling. If you want fewer bars, cut the recipe in half. Adjust the ingredients by halving them. This way, you get the perfect amount for your needs. To keep your No Bake Oreo Cheesecake Dream Bars fresh, store them in the fridge. Use an airtight container to prevent them from drying out. Make sure you cover the dish with plastic wrap if you don’t have a container. This keeps moisture in and prevents odors from other foods from mixing in. You can freeze these bars for later enjoyment. Cut them into individual pieces before freezing. Wrap each piece in plastic wrap, then place them in a freezer bag. When you're ready to eat, take them out and let them thaw in the fridge. This helps keep their creamy texture intact. Avoid thawing them at room temperature; it can make them too soft. These bars last about 4-5 days in the fridge. If you freeze them, they can last up to 2 months. Look for signs of spoilage, such as an off smell or a change in color. If you see any ice crystals, it's best to toss them. Freshness is key to enjoying these delicious bars! Yes, you can swap Oreos for other cookies. For example, you can use chocolate sandwich cookies or even vanilla wafers. Each cookie will change the flavor a bit. Experiment with your favorites to find the best taste. The cheesecake needs at least four hours to set. I recommend letting it chill overnight for the best results. This waiting time helps the filling firm up and makes cutting easier. Absolutely! These bars are perfect for making ahead. They stay fresh in the fridge for up to five days. Just cover them tightly with plastic wrap to prevent drying out. This way, you can enjoy the party without any last-minute stress. If you want a different option, homemade whipped cream works well. Just whip heavy cream with some sugar until soft peaks form. You can also use dairy-free whipped cream for a non-dairy choice. This blog post detailed how to make delicious cheesecake bars using simple ingredients. You learned about the key components like Oreo cookies and cream cheese, plus the steps to create the perfect crust and filling. I shared tips for texture, flavor variations, and serving ideas to make these bars shine. Remember, you can adjust the recipe for diets or gatherings. With the right storage, your cheesecake bars will stay fresh. Enjoy creating this tasty treat!
No Bake Oreo Cheesecake Dream Bars Delightful Treat
Do you love delicious, easy desserts? If so, you’ll adore my No Bake Oreo Cheesecake Dream Bars! This sweet treat is simple, no oven required.
- 2 cups all-purpose flour - 3/4 cup granulated sugar - 1 tablespoon baking powder - 1/2 teaspoon salt - 1/4 teaspoon ground nutmeg - 1/2 teaspoon ground cinnamon - 2 large eggs - 1/2 cup whole milk - 1/4 cup unsalted butter, melted - 1 teaspoon vanilla extract - Vegetable oil for frying - For the glaze: - 1 cup powdered sugar - 1/4 cup pure maple syrup - 1 tablespoon milk (more if needed) You can swap some ingredients if needed. Here are my favorites: - Use whole wheat flour for a heartier donut. - Substitute honey for granulated sugar for a different sweet taste. - Use almond milk instead of whole milk for a dairy-free option. - Replace unsalted butter with coconut oil for a vegan twist. - Maple syrup can be swapped with agave syrup for a lighter flavor. Each donut will give you about: - Calories: 190 - Protein: 2g - Carbohydrates: 25g - Fat: 9g - Fiber: 1g - Sugar: 8g These values can change based on substitutions or toppings. Enjoy making choices that suit your needs! 1. In a large bowl, mix the flour, sugar, baking powder, salt, nutmeg, and cinnamon. Whisk until combined. 2. In another bowl, beat the eggs. Add the milk, melted butter, and vanilla. Mix well until smooth. 3. Pour the wet mix into the dry mix. Stir gently until just combined. Don’t worry about lumps. 4. Cover the dough with plastic wrap. Chill it in the fridge for 30 minutes. This helps the dough firm up. 5. On a floured surface, roll out the dough to 1/2 inch thick. Use a donut cutter to shape them. 6. Heat vegetable oil in a deep skillet to 350°F (175°C). Fry the donuts for 1-2 minutes on each side. They should be golden brown. 7. Once fried, place the donuts on paper towels to drain excess oil. - Always check the oil temperature with a thermometer. Too hot can burn donuts. - Fry a few donuts at a time to avoid crowding. This keeps the oil hot. - Use a slotted spoon to remove the donuts. This allows oil to drip off quickly. - If you see bubbles around donuts, they are frying well. This means the oil is at the right temperature. 1. In a bowl, whisk together the powdered sugar, maple syrup, and milk. Mix until smooth. 2. If the glaze is too thick, add a bit more milk to reach the right consistency. 3. Dip the warm donuts into the glaze. Make sure they are fully coated. 4. Place glazed donuts on a rack to allow the glaze to set. Enjoy them warm or at room temperature. These steps will help you create delicious maple glazed donuts. They are soft, sweet, and perfect for any occasion. To get the best donut texture, mix dry and wet ingredients gently. Too much mixing makes donuts tough. Refrigerate the dough for 30 minutes. This helps it firm up. Roll the dough to 1/2 inch thick. This gives a nice rise when frying. Fry in oil heated to 350°F. This ensures a golden brown color and keeps them soft inside. One common mistake is overmixing the batter. This leads to dense donuts. Another mistake is not heating the oil enough. If the oil is too cool, the donuts absorb more oil and become greasy. Be careful when frying. Fry only a few donuts at a time. This keeps the oil temperature steady. Finally, don’t skip the cooling step. Placing them on paper towels helps remove excess oil. To make the glaze smooth, whisk the powdered sugar, maple syrup, and milk well. If it's thick, add more milk a little at a time. Dip warm donuts into the glaze for the best flavor. Let them sit on a rack after glazing. This helps the glaze set properly. For a special touch, sprinkle cinnamon or chopped nuts on top. This adds flavor and looks great! {{image_2}} You can change up the glaze for fun. Try chocolate glaze for a rich taste. Mix cocoa powder with powdered sugar and milk. You can also add spices like cinnamon or cardamom for a twist. Citrus glazes, like lemon or orange, add a zesty kick. Just mix fresh juice with powdered sugar. Each flavor gives a new life to your donut. You can choose to bake or fry your donuts. Fried donuts are crisp on the outside and soft inside. They have that classic donut feel. If you want a lighter option, baking is great. Baked donuts use less oil and are easy to make. Just pour the batter into a donut pan. Both methods give tasty results, so try them both! Seasonal flavors bring variety to your donut game. In fall, try pumpkin maple donuts. Add pumpkin puree and warm spices like nutmeg and cinnamon. For winter, think about peppermint glaze for a festive touch. You can mix crushed candy canes into your glaze for a holiday vibe. Seasonal variations keep your donut-making exciting all year round! To keep your donuts fresh, store them in an airtight container. Line the container with paper towels. Place the donuts on top and cover them with more paper towels. This helps absorb any moisture. Keep them at room temperature for up to two days. If you want to store them longer, consider freezing. To maintain the glaze's shine and texture, store it separately. Pour any leftover glaze into a clean jar. Seal it tightly and keep it in the fridge. When ready to use, just stir it well. If it’s too thick, add a splash of milk to thin it out. You can freeze donuts for future enjoyment. Let them cool completely before freezing. Place them in a single layer on a baking sheet. Freeze until solid, then transfer them to a freezer bag. They can last up to three months. To thaw, take them out and let them sit at room temperature for about an hour. For a warm treat, reheat them in the oven at 350°F for a few minutes. You can make donuts without a donut cutter by using two round cookie cutters. Use a larger one for the outside and a smaller one for the hole. Press them into the dough after rolling it out. This method works great and gives you perfect shapes. Yes, you can use a different type of flour. If you want a gluten-free option, try using a gluten-free all-purpose flour blend. Just make sure it has xanthan gum for the best texture. Other flours, like whole wheat, may change the taste and texture a bit. To reheat leftover donuts, use your oven. Preheat it to 350°F (175°C). Place the donuts on a baking sheet and warm them for about 5-7 minutes. This method keeps them nice and soft, just like fresh. Homemade donuts last about 1-2 days at room temperature. Store them in an airtight container. If you want to keep them longer, put them in the fridge for up to a week. You can also freeze leftover donuts for up to 3 months. To find the best maple glazed donuts near you, check local bakeries and coffee shops. Look for places that make donuts fresh daily. You can also search online reviews for the best spots in your area. Don't forget to ask friends for their favorites! You now know how to make delicious maple glazed donuts. We covered the right ingredients, preparation steps, and tips for glazing. Remember to choose your favorite flavor and avoid common mistakes. Store your donuts properly to keep them fresh. These treats can delight any occasion. With this guide, you can create donuts that impress family and friends. Happy frying, and enjoy your maple glazed donuts!
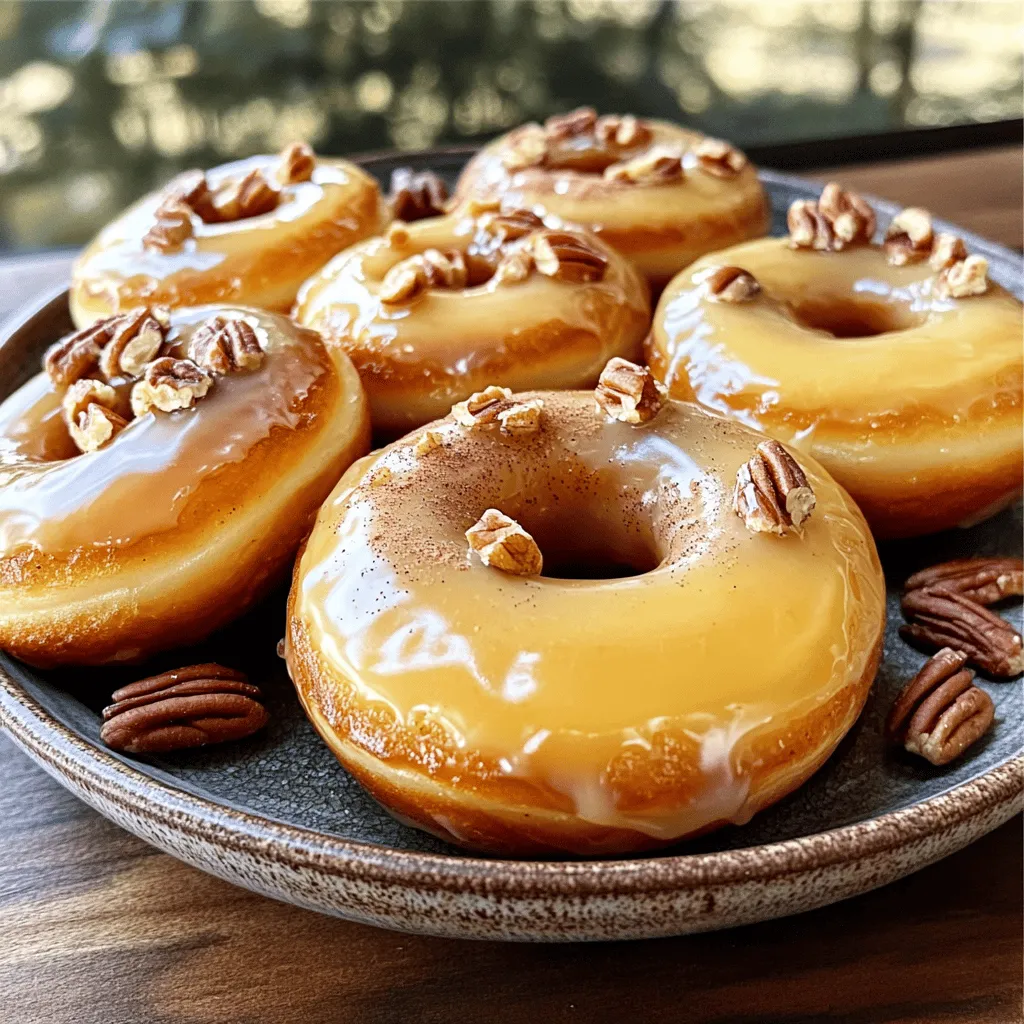
Maple Glazed Donuts Irresistible Homemade Recipe
If you love sweet treats that melt in your mouth, you’re in for a treat! In this blog, I’ll share my easy recipe for maple
- 1 cup canned pumpkin puree - 1/2 cup natural peanut butter or almond butter - 1/4 cup honey or maple syrup These three main ingredients form the base of your protein cups. Canned pumpkin puree gives a rich, creamy texture. It also adds a great flavor, packed with vitamins. Natural peanut butter or almond butter brings healthy fat and protein. Choose one based on your taste. Honey or maple syrup adds sweetness. This balance of flavors makes the cups delicious. - 1/2 cup rolled oats - 1/2 cup vanilla protein powder - 1 teaspoon pumpkin spice blend Now, let's look at the dry ingredients. Rolled oats provide fiber and help bind the mixture. They also add a chewy texture. Vanilla protein powder boosts protein content. This makes your snack filling. The pumpkin spice blend gives that warm, cozy flavor of fall. It usually includes cinnamon, nutmeg, and ginger. - 1/4 cup dark chocolate chips - 1/4 cup chopped walnuts or pecans You can add extra fun with optional add-ins. Dark chocolate chips give a sweet bite. They add antioxidants too. Chopped walnuts or pecans add crunch and healthy fats. These add-ins make your protein cups even more exciting. You can mix and match based on what you have or like. First, grab a mixing bowl. Add 1 cup of canned pumpkin puree. Then, include 1/2 cup of natural peanut butter or almond butter. Next, pour in 1/4 cup of honey or maple syrup. Mix these ingredients well. You want everything to be smooth and uniform. Now, it’s time to add the dry ingredients. Add 1/2 cup of rolled oats to the mixture. Then, include 1/2 cup of vanilla protein powder. Sprinkle in 1 teaspoon of pumpkin spice and 1/4 teaspoon of salt. Stir the mix until a dough-like texture forms. This part is key, as it helps to hold everything together. If you want extra flavor, fold in optional add-ins. You can use 1/4 cup of dark chocolate chips or 1/4 cup of chopped walnuts or pecans. Next, line a muffin tin with paper liners or spray it with non-stick cooking spray. Using a spoon or cookie scoop, evenly distribute the mixture into the muffin cups. Press down firmly to pack them tightly. This ensures each cup holds its shape. To serve the no-bake pumpkin spice protein cups, stack them on a bright plate. Add a sprinkle of cinnamon on top for flair. For a fun twist, place a dollop of whipped coconut cream beside each cup. This makes the dish feel special and festive. To keep your protein cups fresh, store them in an airtight container. Refrigerate them, and they will stay good for about a week. If you want to keep them longer, freeze them. Just wrap each cup in plastic wrap first. This helps maintain their taste and texture. If you don’t have peanut butter, try almond butter or cashew butter for a different flavor. You can also use sunflower seed butter if you need a nut-free option. For sweeteners, honey works great, but maple syrup is a nice choice too. Adjust the amount to match your taste preferences. {{image_2}} Each protein cup has about 6 grams of protein. This comes mainly from the vanilla protein powder and the nut butter. The protein helps to build and repair muscles, making these cups a great snack after a workout. Each protein cup holds around 150 calories. This means you can enjoy them without worrying too much about your calorie intake. The mix of ingredients gives you energy and keeps you full. These ingredients pack a nutritional punch: - Canned pumpkin puree: Rich in vitamins A and C, it supports your immune system. - Nut butter: Provides healthy fats and protein, which help keep you satisfied. - Rolled oats: Full of fiber, they aid digestion and keep your energy steady. - Pumpkin spice: This blend has antioxidants and can help with inflammation. Enjoy these tasty protein cups knowing they are good for you! You can change the taste of these protein cups easily. Try adding different spice blends. Instead of pumpkin spice, use: - Apple pie spice for a sweet twist. - Gingerbread spice for a holiday cheer. - Espresso powder for a coffee kick. Mixing in these spices can make your snack fun and unique. Each blend gives it a new taste. You can switch out the nut butter for a new flavor. Cashew butter is smooth and creamy. It adds a mild taste that pairs well with pumpkin. Sunflower seed butter is a great choice too. It has a nutty flavor and is perfect for nut-free diets. Just replace the peanut or almond butter with one of these options. To make these cups fully vegan, substitute honey with maple syrup. This keeps the sweetness while ensuring it is plant-based. Use a vegan protein powder too. This way, you can enjoy these tasty treats without animal products. These changes make the recipe friendly for everyone. Yes, you can make these protein cups gluten-free. To do this, simply use certified gluten-free oats. Regular oats can be cross-contaminated with gluten during processing. Always check labels when buying oats. This small change helps ensure everyone can enjoy these tasty treats. These protein cups last about one week in the fridge. Keep them in an airtight container. This helps to keep them fresh and tasty. If you notice any changes in smell or texture, it’s best to discard them. Yes, you can freeze the protein cups. To freeze, wrap each cup in plastic wrap. Then place them in a freezer-safe bag or container. They can last up to three months in the freezer. When ready to eat, let them thaw in the fridge overnight. Enjoy your pumpkin spice treat whenever you want! This blog post covered how to make protein cups using simple ingredients. We discussed the main and dry ingredients, plus optional add-ins for extra taste. The step-by-step guide helps anyone mix and assemble these healthy snacks. Remember to consider storage and presentation tips for the best enjoyment. With variations and FAQs, you have all you need for success. Enjoy making these tasty treats!
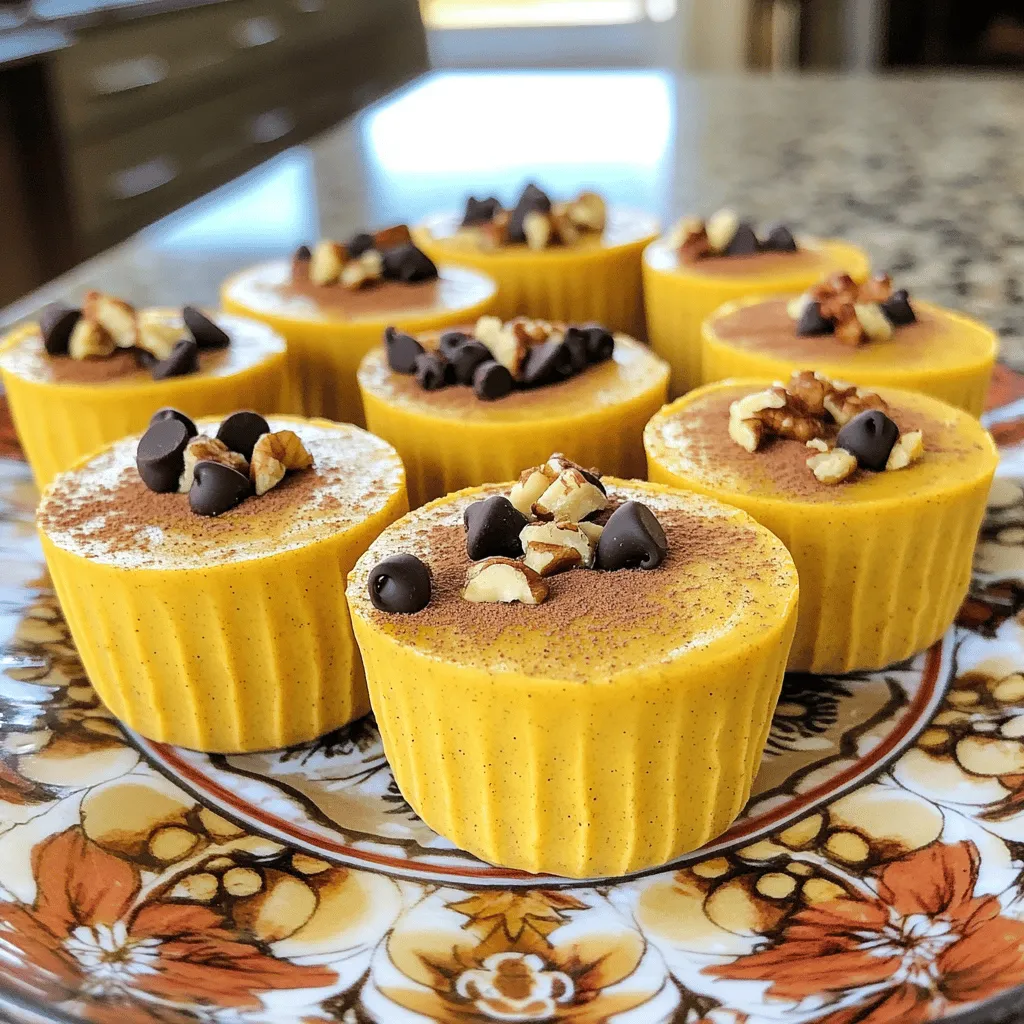
No-Bake Pumpkin Spice Protein Cups Easy and Delicious
Craving a tasty treat that’s also packed with protein? Look no further! These No-Bake Pumpkin Spice Protein Cups are easy to make and delicious. You
- 2 large apples (Granny Smith or Honeycrisp) - 1 cup caramel sauce (store-bought or homemade) - 1 teaspoon cinnamon - 1 tablespoon lemon juice - 1 package (17.3 oz) frozen puff pastry sheets - 1 egg (beaten for egg wash) - 2 tablespoons brown sugar - 1 tablespoon all-purpose flour - A pinch of salt You need a few simple ingredients to make caramel apple turnovers. Start with two large apples. I love using Granny Smith for their tartness or Honeycrisp for sweetness. Next, grab a cup of caramel sauce. You can buy this at a store or make your own. Add a teaspoon of cinnamon for warmth and a tablespoon of lemon juice for brightness. The lemon juice also helps keep the apples fresh. You will also need a package of frozen puff pastry sheets. This is the key to that flaky texture we all love. Don’t forget the egg! You will beat it to make an egg wash. This helps the turnovers turn golden when baking. Measure out two tablespoons of brown sugar and one tablespoon of all-purpose flour. These add sweetness and help thicken the filling. Lastly, just a pinch of salt will balance all the flavors. With these ingredients, you will create a warm and sweet treat that everyone loves. - Preheat oven to 400°F (200°C). - Prepare baking sheet with parchment paper. - In a bowl, combine: - 2 large apples, peeled and diced - 1 cup caramel sauce - 1 teaspoon cinnamon - 1 tablespoon lemon juice - 2 tablespoons brown sugar - 1 tablespoon all-purpose flour - A pinch of salt - Mix well until apples are coated. - Roll out puff pastry on a floured surface. - Cut each sheet into 4x4 inch squares. - Place a heaping tablespoon of filling in the center of each square. - Fold the square diagonally to form a triangle. - Seal edges by pressing down with a fork. - Brush tops with beaten egg for a golden finish. - Place turnovers on the prepared baking sheet. - Bake for 15-20 minutes until golden brown. - Let cool for a few minutes before serving. These steps make it easy to create warm, sweet caramel apple turnovers. Enjoy the delightful taste! Choose apples that give the best taste. I suggest using Granny Smith or Honeycrisp apples. Granny Smith offers a nice tartness, while Honeycrisp brings sweet and juicy flavors. Mixing both types gives you a great balance. This blend makes the filling rich and tasty, ensuring a perfect bite. To seal edges well, press down firmly with a fork. This keeps the filling inside. Make sure to fold the pastry tightly. For even baking, space the turnovers apart on the baking sheet. This allows heat to circulate and gives them a nice, golden color. Serve the turnovers warm for the best flavor. Dust them with powdered sugar for a sweet touch. Drizzle extra caramel sauce over the top for added sweetness. Pair them with vanilla ice cream for a creamy contrast. Enjoying them fresh from the oven makes every bite special! {{image_2}} You can make your caramel apple turnovers even better with fun extras. Try adding chopped nuts like walnuts or pecans for a crunchy texture. You can also mix in some raisins or dried cranberries for a fruity twist. These add-ins will bring new flavors to your turnovers. If you want to switch up the sauce, consider using chocolate or vanilla. A drizzle of melted chocolate can create a rich taste. Vanilla sauce adds a nice sweetness that pairs well with apples and caramel. Both options give you a chance to be creative with your toppings. While puff pastry is great, you can also try different types of dough. Phyllo dough works well for a crispy and flaky texture. It can give your turnovers a unique crunch. You can also use traditional pie crust for a more classic taste. Each type of dough will change the final result, making it fun to experiment. For those who need gluten-free options, look for gluten-free puff pastry. Many brands offer this choice, so you can enjoy the same flavors without the gluten. If you're vegan, you can make simple swaps. Use a plant-based caramel sauce and replace the egg wash with almond milk or soy milk. This way, everyone can enjoy caramel apple turnovers, no matter their diet. To keep your caramel apple turnovers fresh, use these tips: - Let them cool completely before storage. - Place leftovers in an airtight container. - For short-term storage, keep them at room temperature for up to two days. - For long-term storage, freeze them. Wrap each turnover in plastic wrap, then place them in a freezer bag. To maintain crispness: - Reheat before serving. - Avoid stacking them in the container, as this can make them soggy. To reheat your turnovers for the best results: - Preheat your oven to 350°F (175°C). - Place turnovers on a baking sheet. - Heat for about 10-15 minutes until warm and crisp. Common mistakes to avoid: - Don't microwave them; this makes them chewy and soggy. - Avoid reheating from frozen without thawing, as this can lead to uneven heating. Yes, you can prepare the filling a day before. Just keep it in the fridge. For the pastry, you can cut the squares early. Store them in the fridge too. When you are ready, fill and bake them. This saves time and makes baking easier. You can use store-bought caramel sauce for ease. Look for brands that taste good. Homemade caramel sauce can be richer and more fun to make. If you have time, try making it. Both options work well in this recipe. The turnovers are done when they look golden brown. You should see them puffed up nicely. If the outer crust is crisp, they are ready to enjoy. A good sign is the smell of warm apple and caramel filling. Yes, you can freeze turnovers before baking. Place them in a single layer on a baking sheet. Once frozen, transfer them to a freezer bag. To bake, do not thaw them first. Bake for a few extra minutes until golden. Caramel apple turnovers are simple and delicious. We covered key ingredients, easy steps, and helpful tips to make them perfect. You can choose the right apples and even try fun variations. Remember to store your turnovers well to keep them fresh. I hope you enjoy baking and sharing these treats. They are sure to impress family and friends.
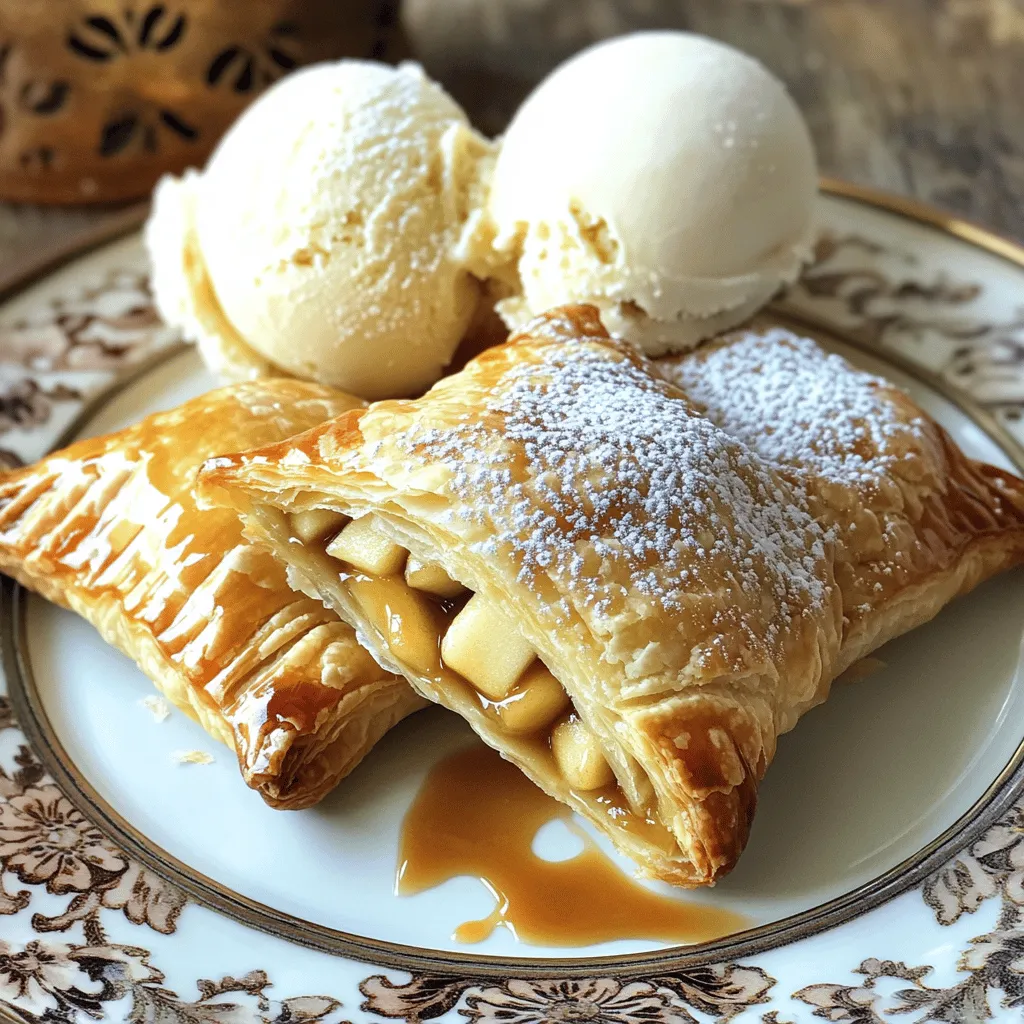
Caramel Apple Turnovers Irresistible and Simple Delight
Are you ready to delight your taste buds with a warm, sweet treat? Caramel apple turnovers are the perfect blend of gooey caramel and crisp
To make these No-Bake Biscoff Cheesecake Cups, gather the following ingredients: - 1 cup Biscoff cookies, crushed - 1/4 cup unsalted butter, melted - 8 oz cream cheese, softened - 1/2 cup powdered sugar - 1 cup heavy whipping cream - 1/2 cup Biscoff spread (for swirls and drizzling) - Pinch of salt - Extra Biscoff cookies for garnish These ingredients create a rich and creamy dessert. The Biscoff cookies give a sweet, spiced flavor. The cream cheese adds a smooth texture, while the heavy whipping cream makes it light and fluffy. The Biscoff spread is the star of the show, offering a unique taste that pairs perfectly with the other ingredients. The pinch of salt balances the sweetness, making each bite delightful. Having these ingredients ready will help you make the cheesecake cups quickly. Remember, using high-quality cream cheese and fresh whipping cream can enhance the taste. Enjoy the process of putting these ingredients together for a treat that will impress everyone! First, we need to make the crust. In a medium bowl, combine 1 cup of crushed Biscoff cookies with 1/4 cup of melted unsalted butter. Mix these until every crumb gets coated. This will give your crust a great flavor. Next, grab your serving cups. Spoon about two tablespoons of the cookie mixture into each cup. Press down gently to form an even layer. This step is key for a crunchy base. Now, let’s move on to the filling. In a large mixing bowl, beat 8 ounces of softened cream cheese with 1/2 cup of powdered sugar. Mix until it’s smooth and creamy. This will be the heart of your cheesecake. Once it’s creamy, gradually add in 1 cup of heavy whipping cream. Beat this mixture until it thickens into soft peaks. This makes the cheesecake light and fluffy. To add that special Biscoff taste, gently fold in 1/2 cup of Biscoff spread. This will create beautiful swirls in your filling. Just be careful not to overmix; you want those lovely, tasty ribbons. Now, it’s time to fill the cups. Spoon the cheesecake mixture over the crust in each cup, filling them about three-quarters full. Don’t worry if it looks a bit messy; it’ll taste amazing. Finally, cover the cups with plastic wrap and refrigerate them for at least 4 hours. This chilling time helps the cheesecake set perfectly. Once they are ready, you can enjoy your delicious No-Bake Biscoff Cheesecake Cups! To get the perfect cheesecake texture, you want it creamy and smooth. Start with softened cream cheese. Cold cream cheese won't mix well. Beat the cream cheese and powdered sugar together until fully combined. This step is key for a fluffy filling. When you add the heavy cream, beat it until you see soft peaks. This adds air and lightness to your cheesecake. Gently fold in the Biscoff spread. Swirling it in gives that rich flavor without overmixing. To keep your cheesecake cups fresh, cover them tightly with plastic wrap. They last in the fridge for up to three days. If you have leftovers, do not add the garnish until you're ready to serve. This keeps the cookies crunchy and the drizzle fresh. If you want to save them longer, you can freeze the filling in airtight containers. Just thaw them in the fridge overnight before serving. For a stunning presentation, use clear cups or glass jars. This shows off the lovely layers. Before serving, drizzle extra Biscoff spread on top. Add some crushed cookies for a nice crunch. You can even add a dollop of whipped cream for extra flair. These small touches make your dessert look fancy and inviting, perfect for parties or gatherings. {{image_2}} You can easily change the flavor of your No-Bake Biscoff Cheesecake Cups. Want to add some chocolate? You can mix in melted chocolate into the cream cheese filling. Dark chocolate works great! You can also add chocolate chips for a nice crunch. If you love fruit, try adding fresh berries. Strawberries or raspberries make a tasty topping. You can even fold in some fruit puree into the cheesecake mix. Garnishes can take your cheesecake cups to the next level. Besides crushed Biscoff cookies, you can use whipped cream for a light touch. Drizzling chocolate sauce or caramel adds a sweet kick. Nuts like chopped hazelnuts or almonds bring a crunchy texture. For a fun twist, consider adding a sprinkle of sea salt. This gives a nice contrast to the sweet flavors. If you plan a big gathering, you can adjust the portion sizes. Use larger cups or bowls to serve more people at once. You can also double the recipe for extra servings. Make sure to chill the larger portions long enough. This way, everyone gets a delicious treat without waiting too long. Biscoff cheesecake cups stay fresh in the fridge for about 3 to 4 days. Keep them covered with plastic wrap or a lid. This keeps them moist and tasty. If you notice any signs of spoilage, it’s best to throw them away. Yes, you can freeze Biscoff cheesecake cups! They freeze well for up to 2 months. Just make sure to store them in an airtight container. This will help prevent freezer burn and keep their flavor intact. The best way to thaw Biscoff cheesecake cups is to move them to the fridge. Let them thaw overnight. This method keeps them creamy and delicious. Avoid using a microwave, as it may change their texture. The no-bake Biscoff cheesecake cups need about 4 hours to chill. This time helps the cheesecake blend flavors and firm up. I recommend letting them chill overnight for the best taste. The longer they sit, the better they become! Yes, you can use other cookies! Some great options are Oreos, graham crackers, or even chocolate biscuits. Each type will change the flavor, so pick what you like best. Just remember to crush them well and mix with melted butter. Cream cheese is thicker and tangy. It gives the cheesecake a rich flavor. Mascarpone is creamier and sweeter. It makes desserts silkier. I prefer cream cheese for this recipe, as it pairs well with the Biscoff. But you can use mascarpone if you want a lighter touch! This blog post focused on making delicious Biscoff cheesecake cups. You learned about essential ingredients, step-by-step instructions, and helpful tips. I shared ideas for variations and storage info to keep your treats fresh. In the end, these cheesecake cups are simple and enjoyable to make. With a little creativity, you can customize them to suit any occasion. Enjoy every creamy bite!
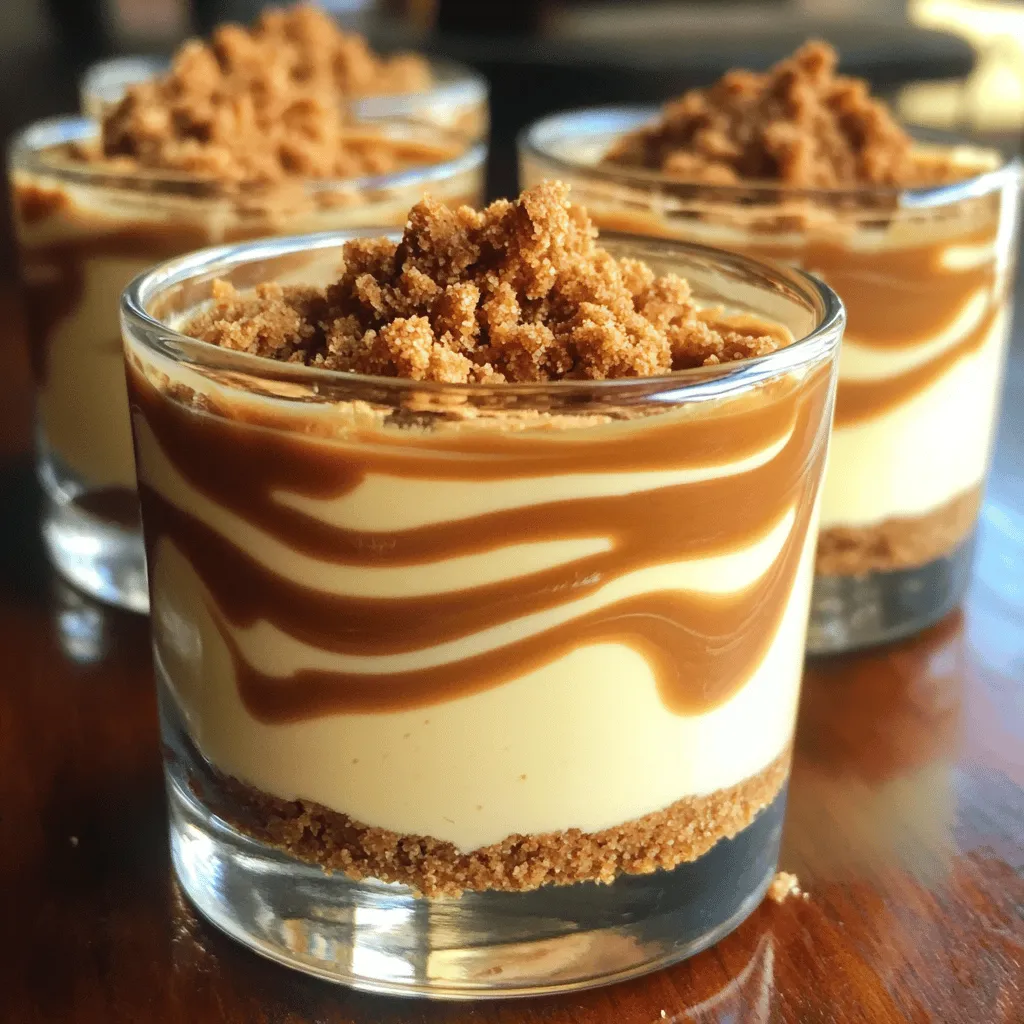
No-Bake Biscoff Cheesecake Cups Delightful Dessert
Craving a sweet treat that’s quick and easy? No-Bake Biscoff Cheesecake Cups are the answer! I promise, these delightful desserts blend creamy cheesecake goodness with
When making Pumpkin Spice Rice Pudding, you need a few simple ingredients. Here’s what you’ll need: - 1 cup Arborio rice - 4 cups whole milk - 1 cup pumpkin puree - 1/3 cup brown sugar - 1 teaspoon pumpkin pie spice - 1 teaspoon vanilla extract - 1/4 teaspoon salt - Optional add-ins: - 1/2 cup raisins - 1/4 cup chopped pecans (for topping) - Whipped cream (for serving) Each ingredient plays a key role in creating rich flavors. Arborio rice gives the pudding its creamy texture. Whole milk adds that wonderful richness. Pumpkin puree is the star, bringing in a lovely fall flavor. Brown sugar sweetens the dish, while pumpkin pie spice adds warmth. Vanilla extract lifts the overall taste, and a pinch of salt balances it. You can also add raisins for sweetness and pecans for crunch. The whipped cream is a nice touch for serving, making it feel special. 1. In a medium saucepan, combine 1 cup of Arborio rice with 4 cups of whole milk. This rice gives our pudding a creamy texture. 2. Next, incorporate 1 cup of pumpkin puree. This adds flavor and color to the dish. 3. Now, add 1/3 cup of brown sugar. This sugar will give the pudding its sweet taste. If you want it sweeter, you can add a bit more. 4. Then, mix in 1 teaspoon of pumpkin pie spice. This will bring that warm, fall flavor. Finally, add 1/4 teaspoon of salt to enhance all the flavors. 1. Bring the mixture to a gentle boil over medium heat. Make sure to stir it often. This helps prevent sticking and burning. 2. Once it starts boiling, reduce the heat to low. Let it simmer uncovered. Stir occasionally for about 25-30 minutes. This is when the rice will become tender and the pudding thickens. 3. Keep an eye on the time. If the rice is still hard, you can cook it a bit longer. Just make sure to stir so it doesn’t stick. 1. After cooking, stir in 1 teaspoon of vanilla extract. If you like, you can also add 1/2 cup of raisins at this point. Cook for an additional 5 minutes. 2. Remove from heat and let it cool slightly. The pudding will thicken a bit more as it cools. 3. For serving, spoon the pudding into bowls. Sprinkle chopped pecans on top for a nice crunch. You can serve it warm or chilled. If you want, add a dollop of whipped cream for extra creaminess. - To avoid sticking, stir often while cooking. Use a wooden spoon for best results. - If your pudding is too thin, let it simmer a bit longer. Keep stirring to prevent burning. - Use a heavy-bottomed pot. It distributes heat evenly and helps your pudding cook well. - You can substitute pumpkin pie spice with cinnamon or nutmeg. This adds depth to your dish. - Try adding a pinch of nutmeg. It pairs nicely with pumpkin and adds warmth. - If you like, mix in maple syrup instead of brown sugar. It gives a nice twist to the flavor. - For garnish, top with chopped pecans or a sprinkle of cinnamon. This adds crunch and color. - Serve with fresh cranberries for a tangy contrast. They brighten the dish and add seasonal flair. - A dollop of whipped cream makes it rich and smooth. It’s a great finishing touch for your pudding. {{image_2}} You can play with rice types in this recipe. Arborio rice is creamy, but other options work too. Jasmine rice gives a nice aroma. Sushi rice adds a chewy texture. Both choices keep it fun and new. For a dairy-free twist, try almond or coconut milk. Almond milk offers a light nutty flavor. Coconut milk gives a tropical taste. Both alternatives still create a nice creamy pudding. Add spices to change the flavor in exciting ways. Nutmeg and allspice can blend well with pumpkin pie spice. A hint of ginger can also add warmth. If you love chocolate, stir in some cocoa powder. You can even add chocolate chips for sweetness. Caramel drizzled on top brings a rich touch. These additions make the pudding unique every time. You can serve this rice pudding in fun ways. Layer it with whipped cream and fruit for a parfait look. This adds texture and makes it more appealing. Want a baked version? Pour the pudding into a baking dish. Top with a sprinkle of nuts or crumbs. Bake until golden for a delicious twist. You can enjoy it warm or cold, whatever you like best. To keep your pumpkin spice rice pudding fresh, let it cool first. Store it in an airtight container. This will help prevent it from drying out. For best results, use glass containers. They keep flavors intact and are easy to clean. You can reheat your rice pudding in two ways: the microwave or stovetop. For the microwave, place the pudding in a bowl. Heat it in short bursts, stirring in between. This keeps the pudding creamy. For the stovetop, place the pudding in a saucepan over low heat. Stir often to avoid burning. Add a splash of milk if it seems too thick. To freeze rice pudding, let it cool completely. Then, scoop it into freezer-safe containers. Leave some space at the top for expansion. When you want to enjoy it, thaw the pudding in the fridge overnight. Reheat it using the stovetop method, adding a bit of milk for creaminess. For pumpkin spice rice pudding, I love using Arborio rice. This rice has a high starch content. As it cooks, it releases creamy starch, which makes the pudding rich and smooth. Other types, like long-grain rice, won’t give the same texture. They do not have enough starch to create that creamy feel. Arborio rice is the star here! Yes, you can make this recipe ahead of time. After cooking, let the pudding cool to room temperature. Then, store it in an airtight container in the fridge. It will stay fresh for about three days. When you want to enjoy it, reheat gently on the stove or in the microwave. Add a splash of milk to bring back its creamy texture. To boost the flavor, you can add extra spices. A pinch of nutmeg or cinnamon works wonders. You can also mix in some maple syrup for sweetness. If you want more texture, try adding chopped nuts or dried fruit. You can even swirl in some caramel sauce for a sweet twist. Each change makes the dish more personal and special! We covered how to make a delicious pumpkin spice rice pudding. You learned about key ingredients like Arborio rice and pumpkin puree. I walked you through preparation, cooking, and finishing touches for the perfect dish. We explored helpful tips and fun variations, enhancing your recipe experience. Finally, I shared storage and reheating advice for leftovers. Enjoy creating this cozy fall dessert that’s easy and customizable for anyone!
Pumpkin Spice Rice Pudding Comforting Fall Delight
Looking for a cozy fall treat? You’ll love my Pumpkin Spice Rice Pudding. This warm, creamy dessert combines the comforting taste of Arborio rice with