Desserts

To make the triple-chocolate trifle, gather these key items: - 1 cup dark chocolate pudding - 1 cup milk chocolate pudding - 1 cup white chocolate pudding - 1 cup heavy whipping cream - 2 tablespoons powdered sugar - 1 teaspoon vanilla extract - 1 cup chocolate cake, cubed (store-bought or homemade) - 1 cup crushed chocolate cookies (like Oreos) - 1/2 cup chocolate shavings (dark, milk, or white for garnish) - Fresh mint leaves for garnish (optional) You can swap some ingredients for variety: - Use chocolate mousse instead of pudding for a richer texture. - Substitute almond milk or coconut milk for regular milk in the puddings. - Try vanilla cake in place of chocolate cake for a lighter taste. - Use any type of cookie you like for the crushed layer. - Instead of chocolate shavings, you can use sprinkles or crushed nuts. Select the best ingredients for a great taste: - Choose high-quality chocolate for the puddings. It makes a big difference in flavor. - Use fresh whipping cream for a rich, fluffy topping. - If possible, buy organic eggs and milk for a more natural flavor. - Opt for premium chocolate cookies for better crunch and taste. - Always check the expiration dates on your ingredients. Freshness matters! These tips help ensure your trifle is as delicious as possible. For the full recipe, check the provided instructions. To start, gather three bowls. You need one for each type of pudding: dark chocolate, milk chocolate, and white chocolate. Follow the package instructions for each pudding. Mix well and make sure there are no lumps. Once mixed, cover each bowl with plastic wrap. Place the bowls in the fridge. Let the puddings chill until they set. This usually takes about 30 minutes. Next, take a mixing bowl. Add the heavy whipping cream, powdered sugar, and vanilla extract. Use an electric mixer to whip the cream. Start at a low speed, then increase to medium. Keep whipping until you see soft peaks form. This means the cream is ready. Be careful not to over-whip, or it will turn into butter. Now it's time to layer your trifle! In a large glass bowl, start with a layer of dark chocolate pudding. Spread it evenly across the bottom. Next, add a layer of cubed chocolate cake. Pile it on top of the pudding. Follow this with a layer of whipped cream. Gently press down to keep the layers neat. Repeat these steps with milk chocolate pudding and more cake. Keep alternating layers until you reach the top. End with a layer of whipped cream. For a finishing touch, sprinkle crushed chocolate cookies on top. Add chocolate shavings for a fancy look. You can also garnish with fresh mint leaves if you like. Finally, chill the trifle in the fridge for at least an hour. This helps the flavors blend and the layers to set. Enjoy this dessert delight with friends or family! You can find the full recipe [Full Recipe]. To make your trifle creamy, use fresh puddings. I recommend making them from scratch. If using store-bought, chill them well. This helps them hold their shape. Whip the cream until soft peaks form. This adds lightness to your layers. Mix the whipped cream gently with the puddings. This keeps it fluffy and airy. Use a clear glass bowl for a stunning display. The layers should shine through beautifully. You can also use individual cups for personal servings. Top with crushed chocolate cookies for added crunch. A sprinkle of chocolate shavings adds elegance. Fresh mint leaves can brighten the look. Don’t rush the chilling time. Letting your trifle sit improves the flavor. Avoid packing the layers too tightly. Each layer should be distinct and visible. Be careful not to over-whip the cream. This can turn it grainy. Lastly, don’t skip the garnishes. They make your dessert look special and inviting. Check the [Full Recipe] for detailed steps! {{image_2}} You can play with the types of chocolate in your trifle. Instead of dark, milk, and white chocolate, try other flavors. Use dark chocolate with sea salt for a savory touch. Swap in mint chocolate for a fresh twist. You can also use caramel chocolate for a sweet layer. Each type brings its own flavor and fun. Adding fruits or nuts makes your trifle even more special. You can layer in fresh berries like strawberries or raspberries. Sliced bananas add sweetness and texture. For a crunchy touch, sprinkle in chopped nuts like almonds or hazelnuts. You can also add granola for a delightful crunch. Each layer adds new flavors and surprises. Finishing touches make your trifle shine. You can top it with whipped cream for extra fluffiness. Chocolate shavings or sprinkles add a fun look. Crushed cookies like Oreos give a fun crunch. Fresh mint leaves add color and a hint of freshness. Use these ideas to create a trifle that looks as good as it tastes. For the full recipe, check out the main section. To store your triple-chocolate trifle, cover it tightly with plastic wrap or a lid. This helps to keep the dessert fresh. If you’ve used individual cups, just place a lid on each cup. Make sure no air can get in, as it can dry out the layers. When stored properly in the fridge, the trifle stays fresh for up to three days. After that, the cake can become soggy, and the cream may lose its fluffiness. To enjoy the best taste, aim to eat it within two days. Always keep the trifle chilled; it tastes best cold and refreshing. Freezing trifle is not recommended. The layers may separate when thawed. The whipped cream can also lose its texture. If you need to prepare ahead, make each layer separately. You can freeze the cakes and puddings but assemble the trifle just before serving. For more details on making this indulgent dessert, check the Full Recipe. The best chocolate cake for this trifle is a moist, rich chocolate cake. You can use a store-bought cake or bake your own. A cake that holds its shape is key. If you want more flavor, choose a dark chocolate cake. It pairs well with all the pudding layers. For a lighter option, a chocolate sponge cake works too. Yes, you can make this trifle ahead of time. I suggest preparing it a day in advance. This gives the flavors time to blend. Just cover the trifle with plastic wrap and chill it in the fridge. This way, you can enjoy more time with your guests and less time in the kitchen. The pudding needs to set for at least 1 hour in the fridge. This helps it thicken and firm up. If you have time, letting it sit longer is even better. Just make sure to cover it so it doesn’t dry out. The longer it sits, the better the trifle will taste. In this post, we explored the key ingredients, step-by-step instructions, and tips for making a fantastic triple-chocolate trifle. You learned how to pick good ingredients and layer them well for great texture. We also shared creative ideas for variations and garnishes. Remember, your trifle can be a true showstopper with care and attention. Follow these tips, avoid common mistakes, and let your creativity shine. Enjoy making this tasty dessert that everyone will love!
Triple-Chocolate Trifle Indulgent Dessert Delight
Craving a sweet treat that will wow your guests? Look no further! My Triple-Chocolate Trifle is an indulgent dessert delight that combines rich chocolate flavors
- 2 cups all-purpose flour - 2 cups granulated sugar - 4 large eggs - 3 cups grated carrots - 1/2 cup unsalted butter - 1 teaspoon ground cinnamon - 2 tablespoons maple syrup - 1/2 cup chopped walnuts or pecans - 1 cup crushed pineapple, drained When I create a carrot cake, I always start with the main ingredients. I use all-purpose flour for the base. It gives the cake a nice texture. Granulated sugar adds sweetness. Eggs help bind everything together. Grated carrots are key. They make the cake moist and flavorful. For the cinnamon butter, I choose unsalted butter. It mixes well with the spices. Ground cinnamon brings warmth and depth. I add maple syrup for a hint of sweetness. This combination makes each bite special. Sometimes, I add optional ingredients. Chopped walnuts or pecans add crunch. Crushed pineapple adds extra moisture and a fruity taste. These options let you customize the cake to your liking. For the full recipe, you can check out the complete details. Happy baking! - Preheat the oven to 350°F (175°C). - Grease and flour two 9-inch round cake pans. - In a large bowl, whisk together 2 cups of flour and 2 cups of sugar. - Add 1 teaspoon of baking powder, 1 teaspoon of baking soda, 1 teaspoon of ground cinnamon, 1/2 teaspoon of ground nutmeg, and 1/2 teaspoon of salt. Mix until well combined. - In another bowl, beat 4 large eggs. - Add 1 cup of vegetable oil and 1 teaspoon of vanilla extract. Whisk until smooth. - Gradually add the wet mixture to the dry mixture, stirring gently. - Fold in 3 cups of grated carrots and 1 cup of crushed pineapple. - Divide the batter equally between the two prepared pans. - Bake for 25-30 minutes. Check doneness with a toothpick; it should come out clean. - Let the cakes cool in the pans for 10 minutes. - Invert them onto wire racks to cool completely. - For the cinnamon butter, mix 1/2 cup of softened butter, 1 teaspoon of ground cinnamon, and 2 tablespoons of maple syrup until smooth. - Once cooled, place one cake layer on a plate. Spread cinnamon butter on top. Add the second layer and frost the top and sides. - Optionally, sprinkle some chopped nuts on top. Enjoy your savory carrot cake with cinnamon butter delight! For the complete recipe, check the Full Recipe link provided earlier. To make your carrot cake moist, always use fresh ingredients. Fresh eggs and ripe carrots work best. Grate the carrots finely for a smooth texture. If you leave them too big, the cake may be uneven. I like to use a box grater or food processor for quick grating. This method ensures even distribution in the batter. Using fresh spices makes a big difference. Ground cinnamon and nutmeg add warmth to the cake. You can also add ginger for a little kick. If you want more flavor, consider adding raisins or coconut. These ingredients can enhance the taste and texture. For a smooth frosting finish, make sure your cinnamon butter is soft. Blend the butter well with the cinnamon and maple syrup. If it’s too thick, add a bit more syrup. When frosting, start with a thin layer to catch crumbs. Then, add a thicker layer on top. For decoration, sprinkle chopped nuts or even edible flowers. This adds a nice touch and makes your cake look stunning. For the full recipe, check out the Carrot Cake Delight with Cinnamon Butter. {{image_2}} You can make your carrot cake a bit healthier. One way is to use whole wheat flour instead of all-purpose flour. Whole wheat flour adds fiber and nutrients. Just swap it one-for-one in the recipe. Reducing sugar content is another option. You can cut the sugar by a third without losing taste. You can also use natural sweeteners like honey or agave syrup. Just keep in mind that these will add moisture, so adjust the liquid in the recipe. Add raisins or shredded coconut for a fun twist. Both mix well with the cake’s flavors. Raisins add chewiness while coconut brings a tropical vibe. You can also experiment with spices. Try adding ginger or cloves for a unique flavor profile. Each spice changes the cake's taste, making it exciting every time you bake. Cream cheese frosting is a classic, but many alternatives exist. You can use Greek yogurt with a bit of honey for a lighter option. This gives a tangy flavor and creamy texture. Chocolate ganache is another great twist. It adds richness and pairs well with the carrots. To make it, melt chocolate with cream, then let it cool slightly before spreading it on the cooled cake. For the full recipe, check out the original details! To keep your carrot cake fresh, you can store it at room temperature or in the fridge. If you plan to eat it within two days, room temperature is fine. Just cover it with plastic wrap or place it in an airtight container. This keeps it moist and tasty. If you want to save it longer, put it in the fridge. Wrap the cake tightly in plastic wrap. This helps prevent it from drying out. You can freeze your carrot cake for later enjoyment. First, let the cake cool completely. Then, wrap each layer in plastic wrap. After that, place the wrapped cake in a freezer-safe bag or container. Be sure to label it with the date. When you’re ready to eat it, take the cake out and let it thaw in the fridge overnight. To serve, just let it sit at room temperature for about 30 minutes. Carrot cake lasts about 5 days in the fridge. It can stay fresh for up to 3 months in the freezer. Check for signs of spoilage before you eat it. If you see mold, smell a sour odor, or notice a change in texture, it's best to throw it away. Keeping your cake stored properly will help it taste great for longer. For the full recipe, visit the link provided above. Yes, you can make this carrot cake ahead of time. Prepare it a day or two before you need it. Just store the cake layers covered at room temperature for up to two days. For longer storage, keep them in the fridge. Frost the cake just before serving. This helps the cake stay fresh and moist. Absolutely! If you have allergies, you can use alternatives. For eggs, use flax eggs or applesauce. You can swap all-purpose flour for oat flour or almond flour. Choose nut-free options by leaving out nuts. No problem! If you lack an ingredient, you can often substitute it. If you don't have pineapple, use applesauce. For walnuts or pecans, try sunflower seeds. You can even skip the nuts entirely. To make this cake gluten-free, replace all-purpose flour with a gluten-free flour blend. Look for a blend that includes xanthan gum. This helps mimic the texture of regular flour. You can also use almond flour or coconut flour, but adjust the liquid in the recipe since they absorb moisture differently. You now have everything you need to make a great carrot cake. We walked through the key ingredients, like flour, sugar, and carrots. I shared tips for baking, storing, and even variations to try. Remember, experimenting can lead to delicious twists. So, gather your ingredients, preheat that oven, and enjoy the fun of baking. A tasty carrot cake awaits you!
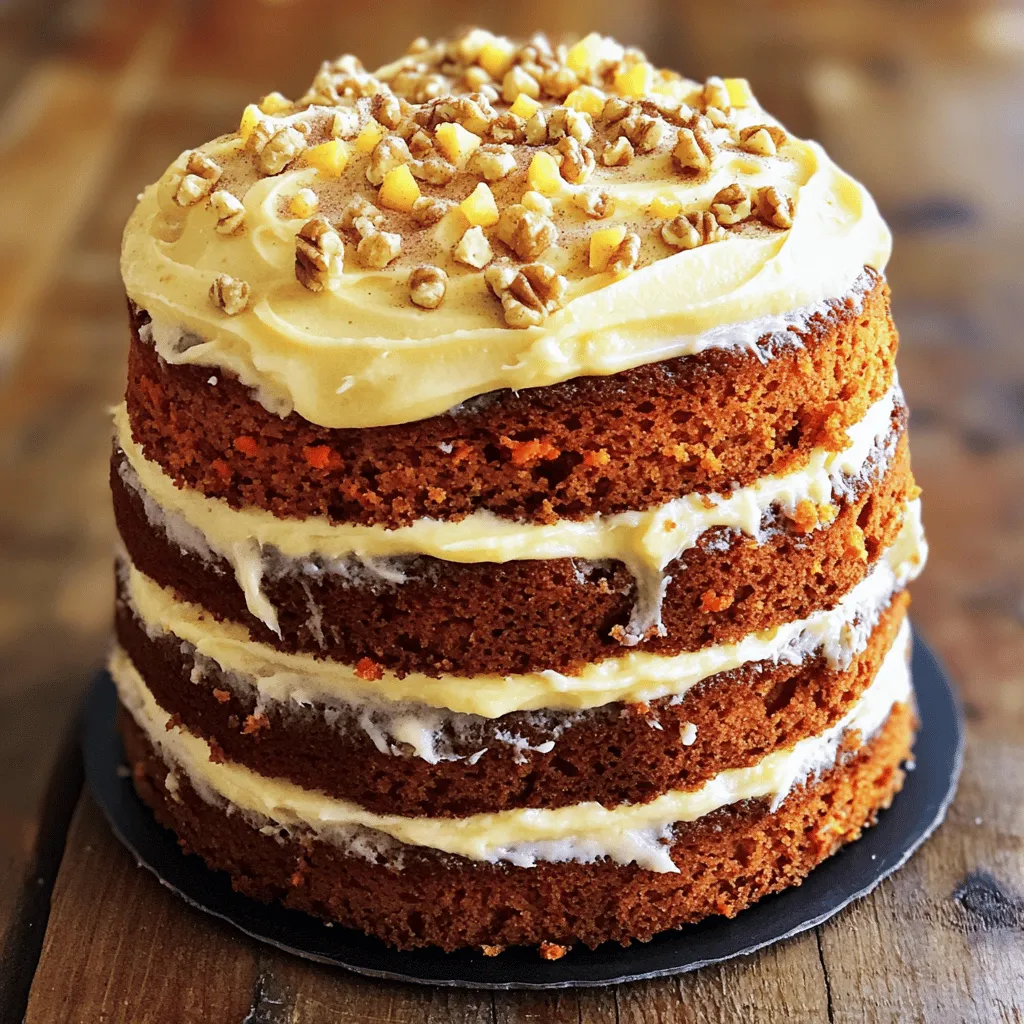
Savory Carrot Cake with Cinnamon Butter Delight
Get ready to experience a delightful twist on a classic treat: savory carrot cake with cinnamon butter! This recipe combines moist, sweet carrots with warm
- 1 cup heavy whipping cream - 1/2 cup semi-sweet chocolate chips - 2 tablespoons powdered sugar These main ingredients create a rich and creamy mousse. The heavy whipping cream gives it a light texture. The semi-sweet chocolate chips add a deep chocolate flavor. Powdered sugar sweetens the mousse just right. - 1 teaspoon pure vanilla extract - Pinch of salt - Fresh berries for garnish (optional) - Mint leaves for garnish (optional) Flavor enhancers elevate the mousse. Vanilla extract brings warmth and depth. A pinch of salt balances the sweetness. Fresh berries and mint leaves make the dessert look pretty. They also add bright flavors that contrast the rich chocolate. For the full recipe, check out Easy Chocolate Mousse Cups. 1. Melt the chocolate properly: Start with a bowl. Add the semi-sweet chocolate chips. Heat in the microwave. Use 30-second intervals. Stir after each time. Keep going until it is smooth. Let it cool a bit before using. 2. Whip the cream to the right consistency: In a large bowl, pour in the heavy whipping cream. Use a hand mixer or a stand mixer. Start on medium speed. Whip until you see soft peaks. Add in the powdered sugar and vanilla. Then, add a pinch of salt. Keep mixing until stiff peaks form. This is key for a fluffy mousse. 1. Folding chocolate and cream together: Take about one-third of the whipped cream. Gently fold it into the melted chocolate. Use a spatula and be careful. This step helps to mix them without losing air. 2. Ensuring the mousse remains airy: Next, add the rest of the whipped cream. Fold it in carefully until it is fully mixed. You want the mixture to stay light and fluffy. Avoid stirring too hard or it will lose its airy texture. 1. How to chill the mousse: Spoon or pipe the mousse into small cups or dessert glasses. Leave a little space at the top. Cover each cup with plastic wrap. Place them in the fridge for at least one hour. This chill time helps the mousse set properly. 2. Best practices for garnishing: Once the mousse is set, it is time to serve. Garnish with fresh berries or mint leaves. This adds color and a fresh taste. You can also use whipped cream on top for extra flair. Enjoy your easy chocolate mousse cups! For the Full Recipe, check out the detailed steps above. - How to achieve stiff peaks in whipped cream: Start with cold heavy cream. Use a clean mixing bowl and beaters. Whip on medium speed. Stop when you see firm peaks that hold shape. Do not overwhip; it can turn grainy. - Best chocolate types for flavor: I recommend using semi-sweet chocolate chips for a balanced taste. Dark chocolate adds depth, while milk chocolate gives a creamier flavor. Choose what you love for the best results. - Overmixing the mousse: When folding in whipped cream, be gentle. Overmixing can deflate the mousse. You want it light and airy, not dense. - Not allowing sufficient chilling time: Chilling is key for the mousse to set properly. Aim for at least one hour in the fridge. This helps achieve the right texture. - Creative serving suggestions: Use small cups, glasses, or even jars for a fun look. Layering mousse with crushed cookies or fruit can add texture and interest. - Alternative garnishing options: Try using chocolate shavings, whipped cream, or edible flowers. Fresh mint leaves and berries also add color and a fresh taste. Get creative with what you have! {{image_2}} You can easily change the flavor of your chocolate mousse. By adding different extracts, you can create unique tastes. Almond extract gives a nutty touch. Orange extract adds a bright, citrusy zing. You can also switch the chocolate type. Use dark chocolate for a richer taste. White chocolate makes it creamier and sweeter. Each choice adds a new twist to this simple treat. If you need dairy-free options, use coconut cream instead of heavy cream. It whips up nicely and adds a tropical flavor. For sweetness, you can choose sugar substitutes. Try using honey or maple syrup for a healthier option. These swaps keep the mousse tasty while catering to dietary needs. Presentation matters! You can use different cups or bowls to serve your mousse. Small jars or elegant glasses can make it look fancy. Try layering the mousse with other desserts, like crumbled cookies or fruit. This gives a fun texture and flavor mix. Each variation makes your mousse cups even more special and delightful. To keep your chocolate mousse fresh, use airtight containers. Glass jars or plastic containers work well. Store the mousse in the fridge for up to three days. Check for signs of spoilage before serving. Can chocolate mousse be frozen? Yes, but it may change texture. Freezing can make it less creamy. To thaw frozen mousse, move it to the fridge overnight. This way, it slowly regains its creamy texture. If you have a gathering, prepare the mousse a day ahead. This gives it time to set properly. Store it in the fridge for up to two days before serving. Just remember to cover it well to prevent drying out. For the full recipe, check back for preparation details. How long does it take to make Easy Chocolate Mousse Cups? It takes about 15 minutes to prep. Then, you let it chill for at least one hour. So, the total time is about 1 hour and 15 minutes. This includes making the mousse and setting it in the fridge. Can I use regular whipped cream instead of heavy cream? Using regular whipped cream won’t give you the same rich texture. Heavy cream makes the mousse creamy and light. If you want a thicker mousse, stick with heavy cream for the best results. How can I make this recipe egg-free? This recipe is already egg-free! You don’t need eggs to make a great mousse. The heavy cream gives it the perfect texture without any eggs. Is it possible to make chocolate mousse without gelatin? Yes, you can make mousse without gelatin. This recipe uses whipped cream to give it structure. The air in whipped cream helps it set well, so you don’t need gelatin at all. What to serve with chocolate mousse cups? You can serve chocolate mousse cups with fresh berries or whipped cream on top. They add color and freshness. A sprinkle of cocoa powder can also enhance the look. Can I pair chocolate mousse with other desserts? Absolutely! Chocolate mousse pairs well with cakes, cookies, or even a fruit tart. Layering mousse with other desserts creates a fun and tasty treat. You can mix flavors and textures for a delightful dessert experience. For the Full Recipe, check out the details above. In this post, we explored making easy chocolate mousse cups. We covered key ingredients, from heavy cream to delicious flavor enhancers. Following the step-by-step guide helps you whip, fold, and chill for the perfect dessert. Remember the tips to avoid common mistakes for success. Plus, we looked at variations and storage options. Enjoy crafting delightful treats that impress and taste amazing! With this knowledge, you can make chocolate mousse your own. Enjoy your tasty creations!
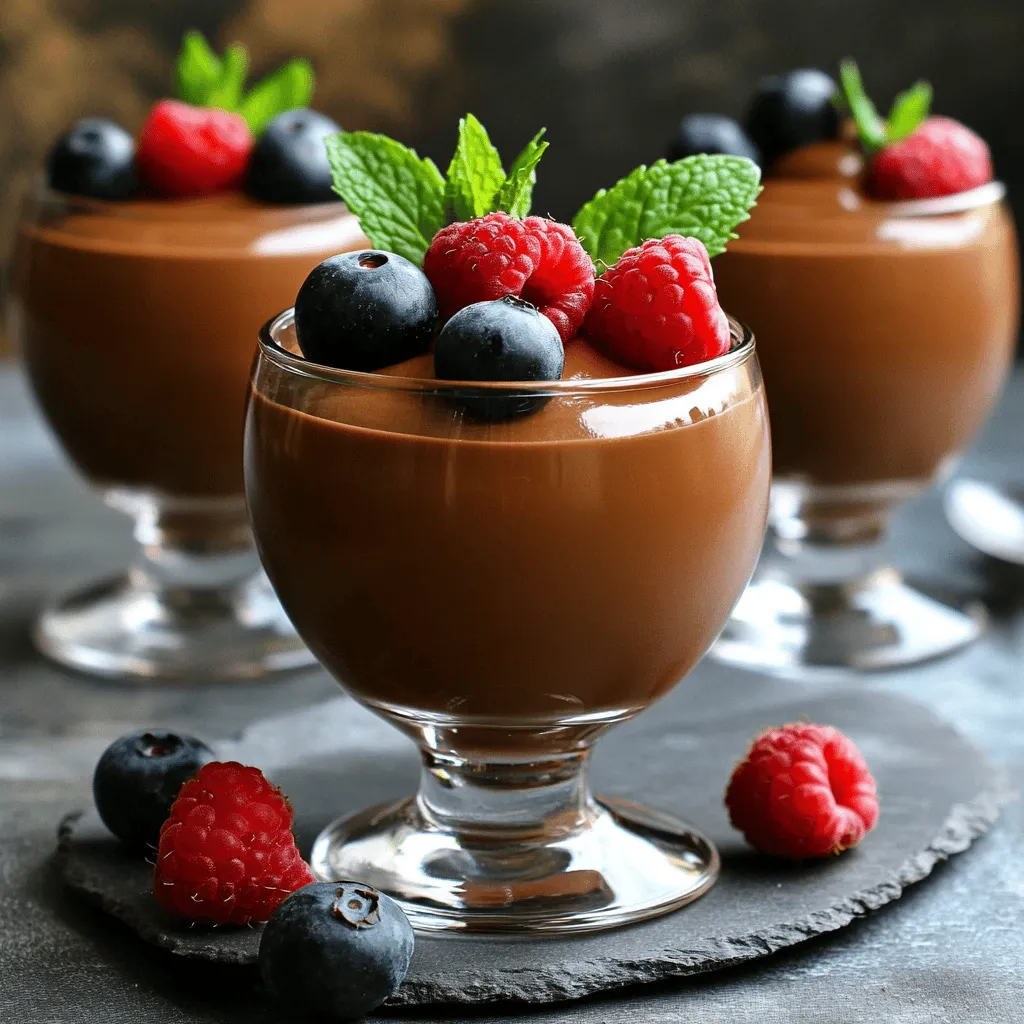
Easy Chocolate Mousse Cups Simple and Indulgent Treat
Indulge in the rich, creamy goodness of Easy Chocolate Mousse Cups! This simple treat only requires a few ingredients and minimal time to make. With
- Ripe banana - Rolled oats - Chia seeds - Almond butter or peanut butter - Honey or maple syrup - Vanilla extract - Ground cinnamon - Pinch of salt - Dark chocolate chips (optional) - Chopped walnuts (optional) These ingredients come together to create a tasty energy bite. Each one plays a key role. The ripe banana adds natural sweetness and moisture. Rolled oats give a hearty texture. Chia seeds boost nutrition with fiber and protein. You can use almond butter or peanut butter based on your taste. Honey or maple syrup acts as a sweetener. Vanilla extract enhances the flavor while ground cinnamon adds warmth. A pinch of salt balances all the flavors. Optional dark chocolate chips can make it more indulgent. Chopped walnuts add crunch and healthy fats. This combination makes each bite both tasty and nutritious. For the full recipe, you can check the details above. - Calories per serving: About 80 calories per bite. - Nutritional benefits: Chia seeds are full of omega-3 fatty acids. They help with heart health. Bananas provide potassium and vitamins. They also offer quick energy. - Energy-boosting properties: These bites give a quick boost. They are ideal for snacks or pre-workout fuel. - High in fiber and protein: Fiber keeps you full longer. Protein helps with muscle repair. - Antioxidants from dark chocolate: Dark chocolate has many health benefits. It can improve heart health and mood. 1. Mixing the wet ingredients Start by mashing 1 ripe banana in a large bowl. Then, add 1/4 cup of almond butter and 1/4 cup of honey or maple syrup. Pour in 1 teaspoon of vanilla extract. Mix until it is smooth and well combined. 2. Combining the dry ingredients In the same bowl, add 1 cup of rolled oats, 1/4 cup of chia seeds, 1 teaspoon of ground cinnamon, and a pinch of salt. Stir everything together until all the dry ingredients blend in smoothly. This mix creates a nice texture. 3. Forming the energy bites If you like, fold in 1/4 cup of dark chocolate chips and 1/4 cup of chopped walnuts for extra flavor. Use your hands or a cookie scoop to form small balls, about 1 inch in size. Place them on a baking sheet lined with parchment paper. - Importance of chilling for texture Chilling helps the energy bites firm up. This makes them easier to eat and gives them a nice texture that holds together well. - Recommended chilling time Refrigerate the formed bites for at least 30 minutes. This time allows the flavors to meld and the bites to set properly. - Suggested serving and portion size This recipe makes about 15 bites. I suggest enjoying 2-3 bites per serving. They are great for a quick snack or a boost during the day. - How to enjoy the energy bites You can eat them straight from the fridge or pack them for on-the-go snacks. These bites pair well with a smoothie or a piece of fruit for a balanced treat. For the full recipe, click here. You can make these energy bites your own. First, you can switch out the nut butter. Almond butter is great, but peanut butter works just as well. If you want a nut-free option, try sunflower seed butter. Next, think about adding fun mix-ins. You can toss in pumpkin seeds or sunflower seeds for a nice crunch. Dried fruits like raisins or cranberries add a sweet touch. Just remember to chop them small so they mix in well. To make these bites, you'll need a few basic tools. Start with mixing bowls. They help you combine all your ingredients easily. A baking sheet comes in handy for placing your energy bites. Line it with parchment paper to prevent sticking. Mixing your ingredients well is key for the best texture. When you combine the wet and dry parts, make sure everything is even. This helps the bites hold together. Avoid mushy bites by not adding too much banana or nut butter. Stick to the recipe. If you find your mixture too wet, add a bit more oats. This will help everything bind nicely without turning soggy. For more details on making these Chia Banana Bread Energy Bites, check out the Full Recipe. {{image_2}} You can change up the flavor of your energy bites easily. Here are some fun ideas: - Peanut butter & chocolate: Mix in creamy peanut butter and dark chocolate chips. This combo adds a rich taste. - Coconut & almond: Add shredded coconut and almond butter. This will give a tropical twist that is delightful. - Spiced pumpkin: Stir in pumpkin puree and pumpkin spice. This version is perfect for fall. These energy bites can fit many diets. Here are some options: - Gluten-free alternatives: Use gluten-free oats. This keeps the bites safe for those with gluten issues. - Vegan options: Replace honey with maple syrup. This makes the bites vegan-friendly while still being sweet. Make your energy bites reflect the season. Here are some ideas: - Holiday-themed energy bites: Add nutmeg and cinnamon for a festive flavor. You can also use holiday-shaped molds. - Summer fruit additions: Toss in fresh berries or chopped peaches. This will give a fresh and juicy taste to your bites. For the full recipe, check out the details above. To keep your Chia Banana Bread Energy Bites fresh, use airtight containers. This helps prevent air and moisture from ruining their taste. You can store them in the fridge or freeze them for later. In the fridge, these energy bites stay fresh for up to one week. If you freeze them, they can last for about three months. For the best taste, wrap them individually before freezing. This keeps them from sticking together. To enjoy your bites after freezing, take them out and let them thaw. You can also warm them in the microwave for a few seconds. This makes them soft and tasty again. Chia Banana Bread Energy Bites can last up to one week in the fridge. Store them in an airtight container to keep them fresh. If you want to keep them longer, freeze them. They can last up to three months in the freezer. Just thaw them in the fridge before enjoying. Yes, you can make these bites ahead of time. They are great for meal prep! Prepare a batch on the weekend and have snacks ready for the week. This saves time and helps you stick to healthy eating. Just remember to store them properly in the fridge. If you can't find chia seeds, you can use flaxseeds. They offer similar health benefits. Ground flaxseeds work best for texture. You could also try hemp seeds, but they change the flavor. Each option keeps the energy bites tasty and nutritious while providing good fats. These energy bites are simple to make using just a few key ingredients. Ripe bananas and oats form the base, while chia seeds add fiber and protein. You can customize these bites with different nut butters and mix-ins. Chilling improves their texture, and proper storage keeps them fresh. With many flavor variations, there’s a bite for everyone. Remember, you can make these ahead for snacks anytime. Enjoy them quickly for a tasty energy boost.
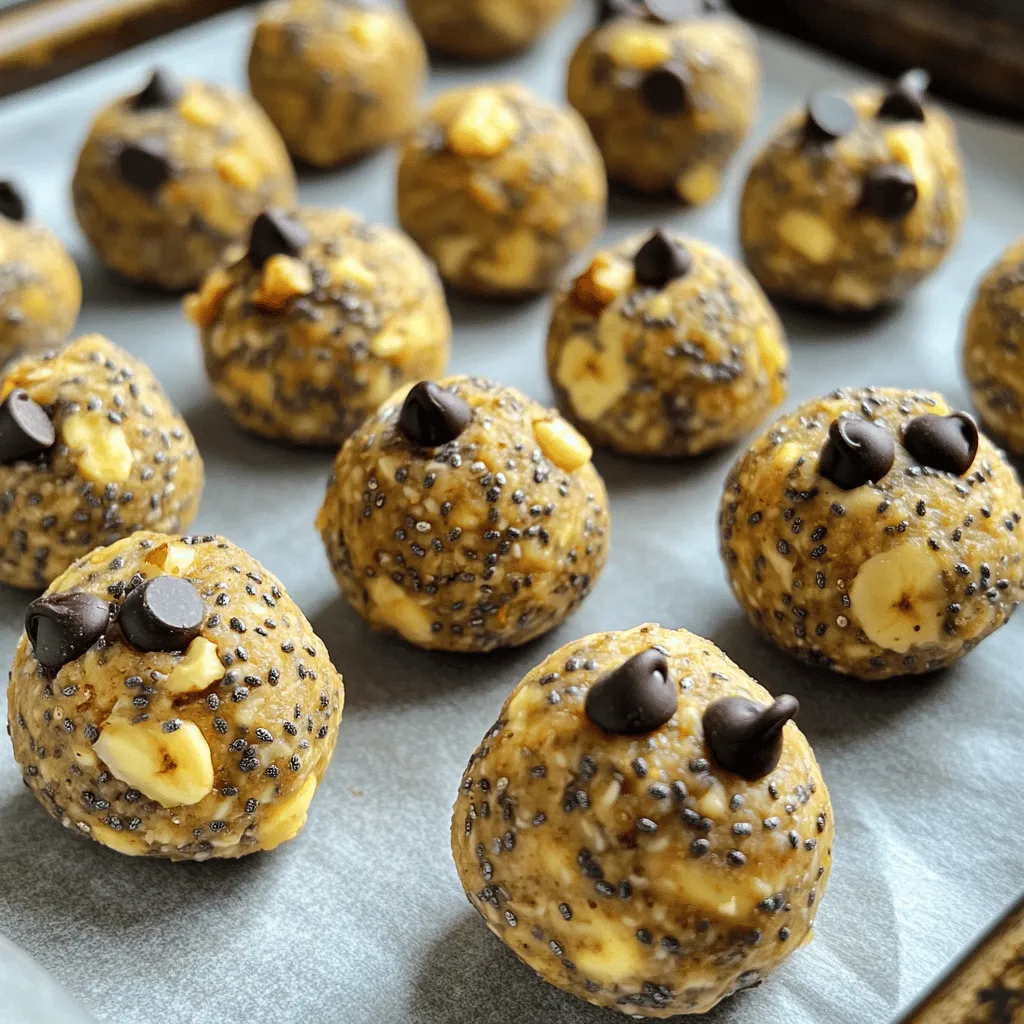
Chia Banana Bread Energy Bites Simple and Tasty Treat
Looking for a quick and healthy snack? Try our Chia Banana Bread Energy Bites! These tasty treats combine ripe bananas, chia seeds, and nut butter
To make this tasty banana bread, you need some key ingredients. Here’s what you will gather: - 3 ripe bananas, mashed - 1/2 cup creamy peanut butter - 1/3 cup melted butter - 3/4 cup brown sugar - 1 large egg, beaten - 1 teaspoon vanilla extract - 1 teaspoon baking soda - 1/4 teaspoon salt - 1 1/2 cups all-purpose flour - 1/2 cup chocolate chips (preferably semi-sweet) - 1/2 cup Reese’s Pieces candies These ingredients work together to give the bread its rich flavor. The ripe bananas add natural sweetness and moisture. Peanut butter brings that creamy, nutty taste we love. You can add a few optional ingredients for extra flavor. Consider these: - 1/2 teaspoon cinnamon for a warm spice - 1/4 cup chopped nuts for crunch - 1/4 cup yogurt for extra moisture These options let you customize your bread. A sprinkle of cinnamon makes it cozy. Nuts add a nice texture. Yogurt keeps it soft and fluffy. If you need to swap some ingredients, here are some easy ideas: - Substitute almond butter for peanut butter if you have a nut allergy. - Use coconut oil instead of melted butter for a dairy-free option. - You can replace all-purpose flour with whole wheat flour for more fiber. These substitutions can help fit your dietary needs. They keep the flavor and fun of the original recipe alive. For the full recipe, check the details above! To make Reese’s Peanut Butter Banana Bread, first gather your ingredients. You will need: - 3 ripe bananas, mashed - 1/2 cup creamy peanut butter - 1/3 cup melted butter - 3/4 cup brown sugar - 1 large egg, beaten - 1 teaspoon vanilla extract - 1 teaspoon baking soda - 1/4 teaspoon salt - 1 1/2 cups all-purpose flour - 1/2 cup chocolate chips (preferably semi-sweet) - 1/2 cup Reese’s Pieces candies Start by preheating your oven to 350°F (175°C). Grease a 9x5 inch loaf pan. This step helps the bread not stick. In a large bowl, mix the mashed bananas with the melted butter. Stir until they blend well. Next, add the peanut butter, brown sugar, beaten egg, and vanilla extract. Mix until the batter is smooth and creamy. Now, sprinkle the baking soda and salt over the banana mixture. Stir until everything is mixed well. Gradually add the all-purpose flour. Mix just enough to combine. Be careful not to overmix; this keeps the bread light. Fold in the chocolate chips and Reese’s Pieces, ensuring even distribution. Pour the batter into your prepared loaf pan. Bake for 60 to 65 minutes. Check the bread by inserting a toothpick into the center. It should come out clean when the bread is done. Once baked, let the banana bread cool in the pan for about 10 minutes. This helps it set. After that, transfer it to a wire rack to cool completely. For serving, slice the banana bread and enjoy it warm. You can add a dollop of peanut butter on top. Sprinkle a few extra Reese’s Pieces around for fun and crunch. For the full recipe, check the recipe section above. When making Reese’s Peanut Butter Banana Bread, a few mistakes can spoil your fun. First, don’t skip the ripe bananas. They bring the best taste and sweetness. Next, avoid overmixing the batter. This can make your bread tough instead of soft. Lastly, check your oven temperature. If it’s too hot or too cold, your bread may not bake evenly. To get that perfect soft texture, use room temperature ingredients. This includes your peanut butter and egg. Mixing the mashed bananas with melted butter is key. It helps create a nice blend. When adding the flour, mix just until combined. This keeps the bread light and fluffy. Also, let your bread cool completely before slicing. This helps it set up nicely. Ripe bananas are the secret to great flavor in this bread. Look for bananas with brown spots. They are sweeter and mash easier. If you have bananas that are not ripe, you can speed up the process. Place them in a paper bag with an apple. The ethylene gas from the apple will help ripen the bananas quicker. Remember, the riper the banana, the better the taste in your bread. For the full recipe, check out the details above. {{image_2}} You can play with flavors in Reese’s peanut butter banana bread. Add-ins make it fun! For a nutty crunch, toss in chopped walnuts or pecans. You can also mix in shredded coconut for a tropical vibe. Want a spice kick? Try adding a teaspoon of cinnamon or a pinch of nutmeg. These small changes add depth to your bread. You can make this recipe gluten-free. Use a gluten-free flour blend instead of all-purpose flour. This swap keeps the taste while making it safe for gluten-sensitive folks. For a vegan version, replace the egg with a flax egg or applesauce. Use vegan peanut butter that has no added sugars. These changes keep the flavor while fitting different diets. Why not mix in some of your favorite snacks? Swap out Reese’s Pieces for M&M’s or Skittles for a colorful twist. Crushed Oreo cookies can add a fun flavor. You can even sprinkle some crushed pretzels on top for a sweet and salty combo. Each twist gives your banana bread a new life. You can find the full recipe to get started on your delicious adventure in baking! Once your Reese’s Peanut Butter Banana Bread cools, store it in an airtight container. This keeps it moist and fresh. You can also wrap it in plastic wrap or aluminum foil. If you store it this way, it can last for about 3 to 5 days at room temperature. For longer storage, consider refrigeration, which can extend its life to about a week. To freeze your banana bread, first let it cool completely. Wrap it tightly in plastic wrap. Then, place the wrapped bread in a freezer bag or container. This helps prevent freezer burn. You can freeze the bread for up to 3 months. When you are ready to enjoy it, simply thaw it in the fridge overnight. To reheat your banana bread, preheat your oven to 350°F (175°C). Place slices on a baking sheet for about 10-15 minutes. This warms the bread and keeps it soft. You can also use a microwave for quick heating, but only for about 15-20 seconds. Enjoy your warm slice with a touch of peanut butter or some extra Reese’s Pieces on top. For the full recipe, check out the details above. Reese’s Peanut Butter Banana Bread stays fresh for about 3 to 4 days at room temperature. Keep it covered to prevent it from drying out. You can also store it in the fridge for up to a week. If you want it to last longer, consider freezing it. Yes, you can make this recipe ahead of time. The banana bread tastes great even after a day or two. If you prefer, bake it a day prior to serving. Just let it cool completely before wrapping it tightly. You can also prepare the batter a day ahead and bake it later. Reese’s Peanut Butter Banana Bread pairs well with many foods. You can enjoy it plain or spread with more peanut butter. It also tastes great with butter or cream cheese. For a fun twist, serve it with chocolate syrup or honey. This blog post covered everything about making Reese’s Peanut Butter Banana Bread. We explored key ingredients, optional flavors, and substitutions. You learned step-by-step instructions for preparation and baking. We shared tips to avoid mistakes and achieve the best texture. You discovered fun variations, storage tips, and answers to common questions. In my view, making this bread is easy and fun. Enjoy experimenting with different flavors and textures. Your next baking project will be a hit!
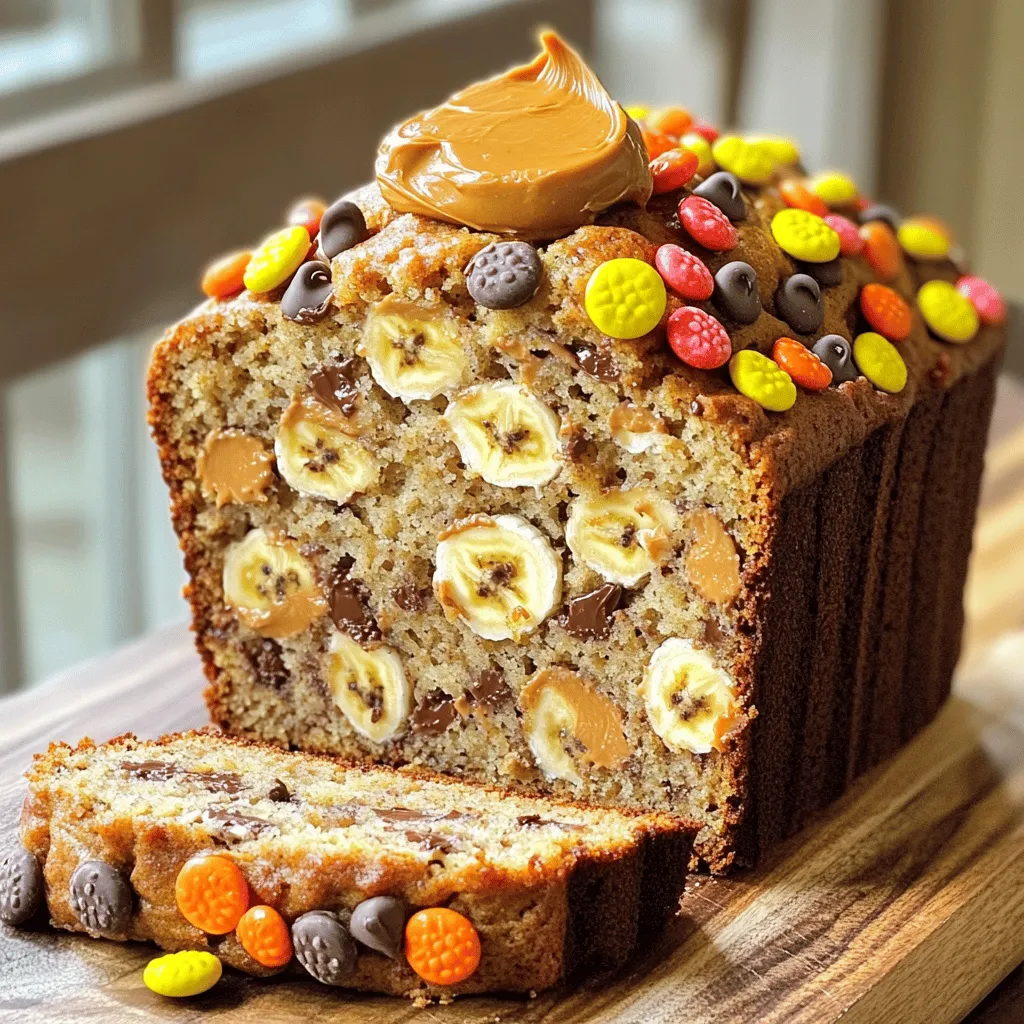
Reese’s Peanut Butter Banana Bread Simple and Tasty
Are you ready to take your banana bread to the next level? This Reese’s Peanut Butter Banana Bread recipe combines rich peanut butter with sweet
To make these delightful pumpkin cookies, you need the following items: - 1 cup pumpkin puree - 1/2 cup granulated sugar - 1/2 cup brown sugar, packed - 1/2 cup unsalted butter, softened - 1 large egg - 1 teaspoon vanilla extract - 2 cups all-purpose flour - 1 teaspoon baking soda - 1 teaspoon baking powder - 1 teaspoon ground cinnamon - 1/2 teaspoon ground nutmeg - 1/4 teaspoon ground ginger - 1/4 teaspoon salt - 1 cup cream cheese, softened - 1/4 cup powdered sugar - 1 tablespoon milk You can make some swaps in this recipe. For pumpkin puree, you can use butternut squash puree. If you want a dairy-free option, try using coconut oil instead of butter. For the frosting, you can use a dairy-free cream cheese. You can also swap powdered sugar for a sugar alternative if you prefer. The quality of your ingredients matters. Fresh pumpkin puree gives the best flavor. Use real butter for a rich taste. Good quality spices add warmth and depth. Using high-quality cream cheese makes the frosting creamy and smooth. If you want the best cookies, don’t skimp on these ingredients. {{ingredient_image_1}} Start by preheating your oven to 350°F (175°C). This step is key for even baking. Next, grab a baking sheet and line it with parchment paper. This helps keep the cookies from sticking. In a large mixing bowl, combine 1/2 cup of softened unsalted butter, 1/2 cup of granulated sugar, and 1/2 cup of brown sugar. Use a mixer to beat these together until creamy. Then, add 1 cup of pumpkin puree, 1 large egg, and 1 teaspoon of vanilla extract. Mix until everything is well blended. In a separate bowl, whisk together 2 cups of all-purpose flour, 1 teaspoon of baking soda, 1 teaspoon of baking powder, 1 teaspoon of ground cinnamon, 1/2 teaspoon of ground nutmeg, 1/4 teaspoon of ground ginger, and 1/4 teaspoon of salt. Gradually add this dry mix to your wet ingredients. Mix just until combined, being careful not to overmix. Now, drop tablespoonfuls of the cookie dough onto your prepared baking sheet. Space them about 2 inches apart and flatten them slightly with a spoon. Bake the cookies for 12-15 minutes. The edges should be lightly golden. The centers will look soft but will firm up as they cool. Keep an eye on them to avoid overbaking. While the cookies cool, it's time to make the frosting. In a medium bowl, beat 1 cup of softened cream cheese until smooth. Add 1/4 cup of powdered sugar and 1 tablespoon of milk. Mix until you reach a creamy consistency. Adjust with more milk or powdered sugar if needed. Once the cookies are cool, spread a generous dollop of frosting on each one. For a lovely finish, sprinkle a pinch of cinnamon or pumpkin spice on top. To make soft and chewy pumpkin cookies, you need the right balance of wet and dry ingredients. Use one cup of pumpkin puree. This adds moisture and flavor. Don’t overmix the dough when you combine wet and dry ingredients. Overmixing can make cookies tough. One common mistake is using too much flour. Scoop flour directly from the bag. Then, level it off with a knife. Don’t pack it down into the cup. Another mistake is baking the cookies too long. Check them at 12 minutes. The edges should be golden, and the middle will look soft. Spices make pumpkin cookies extra special. Use ground cinnamon, nutmeg, and ginger. Each spice adds warmth and depth. For a twist, add a pinch of allspice or cloves. You can also sprinkle some cinnamon on top of the frosting for added flavor. Pro Tips Use Fresh Pumpkin Puree: For the best flavor, consider using fresh pumpkin puree instead of canned. Roast a pumpkin and blend until smooth for a rich, natural taste. Chill the Dough: If the dough feels too sticky to handle, chill it in the refrigerator for 30 minutes. This helps the cookies hold their shape while baking. Frosting Variations: Experiment with the frosting by adding flavors like maple syrup or vanilla bean to create a unique twist on the classic cream cheese frosting. Storage Tips: Store cookies in an airtight container at room temperature for up to a week. For longer storage, freeze the unfrosted cookies and frost them when ready to serve. {{image_2}} You can make gluten-free pumpkin cookies easily. Just swap the all-purpose flour with a gluten-free blend. Look for one that works well in baking. This blend should have a mix of flours and starches. Make sure your baking soda and powder are also gluten-free. The taste stays rich and similar to the classic version. To make these cookies vegan, replace the egg with a flax egg. Mix one tablespoon of ground flaxseed with three tablespoons of water. Let it sit for a few minutes until it thickens. Use vegan butter instead of regular butter. For the frosting, use non-dairy cream cheese. This makes a tasty treat for everyone. While cream cheese frosting is a star, you can try other toppings too. For a lighter option, whip up some coconut cream. Just chill a can of coconut milk and whip the solid part. You can also use a simple glaze made of powdered sugar and milk. Add a splash of vanilla or maple for extra flavor. Each option gives a unique twist to your pumpkin cookies. Store your pumpkin cookies in an airtight container. This keeps them fresh. You can stack them with sheets of parchment paper in between. This prevents them from sticking together. Keep the container at room temperature. They will stay soft and tasty this way. To freeze your pumpkin cookies, first cool them completely. Place them in a single layer on a baking sheet. Freeze them for about an hour. Then, transfer them to a freezer bag. Remove as much air as possible. Label the bag with the date. You can freeze them for up to three months. Pumpkin cookies can last about a week at room temperature. If stored well, they stay soft and yummy. For frosting, keep it in the fridge. It lasts about a week too. If you freeze the cookies with frosting, eat them within a month for best flavor. You can use butternut squash puree instead of pumpkin puree. It has a similar taste and texture. Sweet potato puree is another great choice. Both will give your cookies a lovely flavor. Look for a light golden edge on your cookies. The centers might seem soft but will firm up as they cool. A toothpick inserted in the center should come out clean or with a few moist crumbs. Yes, you can make the cream cheese frosting in advance. Store it in an airtight container in the fridge for up to three days. Just stir it again before using to get it smooth. Pumpkin cookies are usually cakey, thanks to the pumpkin puree. They have a soft, moist texture that feels light. If you want a chewier cookie, try using less flour and bake them a bit longer. Absolutely! Adding chocolate chips brings a nice sweetness to the cookies. You can mix in about one cup of chocolate chips into the dough before baking. It adds a fun twist to the flavor. This blog post provided a complete guide on making pumpkin cookies. We discussed important ingredients, key substitutions, and why quality matters. You learned step-by-step instructions for mixing, baking, and frosting. I shared tips to avoid common mistakes for the best texture. We covered fun variations, storage methods, and answered your top FAQs. Now, you have all the tools to create delicious pumpkin cookies. Enjoy baking and sharing them with friends and family!
Pumpkin Cookies with Cream Cheese Frosting Delight
Get ready to indulge in the rich flavors of fall with my delicious Pumpkin Cookies with Cream Cheese Frosting! These soft, spiced cookies are not
For this easy sweet potato casserole, I use simple and tasty ingredients. Here’s what you need: - 4 large sweet potatoes, peeled and cubed - 1/2 cup brown sugar - 1/4 cup maple syrup - 1/2 cup unsalted butter, melted - 1 teaspoon vanilla extract - 1 teaspoon ground cinnamon - 1/2 teaspoon ground nutmeg - 1/4 teaspoon salt - 1 cup mini marshmallows - Optional: 1/2 cup chopped pecans or walnuts Each ingredient adds its own flavor and texture. Sweet potatoes give a creamy base, while brown sugar and maple syrup add sweetness. The butter makes it rich, and vanilla adds depth. Cinnamon and nutmeg bring warmth and spice. Salt balances the sweetness. Finally, mini marshmallows on top give a fun, toasted finish. If you want crunch, add chopped nuts! These ingredients come together for a delightful dish everyone will love. {{ingredient_image_1}} 1. Preheating the oven Start by setting your oven to 350°F (175°C). This step is key to cooking your casserole evenly. 2. Boiling the sweet potatoes Fill a large pot with salted water and bring it to a boil. Once boiling, add 4 large sweet potatoes, peeled and cubed. Cook them for about 15-20 minutes until they are fork-tender. Drain the sweet potatoes and set them aside. 3. Mashing the sweet potatoes In a large mixing bowl, take your drained sweet potatoes and mash them with a fork or potato masher. Aim for a smooth texture, which helps the flavors mix well. 4. Mixing in other ingredients Add 1/2 cup brown sugar, 1/4 cup maple syrup, and 1/2 cup melted unsalted butter to the mashed sweet potatoes. Then, mix in 1 teaspoon vanilla extract, 1 teaspoon ground cinnamon, 1/2 teaspoon ground nutmeg, and 1/4 teaspoon salt. Stir everything until combined and smooth. 1. Transferring the mixture to a baking dish Grease a 9x13 inch baking dish and pour the sweet potato mixture into it. Spread the mixture evenly across the dish. 2. Adding toppings Sprinkle 1 cup of mini marshmallows on top of the sweet potato layer. Make sure to cover the mixture evenly. If you want extra crunch, you can add 1/2 cup chopped pecans or walnuts. 3. Baking time and temperature Place the baking dish in the preheated oven. Bake for 25-30 minutes. Look for the marshmallows to turn golden brown and toasted. When ready, remove the dish from the oven and let it cool slightly before serving. To get fork-tender sweet potatoes, boil them until soft. This usually takes 15 to 20 minutes. You want them to break apart easily when poked with a fork. After boiling, drain them well to remove excess water. When mashing sweet potatoes, use a fork or potato masher. Mash until smooth for a creamy texture. Avoid using a blender, as it can make them gummy. If you like, you can mix in some melted butter while mashing for extra creaminess. You can boost the flavor with extra spices. Try adding a pinch of ginger or allspice for a warm, inviting taste. If you want a richer sweetness, use honey or agave syrup instead of maple syrup. You can also experiment with flavored extracts. A splash of almond extract can add a nice twist. Just be careful not to add too much, as it can overpower the dish. To make your casserole look great, add some garnishes. A light sprinkle of cinnamon on top can add color and flavor. You can also use chopped pecans or walnuts for a crunchy finish. When serving, try a dollop of whipped cream or a scoop of vanilla ice cream. This makes the dish feel special. Always serve it warm to enjoy the best flavors and texture! Pro Tips Choose the Right Sweet Potatoes: Look for firm, smooth-skinned sweet potatoes without any bruises or blemishes for the best flavor and texture. Adjust Sweetness to Taste: Depending on personal preference and the natural sweetness of the sweet potatoes, you can reduce or increase the amount of brown sugar and maple syrup. Make Ahead: This casserole can be prepared in advance. Assemble it and store it in the refrigerator overnight, then bake when ready to serve. Experiment with Toppings: Feel free to mix up the toppings! Try adding crushed graham crackers or coconut flakes along with or instead of the marshmallows for added flavor. {{image_2}} For those who follow a vegan diet, you can make easy swaps. Use coconut oil instead of butter. Replace the eggs with flaxseed meal or applesauce. You can also skip the mini marshmallows or find vegan versions. For gluten-free options, this recipe is already safe. Just make sure your sugar and toppings are gluten-free. If you're looking for alternative sweeteners, try using agave syrup or honey. These can add a different flavor. You can also reduce the amount of brown sugar if you want it less sweet. For topping alternatives, instead of marshmallows, consider using crushed nuts or a sprinkle of oats. Both add a nice crunch. In the South, sweet potato casserole often has a crunchy pecan topping. Mixing in some orange juice or zest can brighten the dish. For an international twist, consider adding spices like cardamom or ginger. Some cultures even add coconut milk for a creamy texture. Each variation brings new flavors to this classic dish. To keep your sweet potato casserole fresh, store it properly. - Refrigeration guidelines: Place leftovers in an airtight container. It can last for about 3 to 5 days in the fridge. Always let it cool down before sealing the container. - Freezing instructions: If you want to save it longer, freeze the casserole. Wrap it tightly in plastic wrap and then in foil. This way, it can last for up to 3 months. Label the package with the date for easy tracking. When you're ready to enjoy leftovers, use these reheating tips. - Best methods for reheating: The oven is the best choice. Preheat it to 350°F (175°C). Place the casserole in a baking dish and cover it with foil. Heat for about 20 to 25 minutes. You can also use the microwave for quick reheating. Just cover it and heat in short intervals until warm. - Keeping the texture intact: To keep the sweet potatoes creamy, avoid overheating. Stir gently if reheating in the microwave. This helps prevent drying out the dish. Sweet potato casserole lasts about three to five days in the fridge. Make sure you store it in an airtight container. This keeps it fresh and tasty. Yes, you can make sweet potato casserole ahead of time. Prepare it a day before and store it in the fridge. Just bake it when you are ready to serve. This saves time on busy days. Absolutely! Fresh sweet potatoes are great for this dish. Peel and cube them, then boil until fork-tender. They will taste fantastic and add a nice texture. You can serve sweet potato casserole with turkey, ham, or roasted chicken. It pairs well with green beans or a fresh salad. These sides balance the sweetness of the casserole. Sweet potato casserole can be healthy, especially if you control the sugar. Sweet potatoes are full of vitamins and fiber. Using less brown sugar and butter can make it even healthier. This blog post covered all you need to make sweet potato casserole. We explored key ingredients, preparation steps, baking tips, and variations. You can adjust the recipe for your diet or region. Don’t forget to store leftovers correctly for the best taste later. Sweet potato casserole is a comforting dish that fits any table. Embrace your creativity and enjoy making this delicious meal with loved ones. You now have all the tools to create a tasty casserole, so get started!
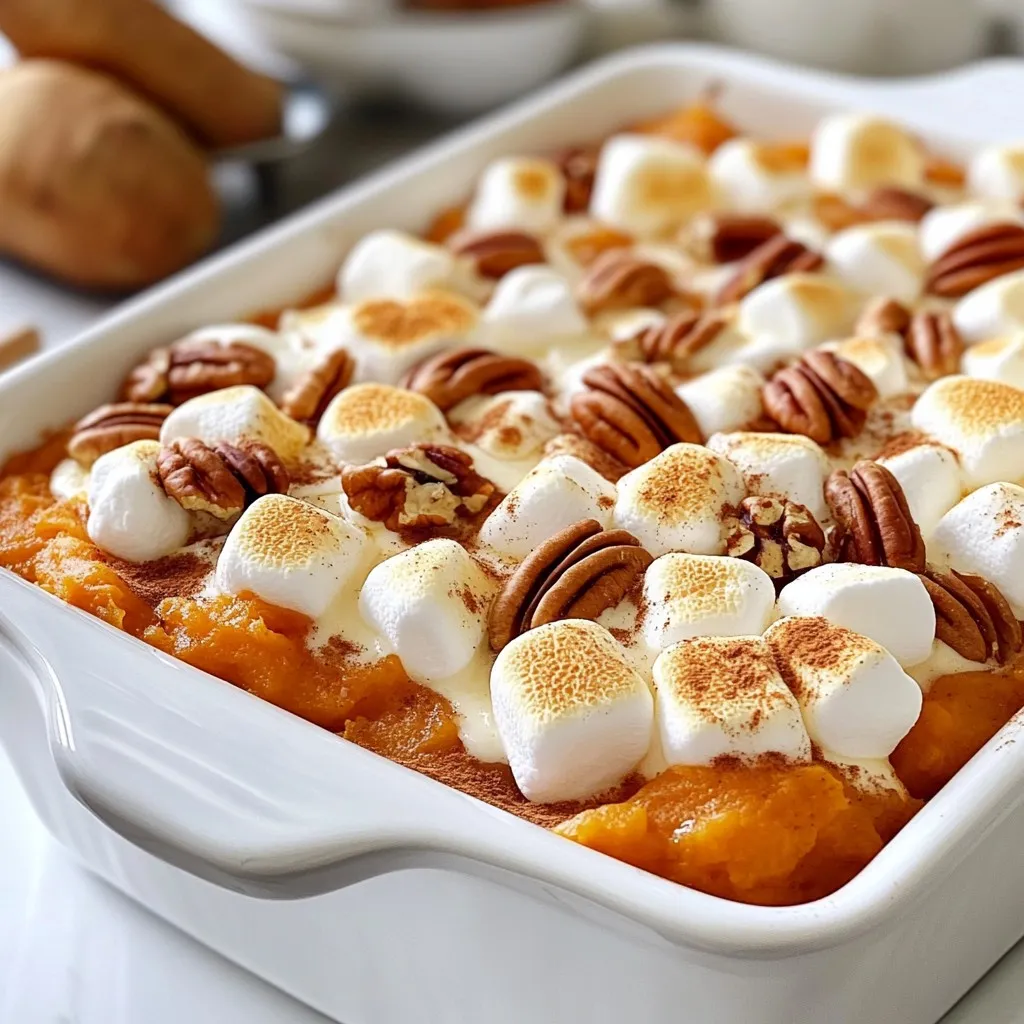
Easy Sweet Potato Casserole Flavorful and Simple Dish
If you’re looking for a simple yet delicious dish that will impress your family, look no further. My Easy Sweet Potato Casserole is packed with
- 3 ripe bananas, sliced - 1/4 cup brown sugar - 1/4 cup unsalted butter - 1 cup all-purpose flour - 1 tsp baking powder - 1/2 tsp baking soda - 1/4 tsp salt - 1/2 cup granulated sugar - 1 large egg - 1/4 cup milk - 1 tsp vanilla extract - 1/2 tsp ground cinnamon - Optional: Whipped cream or vanilla ice cream for serving For this cake, ripe bananas are key. They add natural sweetness and moisture. Look for bananas with brown spots for the best flavor. The brown sugar and butter mixture makes a rich, gooey base. This helps the cake stay moist and gives it a sweet topping when you flip it over. The cake batter is simple yet tasty. It uses all-purpose flour, baking powder, baking soda, and salt for structure. Granulated sugar adds more sweetness. The egg binds the ingredients, while milk and vanilla make it rich. Ground cinnamon adds warmth and depth to the flavor. These ingredients come together to create a delightful dessert. You can enjoy this cake warm or at room temperature. Top it with whipped cream or vanilla ice cream for a special treat! {{ingredient_image_1}} 1. Preheat and Prepare the Cake Pan Set your oven to 350°F (175°C). Grab a 9-inch round cake pan and grease it with cooking spray or butter. This step helps the cake slide out easily later. 2. Make the Topping with Brown Sugar and Butter In a small pot, melt 1/4 cup of unsalted butter and 1/4 cup of brown sugar over low heat. Stir until it bubbles. Pour this mix into your cake pan. Spread it evenly across the bottom. 3. Mixing the Cake Batter In a medium bowl, whisk together 1 cup of all-purpose flour, 1 teaspoon of baking powder, 1/2 teaspoon of baking soda, 1/4 teaspoon of salt, and 1/2 teaspoon of ground cinnamon. In another bowl, beat 1/2 cup of granulated sugar with 1 large egg until light. Mix in 1/4 cup of milk and 1 teaspoon of vanilla extract. Slowly add the dry mix to the wet mix. Stir gently, just until combined. 1. Pouring the Batter Over Bananas Arrange 3 sliced bananas in a circular pattern over the brown sugar mixture in the pan. Then pour the cake batter over the bananas. Spread it out evenly. 2. Baking Time and Temperature Place the cake pan in your preheated oven. Bake for 30 to 35 minutes. You can check if it’s done by inserting a toothpick into the center. If it comes out clean, it’s ready. 3. Cooling and Inverting the Cake Once baked, take the cake out and let it cool in the pan for about 10 minutes. To flip it, place a serving plate over the pan and turn it upside down. Gently lift the pan off. Now, you can see the lovely banana topping. Let it cool completely before slicing. Avoiding Overmixing Mixing the batter is easy, but don’t mix too much. When you combine wet and dry, stop when you see no flour. Overmixing can make the cake tough. A little lumpy batter is okay. It keeps your cake light and fluffy. Ensuring Even Baking For even baking, make sure your oven is at the right temperature. Preheat it to 350°F (175°C). Place the cake pan in the center of the oven. This helps hot air circulate around the cake. Check it at 30 minutes. A toothpick should come out clean when it’s done. Garnishing Ideas To make your cake look great, sprinkle a bit of cinnamon on top. You can also add extra banana slices for color. This small touch makes the cake more appealing. Serving Suggestions with Ice Cream or Whipped Cream Serve your cake warm or at room temperature. Adding a scoop of vanilla ice cream or a dollop of whipped cream makes it special. The cold cream balances the warm cake. Enjoy this treat with family or friends for a happy moment. Pro Tips Use Overripe Bananas: The sweeter and softer the bananas, the better the flavor and texture of your cake. Look for bananas with brown spots for optimal sweetness. Don’t Overmix: When combining the wet and dry ingredients, mix just until incorporated. Overmixing can lead to a tough cake instead of a tender one. Cool Before Inverting: Allow the cake to cool for at least 10 minutes before inverting. This helps the caramelized bananas to set and prevents them from sticking to the pan. Perfect Serving Suggestions: Serve warm with a scoop of vanilla ice cream or a dollop of whipped cream to enhance the flavors and add creaminess. {{image_2}} You can add more flavors to your banana upside-down cake. One great way is by adding nuts or chocolate chips. Chopped walnuts or pecans add a nice crunch. Just fold in about half a cup of nuts before pouring the batter. If you love chocolate, mix in a half cup of chocolate chips for a sweet twist. You can also use other fruits. Pineapple slices work well and give a tropical taste. Try peaches or berries for a fruity mix. Just keep the same baking method and arrange them like the bananas. For gluten-free options, swap all-purpose flour with a gluten-free flour blend. Make sure the blend has a good mix of starches and fibers for the best texture. You might also need to add a bit of xanthan gum to help with the cake’s structure. If you want a vegan version, replace the egg with a flax egg. Mix one tablespoon of ground flaxseed with three tablespoons of water. Let it sit for a few minutes until it thickens. You can also use almond milk or oat milk instead of regular milk. - Best Storage Practices: To store your leftover banana upside-down cake, place it in an airtight container. You can also cover it well with plastic wrap. This keeps the cake moist and fresh. Avoid stacking other items on top of it. - Recommended Duration: The cake stays good for about 3 to 4 days at room temperature. If you want to extend its life, you can refrigerate it. In the fridge, it can last up to a week. - Methods for Keeping the Cake Moist: To reheat, use the microwave. Heat a slice for about 15-20 seconds. This warms it without drying it out. You can also place it in the oven at 350°F (175°C) for about 10 minutes. Cover it with foil to keep it moist. - Serving Leftovers: Serve reheated cake warm. Add a dollop of whipped cream or a scoop of vanilla ice cream on top for a tasty treat. Enjoy it as an easy dessert or snack! Can I use other fruits for the topping? Yes, you can use other fruits! Pineapples and peaches work great. Just slice them thinly. Make sure the fruit is ripe for the best flavor. How do I know when the cake is done baking? To check if the cake is done, use a toothpick. Insert it in the center. If it comes out clean, the cake is ready. If it has wet batter, bake a few more minutes. What can I substitute for eggs in the recipe? You can use applesauce or mashed bananas as an egg substitute. Use 1/4 cup of either for each egg. This keeps the cake moist and tasty. In this blog post, we explored the yummy world of banana upside-down cake. You learned about its main ingredients, how to make it, and tips for perfecting the cake. We also discussed fun variations and how to store and reheat leftovers. This cake is not just delicious; it’s also flexible. Feel free to customize it with your favorite fruits or dietary choices. With this guide, you now have all the tools to bake a tasty treat that will impress everyone! Enjoy making your cake!
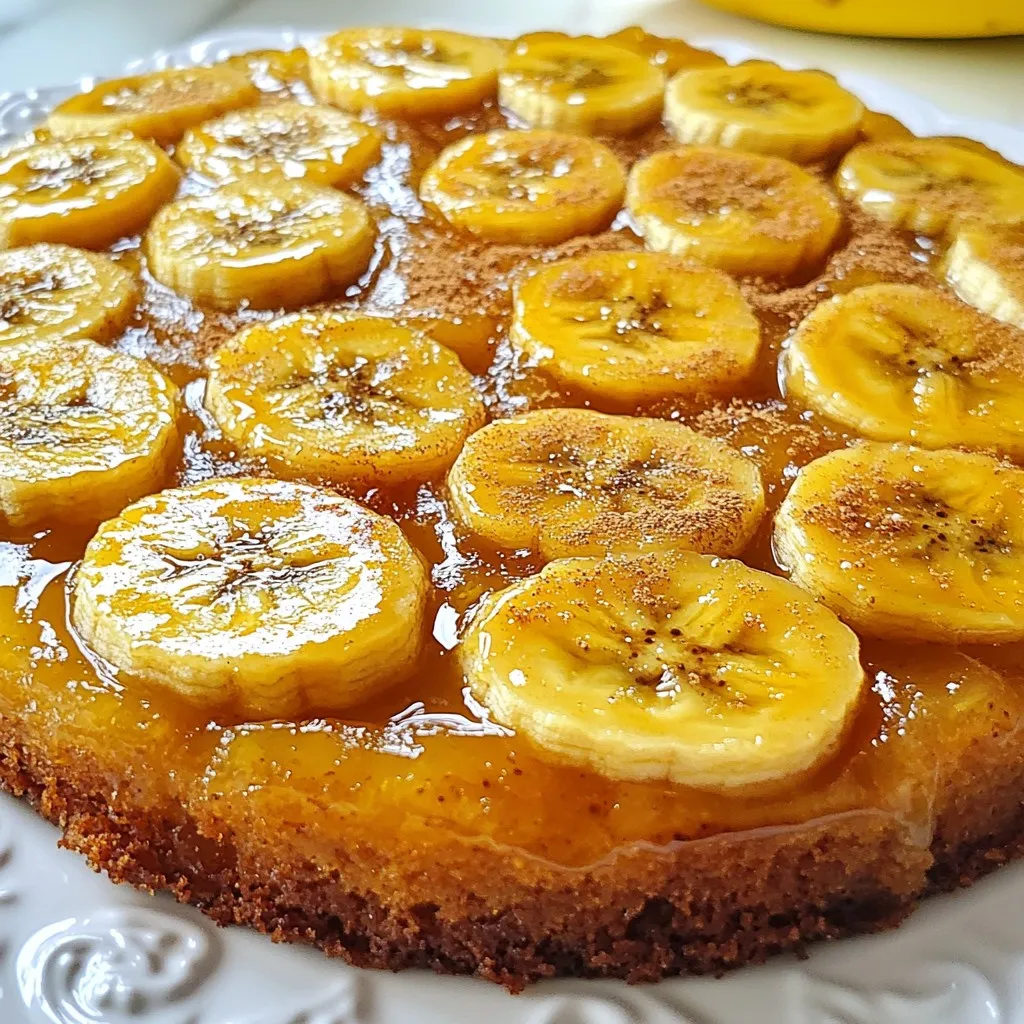
Banana Upside-Down Cake Simple and Tasty Recipe
Are you ready to elevate your dessert game? This Banana Upside-Down Cake is simple, tasty, and sure to impress! With ripe bananas, a sweet brown
To make Strawberry Shortcake Fluff Salad, you will need: - 2 cups fresh strawberries, hulled and sliced - 1 package (8 oz) cream cheese, softened - 1 cup marshmallow fluff - 1/2 cup powdered sugar - 1 teaspoon vanilla extract - 1 cup whipped topping (or cool whip) - 1 cup crushed graham crackers (about 5 graham crackers) - Mint leaves for garnish (optional) These simple ingredients come together to create a light and sweet treat. To keep your salad fresh, use ripe strawberries. Look for bright red berries with no soft spots. Store them in the fridge until you are ready to use them. For the cream cheese, make sure it is at room temperature. This helps it blend smoothly. Keep the whipped topping chilled until you need it. This keeps it fluffy and light. If you do not have cream cheese, you can use mascarpone cheese. It adds a nice creamy texture. Instead of marshmallow fluff, you can use whipped cream for a lighter mix. If you want a sweeter taste, add more powdered sugar or honey. You can swap out strawberries for other fruits like blueberries or peaches. Each fruit gives a unique flavor to the salad. {{ingredient_image_1}} First, gather all your ingredients. You will need fresh strawberries, cream cheese, marshmallow fluff, powdered sugar, vanilla, whipped topping, and crushed graham crackers. Make sure your cream cheese is soft. It helps make the mixture smooth. You can prepare the strawberries while you mix the cream cheese. This keeps the process quick and easy. In a large bowl, beat the cream cheese until it is smooth. Use an electric mixer for the best results. Next, add the marshmallow fluff, powdered sugar, and vanilla extract. Mix everything together until it is fluffy. Now, gently fold in the whipped topping. Use a spatula to combine the two mixtures. Be careful not to deflate the whipped topping. This keeps your salad light and airy. Now it's time to assemble your salad. Take another bowl and mix the sliced strawberries with a tablespoon of powdered sugar. This step makes the strawberries sweeter. Let them sit for about 10 minutes. After that, fold the strawberries into the cream cheese mixture. Make sure they are evenly mixed. For serving, layer the fluff and crushed graham crackers in a large bowl or small cups. Start with graham crackers, then fluff, and repeat layers. Top with more crushed graham crackers for a crunchy finish. Finally, chill the salad in the fridge for at least 30 minutes. This helps the flavors blend together beautifully. For the best texture in your Strawberry Shortcake Fluff Salad, use softened cream cheese. This helps it blend smoothly. Beat it well until creamy. Then, mix in marshmallow fluff and powdered sugar. This creates a light, fluffy base. When you fold in the whipped topping, do it gently. This keeps the mixture airy. Avoid over-mixing; you want it light and fluffy. Presentation matters! Serve the salad in clear glass bowls. This shows off the lovely layers of fluff and strawberries. It looks pretty and inviting. Sprinkle some crushed graham crackers on top for crunch. Add a mint leaf for a pop of color. This makes your dish look fresh and fun. You can make this salad ahead! It tastes even better after chilling. Prepare it up to a day in advance. Just cover it and store it in the fridge. When ready to serve, layer it up in bowls. You can also serve it in individual cups for a fun touch. This way, everyone gets their own serving. Enjoy the easy prep and tasty results! Pro Tips Use Fresh Strawberries: Always opt for fresh, ripe strawberries to enhance the flavor and texture of your salad. Chill Before Serving: Allow the salad to chill for at least 30 minutes before serving; this helps the flavors meld beautifully. Customize the Sweetness: Adjust the powdered sugar according to your taste preference or the sweetness of the strawberries. Presentation Matters: Use clear glass bowls to showcase the lovely layers of the salad for an appealing presentation. {{image_2}} You can easily change up this dessert to fit your taste. Try adding a splash of almond extract for a nutty flavor. You can also mix in some lemon zest for a fresh twist. If you love chocolate, fold in mini chocolate chips. They add a sweet touch to the fluff. You can even use flavored whipped cream for extra flair. Choose your favorite flavor to make it your own! While strawberries are a classic choice, feel free to experiment with other fruits. Blueberries, raspberries, and diced peaches work well too. Slice bananas for a creamy addition that pairs well with the fluff. You can even use mixed berries for a colorful look. Just remember to adjust the sweetness based on the fruit you choose. This keeps the salad tasty and balanced. To make this dessert gluten-free, swap regular graham crackers for gluten-free ones. Many brands offer tasty options that taste just as good. You can also use crushed gluten-free cookies or even oats as a base. Always check labels to ensure all your ingredients are gluten-free. This way, everyone can enjoy this delightful treat! To keep your Strawberry Shortcake Fluff Salad fresh, store it in the fridge. Use an airtight container to prevent any odors from other foods. Layer the mixture gently to avoid smashing the strawberries. If you have extra graham crackers, store them separately to keep them crunchy. You can keep the salad in the fridge for up to three days. After that, the strawberries may start to lose their freshness. Always check for any signs of spoilage before serving. If the smell or color changes, it’s best to toss it out. This salad tastes best cold, so there's no need to reheat it. If it seems a bit thick after a day, add a splash of milk or cream. Stir gently to freshen it up. You can also fold in a few fresh strawberries to enhance the flavor and texture. Enjoy it as a cool treat! Yes, you can use frozen strawberries. Just thaw them first. Drain any extra juice to avoid a watery salad. This keeps your fluff salad light and fluffy. Fresh strawberries taste best, but frozen ones work well in a pinch. This recipe contains dairy and gluten. The cream cheese and whipped topping are dairy products. If you have a gluten allergy, you can use gluten-free graham crackers. Always check labels to ensure they fit your needs. To make this salad dairy-free, swap cream cheese with a dairy-free alternative. Look for options made from nuts or soy. Use dairy-free whipped topping too. These swaps keep the taste and texture nice while avoiding dairy. This blog post covered salad ingredients, mixing techniques, and storage tips. You learned how to choose fresh ingredients and make substitutions. I shared ways to improve texture and presentation. You can customize your salad and store leftovers properly. In summary, with these steps, you can make a great salad. Enjoy experimenting and creating your perfect dish!
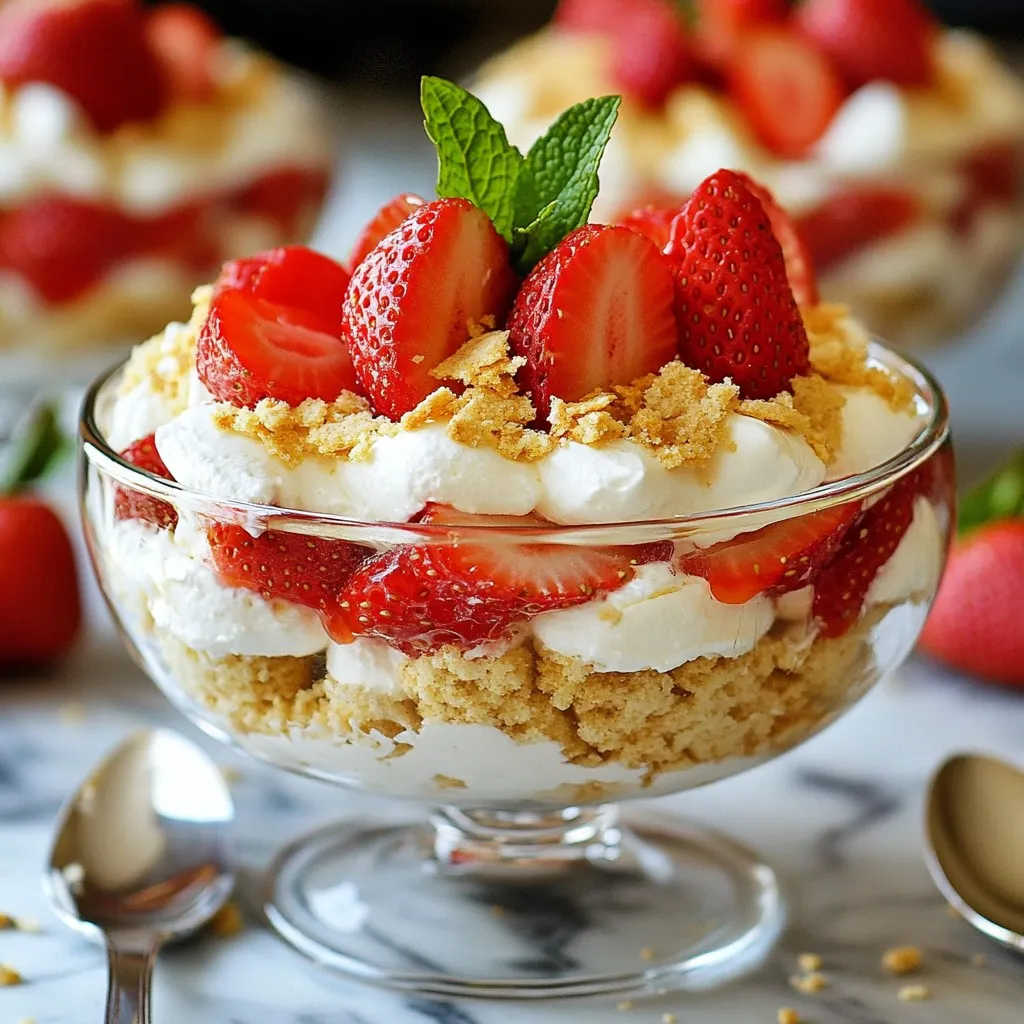
Strawberry Shortcake Fluff Salad Delightful and Easy
Are you ready to make a dessert that wows everyone? My Strawberry Shortcake Fluff Salad is the perfect blend of sweet and creamy goodness. It’s
To make delicious S'Mores hand pies, gather these key ingredients: - 2 cups all-purpose flour - 1/4 cup granulated sugar - 1/2 teaspoon salt - 1/2 cup unsalted butter, cold and cubed - 1/4 cup cold water - 1 cup mini marshmallows - 1/2 cup semi-sweet chocolate chips - 1/2 cup crushed graham crackers - 1 egg, beaten (for egg wash) - 1 teaspoon vanilla extract These items create the perfect blend of sweet and crunchy flavors in your hand pies. You can add fun twists to your S'Mores hand pies. Consider these optional ingredients: - White chocolate chips for a different chocolate flavor - Peanut butter for a creamy filling - Cinnamon for a warm spice kick Feel free to mix and match to suit your taste! If you need alternatives, here are some swaps you can make: - Use whole wheat flour instead of all-purpose flour for a nutty taste. - Swap unsalted butter with coconut oil for a dairy-free option. - Try using dark chocolate chips if you prefer a richer flavor. These substitutions help you create a hand pie that fits your dietary needs or personal preferences. {{ingredient_image_1}} To start, gather your ingredients. You will need flour, sugar, salt, cold butter, and water. In a large bowl, mix together the flour, sugar, and salt. This gives your dough a nice base. Next, add the cold, cubed butter. Use your fingers or a pastry cutter to mix it until it looks like coarse crumbs. This step is key for a flaky crust. Slowly add cold water, one tablespoon at a time. Mix until the dough forms. Be gentle; overworking it can make it tough. Once ready, divide the dough into two disks, wrap them in plastic, and chill for at least 30 minutes. After chilling, preheat your oven to 375°F (190°C) and prepare two baking sheets with parchment paper. Roll out one disk of dough on a floured surface until it is about 1/8-inch thick. Use a cookie cutter or a glass to cut out 3-inch circles. On one half of each circle, place a few mini marshmallows, a sprinkle of crushed graham crackers, and some chocolate chips. Fold the other half over the filling. Press the edges firmly to seal them. For a fun touch, use a fork to crimp the edges. This helps keep the filling inside. Place the assembled hand pies onto your baking sheets. Brush the tops with the beaten egg for a golden finish. Bake them in the oven for 20 to 25 minutes. Keep an eye on them until they turn golden brown. Once they are done, take them out and let them cool slightly. This waiting time makes them easier to handle. Enjoy your delicious S'Mores Hand Pies warm or at room temperature! For a flaky crust, use cold butter. Cold butter creates small pockets that make your crust light. Mix the butter into the flour until it looks like coarse crumbs. Don’t overwork the dough; this helps keep it tender. After mixing, chill the dough for 30 minutes. This step firms up the butter and helps the crust stay flaky when baked. To get that perfect gooey filling, use mini marshmallows and chocolate chips. These melt well inside the pie. Make sure to add a sprinkle of crushed graham crackers. They add texture and help absorb some of the liquid. Don’t overfill the pies; too much filling can spill out while baking. Just a few marshmallows, chocolate chips, and graham cracker crumbs will do. For a beautiful presentation, serve your hand pies warm. Place them on a rustic wooden board. Dust the tops with powdered sugar for a sweet touch. A side of melted chocolate for dipping adds a fun element. You can also arrange fresh berries around the pies. This adds color and freshness to your dish. Pro Tips Chill Your Dough: Make sure to keep your dough cold while working with it. This helps maintain a flaky texture in your hand pies. Use High-Quality Chocolate: Opt for semi-sweet chocolate chips from a reputable brand for a richer flavor in your filling. Experiment with Flavors: Try adding a pinch of cinnamon or a dash of sea salt to the filling for an extra depth of flavor. Serve with Dipping Sauce: Pair your hand pies with a side of melted chocolate or caramel for an indulgent treat. {{image_2}} You can switch up the chocolate for your S'Mores hand pies. Try dark chocolate for a rich flavor. Milk chocolate gives a sweeter taste. You can even use white chocolate for a creamy twist. Each type adds a unique touch to the pie. Have fun mixing and matching! Want to give your hand pies a boost? Consider adding some flavor add-ins. A dash of cinnamon can bring warmth and spice. You might also try a spoonful of peanut butter for creaminess. Want a fruity touch? Add some raspberry or strawberry jam inside. These add-ins will make your pies stand out. If you're looking for healthier options, I have some ideas for you. Use whole wheat flour instead of all-purpose flour. This adds fiber and nutrients. You can use natural sweeteners like honey or maple syrup in place of sugar. Swap out mini marshmallows for homemade, healthier versions. These changes keep the fun while making them more nutritious! To keep your S'Mores hand pies fresh, store them in an airtight container. This helps prevent them from drying out. Place a piece of parchment paper between layers if you stack them. Store at room temperature for up to two days. If you want them to last longer, refrigerate them. They can stay fresh for up to a week in the fridge. When you're ready to enjoy leftovers, reheat them in the oven. Preheat your oven to 350°F (175°C). Place the hand pies on a baking sheet and warm them for about 10 minutes. This keeps them crispy. You can also use a microwave for quick reheating, but they may lose some crispiness. Heat them for about 20 seconds, checking to avoid overheating. Freezing these treats is an easy way to save them for later. First, let the hand pies cool completely. Then, wrap each pie in plastic wrap. Place them in a freezer-safe bag or container. They can last up to three months in the freezer. When you’re ready to eat, thaw them in the fridge overnight. Then, reheat them as mentioned above for that fresh-baked taste. Yes, you can make the dough ahead of time. Prepare it and wrap it in plastic wrap. Chill it in the fridge for up to two days. This way, you can save time when you are ready to bake. Just roll it out when you want to make the hand pies. To prevent the filling from spilling out, don't overfill the pies. Use a small amount of mini marshmallows, chocolate chips, and graham crackers. Make sure to seal the edges well. Crimp them with a fork to ensure they are tight. This keeps the gooey filling inside while baking. You can serve S'Mores Hand Pies with melted chocolate for dipping. A scoop of vanilla ice cream goes well too. For a fun touch, add some fresh strawberries or raspberries. These sides make the dessert even more enjoyable and delicious. You learned how to make delicious S'Mores Hand Pies. We covered the ingredients, step-by-step prep, and baking. I shared tips for a flaky crust and gooey filling. You can even customize flavors and learn storage tips. Try new chocolate types or healthier options for fun twists. With what you know now, you'll create tasty treats and impress friends. Enjoy baking these pies and make tasty memories!
S’Mores Hand Pies Irresistible Dessert Recipe
Get ready to indulge in a sweet treat that’s portable and fun! S’Mores hand pies combine classic flavors of chocolate, marshmallow, and graham crackers, all