Desserts
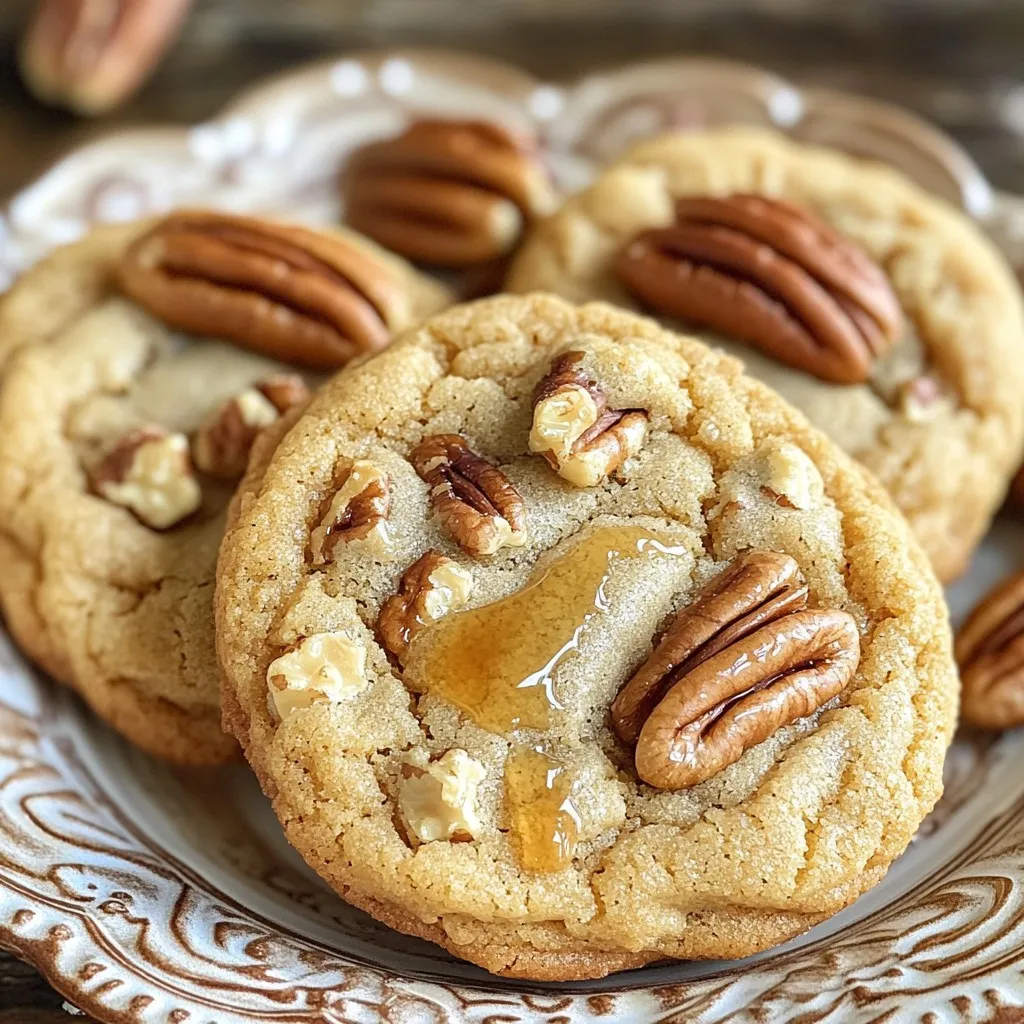
Brown Butter Maple Pecan Cookies Delightfully Flavored
Get ready for a treat that combines rich flavors and a crispy texture! Brown Butter Maple Pecan Cookies are not just cookies; they are pure

Pumpkin Streusel Coffee Cake Cozy Fall Delight
As the leaves change and the air turns crisp, there’s no better treat than Pumpkin Streusel Coffee Cake. This cozy fall delight combines warm spices

Air Fryer Cinnamon Sugar Apple Rings Crunchy Treat
Looking for a fun and tasty snack? Dive into these Air Fryer Cinnamon Sugar Apple Rings! You’ll whip up a crunchy treat that’s both sweet
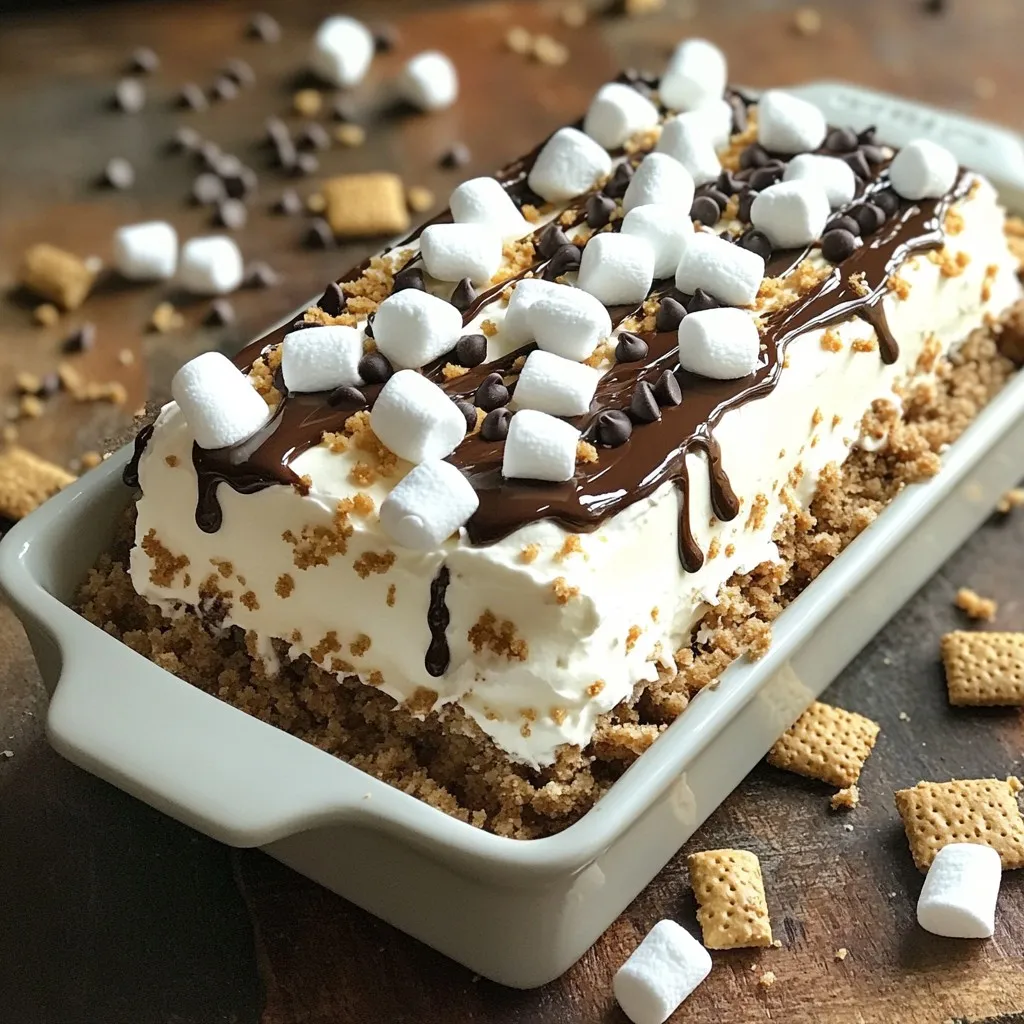
No-Bake S’mores Icebox Cake Decadent and Easy Delight
Ready to indulge in a sweet treat? This No-Bake S’mores Icebox Cake is the perfect answer. With layers of creamy goodness, crunchy graham crackers, and
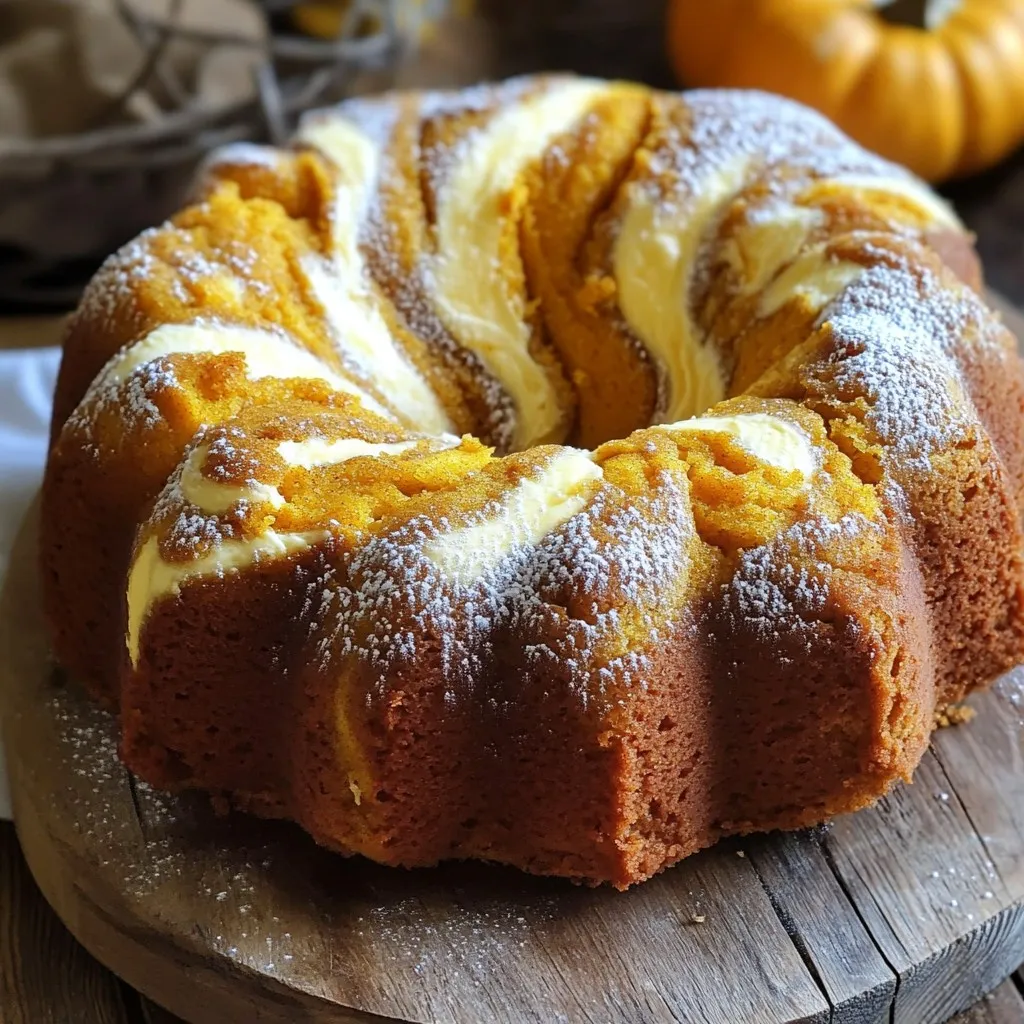
Pumpkin Cream Cheese Pound Cake Simple and Flavorful Cake
Welcome to the delightful world of pumpkin treats! Today, we’re diving into a simple yet flavorful Pumpkin Cream Cheese Pound Cake. This moist cake, filled
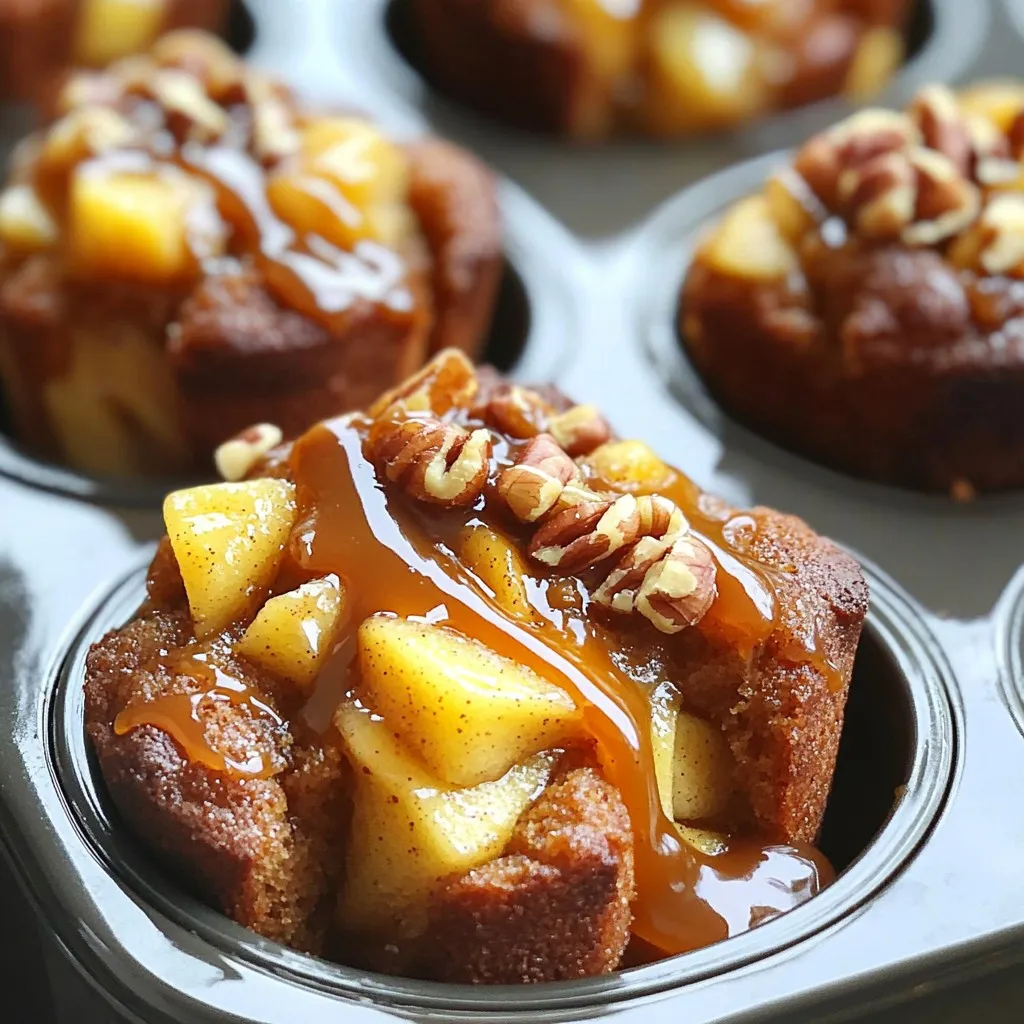
Caramel Apple Monkey Bread Muffins Tasty Sweet Treat
Get ready to enjoy a sweet treat with my Caramel Apple Monkey Bread Muffins! These muffins combine warm, gooey caramel with fresh apples, making them
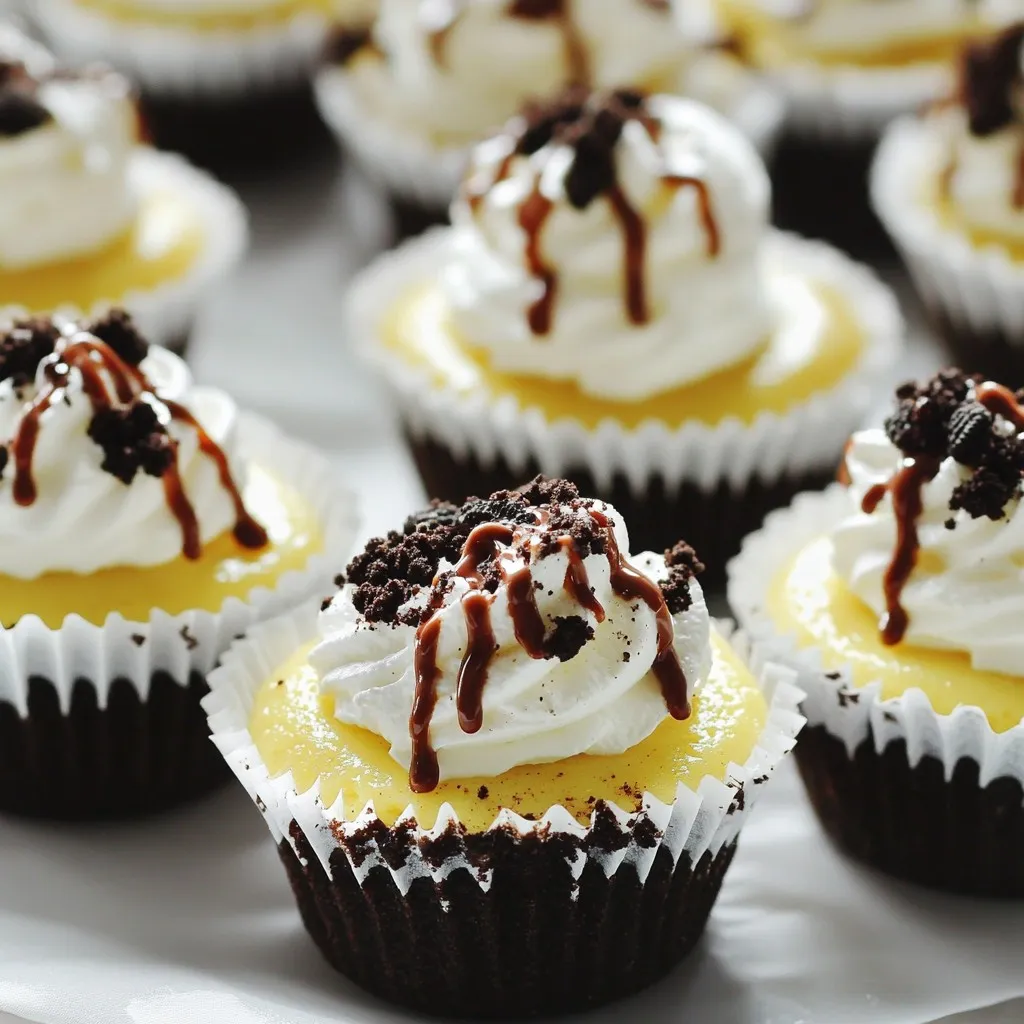
Mini Oreo Cheesecake Bites Delightful Sweet Treat
Looking for a sweet treat that’s both easy to make and crowd-pleasing? You’re in the right place! These Mini Oreo Cheesecake Bites pack all the
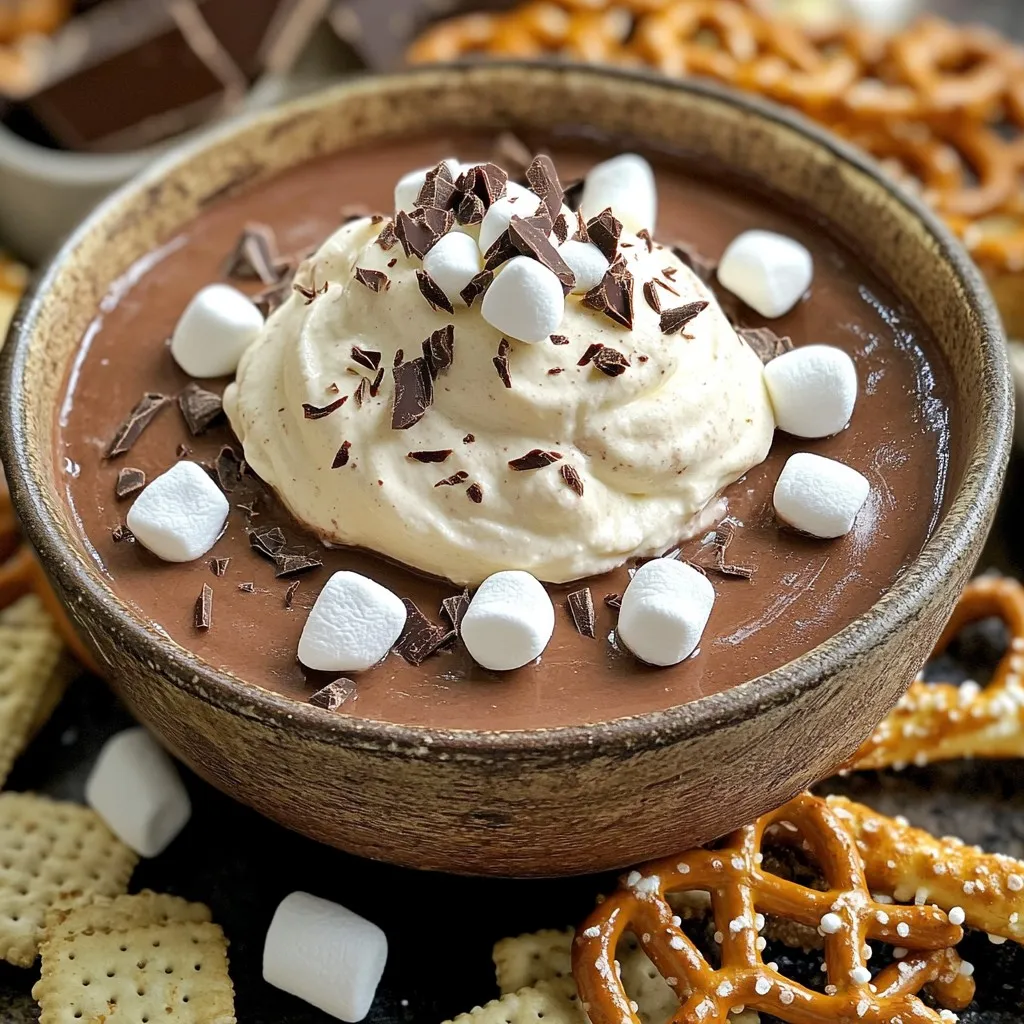
Hot Chocolate Cheesecake Dip Easy and Decadent Treat
Craving a dessert that’s easy, creamy, and totally indulgent? Look no further than my Hot Chocolate Cheesecake Dip! This fun treat combines the rich flavors
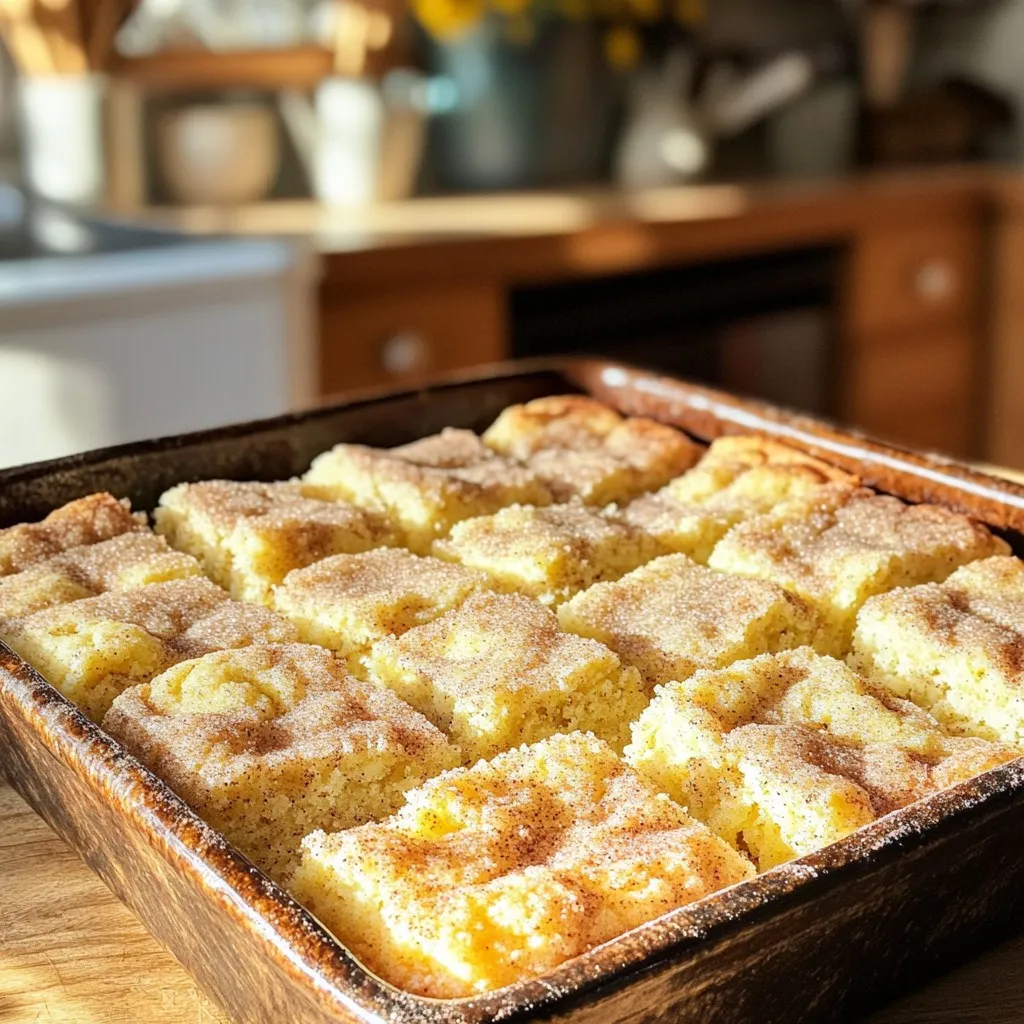
Snickerdoodle Cookie Bars Tasty and Easy Recipe
Craving a tasty treat that’s easy to make? Snickerdoodle Cookie Bars are the answer! These delightful bars combine the classic flavor of snickerdoodles with the
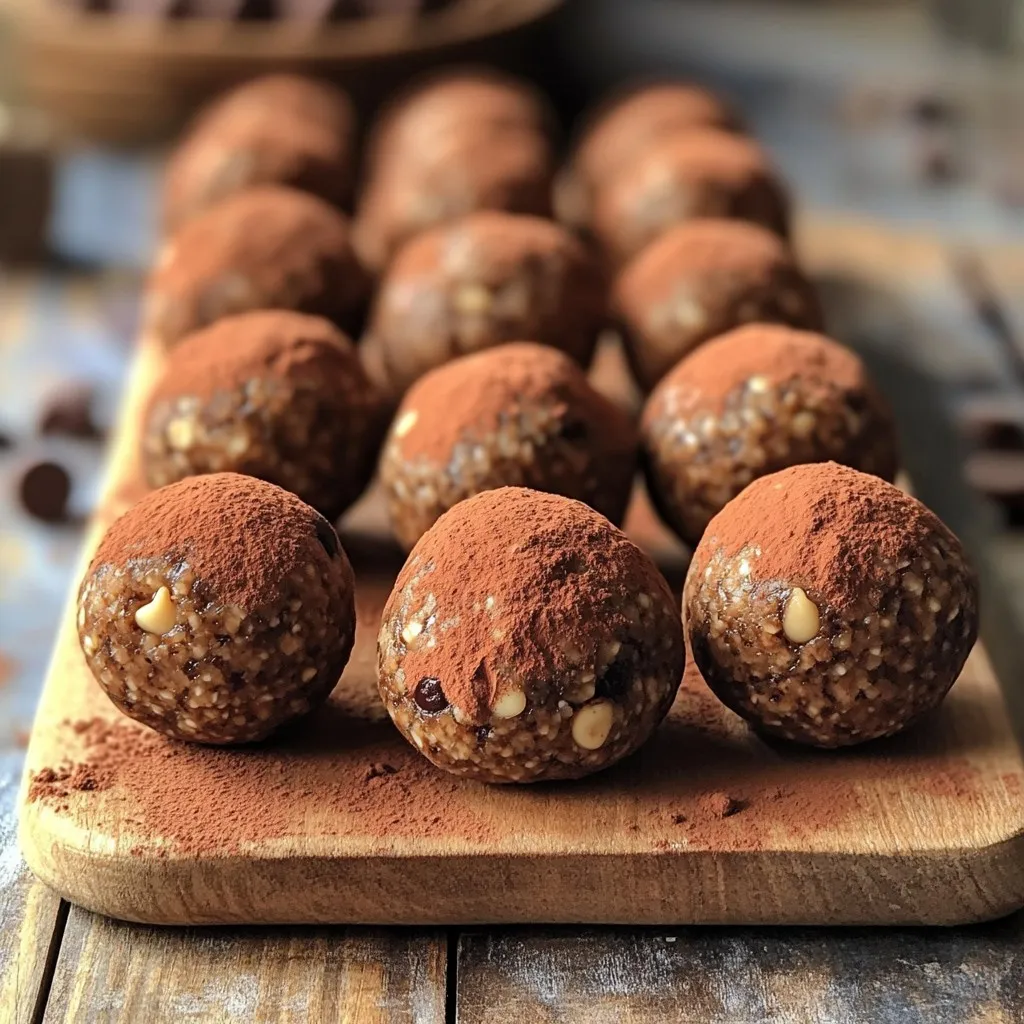
No-Bake Mocha Espresso Energy Balls Easy Recipe
Looking for a quick energy boost without the oven? You’ll love these No-Bake Mocha Espresso Energy Balls! With just a few simple ingredients, you can