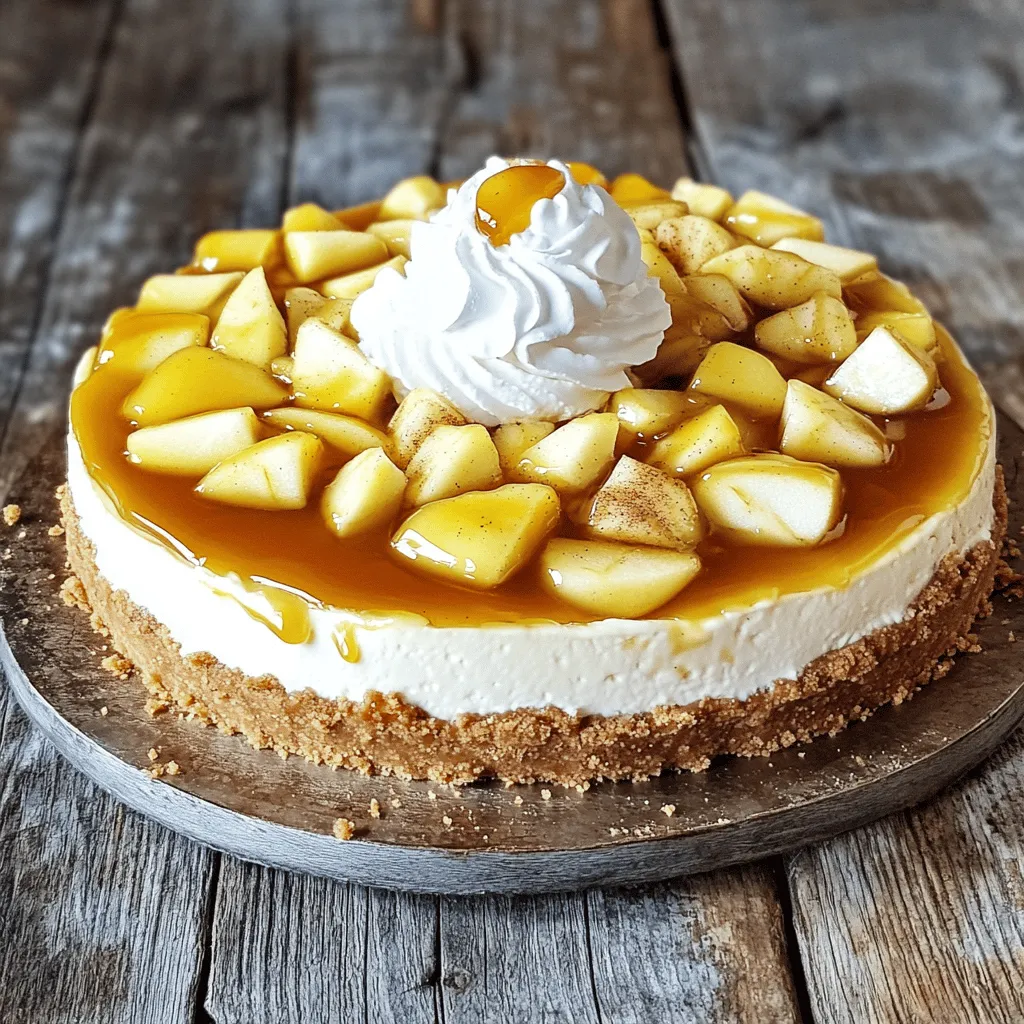
Desserts

To make a Neapolitan Rose Cake, you need some simple ingredients. Each one plays a key role in creating this delightful dessert. Here’s what you will need: - 1 ½ cups all-purpose flour - 1 cup granulated sugar - ½ cup unsweetened cocoa powder - 1 ½ teaspoons baking powder - ½ teaspoon baking soda - ½ teaspoon salt - ½ cup unsalted butter, softened - 2 large eggs - 1 teaspoon vanilla extract - ½ cup whole milk - ½ cup boiling water - 1 cup whipped cream (for frosting) - ½ cup strawberry preserves - ½ cup chocolate ganache (for drizzling) - Edible rose petals (for garnish) These ingredients blend together to create a rich chocolate cake with a fresh twist. The cocoa powder gives it that deep flavor. The butter and eggs keep the cake moist. Strawberry preserves add a sweet layer, while whipped cream and chocolate ganache create a beautiful finish. Next, let’s gather the right tools. You will need a few essential items to help you bake this cake perfectly. - Preheat your oven to 350°F (175°C). Grease and flour two 8-inch round cake pans. This step helps the cake come out easily. - In a large bowl, sift together the dry ingredients: 1 ½ cups flour, 1 cup sugar, ½ cup cocoa powder, 1 ½ teaspoons baking powder, ½ teaspoon baking soda, and ½ teaspoon salt. This ensures even mixing. - In another bowl, mix the wet ingredients: ½ cup softened butter, 2 large eggs, 1 teaspoon vanilla, and ½ cup milk. Beat this mixture for 2-3 minutes until smooth. - Carefully stir in ½ cup boiling water. Your batter will be thin, but that is okay! - Pour the batter evenly into the prepared pans. Bake for 30-35 minutes. A toothpick should come out clean when inserted in the center. - Let the cakes cool in the pans for 10 minutes. Then turn them out onto wire racks to cool completely. This helps prevent sogginess. - Place one cake layer on a serving platter. Spread a layer of ½ cup strawberry preserves on top. Add a layer of 1 cup whipped cream next. - Place the second cake layer on top. Frost the top and sides with more whipped cream. Be generous; this is where the magic happens! - Drizzle ½ cup chocolate ganache over the cake. Let it cascade down the sides for a beautiful effect. - Garnish your cake with edible rose petals. This adds charm and elegance. - For serving, place slices on elegant dessert plates. You might add extra rose petals around the plate for a lovely touch. Enjoy creating this delightful and beautiful Neapolitan Rose Cake! For the complete recipe, refer to the Full Recipe section. To achieve a moist cake, use room temperature ingredients. This helps the layers mix well. You can also try adding a bit more milk or butter for extra moisture. For even baking, always preheat your oven. Place the pans in the center of the oven. Rotate them halfway through baking. This ensures every side bakes the same. For a smooth frosting, start with cold whipped cream. Beat it until it forms stiff peaks. Then, apply it to the cake using a spatula. To create the rose design with ganache, let it cool slightly. Pour it over the top and let it drip down the sides. Use a spatula to shape the ganache into rose petals. Ideal pairings for this cake include coffee or tea. A light sparkling drink also works well. For presentation, serve each slice on an elegant dessert plate. Add a few rose petals around the plate for a lovely touch. You can find the Full Recipe for the Neapolitan Rose Cake above. Enjoy your baking! {{image_2}} You can make the Neapolitan Rose Cake unique by using different fruit preserves. Instead of strawberry, try raspberry or apricot for a twist. Each fruit gives a new taste and color. Chocolate lovers can enhance the cake with chocolate variations too. Adding chocolate chips to the batter makes it richer. You can also mix cocoa powder into the cream for a chocolate frosting. These changes create a deeper flavor. If you need to make the cake gluten-free, swap all-purpose flour for a gluten-free blend. This change keeps the cake soft and fluffy. You can also use almond flour for a nutty taste. For vegan options, replace eggs with flax eggs. Mix one tablespoon of ground flaxseed with three tablespoons of water. Let it sit until it thickens. Use coconut cream instead of whipped cream for frosting. Both swaps keep the cake delicious and suitable for all diets. Decorate the Neapolitan Rose Cake with different edible garnishes. Try fresh berries or mint leaves for a fresh look. Edible flowers can add color and elegance too. Seasonal decorations make the cake special. Use autumn leaves in fall or peppermint sticks for winter. A sprinkle of edible glitter gives a festive touch for celebrations. Each decoration makes the cake shine in its own way. Explore the [Full Recipe] for more ways to enjoy this delightful dessert! To keep your Neapolitan Rose Cake fresh, store it in an airtight container. This helps seal in moisture and flavor. If you have leftover slices, wrap them tightly in plastic wrap before placing them in the container. - In the refrigerator, the cake lasts about 5 days. - If you freeze it, it can stay good for up to 3 months. Just remember to wrap it well to prevent freezer burn. When it's time to enjoy your cake again, reheating is key. You want to keep it moist and tasty. - For best results, microwave a slice on low power for about 10 to 15 seconds. - You can also place a slice in a warm oven for a few minutes. This way, the cake stays soft and delicious. Serve your reheated cake with a dollop of fresh whipped cream or a drizzle of chocolate ganache for extra flavor. The Neapolitan Rose Cake is a delightful treat that impresses in both taste and appearance. We explored the ingredients needed, from flour to rose petals, and provided step-by-step instructions for baking. You learned fun tips to perfect your cake's texture and various ways to customize it. Remember, baking is about creativity. Use the information here to make your unique cake! With practice, you'll be serving up stunning desserts that everyone loves. Enjoy the baking journey, and don't hesitate to experiment with flavors and designs!
Neapolitan Rose Cake Delightful and Beautiful Dessert
Are you ready to bake a stunning cake that pleases the eye and the taste buds? The Neapolitan Rose Cake is a delicious blend of
To make these easy pumpkin pie twists, you need a few key items: - 1 sheet of puff pastry, thawed - 1 cup pumpkin puree - 1/2 cup brown sugar - 1 teaspoon pumpkin pie spice - 1/2 teaspoon vanilla extract - 1 egg, beaten (for egg wash) - 2 tablespoons granulated sugar (for sprinkling) These ingredients come together to create a rich, warm filling wrapped in flaky pastry. The pumpkin puree gives it that classic fall flavor, while the brown sugar adds sweetness. You can customize your pumpkin twists with some fun extras: - Chopped nuts (like pecans or walnuts) for crunch - Mini chocolate chips for a sweet surprise - Cream cheese for a richer filling - Different spices like cinnamon or nutmeg for a unique twist Feel free to mix and match based on your taste! This way, you can create a treat that speaks to your palate. For the full recipe, check out Easy Pumpkin Pie Twists. Start by preheating your oven to 400°F (200°C). This helps the twists bake just right. Take a sheet of puff pastry and let it thaw. Place it on a lightly floured surface. Roll it out gently to smooth any creases. You want it nice and flat. Next, cut the pastry into 12 equal rectangles. This makes it easy to fill and fold. In a mixing bowl, add 1 cup of pumpkin puree. Then, mix in 1/2 cup of brown sugar. Sprinkle in 1 teaspoon of pumpkin pie spice and add 1/2 teaspoon of vanilla extract. Stir everything together until it is smooth. This filling is creamy and full of flavor. It captures that warm, fall feeling in every bite. Now it’s time to put it all together. Take one rectangle of pastry and place about a tablespoon of pumpkin filling on one side. Make sure to leave some space at the edges. Next, fold the other side over the filling, forming a pocket. Press down on the edges to seal it well. Use a fork to crimp the edges for a fun look. This step keeps the filling from spilling out while baking. Place the twists on a baking sheet lined with parchment paper. Brush the tops with a beaten egg. This gives them a lovely golden color. Sprinkle granulated sugar over each twist for a sweet touch. Bake them in the oven for 15 to 20 minutes. Watch for that golden brown color and puffiness. Once done, let them cool slightly before enjoying. For the full recipe, check the earlier section. Thaw puff pastry in the fridge overnight for best results. If you need it fast, leave it out for 30 minutes at room temperature. Avoid microwaving it, as this can make it soggy. A thawed pastry should be cool and pliable, perfect for rolling. To get a nice golden hue on your pumpkin pie twists, brush them with beaten egg. This egg wash gives them a shiny, crisp look. You can also sprinkle granulated sugar on top for added sweetness and crunch. Bake them at 400°F (200°C) until golden brown, about 15-20 minutes. One common mistake is not sealing the edges well. If your twists open during baking, the filling will spill out. Another tip is to avoid overfilling. Stick to about a tablespoon of filling per twist. If you add too much, they can burst open. Always use parchment paper on your baking sheet to prevent sticking. For the full recipe, follow the steps closely for the best results. {{image_2}} You can enhance the flavor of your pumpkin pie twists by adding spices. Try mixing in a bit of cinnamon for warmth or some nutmeg for a nutty taste. You can even add a pinch of ginger for a spicy kick. These small changes can make a big difference. Just remember to adjust the amount of pumpkin pie spice to keep a good balance. Experiment with what you love! If you have dietary needs, there are easy swaps. For a gluten-free option, use a gluten-free puff pastry. If you want a vegan treat, replace the egg wash with almond milk or a plant-based milk. For the filling, you can use maple syrup instead of brown sugar to keep it vegan. These changes keep the taste delicious while meeting your needs. The filling for these twists is not set in stone. You can try other flavors if pumpkin isn’t your favorite. For instance, apple pie filling makes a sweet twist. Or, use cream cheese mixed with sugar and vanilla for a rich treat. You can even try chocolate hazelnut spread for a fun dessert. These variations let you get creative and find your favorite combination. For the full recipe, you can refer to the Easy Pumpkin Pie Twists. To keep your pumpkin pie twists fresh, store them in an airtight container. This helps keep them soft and tasty. Place a piece of parchment paper between layers to avoid sticking. They will stay good for about 2-3 days at room temperature. If you want to keep them longer, consider freezing. You can freeze the twists for up to 2 months. Make sure they are fully cooled before freezing. Place them in a single layer on a baking sheet. Once they are frozen solid, transfer them to a freezer-safe bag or container. Label the bag with the date for easy reference. To reheat, you can use an oven or toaster oven. Preheat it to 350°F (175°C). Place the twists on a baking sheet. Heat them for about 10-15 minutes until they are warm and crisp again. Avoid using the microwave, as it can make them soggy. Enjoy your tasty treats! Yes, you can make these twists ahead of time. You can prepare the twists and store them in the fridge before baking. Wrap them tightly in plastic wrap. When ready to bake, just take them out and brush with egg wash. Bake as directed in the Full Recipe. This way, you save time on busy days. If you lack pumpkin pie spice, you can use simple spices instead. Mix cinnamon, nutmeg, and ginger for a quick substitute. Use 1 teaspoon of cinnamon, 1/4 teaspoon of nutmeg, and 1/4 teaspoon of ginger. This mix will give your twists a warm flavor. You can also try just cinnamon if that's what you have. These tasty twists last for about 2 to 3 days when stored properly. Keep them in an airtight container at room temperature. If you want them to last longer, you can freeze them. They freeze well for up to a month. When ready, just thaw and bake them again for a fresh treat! In this post, we explored the essential and optional ingredients for puff pastry twists. I provided clear, step-by-step instructions for prepping, filling, and baking. You learned valuable tips to avoid common mistakes and achieve that perfect golden color. We also discussed tasty variations and how to store leftovers. With this knowledge, you can create delicious twists to impress everyone. Enjoy the process and have fun experimenting with flavors!
Easy Pumpkin Pie Twists Tasty and Simple Treats
Get ready to impress your friends and family with my Easy Pumpkin Pie Twists! These tasty treats blend classic pumpkin pie flavors with crispy puff
To make the best pumpkin coffee cake, you need a mix of dry and wet ingredients. This will create a rich, moist cake with great flavor. Dry Ingredients - 2 cups all-purpose flour - 1 teaspoon baking soda - 1 teaspoon baking powder - 1 teaspoon cinnamon - 1/2 teaspoon nutmeg - 1/4 teaspoon ginger - 1/4 teaspoon salt These dry ingredients give the cake its structure and flavor. The spices add warmth and a cozy feel. Wet Ingredients - 1 cup canned pumpkin puree - 1/2 cup vegetable oil - 1 cup granulated sugar - 1/2 cup brown sugar, packed - 2 large eggs - 1/4 cup milk - 2 teaspoons vanilla extract The wet ingredients bring moisture and sweetness. Canned pumpkin adds rich flavor and a lovely color. Optional Toppings and Mix-ins - 1/2 cup chopped walnuts (optional) - 1/4 cup brown sugar (for topping) - 1 teaspoon cinnamon (for topping) - 1/2 cup powdered sugar (for glaze) - 2 tablespoons milk (for glaze) You can add walnuts for crunch, or use a glaze to make it special. This recipe allows for creativity, so feel free to mix it up! For the full recipe, refer to the instructions provided. 1. Start by preheating your oven to 350°F (175°C). This ensures even baking. 2. Lightly grease a 9x13-inch baking pan. Use cooking spray or butter for best results. 3. In a large bowl, mix together the pumpkin puree, vegetable oil, granulated sugar, and brown sugar. Stir until smooth. 4. Next, add the eggs, milk, and vanilla extract to the mixture. Whisk until all is combined. 5. In another bowl, whisk the flour, baking soda, baking powder, cinnamon, nutmeg, ginger, and salt. 6. Gradually add the dry mix to the wet mix. Fold gently until just blended. Do not overmix. 7. If you want, fold in the chopped walnuts for a nice crunch. 8. Pour the batter into the greased pan. Smooth the top with a spatula. 1. Bake the cake in the preheated oven for 30-35 minutes. 2. To check if it’s done, insert a toothpick into the center. It should come out clean. 1. While the cake bakes, prepare the glaze. Mix powdered sugar and milk in a small bowl until smooth. 2. After baking, let the cake cool in the pan for about 10 minutes. 3. Carefully transfer the cake to a wire rack to cool completely. 4. Once cooled, drizzle the glaze over the top. 5. Slice and serve your delicious Pumpkin Spice Coffee Cake with a warm cup of coffee! When making pumpkin coffee cake, avoid overmixing the batter. Overmixing leads to a tough cake. Mix just until the ingredients combine for a light, fluffy texture. Proper baking time is key. Bake at 350°F for 30-35 minutes. Check for doneness by inserting a toothpick. If it comes out clean, your cake is ready. If your cake is undercooked, it may need more time in the oven. Keep baking for a few more minutes and check again. If it’s overbaked, it may be dry. Always use an oven thermometer to ensure the right temperature. For a dense texture, make sure to measure flour correctly. Too much flour can weigh down your cake. You can swap out ingredients for dietary needs. Use gluten-free flour for a gluten-free version. Applesauce can replace oil for a lower-fat option. For a dairy-free cake, use almond or oat milk instead of regular milk. Try adding chocolate chips or dried cranberries for different flavors. These tweaks make your pumpkin coffee cake unique! For the full recipe, check the [Full Recipe]. {{image_2}} You can add spices to boost flavor. Try using allspice, cloves, or cardamom. These spices give depth to the cake. You can also experiment with extracts. Almond or maple extracts can make your cake unique. Adding fruits or nuts can change the texture. Chopped apples or pears give a sweet crunch. Walnuts or pecans add a nice nutty flavor. If you want, sprinkle some chocolate chips for a fun touch. You can make a gluten-free pumpkin coffee cake easily. Just use a good gluten-free flour blend instead of regular flour. Make sure it has a good mix of starches and fibers. For a vegan version, swap eggs with flax eggs. Mix one tablespoon of flaxseed meal with three tablespoons of water. Let it sit for five minutes until it gels. You can also use plant-based milk and oil. Pair your pumpkin coffee cake with drinks. A hot cup of coffee or chai tea works well. You can also serve it with apple cider for a cozy feel. For gatherings, slice the cake into squares. Place them on a cake stand for a pretty display. Dust the top with powdered sugar for a festive touch. You can add a dollop of whipped cream on the side too! Check out the Full Recipe for more ways to enjoy this delightful dessert. For short-term storage, keep your pumpkin coffee cake in an airtight container. This will maintain its moisture and flavor. If you want to store it long-term, wrap it tightly in plastic wrap and then in aluminum foil. This helps prevent freezer burn. Store it in the fridge for up to five days. For longer storage, freeze it for up to three months. To reheat your cake, avoid drying it out. You can use the microwave or oven. If using the microwave, heat a slice for 10-15 seconds. Check if it's warm enough. If using the oven, preheat to 350°F. Place the cake in a baking dish and cover it with foil. Heat for about 10-15 minutes. This keeps it moist and tasty. Freezing pumpkin coffee cake is easy! First, let the cake cool completely. Then, cut it into slices for easy thawing. Wrap each slice in plastic wrap. Place all wrapped slices in a freezer bag. When ready to serve, take out a slice and thaw in the fridge overnight. You can also warm it in the microwave for a quick treat. Enjoy with a hot drink! For the full recipe, check out the Pumpkin Spice Coffee Cake section above! How do I know if my pumpkin coffee cake is done? You can check if your cake is done by inserting a toothpick into the center. If it comes out clean, your cake is ready. The edges should slightly pull away from the pan. Can I use fresh pumpkin instead of canned? Yes, you can use fresh pumpkin. Just cook and puree it until smooth. Make sure to measure it the same as the canned version. This gives a fresh taste to your cake. What can I serve with pumpkin coffee cake? Pumpkin coffee cake pairs well with coffee or tea. You can also serve it with whipped cream or a scoop of vanilla ice cream for a treat. How long will the cake last in the fridge? Your pumpkin coffee cake will last about 5 days in the fridge. Make sure to keep it in an airtight container to stay fresh. Can I prepare the batter ahead of time? Yes, you can prepare the batter ahead of time. Just cover it well and store it in the fridge. Use it within 24 hours for the best results. What makes this the best pumpkin coffee cake recipe? This recipe blends warm spices with rich pumpkin flavor. The texture is moist, and the topping adds a sweet crunch. Plus, it is easy to make and share with friends! Are there any variations of pumpkin coffee cake to try? Absolutely! You can add chocolate chips, dried cranberries, or even cream cheese swirls. These variations add fun and flavor to the cake. How to make the pumpkin flavor stronger? To boost the pumpkin flavor, use more pumpkin puree or add pumpkin spice. You can also use pure pumpkin extract for an extra kick. Can I use a different type of sugar? Yes, you can substitute brown sugar with coconut sugar or maple sugar. Each will give your cake a unique flavor while keeping it sweet. For the full recipe and more details, check the Full Recipe. In this post, I detailed how to make a delicious pumpkin coffee cake. We covered essential ingredients, step-by-step baking instructions, and helpful tips. You learned how to enhance flavors and adapt the recipe for dietary needs. Proper storage and reheat methods keep your cake fresh. Remember, baking is both an art and a science. By following these steps, you'll create a tasty treat that everyone will enjoy. Now, get into the kitchen and bake your own pumpkin coffee cake!
Pumpkin Coffee Cake Irresistible Fall Delight Recipe
Get ready to indulge in the warm and cozy flavors of fall with my Pumpkin Coffee Cake recipe. This delicious treat combines the rich taste
To make Brown Butter Dulce de Leche Rice Krispie Treats, you need the following ingredients: - 4 cups Rice Krispies cereal - 1 cup marshmallows - 1 cup dulce de leche - 1/2 cup unsalted butter - 1/2 teaspoon sea salt - 1 teaspoon vanilla extract - Optional: Flaky sea salt for garnish These ingredients combine to create a sweet and rich treat. The Rice Krispies provide crunch, while the marshmallows and dulce de leche add sweetness and creaminess. The brown butter gives a nutty depth that makes these treats special. You can find the full recipe to guide your cooking process. Enjoy the mix of flavors and textures as you create this delightful dessert! Melting the butter Start by placing the unsalted butter in a medium saucepan. Set the heat to medium. As the butter starts to melt, stir it gently. This helps the butter melt evenly. Achieving the perfect golden brown color Continue to cook the butter, stirring often. Watch for it to change color. When the butter turns a golden brown and smells nutty, it’s ready. Remove it from heat right away to prevent burning. Incorporating marshmallows and dulce de leche Once the butter is browned, add the marshmallows. Stir until they melt completely. The mixture should be smooth and creamy. Next, pour in the dulce de leche, sea salt, and vanilla extract. Stir until all ingredients blend well. Folding in Rice Krispies Now, it's time to add the Rice Krispies. Gently fold them into the marshmallow mix. Make sure every piece gets coated. This gives your treats that sweet, crunchy texture. Transferring to baking dish Prepare a 9x13 inch baking dish by lining it with parchment paper. This makes it easy to lift out the treats later. Pour the Rice Krispie mixture into the dish. Pressing down the mixture Use a spatula or your hands to press it down firmly. Aim for an even layer. If your hands stick, lightly grease them. After this step, let the treats cool completely at room temperature. For the full recipe, refer to the instructions above. To make the best brown butter, watch it closely. Heat the unsalted butter in a medium saucepan over medium heat. Stir it often to keep it moving. Do not leave it unattended! Burnt butter will ruin the taste. The right aroma is key. You want a nutty smell that fills the kitchen. This means it is ready. The color should be a deep golden brown. If it turns too dark, start over. Cooling time is important. Let your treats cool completely at room temperature. This helps them set properly. If they are too warm, they can be sticky and hard to cut. For even pressing, use a spatula or your hands. Lightly grease them to avoid sticking. Press down firmly, but do not squish them. This keeps the treats light and chewy. Flaky sea salt adds a nice touch. It contrasts the sweetness and enhances the flavor. Just sprinkle it on top after pressing the mixture into the dish. You can get creative with other toppings. Try drizzling melted chocolate or adding crushed nuts. These will give your treats a fun twist. For more ideas, check the Full Recipe for inspiration. {{image_2}} You can make these treats even better by adding flavors. Try mixing in chocolate or peanut butter for a rich twist. Melted chocolate swirled in adds a sweet touch. For a nutty flavor, consider adding chopped nuts like almonds or pecans. They give a nice crunch and depth. If you need gluten-free treats, use gluten-free Rice Krispies. They taste just as good! For a vegan version, swap the butter for coconut oil and use vegan marshmallows. This way, everyone can enjoy these delicious treats. Pair your treats with a cold glass of milk or coffee for a perfect snack. You can also serve them at parties. Cut them into fun shapes using cookie cutters for a creative twist. These ideas will impress your guests and keep the fun going! For the full recipe, check out the details above. To keep your Brown Butter Dulce de Leche Rice Krispie Treats fresh, use airtight containers. This helps prevent air from making them stale. You can store them at room temperature for a few days. If you want them to last longer, put them in the fridge. Just remember, cold treats may be a little harder. How long do they last? These treats can last about five days at room temperature. If you store them in the fridge, they can last up to a week. Look for signs they’ve gone bad. If they feel hard or have a strange smell, it’s time to toss them out. Always trust your senses! To make these treats, follow these steps: 1. Melt unsalted butter in a medium saucepan over medium heat. 2. Cook until the butter turns golden brown and smells nutty. 3. Remove from heat and stir in marshmallows. 4. Mix until the marshmallows melt completely. 5. Add dulce de leche, sea salt, and vanilla extract. 6. Fold in Rice Krispies until coated. 7. Press the mixture into a lined baking dish. 8. Cool before cutting into squares. For the full recipe, check out the details above. You can use flavored marshmallows. This change adds a twist to the taste. However, it may alter the texture. Flavored marshmallows can be softer and stickier. This texture might make it harder to cut clean squares. Keep this in mind when choosing your marshmallows. You can swap Rice Krispies with other cereals. Here are some great options: - Treats can use Cocoa Krispies for a chocolate flavor. - Corn flakes add a different crunch. - Cheerios offer a honey taste and unique texture. These swaps can change the treat's taste and crunch. Experiment to find your favorite mix! You now know how to make Brown Butter Dulce de Leche Rice Krispie Treats. We covered all the key steps, from preparing the brown butter to mixing in the ingredients. Remember, timing is vital for the best texture. Experiment by adding flavors or using different cereals to make it your own. For storage, keep them in an airtight container for freshness. Enjoy creating these tasty treats that bring joy to any gathering. Happy cooking!
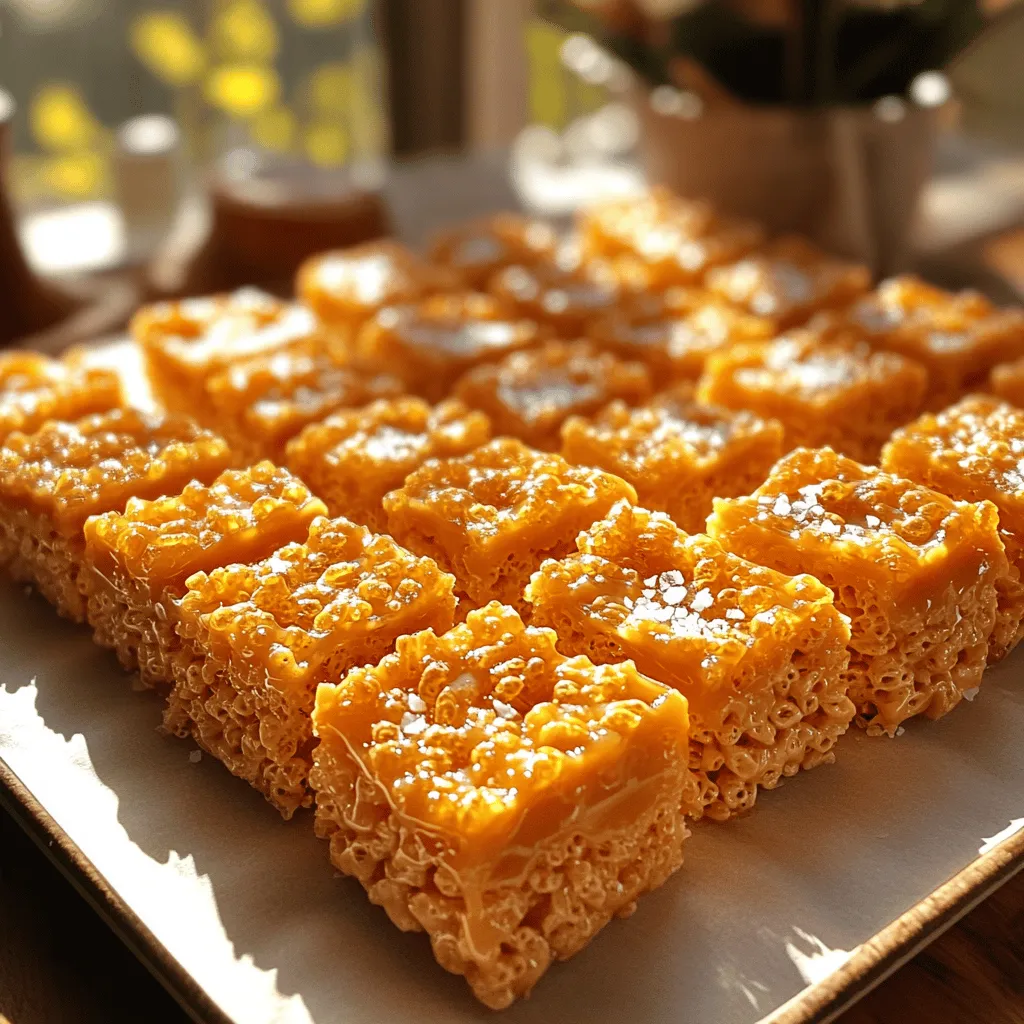
Brown Butter Dulce de Leche Rice Krispie Treats Delight
Get ready for a sweet twist on a classic treat! My Brown Butter Dulce de Leche Rice Krispie Treats combine crunchy cereal with rich, gooey
For a great Cinnamon Apple Bread, you need key ingredients. Here’s what you must gather: - 2 cups all-purpose flour - 1 cup granulated sugar - 1 teaspoon baking powder - 1/2 teaspoon baking soda - 1/2 teaspoon salt - 1 tablespoon ground cinnamon - 1/2 cup unsalted butter, melted - 2 large eggs, beaten - 1 teaspoon vanilla extract - 1/2 cup sour cream - 2 medium apples, peeled and diced (like Granny Smith or Honeycrisp) - 1/2 cup chopped walnuts or pecans (optional) - 1 tablespoon brown sugar for topping These ingredients work together to create a moist, flavorful bread. The apples add sweetness, while the cinnamon gives warmth and spice. You can customize this bread with some optional ingredients. Here are a few ideas: - 1/2 cup raisins or dried cranberries for sweetness - 1/4 teaspoon nutmeg for extra spice - A sprinkle of oats on top for texture These options let you play with flavors. You can make the bread your own. If you run out of something, don’t worry! Here are some easy swaps: - Use whole wheat flour instead of all-purpose flour. - Replace sugar with honey or maple syrup for a natural sweetener. - Use Greek yogurt in place of sour cream for a tangy twist. These substitutions can help you adjust the recipe to fit your pantry. Each change brings a unique taste. Just remember to keep the ratios similar for the best results. For the full recipe, check out the section above. Start by gathering all your ingredients. You will need: - 2 cups all-purpose flour - 1 cup granulated sugar - 1 teaspoon baking powder - 1/2 teaspoon baking soda - 1/2 teaspoon salt - 1 tablespoon ground cinnamon - 1/2 cup unsalted butter, melted - 2 large eggs, beaten - 1 teaspoon vanilla extract - 1/2 cup sour cream - 2 medium apples, peeled and diced - 1/2 cup chopped walnuts or pecans (optional) - 1 tablespoon brown sugar for topping Once you have everything, preheat your oven to 350°F (175°C). Grease a 9x5-inch loaf pan or line it with parchment paper. This makes it easier to take the bread out later. In a large bowl, whisk together the dry ingredients: flour, sugar, baking powder, baking soda, salt, and cinnamon. Mix them well so the flavors blend. In another bowl, mix the melted butter, beaten eggs, vanilla extract, and sour cream until smooth. This step is key for a moist bread. Next, slowly add the wet mixture to the dry mixture. Stir gently until just combined. Don’t worry if there are a few lumps; this is normal. Finally, fold in the diced apples and nuts if you're using them. This adds great texture and flavor to your bread. Pour the batter into your prepared loaf pan. Spread it evenly across the pan. In a small bowl, mix the brown sugar with a pinch of cinnamon. Sprinkle this over the top of the batter. This creates a lovely sweet crust. Now, bake your bread in the preheated oven for 50-60 minutes. To check for doneness, insert a toothpick into the center. If it comes out clean, your bread is ready. The top should be golden brown and smell amazing! Once baked, remove the bread from the oven. Let it cool in the pan for about 10 minutes. Then, transfer it to a wire rack to cool completely. Enjoy your delicious Cinnamon Apple Bread! For the full recipe, refer back to the section above. To make your cinnamon apple bread moist, use sour cream. It adds richness and moisture. Also, don't over mix your batter. A few lumps are okay and help keep it tender. Another tip is to watch your baking time. Ovens vary, so check early to avoid dry bread. One common mistake is using cold eggs or butter. Always use room temperature ingredients. It helps your batter mix better. Another mistake is not measuring flour correctly. Too much flour makes the bread dense. Use a spoon to scoop flour into the measuring cup, then level it off. For extra flavor, try adding nuts or dried fruits. Walnuts or pecans add crunch and taste. You can also change the spices. Adding nutmeg or ginger can give a new twist. Finally, topping the bread with brown sugar and cinnamon creates a sweet crust. This step adds a delightful texture. For the complete recipe, check the Full Recipe section. {{image_2}} You can enjoy this bread gluten-free. Use a 1:1 gluten-free flour blend. This mixture replaces all-purpose flour without changing the taste. Be sure to check the blend for xanthan gum. It helps the bread rise and stay fluffy. Follow the same steps in the Full Recipe for mixing and baking. The choice of apples can change the flavor. Granny Smith apples are tart and firm. They add a nice contrast to the sweet bread. Honeycrisp apples are sweet and juicy, perfect for a sweeter treat. You can also try Fuji or Gala apples for a milder taste. Each type gives a unique twist to your bread. Spices can enhance your bread. Try adding nutmeg or allspice for a warm kick. You can also mix in chopped walnuts or pecans. These nuts add texture and a nutty taste. For a twist, add raisins or dried cranberries for sweetness. Experiment with these options to find your favorite flavor combination! To keep your cinnamon apple bread fresh, wrap it well. Use plastic wrap or foil. This helps keep moisture in and air out. Store it at room temperature for up to three days. If you live in a warm place, the fridge may dry it out. Instead, find a cool, dry spot. If you want to save some for later, freezing is great. First, let the bread cool completely. Then, slice it into pieces. Wrap each slice in plastic wrap and then in foil. This protects it from freezer burn. Your bread can last up to three months in the freezer. When you want a slice, just take it out and let it thaw. To enjoy your bread warm, reheating is key. Preheat your oven to 350°F (175°C). Place the slices on a baking sheet. Heat for about 10 minutes. You can also use a microwave. Heat one slice for about 15-20 seconds. This keeps the bread soft and tasty, just like fresh-baked. Enjoy with butter or honey for an extra treat! Cinnamon Apple Bread can stay fresh for about three to five days. Keep it in an airtight container at room temperature. This bread may last longer if you refrigerate it, but it might dry out. For the best taste, eat it within the first few days. You can also freeze it for up to three months. Just wrap it well in plastic wrap and foil. Yes, you can make this recipe vegan with a few easy swaps. Replace the eggs with flaxseed meal or unsweetened applesauce. Use a plant-based butter instead of regular butter. For sour cream, use non-dairy yogurt. These changes make the bread just as tasty and moist! Cinnamon Apple Bread pairs well with many foods and drinks. Enjoy it warm with a pat of butter or a drizzle of honey. It goes great with a cup of coffee or tea. You can also serve it with yogurt or ice cream for dessert. For a fun twist, try it with a slice of cheese for a savory touch. You can find the full recipe in the earlier section. Cinnamon apple bread is simple and tasty. We covered essential and optional ingredients, giving you choices. I shared easy steps to mix and bake. You learned tips to keep your bread moist and avoid mistakes. Exploring variations lets you try gluten-free options and different apple types. Storing leftovers is easy too. Baking this bread can give joy to your kitchen. Enjoy sharing your creation with friends!
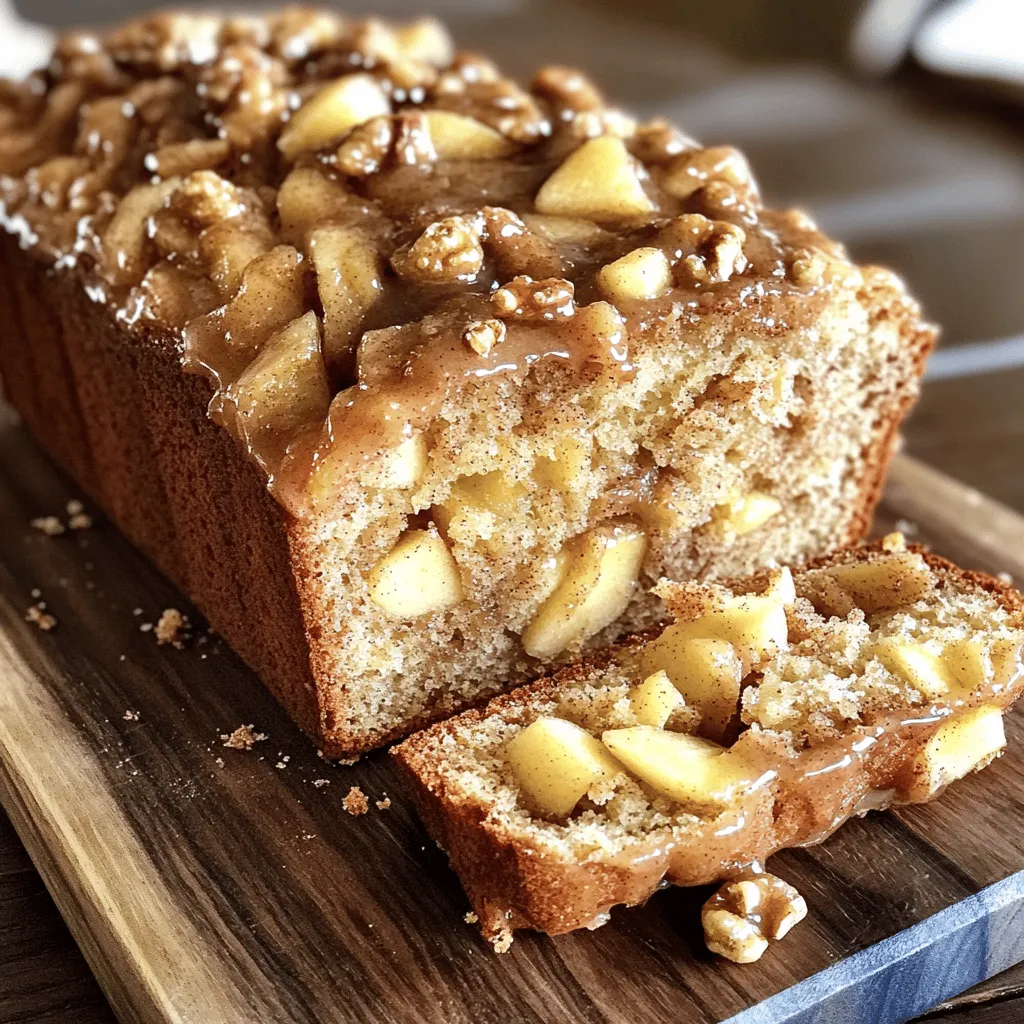
Cinnamon Apple Bread Delectable and Simple Recipe
If you crave a warm, sweet treat that fills your kitchen with the smell of fall, you’ll love my Cinnamon Apple Bread recipe! It blends
To create the best funfetti cake, gather these simple ingredients: - 2 ½ cups all-purpose flour - 1 ½ cups granulated sugar - 1 tablespoon baking powder - ½ teaspoon baking soda - ½ teaspoon salt - 1 cup unsalted butter, softened - 4 large eggs - 1 tablespoon vanilla extract - 1 cup buttermilk - ¾ cup rainbow sprinkles (plus more for decoration) - 1 cup frosting of choice (buttercream recommended) These ingredients help the cake rise, stay moist, and taste great. Each one plays a key role. Flour gives the cake structure. Sugar adds sweetness. Baking powder and soda help it rise and become fluffy. Salt enhances the flavor. Butter makes it rich and creamy. Eggs bind everything together. Vanilla and buttermilk add depth to the taste. When choosing sprinkles, look for high-quality ones. They should be colorful and fun. The extra sprinkles on top make the cake look festive. You can even mix in different colors or shapes for a special touch. For an easy baking experience, make sure all ingredients are at room temperature. This helps them mix well. You can find the full recipe in the previous section. Enjoy making this funfetti cake! - Preheat the oven to 350°F (175°C). - Grease and flour two 9-inch round cake pans or line with parchment paper. - Sift dry ingredients together in a bowl. - Cream butter and sugar until light and fluffy. - Add eggs and vanilla to the creamed mixture. - Alternate adding dry ingredients and buttermilk, mixing briefly. - Fold in sprinkles. - Divide batter into pans and bake for 25-30 minutes. - Check doneness with a toothpick. - Allow cakes to cool before frosting. - Frost and decorate with additional sprinkles. This is the best recipe for Funfetti cake delight. It's fun and easy to make! Just follow the full recipe for all the details. Enjoy each step of baking and decorating this joyful cake. - Always use room temperature ingredients. This helps the batter mix well. - Do not overmix the batter. This keeps the cake fluffy and light. - Use a mix of colored sprinkles for a fun look. Bright colors make the cake pop! - Try different cake stands or decorations. A festive display makes it even more special. - Add almond extract for a new twist. It gives a nice flavor boost. - Mix in chocolate chips or different sprinkles. They add fun and surprise in every bite. For the full recipe, check out the Funfetti Cake Extravaganza! {{image_2}} You can have fun with flavors in your Funfetti cake. - Swap vanilla extract for almond extract. This gives a nutty twist that many love. - Add citrus zest for a refreshing flavor. Lemon or orange zest brightens the cake and adds zest. If you need a gluten-free cake, it’s easy to adjust. - Substitute all-purpose flour with a gluten-free flour blend. This keeps the cake light and fluffy without gluten. Making a vegan Funfetti cake is simple and tasty. - Use flax eggs and dairy-free butter. This way, you keep all the fun without animal products. Feel free to explore these variations to make your Funfetti cake your own! You can check out the Full Recipe for more tips and details. You can store your funfetti cake covered at room temperature. It stays fresh for up to 3 days. Just make sure to keep it away from heat and sunlight. This keeps the cake moist and tasty. If you want to keep the sprinkles bright, cover it well to avoid fading. For long-term storage, wrap cake layers in plastic wrap. You can freeze them for up to 2 months. This is great if you want to bake ahead of time. Make sure the layers do not touch each other in the freezer. This prevents freezer burn and keeps the sprinkles intact. When you are ready to enjoy your cake, thaw it in the refrigerator. Let it sit overnight to ensure it thaws evenly. This method helps maintain its flavor and texture. Once ready, frost and decorate as desired from the Full Recipe. Enjoy your delicious treat! To make a Funfetti cake from scratch, follow these steps: 1. Gather your ingredients: You will need flour, sugar, baking powder, baking soda, salt, butter, eggs, vanilla, buttermilk, and sprinkles. 2. Preheat your oven: Set it to 350°F (175°C). 3. Prepare your pans: Grease and flour two 9-inch round cake pans or line them with parchment paper. 4. Mix dry ingredients: In a bowl, sift together flour, baking powder, baking soda, and salt. 5. Cream butter and sugar: Use an electric mixer to blend softened butter and sugar until light and fluffy. 6. Add eggs and vanilla: Mix in eggs one at a time and then add vanilla extract. 7. Combine wet and dry ingredients: Alternate adding the dry mix and buttermilk to the butter mixture. Do not overmix. 8. Fold in sprinkles: Gently mix in the rainbow sprinkles. 9. Divide and bake: Pour the batter into pans and bake for 25-30 minutes. 10. Cool and frost: Let the cakes cool before adding frosting and more sprinkles. This method creates a moist and vibrant Funfetti cake without using any box mixes. Yes, you can make Funfetti cake in advance. Here are some tips: - Bake the cake layers: You can bake them a day or two ahead of your event. - Cool completely: Make sure the layers are cool before storing. - Wrap layers: Use plastic wrap to cover the layers tightly. - Freeze for longer storage: You can freeze the layers for up to two months. Just be sure to wrap them well to prevent freezer burn. - Thaw before serving: Move the layers to the fridge the night before you need them. This helps them thaw gently. Making the cake ahead of time can save you stress on the day of your celebration. The best frosting for Funfetti cake is buttercream. Here are some great options: - Classic buttercream: Sweet and creamy, it enhances the cake's flavors. - Cream cheese frosting: Adds a tangy twist that pairs well with the sweet cake. - Whipped cream frosting: Light and airy, it keeps the cake from feeling too heavy. - Chocolate frosting: For a fun contrast, chocolate frosting can add richness. You can also mix in some sprinkles into the frosting for extra fun! Absolutely! You can use various sprinkles to change up your Funfetti cake. Here are some options: - Nonpareils: These tiny balls add a nice crunch and fun look. - Chocolate sprinkles: They add a rich flavor and work well with chocolate frosting. - Colored sugar: Use it for a sparkly effect on the cake. - Heart or star sprinkles: These shapes can make your cake festive for special occasions. Each type of sprinkle can change the look and taste of your cake, making it uniquely yours! We explored an easy recipe for Funfetti cake, covering ingredients, tips, and variations. You learned how to bake a fluffy and colorful cake, perfect for any occasion. Remember, you can customize it with flavors or sprinkles for a unique twist. Enjoy creating and sharing this delicious treat with friends and family. Have fun baking!
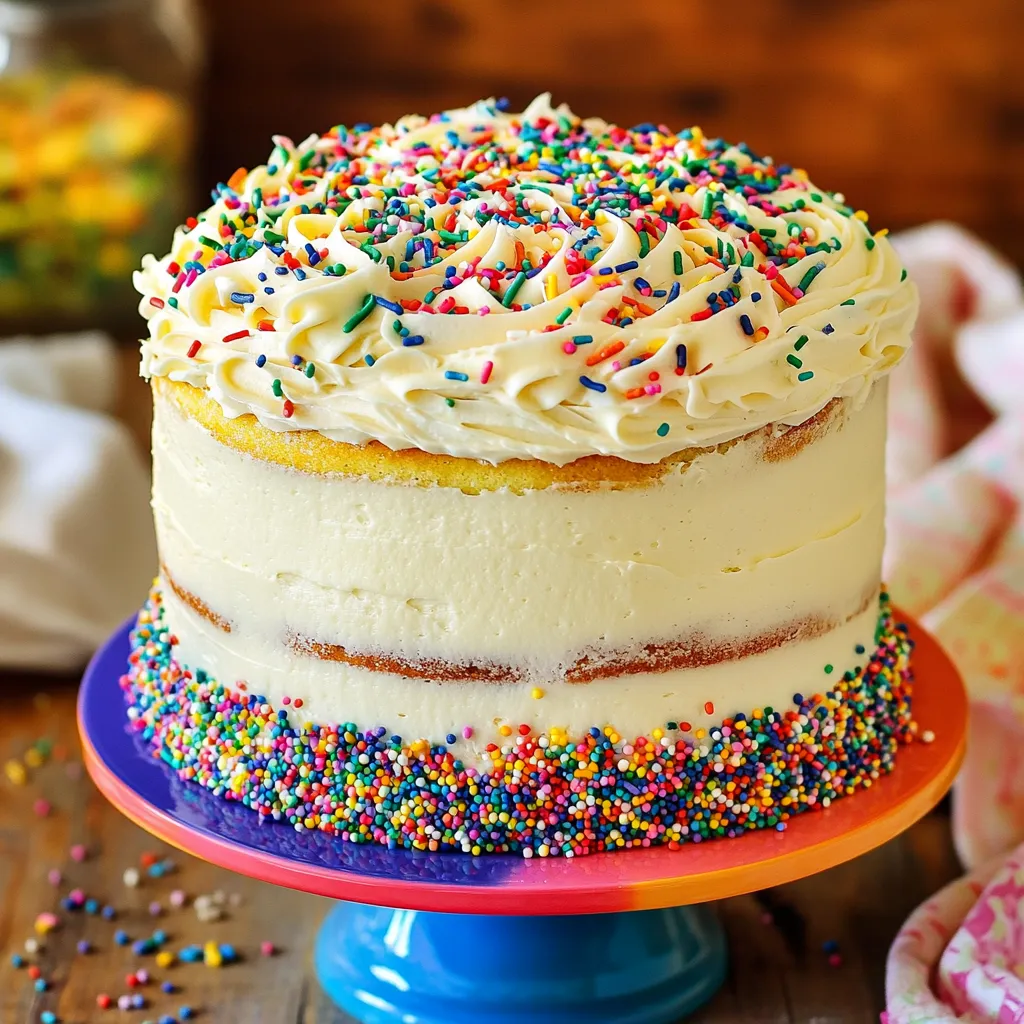
This Is The Best Recipe For Funfetti Cake Delight
Are you ready to bake the most joyful Funfetti cake ever? This recipe combines soft, fluffy cake with colorful sprinkles, making it perfect for any
Here are the ingredients you need for Triple Chocolate Chip Zucchini Bread: - 1 medium zucchini, grated - 1 cup all-purpose flour - 1/2 cup whole wheat flour - 1/2 cup unsweetened cocoa powder - 1 teaspoon baking soda - 1/2 teaspoon baking powder - 1/4 teaspoon salt - 1/2 cup granulated sugar - 1/2 cup brown sugar, packed - 1/2 cup vegetable oil - 2 large eggs - 1 teaspoon vanilla extract - 1/2 cup semi-sweet chocolate chips - 1/2 cup milk chocolate chips - 1/2 cup white chocolate chips This mix of ingredients gives the bread its rich taste and moist texture. The zucchini adds a secret ingredient that keeps it soft. You can enjoy the chocolate in three different ways: semi-sweet, milk, and white. Each type of chocolate brings its own sweetness and flavor. If you want to know how to make this, check the Full Recipe. - Preheat the oven to 350°F (175°C). - Grease and flour a 9x5 inch loaf pan. - In a medium bowl, mix the grated zucchini, sugars, oil, eggs, and vanilla extract. - In another bowl, whisk together the all-purpose flour, whole wheat flour, cocoa powder, baking soda, baking powder, and salt. - Pour the wet mix into the dry mix. Stir gently until just combined. - Fold in the three types of chocolate chips: semi-sweet, milk chocolate, and white chocolate. - Pour the batter into the prepared loaf pan. Smooth the top with a spatula. - Bake for 50-60 minutes. Check with a toothpick to see if it is done. This process gives you a rich, moist loaf that is hard to resist. For more details, check the Full Recipe. - Ensuring the correct oven temperature: Always check your oven's temperature with an oven thermometer. Preheat to 350°F (175°C) for best results. If your oven runs hot, the bread may bake too fast. - Properly measuring ingredients: Use dry measuring cups for flour and cocoa powder. Spoon the flour into the cup and level it off with a knife. This method prevents too much flour from making your bread dense. - Achieving the ideal moistness: Grate the zucchini finely and leave the skin on for extra moisture. Do not squeeze out the water; it keeps the bread tender. - Flavor balancing with different chocolate types: The mix of semi-sweet, milk, and white chocolate gives a rich taste. Each type adds a unique flavor. This balance keeps the bread from being overly sweet. - Serving suggestions for enhanced appeal: Slice while warm and serve with a dollop of whipped cream. Add a scoop of vanilla ice cream for a fun treat. - Garnishing ideas for an attractive finish: Dust the top with powdered sugar. For a touch of elegance, drizzle melted chocolate on top. Sprinkle extra chocolate chips for a delightful look. This recipe is sure to impress. For the full recipe, check the earlier section. {{image_2}} You can change a few ingredients to suit your taste. Try using different flours or sweeteners. For example, if you want a nutty flavor, swap some all-purpose flour for almond flour. This gives a unique taste and texture. You can also use honey or maple syrup instead of sugar for a natural sweetener. Adding nuts or dried fruits boosts flavor and texture. Walnuts or pecans add crunch. Dried cranberries or raisins bring a hint of sweetness. Mix these in when you fold in the chocolate chips for a delightful surprise in every bite. Seasonal changes can make this bread even more exciting. In autumn, add spices like cinnamon or nutmeg for a warm flavor. These spices pair well with chocolate and zucchini. In summer, you might want a fresh twist. Adding citrus zest, like lemon or orange, brightens the bread. This adds a refreshing taste that’s perfect for warmer days. For gluten-free options, use gluten-free flour blends. These blends work well and keep the bread moist. Just make sure to check the blends are safe if you have allergies. If you want a vegan version, replace the eggs with flax eggs or applesauce. This keeps the texture nice and moist. Use plant-based oil and dairy-free chocolate chips for a fully vegan treat. Explore these variations and find the one that makes your taste buds dance! For the full recipe, check the details above. To keep your Triple Chocolate Chip Zucchini Bread fresh, store it in an airtight container at room temperature. This helps maintain its soft texture and rich taste. If you want to keep it moist, you can add a slice of bread or a piece of parchment paper inside the container. This tiny trick helps keep moisture locked in. If you want to save some for later, freezing is a great option. Wrap the cooled bread tightly in plastic wrap or aluminum foil. Then, place it in a freezer-safe bag. This method keeps the bread safe for up to three months. To thaw, simply move it to the fridge overnight. You can also reheat it in the oven at 350°F (175°C) for about 10 minutes for that fresh-baked taste. This sweet treat is best enjoyed within a week. After that, it may start to lose its flavor and texture. Look for signs of staleness, like a dry crust or hard texture. If you notice any mold or an off smell, it's time to toss it. Enjoy every slice while it's still fresh! Can I use frozen zucchini in this recipe? Yes, you can use frozen zucchini. Just thaw it first and drain excess water. This keeps your bread from getting too wet. Frozen zucchini works well and saves time. How do I know when the bread is fully baked? Check with a toothpick. Insert it into the center. If it comes out clean, your bread is ready. If it has batter on it, bake a bit longer. Oven times can change, so keep an eye on it. What can I serve with Triple Chocolate Chip Zucchini Bread? This bread is great on its own. You can serve it warm or at room temperature. Try adding a scoop of ice cream or a dollop of whipped cream for extra fun. A hot cup of coffee or tea pairs well too. Why did my bread sink in the middle? If your bread sinks, it may be underbaked. Always test with a toothpick. Overmixing can also cause this. It adds too much air to the batter. Gently mix your ingredients to keep the bread light. How do I make my bread more chocolatey? Add an extra 1/4 cup of cocoa powder or chocolate chips. You can use all three types of chocolate chips for more flavor. Mixing in dark chocolate adds richness too. Can I reduce the sugar content? Yes, you can cut the sugar by 1/4 cup. Use ripe bananas or applesauce to replace some sugar. This adds natural sweetness and keeps the bread moist. What's the best way to make it dairy-free? To make this recipe dairy-free, swap the chocolate chips for dairy-free options. Use almond milk or coconut milk in place of regular milk. You can also use a vegetable or coconut oil instead of butter. For the full recipe, check [Full Recipe]. You now know how to make a tasty Triple Chocolate Chip Zucchini Bread. We covered key ingredients, easy steps, and helpful tips for the best results. The variations let you explore new flavors and adjustments for different diets. Lastly, proper storage ensures your bread stays fresh longer. Enjoy baking this delight, and share it with friends or family. Happy cooking!
Triple Chocolate Chip Zucchini Bread Delightful Recipe
Want a treat that surprises your taste buds? My Triple Chocolate Chip Zucchini Bread combines the rich flavor of chocolate with the freshness of zucchini.
To create a rich and moist Zucchini Chocolate Cake, gather these simple ingredients. Each one plays a key role in ensuring your cake turns out delightful. You can easily find these at your local store. - 1 ½ cups grated zucchini (squeezed dry) - 1 cup all-purpose flour - ½ cup unsweetened cocoa powder - 1 teaspoon baking soda - ½ teaspoon baking powder - ¼ teaspoon salt - ¾ cup granulated sugar - ½ cup brown sugar, packed - ½ cup vegetable oil - 2 large eggs - 1 teaspoon vanilla extract - ½ cup semi-sweet chocolate chips - ½ cup chopped walnuts (optional) You can swap ingredients based on your needs. For example, use whole wheat flour for a healthier option. If you want a richer taste, try using dark chocolate cocoa powder. Applesauce can replace oil for a lower-fat choice. You can also add spices like cinnamon or nutmeg for warmth. If you enjoy nuts, feel free to add pecans or almonds instead of walnuts. Each change creates a unique twist to your cake. Start by gathering your ingredients. This makes cooking fun and easy. You need: - 1 ½ cups grated zucchini (squeezed dry) - 1 cup all-purpose flour - ½ cup unsweetened cocoa powder - 1 teaspoon baking soda - ½ teaspoon baking powder - ¼ teaspoon salt - ¾ cup granulated sugar - ½ cup brown sugar, packed - ½ cup vegetable oil - 2 large eggs - 1 teaspoon vanilla extract - ½ cup semi-sweet chocolate chips - ½ cup chopped walnuts (optional) Preheat your oven to 350°F (175°C). Grease and flour your 8-inch round cake pan. You can also use parchment paper for easy removal later. In a medium bowl, mix the flour, cocoa powder, baking soda, baking powder, and salt. Whisk until everything is combined well. In a large bowl, blend the granulated sugar, brown sugar, and vegetable oil. Use a hand mixer or whisk until the mixture is smooth. Add the eggs, one by one, mixing well after each. Then, stir in the vanilla extract. Gradually mix the dry ingredients into the wet ingredients. Be gentle; you don’t want to overmix. Now, fold in the grated zucchini, chocolate chips, and walnuts if you want. This adds texture and flavor. Pour the batter into the prepared pan and smooth the top with a spatula. Bake for 30-35 minutes. A toothpick should come out clean when it’s done. Once baked, take the cake out and let it cool in the pan for about 10 minutes. Carefully transfer it to a wire rack to cool completely. For serving, dust the cooled cake with powdered sugar. You can add whipped cream and a sprinkle of cocoa powder on top. This makes it look fancy! Adding some chocolate shavings and fresh zucchini slices makes it even better. Enjoy your delicious creation! To make the best zucchini chocolate cake, start with fresh zucchini. Grate it finely and squeeze out excess water. Too much moisture can make your cake soggy. Use a food processor for quick grating. Mix your dry ingredients well. This ensures even baking and flavor. Sift the cocoa powder to remove lumps. This will make your cake smooth and rich. When you combine wet and dry ingredients, do it gently. Overmixing can lead to a tough texture. Stir just until you see no dry flour. One common mistake is not squeezing the zucchini. If you skip this step, your cake may be too wet. Another mistake is not measuring your ingredients correctly. Use proper measuring cups for dry and wet items. Baking time is also crucial. Every oven is different. Check your cake a few minutes early. Use a toothpick to test for doneness. If it comes out clean, your cake is ready. To boost flavor, add a pinch of cinnamon or espresso powder. These ingredients enhance the chocolate without being overpowering. You can also swap out some chocolate chips for dried fruit for a twist. For a richer texture, try using sour cream or yogurt. This will add moisture and tang. You can also use whole wheat flour for a nuttier flavor. Finally, don’t forget the presentation. Dust your cooled cake with powdered sugar. Serve with whipped cream and chocolate shavings for a lovely touch. This cake is not just tasty; it looks great too! For the full recipe, check out the detailed list above. Enjoy baking! {{image_2}} You can make this cake a bit healthier. Use whole wheat flour instead of all-purpose flour. This change adds fiber and nutrients. You can also reduce the sugar. Try using half the amount or substitute with honey or maple syrup. Applesauce can replace some oil. This swap keeps the cake moist but lowers fat. You can mix in different flavors. Try adding peanut butter chips for a nutty taste. Or use dried fruits like raisins or cranberries for sweetness. Shredded coconut adds a tropical vibe. Each option gives your cake a new twist. Don't be afraid to experiment with flavors you love. Making this cake gluten-free is easy. Use a gluten-free flour blend instead of regular flour. Check the blend has xanthan gum for better texture. For a vegan version, replace eggs with flaxseed meal. Mix 1 tablespoon of flaxseed with 3 tablespoons of water. Let it sit until it thickens. This acts as a great binder. You can also swap the vegetable oil for coconut oil for a rich flavor. These tweaks help everyone enjoy this delightful treat. To keep your Zucchini Chocolate Cake fresh, store it in an airtight container. Place it at room temperature for up to three days. If your home is warm, you may want to refrigerate it. Just remember to wrap it well. This keeps the cake moist and tasty. When you're ready to enjoy your leftover cake, preheat your oven to 350°F. Place a slice on a baking sheet. Heat it for about 10 minutes or until warm. You can also microwave it for a quick fix. Just heat it for 15 to 20 seconds. This helps keep the cake soft and delicious. If you want to save your cake for later, freezing works great. First, let the cake cool completely. Then, wrap each slice in plastic wrap tightly. Place wrapped slices in a freezer-safe bag. They can keep well for up to three months. When you're ready to eat, thaw it in the fridge overnight. For a quick treat, you can thaw it at room temperature for a few hours. Enjoy your Zucchini Chocolate Cake anytime! For the full recipe, check out the details above. No, you cannot taste the zucchini. The cake has rich chocolate flavor. The zucchini adds moisture and keeps it soft. You will enjoy the texture, not the taste of the veggie. To check if the cake is done, insert a toothpick in the center. If it comes out clean, the cake is ready. You can also gently press the top with your finger. If it springs back, it is baked well. Adding zucchini gives the cake moisture and prevents it from being dry. It also adds some nutrients without changing the flavor. Zucchini is low in calories but high in vitamins. Plus, it helps you sneak in veggies, which is always a win! For the full recipe, check out the Zucchini Delight Chocolate Cake. You now have all the details to make a great zucchini chocolate cake. We covered the ingredients, step-by-step instructions, and helpful tips. Remember to try different flavors or substitutes to make your cake unique. Use the storage tips to enjoy your cake longer. With this guide, you can bake with confidence and impress everyone. Embrace your baking journey and have fun!
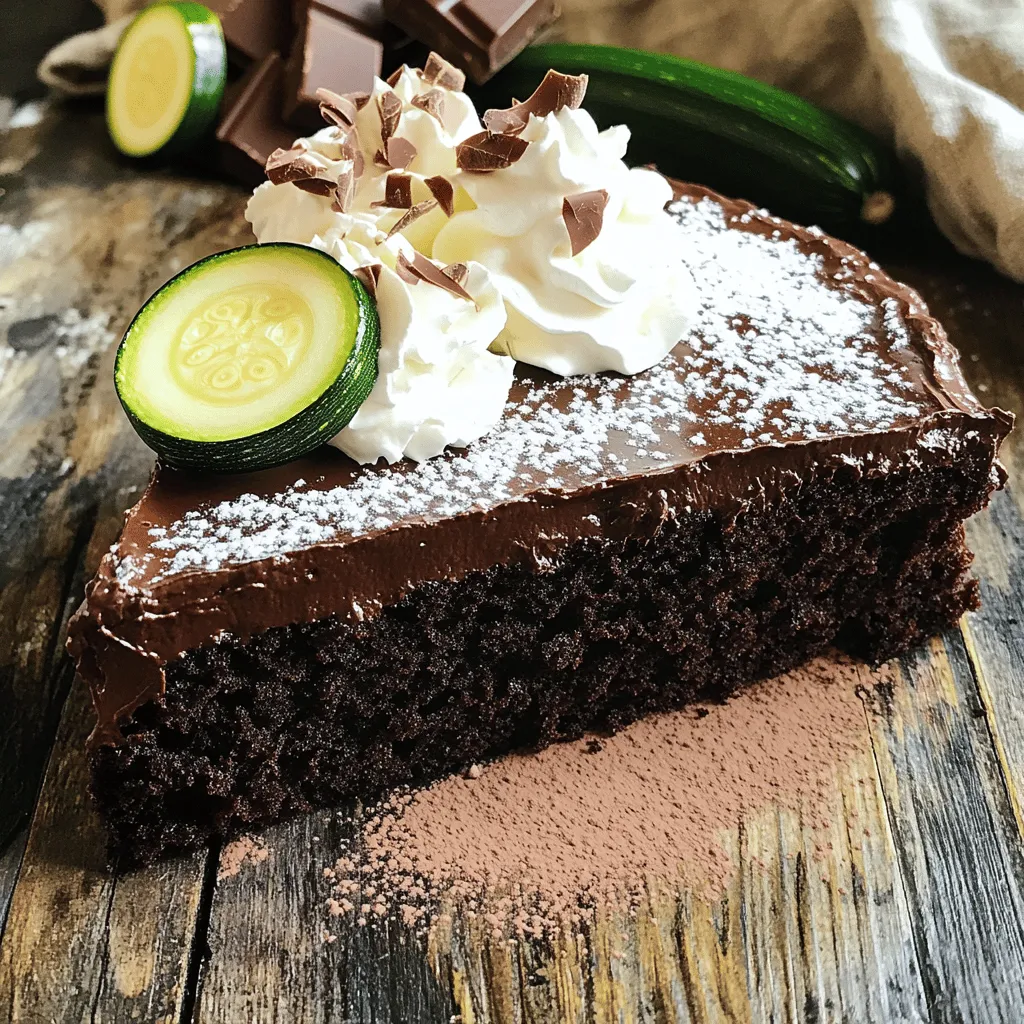
Zucchini Chocolate Cake Delightful and Simple Recipe
If you love chocolate cake and want a fun twist, you’re in the right place! This Zucchini Chocolate Cake is not only delicious, but it’s
To make delicious double chocolate zucchini bread, gather these ingredients: - 1 cup grated zucchini (about 1 medium zucchini) - 1 cup all-purpose flour - 1/2 cup unsweetened cocoa powder - 1 teaspoon baking powder - 1/2 teaspoon baking soda - 1/4 teaspoon salt - 1/2 cup granulated sugar - 1/2 cup brown sugar, packed - 1/2 cup vegetable oil or melted coconut oil - 2 large eggs - 1 teaspoon vanilla extract - 1/2 cup semi-sweet chocolate chips - 1/4 cup chopped nuts (walnuts or pecans, optional) You can swap ingredients based on what you have at home. Here are some ideas: - Use whole wheat flour instead of all-purpose flour for more fiber. - Replace granulated sugar with honey or maple syrup for a natural sweetener. - Substitute applesauce for oil to cut fat and add moisture. - If you don’t have cocoa powder, carob powder works too! - For a nut-free option, skip the nuts or use seeds like sunflower seeds. Choosing the right zucchini is key to great bread. Here’s what to look for: - Pick small to medium zucchinis. They are sweeter and less watery. - Check for smooth skin without blemishes or soft spots. - Look for a vibrant green color. This shows freshness. - If possible, buy organic zucchini to avoid pesticides. - Store zucchini in the fridge and use it within a week for best results. Making double chocolate zucchini bread is a fun way to enjoy veggies in a treat. For the full recipe, check the earlier section! 1. First, gather all your ingredients. You need grated zucchini, flour, cocoa powder, baking powder, baking soda, salt, sugars, oil, eggs, vanilla, chocolate chips, and nuts if you like them. 2. Preheat your oven to 350°F (175°C). Grease a 9x5-inch loaf pan or line it with parchment paper. This will help you remove the bread later. 3. In a medium bowl, mix the flour, cocoa powder, baking powder, baking soda, and salt. Whisk until they blend well. 4. In a large bowl, combine granulated sugar, brown sugar, and oil. Mix until the mixture is smooth. 5. Add the eggs and vanilla extract into the sugar mixture. Whisk these together until fully combined. 6. Gently fold the grated zucchini into the wet mixture. Make sure it spreads evenly throughout. 7. Gradually add the dry mix to the wet mix. Stir until just combined. Avoid overmixing, as this can make the bread tough. 1. Fold in the chocolate chips and nuts if you're using them. This adds great flavor and texture. 2. Pour the batter into the prepared loaf pan. Use a spatula to smooth the top. 3. Place the pan in the oven. Bake for 50-60 minutes. 4. Check if it's done by inserting a toothpick into the center. If it comes out clean or with a few moist crumbs, it's ready. 1. If the toothpick comes out with wet batter, bake it a bit longer. 2. When checking, avoid touching the chocolate chips. They can make it tricky to see if the batter is wet. 3. Trust your senses! The bread will smell delicious and look set when it’s done. 4. Once baked, let it cool in the pan for about 10 minutes. Then, move it to a wire rack to cool completely. Check the [Full Recipe](#) for more details and tips! To keep your zucchini bread moist, I recommend a few simple steps. First, always use fresh zucchini. Grate it and let it drain for a bit. This helps remove excess water. Second, add oil to your batter. The oil keeps the bread soft. Lastly, do not overmix the batter. Mix just until combined for the best texture. You can easily enhance the flavor of your double chocolate zucchini bread. Try adding a teaspoon of cinnamon or espresso powder. These spices deepen the chocolate taste. You can also use dark chocolate chips for a richer flavor. If you like nuts, add walnuts or pecans for a nice crunch. These options add both texture and taste. Many people make common mistakes when baking zucchini bread. One mistake is using too much flour. This makes the bread dry. Always spoon and level your flour for accurate measurements. Another mistake is not checking for doneness. Use a toothpick to test the center; it should come out clean or with a few crumbs. Lastly, don't skip the cooling step. Let the bread cool in the pan for 10 minutes before transferring it to a rack. This helps it set properly. For the full recipe, check out the complete guide on making this delicious treat! {{image_2}} You can boost your Double Chocolate Zucchini Bread with spices and extracts. Cinnamon adds warmth and pairs well with chocolate. A touch of nutmeg can brighten the flavor. Try adding a teaspoon of espresso powder to deepen the chocolate taste. If you want, a splash of almond or orange extract can add a twist. These small changes bring new life to the recipe. If you're looking for healthier options, consider these swaps. Use whole wheat flour instead of all-purpose flour for more fiber. You can also cut down sugar by using applesauce or mashed bananas. These substitutes keep the bread moist and sweet. Another choice is to use Greek yogurt instead of oil. This will lower fat and add protein, making your bread even better for you. Adding fruits and seeds can make your bread even tastier. Chopped apples or mashed ripe bananas work well with chocolate. You can also mix in nuts like walnuts or pecans for crunch. For a fun twist, throw in some chia or flax seeds. They offer healthy fats and extra fiber. Each of these add-ins can create a unique flavor profile for your Double Chocolate Zucchini Bread. To keep your Double Chocolate Zucchini Bread fresh, store it at room temperature. Place it in an airtight container or wrap it tightly in plastic wrap. This prevents it from drying out. It should last about 3 to 4 days this way. If you want it to last longer, consider freezing it. To freeze your bread, first let it cool completely. Wrap it tightly in plastic wrap or aluminum foil. Then, place the wrapped bread in a freezer-safe bag. This helps avoid freezer burn. You can freeze it for up to 3 months. Just remember to label the bag with the date. When you're ready to enjoy your frozen bread, take it out and thaw it in the fridge overnight. If you're in a hurry, you can leave it at room temperature for a few hours. To reheat, slice the bread and warm it in the oven at 350°F (175°C) for about 10 minutes. This will bring back its moist texture and rich flavor. For a special touch, consider adding a bit of butter while it warms. Enjoy your delicious treat! Yes, you can use frozen zucchini. Just thaw and drain it well. This helps keep your bread from getting too watery. Frozen zucchini works well in this recipe. To make this recipe dairy-free, use plant-based milk instead of regular milk. You can also use dairy-free chocolate chips. Coconut oil is a great alternative for butter, too. You can use mashed banana or unsweetened applesauce as an egg substitute. Each egg can be replaced with 1/4 cup of either fruit. This keeps the bread moist and adds flavor. Double Chocolate Zucchini Bread lasts about 3 to 4 days at room temperature. Store it in an airtight container. You can also refrigerate it for a week for better freshness. Yes, you can make mini loaves! Just adjust the baking time to about 25-30 minutes. Check for doneness with a toothpick. Mini loaves are perfect for sharing or gifting. This bread pairs well with a scoop of vanilla ice cream or a dollop of whipped cream. You can also enjoy it with a cup of coffee or tea for a nice treat. For the full recipe, check the section above. You learned how to make delicious zucchini bread today. We covered ingredient lists, useful tips, and baking steps. You now know how to keep the bread moist and avoid common mistakes. Adding flavors and variations can make your bread unique. Storing leftovers properly ensures your bread lasts longer. Finally, FAQs help answer any leftover questions. Enjoy baking and experimenting with this tasty treat!
Double Chocolate Zucchini Bread Rich and Moist Recipe
Are you ready to bake something truly special? My Double Chocolate Zucchini Bread recipe is rich, moist, and packed with flavor. This treat hides healthy
To make the best brownie recipe, you need simple, quality ingredients. Here’s what to gather: - 1 cup unsalted butter - 2 cups granulated sugar - 4 large eggs - 1 teaspoon vanilla extract - 1 cup all-purpose flour - 1 cup unsweetened cocoa powder - 1/2 teaspoon baking powder - 1/2 teaspoon salt - Optional add-ins: chocolate chips and walnuts Each ingredient plays a key role in creating that fudgy, rich texture we all love. Butter adds moisture and flavor, while sugar sweetens and helps with that shiny crust. Eggs bind everything together and give structure. The vanilla extract enhances all the flavors. The all-purpose flour gives structure without making the brownies too dry. Cocoa powder provides that deep chocolate taste. Both baking powder and salt help balance flavors and improve texture. If you want a twist, try adding chocolate chips for extra chocolatey goodness or walnuts for a nice crunch. You can find the full recipe for these decadent fudge brownies on my site, where I share all the details you'll need to create these treats. - Preheat your oven to 350°F (175°C). - Grease a 9x13-inch baking pan. - Line it with parchment paper. - Let the paper hang over the sides for easy removal. - Melt 1 cup of unsalted butter in a medium saucepan over low heat. - Once the butter melts, take it off the heat. - Stir in 2 cups of granulated sugar until the mix is smooth. - Add 4 large eggs, one at a time, mixing well each time. - Stir in 1 teaspoon of vanilla extract for flavor. - In a separate bowl, sift together 1 cup of all-purpose flour, 1 cup of cocoa powder, 1/2 teaspoon of baking powder, and 1/2 teaspoon of salt. - Gradually add this dry mix to your wet mix. - Stir until just combined; it's okay if it’s a bit lumpy. - Pour the brownie batter into the prepared pan. - Spread the batter evenly across the pan. - Bake in your preheated oven for 25 to 30 minutes. - Check if they are done using a toothpick; it should have moist crumbs but not wet batter. Enjoy this full recipe for decadent fudge brownies. To get the perfect brownie, you must know the difference between fudgy and cakey brownies. Fudgy brownies have more fat and less flour. They feel rich and gooey. Cakey brownies have more flour and feel light. If you want fudgy brownies, use less flour and more butter. You can also add an extra egg for richness. Do not over-mix the batter. Over-mixing adds air and makes brownies cakier. Mix just until the dry and wet ingredients come together. A few lumps are fine. This keeps the brownies dense and fudgy. To make your brownies even better, try adding flavorings. You can mix in coffee, mint, or orange zest for a twist. These add depth and make your brownies stand out. Pair your brownies with tasty toppings. A scoop of vanilla ice cream is a classic choice. It adds creaminess and coolness to the warm brownie. You can also drizzle chocolate or caramel sauce on top. These toppings bring additional flavors and textures to your treat. For the full brownie experience, check out the Full Recipe. {{image_2}} You can easily add walnuts or pecans to your brownies. Nuts give a nice crunch and rich flavor. Just fold in about 1/2 cup of your choice when mixing the batter. Chop them roughly for texture. The nuts also add healthy fats and protein to your treat, making them even better. For a gourmet touch, try using different types of chocolate. Dark chocolate, milk chocolate, or even white chocolate can change the taste. You can also swirl in caramel or peanut butter. Just drop spoonfuls of either into the batter and use a knife to swirl it. This adds a creamy layer and a fun surprise in every bite. If you want a healthier option, consider using alternative sweeteners like honey or maple syrup. These can give a nice flavor while cutting down on refined sugar. You can also make gluten-free brownies by using almond flour instead of all-purpose flour. This swap keeps the brownies rich and moist while catering to gluten-free diets. To keep your brownies fresh, follow these simple tips. First, let the brownies cool completely in the pan. Once cool, cut them into squares. Place the squares in an airtight container. You can stack them with parchment paper between layers to avoid sticking. Store the container in a cool, dry place. Brownies stay fresh for about four to five days at room temperature. For longer storage, you can keep brownies in the fridge. Just make sure they are in a sealed container to prevent drying out. They can last up to a week in the fridge. Freezing brownies is a great way to enjoy them later. Start by cutting the brownies into squares. Wrap each square tightly in plastic wrap. Then, place the wrapped brownies in a freezer-safe bag or container. Make sure to remove as much air as possible. You can freeze brownies for up to three months. When you’re ready to eat them, take the brownies out of the freezer. Let them thaw in the fridge for a few hours or overnight. For a quick method, you can microwave them for about 15-20 seconds. This will help restore their fudgy texture. Enjoy your brownies fresh from the freezer! Brownies get their dense and fudgy texture from a few key ingredients. The unsalted butter adds richness and moisture. Granulated sugar helps create a chewy bite. Using eggs contributes to the structure and richness. The cocoa powder is crucial for flavor and moisture. Lastly, not over-mixing keeps the brownies fudgy. Yes, you can make swaps based on your needs. For a dairy-free option, use coconut oil instead of butter. If you want to cut sugar, try coconut sugar or a sugar alternative. For gluten-free brownies, replace all-purpose flour with almond flour or a gluten-free blend. Feel free to experiment with ingredients for your taste! You can use a simple toothpick test. Insert a toothpick into the center of the brownies. If it comes out with a few moist crumbs, they are done. If it has wet batter on it, bake for a little longer. Visually, the edges should look set while the center may still look slightly soft. Homemade brownies can last up to three days at room temperature. Be sure to store them in an airtight container. If you refrigerate them, they can last about a week. For longer storage, consider freezing them. Brownies freeze well and can stay fresh for up to three months! You now have a complete guide for making the best brownies. We covered essential ingredients, step-by-step instructions, and tips for perfect texture. I shared variations and storage tips too. Remember, it's all about balance—whether you prefer fudgy or cakey. Experiment with flavors and enjoy your tasty results. Brownies are a treat worth mastering! With each batch, you can make them unique and delicious. Now, it's time to get baking and treat yourself.
Best Brownie Recipe for Fudgy Perfection Today
Welcome to the ultimate guide for brownie lovers! If you dream of fudgy, rich brownies that melt in your mouth, you’re in the right place.