Desserts
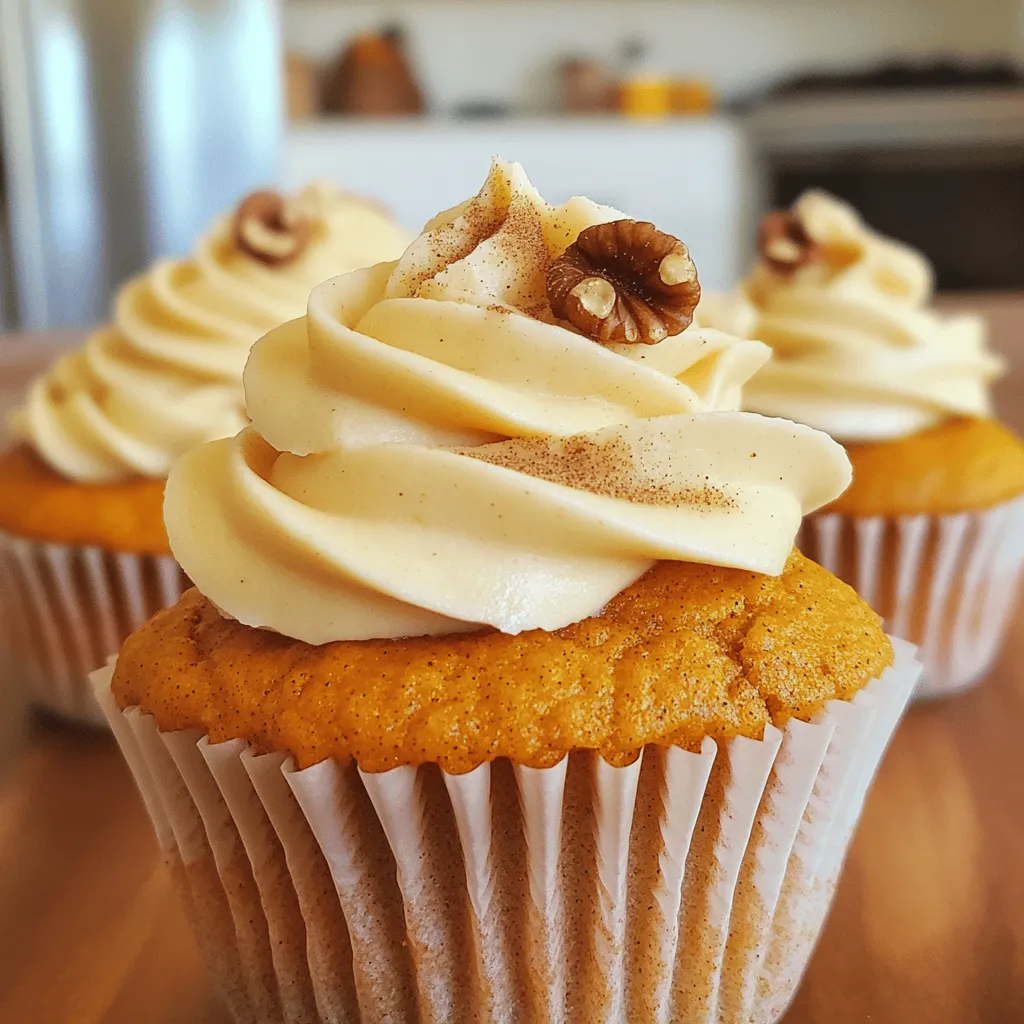
Pumpkin Cupcakes with Cinnamon Frosting Delight
Get ready to savor the taste of fall with my Pumpkin Cupcakes with Cinnamon Frosting! These cupcakes blend moist pumpkin goodness with a creamy frosting
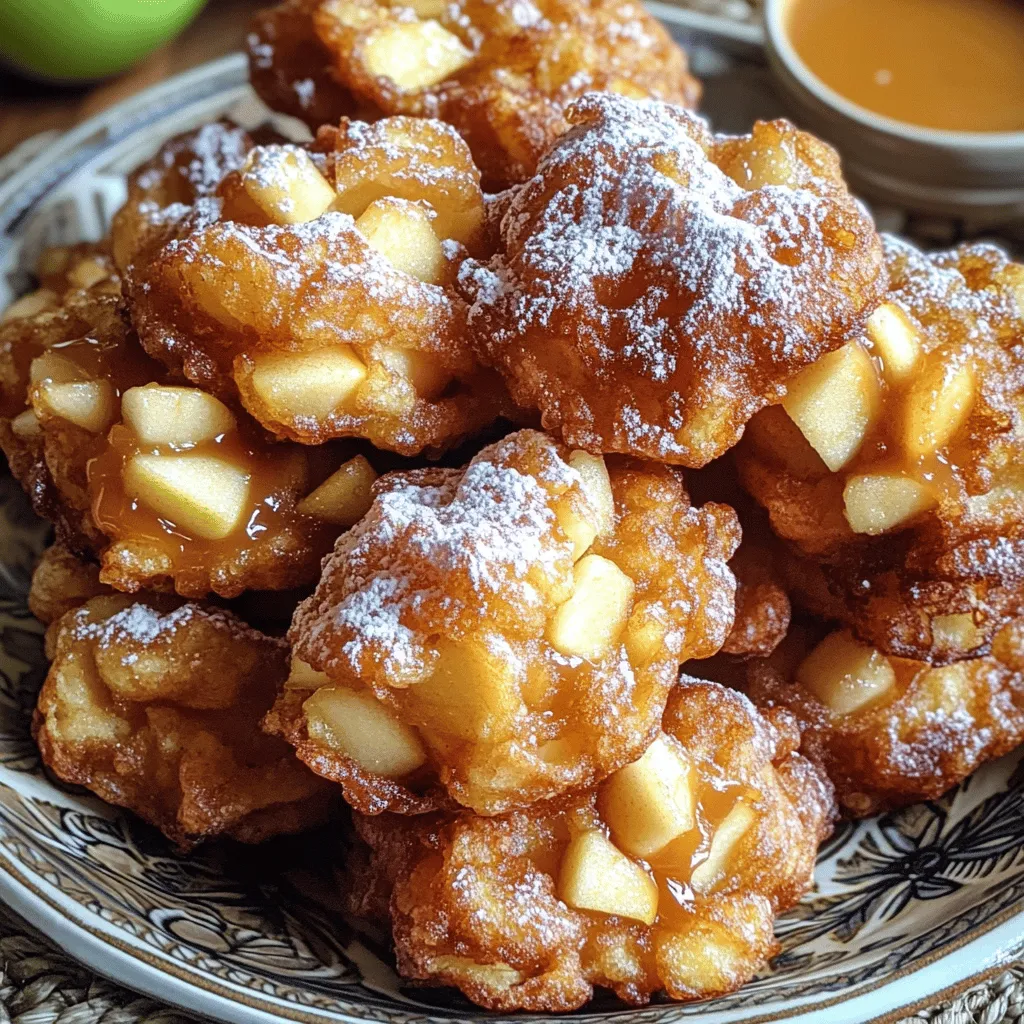
Irresistible Big Apple Fritters Simple and Delightful
If you crave a sweet treat, Big Apple Fritters are a must-try! These donuts boast juicy apples and a crispy outer layer. In this post,

Crumbl Banana Bread Cookies Delightful and Easy Recipe
Are you ready to bake something amazing? Crumbl Banana Bread Cookies are the perfect blend of soft and sweet. With just a few simple ingredients,
![To make this delicious cake, gather these key ingredients: - 1 cup pecan halves - 1/2 cup unsalted butter - 1 cup brown sugar - 1/4 cup maple syrup - 1 cup all-purpose flour - 1 teaspoon baking powder - 1/2 teaspoon baking soda - 1/4 teaspoon salt - 1/2 cup granulated sugar - 1/2 cup buttermilk - 2 large eggs - 1 teaspoon vanilla extract These ingredients blend together to create a rich and tasty cake. The pecans add crunch, while the maple syrup lends a warm flavor. If you’re missing an ingredient, here are some easy swaps: - Unsalted Butter: Use coconut oil or margarine. - Brown Sugar: You can use white sugar mixed with molasses. - Buttermilk: Mix milk with lemon juice or vinegar for an easy substitute. - Granulated Sugar: You can replace it with coconut sugar for a more natural option. These substitutes keep the cake tasty while making it easier for you to bake. For this recipe, you will need: - 9-inch round cake pan - Small saucepan - Mixing bowls - Whisk - Measuring cups and spoons - Toothpick for testing doneness Having the right tools makes baking smooth and fun. A sturdy cake pan ensures even baking, and good mixing bowls help combine ingredients well. Follow the [Full Recipe] for step-by-step instructions, and enjoy your baking! To start, you need to prepare the base and topping for the cake. First, preheat your oven to 350°F (175°C). Grease a 9-inch round cake pan and set it aside. In a small saucepan, melt 1/2 cup of unsalted butter over medium heat. Add 1 cup of brown sugar and 1/4 cup of maple syrup. Stir this mixture until it combines and bubbles, which takes about 2-3 minutes. Once done, pour it into the bottom of your prepared pan. Now, evenly arrange 1 cup of pecan halves on top of this caramel mixture. Next, it’s time to mix and bake the cake. In a mixing bowl, whisk together 1 cup of all-purpose flour, 1 teaspoon of baking powder, 1/2 teaspoon of baking soda, and 1/4 teaspoon of salt. Set this bowl aside. In another bowl, beat 1/2 cup of granulated sugar with the remaining 1/2 cup of butter until creamy, about 3 minutes. Add 2 large eggs, mixing well after each. Stir in 1 teaspoon of vanilla extract. Now, gradually mix in the dry ingredients, alternating with 1/2 cup of buttermilk. Start and end with the flour. Mix until smooth. Carefully pour this cake batter over the pecans in the pan, smoothing the top. Bake for 30-35 minutes. Check for doneness by inserting a toothpick into the center. If it comes out clean, your cake is ready! After baking, let the cake cool in the pan for about 10 minutes. Then, carefully invert it onto a serving plate. You’ll see the beautiful caramelized pecans on top. Allow the cake to cool for another 10-15 minutes before slicing. For extra delight, serve it warm with whipped cream or a scoop of vanilla ice cream. Enjoy this delicious treat! For the full recipe, click here. One common mistake is overcooking the cake. Keep an eye on the time. Check it at 30 minutes. Insert a toothpick to see if it comes out clean. If it does, the cake is done. Another mistake is not letting the cake cool before inverting it. This can lead to a messy presentation. Also, be careful when pouring the batter. If you pour too fast, it may disturb the pecans. To get that perfect caramel layer, heat the butter, brown sugar, and maple syrup slowly. Stir it until it bubbles. This can take about 2-3 minutes. Don’t rush this step. If you cook it too long, it can burn. Pour the caramel into the pan while it's hot. This helps the pecans stick well and creates a nice glaze. For a moist cake, use room temperature ingredients. This includes butter, eggs, and buttermilk. Mix the batter gently. Overmixing can lead to a tough cake. It’s better to mix until just combined. Lastly, let the cake cool in the pan for a few minutes. This keeps it moist and helps it hold together better. For a detailed guide, check the Full Recipe. {{image_2}} You can swap pecans for other nuts. Walnuts work well and add a nice crunch. Almonds bring a light taste and a different texture. Hazelnuts also make a great choice. Just chop them roughly and add them to the cake. The caramel topping will be just as tasty with these nuts. Add a splash of orange juice or zest for a bright twist. You can also mix in spices like cinnamon or nutmeg for warmth. Dark chocolate chips can bring richness and depth. For a tropical touch, try adding shredded coconut. Each of these add-ins makes the cake unique and exciting. To make this cake gluten-free, use a gluten-free flour blend. This keeps the texture light and airy. For a vegan version, replace eggs with flaxseed meal or applesauce. Use plant-based butter and almond milk instead of buttermilk. These swaps keep the cake delicious while meeting dietary needs. For the full recipe, check the earlier section. Enjoy exploring these fun variations! To keep your cake fresh, wrap it tightly in plastic wrap. You can also place it in an airtight container. Store it at room temperature for up to three days. If you want it to last longer, refrigeration is a good option. Just remember, refrigeration can change the cake's texture a bit. For long-term storage, freezing is best. Slice the cake into pieces for easy serving later. Wrap each slice in plastic wrap, then place them in a freezer bag. Label the bag with the date. The cake can last up to three months in the freezer. When you're ready to enjoy it, simply thaw it in the fridge overnight. To reheat your cake, preheat the oven to 350°F (175°C). Place the cake on a baking sheet and cover it with foil to keep it moist. Heat it for about 10-15 minutes. You can also microwave a slice for 15-20 seconds. Just be careful not to overheat it, as it can dry out. Enjoy your warm, gooey cake! For the full recipe, check out the details above. You can bake the cake a day or two in advance. Once it cools, cover it tightly. Store it at room temperature. This keeps the cake moist and fresh. When you are ready, you can warm it slightly in the oven. This step brings back its delicious flavor. Yes, you can! While pecans are great, walnuts or almonds work well too. Just keep the same amount. Each nut gives a unique flavor and texture. Try mixing nuts for added taste, too! If your cake turns out dry, try these tips. Serve it warm with a drizzle of syrup or cream. You can also add a scoop of ice cream. The moisture will help balance the dryness. Next time, check your baking time. Overbaking can lead to dryness. To check if your cake is done, use a toothpick. Insert it into the center of the cake. If it comes out clean, your cake is ready. If there’s batter on the toothpick, bake it a bit longer. The cake should also spring back when touched lightly. This cake pairs well with many treats. A dollop of whipped cream adds lightness. Vanilla ice cream is a classic choice, too. You can also serve it with fresh fruit or a hot coffee. Each option enhances the cake's rich flavors. For the full recipe, refer to the earlier section. You learned how to make a delicious Caramelised Pecan Upside Down Cake. We covered all the ingredients, tools, and step-by-step instructions to ensure your success. I shared tips to avoid common mistakes and achieve great flavors. Plus, I offered storage advice and answers to your most pressing questions. Remember, cooking is about pleasure and creativity. Enjoy making this cake, and don’t hesitate to try new flavors and extras. Your kitchen is a space for fun and taste. Happy baking!](https://stirredrecipes.com/wp-content/uploads/2025/07/fbf028e5-0d44-4739-96bb-636f3d4b8e56.webp)
Caramelised Pecan Upside Down Cake Delight Recipe
Craving a sweet treat that wows? Let me introduce you to the Caramelised Pecan Upside Down Cake. This cake shines with golden pecans soaked in

Irresistible Apple Crumble Cheesecake Recipe to Enjoy
Looking for a dessert that combines creamy cheesecake with a sweet, crunchy topping? You’re in the right place! My Irresistible Apple Crumble Cheesecake Recipe is
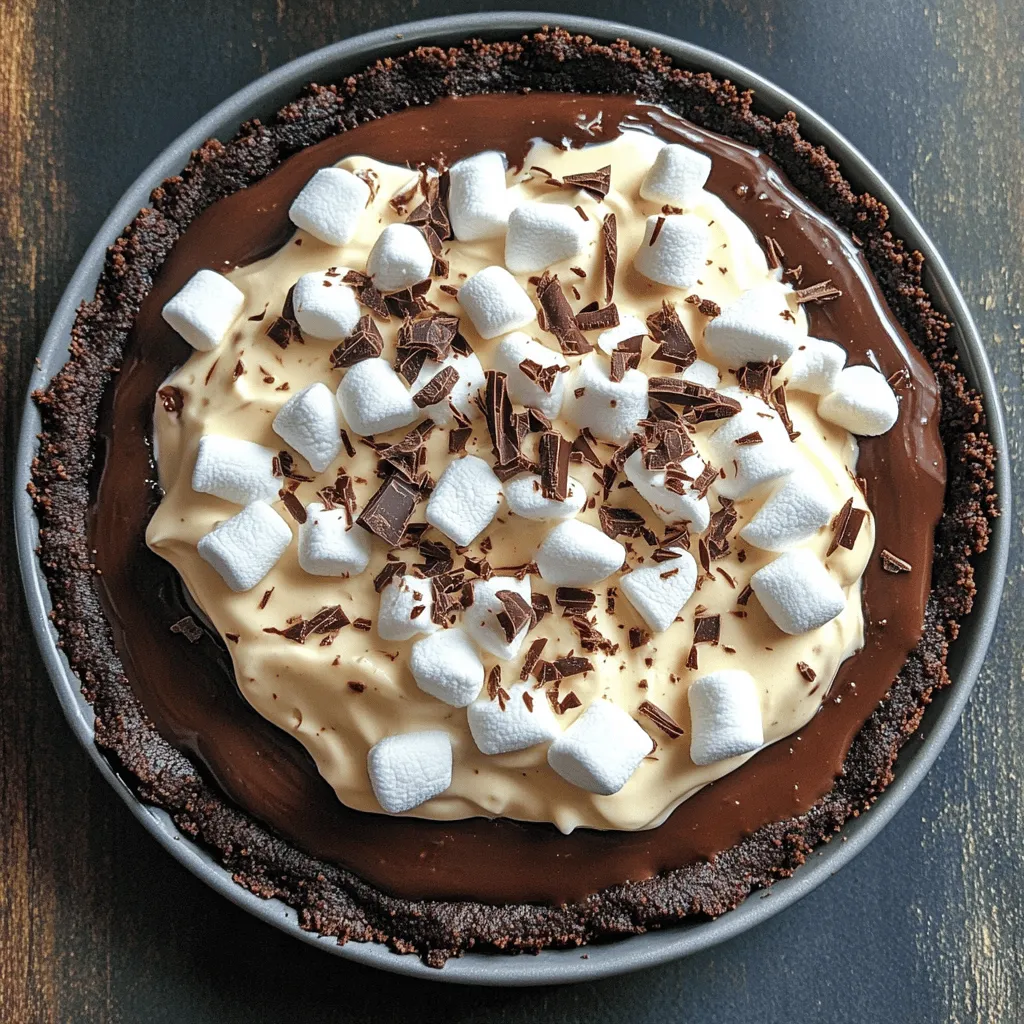
Mississippi Mud Pie Decadent Chocolate Dessert Recipe
Are you ready to indulge in a creamy treat that packs a chocolate punch? Mississippi Mud Pie is the perfect dessert to impress your friends
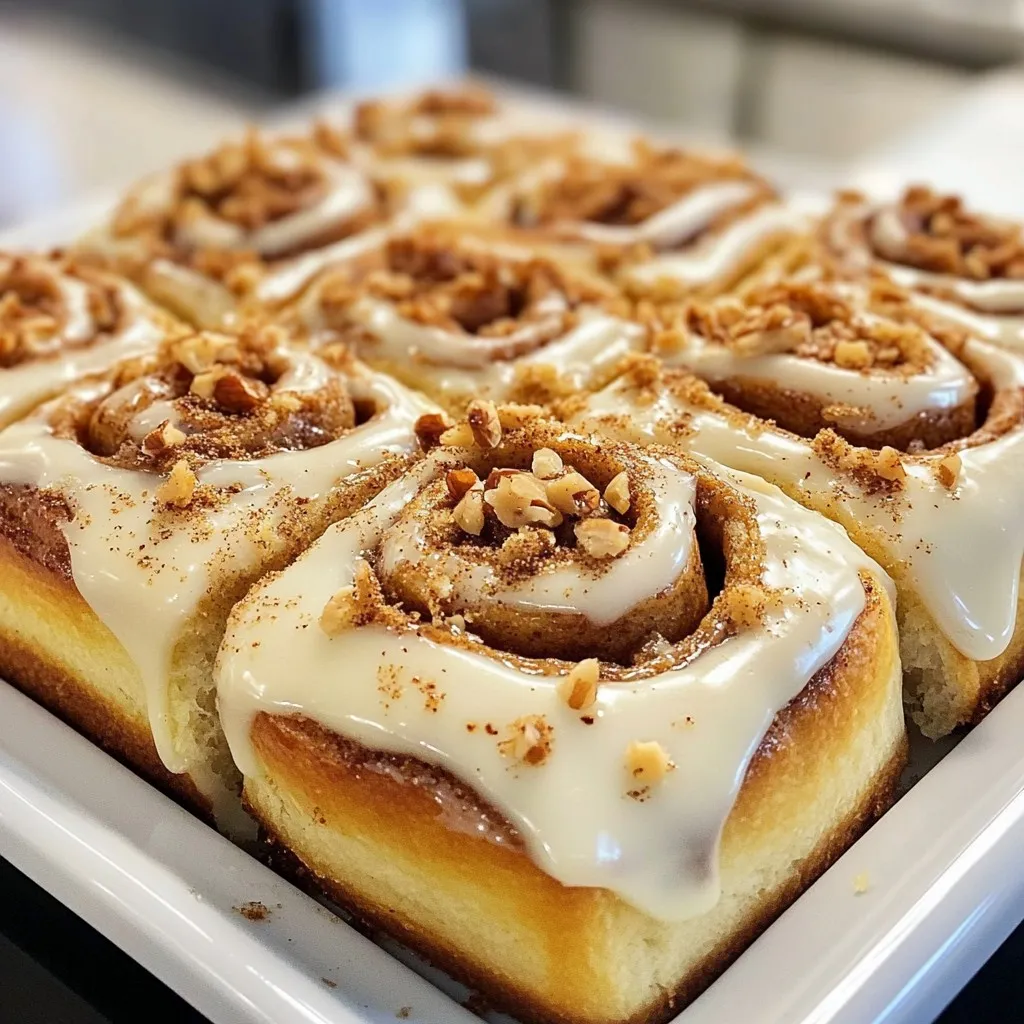
Homemade Cinnamon Rolls Soft and Luscious Delight
Are you ready to indulge in the warm, sweet aroma of homemade cinnamon rolls? In this guide, I’ll show you step-by-step how to create soft
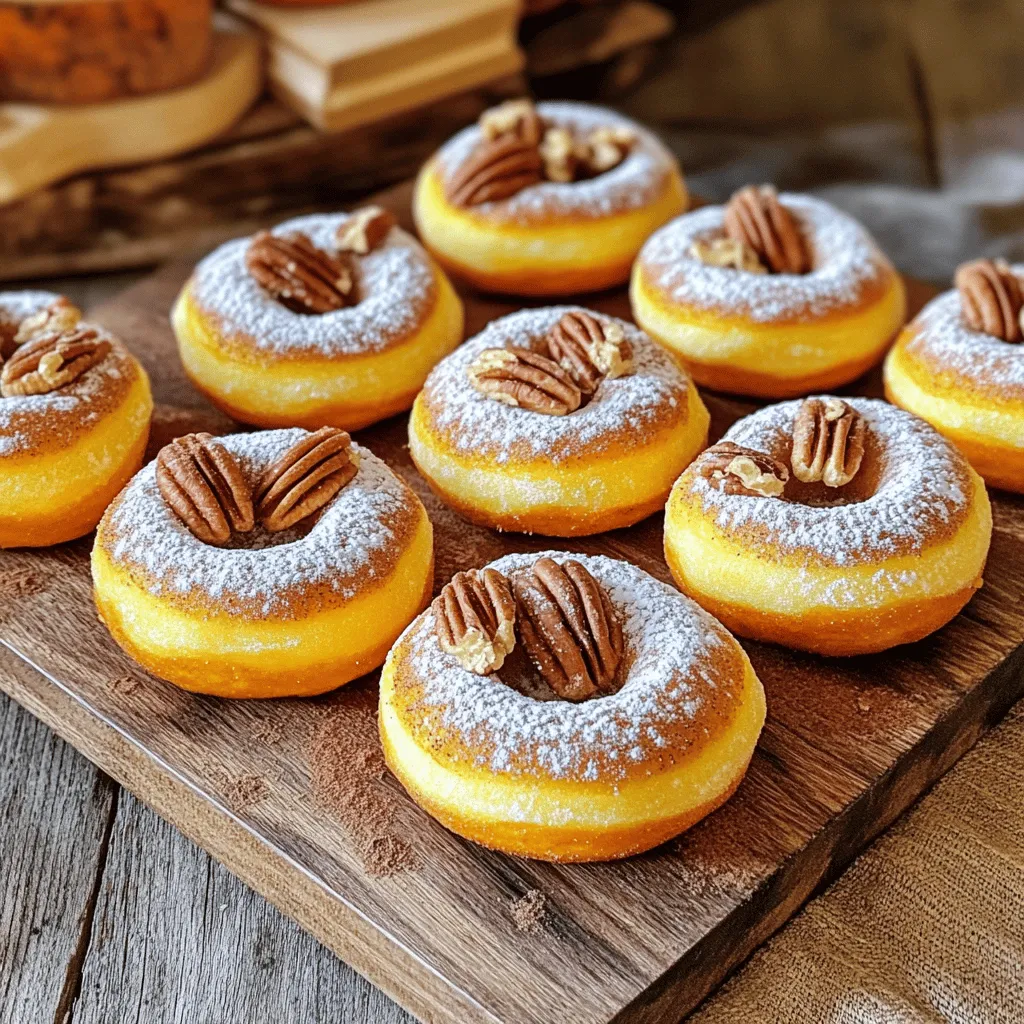
Gluten-Free Pumpkin Donuts Tasty and Simple Recipe
If you crave a tasty treat that’s both easy to make and gluten-free, you’re in the right place! This Gluten-Free Pumpkin Donuts recipe combines the
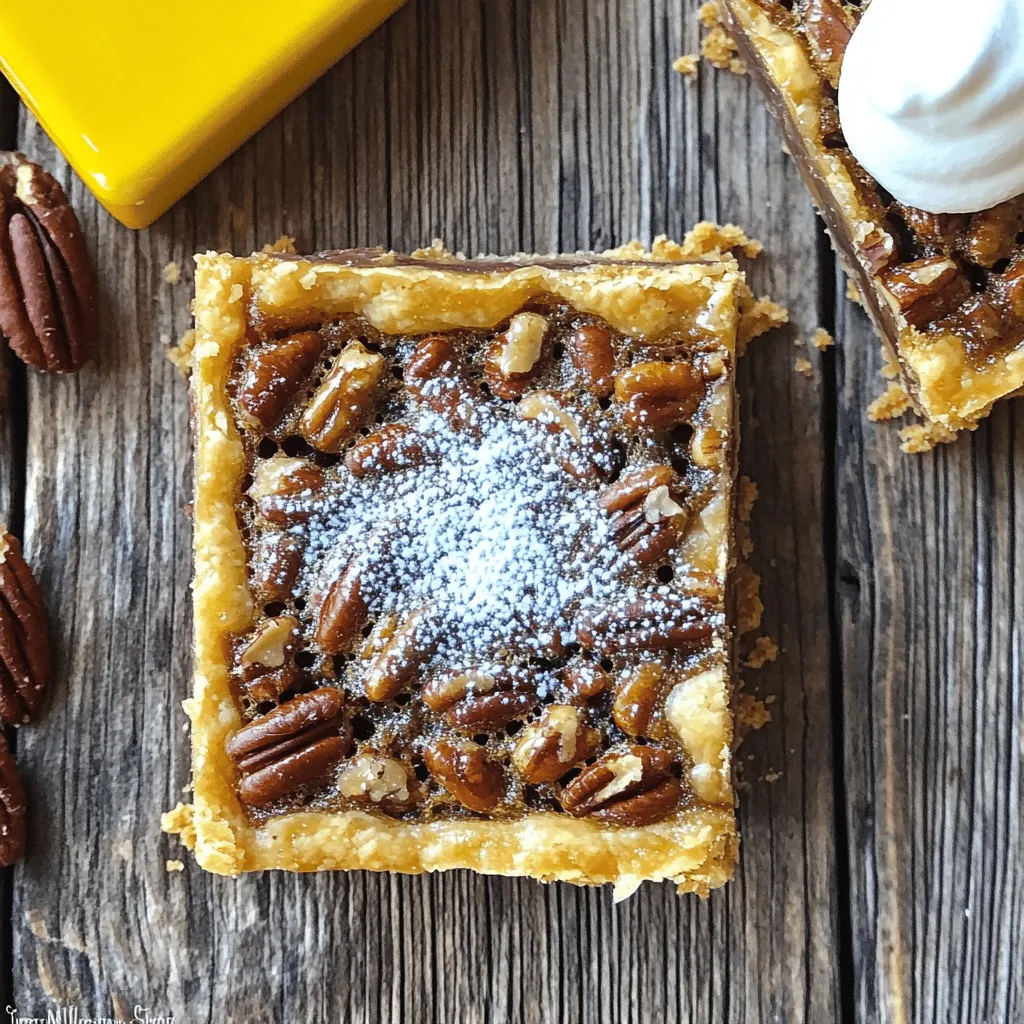
Pecan Pie Bars Simple and Irresistible Delight
Are you ready to satisfy your sweet tooth? These Pecan Pie Bars are simple and incredibly delicious! They combine the rich flavors of classic pecan
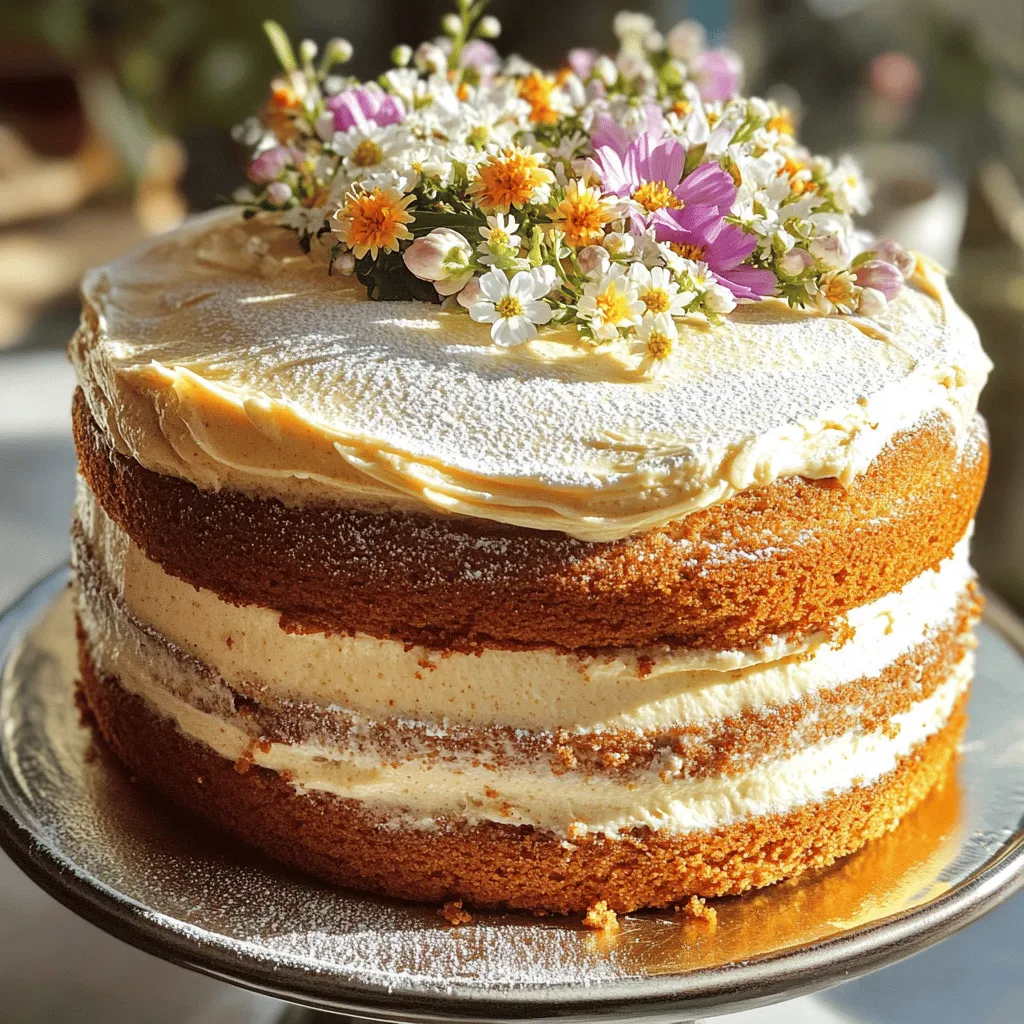
Chai Cake Delight Simple and Flavorful Recipe
Welcome to the world of Chai Cake! This simple and flavorful recipe combines warm spices with a soft cake, creating a dessert that’s perfect for