Desserts
EASY FALL TREATS Simple and Delicious Energy Bites
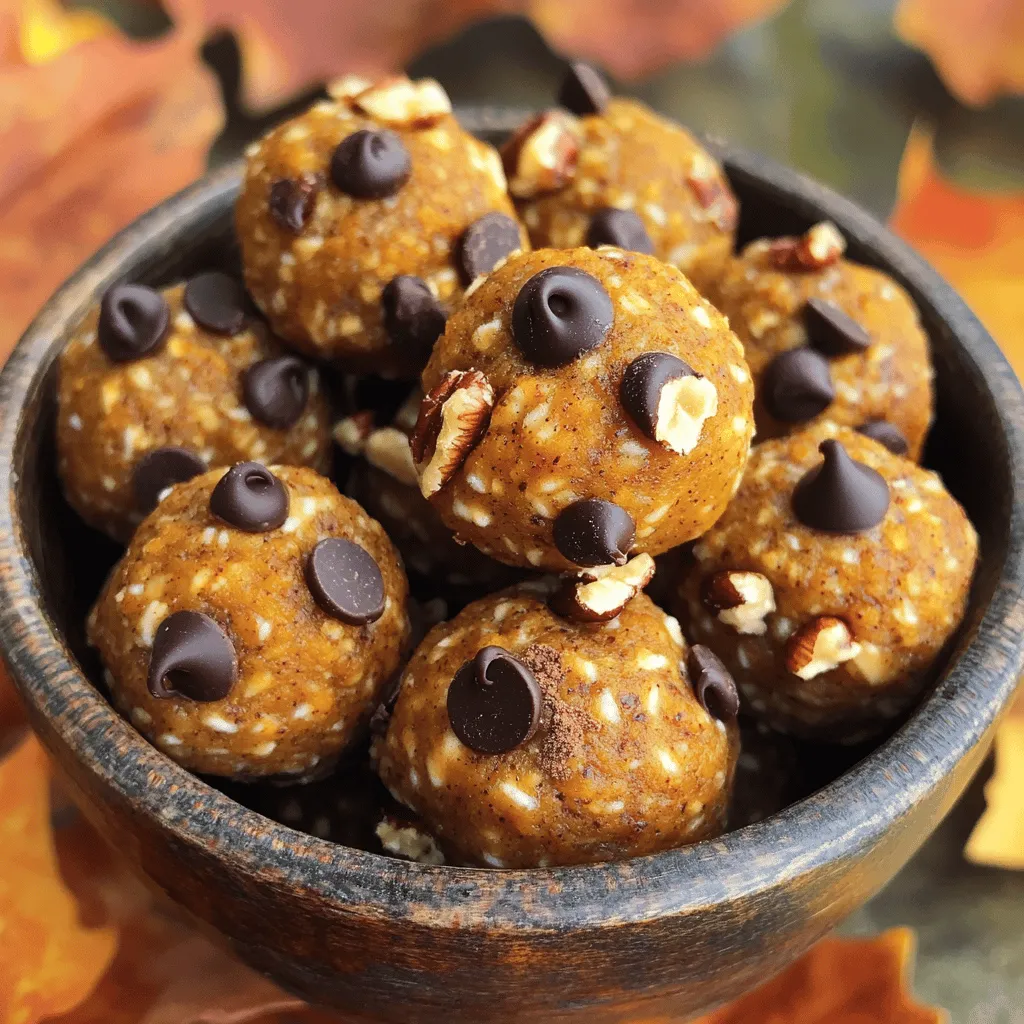
Fall is the perfect time for cozy flavors, and I have a treat for you! These Easy Fall Treats are simple, wholesome energy bites packed
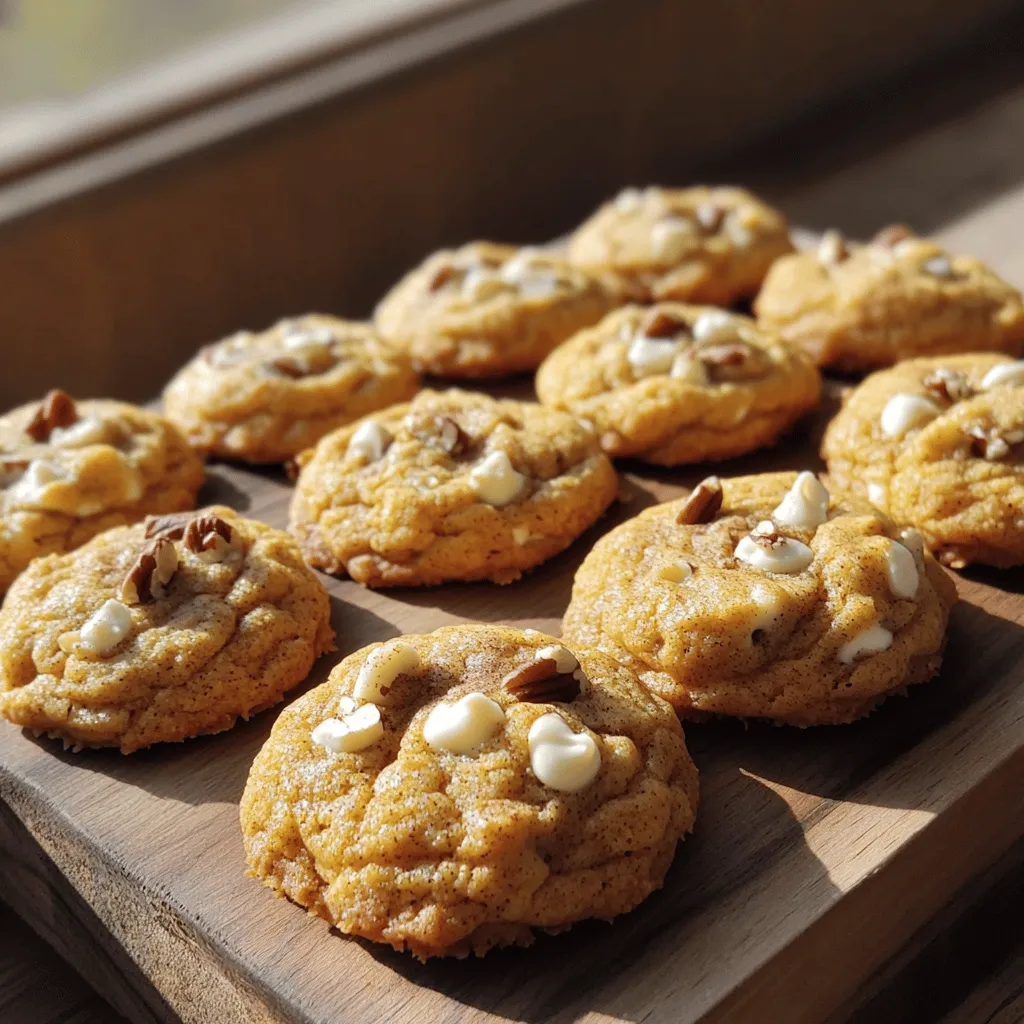
![Let's dive into the essential ingredients for making Chewy French Toast Cookies. These cookies are simple yet packed with flavor. You will need both dry and wet ingredients to create that perfect chewy texture. - 1 cup all-purpose flour - 1/2 cup rolled oats - 1/2 teaspoon baking powder - 1/4 teaspoon baking soda - 1/4 teaspoon salt - 1 teaspoon ground cinnamon - 1/4 teaspoon nutmeg The dry ingredients set the base for your cookies. Flour gives structure, while oats add a hearty texture. The baking powder and baking soda help them rise, ensuring they stay chewy. Salt enhances all the flavors, and spices like cinnamon and nutmeg bring that warm, cozy taste. - 1/2 cup unsalted butter, softened - 1/2 cup brown sugar, packed - 1/4 cup granulated sugar - 1 large egg - 1 teaspoon vanilla extract - 1/4 cup maple syrup The wet ingredients are where the magic happens. Softened butter makes the dough creamy. Brown sugar adds moisture and a rich flavor, while granulated sugar gives a bit of crunch. The egg binds everything together. Vanilla and maple syrup add that classic French toast flavor we all love. - 1/2 cup chopped pecans or walnuts - 1/4 cup raisins If you want to personalize your cookies, consider these add-ins. Nuts add crunch and richness. Raisins bring sweetness and a chewy texture. Feel free to mix and match your favorite toppings. For the complete recipe, check out the [Full Recipe]. Making these cookies is not just baking; it’s a fun way to enjoy a beloved breakfast treat in cookie form! - Preheat the oven to 350°F (175°C). - Line a baking sheet with parchment paper. - In a medium bowl, combine the dry ingredients: flour, oats, baking powder, baking soda, salt, cinnamon, and nutmeg. - In a large bowl, cream the softened butter, brown sugar, and granulated sugar until light and fluffy. - Add the egg, vanilla, and maple syrup to the butter mixture. Beat well until combined. - Gradually mix the dry ingredients into the wet mixture. Be careful not to overmix! - If you want, fold in the chopped pecans or walnuts and raisins. - Using a cookie scoop, drop rounded balls of dough onto the prepared baking sheet. Leave space between each one for spreading. - Bake in the preheated oven for 10-12 minutes. The edges should be lightly golden. The centers will firm up as they cool. Enjoy making these chewy French toast cookies with this full recipe! To get that perfect chewy texture, you need to start with softened butter. Softened butter blends well into the dough. It helps the cookies stay soft and chewy. Avoid using melted butter, as it can make the cookies spread too much. Also, be careful not to overmix the dough. When you mix too long, it can create tough cookies. Just mix until everything comes together. Choosing high-quality maple syrup makes a big difference in flavor. It adds sweetness and a rich taste. You can also play with spices to boost the flavor. Try adding a bit of ground ginger or cloves. These spices can give your cookies a warm, cozy taste. Just a little bit can turn a good cookie into a great one! Keep a close eye on your cookies after about 10 minutes of baking. The edges should turn light golden, while the centers may look soft. This is normal! Letting them cool is key for the perfect texture. Once they cool, they will firm up nicely. This step helps maintain that chewy goodness we all love. {{image_2}} You can make these cookies even more fun with some tasty twists. The cinnamon sugar variation is a classic. Just sprinkle a mix of cinnamon and sugar on top before baking. This adds a sweet crunch. Another great option is chocolate chip French toast cookies. Just fold in half a cup of chocolate chips into the dough. This will make them extra gooey and delicious. If you need a gluten-free option, swap all-purpose flour for gluten-free flour. This works great and keeps the cookies chewy. For those who prefer a vegan treat, you can use flax eggs. Mix one tablespoon of flaxseed meal with two and a half tablespoons of water. Also, replace butter with coconut oil. These swaps keep the flavor while fitting your diet. Cookies can change with the seasons! For fall, try pumpkin spice French toast cookies. Add pumpkin puree and pumpkin pie spice to the dough. This gives a warm, cozy flavor. In winter, consider an Almond Joy-inspired cookie. Mix in shredded coconut and chocolate chips. This adds a sweet, tropical twist to your cookies. You can find the full recipe to get started on these variations! Store your chewy French toast cookies in an airtight container at room temperature. This helps keep them fresh and tasty. They are best consumed within a week for optimal flavor and texture. If you want to save some cookies for later, freeze them for up to three months. Make sure to wrap them well to avoid freezer burn. When you’re ready to enjoy, thaw them at room temperature. This keeps them soft and chewy. To bring back their warm, fresh taste, warm the cookies in the microwave for a few seconds. If you want them crispy again, pop them in a toaster oven for a short time. This gives them a nice crunch. For the full recipe, check the [Full Recipe]. Yes, it may alter the texture but can be used. Whole wheat flour adds a nutty taste. It will make the cookies denser. Start with half whole wheat and half all-purpose if you want to test it. Adjust the sugar content based on your preference. You can add or reduce sugar as you like. Try adding a bit of brown sugar for a deeper flavor. If you want them less sweet, cut the sugar in half. Yes, substitute with a flax egg. To make one flax egg, mix 1 tablespoon of flaxseed meal with 2.5 tablespoons of water. Let it sit for a few minutes until it thickens. This method works well for binding. Absolutely! Chocolate chips, dried fruits, or seeds work well. Feel free to get creative! Try adding shredded coconut or even a sprinkle of sea salt on top. These additions can enhance the flavor and texture. The edges should be light golden; centers may look soft but will firm up as they cool. Check them around the 10-minute mark. If they look puffy and slightly shiny, they are likely ready to come out. This article covered key ingredients, steps, and tips for making delicious cookies. You learned how to mix dry and wet ingredients, plus how to create your own flavor variations. Remember, using quality ingredients can boost your cookie's taste. Don’t forget to store your cookies properly for the best texture. Now, it’s time to bake, share with friends, and enjoy your tasty creations!](https://stirredrecipes.com/wp-content/uploads/2025/07/a43e8471-3a75-40e1-af5e-993149dd166e.webp)
Chewy French Toast Cookies Delightful Easy Treat
Imagine biting into a cookie that captures the warm, cozy flavors of French toast. My Chewy French Toast Cookies are easy to make and perfect
![Here’s a detailed list of the ingredients you need for this delightful White Chocolate Raspberry Cake: - 1 ½ cups all-purpose flour - 1 cup granulated sugar - ½ cup unsalted butter, softened - 2 large eggs - 2 teaspoons baking powder - ½ teaspoon salt - 1 cup milk - 1 teaspoon vanilla extract - 1 cup white chocolate chips - 1 cup fresh raspberries - ½ cup raspberry puree - Whipped cream, for topping - Optional: fresh mint leaves for garnish You can find the full recipe, which guides you step by step, right here. Each ingredient plays a key role in making this cake rich and flavorful. The white chocolate chips add a creamy sweetness, while the fresh raspberries provide a tart contrast. This balance makes every bite a true delight. Using fresh ingredients will ensure that your cake tastes amazing. Don't forget to gather everything before you start for a smooth baking experience! - Preheat your oven to 350°F (175°C). - Prepare two 9-inch round cake pans. Grease and flour them well. - In a bowl, whisk together the flour, baking powder, and salt. - In another bowl, cream the softened butter and sugar until light. - Add the eggs one at a time, then mix in the vanilla. - Gradually add the dry ingredients to the butter mix, alternating with the milk. - Start and end with the dry mix. Stir gently just until combined. - Fold in the white chocolate chips and fresh raspberries. Be gentle to keep the raspberries whole. - Divide the batter evenly between the prepared pans. - Bake for about 25-30 minutes. Check doneness with a toothpick. - Once done, let the cakes cool in the pans for 10 minutes. Then, move them to wire racks to cool completely. - Place one cake layer on a serving platter. - Drizzle raspberry puree over the first layer, then add a dollop of whipped cream. - Top with the second cake layer. - Frost the entire cake with whipped cream. Drizzle more raspberry puree on top. - Garnish with fresh mint leaves for a nice touch. You can find the Full Recipe in the previous section. Enjoy every bite of this delightful treat! To get the best cake, start with the right oven temperature. Preheat your oven to 350°F (175°C). This helps the cake rise evenly. If your oven runs hot or cold, it can change the bake time and texture. Next, properly grease and flour your cake pans. Use unsalted butter to grease the pans. Then, add a light dusting of flour. This prevents sticking and helps the cakes come out smoothly. To boost flavor, consider adding different extracts. Almond or coconut extract can add a nice twist to your cake. Just a teaspoon can make a big difference. Using premium chocolate is also key. High-quality white chocolate chips melt better and provide richer taste. Look for brands with high cocoa butter content for the best flavor. When it comes to presenting your cake, creativity shines. You can layer fresh raspberries on top for a pop of color. Drizzling raspberry puree over the whipped cream adds a beautiful touch. For alternative toppings, consider crushed pistachios or toasted coconut. These add texture and flavor. Fresh mint leaves also make a lovely garnish, giving your cake an elegant finish. {{image_2}} You can try fun twists on this cake. One great idea is a white chocolate and almond cake. Just add almond extract to the batter. It pairs well with the sweet white chocolate. Another tasty option is a lemon raspberry twist. Add lemon zest and lemon juice to the batter. This brightens the cake and adds a nice zing. It also enhances the raspberry flavor. Both variations give you new ways to enjoy this cake. You might need a gluten-free option. You can swap the all-purpose flour for a gluten-free blend. Make sure it has a good mix of starches. This will give you a nice texture. For a dairy-free cake, use coconut milk instead of regular milk. You can also try dairy-free butter. This helps keep the cake moist and tasty. Both options let everyone enjoy the cake, no matter their diet. Serving this cake with ice cream is a hit. A scoop of vanilla or raspberry ice cream adds creaminess. It balances the sweetness of the cake. Fresh fruits like strawberries or blueberries also make a lovely pair. They add freshness and color to your plate. For drinks, serve with sparkling water or a fruity lemonade. These drinks enhance the cake’s flavors and keep things light. You can also try a nice cup of tea. It makes for a cozy treat. Explore the [Full Recipe] for more tips and details on making this cake. To keep your white chocolate raspberry cake fresh, store it in the fridge. Place it in an airtight container. This helps prevent it from drying out. You can also cover it tightly with plastic wrap. If you have leftover slices, you can freeze them. Wrap each slice in plastic wrap and place them in a freezer bag. This keeps them tasty for later. When you're ready to enjoy a slice, reheating is easy. Take a slice from the fridge or freezer. If it’s frozen, let it thaw at room temperature for about 30 minutes. For warm cake, use a microwave. Heat each slice for about 10-15 seconds. Check to see if it’s warm enough for your taste. If not, heat it for a few more seconds. When stored properly, your cake will stay fresh for about 3 to 4 days in the fridge. If you freeze it, the cake can last for up to 3 months. Just remember, the sooner you eat it, the better it will taste! Keeping track of these tips helps you enjoy your cake at its best. To make this cake from scratch, follow these steps: 1. Preheat your oven to 350°F (175°C) and prepare two cake pans. 2. Mix the dry ingredients in a bowl. 3. Cream butter and sugar until light. 4. Add eggs and vanilla, and mix well. 5. Alternate adding dry mix and milk to the batter. 6. Fold in white chocolate chips and fresh raspberries. 7. Divide the batter, bake for 25-30 minutes, and let cool. These steps create a soft and tasty cake. For the full recipe, check out the Full Recipe section. Yes, you can use frozen raspberries. They work well in the cake. However, they may add more moisture. This could make the cake a bit denser. If you use them, try not to thaw them first. Fold them in gently to keep some shape. The secret lies in the ingredients and methods. Use fresh milk and butter. Eggs add richness too. Do not overmix the batter. This can make the cake tough. Also, check for doneness early. It helps keep the cake moist. For great layers, ensure even baking. Tap the pans before baking to remove air bubbles. Bake until a toothpick comes out clean. Let the layers cool fully before stacking. This helps avoid sliding or breaking. Look for local bakeries that specialize in gourmet cakes. Many offer creative flavors. You can also check online for delivery options. Websites like Yelp or Google can help you find the best-rated spots in your area. To make this cake gluten-free, swap the all-purpose flour for a gluten-free blend. Ensure the blend has xanthan gum for structure. This keeps the cake light and fluffy. Always check labels to avoid hidden gluten in other ingredients. We covered everything you need to make a delicious White Chocolate Raspberry Cake. From gathering easy ingredients to baking and decorating, this cake is fun to create. Remember to use fresh raspberries for the best taste. Don’t hesitate to try variations and tips for extra flavor. Proper storage will keep your cake fresh for longer. Enjoy every slice, and share with friends and family. This cake is sure to impress!](https://stirredrecipes.com/wp-content/uploads/2025/07/f2f17bab-92d5-4121-ac23-0b2ef71891e1.webp)
White Chocolate Raspberry Cake Delightful and Easy Recipe
Looking to impress your guests with a stunning dessert? This White Chocolate Raspberry Cake is both delightful and easy to make. With its rich white
Delicious Apple Fritter Bread Easy and Homemade Recipe
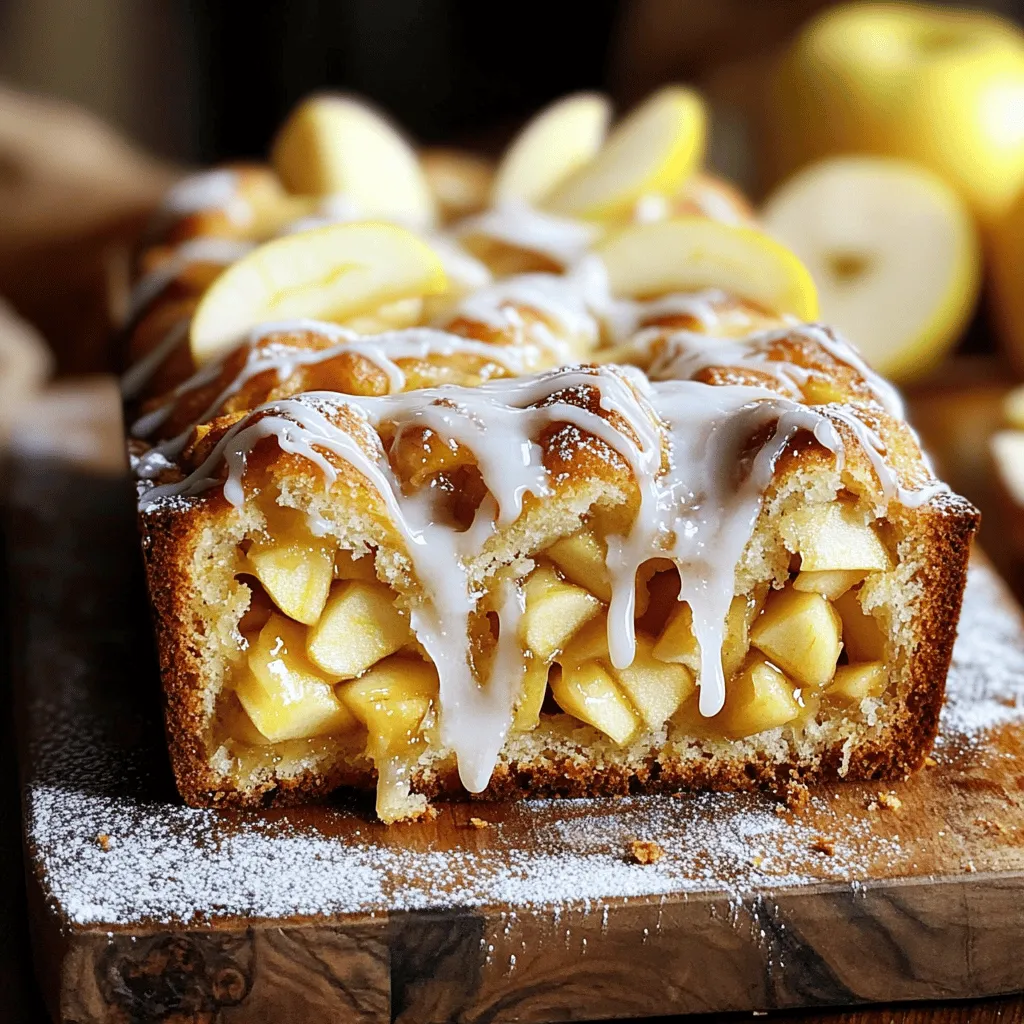
Craving a sweet treat that’s easy and homemade? Look no further than my Delicious Apple Fritter Bread! This warm, moist loaf bursts with apple flavor,
Easy Caramel Apple Bites Fun and Delicious Treat
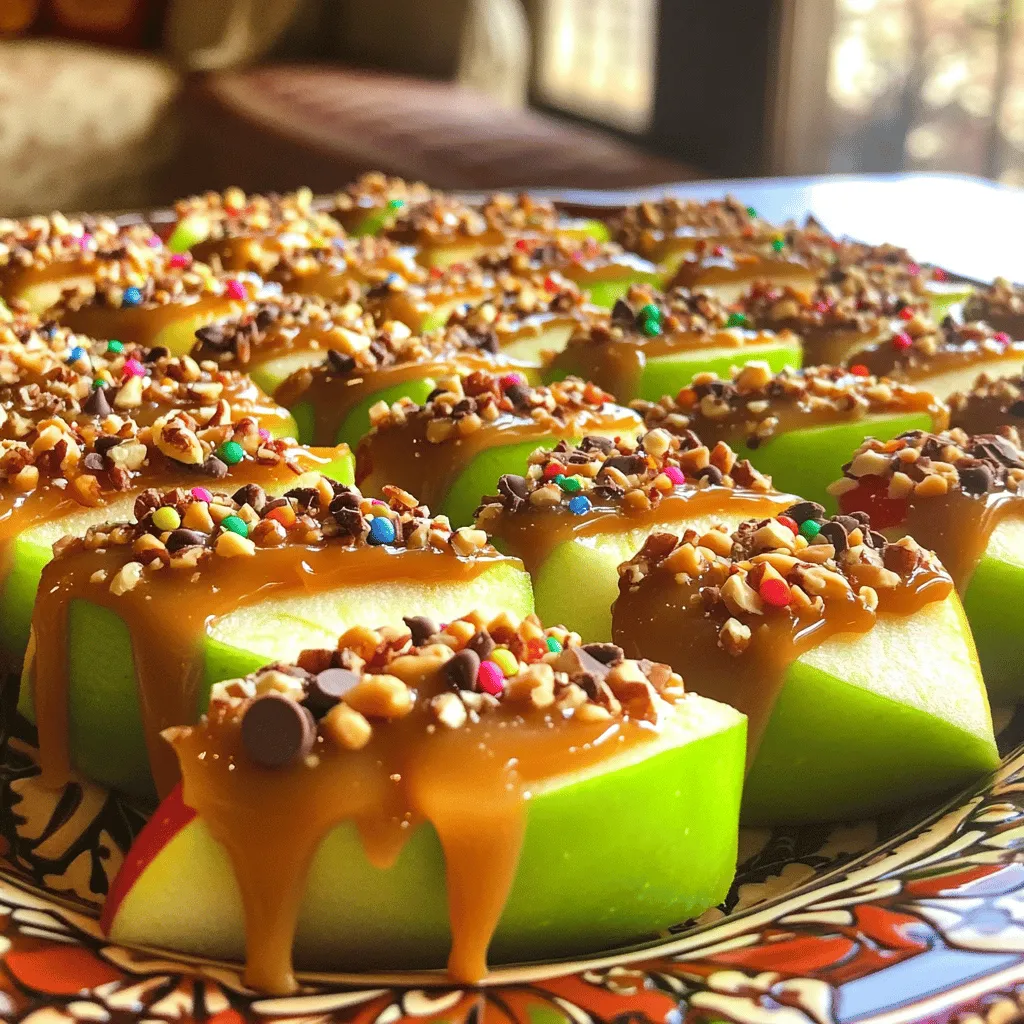
Craving a fun treat that’s easy to make? You’re in the right place! My Easy Caramel Apple Bites are a simple way to combine sweetness
Healthy Vegan Pecan Pie Bars Rich and Delicious Treat
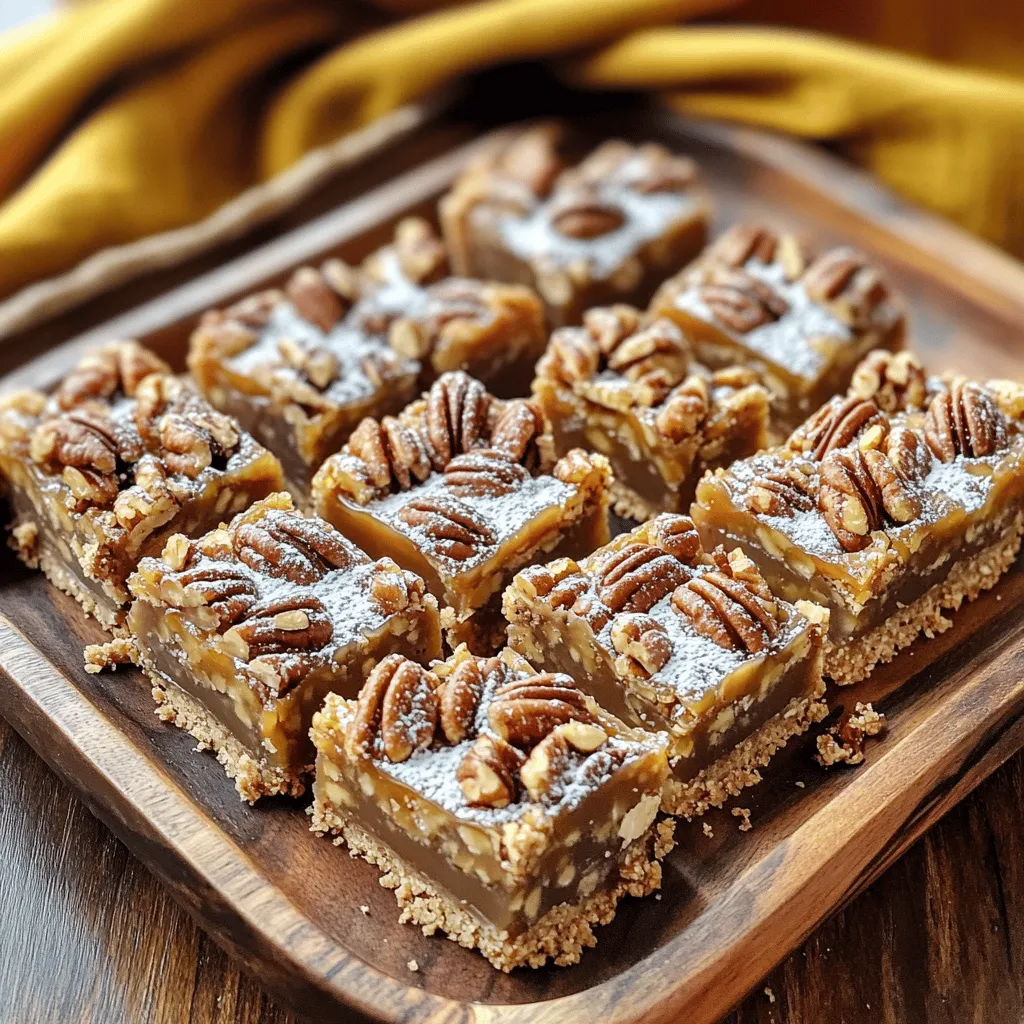
Looking for a delicious treat that’s kind to your body? Try my Healthy Vegan Pecan Pie Bars! These bars pack all the rich, nutty flavor
Pumpkindoodle Cookies Delightful and Cozy Treat
Craving a sweet treat that captures the essence of fall? Let me introduce you to Pumpkindoodle Cookies! These cozy cookies blend the flavors of pumpkin,
![These cookies shine with simple yet flavorful ingredients. Here is what you will need: - 2 cups all-purpose flour - 1 teaspoon baking soda - 1 teaspoon ground cinnamon - 1/2 teaspoon ground nutmeg - 1/2 teaspoon salt - 1 cup unsalted butter, softened - 1 cup brown sugar, packed - 1/2 cup granulated sugar - 1 large egg - 1 tablespoon pure vanilla extract - 1/2 cup apple cider - 1 cup chopped dried apples (or fresh diced, if preferred) - 1/2 cup walnuts, chopped (optional) The flour gives the cookies structure. Baking soda helps them rise. Cinnamon and nutmeg add warmth. Salt enhances all the flavors. The butter makes them rich and chewy. Brown sugar adds moisture and depth, while granulated sugar gives a nice crunch. The egg binds everything together. Vanilla brings out the sweetness. Apple cider infuses a lovely autumn flavor. Dried apples offer chewiness, and walnuts provide a nice crunch. You can boost the cookies with some fun add-ins. Here are a few ideas: - Chopped pecans for a different nutty flavor. - A pinch of ginger for added warmth. - White chocolate chips for a sweet touch. - A sprinkle of sea salt on top for contrast. These additions can change the flavor and texture. Feel free to mix and match based on your taste! Using high-quality ingredients is key. Here are some helpful tips: - Choose fresh spices. Old spices lose flavor. - Use real vanilla extract. It has better taste than imitation. - Opt for unsalted butter for better control of salt levels. - If you go for dried apples, pick ones without added sugar or preservatives. Good ingredients make a big difference in taste. Always look for the best quality you can find. For the full recipe, check the section above. Start by getting everything ready. Gather your ingredients and tools. You will need a medium bowl, a large mixing bowl, a whisk, and a cookie scoop or tablespoon. Measure out your ingredients carefully. You want to have: - 2 cups all-purpose flour - 1 teaspoon baking soda - 1 teaspoon ground cinnamon - 1/2 teaspoon ground nutmeg - 1/2 teaspoon salt - 1 cup unsalted butter, softened - 1 cup brown sugar, packed - 1/2 cup granulated sugar - 1 large egg - 1 tablespoon pure vanilla extract - 1/2 cup apple cider - 1 cup chopped dried apples - 1/2 cup walnuts, chopped (optional) This step sets you up for success in making chewy apple cider cookies. Now, let's mix. In the medium bowl, whisk the flour, baking soda, cinnamon, nutmeg, and salt. Set this dry mix aside. In your large bowl, beat the softened butter, brown sugar, and granulated sugar together. Blend them until creamy. Then, add the egg and vanilla extract. Mix until it's smooth and combined. Slowly pour in the apple cider while mixing. This adds great flavor and moisture. Next, combine your dry mix with the wet mixture. Stir until just combined. Avoid overmixing to keep your cookies chewy. Finally, fold in the chopped dried apples and walnuts if you're using them. You want these flavors to mix evenly throughout the dough. Preheat your oven to 350°F (175°C) while you prepare the cookies. Line a baking sheet with parchment paper. Using a cookie scoop or tablespoon, drop rounded dough onto the sheet. Space them about 2 inches apart. This helps them bake evenly. Bake for 12-15 minutes. Look for lightly golden edges and soft centers. This is the sweet spot for chewy cookies. Once baked, remove the cookies from the oven. Let them cool on the baking sheet for 5 minutes. This helps them set before you move them. Transfer the cookies to wire racks to cool completely. For a delightful presentation, serve them on a rustic wooden platter. A sprinkle of cinnamon and thin apple slices can add a lovely touch. Enjoy your chewy apple cider cookies! To get chewy apple cider cookies, focus on the right balance of wet and dry. Use room-temperature butter for a creamy mix. This helps the sugars blend well, adding to the chewiness. The apple cider brings moisture, making the cookies soft. Bake them just until the edges turn light brown. This keeps the centers soft and chewy. One common mistake is overmixing the dough. This can lead to tough cookies. Mix just until the dry ingredients combine. Also, watch your baking time closely. If you bake too long, the cookies will harden. Remember, they will continue to cook a bit after you take them out. If you have dietary needs, you can make easy swaps. For gluten-free cookies, use a gluten-free flour blend. If you need a vegan option, replace the egg with a flax egg or applesauce. You can also use coconut oil instead of butter for a dairy-free version. Adjust the sugar based on your taste or use alternatives like maple syrup for a different flavor. For the full recipe, check the earlier section. {{image_2}} You can make gluten-free chewy apple cider cookies. Use a gluten-free flour blend instead of regular flour. Look for a mix that includes xanthan gum. This helps to bind the dough. You can find many good options in stores. Just measure the same amount as the recipe calls for. The flavor and texture will still shine through. If you want vegan chewy apple cider cookies, swap out a few ingredients. Replace the egg with a flax egg. Mix 1 tablespoon of ground flaxseed with 2.5 tablespoons of water. Let it sit for five minutes to thicken. Use coconut oil instead of butter. This keeps the cookies moist. Also, choose a plant-based milk for the apple cider. Your cookies will still taste great! Boost the flavor of your chewy apple cider cookies with spices and extracts. Add more cinnamon or nutmeg for a stronger taste. A pinch of ginger can add warmth. You can also use maple extract for a sweet twist. If you love nuts, try adding pecans or almonds. Each choice brings a new layer of flavor to your cookies. To keep your chewy apple cider cookies fresh, store them in an airtight container. Make sure the cookies are cool before you place them in the container. This will prevent moisture from making them soggy. Layer parchment paper between the cookies to stop them from sticking together. Store the container in a cool, dry place away from sunlight. Your cookies will stay fresh for about one week this way. If you want to save some cookies for later, freezing is a great option. To freeze, first, let the cookies cool completely. Then, place them in a single layer on a baking sheet. Freeze them for about one hour. Once they are firm, transfer them to a freezer bag or container. Remove as much air as possible to prevent freezer burn. You can freeze them for up to three months. When you're ready to enjoy your cookies, you might find they need a little refresh. If they are soft, just pop them in a preheated oven at 350°F for about five minutes. This will bring back their chewy texture. If they are too hard, place them in a container with a slice of bread for a few hours. The bread will add moisture and soften the cookies. Enjoy your delicious chewy apple cider cookies! Yes, you can use fresh apples in this recipe. Just chop them into small pieces. Keep in mind that fresh apples add moisture. This can make the cookies softer. If you prefer a chewier texture, use dried apples instead. They offer great flavor and a wonderful chew. To know if your cookies are done, look for golden edges. The centers should be set but soft. They will firm up as they cool. A good rule is to bake them for 12-15 minutes. If you prefer them soft, take them out closer to 12 minutes. There are many fun ways to change up your cookies! Here are a few ideas: - Add spices: Try using ginger or allspice for more warmth. - Mix in nuts: Chopped pecans or almonds work great in the dough. - Use different fruits: You can swap in dried cranberries or raisins for a twist. - Ice them: A simple glaze can add a sweet touch on top. For the complete instructions and ingredient list for Chewy Apple Cider Cookies, check out the [Full Recipe]. This will guide you through every step to make these delicious treats. You now have all the tools to make chewy apple cider cookies. We covered key ingredients, mixing methods, and baking tips. You learned how to achieve the perfect texture and avoid common mistakes. Explore variations like gluten-free or vegan to suit your needs. Follow storage tips to keep your cookies fresh. With this knowledge, you can enjoy delicious cookies any time. Happy baking!](https://stirredrecipes.com/wp-content/uploads/2025/07/289f5bd3-cd4b-463b-a4d9-559e6df0dc9d.webp)
Chewy Apple Cider Cookies Irresistible Flavor Await
Get ready to indulge in the warm, sweet taste of fall with Chewy Apple Cider Cookies! With just a few simple ingredients, you can create
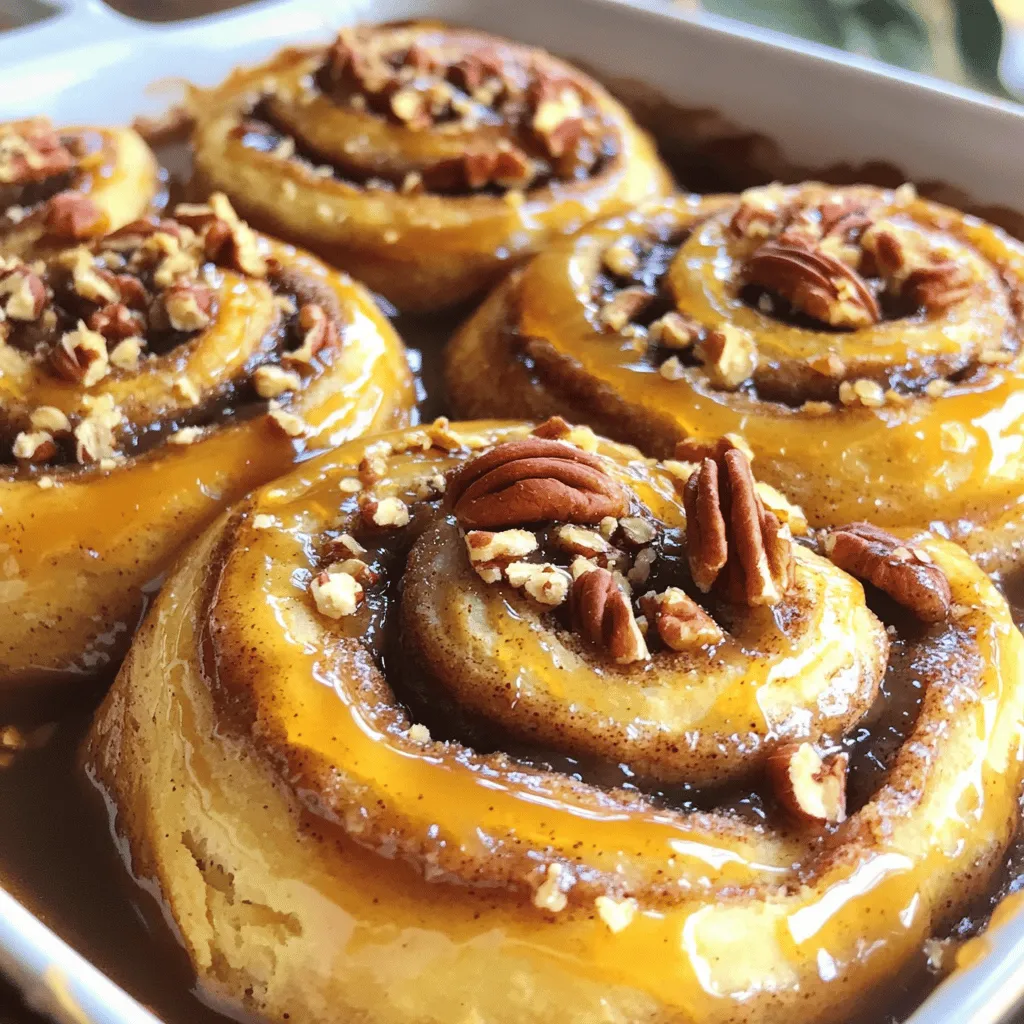
Sticky Pecan Cinnamon Buns Irresistible and Soft Treat
Are you ready to bake the most delicious Sticky Pecan Cinnamon Buns? These soft treats will make your kitchen smell heavenly. With a few simple
![- 100g almond flour - 100g powdered sugar - 70g egg whites (from about 2 large eggs) - 30g granulated sugar - 1 teaspoon pumpkin spice blend - 1/2 teaspoon vanilla extract The base of the macaron is almond flour. It gives a light and nutty flavor. Powdered sugar adds sweetness and helps make a smooth batter. Egg whites are key for the macaron's structure. They whip up into a fluffy foam. This foam is what makes the macarons rise and create that lovely shell. - 200g cream cheese, softened - 100g unsalted butter, softened - 100g powdered sugar (for filling) - 1 tablespoon maple syrup For the filling, I use cream cheese and butter. They create a rich and creamy texture. Mixing in maple syrup adds a sweet touch. This filling balances the spiced shell perfectly, making each bite delightful. - Variations of spices - Decorative toppings You can get creative! Add different spices, like nutmeg or cinnamon, for extra warmth. You might also top them with a sprinkle of pumpkin spice. This adds an eye-catching touch and enhances the flavor. For the full recipe, check out the [Full Recipe]. To start, you need to prepare your baking sheets. First, line two baking sheets with parchment paper. This prevents sticking. Next, draw 1.5-inch circles on the paper. These circles will guide your piping. Flip the parchment over afterward. This way, the ink won't touch your macarons. Now, let's mix the batter. Begin by sifting the dry ingredients. In a bowl, combine almond flour, powdered sugar, and pumpkin spice blend. This helps aerate the mix. Set it aside for later. Next, you'll whip the egg whites. Use a clean mixing bowl for this. Start on medium speed until the egg whites become foamy. Gradually add granulated sugar. Increase the speed to high. Whip until you see stiff peaks and a glossy texture. This step is key for light macarons. Once the batter is ready, it's time to pipe. Transfer the mix into a piping bag with a round tip. Pipe the batter onto the prepared sheets, using the circles as a guide. Aim for consistent sizes as you pipe. After piping, gently tap the baking sheets on the counter. This helps release any air bubbles. Let the piped macarons rest. Allow them to sit for 30-60 minutes. This forms a firm shell. While you wait, preheat your oven to 300°F (150°C). When the macarons are dry, bake them. Place them in the oven for 15-18 minutes. Check for doneness by gently touching the tops. After baking, let them cool completely on the sheets. For the full recipe, refer to the instructions above. To make perfect macarons, avoid these common pitfalls: - Overmixing: Be gentle when folding the dry ingredients into the egg whites. Overmixing causes flat shells. - Humidity: High humidity can ruin your macarons. Try to bake on dry days. - Egg Whites: Use aged egg whites. Let them sit in the fridge for a day or two. This helps them whip better. To check for doneness, gently touch the tops of the macarons. They should feel dry and firm. If they stick, let them sit longer. Finding the right balance of spices is key. Use one teaspoon of pumpkin spice blend for a classic taste. You can also mix in a hint of nutmeg or ginger for extra warmth. For fillings, think beyond cream cheese. Try flavored buttercreams or even chocolate ganache. Maple-flavored filling adds a nice twist too. To serve your macarons, use a decorative tray. Arrange them in a circle or a fun pattern. Dust a light sprinkle of pumpkin spice on top for extra flair. For garnishing, consider adding edible gold flakes or tiny pumpkin candies. These touches make your macarons look as good as they taste. {{image_2}} You can change the flavor of your pumpkin spice macarons in fun ways. One tasty option is to make chocolate pumpkin spice macarons. Just add cocoa powder to your dry ingredients. This adds a rich taste that pairs well with pumpkin spice. Another fun twist is using nut butter as a filling. Try almond, peanut, or cashew butter. These add a creamy texture and nutty flavor. You can mix the nut butter with some powdered sugar for added sweetness. Decorating your macarons can be just as fun as making them. You can use colorful fillings to make your macarons pop. Consider using bright shades of cream cheese frosting or adding food coloring to match the season. Themed designs are great for special occasions. For Halloween, you could pipe orange and black frosting. For Thanksgiving, try a leaf pattern with fall colors. Creativity makes your macarons even more special. Fall-inspired variations are a hit during autumn. You can add apple or caramel flavors to your macarons. These flavors mix perfectly with pumpkin spice. For holidays, think about festive flavors. Peppermint or eggnog can be great options for winter. These seasonal adaptations keep your macarons exciting year-round. For the full recipe, check out the detailed instructions above. Enjoy experimenting with these variations! To keep your macarons fresh, use an airtight container. This helps them stay soft and chewy. Avoid glass containers, as they can trap moisture. Instead, opt for plastic or silicone containers. You can store macarons at room temperature for up to two days. If you want them to last longer, refrigerate them. Just be sure to let them sit at room temperature for a bit before eating. You can freeze macarons to enjoy later. Here’s how: 1. Cool Completely: Ensure the macarons are fully cool. 2. Layer with Parchment: Place them in a single layer in a container. Separate layers with parchment paper. 3. Seal Well: Close the container tightly to prevent freezer burn. For thawing, take them out of the freezer. Let them sit in the fridge for a few hours. This helps maintain their soft texture. For best results, eat them within a month. Homemade macarons last about 3 to 5 days in the fridge. Look for these signs that your macarons have gone bad: - Texture Change: If they feel hard or dry, they are no longer good. - Smell: A sour or off smell means they should be discarded. - Discoloration: Any dark spots or changes in color indicate spoilage. To make the most of your pumpkin spice macarons, try the Full Recipe for perfect results every time! The secret to making macarons is in the technique. Start with fresh egg whites. Whip them until they form stiff peaks. Fold in the dry ingredients gently. You want to keep the air in the whites. This step makes the macarons light and airy. Practice makes perfect, so don’t get discouraged if they don’t turn out right the first time. You should stick with almond flour for macarons. Almond flour gives macarons their unique texture. Other flours can change the taste and feel. If you cannot find almond flour, you may try hazelnut flour. It offers a nutty flavor, but results can vary. To avoid cracks, ensure your macarons rest before baking. Let them sit until a firm skin forms. This usually takes 30 to 60 minutes. Also, check your oven temperature. Too hot can cause them to crack. Using an oven thermometer can help you monitor this. You can find pumpkin spice macarons at local bakeries during fall. Many online shops also sell them. Look for bakeries that focus on macarons. Websites like Etsy often feature smaller shops with unique flavors. Check reviews to find a reliable source. Yes, you can make macarons without a scale. Use measuring cups and spoons instead. One cup of almond flour weighs about 96 grams. One cup of powdered sugar weighs around 120 grams. Measure carefully for the best results. It's not as precise but can work in a pinch. For best results, refer to the Full Recipe for guidance. You’ve learned how to make delicious pumpkin spice macarons. We explored the key ingredients like almond flour and cream cheese. We then covered step-by-step baking instructions and shared tips to avoid mistakes. You can even add your unique twist with flavor and decoration variations. Remember, practice makes perfect. Don't be afraid to experiment with flavors and shapes. In time, you’ll impress your friends and family with your tasty treats. Enjoy your baking!](https://stirredrecipes.com/wp-content/uploads/2025/07/baeaa702-f720-482e-9ee2-55d5065b7fdb.webp)
Pumpkin Spice Macarons Delightfully Seasonal Treat
Are you ready to fall in love with baking? These Pumpkin Spice Macarons are the perfect mix of flavor and fun, making them a delightful