Desserts
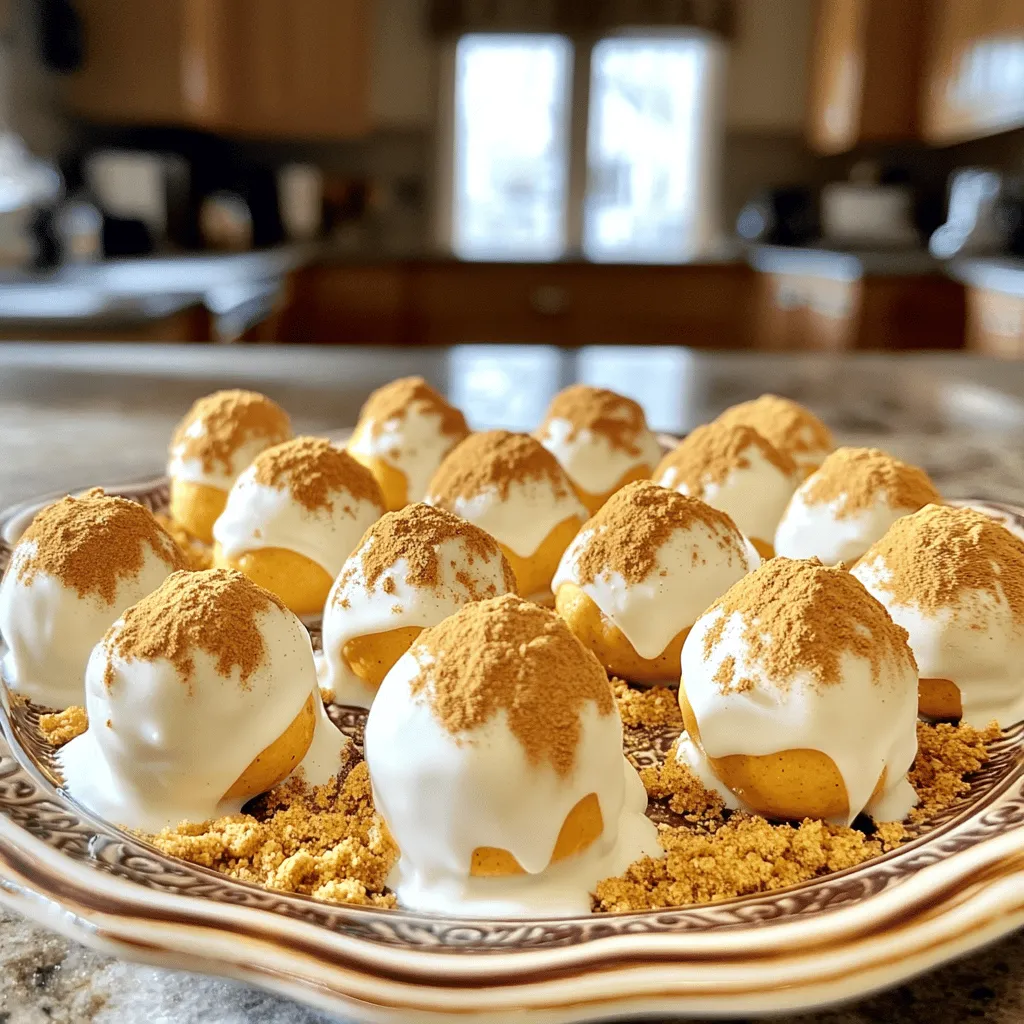
Pumpkin Cheesecake Truffles Irresistible Sweet Treat
Looking for a sweet treat that captures the essence of fall? Let me introduce you to Pumpkin Cheesecake Truffles! These bite-sized delights blend creamy pumpkin,

Two Ingredient Caramel Apple Fudge Delicious and Easy
Are you ready to whip up something sweet and simple? You can make delicious Two Ingredient Caramel Apple Fudge with just apple butter and white
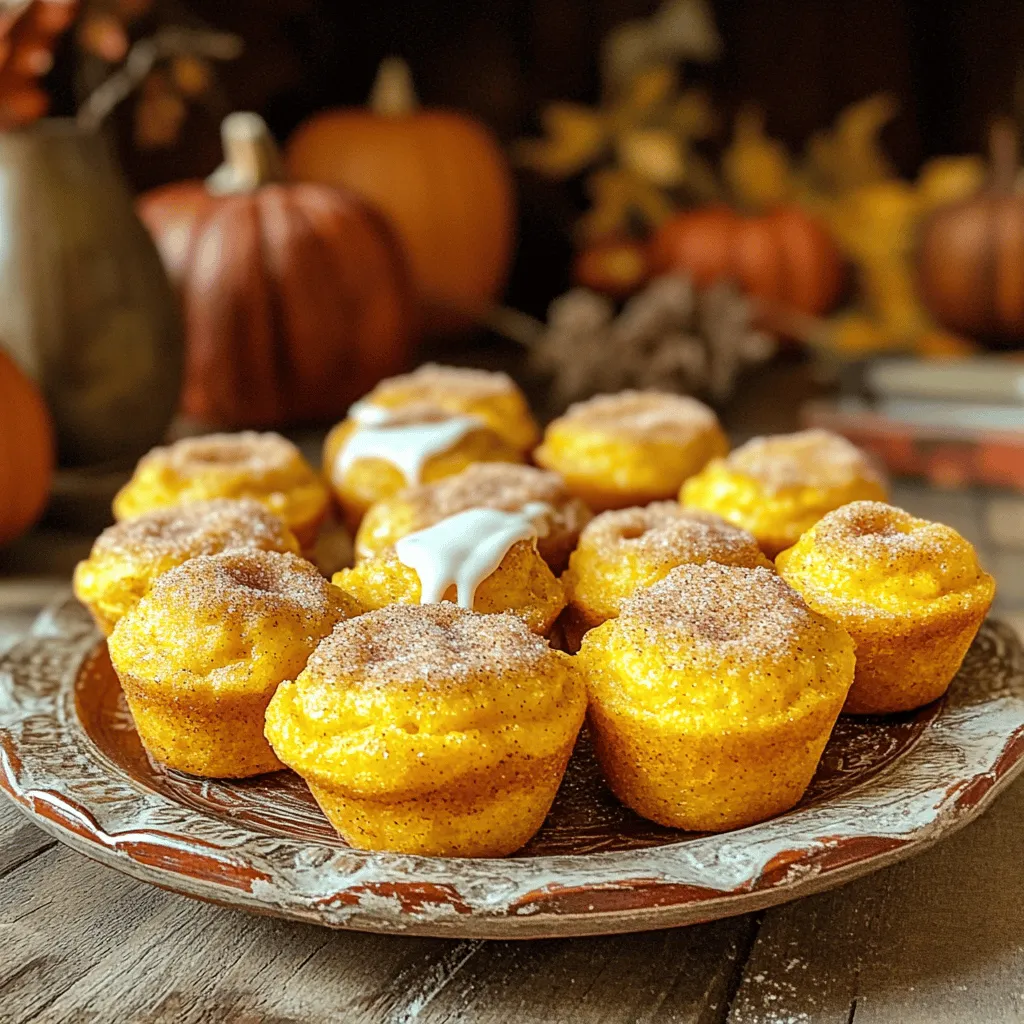
Pumpkin Donut Muffins Delightful and Easy Recipe
Are you ready for a fall treat that combines the best of both worlds? Pumpkin donut muffins are a delightful way to enjoy pumpkin’s rich
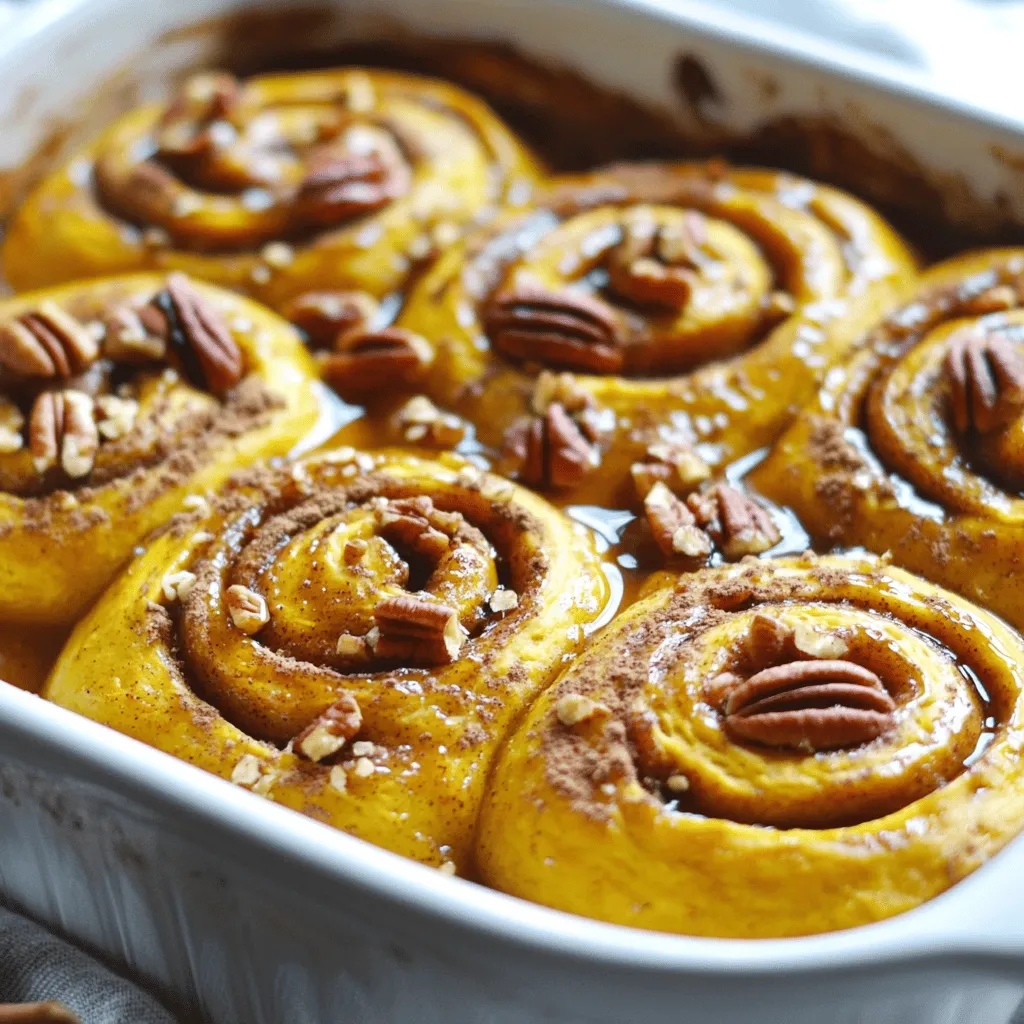
Pumpkin Cinnamon Roll Bake Delicious and Simple Treat
Get ready to enjoy fall flavors with my Pumpkin Cinnamon Roll Bake! This dish combines warm spices and soft, gooey cinnamon rolls for a treat

Oreo Cheesecake Cookie Cups Irresistible Dessert Treat
Looking for a dessert that will wow your family and friends? You’ve found it! These Oreo Cheesecake Cookie Cups are both creamy and crunchy, offering
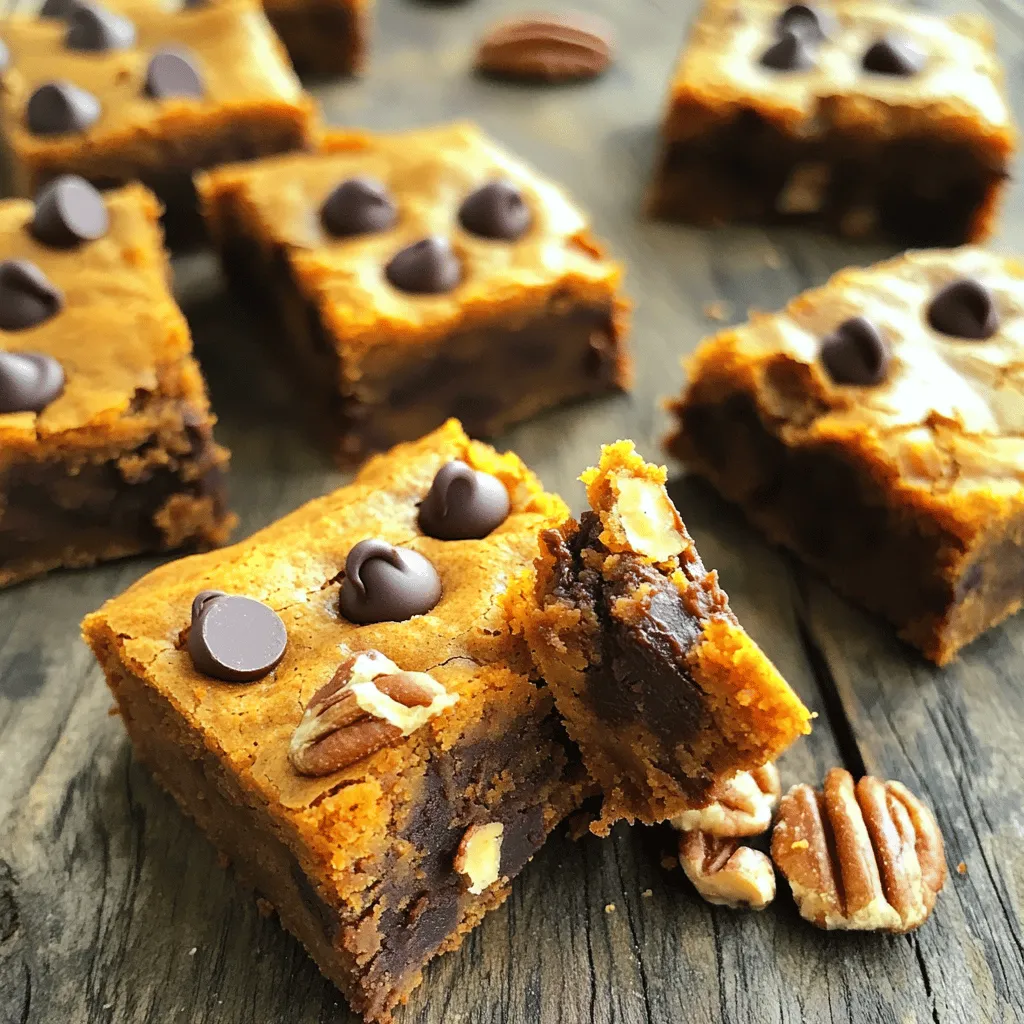
Chocolate Chip Pumpkin Blondies Rich and Flavorful Treat
Welcome to the world of Chocolate Chip Pumpkin Blondies! If you love rich flavors and cozy treats, you’re in the right place. These blondies blend
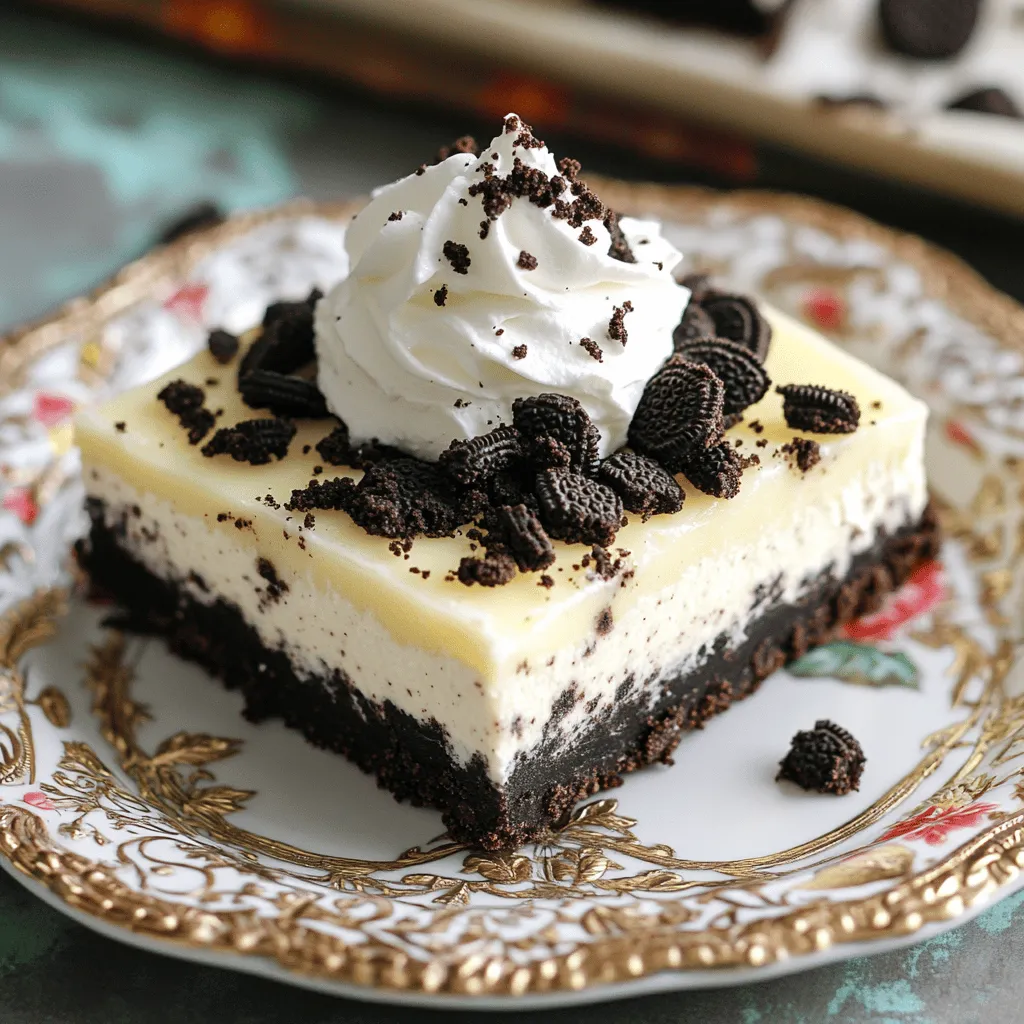
No-Bake Oreo Cheesecake Bars Deliciously Easy Treat
Are you ready to indulge in a sweet treat that’s easy to make? These No-Bake Oreo Cheesecake Bars are a dessert lover’s dream come true!
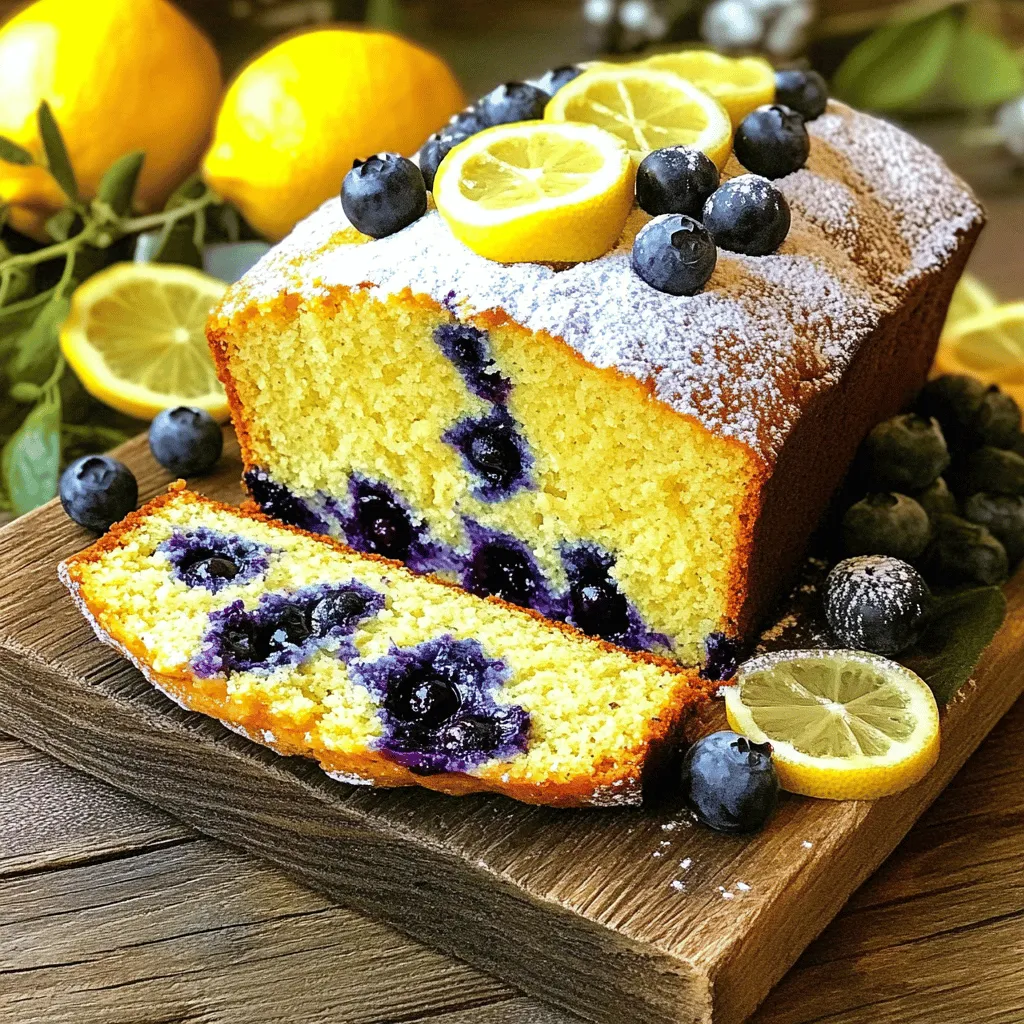
Lemon Blueberry Yogurt Loaf Delicious and Simple Recipe
If you’re craving a sweet treat that combines fresh flavors and is easy to make, you’re in the right place! My Lemon Blueberry Yogurt Loaf
![To make a delicious and moist pumpkin zucchini bread, gather these simple ingredients. Each one plays a key role in making this treat delightful. - Grated zucchini (1 cup, about 1 medium zucchini) - Pumpkin puree (1 cup, canned or fresh) - Vegetable oil (1/2 cup) - Brown sugar (3/4 cup) - Granulated sugar (1/2 cup) - Eggs (2 large) - Vanilla extract (2 teaspoons) - All-purpose flour (2 cups) - Baking soda (1 teaspoon) - Baking powder (1/2 teaspoon) - Ground cinnamon (1 teaspoon) - Ground nutmeg (1/2 teaspoon) - Ground ginger (1/4 teaspoon) - Salt (1/2 teaspoon) - Chopped walnuts or pecans (1/2 cup, optional) - Chocolate chips (1/2 cup, optional) Each ingredient adds flavor and moisture. The grated zucchini keeps the bread soft, while pumpkin brings a rich taste. Using a mix of sugars helps achieve the right sweetness. You can add nuts or chocolate chips to make it even more exciting! Don't forget to check the [Full Recipe] for more details. Mixing Wet Ingredients Start by grabbing a large mixing bowl. Add 1 cup of grated zucchini and 1 cup of pumpkin puree. Pour in 1/2 cup of vegetable oil, 3/4 cup of brown sugar, and 1/2 cup of granulated sugar. Crack in 2 large eggs, then add 2 teaspoons of vanilla extract. Mix everything well until it is smooth. This step blends the flavors and moisture. Combining Dry Ingredients In a separate bowl, whisk together 2 cups of all-purpose flour, 1 teaspoon of baking soda, 1/2 teaspoon of baking powder, 1 teaspoon of ground cinnamon, 1/2 teaspoon of ground nutmeg, 1/4 teaspoon of ground ginger, and 1/2 teaspoon of salt. Make sure to mix it well. This dry mix adds structure and spice to your bread. Folding in Optional Add-ins If you like, fold in 1/2 cup of chopped walnuts or pecans. You can also add 1/2 cup of chocolate chips for a sweet touch. Gently mix until just combined. Be careful not to overmix, as that keeps your bread light and fluffy. Preheating the Oven Preheat your oven to 350°F (175°C). Greasing and flouring a 9x5 inch loaf pan helps the bread release easily after baking. Pouring into Loaf Pan Pour the batter into the prepared loaf pan. Smooth the top with a spatula to ensure it bakes evenly. This helps form a nice, even crust. Baking Time and Testing for Doneness Bake the bread for 50 to 60 minutes. To check if it’s done, insert a toothpick into the center. If it comes out clean, your bread is ready. Let it cool in the pan for about 10 minutes. Then, transfer it to a wire rack to cool completely. Enjoy this delightful bread and savor its warm, cozy flavors! For the full recipe, check out the complete section above. Avoiding Overmixing When you mix your batter, do it gently. Overmixing can make your bread tough. Mix only until you see no dry flour. This keeps your bread soft and fluffy. Importance of Fresh Ingredients Always use fresh zucchini and pumpkin. Fresh ingredients bring out the best flavors. If your zucchini is soggy or old, your bread may not rise well. Freshness matters for taste and texture. Oven Temperature Accuracy Make sure your oven is at the right temperature. An oven thermometer can help. If it's too hot or too cold, your bread won't bake evenly. A correct temperature leads to a perfect loaf. Cooling and Storing Best Practices After baking, let the bread cool in the pan for 10 minutes. Then, move it to a wire rack. This helps it cool evenly. Store the bread in an airtight container. It stays fresh longer this way. You can also wrap it tightly in plastic wrap for added protection. {{image_2}} You can boost the flavor of your pumpkin zucchini bread. Try adding spices like allspice or cloves. A touch of lemon or orange zest can brighten the taste. Just a teaspoon or two will do wonders. These flavors mix well with the pumpkin and zucchini. They create a warm, cozy feeling in every bite. If you love chocolate, add chocolate chips to your bread. They melt and create a rich sweetness. You can also swap them with dried fruit or nuts. Raisins, cranberries, or even pecans work great. This change adds a different texture and flavor. Experiment to find what you like best! To make this bread gluten-free, swap all-purpose flour for a gluten-free blend. Many brands offer great options. Just make sure it has xanthan gum for the right texture. Your bread will still be soft and tasty. This way, everyone can enjoy your delicious treat. You can easily turn this recipe vegan. Replace the eggs with flax eggs. To make a flax egg, mix one tablespoon of flaxseed meal with three tablespoons of water. Let it sit for a few minutes until it thickens. You can also use plant-based oil instead of vegetable oil. This keeps the bread moist and flavorful. These simple swaps keep the spirit of the recipe while catering to different diets. For short-term storage, keep your Pumpkin Zucchini Bread in the fridge. Wrap it tightly in plastic wrap or place it in an airtight container. This keeps the bread fresh and moist. It can stay good for about a week. If you plan to eat it soon, you can also leave it at room temperature for a couple of days. Just make sure to cover it well to prevent drying out. To store Pumpkin Zucchini Bread for a longer time, freezing is a great option. First, let the bread cool completely. Then, wrap it tightly in plastic wrap and foil. This helps prevent freezer burn. You can freeze it for up to three months. When you are ready to eat it, just thaw it in the fridge overnight. For a quick fix, you can microwave a slice for about 30 seconds. Enjoy it warm! You can find the full recipe for this delicious bread above. You can make gluten-free Pumpkin Zucchini Bread easily. The best gluten-free flour choices include almond flour, coconut flour, or a blend of gluten-free all-purpose flour. Each option works well and gives a nice texture. I suggest using a mix of these flours for the best taste and feel. Yes, you can use fresh pumpkin instead of canned. To prepare fresh pumpkin, start by roasting it. Cut the pumpkin in half, remove the seeds, and place it cut-side down on a baking sheet. Roast it at 400°F (200°C) for 45 minutes. Once it's soft, scoop out the flesh and blend it until smooth. This gives your bread a fresh taste. If you want to make this bread without eggs, there are great options. You can use unsweetened applesauce, mashed banana, or flaxseed meal mixed with water. Use 1/4 cup of applesauce or mashed banana for each egg. For flaxseed, mix 1 tablespoon of ground flaxseed with 2.5 tablespoons of water. Let it sit for five minutes before adding it to your mix. To test if the bread is done, use a toothpick. Insert the toothpick into the center of the bread. If it comes out clean or with a few crumbs, your bread is ready. The top should be golden-brown and spring back when gently pressed. This means you have baked a perfect loaf. This post covered the key ingredients and steps for making delicious pumpkin zucchini bread. You learned about mixing wet and dry ingredients, baking tips, and how to store the bread. I shared variations to suit different tastes and dietary needs, too. Always use fresh ingredients and avoid overmixing for the best texture. Enjoy every slice, and remember that baking is all about fun and creativity!](https://stirredrecipes.com/wp-content/uploads/2025/08/346aad4f-bc46-4c4b-8b97-7ff9d4d3a34f.webp)
Pumpkin Zucchini Bread Delicious and Easy Recipe
Are you ready to transform your baking routine? This Pumpkin Zucchini Bread recipe is not only delicious but also super easy to make. Imagine the
![- 2 cups all-purpose flour - 1 cup granulated sugar - 1 tablespoon baking powder - 1 teaspoon baking soda - 1 teaspoon ground cinnamon - ½ teaspoon salt - 1 large egg - 1 cup buttermilk (or milk with 1 tablespoon vinegar added) - ½ cup vegetable oil - 1 teaspoon vanilla extract - 2 cups peeled and diced apples (such as Granny Smith or Honeycrisp) Crumb Topping: - ½ cup rolled oats - ½ cup brown sugar - ½ teaspoon ground cinnamon - ¼ cup all-purpose flour - ¼ cup cold butter, cubed I use precise measurements for the best results. Always use level cups for flour and sugar. This keeps the muffins light and fluffy. The baking powder and baking soda help the muffins rise. Using fresh apples brings out the best flavor. The buttermilk adds moisture and tang. If you can’t find buttermilk, mix milk with vinegar as a substitute. You can swap granulated sugar for brown sugar for a richer taste. If you want a healthier muffin, try whole wheat flour instead of all-purpose flour. For a nutty crunch, add ½ cup of chopped nuts to the batter. Start by gathering all your ingredients. You need flour, sugar, baking powder, baking soda, cinnamon, salt, an egg, buttermilk, vegetable oil, vanilla, and apples. For the crumb topping, you will need rolled oats, brown sugar, cinnamon, flour, and cold butter. Preheat your oven to 350°F (175°C). Line your muffin tin with paper liners or spray it with cooking spray. 1. In a large bowl, mix the flour, sugar, baking powder, baking soda, cinnamon, and salt. Stir this until it's well combined. 2. In another bowl, whisk the egg, buttermilk, vegetable oil, and vanilla. Mix until everything blends together. 3. Pour the wet mix into the dry mix. Stir gently until just combined. Don’t overmix; a few lumps are okay. 4. Now, fold in the diced apples. Make sure they spread evenly in the batter. 5. For the crumb topping, mix the rolled oats, brown sugar, cinnamon, flour, and cold butter in a different bowl. Use your fingers or a pastry cutter to make it crumbly. 6. Scoop the muffin batter into the prepared muffin cups. Fill each about ¾ full. 7. Generously sprinkle the crumb topping on top of each muffin. Bake the muffins in the oven for 18-20 minutes. Check if they are done by inserting a toothpick in the center. If it comes out clean, they're ready! Once baked, let them cool in the tin for about 5 minutes. Then, transfer them to a wire rack to cool completely. Serve them warm for the best taste! You can also dust them with powdered sugar or pair them with whipped cream. Enjoy your creations! For the complete recipe, see the Full Recipe. Mixing the batter well is key to tasty muffins. Start with dry ingredients. In a big bowl, blend flour, sugar, baking powder, baking soda, cinnamon, and salt. Make sure they mix well. Next, whisk the wet ingredients in a separate bowl. This includes the egg, buttermilk, oil, and vanilla. When you combine wet and dry, stir gently. You want to mix just until it comes together. Overmixing can make the muffins tough. It's okay if you see a few lumps; they will bake out. Lastly, fold in your diced apples carefully. This keeps them from breaking apart. A great crumb topping adds texture and flavor. Start with rolled oats, brown sugar, cinnamon, and flour in a bowl. Mix these dry ingredients together first. Then, add cold butter in small cubes. Use your fingers or a pastry cutter to blend. You want a mixture that looks like coarse crumbs. Make sure not to melt the butter. Cold butter helps create a crunchy topping. Once mixed, sprinkle it generously on top of your muffin batter. This will bake into a sweet, crispy layer. Many mistakes can happen when baking muffins. Here are a few to watch for: - Not measuring ingredients: Always use the right measurements for success. - Using warm ingredients: Cold or room temperature ingredients work best. - Overfilling muffin cups: Fill them about ¾ full. This allows room for rising. - Skipping the toothpick test: Check muffins with a toothpick before you take them out. If it comes out clean, they are ready. For a foolproof baking experience, follow these tips closely. You’ll end up with perfect apple muffins each time! For the full recipe, check out the details above. {{image_2}} You can add a twist to your apple muffins with spices and nuts. Try adding nutmeg for warmth. A pinch of ginger can bring a nice zing. If you want crunch, mix in chopped walnuts or pecans. They pair well with the apples. You can even add raisins for extra sweetness. These small changes make a big difference. To make your muffins healthier, swap some flour for whole wheat flour. This adds fiber and nutrients. You can also cut the sugar by using applesauce. It keeps the muffins moist while reducing calories. If you like, try using honey or maple syrup instead of sugar. These options add natural sweetness. Change your muffins with seasonal fruits. In fall, add pumpkin puree for a cozy flavor. Mix in dried cranberries for a tart kick during winter. You can even use fresh blueberries in the summer. Each season brings new tastes to explore. Enjoy the versatility of these muffins! After baking your apple muffins, let them cool completely. This step is key to keeping them fresh. Place them in an airtight container. You can also wrap them in plastic wrap. Store them at room temperature for up to three days. If you want them to last longer, consider freezing them. To freeze your muffins, first, cool them completely. Then, wrap each muffin in plastic wrap. Place the wrapped muffins in a freezer bag or a freezer-safe container. Label the bag with the date. You can freeze them for up to three months. When you want one, just take it out and let it thaw at room temperature. For the best taste, reheat your muffins in the oven. Preheat your oven to 350°F (175°C). Place the muffins on a baking sheet. Heat them for about 10 minutes. You can also microwave them for about 20-30 seconds. However, the oven will keep the crumb topping crispier. Enjoy your muffins warm for the best flavor! For the complete recipe, check the Full Recipe. Yes, you can! You may swap apples for other fruits like pears or berries. Each fruit adds its own taste. Use fruit that is soft when cooked. Make sure to chop them small. This keeps your muffins light and moist. Muffins may not rise due to old baking powder or baking soda. Check their dates before use. Overmixing the batter can also cause flat muffins. Mix until just combined. Lastly, ensure your oven is at the right temperature. An oven thermometer can help with this. To check, insert a toothpick into the center of a muffin. If it comes out clean, they are done. If wet batter sticks to the toothpick, bake for a few more minutes. Muffins should also look golden brown on top. Trust your eyes and the toothpick test! For the full recipe, refer to the [Full Recipe]. This blog post shared how to make delicious apple muffins. You learned the key ingredients and their amounts. We covered how to prepare and bake the muffins step-by-step. You also found tips for mixing batter and making the crumb topping. Variations like spices and healthy swaps were discussed. Finally, I shared how to store and reheat leftovers. Baking can be fun and rewarding. I hope you feel ready to try these muffins. Enjoy making them!](https://stirredrecipes.com/wp-content/uploads/2025/08/1cdee9a9-a811-44ff-9a1a-1be432df2843.webp)
Irresistible Apple Muffins with Crumb Topping Recipe
Are you ready to bake the most delicious Apple Muffins with Crumb Topping? This easy recipe combines tasty apples and a crunchy topping to create