Breakfast

Ham, Cheese, & Egg Cups Quick and Tasty Breakfast
Looking for a quick and tasty breakfast? Try my Ham, Cheese, & Egg Cups! They’re easy to make and packed with flavor. With just a

Cinnamon Roll Protein Crepes Tasty and Healthy Treat
Craving something warm, tasty, and healthy? Let me introduce you to Cinnamon Roll Protein Crepes—a fun twist on a classic treat! These crepes offer the
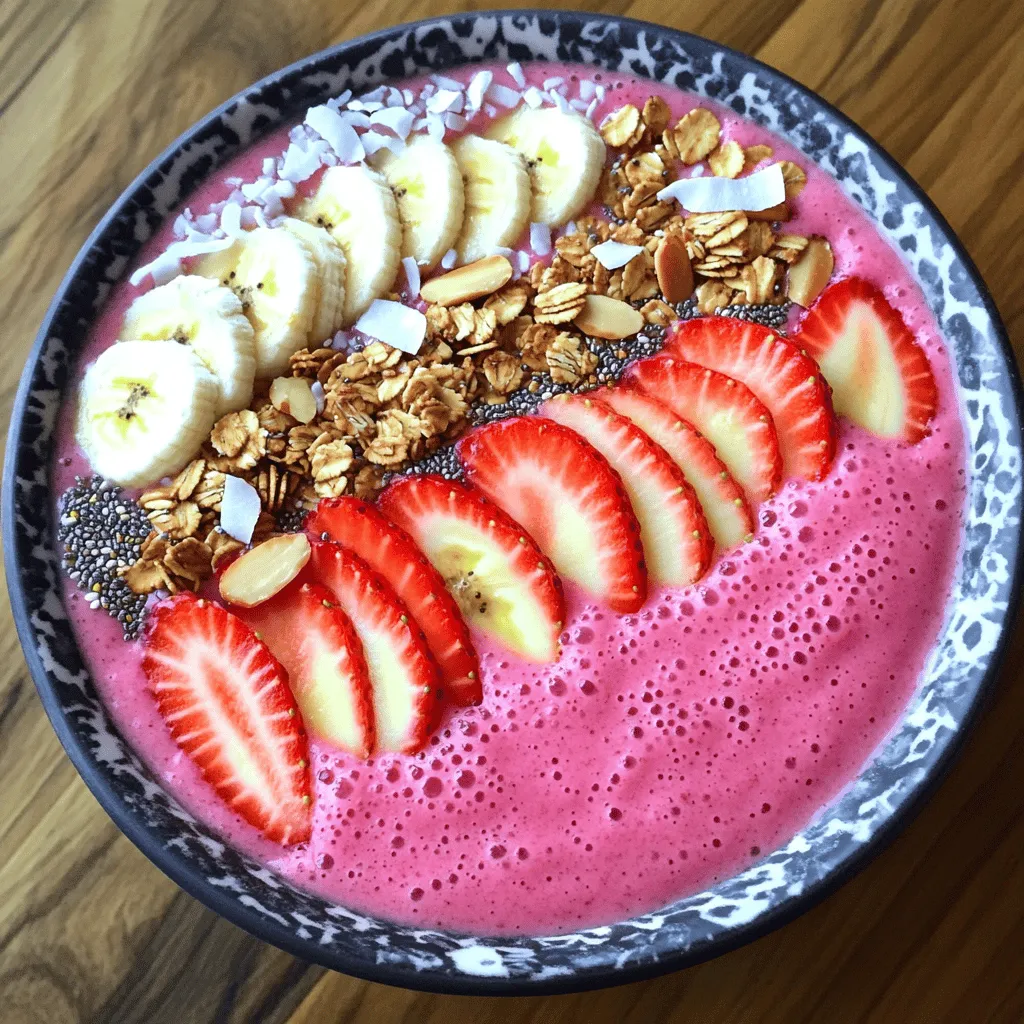
Strawberry Smoothie Bowl Simple and Delicious Recipe
Are you ready to whip up a tasty treat? This Strawberry Smoothie Bowl is simple and delicious! Bursting with fresh strawberries and creamy Greek yogurt,
![- 1 cup rolled oats - 1 scoop protein powder (vanilla or chocolate) - 1 ripe banana, mashed - 2 eggs - 1/4 cup Greek yogurt (plain) - 1/2 cup almond milk (or any milk of your choice) - 1 tablespoon baking powder - 1 teaspoon vanilla extract - 1/2 teaspoon cinnamon - A pinch of salt - Olive oil or cooking spray for the waffle iron When I make protein waffles, I love to use rolled oats. They give the waffles a great base. Next, I add a scoop of protein powder. You can pick vanilla or chocolate for extra flavor. A ripe banana adds natural sweetness and moisture. Eggs help bind everything together and give it a nice texture. Greek yogurt adds creaminess and boosts the protein. I use almond milk, but you can use any milk you like. Baking powder makes the waffles fluffy. A touch of vanilla extract and cinnamon makes everything taste better. Don’t forget a pinch of salt to bring out the flavors! For a little fun, think about adding toppings or mix-ins. You can use fresh berries, nuts, or a drizzle of honey. These ingredients make the meal even more enjoyable. This recipe is simple, tasty, and packed with protein! Check out the Full Recipe for more details. 1. Preheating the waffle iron Start by turning on your waffle iron. Set it to medium heat. This helps your waffles cook evenly. 2. Mixing dry ingredients In a large bowl, add 1 cup of rolled oats and 1 scoop of protein powder. Mix these ingredients well. This blends the flavors and ensures even distribution. 3. Combining wet ingredients In the same bowl, add 1 ripe mashed banana, 2 eggs, 1/4 cup plain Greek yogurt, and 1/2 cup almond milk. Also, add 1 tablespoon of baking powder, 1 teaspoon of vanilla extract, 1/2 teaspoon of cinnamon, and a pinch of salt. 4. Mixing to achieve the right batter consistency Use a whisk or hand mixer to blend the mixture. Mix until it is smooth. Let the batter sit for about 5 minutes. This helps it thicken slightly. 1. Greasing the waffle iron Lightly grease the preheated waffle iron. You can use olive oil or cooking spray. This prevents sticking and helps the waffles crisp up. 2. Pouring batter into the waffle maker Pour about 1/2 cup of batter into the waffle iron. Adjust this amount based on your waffle maker's size. 3. Cooking time recommendations Close the waffle iron and cook for about 4-5 minutes. Most waffle makers beep or have a light that indicates when they are done. 4. Tips for checking doneness Open the waffle iron carefully. The waffles should be golden brown and crisp. If they look too soft, close the iron and cook for another minute. Enjoy your Protein Power Waffles! For the complete recipe, refer to the [Full Recipe]. To make your protein waffles pop, add some spices. Cinnamon is a great start. You can also try nutmeg or cardamom for a warm taste. If you love sweetness, a splash of vanilla extract or almond extract works well. Fruits add freshness and flavor. I love using berries, like blueberries or strawberries. They add a nice burst of juice. Sliced bananas also pair well. They complement the waffle's texture and taste. The thickness of the batter matters. If your batter is too thin, your waffles may be soft. Add more oats or a little extra protein powder to thicken it. If it's too thick, add a splash of milk. Cooking technique also plays a role. For crispy waffles, preheat your waffle iron well. Cook them until they are golden brown. Keep them in the iron for an extra minute for more crunch. Toppings make your protein waffles shine. Try Greek yogurt for creaminess. Fresh fruits, like sliced bananas or berries, add color and taste. A drizzle of honey or maple syrup brings sweetness. For a full meal, pair your waffles with scrambled eggs or turkey bacon. This adds protein and makes breakfast more filling. You can enjoy these waffles any time of the day! For the full recipe, check above. {{image_2}} You can switch things up in your protein waffles recipe. Here are some great options: - Gluten-free options: Use gluten-free oats instead of regular oats. This keeps your waffles just as tasty. - Vegan adaptations: Replace eggs with flaxseed meal or applesauce. Use plant-based yogurt and almond milk, too. - Flavor variations: Add chocolate chips for a sweet twist. Fresh berries also work well and add freshness. You can cook protein waffles in different ways. Here are a couple of methods to try: - Making protein waffles in the oven: Preheat your oven to 350°F (175°C). Pour the batter into a greased baking dish. Bake for about 20-25 minutes. Check with a toothpick to see if it’s done. - Alternative appliances: If you don’t have a waffle maker, use a pancake griddle. Pour the batter like you would for pancakes. Cook for 2-3 minutes on each side until golden. Feel free to experiment with these variations to find your perfect protein waffle! For the full recipe, check out the details above. To store leftover waffles, let them cool first. Place them in an airtight container. This keeps them fresh for up to three days. When you want to reheat, use a toaster or an oven. This method keeps the waffles crispy. Avoid using a microwave, as it can make them soggy. To freeze your waffles, stack them with parchment paper in between. Place them in a freezer-safe bag. Make sure to squeeze out the air to prevent freezer burn. Thawing is easy; just leave them in the fridge overnight. You can also use a toaster for quick reheating. For texture, reheat them straight from the freezer. This helps keep them crispy and delicious. Enjoy your protein-packed waffles anytime! For the full recipe, check the details in the main article. Why add protein to waffles? Adding protein to waffles boosts their health value. Protein helps build muscles and keeps you full. This means you stay energized longer. It supports recovery after exercise and keeps hunger at bay. A protein-packed breakfast sets a strong tone for the day. Comparison with regular waffles Regular waffles lack protein and don't keep you full. They often have more sugar and fewer nutrients. Protein waffles offer better balance with whole grains and healthy fats. This makes them a smarter choice for breakfast. You get the taste you love with added benefits. Why are my waffles soggy? Soggy waffles often result from too much liquid in the batter. Make sure to measure the milk and yogurt correctly. Another reason could be undercooking. Cook them longer to ensure they crisp up. How to make protein waffles fluffier? To make your waffles fluffier, try these tips: - Use baking powder; it helps the batter rise. - Let the batter sit for a few minutes before cooking. - Whisk the eggs well to add air. These tricks will give you light, airy waffles. Recommendations for store-bought options When buying pre-made protein waffles, check labels for protein content. Look for those with at least 10 grams of protein per serving. Brands like Kodiak Cakes and Egglife offer great options. They use wholesome ingredients and taste good. Factors to consider when choosing pre-made waffles Consider the sugar content and serving size. Choose waffles with whole grains for more fiber. Look for options without artificial ingredients. Lastly, check for allergens if you have dietary restrictions. This ensures you make a safe choice that aligns with your health goals. Protein waffles are simple to make and full of flavor. We covered the key ingredients, preparation steps, and cooking tips. You can use oats and protein powder to create a healthy treat. Experiment with flavors and toppings for variety. Whether you choose to freeze leftovers or add fruits, these waffles are a great addition to your meals. By following these tips, you will enjoy delicious and nutritious waffles that can power your day. Make them your own and enjoy!](https://stirredrecipes.com/wp-content/uploads/2025/06/6adad43b-06c3-4912-8d5d-c2ee1e8f8cb7.webp)
Protein Waffles Energizing and Easy Breakfast Recipe
Start your day right with protein waffles—an energizing and easy breakfast! Packed with nutrients, these waffles are perfect for anyone wanting to boost their morning

Mini Breakfast Omelets Packed with Flavor and Nutrition
Are you looking for a quick and tasty breakfast? Mini breakfast omelets are the perfect solution! These bite-sized delights are packed with flavor and nutrition.
. Combining Dry Ingredients Start by gathering your dry ingredients. In a medium bowl, add 1 cup of rolled oats and 1 tablespoon of chia seeds. Then, sprinkle in 1 teaspoon of ground cinnamon. This mix gives the oats that lovely cinnamon roll flavor. Mixing Wet Ingredients Next, it’s time for the wet ingredients. In the same bowl, pour in 1 cup of almond milk and 1 tablespoon of maple syrup. Add 1 teaspoon of vanilla extract for a nice touch. If you want creaminess, mix in 2 tablespoons of Greek yogurt. Stir everything together until it looks smooth. Assembling the Oats Now it’s time to combine everything. Pour the wet mixture into the bowl with the dry ingredients. Stir until all the oats are coated. If you like, fold in 2 tablespoons of raisins or chopped walnuts for extra texture. How Long to Soak Overnight Once everything is mixed, transfer the oats into an airtight container. Cover it tightly and place it in the fridge overnight. This soaking helps the oats absorb the milk and flavors. Storing in Airtight Container Using an airtight container is key. It keeps your oats fresh and tasty. You can prepare a few jars at once for easy breakfasts throughout the week. Stirring and Adjusting Consistency In the morning, take your oats out of the fridge. Give them a good stir. If they are too thick, add a splash of almond milk to thin them out. This way, you get the right texture for your breakfast. Adding Toppings for Extra Flavor Finally, it’s time to serve. Top your oats with fresh apple slices or banana slices. A sprinkle of cinnamon on top adds extra flavor. Enjoy your cinnamon roll overnight oats as a healthy breakfast! You can make your cinnamon roll overnight oats unique. Try adding a pinch of nutmeg for warmth. Cocoa powder can give a rich chocolate flavor. You can also swap maple syrup for honey or agave. Taste your mix; add more sweetener if you like it sweeter. To make this recipe vegan, switch to almond milk or oat milk. For creaminess, replace Greek yogurt with a plant-based yogurt. You can use maple syrup or agave as sweeteners. These swaps keep your oats tasty and vegan-friendly. If you want a crunch, add some chopped nuts or seeds. Almonds or pecans work well. You can also mix in some granola for extra crunch. For creamier oats, add more yogurt or an extra splash of milk. This gives you a smooth and satisfying breakfast. Check out the Full Recipe for a delicious start to your day! {{image_2}} You can switch up your cinnamon roll overnight oats in fun ways. Here are two great ideas: - Chocolate Chip Cinnamon Roll Overnight Oats: Add a handful of chocolate chips to the oat mix. The chocolate will melt slightly overnight, giving a rich taste. - Pumpkin Spice Cinnamon Roll Oats: Mix in a few tablespoons of pumpkin puree and a dash of pumpkin spice. This adds warmth and a touch of fall to your oats. Seasonal fruits make your oats fresh and exciting. Try these ideas: - Fall-Inspired: Add diced apples and chopped nuts. The crunchy nuts and sweet apples give a cozy feel to your breakfast. - Summer-Inspired: Top your oats with fresh berries and a dollop of yogurt. This will create a light and refreshing morning treat. You can serve your cinnamon roll overnight oats in different ways: - Breakfast Bowl Ideas: Serve the oats in a bowl topped with your favorite fruits, nuts, or a drizzle of honey. This makes a colorful and inviting breakfast. - Portable Snack Ideas: Pack the oats in jars for a quick snack on the go. Just grab a jar, and you're ready to enjoy your healthy treat anywhere. Try these variations and serving ideas to make your cinnamon roll overnight oats even more delicious. For the complete recipe, check the Full Recipe section. To keep your cinnamon roll overnight oats fresh, use airtight containers. Glass jars work great and let you see the oats inside. You can also use plastic containers with tight lids. If you have leftovers, simply cover them well. This keeps the oats moist and tasty. Refrigerated Duration In the fridge, these oats last about 3 to 5 days. This makes them a perfect make-ahead breakfast. Just check for any changes in smell or texture before eating. Freezing Guidelines You can freeze cinnamon roll overnight oats, but it's best to skip toppings before freezing. Place the oats in freezer-safe containers. They can last for up to 3 months. When ready to eat, thaw them overnight in the fridge. Best Methods for Reheating Overnight Oats To reheat, use the microwave. Heat a single serving for about 30 seconds. Stir, then heat for another 30 seconds if needed. You can also warm them on the stove, adding a splash of almond milk for moisture. Adjusting Consistency After Reheating After reheating, the oats may be thick. Just stir in a little almond milk until you reach the right texture. This keeps your breakfast creamy and enjoyable. For the full recipe, check the main section. You can use steel-cut oats, but the texture will differ. Steel-cut oats take longer to soften. I recommend soaking them longer or cooking them briefly before mixing. Rolled oats are softer and ready to eat after soaking overnight. Overnight oats stay fresh in the fridge for up to five days. Make sure to store them in an airtight container. After five days, the oats may lose flavor and texture. Yes, these oats are perfect for meal prep. You can make several servings at once. Just divide the mixture into jars or containers. This way, you have easy breakfasts ready for the week! Great toppings include fresh apple slices, banana slices, or a sprinkle of cinnamon. You can also add a dollop of Greek yogurt for creaminess. Nuts or granola can add a nice crunch, too. For the full recipe, check the details above! This guide on overnight oats covers essential ingredients, preparation, tips, and variations. You learned how to combine rolled oats, almond milk, and sweeteners for a great base. You can make it your own with toppings, flavors, and adjustments. Storing safely and reheating properly are key to enjoying your oats. Experimenting with seasonal flavors can keep breakfast fun. Enjoy crafting your perfect bowl of overnight oats. Your mornings can be healthy, varied, and delicious. Dive in and start making the best oats today!](https://stirredrecipes.com/wp-content/uploads/2025/06/77337e1f-569c-40d6-9edc-a90e0eda77ef.webp)
Cinnamon Roll Overnight Oats Healthy Breakfast Idea
Looking for a quick, delicious, and healthy breakfast? Try my Cinnamon Roll Overnight Oats! This recipe gives you all the sweet, spiced goodness of a
![Gather these simple and tasty ingredients to make your strawberry cheesecake overnight oats: - 1 cup rolled oats - 1 cup milk (dairy or non-dairy) - ½ cup Greek yogurt - 1 tablespoon cream cheese, softened - 2 tablespoons maple syrup or honey - ½ teaspoon vanilla extract - ½ cup fresh strawberries, hulled and sliced - 2 tablespoons crushed graham crackers (optional) - Pinch of salt These ingredients create a creamy and flavorful dish. The rolled oats serve as a hearty base. The milk adds moisture, while the Greek yogurt and cream cheese give a rich taste. Sweetness comes from maple syrup or honey, and the vanilla adds warmth. Fresh strawberries bring a burst of flavor, making each bite delightful. The graham crackers add a nice crunch, but they are optional. You can find the full recipe for step-by-step instructions on how to prepare this delicious meal. Enjoy! - In a large bowl, combine the rolled oats, milk, Greek yogurt, and softened cream cheese. - Add maple syrup or honey, vanilla extract, and a pinch of salt. - Mix well until everything is creamy and smooth. - Gently fold in the fresh, hulled, and sliced strawberries. - Divide the creamy mixture into two or three jars. - Seal the jars tightly with their lids. - Place the jars in the fridge overnight or for at least 6 hours. - In the morning, stir well and top with more sliced strawberries and crushed graham crackers before you serve. With this simple method, you create a delightful breakfast that tastes just like cheesecake! For the complete recipe, check out the [Full Recipe]. - Use rolled oats for best texture. They soak up liquid well and stay chewy. - Experiment with different sweeteners. Maple syrup or honey both work great. You can even try agave or stevia for a lower-calorie option. - Pair with yogurt for added protein. Greek yogurt boosts creaminess and nutrition. - Add nuts or seeds for extra crunch. Almonds, walnuts, or chia seeds enhance flavor and texture. - Use clear jars for a pretty display. Seeing the layers makes it more fun to eat. - Decorate with fresh mint or additional fruit. A sprig of mint adds color and a fresh taste. You can also use extra strawberry slices for a lovely touch. For the full recipe, check out the detailed steps to make this delightful dish! {{image_2}} You can switch up the flavor of your overnight oats easily. Here are two tasty options: - Chocolate Strawberry Cheesecake: Add cocoa powder to the base. Mix in dark chocolate chips for extra joy. The chocolate pairs great with strawberries. - Banana Cream Pie Overnight Oats: Use mashed bananas instead of strawberries. Add a bit of cinnamon for warmth. Top with crushed vanilla wafers for a fun crunch. You can customize your oats for different diets. Here are some ideas: - Dairy-free options: Use almond or coconut yogurt instead of Greek yogurt. Use almond or oat milk to keep it creamy. - Sugar-free alternatives: Replace maple syrup or honey with stevia or monk fruit. This keeps the oats sweet without added sugar. Using seasonal fruits keeps your oats fresh and exciting. Here are a few tips: - Seasonal fruits: In spring and summer, use berries like blueberries or raspberries. In fall, try apples or pears for a cozy twist. - Adjust spices: Add a pinch of cinnamon in the fall or nutmeg in winter. These spices make your oats feel like a warm hug. For the complete recipe, check out the [Full Recipe]. Store your strawberry cheesecake overnight oats in airtight containers. This keeps them fresh and tasty. You can keep them in the refrigerator for up to 3 days. If you want a quick breakfast, make a batch at the start of the week. Can overnight oats be frozen? Yes, you can freeze them! Just remember to use freezer-safe containers. When you're ready to eat, thaw them in the fridge overnight. This way, they stay creamy and delicious. How can you tell if your oats have gone bad? Look for any off smells or changes in texture. If they smell sour or feel slimy, it's time to toss them. Always check your ingredients, especially if you add fruit or yogurt. Freshness is key to enjoying your oats! To make overnight oats, you follow a simple method. First, mix rolled oats with milk and yogurt. Add some sweetener and a pinch of salt. Stir it all together until smooth. Then, fold in your favorite fruits. Pack the mixture into jars and seal them tightly. Place them in the fridge overnight. In the morning, just stir and enjoy! Yes, you can use instant oats, but there are some points to consider. Instant oats cook faster and can become mushy. They may not give you the same texture as rolled oats. Rolled oats soak up liquid better and stay chewier. If you prefer a creamier dish, instant oats may work. For a firmer bite, stick to rolled oats. Overnight oats offer several health benefits. They are high in fiber, which helps with digestion. The oats provide long-lasting energy. Greek yogurt adds protein, keeping you full longer. Fresh strawberries bring vitamins and antioxidants. Using honey or maple syrup gives natural sweetness without added chemicals. Together, these ingredients make a healthy and tasty breakfast. This blog post covered how to make delicious overnight oats. We discussed the key ingredients, step-by-step instructions, and helpful tips. You learned about variations to fit different tastes and dietary needs. I also shared storage tips to keep your oats fresh. Overnight oats are a fun and easy way to enjoy a healthy breakfast. Feel free to experiment with flavors and toppings. Enjoy your homemade creation!](https://stirredrecipes.com/wp-content/uploads/2025/06/ccc347c0-7682-4ce7-8082-5c7078e3eceb.webp)
Strawberry Cheesecake Overnight Oats Delightful Recipe
Wake up to a tasty treat with my Strawberry Cheesecake Overnight Oats recipe! This dish is creamy, sweet, and packed with fresh fruit. It’s perfect
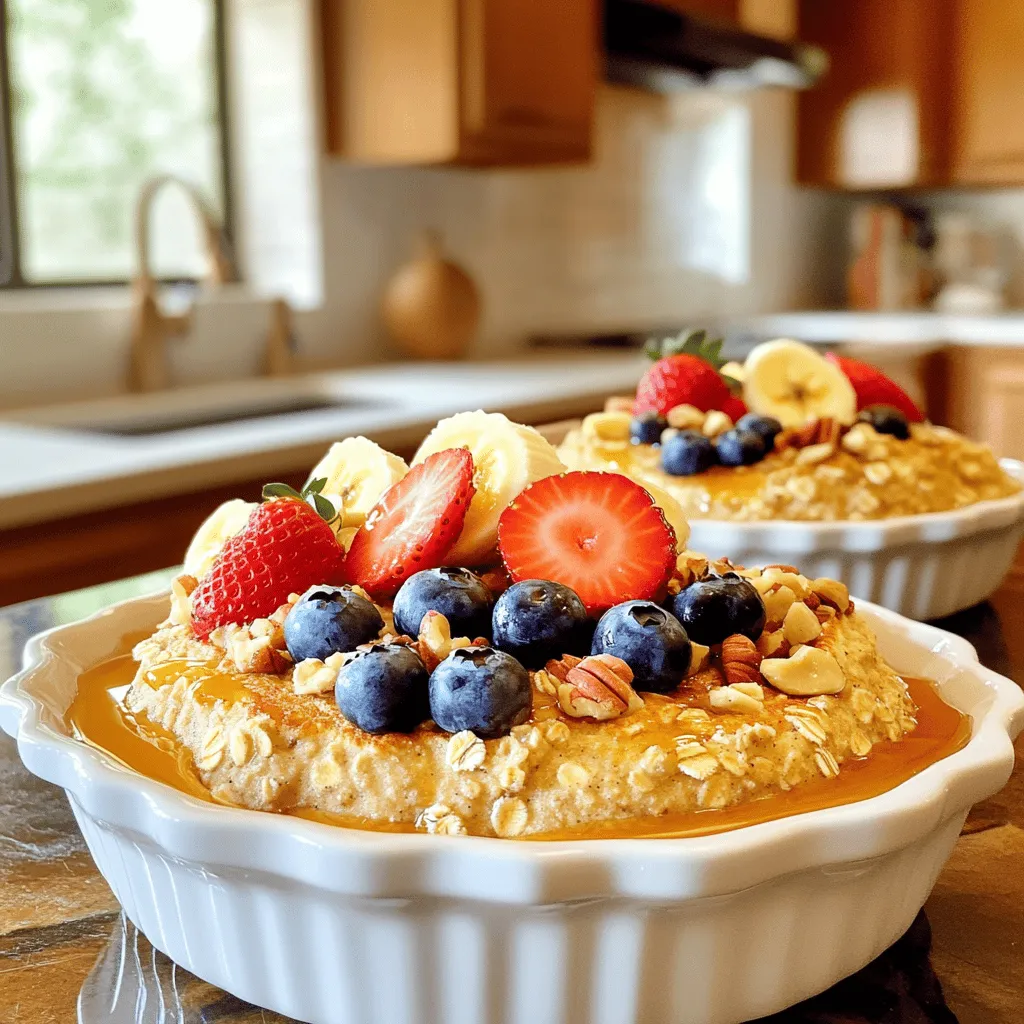
Baked Protein Pancake Bowls Easy and Nutritious Recipe
Are you looking for a healthy twist on breakfast? Try my Baked Protein Pancake Bowls! They are easy to make, packed with nutrition, and taste

Blueberry Cottage Cheese Muffins Tasty and Simple Recipe
Want a quick and tasty snack? Blueberry cottage cheese muffins are a perfect choice! They are easy to make, healthy, and packed with flavor. In
![- Whole grain bread and its role Whole grain bread gives the dish texture and fiber. The cubes soak up the egg mixture, making each bite soft and tasty. You can use any whole grain bread you like. Sourdough or multigrain also works well. - Breakfast sausage options I recommend using a pound of crumbled breakfast sausage. You can choose pork, turkey, or chicken. Each adds a different flavor. If you prefer a bit of spice, opt for hot sausage. It will bring warmth to the casserole. - Choosing the right cheese Sharp cheddar cheese is my go-to for this dish. It melts beautifully and adds a rich flavor. You can also mix in mozzarella or pepper jack for a twist. Just be sure to shred it fresh for the best results. - Vegetables to enhance flavor Adding vegetables like bell peppers and onions boosts flavor and nutrition. Diced bell peppers bring color and sweetness. Onions add a nice depth. Feel free to include spinach or mushrooms for more variety. - Seasoning suggestions for a unique taste Garlic powder and onion powder give a great base flavor. I also like adding smoked paprika for a hint of smokiness. Adjust the salt and pepper based on your taste. Experimenting with herbs can also add a fresh touch. - Garnish options for presentation Fresh parsley is perfect for garnish. It adds a pop of green and freshness. You can also use chopped green onions or even a sprinkle of paprika for color. These small touches make your dish look more appealing. For the complete recipe, check out the Full Recipe section. 1. Cooking the sausage Start by heating a large skillet over medium heat. Add the crumbled breakfast sausage. Cook it until it's browned and fully cooked. This should take about 5 to 7 minutes. Make sure to drain any extra fat after cooking. Set the cooked sausage aside to cool slightly. 2. Preparing the bread and mixing ingredients In a large mixing bowl, take 8 slices of cubed whole grain bread. Add the cooked sausage, 1 cup of diced bell peppers, 1 cup of diced onion, and 1 ½ cups of shredded sharp cheddar cheese. Stir everything together until all the ingredients are well mixed. 1. Combining eggs and seasonings In another bowl, crack 8 large eggs and pour in 2 cups of milk. Add 1 teaspoon of garlic powder, 1 teaspoon of onion powder, ½ teaspoon of smoked paprika, and some salt and pepper to taste. 2. Tips for whisking effectively Use a whisk to blend the eggs and milk. Whisk until the mixture is smooth and all ingredients are combined. Make sure there are no egg whites left unblended. 1. Transferring to baking dish Pour the egg mixture over the bread and sausage mixture. Gently stir until everything is coated well with the egg mixture. 2. Prepping the casserole for refrigeration Transfer the entire mixture into a greased 9x13 inch baking dish. Spread it out evenly. Cover the dish with plastic wrap or foil. Place it in the refrigerator overnight. 3. Baking recommendations The next morning, preheat your oven to 350°F (175°C). Remove the cover from the casserole and sprinkle the remaining ½ cup of cheddar cheese on top. Bake the casserole uncovered for 45 to 55 minutes. The center should be set, and the top should look golden and bubbly. Let it rest for about 10 minutes before slicing. You can garnish with chopped fresh parsley. For the full recipe, check the [Full Recipe]. To ensure even cooking, spread the mixture in your dish evenly. Avoid piling it too high on one side. This helps every bite cook just right. When baking, keep an eye on the casserole. It should be golden brown on top. To check for doneness, stick a toothpick in the center. If it comes out clean, it’s ready. If it’s still wet or gooey, give it more time. Remember, the center must be fully set for the best texture. Prep-ahead ideas can make busy mornings stress-free. You can prepare this casserole the night before. Just mix all the ingredients and place them in your baking dish. Cover it well and refrigerate overnight. In the morning, you only need to bake it. Freezing portions is another great idea. Cut leftover casserole into slices and wrap them tightly. Place them in freezer bags to keep them fresh. When you want a quick meal, just reheat a slice in the oven or microwave. This makes for easy breakfasts any day of the week! {{image_2}} You can easily swap some ingredients in Fireman’s Overnight Breakfast Casserole. If you need a gluten-free option, try using gluten-free bread. Many brands offer great alternatives that taste good. For the sausage, you can use turkey sausage or even plant-based options. These substitutions keep the dish tasty while being healthier. To add more flavor, consider adding spices. A pinch of cayenne pepper or a dash of hot sauce can give it a nice kick. You can also play with cheeses. Try mixing sharp cheddar with mozzarella or pepper jack for a fun twist. Adding vegetables like spinach, mushrooms, or zucchini can also boost the taste and nutrition. For the full recipe, visit the [Full Recipe] link. To store leftovers, let the casserole cool completely. Cut it into serving sizes. Place the pieces in an airtight container. Store them in the fridge. This method keeps them fresh. How long does it last? The casserole lasts about 3 to 4 days in the fridge. After that, the quality may decline. If you want to keep it longer, consider freezing it. To reheat, use the oven for the best texture. Preheat it to 350°F (175°C). Place the casserole in a baking dish. Cover it with foil to prevent drying out. Heat for about 20 minutes or until warm. You can also use the microwave for quick reheating. However, this may make it a bit soggy. Serve it with fresh fruit or a side salad. These sides balance the rich flavors of the casserole. Can I prepare this casserole without eggs? Yes, you can make this casserole without eggs. Use a mix of silken tofu and plant-based milk. Blend until smooth. This will keep the casserole creamy and moist. What can I serve with Fireman’s Overnight Breakfast Casserole? This dish pairs well with fruit salad or yogurt. You can also serve it with crispy bacon or fresh juice. These sides add balance to the meal. Is it possible to make this dish in advance longer than overnight? Yes, you can prepare this casserole up to two days ahead. Just keep it in the fridge. Make sure it is well-covered to prevent drying out. How to adjust cooking time for smaller portions? If you make a smaller batch, reduce the baking time. Check the casserole after 30 minutes. It may need an extra 10-15 minutes, depending on the size. Can I make it vegetarian-friendly? Absolutely! Simply swap the sausage for a veggie option. You can use mushrooms or plant-based sausage. This change keeps the flavor while making it meat-free. In summary, this blog post guides you through making a delicious breakfast casserole. We covered essential ingredients like whole grain bread, sausage, and cheese, enhancing flavors with vegetables and spices. The step-by-step instructions simplify preparation, while tips help save time. You can explore variations with gluten-free options or plant-based sausage. Remember to store leftovers properly and reheat for the best taste. Enjoy this hearty dish any morning, and feel free to customize it to fit your taste!](https://stirredrecipes.com/wp-content/uploads/2025/06/af3dad79-afa8-4eb4-9e5d-e87c882b2ea2.webp)
Fireman’s Overnight Breakfast Casserole Savory Delight
Looking for an easy and delicious breakfast that will fuel your day? Try my Fireman’s Overnight Breakfast Casserole! This savory delight combines wholesome bread, savory