Breakfast

Easy Cheesy Zucchini Muffins Tasty and Simple Recipe
If you’re craving a snack that’s both tasty and simple to make, you’re in the right place! I’ll show you how to whip up Easy
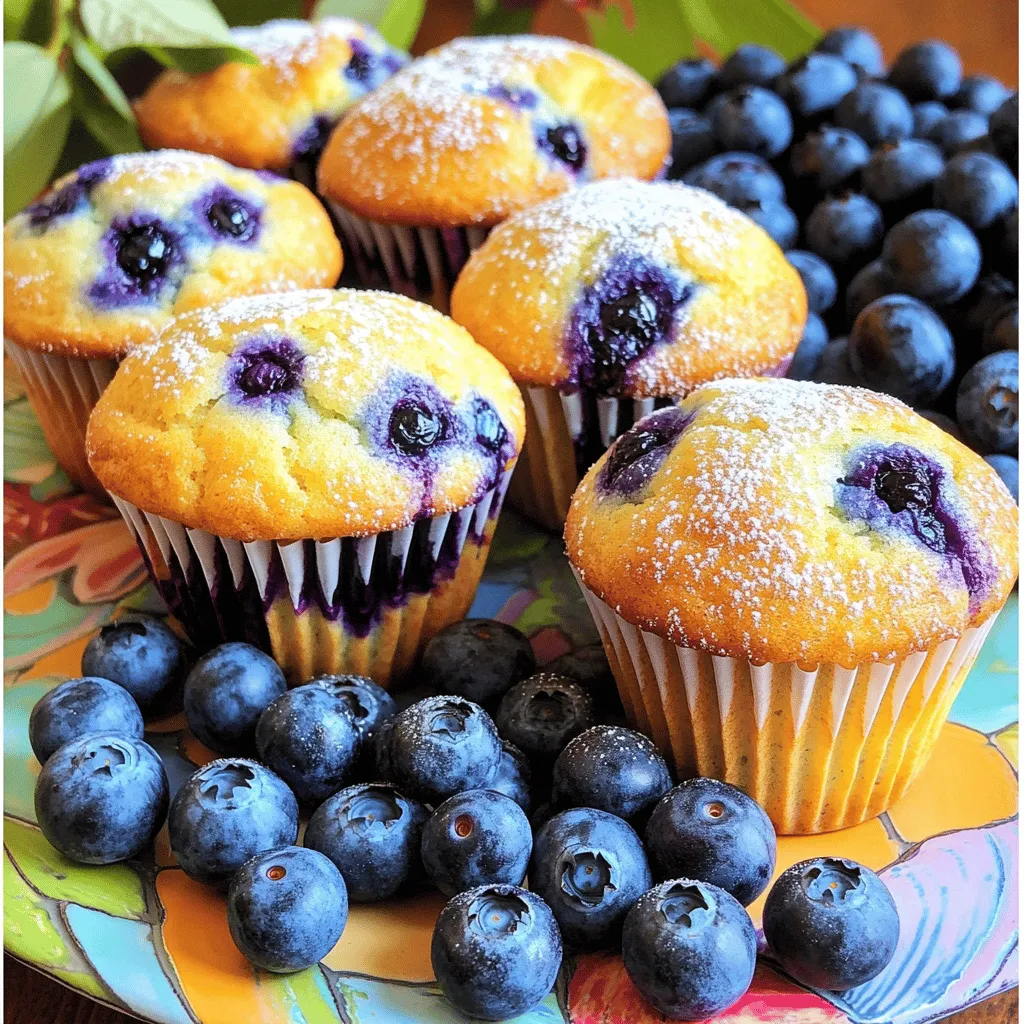
Moist & Fluffy Blueberry Muffins Easy Baking Recipe
Looking for a simple way to make moist and fluffy blueberry muffins? You’ve come to the right place! In this easy baking recipe, I’ll guide
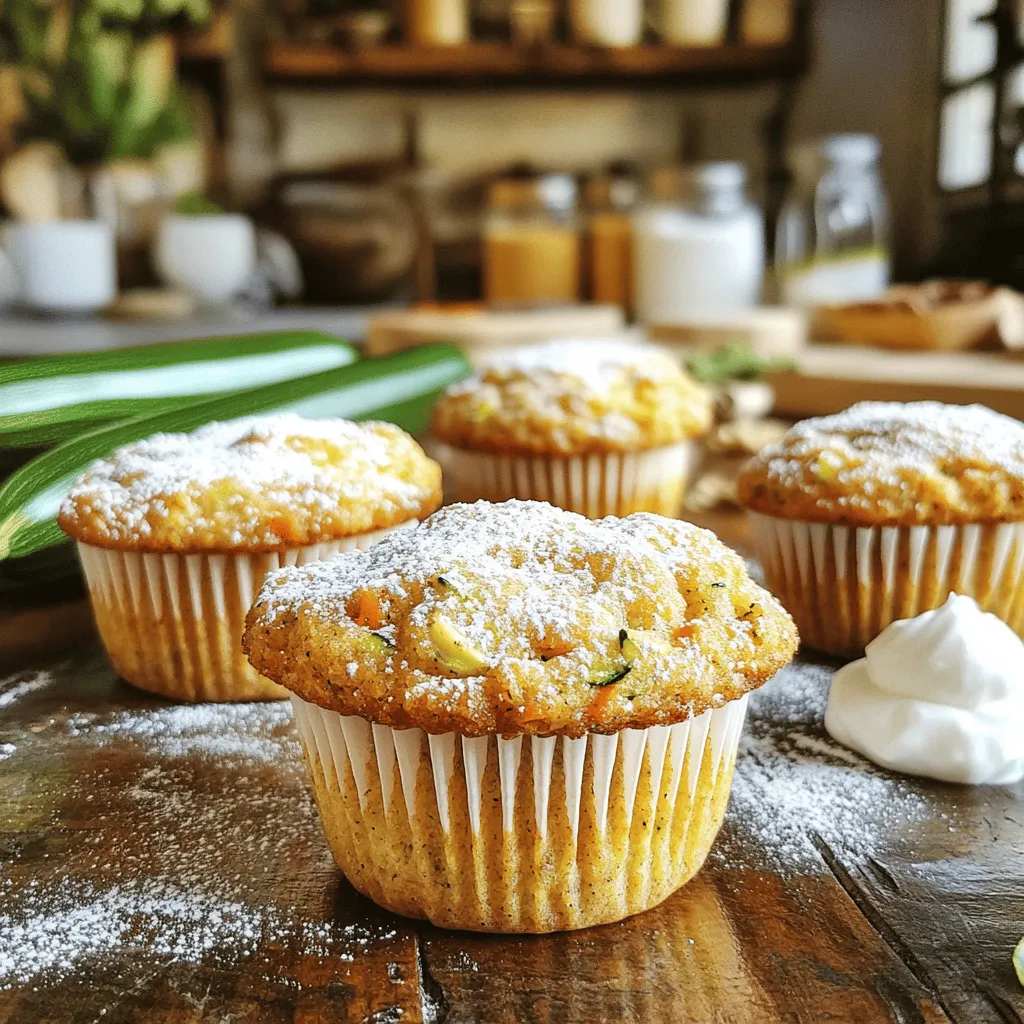
![- 1 medium zucchini, grated - 1 cup fresh blueberries - 1 cup all-purpose flour - 1/2 cup whole wheat flour In this recipe, zucchini adds moisture and a healthy twist. The fresh blueberries give a sweet burst in each bite. Combining all-purpose and whole wheat flour gives a nice texture to the muffins. - 1/2 cup granulated sugar - 1/4 cup brown sugar, packed - 1/4 cup unsweetened applesauce - 1/4 cup vegetable oil These sweeteners balance the flavor. Applesauce keeps the muffins moist and lowers the fat. The vegetable oil works well for a soft crumb. - 2 large eggs - 1 teaspoon vanilla extract - 1 teaspoon baking powder - 1/2 teaspoon baking soda - 1/2 teaspoon salt - 1 teaspoon ground cinnamon - 1/4 teaspoon nutmeg (optional) - 1/2 cup chopped walnuts or pecans (optional) Eggs bind the mix together, while baking powder and soda help them rise. Vanilla extract adds a warm flavor. Spices like cinnamon and nutmeg give a cozy touch. If you like, add nuts for crunch. For the complete preparation steps, check out the Full Recipe. 1. First, preheat your oven to 350°F (175°C). This step is key for even baking. 2. Next, line a muffin tin with paper liners or spray it with non-stick spray. This will help the muffins release easily. 3. In a large bowl, combine the grated zucchini, fresh blueberries, applesauce, vegetable oil, eggs, and vanilla extract. Mix well until everything is combined. 1. In a separate bowl, whisk together the all-purpose flour, whole wheat flour, granulated sugar, brown sugar, baking powder, baking soda, salt, cinnamon, and nutmeg if you choose to use it. This blend adds flavor and helps the muffins rise. 1. Gradually add the dry mixture to the wet mixture. Gently fold them together until just combined. Be careful not to overmix; a few lumps are fine. 2. If you like nuts, fold in the chopped walnuts or pecans at this stage. They add crunch and flavor. 3. Now, divide the batter evenly among the muffin cups, filling each about two-thirds full. 1. Place the muffin tin in the oven and bake for 18 to 22 minutes. Check for doneness by inserting a toothpick into the center of a muffin. It should come out clean. 2. Once baked, remove the muffins from the oven. Allow them to cool in the tin for about five minutes. After that, transfer them to a wire rack to cool completely. For the full recipe, refer to the [Full Recipe]. Enjoy these tasty muffins warm! To make great blueberry zucchini muffins, avoid overmixing. Mix the wet and dry ingredients until just combined. A few lumps are fine. Overmixing makes muffins dense and tough. Next, monitor your baking time closely. Start checking at 18 minutes. Insert a toothpick into the center. If it comes out clean, your muffins are done. If not, bake for a couple more minutes. You can boost the flavor by adding spices or nuts. Try adding a pinch of nutmeg or some chopped walnuts. These give extra texture and taste. Also, consider optional toppings before baking. Sprinkle a little sugar on top for a nice crunch. You can even add a few extra blueberries for a pop of color. When serving, presentation matters. Serve the muffins warm and dust them with powdered sugar. Place them on a beautiful platter. Add fresh blueberries and mint leaves as a garnish. This makes your muffins look as good as they taste! {{image_2}} You can change up the flavor of your muffins. Try adding different fruits like raspberries or cranberries. Both will create a nice twist. You can also add citrus zest from oranges or lemons. This zest gives a bright flavor that enhances the muffins. If you want to make gluten-free muffins, use gluten-free flour. This flour works well in most recipes and keeps the muffins fluffy. Just swap the all-purpose flour with a good gluten-free blend. The muffins will still taste great! For a vegan version, replace the eggs with flaxseed or applesauce. To use flaxseed, mix one tablespoon of ground flaxseed with three tablespoons of water. Let it sit for a few minutes until it gets thick. If you prefer applesauce, use a quarter cup for each egg. This keeps the muffins moist and delicious. For the full recipe, check out the complete preparation steps for Blueberry Zucchini Muffins. You can store blueberry zucchini muffins at room temperature or in the fridge. If you keep them at room temperature, place them in an airtight container. They stay fresh for about three days this way. If you prefer refrigeration, they will last a bit longer, up to a week. Just remember that cold muffins may lose some of their soft texture. Freezing muffins is a great option if you want to keep them longer. To freeze, let the muffins cool completely. Then, wrap each muffin in plastic wrap. Place them in a freezer bag and remove as much air as possible. They can stay frozen for up to three months. When you're ready to eat them, thaw them in the fridge overnight or warm them in the microwave. Blueberry zucchini muffins can last for several days when stored correctly. At room temperature, they last about three days. In the fridge, they can last up to one week. If you freeze them, they retain their taste for up to three months. Enjoy your muffins fresh, but know they can stay tasty for a while! Yes, you can use frozen blueberries. They work well in muffins. Just add them straight from the freezer. This keeps them from getting mushy. Frozen blueberries may tint the batter a little. But they still taste great! Fresh blueberries offer a burst of flavor. Use what you have on hand. To stop muffins from sticking, grease your muffin tin well. You can use cooking spray or line with paper liners. If using spray, make sure to cover the sides and bottom. This helps them pop out easily. Let the muffins cool for a few minutes in the tin. Then, gently remove them with a spoon or spatula. Yes, you can double the recipe! Just multiply each ingredient by two. Mix the wet and dry ingredients in separate bowls. Then, combine them as you would for a single batch. Use two muffin tins if needed. Keep an eye on baking time. They may take a few extra minutes to cook through. Leftover zucchini can be used in many ways. You can make zucchini fritters or add it to stir-fries. It also works well in salads. Try blending it into smoothies for extra nutrition. You can even freeze it for later use. Grate and pack it into bags. This way, it’s ready for your next recipe! For the complete preparation steps of Blueberry Zucchini Muffins, please refer to the [Full Recipe]. In this post, we explored how to make delicious blueberry zucchini muffins. You learned about the main ingredients like zucchini and blueberries, plus sweeteners and fats. The step-by-step instructions made it easy to follow along. We shared tips for perfect muffins and tasty variations to try. Remember, these muffins are versatile; you can freeze them or adjust the recipe to your taste. I hope you feel inspired to bake and enjoy these treats! Happy baking!](https://stirredrecipes.com/wp-content/uploads/2025/07/8f00fcdb-7d9e-439a-9dce-193686cfa52b.webp)
Blueberry Zucchini Muffins Simple and Tasty Recipe
Craving a delicious and healthy treat? Let me introduce you to my Blueberry Zucchini Muffins! This simple recipe blends juicy blueberries with grated zucchini for

Flavorful Yellow Squash Pancakes Simple and Quick Recipe
Looking for a tasty and unique breakfast? These flavorful yellow squash pancakes are quick and easy to make! Packed with nutritious ingredients and a savory
Coconut Flour Carrot Zucchini Muffins Easy and Tasty
Looking for a tasty snack that’s easy to make? You’re in the right place! These Coconut Flour Carrot Zucchini Muffins are not only delicious but
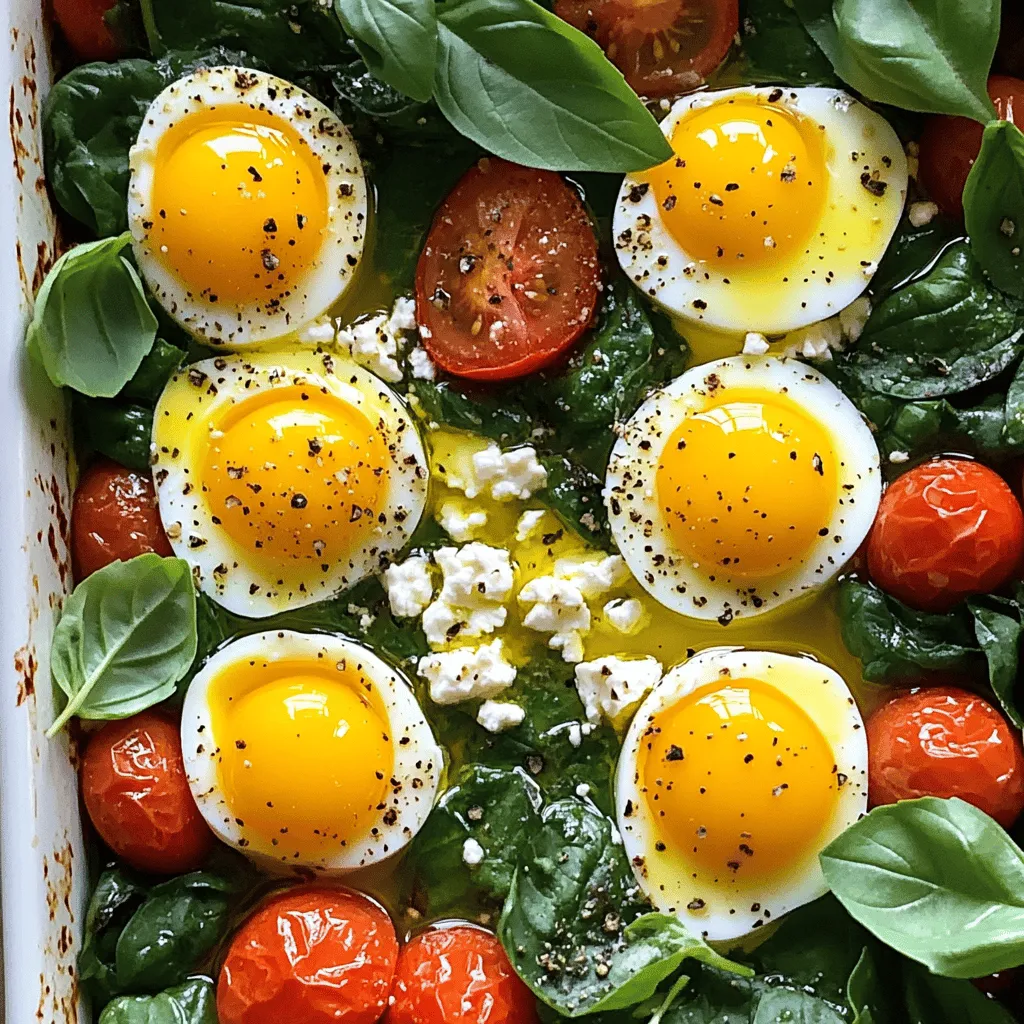
Baked Feta Eggs Simple and Flavorful Recipe
Looking for a quick, tasty meal? Baked Feta Eggs are the answer! This simple recipe features creamy feta, fresh eggs, and colorful veggies, making breakfast

Spinach Mushroom Frittata Simple and Tasty Dish
Are you looking for a simple yet tasty dish that packs a punch? Look no further than this Spinach Mushroom Frittata! With just a handful

Make-Ahead Frittata Squares for Hassle-Free Meals
Imagine waking up to a delicious, healthy breakfast ready to go! With my Make-Ahead Frittata Squares, you can enjoy hassle-free meals all week. These tasty

Greek Vegetable Frittata Flavorful and Nourishing Dish
If you crave a dish that’s both tasty and healthy, you’re in for a treat! A Greek Vegetable Frittata is easy to make and packed
![- 6 large eggs - 1 cup cottage cheese - 1/2 cup shredded mozzarella cheese - 1/2 cup spinach, chopped - 1/4 cup roasted red peppers, diced - 1/4 teaspoon garlic powder - 1/4 teaspoon onion powder - Salt and pepper to taste - Cooking spray or olive oil for greasing Gather these simple ingredients to make your egg bites. The eggs give a rich base. Cottage cheese adds creaminess and protein. Mozzarella gives a nice, melty texture. Spinach and roasted red peppers bring color and flavor. Use garlic and onion powder for extra taste. Lastly, season with salt and pepper to your liking. Don't forget to grease your muffin tin. This helps the egg bites come out easily. You can find the complete recipe in the [Full Recipe]. - Preheat your oven to 325°F (165°C). - Combine the following in a blender: - 6 large eggs - 1 cup cottage cheese - 1/2 cup shredded mozzarella cheese - 1/4 teaspoon garlic powder - 1/4 teaspoon onion powder - Salt and pepper to taste Blend until smooth and well mixed. - Stir in: - 1/2 cup chopped spinach - 1/4 cup diced roasted red peppers Grease a muffin tin with cooking spray or olive oil. Pour the egg mixture into the muffin tin, filling each cup about 3/4 full. - Place the muffin tin in the oven. - Bake for 25-30 minutes until the egg bites are set and slightly golden. Enjoy making this recipe, and for the full recipe, refer back to the earlier section. To get that creamy texture, blend all the ingredients well. Use a good blender. This makes sure everything mixes together. You want a smooth and velvety mix for your egg bites. Check if your egg bites are done by inserting a toothpick. Pull it out and see if it is clean. If it is clean, your bites are ready. If not, give them a few more minutes in the oven. For a great look, arrange your egg bites on a nice platter. Garnish with fresh herbs like basil or chives. This adds a pop of color and makes the dish more inviting. For a brunch, pair them with fresh fruit or a light salad for a well-rounded meal. {{image_2}} When you make Copycat Starbucks Egg Bites, you can easily change them up. Here are some fun ideas to try. You can swap mozzarella for feta or cheddar. Feta adds a tangy taste. Cheddar brings a sharp flavor. Both options will change the bite in a tasty way. Want more veggies? Add diced mushrooms or zucchini. Mushrooms give an earthy flavor. Zucchini adds moisture and nutrition. These veggies boost the health factor and taste great. For meat lovers, include cooked bacon or sausage. These options add protein and a savory touch. You can mix them in or layer them on top before baking. This change makes your egg bites more filling and satisfying. Try these variations to make your egg bites your own. You can create a new favorite each time you make them. Store egg bites in an airtight container in the fridge for up to 5 days. This keeps them fresh and safe to eat. Make sure they cool down before sealing them in the container. This way, they won’t sweat and lose their texture. Freeze cooked egg bites in individual portions for up to 3 months. This makes it easy to grab a quick breakfast. Use plastic wrap or freezer bags to prevent freezer burn. Label the bags with the date for best results. Reheat in the microwave or oven for best results. For the microwave, use a microwave-safe dish. Heat for about 30 seconds, then check if they are warm. If using the oven, preheat it to 350°F (175°C) and warm them for about 10 minutes. This helps keep their fluffy texture. You can enjoy these tasty bites any time! Yes, you can easily make these egg bites dairy-free. Just use dairy-free cheese. For cottage cheese, pick a non-dairy alternative like tofu or almond-based options. This way, you keep the texture smooth and creamy. You won’t lose flavor or fun with these swaps. To make low-carb egg bites, skip high-carb veggies. Focus on the eggs and cheese. You can use spinach or other low-carb greens. This keeps the taste great and the carbs low. You can still enjoy a filling bite without the extra carbs. Egg bites pair well with a side of fresh fruit. Try berries, slices of apple, or orange wedges. You can also add a light salad for a balanced meal. This makes your breakfast or brunch more colorful and tasty. It’s all about balance and flavor! These egg bites are easy and tasty. You blend six eggs with cottage cheese and veggies. Bake them at 325°F for about 30 minutes. Remember to check if they are done with a toothpick. You can add different cheeses or meats to change up the flavor. Store leftovers safely in the fridge or freezer. These bites make a great snack or meal. Try making them your own in fun ways. Enjoy your cooking!](https://stirredrecipes.com/wp-content/uploads/2025/06/e658e870-5bf6-456d-8774-c0fd8159da80.webp)
Copycat Starbucks Egg Bites Tasty and Easy Recipe
Do you love Starbucks egg bites but want to make them at home? You’re in luck! This easy recipe allows you to whip up delicious