Breakfast
 for step-by-step instructions to create your Maple Walnut Muffins. Baking Maple Walnut Muffins is simple and fun. First, gather all your ingredients. This helps you stay organized. You will need about 15 minutes for prep time. Measuring ingredients accurately is key. It ensures your muffins rise well and taste great. 1. Preheat your oven to 350°F (175°C). This step is crucial for even baking. 2. Line a muffin tin with paper liners or grease it lightly. This keeps the muffins from sticking. 3. In a mixing bowl, whisk together the dry ingredients: all-purpose flour, whole wheat flour, baking powder, baking soda, salt, and cinnamon. Mix these well to combine. 4. In a separate bowl, cream the softened butter and maple syrup using an electric mixer. Beat for about 2-3 minutes until fluffy. 5. Add the eggs one at a time. Mix well after each egg. Then, stir in the vanilla extract. 6. Gradually add the dry mix to the wet mix, alternating with milk. Start and end with the flour mix. Mix until just combined; over-mixing can make muffins tough. 7. Gently fold in the chopped walnuts. Be careful not to over-mix the batter; this keeps them light. 8. Divide the mixture among the muffin cups, filling each about two-thirds full. This allows them to rise. 9. Top each muffin with a few chopped walnuts and a pinch of maple sugar. This adds a nice crunch and sweetness. 10. Bake for 18-20 minutes. Check for doneness by inserting a toothpick. It should come out clean. 11. Let the muffins cool in the tin for 5 minutes. Then, move them to a wire rack to cool completely. Using these steps, you will create delicious Maple Walnut Muffins. For a complete list of ingredients and instructions, check the Full Recipe. To make the best maple walnut muffins, focus on a few key details. Start with the right texture. Use a light touch when mixing the batter. Over-mixing can lead to dense muffins. Aim for a smooth blend, but don’t worry if small lumps remain. For even baking, fill each muffin cup about two-thirds full. This allows space for rising. Rotate the muffin tin halfway through baking. This helps all muffins bake evenly. The ideal baking time is 18 to 20 minutes. Test doneness with a toothpick; it should come out clean. Cooling is vital for freshness. Allow muffins to cool in the tin for five minutes. Then, transfer them to a wire rack. This prevents sogginess and keeps them fluffy. Maple walnut muffins pair well with coffee or tea. They make a great breakfast treat. Try serving them with almond butter or cream cheese. These spreads add a creamy texture and rich flavor. For special occasions, present the muffins in a rustic basket. Line the basket with a cloth napkin. Drizzle a little extra maple syrup on top. This simple touch makes them look beautiful and inviting. For more ideas, consider adding fresh fruit on the side. Sliced strawberries or bananas complement the muffins nicely. These pairings enhance the overall taste experience. Enjoy exploring these options! {{image_2}} You can easily change up the flavor of your Maple Walnut Muffins. Adding fruit can bring a new twist. Try mixing in blueberries for a burst of sweetness. Chopped bananas give a nice texture and flavor too. For added depth, think about using spices. A bit of nutmeg can add warmth. You can also add ginger for a nice kick. These spices work well with the maple flavor. If you want to make a vegan version, it’s simple. Swap eggs for flaxseed meal mixed with water. Use almond milk instead of regular milk. Replace the butter with coconut oil. These changes keep the muffins moist and tasty. For those with nut allergies, you can skip the walnuts. You might want to use sunflower seeds instead. They give a nice crunch without the nuts. If you have wheat sensitivities, there are options. Use a gluten-free flour blend in place of regular flour. This keeps the muffins light and fluffy. You can also switch up sweeteners. Try agave syrup or honey instead of maple syrup. This adds a different but still sweet flavor. For extra fun, mix in chocolate chips or dried fruits. These add sweetness and a hint of chewiness. You can be creative with your mix-ins to find what you love best. For the full recipe, check out the instructions above. To keep your maple walnut muffins fresh, store them in an airtight container. This helps prevent them from drying out. If you want to refrigerate, they last about five days. If you freeze them, they can stay good for up to three months. Just make sure to wrap them well to avoid freezer burn. When reheating, use the oven at 350°F for about 10 minutes. This keeps the muffins soft and tasty. Use a plastic or glass container with a tight lid for best results. You can also use freezer bags for freezing. To keep your muffins fresh, add a piece of bread to the container. It helps maintain moisture. It is smart to label your containers with the date so you know when you made them. Organize them by flavor or type for easy access when you're hungry! What can I use instead of maple syrup? If you want to swap maple syrup, try honey or agave nectar. They both add sweetness. You can also use brown sugar mixed with water for a similar flavor. How do I make muffins moist without adding extra fat? To keep muffins moist, use ingredients like yogurt or applesauce. They add moisture without extra fat. You can also avoid overmixing the batter, which helps keep muffins light. Can I make the batter ahead of time? Yes, you can make the batter ahead. Store it in the fridge for a few hours. Just remember to mix it gently before baking. Why are my muffins too dense or too dry? Dense or dry muffins often come from too much flour or overmixing. Always measure flour correctly and mix just until combined. This keeps muffins light and fluffy. How can I prevent my muffins from sticking to the tin? To prevent sticking, use paper liners or grease the muffin tin well. You can use cooking spray or butter. This helps muffins release easily after baking. What should I do if my muffins overflow? If muffins overflow, it may be because you filled them too high. Next time, fill each cup only two-thirds full. This gives them room to rise without spilling. Can I swap walnuts for another nut or seed? Absolutely! You can use pecans, almonds, or even sunflower seeds. Each nut adds a unique taste and texture to your muffins. How long do muffins generally last? Muffins stay fresh for about three days at room temperature. If you keep them in the fridge, they last a week. For longer storage, freeze them. What's the best way to know if my muffins are done baking? To check if muffins are done, insert a toothpick into the center. If it comes out clean or with a few crumbs, they are ready. If it’s wet, bake a few more minutes. Making Maple Walnut Muffins is a fun and rewarding task. We covered choosing the right ingredients and simple steps for baking. You learned tips for perfecting texture and how to store your muffins well. Remember, variations can make your muffins unique, so experiment with flavors and dietary needs. With these guidelines, you can create tasty treats for any occasion. Enjoy your baking journey and the delicious muffins you will share!](https://stirredrecipes.com/wp-content/uploads/2025/08/4ce55c9d-0dfd-4b66-8d23-2f903642a5aa.webp)
Maple Walnut Muffins Delightful and Simple Recipe
Welcome to the delightful world of Maple Walnut Muffins! If you crave a simple yet delicious treat, you’re in the right place. These muffins are
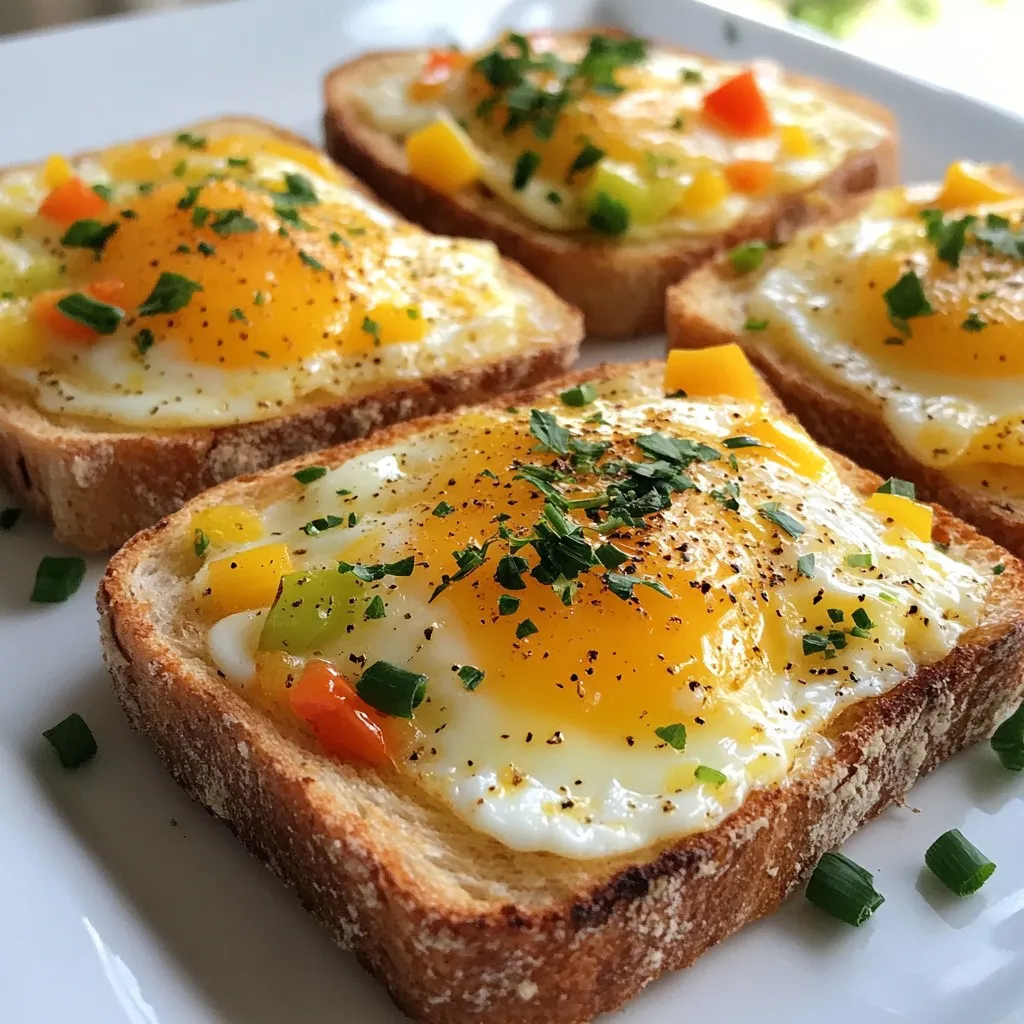
Cheesy Egg Toast Simple and Tasty Recipe Guide
Welcome to my simple and tasty guide for cheesy egg toast! This quick meal is perfect for breakfast or a snack. You only need a
![- 1 cup all-purpose flour - 1 tablespoon baking powder - 1 teaspoon ground cinnamon - 1/2 teaspoon ground nutmeg - 1/2 teaspoon ground ginger - 1/4 teaspoon salt - 1 cup pumpkin puree - 2 large eggs - 1/4 cup brown sugar - 1/2 cup milk (or plant-based milk) - 1/4 cup melted butter (plus more for greasing the waffle iron) - 1/2 cup unsalted butter - 1/2 cup maple syrup - 1/4 teaspoon ground cinnamon In this recipe, I use a mix of dry and wet ingredients to create a rich batter. The dry ingredients give structure, while the wet ingredients add moisture and flavor. The key spices, like cinnamon and nutmeg, give the waffles a warm, cozy taste. When choosing your pumpkin puree, I recommend using canned for ease. It saves time and tastes great. For the brown butter syrup, watch the butter closely as it cooks. It turns a lovely golden brown and adds a nutty flavor that pairs perfectly with the pumpkin. This combination of ingredients makes for a delightful breakfast. You can find the full recipe to guide you through the steps to make these delicious spiced pumpkin waffles with brown butter syrup. Enjoy the process and the wonderful smells that fill your kitchen! First, preheat your waffle iron. Make sure to grease it well with melted butter. This helps the waffles not stick. In a large bowl, get your dry ingredients ready. Whisk together the flour, baking powder, cinnamon, nutmeg, ginger, and salt. This mix gives the waffles their warm spice flavor. In another bowl, combine the wet ingredients. Mix the pumpkin puree, eggs, brown sugar, milk, and melted butter until smooth. Now, pour the wet mix into the dry mix. Gently fold them together until just combined. Don't worry if there are a few lumps; it’s okay! Now it’s time to cook! Pour about 1/2 cup of batter into the preheated waffle iron. Close the lid and let it cook until golden brown and crispy. This usually takes around 3-5 minutes, but check your iron's instructions. Repeat until all the batter is used. The smell will be amazing! While the waffles cook, let's make the brown butter syrup. Start by melting the butter in a saucepan over medium heat. Watch it closely as it turns golden brown. This step takes about 3-5 minutes. The nutty smell means it’s ready! Once browned, take the pan off the heat. Stir in the maple syrup and cinnamon. Mix well and set aside to cool slightly. This syrup pairs perfectly with your waffles. For the full recipe, check out the details above. Enjoy your delicious spiced pumpkin waffles! To make the best spiced pumpkin waffles, follow some simple tips. First, avoid overmixing the batter. If you mix too much, your waffles can turn out tough. Instead, mix until just combined. A few lumps are okay! Second, always use a preheated waffle iron. A hot iron helps your waffles become crispy and golden brown. When it's time to serve, stack your waffles high. You can sprinkle some cinnamon on top for a warm touch. A dollop of whipped cream adds a creamy finish. Want to add more flavor? Toss on some chopped pecans or walnuts. These give a nice crunch and extra taste. You can switch out some ingredients for a healthier twist. Try using whole wheat flour or gluten-free flour instead of all-purpose flour. This makes the waffles more nutritious. You can also play with spices. Add cloves or allspice for a unique flavor. This gives your waffles a special touch and keeps things interesting. {{image_2}} Want to mix things up? Adding chocolate chips to your pumpkin waffles makes them sweet and fun. The little bursts of chocolate add joy to every bite. You can also toss in cranberries or walnuts. These ingredients add a nice crunch and a tart flavor that contrasts the sweet pumpkin. Both options are perfect for a cozy fall breakfast. If you want to make these waffles vegan, swap the eggs and milk for plant-based options. Try using flax eggs or applesauce as a binder. For milk, almond or oat milk works well. You can also use sugar substitutes for a low-calorie version. Options like stevia or coconut sugar give you sweetness without the extra calories. To make your meal even better, serve the waffles with fresh fruit. Sliced bananas or berries add a burst of flavor and color. You could also include a yogurt dip, which adds creaminess. Pair your waffles with a warm drink, like chai or hot cocoa. These drinks keep you warm and add to the cozy vibe. Enjoy your tasty treat! You can store leftover waffles in the fridge for up to 3 days. Place them in an airtight container to keep them fresh. When you're ready to enjoy them, reheat in the toaster or oven for the best results. This way, they stay crispy and delicious. Freezing these waffles is a great option. First, cook them and then lay them flat on a baking sheet. Separate each waffle with parchment paper to avoid sticking. Once frozen, transfer them to a freezer bag. You can reheat them straight from frozen. Use the toaster for a crispy finish or microwave for a quick warm-up. The brown butter syrup can be stored in the fridge for up to a week. Let it cool before pouring it into a jar. When you want to use it again, reheat gently in a saucepan or microwave. This syrup will add a sweet touch to your waffles every time! For the full recipe, check the earlier section. Cooking time varies by waffle iron; generally 3-5 minutes is ideal. You want to check the color. The waffles should be golden brown. If your waffles are not brown after 5 minutes, you might need to adjust your iron's settings. Yes, canned pumpkin puree is perfect for these waffles. It saves time and gives great flavor. Just make sure you use plain pumpkin puree, not pumpkin pie filling. The filling has added sugar and spices that may change the taste. Ensure the waffle iron is preheated well and do not overmix the batter. Overmixing can make the waffles tough. A few lumps in the batter are fine. The preheated iron helps create a nice crispy outside. For extra crunch, you can add a bit of cornstarch to your flour mix. Enjoy the texture! For the full recipe, check [Full Recipe]. These pumpkin waffles combine simple dry and wet ingredients for a delicious treat. You prepare a rich brown butter syrup to top them off. I shared tips for perfecting your waffles and offered fun variations. You can store leftovers easily or even freeze them for later. Enjoy experimenting with toppings or dietary swaps. These waffles are more than a meal; they bring joy and comfort. Now, gather your ingredients and start making some homemade fun!](https://stirredrecipes.com/wp-content/uploads/2025/07/80977165-b6c0-4977-ba58-e45c55d9ccf0.webp)
Spiced Pumpkin Waffles with Brown Butter Syrup Delight
Get ready to impress your taste buds with my Spiced Pumpkin Waffles with Brown Butter Syrup! These warm, fluffy waffles packed with seasonal spices are
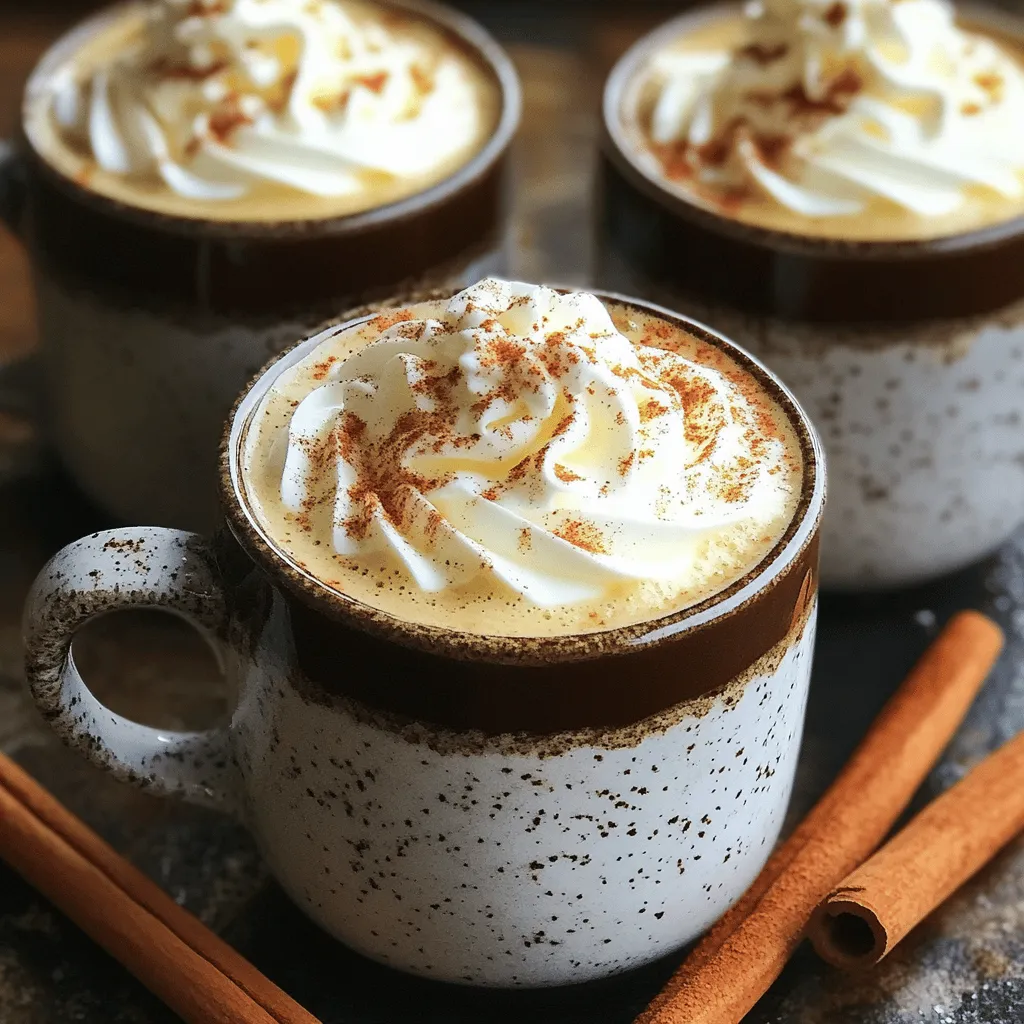
Homemade Cinnamon Coffee Flavorful and Easy Recipe
Want to spice up your morning routine? Homemade cinnamon coffee is both flavorful and simple to make! This cozy drink brings warmth and comfort to
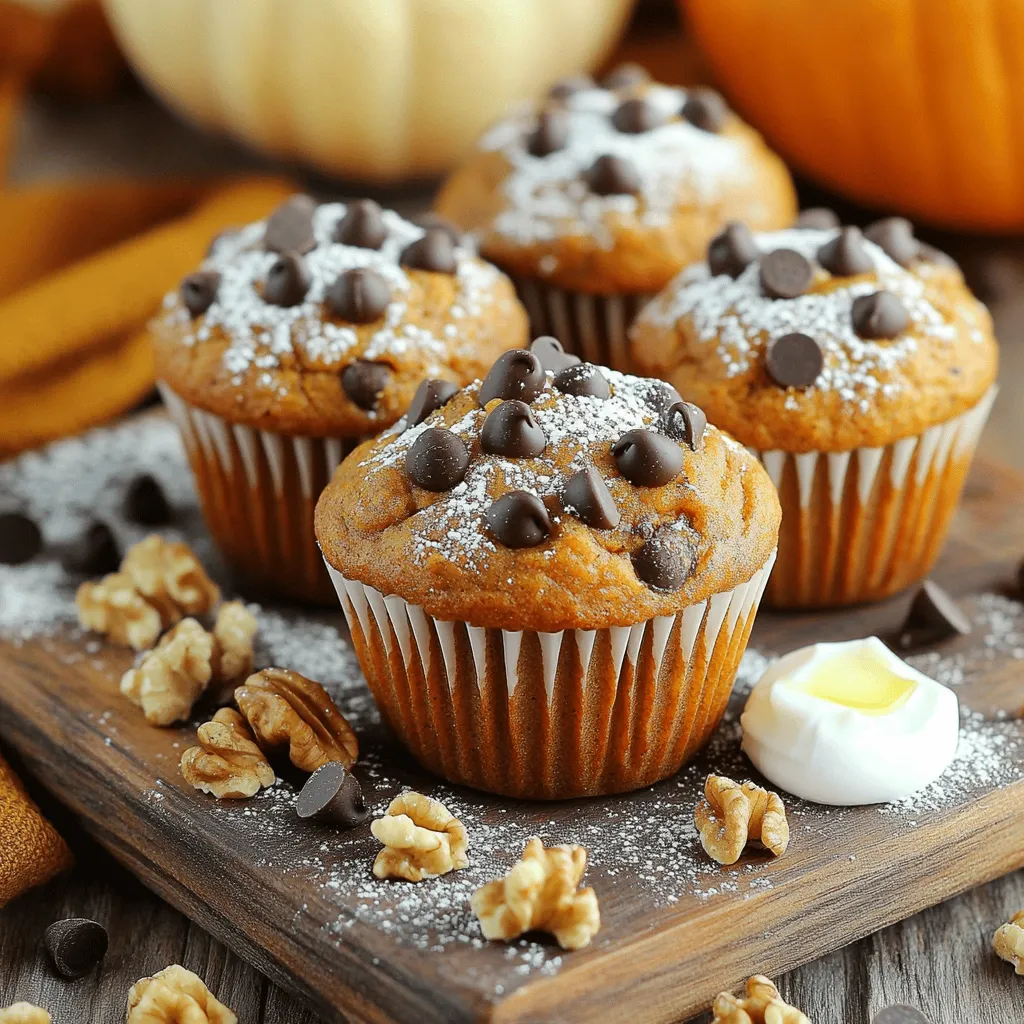
![To make moist pumpkin banana muffins, gather these ingredients: - 1 cup mashed ripe bananas (about 2 medium bananas) - 1 cup canned pumpkin puree - 1/2 cup vegetable oil - 1/2 cup brown sugar, packed - 1/4 cup granulated sugar - 2 large eggs - 1 teaspoon vanilla extract - 1 1/2 cups all-purpose flour - 1 teaspoon baking soda - 1/2 teaspoon baking powder - 1 teaspoon ground cinnamon - 1/2 teaspoon ground nutmeg - 1/2 teaspoon salt - 1/2 cup chopped walnuts or pecans (optional) - 1/2 cup chocolate chips (optional) When measuring ingredients, precision matters. Here’s a quick guide: - Use a dry measuring cup for flour and sugar. - Use a liquid measuring cup for oil and pumpkin puree. - Level off dry ingredients with a straight edge to avoid excess. - For mashed bananas, press them down in the cup, but don’t pack them too tightly. You can customize these muffins to suit your taste. Here are some ideas: - Swap vegetable oil for melted coconut oil for a different flavor. - Use honey or maple syrup instead of granulated sugar for a natural sweetener. - Add in 1/2 cup of dried fruit like raisins or cranberries for extra sweetness. - If you want a nut-free option, skip the nuts or replace them with seeds like sunflower or pumpkin seeds. These choices allow you to create your perfect moist pumpkin banana muffins. For the full recipe, check out the complete instructions. Start by preheating your oven to 350°F (175°C). This step is key for even baking. Next, grab a large bowl. Here, combine one cup of mashed ripe bananas, which is about two medium bananas, with one cup of canned pumpkin puree. Add half a cup of vegetable oil, half a cup of packed brown sugar, and a quarter cup of granulated sugar. Then, crack in two large eggs and pour in one teaspoon of vanilla extract. Whisk everything together until it’s smooth and well mixed. This mixture is where the magic begins! In a separate bowl, measure out one and a half cups of all-purpose flour. Add one teaspoon of baking soda, half a teaspoon of baking powder, one teaspoon of ground cinnamon, half a teaspoon of ground nutmeg, and half a teaspoon of salt. Whisk these dry ingredients together. This mix brings flavor and helps your muffins rise nicely. Now, it’s time to combine the wet and dry mixtures. Slowly add the dry mix into the wet bowl. Stir gently as you combine them. Be careful not to overmix! The batter should be slightly lumpy. If you want to add extras, like half a cup of chopped walnuts or pecans and half a cup of chocolate chips, fold them in now. This adds great texture and flavor. Spoon the batter into your prepared muffin tin. Fill each cup about two-thirds full. This gives them room to rise. Place the tin in your preheated oven and bake for 18 to 22 minutes. Check if they are done by inserting a toothpick in the center of a muffin. If it comes out clean, they are ready! Let the muffins cool in the tin for about five minutes, then transfer them to a wire rack. Enjoy them warm, drizzled with honey or maple syrup for a special treat. For the full recipe, refer to the earlier section. To make your muffins moist, use ripe bananas and canned pumpkin. Ripe bananas have more natural sugars, which add sweetness and moisture. Canned pumpkin puree brings in extra moisture and flavor. You can also use oil instead of butter. Oil keeps muffins soft and tender. Another tip is to avoid overbaking. Keep an eye on your muffins and remove them when a toothpick comes out clean. Mixing is key to great muffins. Start by combining wet ingredients in one bowl and dry ingredients in another. This helps you avoid overmixing. When you mix them together, stir gently until just combined. It's okay if the batter is lumpy. Lumpy batter makes for light, fluffy muffins. If you want to add nuts or chocolate chips, fold them in at the end. After baking, let the muffins cool in the tin for five minutes. This helps them set. Then, transfer them to a wire rack. Cooling completely helps keep them soft. Store your muffins in an airtight container. They stay fresh for up to three days at room temperature. For longer storage, freeze them. Just wrap them well to prevent freezer burn. Reheat them in the microwave for a quick warm-up. For the full recipe, check out the section above. {{image_2}} You can change the flavors of your muffins easily. Try adding peanut butter for a nutty taste. Swap in applesauce to make them even more moist. You can also use different spices, like ginger or allspice, for a unique twist. If you love chocolate, add cocoa powder for a rich flavor. Each choice brings a fun new taste to the muffins. Making these muffins gluten-free is simple. Use a gluten-free flour blend instead of all-purpose flour. This keeps the texture light and fluffy. For vegan muffins, replace the eggs with flaxseed meal. Mix one tablespoon of flaxseed meal with three tablespoons of water. Let it sit for a few minutes until it thickens. You can also use a plant-based oil instead of vegetable oil. These swaps make the muffins fit many diets. Seasonal add-ins can make these muffins special. In fall, add more cinnamon and nutmeg for warmth. Dried cranberries or raisins can add a sweet touch. During summer, fresh blueberries or chopped apples bring freshness. In winter, consider adding chopped nuts or even a hint of orange zest. Each of these options makes the muffins fun and festive. With these variations, you can enjoy Moist Pumpkin Banana Muffins in many ways. For a complete guide, check the Full Recipe. Store your leftover muffins in an airtight container. This keeps them fresh and moist. You can leave them at room temperature for up to three days. If you want to keep them longer, refrigerate them. Just know that refrigeration can change their texture a bit. To freeze your muffins, let them cool completely first. Then, wrap each muffin tightly in plastic wrap. Place them in a freezer-safe bag or container. You can freeze muffins for up to three months. When you are ready to eat them, just take them out and let them thaw at room temperature. To reheat your muffins, you can use the microwave or the oven. For the microwave, heat each muffin for about 15-20 seconds. For the oven, preheat it to 350°F (175°C). Place the muffins on a baking sheet and heat for about 5-10 minutes. This warms them nicely and helps restore some moisture. Enjoy your muffins warm for the best taste! To keep your muffins fluffy, don't overmix the batter. Mix until the dry and wet ingredients just blend. This keeps air pockets in the batter. Also, use fresh baking soda and baking powder for the best rise. Yes, you can use fresh pumpkins! First, cook the pumpkin until soft, then puree it. Make sure to drain excess water. Canned pumpkin is smooth and convenient, but fresh gives a unique taste. To mash bananas, use a fork or a potato masher. Aim for a smooth but slightly chunky texture. This helps the bananas blend well without turning into liquid. Ripe bananas work best, as they are sweeter and softer. To boost flavor, add spices like ginger or cloves. You can also mix in vanilla extract or citrus zest. Adding chocolate chips or nuts brings extra crunch and taste. Experiment until you find your favorite blend! You can add toppings like streusel, nuts, or seeds. Drizzling honey or maple syrup adds sweetness. For a fun twist, sprinkle powdered sugar on top. These add flavor and a nice look to your muffins. For the complete recipe, check out the [Full Recipe]. This article covered key steps to make great muffins. We went over ingredients, cooking tips, and variations. You learned how to mix and bake muffins for the best results. Remember to focus on moisture and flavor with optional add-ins. Proper storage helps keep your muffins fresh. Enjoy experimenting with new flavors and tips. With practice, your muffin skills will shine. Now, it's time to bake your perfect batch!](https://stirredrecipes.com/wp-content/uploads/2025/07/ba6e30d6-acfd-48ed-a154-7015bba57716.webp)
Moist Pumpkin Banana Muffins Easy and Tasty Recipe
Are you ready to bake something delicious? These Moist Pumpkin Banana Muffins are a perfect treat. They combine sweet bananas and rich pumpkin for a
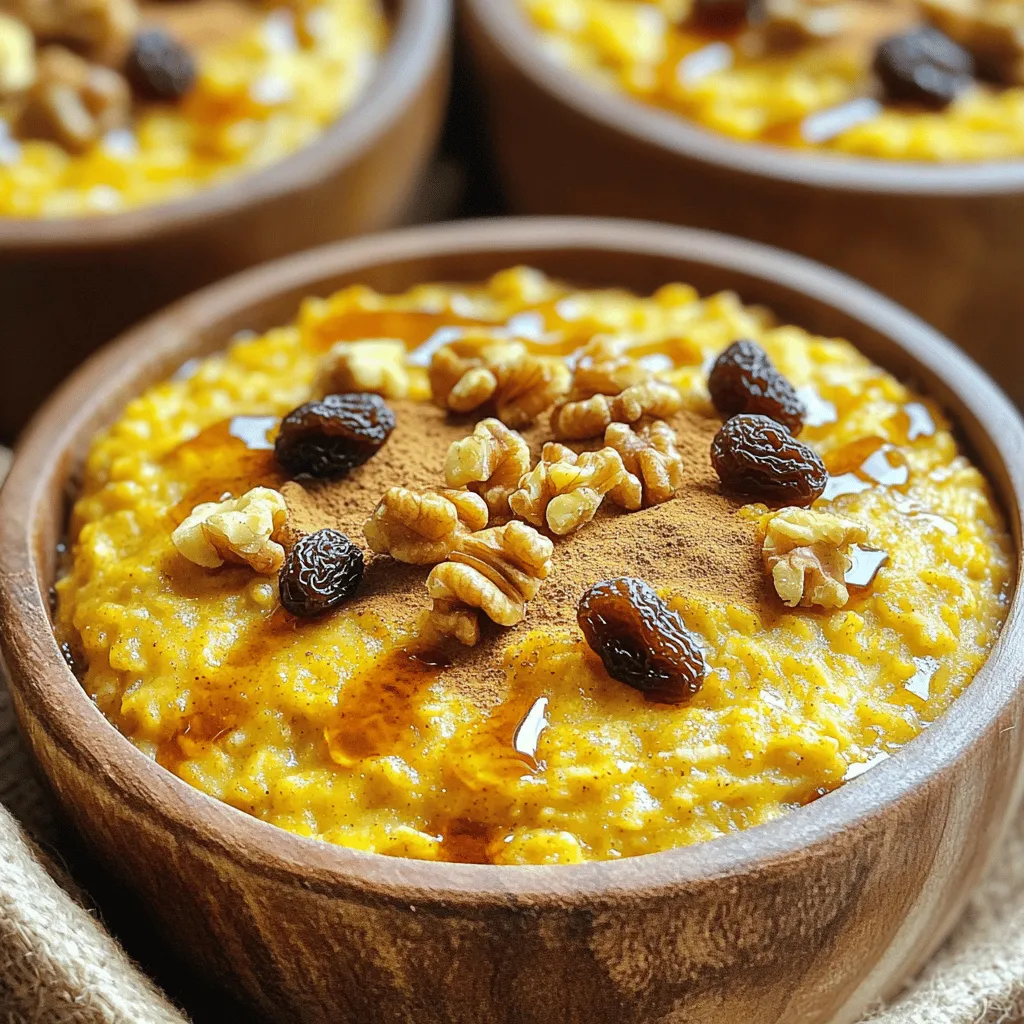
Pumpkin Baked Oatmeal Nourishing and Simple Recipe
Are you ready for a warm, hearty breakfast that’s both easy and nourishing? My Pumpkin Baked Oatmeal is perfect for chilly mornings or any time
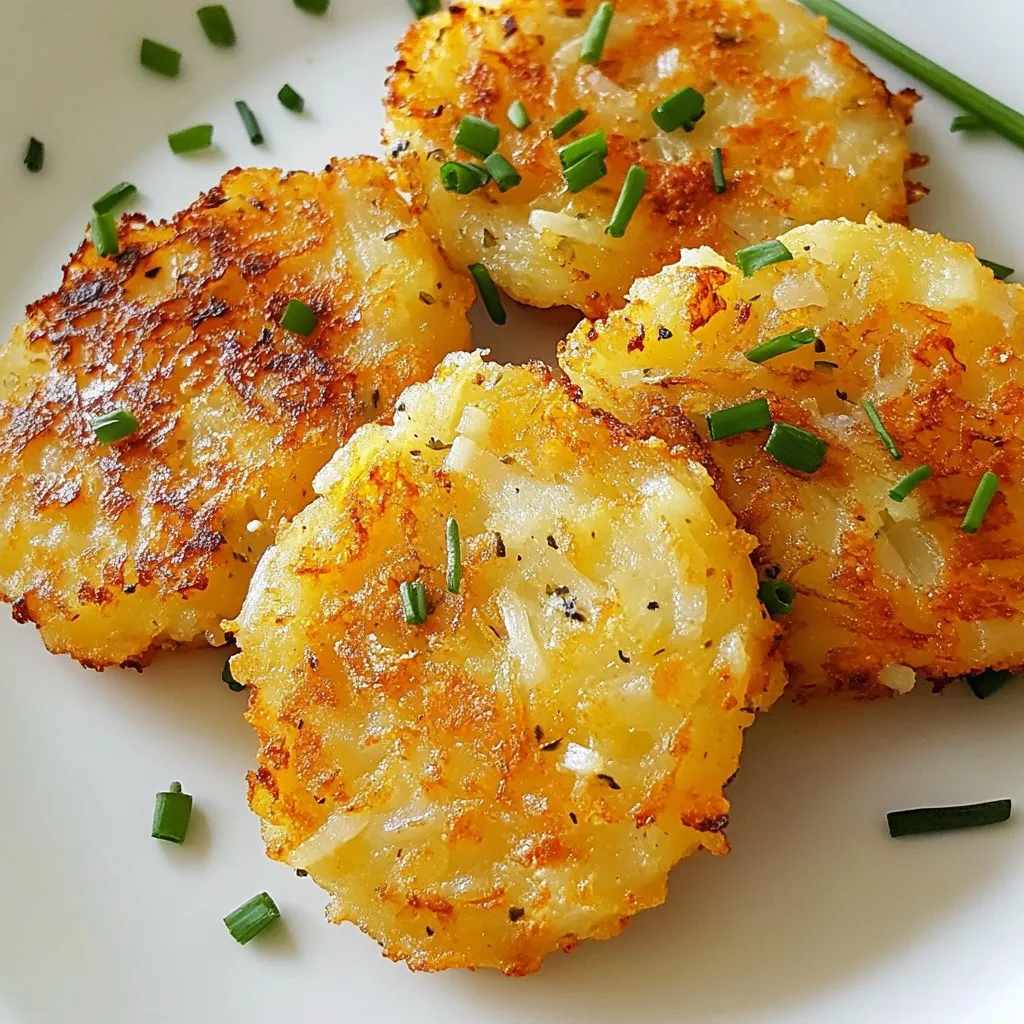
Crispy Low Calorie Hash Browns Easy and Healthy Dish
Craving crispy hash browns without the guilt? You’re in the right place! These low-calorie hash browns are easy to make and pack a crunch that
Gingerbread Oatmilk Chai Tea Latte Cozy and Creamy Drink
Warm up this season with a Gingerbread Oatmilk Chai Tea Latte that’s cozy and creamy! This perfect blend of chai, spices, and oat milk creates
Pumpkin Protein Muffins Tasty and Nutritious Treat
Are you ready to enjoy a tasty and nutritious treat? Pumpkin protein muffins are your answer! Packed with flavor and wholesome ingredients, these muffins are
. First, I preheat the oven to 350°F (175°C). This step is crucial for even baking. Next, I line a muffin tin with paper liners. You can also use cooking spray on the tin. Grating the zucchini is next. I use one medium zucchini, which gives about one cup of grated zucchini. Make sure to squeeze out extra moisture from the zucchini. This keeps the muffins from being too wet. In a large mixing bowl, I combine the grated zucchini and unsweetened applesauce. Then, I add 1/3 cup of vegetable oil or melted coconut oil. I mix in 1/2 cup of brown sugar and 1/2 cup of granulated sugar until it is smooth. Next, I add two large eggs, mixing well after each one. I also add 1 teaspoon of vanilla extract for flavor. In a separate bowl, I whisk together 1 1/2 cups of all-purpose flour, 1 teaspoon of baking powder, 1 teaspoon of baking soda, 1 teaspoon of ground cinnamon, and 1/2 teaspoon of salt. I gradually add these dry ingredients to the wet mixture. I mix until everything is just combined. Overmixing can make the muffins tough, so I am careful here. If I want extra crunch, I fold in 1/2 cup of chopped walnuts or pecans and 1/4 cup of pumpkin seeds. Now, I divide the batter evenly among the muffin cups, filling them about 2/3 full. I bake the muffins in the preheated oven for 18-22 minutes. To check if they are done, I insert a toothpick in the center. If it comes out clean, the muffins are ready. After baking, I let them cool in the tin for 5 minutes. Finally, I transfer the muffins to a wire rack to cool completely. For a lovely touch, I serve them warm with a sprinkle of powdered sugar or a dollop of cream cheese spread on top. For the full recipe, check the earlier section! To get moist muffins, use fresh zucchini. Grate it just before adding to the mix. Do not squeeze out the moisture. This helps keep your muffins soft. Applesauce adds more moisture too. Use unsweetened applesauce for the best taste. If your batter seems too thick, add a splash more applesauce. This small change makes a big difference. Use an oven thermometer to check your oven's heat. Sometimes, ovens are not accurate. Preheat your oven well before baking. Line your muffin tin with paper liners for easy removal. Fill each muffin cup about two-thirds full. This allows room for rising. Rotate the pan halfway through baking for even cooking. This tip helps all muffins bake the same. Store your muffins in an airtight container. This keeps them fresh for up to three days at room temperature. For longer storage, place them in the fridge. They will last about a week this way. You can also freeze muffins for up to three months. Wrap each muffin well in plastic wrap, then place them in a freezer bag. Thaw them in the fridge before serving. Enjoy warm muffins anytime! {{image_2}} You can make gluten-free applesauce zucchini muffins. Use a gluten-free flour blend instead of all-purpose flour. Make sure it has a good mix of starches and fibers. This keeps the muffins light and moist. You may also want to add a bit of xanthan gum. It helps with texture. Follow the same steps in the full recipe for mixing and baking. Want to add a sweet twist? Toss in some chocolate chips or your favorite dried fruits. Chocolate chips give a rich taste. Dried fruits like raisins or cranberries add chewiness. Mix in about half a cup of either option. Stir them in with the dry ingredients. This makes each muffin a delightful surprise. For a savory take, try adding herbs and cheese. You can mix in a handful of shredded cheese, like cheddar or feta. Fresh herbs like basil or chives add a great flavor. Just chop them finely and fold them into the batter. This twist turns your muffins into a savory snack. Perfect for lunch or a quick breakfast! After baking your applesauce zucchini muffins, let them cool completely. Once cool, place them in an airtight container. This helps keep them fresh. You can store them at room temperature for up to three days. For longer storage, consider the fridge. Just make sure the container seals tight. This way, your muffins stay moist and tasty. If you want to save muffins for later, freezing is a great option. Wrap each muffin in plastic wrap. Then, place them in a freezer bag. Make sure to squeeze out as much air as possible. Label the bag with the date. You can freeze the muffins for up to three months. When you need a quick snack, just pull one out! Reheating applesauce zucchini muffins is simple. You can use the microwave or an oven. For the microwave, heat for about 15-20 seconds. This warms them up nicely. If you prefer the oven, set it to 350°F (175°C). Place the muffins on a baking sheet and heat for about 5-10 minutes. This keeps them soft and delicious. Enjoy your muffins warm! Yes, you can use frozen zucchini. Just thaw it first and drain any extra water. This keeps your muffins from becoming soggy. Frozen zucchini works well because it still has great flavor. To make these muffins vegan, swap the eggs for flax eggs. Use one tablespoon of ground flaxseed mixed with three tablespoons of water for each egg. Let it sit for five minutes to thicken. You can also use a plant-based oil instead of regular oil. Applesauce adds natural sweetness without extra fat. It also provides fiber and vitamins. Zucchini is low in calories but high in water and nutrients. It adds moisture and helps keep the muffins soft. Both ingredients make these muffins a healthy choice. To check if the muffins are done, insert a toothpick into the center of one. If it comes out clean or with a few crumbs, they are ready. If the toothpick has wet batter, bake them for a few more minutes. Yes, you can make mini muffins! Just fill the mini muffin tin with the batter. Bake for about 10-15 minutes, checking for doneness with a toothpick, just like with regular muffins. Enjoy these bite-sized treats with your family! For the full recipe, check out the details above. In this post, we explored how to make delicious applesauce zucchini muffins. We covered key ingredients, optional add-ins, and substitutions for dietary needs. The step-by-step instructions ensure you mix, bake, and store them with ease. I shared tips to keep your muffins moist and fresh, plus variations to personalize your recipe. Whether you go for a sweet or savory spin, these muffins are a great choice. Enjoy baking and sharing these tasty treats!](https://stirredrecipes.com/wp-content/uploads/2025/07/74460fb3-83b5-4a38-93ec-72a64fd93949.webp)
Applesauce Zucchini Muffins Easy and Moist Recipe
Are you ready to bake something delicious and healthy? These Applesauce Zucchini Muffins are easy to make and moist, perfect for breakfast or a snack.