Breakfast

Low-Carb Breakfast Burrito Bowl Simple and Tasty Meal
Start your day off right with my Low-Carb Breakfast Burrito Bowl—it’s nutritious, simple, and full of flavor! This recipe uses easy ingredients like riced cauliflower
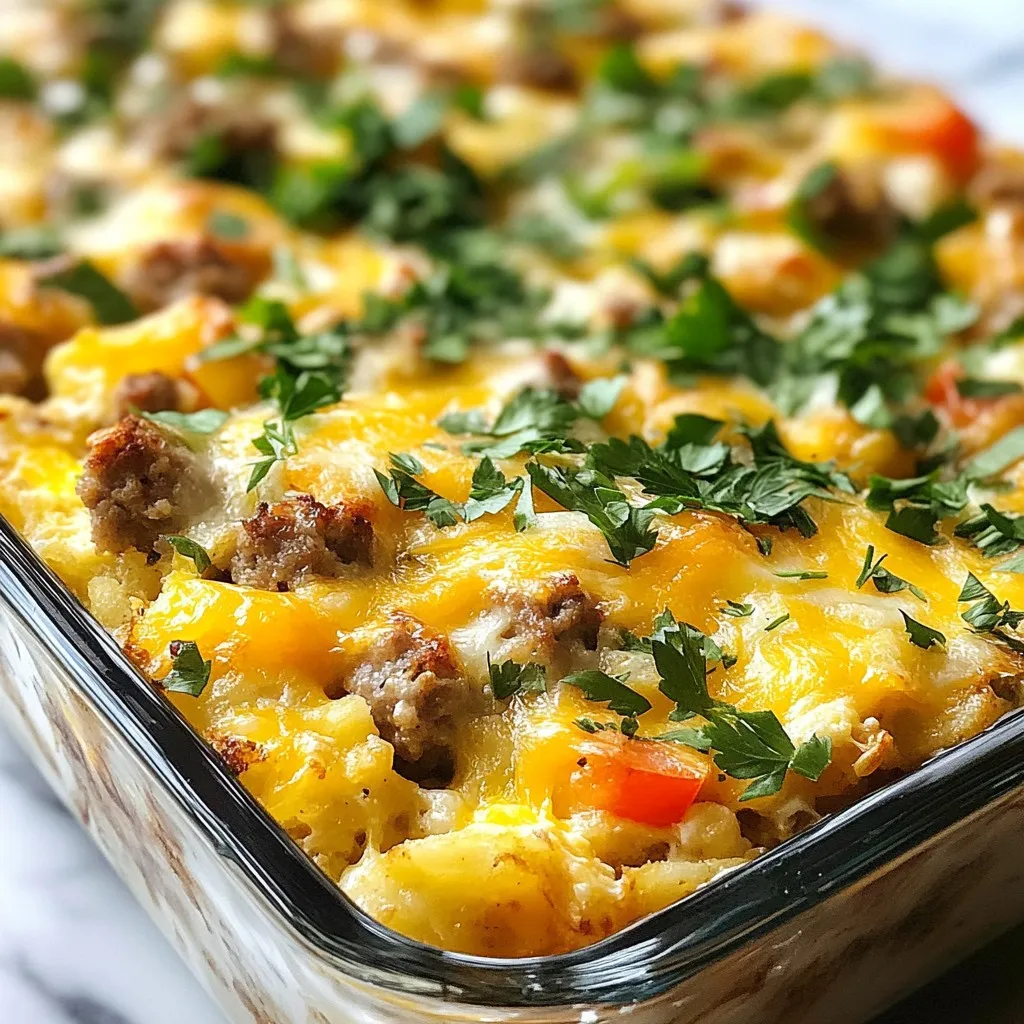
Crack Breakfast Casserole Tasty and Easy Recipe
Looking for a delicious and simple breakfast option? Let me introduce you to my Crack Breakfast Casserole. This dish is packed with eggs, sausage, and
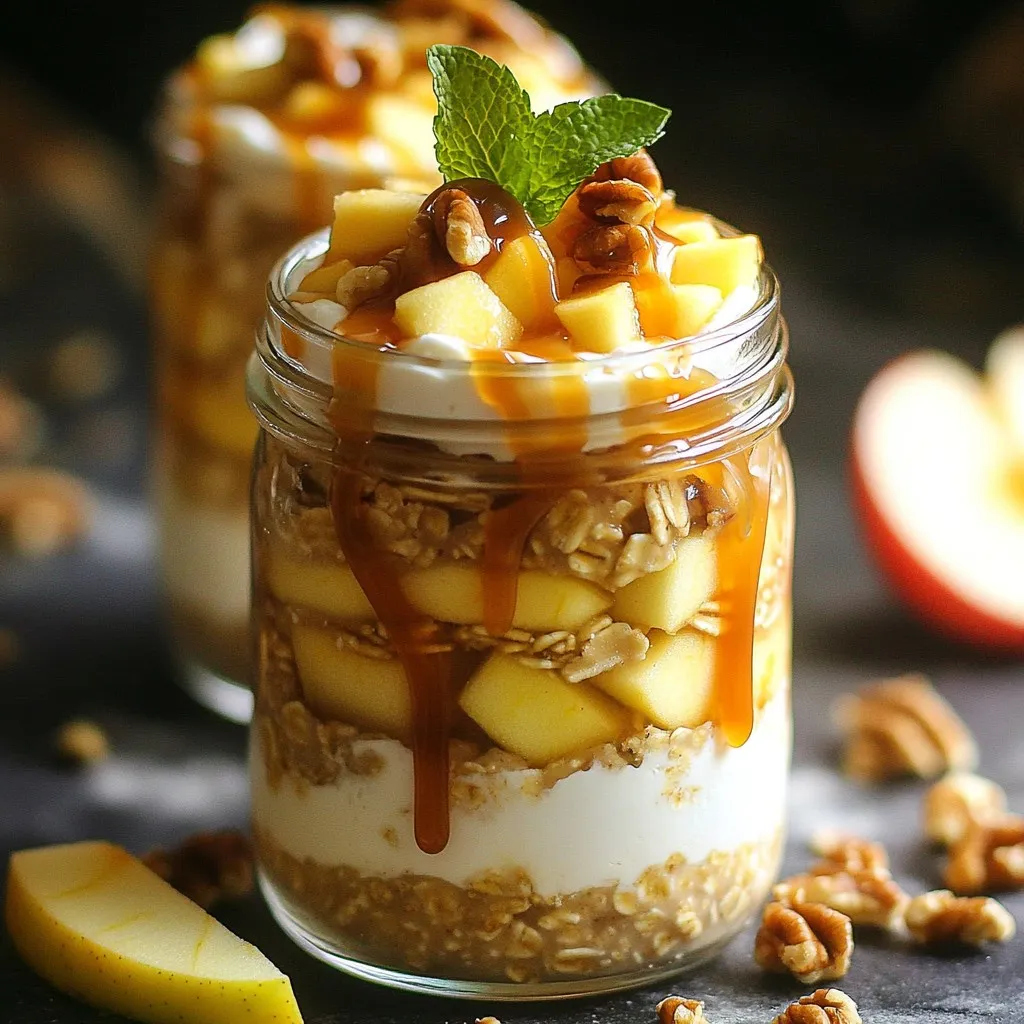
Caramel Apple Cheesecake Overnight Oats Delight
Are you ready to whip up a delicious breakfast that tastes like dessert? My Caramel Apple Cheesecake Overnight Oats Delight is the perfect blend of
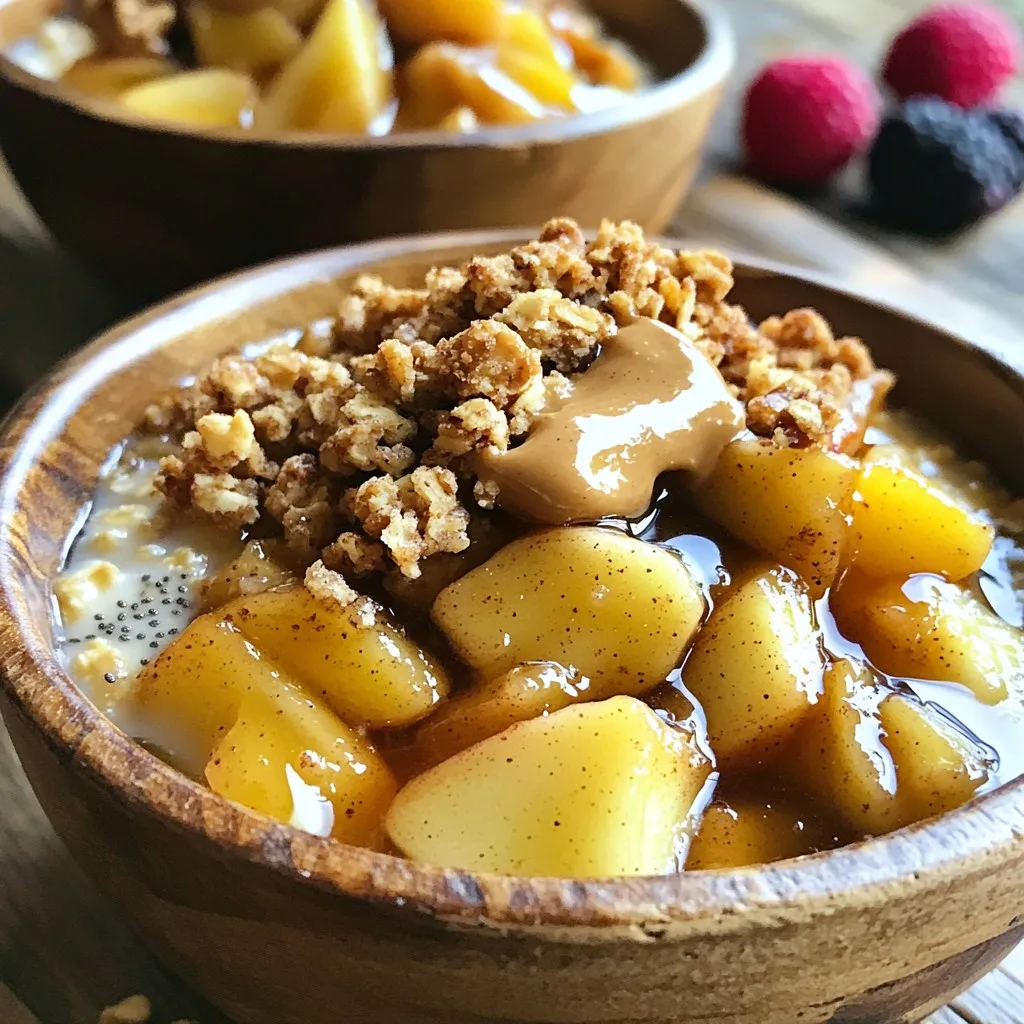
Cinnamon Apple Crumble Breakfast Bowl Delightful Start
Wake up to a delicious treat with my Cinnamon Apple Crumble Breakfast Bowl! This hearty dish combines sweet apples, warm spices, and creamy oats for
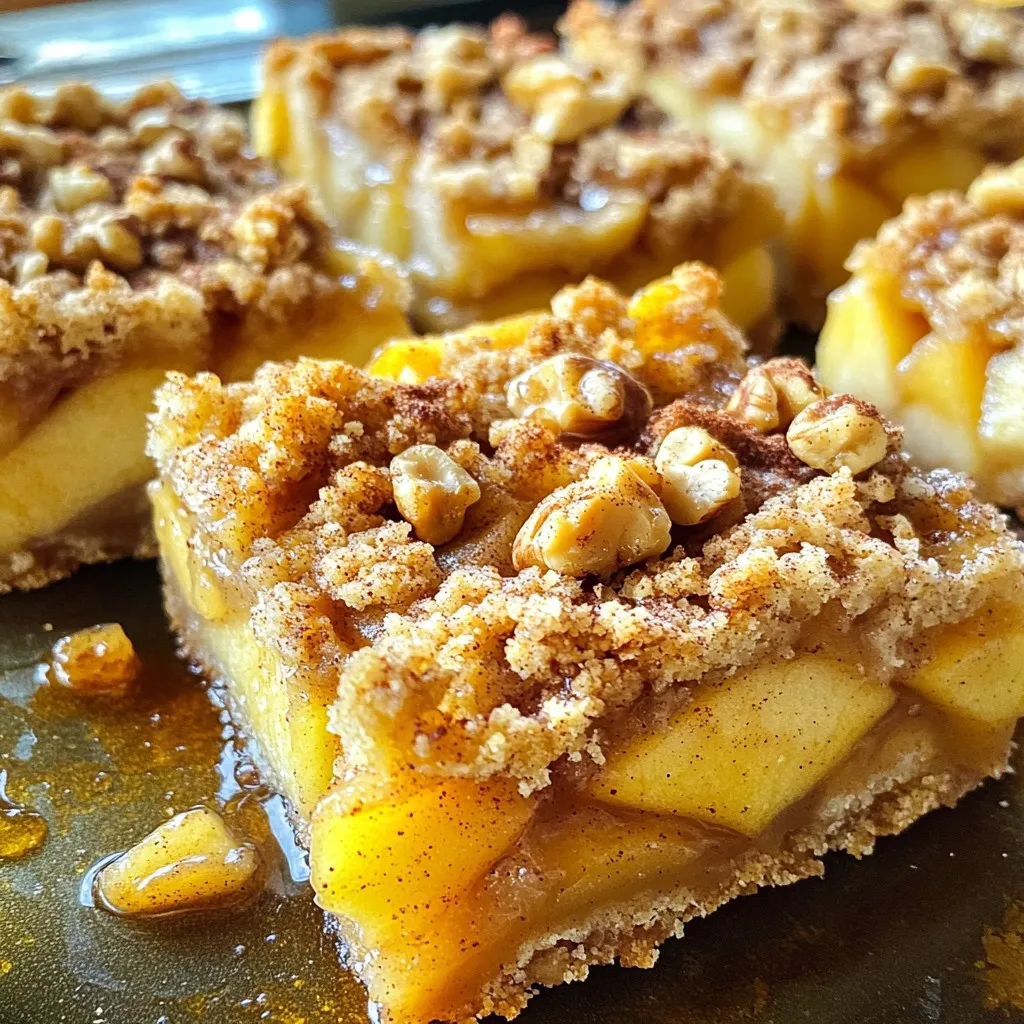
Baked Apple Crumble Breakfast Bars Simple and Tasty
Imagine waking up to the sweet aroma of baked apple crumble breakfast bars! These tasty treats combine warm, spiced apples with a crispy oat topping.
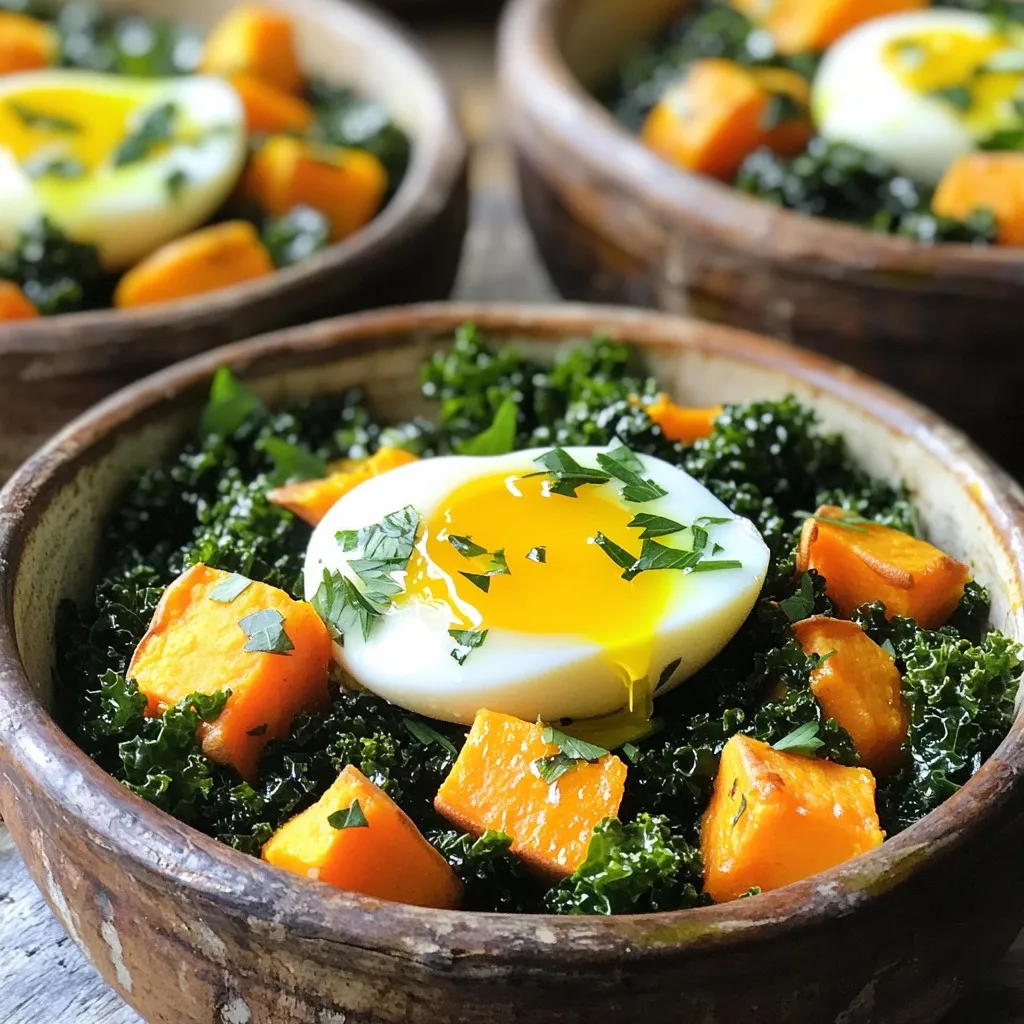
Savory Sweet Potato & Kale Breakfast Hash Recipe
Looking for a hearty breakfast that’s packed with flavor? My Savory Sweet Potato & Kale Breakfast Hash is the answer! This recipe is simple, healthy,
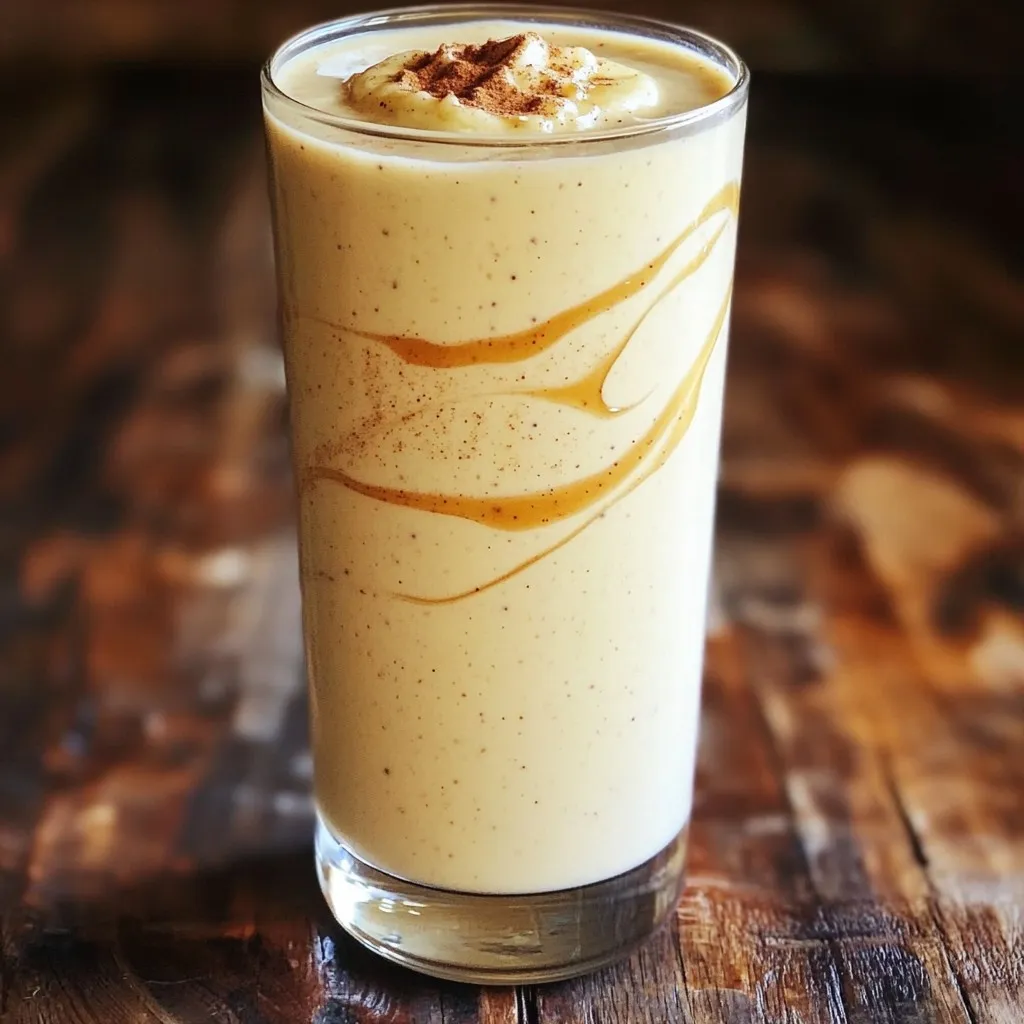
Protein Cinnamon Roll Smoothie Delightful and Nutritious
Are you ready to enjoy a delicious and nutritious treat? The Protein Cinnamon Roll Smoothie is here to satisfy your cravings while boosting your health.

Creamy Lemon Ricotta Pancake Bites Recipe Delight
If you’re craving a fresh, zesty twist on breakfast, you’ve found it! My Creamy Lemon Ricotta Pancake Bites are not just delicious—they’re quick and easy

Brown Sugar Cinnamon Latte Creamy and Sweet Delight
Craving a cozy drink that warms your soul? Try my Brown Sugar Cinnamon Latte! This creamy and sweet delight combines rich espresso, velvety milk, and
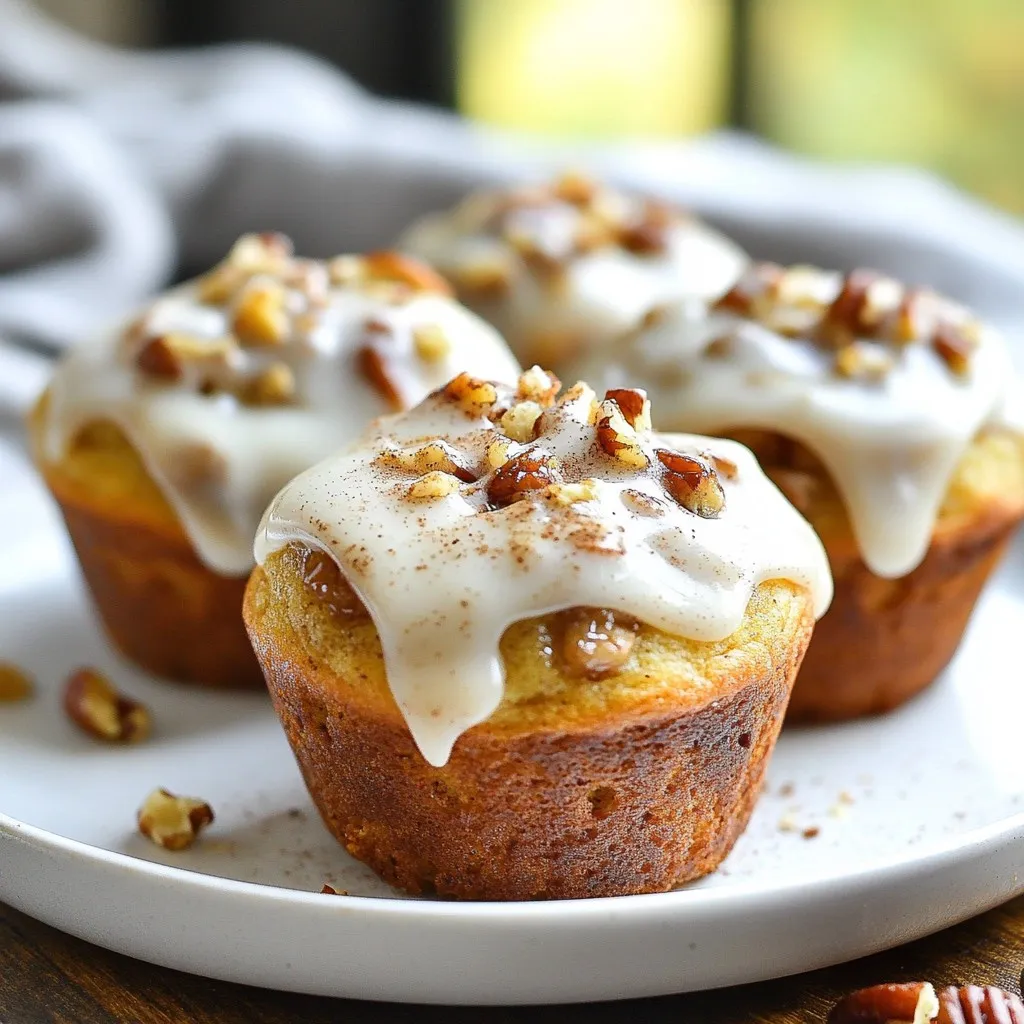
Cinnamon Roll Protein Muffins Healthy and Delicious Treat
Craving a sweet treat that won’t ruin your healthy eating goals? Look no further! These Cinnamon Roll Protein Muffins are both delicious and nutritious. Packed