Appetizers

- 2 medium zucchinis, grated - 1 teaspoon salt - 1/2 cup all-purpose flour - 1/4 cup cornmeal - 1/4 cup grated Parmesan cheese - 1 large egg - 2 green onions, finely chopped - 2 cloves garlic, minced - 1/2 teaspoon black pepper - 1/2 teaspoon paprika - Olive oil for frying - Optional: Fresh herbs (like parsley or basil) for garnish These ingredients come together to create crispy zucchini fritters that are not just tasty but also fun to make. The zucchinis are the star here. They provide a fresh taste and a lovely texture. I love using medium zucchinis because they have the right amount of moisture for this recipe. The salt is important. It helps draw out the water from the zucchinis, making the fritters crispy. After grating the zucchinis, I let them sit with salt for about ten minutes, then wring them to remove extra moisture. This step is key to avoiding soggy fritters. The flour and cornmeal mix gives the fritters their structure. The flour binds everything, while the cornmeal adds a nice crunch. Parmesan cheese offers a savory flavor that makes each bite delightful. The egg acts as a binder, bringing all the ingredients together. Green onions and garlic add a punch of flavor. Black pepper and paprika bring warmth and depth. Finally, using olive oil to fry the fritters gives them a golden, crispy exterior. These ingredients are simple, yet they come together to create a delicious dish. You can find the full recipe for crispy zucchini fritters, which details every step to create this tasty delight. First, you need to grate the zucchinis. Use a box grater or a food processor for ease. Place the grated zucchini in a clean kitchen towel. Sprinkle one teaspoon of salt over it. Let it sit for about ten minutes. This helps draw out moisture. After ten minutes, wring out the towel. Remove as much liquid as you can. This step is important. Too much moisture makes the fritters soggy. You want a dry mixture for crispiness. In a large mixing bowl, combine the drained zucchini with the following ingredients: - 1/2 cup all-purpose flour - 1/4 cup cornmeal - 1/4 cup grated Parmesan cheese - 1 large egg - 2 finely chopped green onions - 2 minced garlic cloves - 1/2 teaspoon black pepper - 1/2 teaspoon paprika Stir until all the ingredients mix well. You want a batter-like consistency. If it feels too wet, add a bit more flour. If too dry, add a touch of water. Heat a non-stick skillet over medium heat. Drizzle olive oil to coat the bottom. Once the oil is hot, scoop about two tablespoons of the zucchini mixture. Drop it into the pan. Gently flatten each fritter with the back of your spatula. Fry each fritter for about three to four minutes on each side. Look for a golden brown color and a crispy texture. If needed, add more oil between batches. Once cooked, place the fritters on a plate lined with paper towels. This helps absorb any extra oil. To get that golden crunch, choose the right oil. I recommend olive oil for its flavor and heat tolerance. Heat the oil until it shimmers. This helps the fritters fry evenly and stay crispy. Managing the temperature is key. Keep your skillet on medium heat. If it’s too hot, the outside cooks fast, but the inside stays raw. If it’s too low, the fritters absorb oil and become greasy. Dips and sauces can elevate your fritters. Try a tangy yogurt dip or a zesty salsa. Both add freshness to each bite. For garnishing, sprinkle fresh herbs like parsley or basil. A bright green touch makes the dish look appealing. You can also add a squeeze of lemon for zest. One common mistake is over-salting the zucchini. Too much salt draws out water but can make the fritters too salty. Use just one teaspoon for the best flavor. Another mistake is not draining the zucchini enough. After salting, always wring out the water well. Excess moisture will make your fritters soggy. Remember, the drier the zucchini, the crispier the fritters. For the full recipe, check out the complete guide on crispy zucchini fritters. {{image_2}} To boost the taste of your crispy zucchini fritters, consider adding herbs and spices. Fresh herbs like parsley or basil bring brightness. You can also experiment with dried herbs such as oregano or thyme. Adding a pinch of cayenne can give a fun kick. Different cheeses can also enhance the flavor. While Parmesan adds a rich taste, you might try feta or goat cheese for a tangy twist. Mixing cheeses creates a unique flavor profile that makes your fritters special. If you need gluten-free options, replace all-purpose flour with almond flour or chickpea flour. Both options give great texture and flavor without gluten. For a vegan version, substitute the egg with a flaxseed egg. Mix one tablespoon of ground flaxseed with three tablespoons of water. Let it sit for a few minutes until it thickens. This works well to bind the fritters together. You can serve zucchini fritters in fun ways. Try making zucchini fritter tacos. Use small tortillas and fill them with fritters, avocado, and salsa for a tasty bite. Another idea is to toss your fritters in a salad. Slice them up and add them to mixed greens, tomatoes, and a light vinaigrette. This adds crunch and flavor to your meal. For the full recipe, check out the detailed instructions above. To store your crispy zucchini fritters, let them cool completely. Place them in a single layer on a plate. This helps prevent them from getting soggy. Use an airtight container to keep them fresh. Glass containers work well. You can also use plastic containers, but make sure they seal tightly. When it's time to enjoy your leftovers, reheating is key. Use the oven for the best results. Preheat it to 350°F (175°C). Place the fritters on a baking sheet. This method keeps them crispy. Heat them for about 10 minutes, flipping them halfway. You can also use a skillet on medium heat for a few minutes. Just add a little olive oil to help maintain the crunch. If you want to freeze your fritters, first let them cool completely. Arrange them in a single layer on a baking sheet. Freeze them for about an hour until solid. Then, transfer them to a freezer-safe bag. This way, they won't stick together. When you're ready to eat, thaw them in the fridge overnight. Reheat them in the oven to restore that crispy texture. Enjoy your delicious fritters anytime! For the full recipe, check the earlier section. To keep your zucchini fritters crispy, moisture control is key. Start by salting the grated zucchini. This draws out extra water. Let the zucchini sit for about 10 minutes. After that, use a clean kitchen towel to squeeze out the moisture. The drier your zucchini, the crispier your fritters will be. Yes, you can bake zucchini fritters! Preheat your oven to 400°F (200°C). Line a baking sheet with parchment paper. Shape the fritters and place them on the sheet. Lightly spray or brush them with olive oil. Bake for about 20-25 minutes, flipping halfway. This method gives you a healthier option, though they may not be as crispy as fried fritters. These fritters pair well with many sides. Try serving them with a fresh salad. A yogurt dip or tzatziki sauce adds a nice touch. You can also serve them with a spicy marinara sauce for a kick. Experiment with different sauces to find your favorite pairing! Crispy zucchini fritters stay fresh for about 3 days in the fridge. Store them in an airtight container. To keep them crispy, place a paper towel inside the container to absorb moisture. Reheat them in a skillet for the best texture, and enjoy! For the full recipe, check the earlier section. Zucchini fritters are easy and fun to make. We covered the key ingredients, mixing techniques, and cooking tips for perfect crispiness. I shared variations and storage advice to keep your fritters fresh and tasty. Remember, moisture control is crucial to avoid soggy fritters. Whether you choose to fry or bake, these fritters are a delicious treat. Explore your creativity with flavors and serving ideas. Enjoy making and sharing these simple yet delightful fritters in your kitchen.
Crispy Zucchini Fritters Simple and Tasty Delight
Zucchini fritters are a crispy, tasty delight that can win over any palate. With just a few simple ingredients, you’ll learn to transform fresh zucchini
- 2 medium zucchinis, thinly sliced - 1 cup grated Parmesan cheese - 1 cup breadcrumbs (preferably whole wheat) - 2 teaspoons garlic powder - 1 teaspoon onion powder - 1 teaspoon dried oregano - ½ teaspoon salt - ½ teaspoon black pepper - 1 large egg - Cooking spray (for air frying) - Fresh herbs like basil or parsley - Spices suggestions - Air fryer - Shallow bowls - Cooking spray For this recipe, I love using fresh zucchinis. They add a nice crunch. Using whole wheat breadcrumbs gives a great texture. Parmesan cheese brings a savory flavor that makes these chips irresistible. If you want to boost the taste, fresh herbs like basil or parsley work wonders. You can also add spices like smoked paprika or cayenne for some heat. You'll need an air fryer to get that perfect crisp. Shallow bowls help with the breading process. Cooking spray is key to achieving a golden finish. Check out the [Full Recipe] for more details on how to make these crispy delights! - Washing and drying: Start by washing the zucchinis under cool water. Make sure you remove any dirt or grit. Once clean, dry them using a towel. This step helps the coating stick better. - Trimming and slicing: Trim both ends of the zucchinis. Slice them into thin rounds, about 1/8 inch thick. Thin slices will cook evenly and become crispier. - Mixing cheese and breadcrumbs: In a shallow bowl, combine 1 cup of grated Parmesan cheese and 1 cup of breadcrumbs. Add 2 teaspoons of garlic powder, 1 teaspoon of onion powder, 1 teaspoon of dried oregano, ½ teaspoon of salt, and ½ teaspoon of black pepper. Mix everything well to ensure even flavor. - Beating the egg: In another bowl, beat one large egg until it's smooth. This egg will help the coating stick to the zucchini. - Preheating the air fryer: Preheat your air fryer for about 5 minutes. Set it to 370°F (190°C). This step helps achieve a nice crunch. - Coating and arranging zucchini: Dip each zucchini slice into the egg first. Let any extra egg drip off. Then, coat it in the breadcrumb mixture. Press gently to help it stick. Place the coated chips in a single layer in the air fryer basket. Do not overcrowd them. - Cooking time and temperature: Lightly spray the tops of the chips with cooking spray. Air fry the zucchini chips for 10-12 minutes. Flip them halfway through for even cooking. They should be golden and crispy when done. Feel free to explore the [Full Recipe] as you enjoy making these delicious chips! To get crispy zucchini chips, slice them evenly. Thin slices, about 1/8 inch, help them cook well. You want them to be uniform in size to ensure even cooking. Set your air fryer to 370°F (190°C). This temperature works best for crisping the chips without burning them. Preheat it for about 5 minutes before adding the zucchini. Avoid overcrowding the basket. If you add too many zucchini slices at once, they will steam instead of crisp. It’s better to cook in batches for the best texture. Don’t skip the egg step. Dipping the zucchini in egg helps the coating stick. This step is key for a crunchy finish. For tasty dips, marinara sauce or yogurt dip works well. Both add a nice flavor contrast to the chips. You can also add spices or herbs. Try paprika for some heat or fresh basil for a herbaceous touch. Experimenting with flavors can make your zucchini chips even more exciting. {{image_2}} You can switch Parmesan for other cheeses. Cheddar works great for a sharp flavor. Mozzarella gives a nice melt. Feta adds a salty twist. Try a blend for fun! Each cheese brings its own taste, so feel free to mix and match. This makes your zucchini chips unique and tasty. Zucchini isn’t the only veggie you can use. Eggplant makes for a delicious alternative. Slice it thin like zucchini and follow the same steps. Sweet potatoes also work well. They add a sweet crunch that pairs nicely with cheese. Experiment with your favorite vegetables for a colorful platter! Want to spice things up? Add chili powder or cayenne for a kick. You can also mix in herbs like thyme or rosemary for extra flavor. For a cheesy mix, combine different cheeses in your breadcrumb mix. These small changes can create a whole new taste experience. Enjoy creating your perfect chip! To keep your leftover zucchini chips fresh, store them in an airtight container. Allow the chips to cool completely before sealing. This step prevents moisture buildup, which can make them soggy. You can keep them in the fridge for about 3 days. For longer freshness, consider freezing. To reheat your zucchini chips and keep them crispy, use your air fryer. Preheat it to 350°F (175°C). Place the chips in a single layer and heat them for about 3 to 5 minutes. This method helps restore their crunch. Avoid using the microwave, as it will make them soft. To freeze zucchini chips, first, let them cool completely. Next, spread them in a single layer on a baking sheet. Freeze them for about an hour until firm. Afterward, transfer the chips to a freezer bag or container. When ready to enjoy, reheat directly from frozen in your air fryer for a quick snack. To make your zucchini chips crispy, there are a few key tips. First, slice the zucchini thinly, about 1/8 inch thick. This helps them cook evenly and become crispy. Make sure to dry the slices after washing. This removes excess moisture. Also, coat them well in the breadcrumb mixture. Press gently to make the coating stick. Finally, avoid overcrowding the air fryer basket. This allows hot air to circulate, ensuring crispiness. Using frozen zucchini is not the best choice for this recipe. Frozen zucchini has more moisture than fresh. This can lead to soggy chips. If you have to use frozen zucchini, thaw it first and drain excess water. Pat them dry with paper towels before coating. However, fresh zucchini works best for a crispy texture. Zucchini chips taste great with many dips. Here are some suggested options: - Marinara sauce - Greek yogurt dip - Ranch dressing - Hummus These dips enhance the flavor and add variety to your snack. Leftovers can last up to 2 days in the fridge. Store them in an airtight container to keep them fresh. If you want to keep them longer, consider freezing. However, freezing may make them less crispy when reheated. If you don’t have an air fryer, no problem! You can bake the zucchini chips in the oven. Preheat your oven to 425°F (220°C). Place the coated zucchini slices on a baking sheet lined with parchment paper. Bake for 20-25 minutes, flipping halfway through. This method will also yield crispy chips, but keep an eye on them. In this article, we discussed how to prepare delicious air fryer zucchini chips. You learned about the key ingredients, tips for crispiness, and common mistakes to avoid. I provided ways to enhance flavor and suggested storage methods for leftovers. Air frying zucchini chips is easy and fun. With the right ingredients and techniques, you can enjoy a tasty snack without guilt. Experiment with flavors, and your snacks will shine. Enjoy your cooking journey!
Crispy Air Fryer Zucchini Chips with Parmesan Recipe
Are you ready to crunch into something delicious? These Crispy Air Fryer Zucchini Chips with Parmesan are a game-changer. With a few simple ingredients, you’ll
- 4 medium zucchinis - 1 cup ricotta cheese - 1 cup shredded mozzarella cheese - 1/2 cup grated Parmesan cheese - 1 cup cherry tomatoes, halved - 1 tablespoon dried Italian herbs - 2 cloves garlic, minced - 1/2 teaspoon red pepper flakes - Salt and black pepper to taste - Olive oil for drizzling - Fresh basil for garnish (optional) Gathering the right ingredients is key to making delicious cheese stuffed zucchini boats. Start with four medium zucchinis. They should be firm and fresh. Next, you’ll need one cup of ricotta cheese. This cheese gives a creamy base to your filling. One cup of shredded mozzarella cheese adds a gooey texture that melts beautifully. You’ll also need half a cup of grated Parmesan cheese. This cheese brings a sharp flavor that makes the dish shine. For some freshness, add one cup of halved cherry tomatoes. They add color and a burst of juiciness. A tablespoon of dried Italian herbs adds depth. Mix in two cloves of minced garlic for a punch of flavor. If you want some heat, sprinkle in half a teaspoon of red pepper flakes. Don’t forget salt and black pepper to taste. Lastly, use olive oil for drizzling, which adds richness. Fresh basil can be used as a garnish to brighten the dish. If you want to follow the full recipe, check the detailed instructions above. First, preheat your oven to 375°F (190°C). This helps the zucchinis cook evenly. Next, wash the zucchinis well. Slice each zucchini in half lengthwise. Take a spoon and scoop out the center of each half. You want to create a boat shape. Don’t toss the scooped-out flesh; you will use it later in the filling. In a mixing bowl, combine the ricotta cheese, half of the mozzarella cheese, and the grated Parmesan cheese. Add the halved cherry tomatoes and the minced garlic. Then, mix in the dried Italian herbs, red pepper flakes, salt, and black pepper. Finally, add the chopped zucchini flesh you set aside. Stir gently until everything is well mixed. Now, generously fill each zucchini boat with the cheese mixture, pressing down lightly to pack it in. Arrange the stuffed zucchinis on a baking sheet lined with parchment paper. Drizzle olive oil over the top for added flavor. Sprinkle the remaining mozzarella cheese on top of each stuffed zucchini. Bake them in the preheated oven for 25-30 minutes. You want the zucchinis to be tender and the cheese to be golden and bubbly. Once done, take them out and let them cool for a few minutes. Enjoy this flavorful dish as part of your meal! For the complete recipe, check [Full Recipe]. To keep zucchini from getting soggy, salt them first. After slicing, sprinkle salt inside the boats. Let them sit for about 10-15 minutes. This draws out excess moisture. Then, pat them dry with a paper towel. You will have crispier zucchini. For a tasty cheese mixture, use fresh herbs. Basil and parsley brighten the flavors. Adding garlic enhances the taste, too. I like to mix in some red pepper flakes for a little heat. Always taste your mixture before filling the boats. Adjust salt and pepper as needed. Cheese stuffed zucchini boats pair well with a light salad. A simple arugula salad adds freshness and crunch. You can also serve them with crusty bread. This makes a great meal or side dish. For garnishes, fresh herbs are a must. Chopped parsley or basil look great on top. A drizzle of balsamic glaze adds a nice touch as well. You can even sprinkle some extra cheese for extra richness. For the full recipe, check out the Zesty Cheese Stuffed Zucchini Boats. {{image_2}} You can change the cheese in this recipe. Try goat cheese or feta. These cheeses add a tangy flavor. You can also mix in some cream cheese for a richer taste. Adding protein makes this dish heartier. Ground turkey or sausage works well. Cook the meat before mixing it with the cheese. This adds flavor and makes the meal more filling. If you want a vegan option, use dairy-free cheese. Many brands make great vegan cheese now. You can find them at most grocery stores. You can also add more veggies. Chopped spinach, bell peppers, or mushrooms can boost nutrition. Just sauté them lightly before mixing. This keeps them tender and flavorful. These variations let you customize your zucchini boats. For the full recipe, check out the details above. To store leftover cheese stuffed zucchinis, first, let them cool. Place them in an airtight container. You can keep them in the fridge for up to three days. If you want to keep them longer, freeze them. Wrap each stuffed zucchini in plastic wrap, then place them in a freezer bag. They can last up to three months in the freezer. When it's time to reheat, use an oven for the best results. Preheat your oven to 350°F (175°C). Place the zucchini on a baking sheet. Cover them with foil to keep them from drying out. Heat for about 15-20 minutes, or until warm. For a crisp top, remove the foil for the last five minutes. Enjoy your tasty leftovers! How do I make zucchini boats without cheese? You can swap cheese for cooked quinoa or lentils. Use your favorite spices to add flavor. Mix in veggies like bell peppers and onions for texture. This gives a tasty, cheesy feel without dairy. Can I prepare cheese stuffed zucchini boats ahead of time? Yes, you can prep them ahead. Stuff the zucchini boats and cover them in the fridge. Bake them when you’re ready to eat. This makes dinner quick and easy on busy nights. What's the ideal serving size for this recipe? One zucchini boat is a good serving size. Each boat is filling and packed with flavor. You can serve one or two boats per person, depending on your appetite. Are cheese stuffed zucchini boats healthy? Yes, they are a healthy choice! Zucchini is low in calories and high in fiber. The cheese provides protein and calcium. Plus, the tomatoes and herbs add vitamins and antioxidants. What is the calorie count per serving? Each cheese stuffed zucchini boat has about 150-200 calories. This may vary based on the cheese and toppings you use. You can check the Full Recipe for precise numbers. These cheese stuffed zucchini boats are a tasty and easy dish. You learned how to prepare them step-by-step, from scooping out the zucchini to packing in the flavorful filling. We explored tips to keep them from getting soggy and ways to serve them well. You can even try different cheeses or add protein, making this dish flexible. Enjoy making and sharing this recipe with friends and family. Cooking can be fun and rewarding!
Cheese Stuffed Zucchini Boats Flavorful and Easy Recipe
Ready for a tasty dish that’s simple to make? These cheese stuffed zucchini boats pack flavor and satisfaction in every bite! With creamy cheeses and
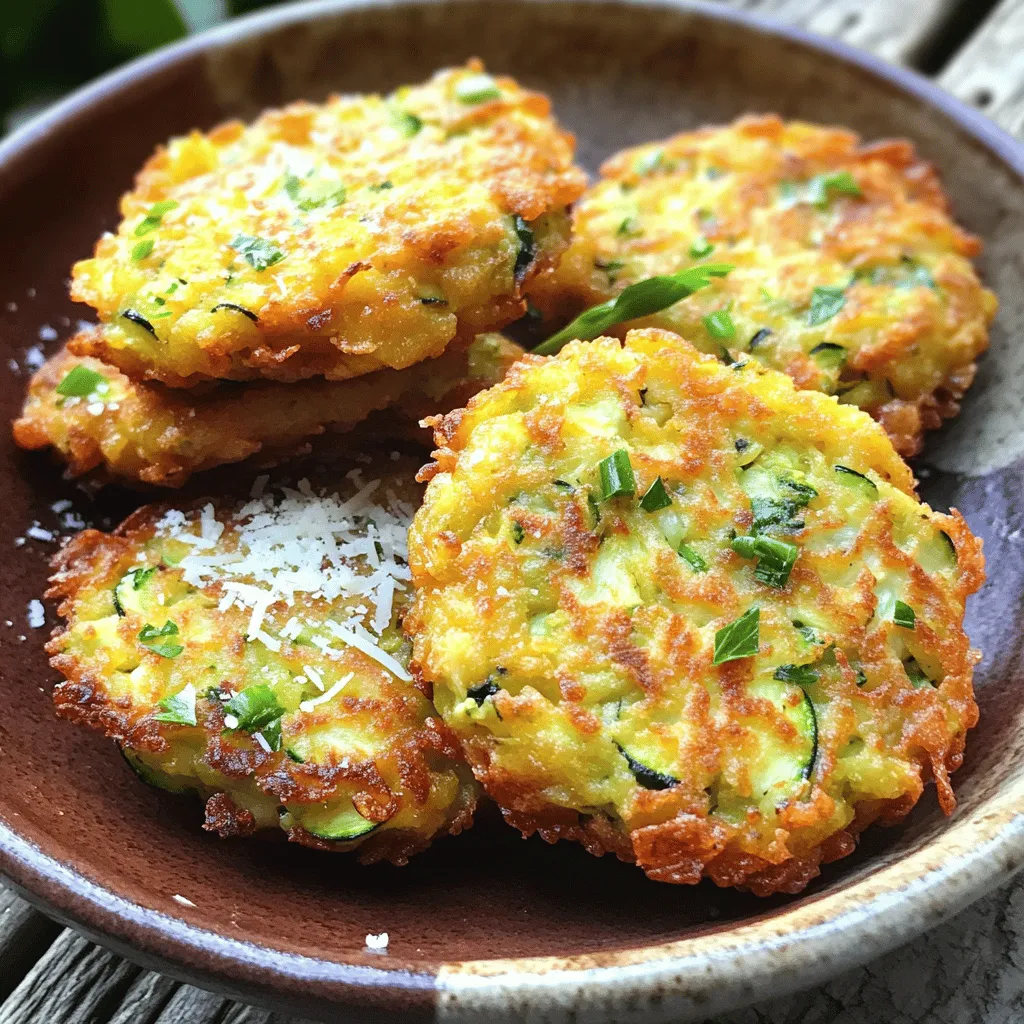
- 2 medium zucchinis - 1/2 cup chopped green onions - 1/2 cup grated Parmesan cheese - 1 large egg - 1 teaspoon salt - 1/4 teaspoon black pepper - 1/4 teaspoon cayenne pepper (optional) - Olive oil for frying - 1 cup all-purpose flour - 2 cloves garlic, minced For the best zucchini fritters, start with fresh produce. Choose firm zucchinis with a shiny skin. They should feel heavy for their size. Fresh green onions add a nice crunch and mild flavor. Next, we need dairy and binders. Grated Parmesan cheese brings richness and umami. The egg acts as a binder, helping the fritters hold together. Now, let's talk seasonings and cooking essentials. Salt is key to enhancing flavor. Black pepper adds warmth, while cayenne gives a kick. Olive oil helps fry the fritters to a golden brown. All-purpose flour gives the fritters structure and a nice crisp. This list gives you everything you need to create perfect fritters. Combine these ingredients for a fun dish that is easy to prepare. You can find the full recipe for these zesty zucchini fritters above! First, you need to grate the zucchinis. Use a box grater or food processor. Grating makes the zucchini easier to mix. Once you have the grated zucchini, place it in a colander. Sprinkle 1 teaspoon of salt over it. This step is key. Salt draws out moisture. Let the zucchini sit for about 10-15 minutes. After the time is up, you’ll need to drain the excess moisture. Take the grated zucchini and gently squeeze it with your hands. The goal is to remove as much liquid as possible. This helps the fritters stay crispy. Next, grab a mixing bowl. Combine the drained zucchini with the other ingredients. You will need: - 1 cup all-purpose flour - 1/2 cup grated Parmesan cheese - 1/2 cup chopped green onions - 1 large egg, lightly beaten - 2 cloves garlic, minced - 1/4 teaspoon black pepper - 1/4 teaspoon cayenne pepper (optional for heat) Mix everything well until you have a consistent mixture. Make sure all the ingredients are fully incorporated. This ensures each bite is full of flavor. Now, it’s time to cook. Heat a non-stick skillet over medium heat. Add a drizzle of olive oil to coat the bottom of the pan. You want enough oil to fry the fritters, but not too much. Using a tablespoon, scoop some of the zucchini mixture. Form small patties with your hands. Carefully place them in the skillet. Don't overcrowd the pan. Cook for about 3-4 minutes on each side. You want them to be golden brown and crispy. Once cooked, transfer the fritters to a plate lined with paper towels. This helps absorb any extra oil. Repeat this process with the remaining mixture. Add more oil to the pan as needed. Serve the fritters warm. You can garnish with extra green onions or a dollop of Greek yogurt for a tasty touch. This recipe is easy and delicious, making it a great choice for any meal. For the complete guide, refer to the Full Recipe. To get your zucchini fritters crispy, start by draining the zucchini well. After grating the zucchini, sprinkle it with salt and let it sit for 10-15 minutes. This step helps draw out excess moisture. Once time's up, take the grated zucchini and squeeze it with your hands to remove as much liquid as you can. Next, you need to fry at the right temperature. Heat your skillet over medium heat and add a drizzle of olive oil. If the oil is too cool, the fritters will soak it up and become soggy. If it’s too hot, they will burn. Aim for a nice sizzle when you drop in the patties. To add more flavor to your fritters, think about spices and herbs. You can add fresh herbs like dill or basil to brighten up the taste. A pinch of garlic powder can boost the flavor, too. When serving, consider a dollop of Greek yogurt or sour cream for a creamy contrast. Fresh salsa or a simple cucumber dip can also add a tasty twist. These additions can elevate your fritters from good to great! For the full recipe, check out the Zesty Zucchini Fritters 🥒 and enjoy your cooking! {{image_2}} You can make these fritters fit your diet easily. For a gluten-free option, swap all-purpose flour for almond flour or chickpea flour. These flours hold moisture well and add a nice flavor. If you are dairy-free, use nutritional yeast instead of Parmesan cheese. It gives a cheesy taste without the dairy. You can also skip the egg and use flaxseed meal mixed with water as a binder. Mix one tablespoon of flaxseed meal with three tablespoons of water. Let it sit for five minutes to gel. Feel free to get creative with your fritters. You can add corn for a sweet crunch or bell peppers for a pop of color. Fresh herbs like dill or parsley also brighten the dish. Try different cheeses for unique flavors. Feta adds a tangy touch, while mozzarella gives a gooey texture. Mixing these ingredients can make your fritters exciting each time you cook. For the full recipe, check [Full Recipe]. To keep your zucchini fritters fresh, place them in an airtight container. This method stops air from making them soggy. You can store them in the fridge for up to three days. If you want to keep them longer, refrigerate them as soon as they cool down. When reheating, aim for that crispy texture. I recommend using a skillet for the best results. Heat a small amount of olive oil over medium heat. Add the fritters and cook for about 2-3 minutes on each side. This will help them regain their crunch. If you decide to freeze the fritters, let them cool completely first. Place them in a single layer on a baking sheet, and freeze until solid. Once frozen, transfer them to a freezer bag. They will last for up to three months. When you're ready to enjoy them, just reheat from frozen using the skillet method. For more details, check the Full Recipe for tips on making the best zucchini fritters. You can serve zucchini fritters with many tasty dips. Greek yogurt is a great choice. It adds creaminess and tang. You could also use sour cream or tzatziki sauce. These dips enhance the flavor and texture. For side dishes, consider a fresh salad. A simple cucumber and tomato salad pairs well. You could also serve roasted vegetables on the side. They add color and nutrition to your meal. Yes, you can make zucchini fritters ahead of time. Prepare the mixture, then store it in the fridge. This keeps it fresh for a day. When you are ready to cook, just form the patties and fry them. If you want to batch cook, make a larger amount. Once cooked, let the fritters cool completely. Store them in an airtight container in the fridge. They stay good for up to three days. To check if your zucchini fritters are cooked, look for a golden-brown color. This shows they are crispy outside. You can also press gently on the fritters. They should feel firm but not hard. For a better test, cut one in half. The inside should be cooked and moist, not wet. If they are too soft, give them a bit more time in the pan. This way, you ensure they are perfectly done. Zucchini fritters are tasty and easy to make. We covered the key ingredients, like zucchini, cheese, and spices. I shared simple steps to prepare and cook them perfectly. Tips on achieving crispiness and flavor variations help you customize your fritters. Store leftovers properly for future meals. Feel free to serve with your favorite dips. Enjoy making these fritters as a fun way to eat vegetables!
Best Zucchini Fritters Easy and Delicious Recipe Guide
Looking for a tasty way to use up those garden zucchinis? You’ve come to the right place! In this guide, I’ll show you how to
- 2 medium zucchinis, sliced into thin strips - 1 cup breadcrumbs (preferably panko for extra crunch) - 1/2 cup grated Parmesan cheese - 1 teaspoon garlic powder - 1 teaspoon onion powder - 1 teaspoon dried oregano - Salt and pepper to taste - 2 large eggs - 1 tablespoon olive oil For these easy Parmesan zucchini fries, you need fresh ingredients. Start with two medium zucchinis. Slice them into thin strips for the best fry-like shape. Thin strips cook well and get nice and crispy. Next, grab a cup of breadcrumbs. I recommend using panko. It gives the fries an amazing crunch that regular breadcrumbs just can't match. You also need half a cup of grated Parmesan cheese. This cheese adds a salty, rich flavor that makes each bite special. You will also need some spices: one teaspoon each of garlic powder, onion powder, and dried oregano. These add depth to the flavor. Don't forget salt and pepper to taste. Adjust these to your liking for the perfect seasoning. You will use two large eggs to help the coating stick. Finally, add one tablespoon of olive oil. This adds moisture and helps the coating crisp up. - Fresh parsley or basil - Marinara or garlic aioli for dipping Garnishes can elevate your dish. Fresh parsley or basil adds color and freshness. Serve with marinara or garlic aioli for dipping. These add flavor and a fun touch to your zucchini fries. For the full recipe, check out the detailed steps later in the article. - Preheat the oven to 425°F (220°C). - Line a baking sheet with parchment paper. Start by setting your oven to 425°F. This high heat gives the fries a great crunch. Next, grab a baking sheet and line it with parchment paper. This makes cleanup easy and helps the fries crisp up nicely. - Combine breadcrumbs, Parmesan cheese, and spices. In a shallow bowl, mix together the breadcrumbs and grated Parmesan cheese. I like to use panko for extra crunch. Add garlic powder, onion powder, oregano, salt, and pepper. Stir everything together well. This mixture brings a lot of flavor to the fries. - Dip zucchini into egg mixture. - Coat with breadcrumb mixture. In another bowl, whisk together two large eggs and a tablespoon of olive oil. Take each zucchini strip and dip it into the egg mixture. Make sure it’s fully coated. After that, roll it in the breadcrumb mixture. Press lightly to help it stick. - Place fries on the baking sheet. - Bake for 20-25 minutes, flipping halfway through. Now, place the coated zucchini fries on the parchment-lined baking sheet. Be sure to spread them out so they don’t touch. Bake them in your preheated oven for 20 to 25 minutes. Flip them halfway through to ensure even cooking. Look for that golden brown color to know they’re done. For the full recipe, check out the detailed instructions above. Enjoy your crunchy snack! To get the best crunch, use panko breadcrumbs. They are lighter and crispier than regular ones. This makes your fries more enjoyable. Next, make sure each zucchini strip is evenly coated. This helps with even cooking and gives you that perfect crunch. If you want a different method, try air frying the zucchini fries. It cooks them quickly and keeps them crispy. You can also pan-fry the fries in a bit of oil. This method gives them a nice golden color and great taste. These zucchini fries taste amazing with dips. You can pair them with marinara sauce or garlic aioli. They also make a great side dish for burgers or sandwiches. Try serving them with a fresh salad for a balanced meal. For more ideas, check out the Full Recipe for inspiration. {{image_2}} You can mix up the cheese for these fries. Cheddar adds a nice sharpness. Mozzarella gives a gooey texture. You can even create a blend of both. This change makes each bite unique and tasty. If you want a kick, try adding cayenne pepper. Just a pinch can make a big difference. Italian seasoning also works well. It adds herbs that brighten the flavor of the fries. Feel free to experiment with your favorite spices! Zucchini is great, but don't stop there. You can use eggplant instead for a hearty bite. Carrots work too, giving a sweet crunch. These swaps keep the recipe fresh and fun. Enjoy trying different veggies for new taste experiences! To keep leftovers fresh, place the zucchini fries in an airtight container. They can stay in the fridge for up to three days. When storing, allow them to cool completely first. This step helps prevent moisture buildup, which can make them soggy. If you have a lot of fries, consider dividing them into smaller portions. It makes it easier to reheat only what you need. When it's time to enjoy your leftovers, you have a couple of good options. For the best taste, use the oven. Preheat it to 375°F (190°C). Spread the fries on a baking sheet and bake them for about 10 minutes. This method keeps them crispy. If you're short on time, you can use the microwave. Place the fries on a microwave-safe plate and heat them for 30 seconds to 1 minute. However, they may turn out softer. Freezing is a great way to save extra zucchini fries for later. First, let them cool completely. Then, arrange the fries in a single layer on a baking sheet. Freeze them for about 1 hour. This step helps prevent them from sticking together. After they are frozen, transfer the fries to a freezer bag. Remove as much air as possible before sealing. To re-bake, preheat your oven to 425°F (220°C). Bake the frozen fries for 25-30 minutes. Enjoy them just like the first time! For the full recipe, check out the earlier section. Cutting zucchini for fries is easy! First, wash the zucchini well. Then, slice off both ends. You want to cut the zucchini into thin strips, about 1/4 inch thick. This size helps them cook evenly and get crispy. If they are too thick, they may turn out soggy. Thin strips will give you that nice crunch you want in fries. Yes, you can make these fries gluten-free! Use gluten-free breadcrumbs instead of regular ones. There are many options available, like almond flour or crushed cornflakes. These options give a great texture. Just check the labels to ensure they are gluten-free. This way, everyone can enjoy these tasty fries. To know when the zucchini fries are done, look for a golden brown color. They should be crispy on the outside. You can also poke one with a fork; it should feel tender inside. Baking them for 20-25 minutes usually does the trick. Make sure to flip them halfway through for even cooking. Enjoy your crispy snack! For the full recipe, check out the details above. In this post, we covered how to make crispy zucchini fries. We discussed the ingredients, cooking steps, and helpful tips for a perfect result. You can customize the recipe with different flavors and vegetables. For storage, we also shared best practices for leftovers and reheating. These zucchini fries are a tasty and healthy snack option. Enjoy experimenting with your favorite dips and garnishes. This recipe is simple, fun, and sure to impress your family and friends!
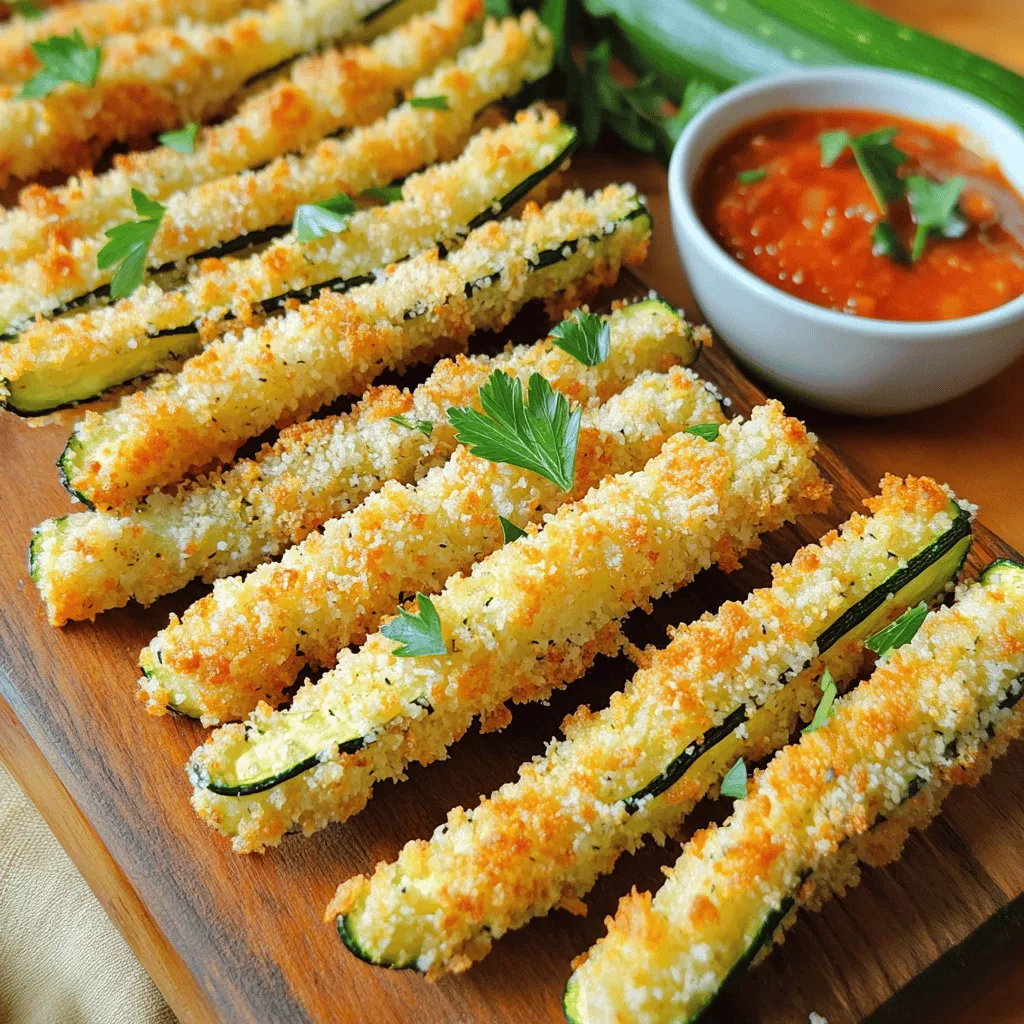
Easy Parmesan Zucchini Fries Crunchy and Delicious Snack
Craving a snack that’s both crunchy and delicious? Look no further than these Easy Parmesan Zucchini Fries! With just a few simple ingredients, you can
For a great tomato toast, you'll need: - 4 slices of artisan bread (like sourdough or ciabatta) - 2 cups cherry tomatoes, halved - 1 clove garlic, minced - 1/4 cup fresh basil leaves, chopped - 2 tablespoons olive oil - 1 tablespoon balsamic vinegar - Salt and pepper to taste To add extra flavor, consider these options: - 1/4 cup crumbled feta cheese - A pinch of red pepper flakes Adding feta gives a creamy taste. Red pepper flakes can spice things up. Feel free to mix and match! The right bread makes a big difference. Here are my favorites: - Sourdough: It has a nice tangy flavor. - Ciabatta: This bread is airy and crispy. - Whole grain: It adds a nutty taste and is healthy. Choose any of these breads for a tasty base. The crusty texture holds the toppings well. To make the tomato mixture, start by grabbing a mixing bowl. Add 2 cups of halved cherry tomatoes. Next, add 1 clove of minced garlic and 1/4 cup of chopped fresh basil. Pour in 2 tablespoons of olive oil and 1 tablespoon of balsamic vinegar. Sprinkle salt and pepper to taste. Mix gently until the tomatoes are well coated. Let this sit for 15-20 minutes. This time helps the flavors blend nicely. While your tomato mixture sits, it’s time to toast the bread. Preheat your toaster or grill. Use 4 slices of artisan bread, like sourdough or ciabatta. Place the bread in the toaster or on the grill. Toast them until they turn golden brown and crispy. This step is key for a great crunch that holds the topping well. Now for the fun part! Take your toasted bread and place it on a serving platter. Spoon a generous amount of your marinated tomato mixture onto each slice. If you want, sprinkle 1/4 cup of crumbled feta cheese on top for extra flavor. For a little kick, add a pinch of red pepper flakes. Serve these toasts warm and enjoy the burst of fresh flavors. This recipe is a true delight! For the complete instructions, check out the Full Recipe. When making tomato toast, avoid over-toasting the bread. Bread should be golden, not burnt. Also, don’t skip the marinating step. This helps the flavors blend well. Use fresh tomatoes for the best taste. Old tomatoes can make your toast soggy. Lastly, don’t forget to season. A pinch of salt and pepper makes a great difference. To make your tomato toast pop, try adding some extra flavors. Fresh mozzarella pairs well with tomatoes and basil. A drizzle of pesto adds a fresh taste too. For a spicy kick, try jalapeños or crushed red pepper. You can also use a spread like hummus or avocado. These add creaminess and depth to your dish. Presentation matters when serving tomato toast. Arrange the toasts on a rustic wooden board. This gives a warm and inviting look. Garnish with fresh basil leaves for color. Add lemon wedges on the side for brightness. You could also sprinkle some extra feta cheese on top. These details make your dish stand out and look appealing. For the full recipe, check back to ensure all steps are followed. {{image_2}} To make avocado tomato toast, start with ripe avocados. Mash them in a bowl and add lemon juice. This keeps the avocado fresh and bright. Spread the mashed avocado over toasted bread. Then, top it with the marinated tomato mix. The creamy avocado blends well with the juicy tomatoes. This variation adds healthy fats to your meal. Bruschetta style is a classic. Begin with your artisan bread, cut into thick slices. Toast them until they are golden and crisp. For the topping, mix diced tomatoes, minced garlic, and chopped basil. Add a little olive oil and balsamic vinegar. Spoon this mixture over the toasted bread. Serve it warm. The crunch of the bread pairs perfectly with the fresh topping. For a Mediterranean twist, use a mix of flavors. Start with your base of toasted bread. Then, add the tomato mix, but don’t stop there! Sprinkle with crumbled feta cheese and sliced olives. You can also add capers for extra zing. Drizzle a bit of olive oil on top. This style brings a taste of the Mediterranean to your table. It’s a meal full of flavor and fun. For the full recipe, check out the Tomato Toast Extravaganza 🥖 section. Each variation is simple and delightful. Feel free to mix and match these ideas to create your perfect tomato toast! If you have leftover tomato toast, store it carefully. Place the slices in an airtight container. Keep them in the fridge for up to two days. Note that the bread may lose its crispness. You can store the tomato mixture separately for better taste. To keep your ingredients fresh, follow these tips. Store cherry tomatoes at room temperature. This helps them stay sweet and tasty. Keep basil in a glass of water, like fresh flowers. Seal olive oil tightly and store it away from heat. Use fresh bread within a few days for the best flavor. When ready to enjoy leftover toast, reheat it for the best taste. Preheat your oven to 350°F. Place the toast on a baking sheet for 5-7 minutes. This will make it warm and a bit crispy again. You can also microwave it, but this may make the bread soft. Enjoy your tomato toast delight! For the complete steps, check the Full Recipe. For tomato toast, cherry tomatoes work best. They are sweet and juicy. You can also use heirloom tomatoes for a richer flavor. Look for ripe tomatoes that have a nice color. They will add a fresh taste to your dish. You can prepare the tomato mixture ahead of time. Just keep it in the fridge for up to two hours. However, toast the bread just before serving. This keeps the toast crispy and delicious. If you prepare it too early, the bread may get soggy. To make tomato toast gluten-free, choose gluten-free bread. Many brands offer good options now. You can also try using rice cakes or corn tortillas. These alternatives work well and taste great with the tomato topping. You can find the full recipe for Tomato Toast Extravaganza in this article. It includes all the steps you need to create this tasty dish. Enjoy making this simple and flavorful meal! In this blog post, I shared how to make the perfect tomato toast. I covered main and optional ingredients, plus the best bread types. You learned step-by-step how to prepare the tomato mixture, toast the bread, and assemble your dish. I also shared tips to avoid common mistakes and make it unique. Don't forget to try out different variations and proper storage methods. Tomato toast is easy, fun, and delicious. Enjoy experimenting with flavors and let your creativity shine!
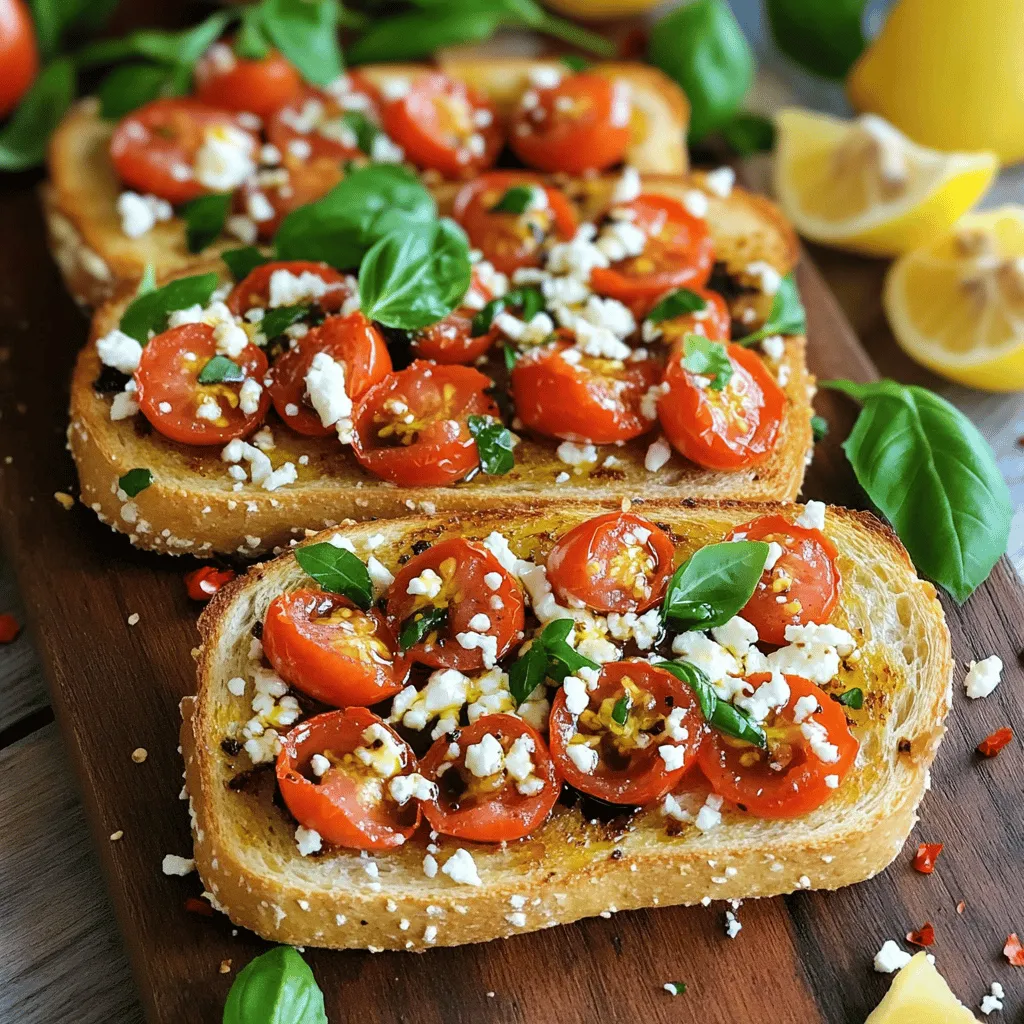
Tomato Toast Delight Simple and Flavorful Recipe
Are you ready to elevate your snack game with a simple yet delightful Tomato Toast? This easy recipe promises fresh flavors and quick prep, making
To start, you need fresh okra. Look for bright green pods that are firm to the touch. About 1 pound will work well. Trim the stems but leave the tips intact. This keeps the texture crunchy. Fresh okra gives the best flavor and crunch. The brine makes the pickling magic happen. You’ll need: - 1 cup distilled white vinegar - 1 cup water - 2 tablespoons kosher salt - 1 tablespoon sugar This mix balances tang and sweetness. The vinegar adds a nice zing, while the sugar softens the sharpness. Salt helps preserve the okra and enhances the taste. Flavor is key in pickling. For this recipe, gather: - 2 cloves garlic, sliced - 1 teaspoon black peppercorns - 1 teaspoon mustard seeds - 1 teaspoon red pepper flakes (optional for heat) - 1 bay leaf Garlic brings depth, while the mustard seeds add a unique crunch. Black peppercorns give a warm spice, and red pepper flakes can kick up the heat! The bay leaf rounds out the flavors nicely. Using these ingredients, you’ll create a crunchy and tangy delight. Try this full recipe for the best results! To start, gather your ingredients for the brine. You need distilled white vinegar, water, kosher salt, and sugar. Combine these in a medium saucepan. Heat it over medium heat while stirring. You want the salt and sugar to dissolve fully. This step is key for flavor. Once dissolved, take it off the heat and let it cool a bit. Next, you must prepare your jars. Sterilization is crucial to keep your pickles fresh. Wash two 16-ounce glass jars well. Rinse them with hot water. You can also run them through the dishwasher. Just ensure they are clean and dry before you fill them. Now it's time to pack the okra. Take your fresh, trimmed okra and stand them upright in the jars. Make sure they fit snugly but do not crush them. This keeps them crunchy. Next, divide the sliced garlic, black peppercorns, mustard seeds, red pepper flakes, and bay leaf evenly between the jars. Once the okra is in place, pour the cooled brine over it. Make sure the okra is fully submerged. Seal the lids tightly. Let them cool to room temperature. Store them in the fridge for at least 24 hours. You can eat them after a day, but they taste even better after a week! To keep your okra crunchy, start with fresh, young pods. Older okra can turn soft. Trim the stems, but leave the pods whole. Packing them tightly in jars helps maintain their shape. Pour the cooled brine over the okra quickly. This helps keep the crunch intact. Always sterilize your jars before pickling. Wash them in hot, soapy water. Rinse well to remove soap. You can also run them through the dishwasher for a deep clean. After washing, place the jars in a hot oven for 10 minutes to ensure they’re dry and sterile. This step prevents any unwanted bacteria. Want to amp up the flavor? Try adding dill seeds or coriander for a fresh twist. You can also toss in a few slices of fresh ginger for a zing. If you like it spicy, add more red pepper flakes or even fresh chili peppers. Experiment with herbs like thyme or oregano to find your perfect blend. For the full recipe, check out the detailed instructions and enjoy making your pickled okra! {{image_2}} You can change the heat of your pickled okra easily. If you like it spicy, add more red pepper flakes. For a milder touch, reduce the flakes or skip them. You can also try adding sliced jalapeños or a dash of hot sauce. This gives you control over the spice level. Experiment with different spices to create unique flavors. For a savory kick, add dill or coriander seeds. If you prefer a more herbal taste, try adding fresh thyme or oregano. This adds depth to your pickles and makes them more exciting. Don’t limit yourself to just okra! You can use other vegetables too. Try pickling carrots, cucumbers, or green beans. Each veggie brings its own crunch and taste. Mix and match for a colorful jar of pickled goodness. You can find the full recipe in this article to guide your pickling adventure. Store your refrigerator pickled okra in a cool place. The best spot is your fridge. Use clean glass jars with tight lids. Make sure the okra is fully submerged in the brine. This keeps it fresh and crunchy. Refrigerator pickled okra lasts for about two months. After that, the taste and texture may change. To enjoy the best flavor, eat it within four weeks. Always check the jar for any signs before eating. Look for any changes in color or smell. If the okra looks dull or has an off smell, it may be bad. You might also see mold or bubbles in the jar. If any of these happen, throw it away. Safety first! For the full recipe, check out the details above. You should refrigerate pickled okra for at least 24 hours. This time allows the flavors to soak in. If you can wait a week, that’s even better! The taste will grow richer and more complex. It’s best to use fresh okra for this recipe. Frozen okra can lose its crunch during freezing. If you must use frozen, thaw it first and drain any excess water. This can help maintain some crunch. Pickled okra holds many health perks. It is low in calories but high in fiber. This fiber aids digestion and keeps you full. Okra also contains vitamins like A and C, which support your immune system. The vinegar in the pickles may even help with blood sugar control. If your pickled okra is too salty, try adding more water to the brine. If it’s too soft, check your brining time. You may have kept it too long in the brine. For off flavors, ensure your jars and ingredients are clean and fresh. Always taste as you go! This article covered how to make pickled okra, including ingredients, instructions, and tips. Fresh okra, brine components, and seasoning create tasty picks. I also shared steps for brining, sterilizing jars, and packing okra. Remember to ensure your okra stays crunchy and consider variations in spice and flavors. Store your pickled okra properly for the best shelf life. Enjoy the health benefits and fun of pickling as you experiment with different ingredients and techniques. Happy pickling!
Refrigerator Pickled Okra Crunchy and Tangy Delight
Are you ready to elevate your snack game? Refrigerator pickled okra is a crunchy and tangy delight that adds zest to meals or stands alone
- 4 ears of fresh corn, husked - 1/2 cup unsalted butter, softened - 4 cloves garlic, minced - 2 tablespoons fresh parsley, chopped - 1 tablespoon fresh lemon juice - 1/2 teaspoon paprika - Salt and pepper to taste - Parmesan cheese for garnish (optional) For this garlic butter grilled corn, you need simple, fresh ingredients. Fresh corn is the star here. Choose ears that feel heavy and have bright green husks. The butter adds richness, while garlic gives a bold flavor. Fresh parsley brightens the dish. Lemon juice adds a hint of tartness. Paprika gives a gentle warmth, while salt and pepper enhance all the flavors. If you like, sprinkle Parmesan cheese on top for extra creaminess. Using high-quality ingredients makes a big difference. This dish shines with freshness. You can find most of these items at your local market or grocery store. Remember, the goal is to make this dish easy and tasty. For the full recipe, check the detailed steps above. First, you need to preheat your grill to medium-high heat. This step is key for even cooking. A hot grill will help the corn get those nice grill marks and a smoky flavor. While the grill heats up, ensure the grill grates are clean. Use a grill brush to scrape off any old food particles. A clean grill gives you the best taste. Next, let's make the garlic butter spread. In a small bowl, combine the softened butter with minced garlic and chopped herbs. I like to add fresh parsley for color and taste. Also, squeeze in some lemon juice and sprinkle paprika, salt, and pepper. Mix everything until it’s well blended. This garlic butter will coat the corn and make it super tasty. Now it’s time to grill the corn. Take your husked corn and brush it generously with the garlic butter spread. Make sure every cob is well-coated. Then, wrap each ear of corn in aluminum foil. Sealing it tightly keeps all the flavors locked in. Place the wrapped corn on the grill. Cook it for about 15-20 minutes, turning it every few minutes. You want the corn to be tender but not mushy. When done, carefully unwrap the foil. Be cautious of the steam. You can brush on any leftover garlic butter for extra flavor. If you want to elevate your dish, sprinkle some Parmesan cheese on top. This adds a delightful finish. For the full recipe, check out the details above. When you pick corn, look for bright green husks. The silk should be moist and golden. Squeeze the kernels gently. They should feel plump and firm. Fresh corn smells sweet and grassy. If it feels dry or shriveled, skip it. Always choose corn that is in season for the best taste. To keep corn tender, avoid grilling it too long. Wrap each ear tightly in foil to trap moisture. This helps it steam as it grills. Cook the corn for about 15 to 20 minutes. Turn it every five minutes for even cooking. Check if it’s done by piercing a kernel. If it bursts with juice, it’s ready. You can spice up your garlic butter grilled corn in many ways. Try adding chili powder for heat. Lime juice gives a zesty twist. Fresh herbs like basil or cilantro can brighten the flavor. You can also sprinkle crumbled feta cheese for a salty kick. Every twist makes it unique and exciting. For the full recipe, check out the Garlic Butter Grilled Corn recipe. {{image_2}} You can easily change up the taste of garlic butter grilled corn. One way is by adding chili powder. This spice gives the corn a nice kick. You can also squeeze fresh lime juice over the corn. This brightens up the flavor and adds a zesty note. Another fun idea is to try different cheese toppings. You can use feta or cotija cheese for a salty twist. Just sprinkle it on right before serving for a tasty finish. If you don’t have a grill, don’t worry! You can cook corn in the oven or on the stovetop. For the oven, wrap the corn in foil and bake at 400°F for 25-30 minutes. This method keeps the corn juicy and flavorful. On the stovetop, boil the corn in water for about 7-10 minutes. Then, you can brush on garlic butter as you would on the grill. Both methods work well and still give you a delicious result. Want to make this dish vegan? You can substitute the butter with a plant-based option. Look for vegan butter or even olive oil. Both choices will keep the corn moist. For cheese, try using nutritional yeast. It gives a cheesy flavor without dairy. Sprinkle it on before serving for that extra savory touch. Explore these variations to make garlic butter grilled corn your own! For more tips and a full recipe, check out the Full Recipe section. To keep your garlic butter grilled corn fresh, wrap it tightly in plastic wrap or foil. Store it in the fridge for up to three days. This helps lock in flavors and moisture. If you want to avoid sogginess, don’t add any extra butter before storing. When it's time to enjoy your leftovers, reheat them carefully. The best way is to use a grill or stovetop. Heat the corn on medium heat for about five minutes, turning often. This method will warm the corn without making it dry. If you prefer the microwave, cover the corn with a damp paper towel. Heat in short bursts of 30 seconds until hot. Yes, you can freeze grilled corn! To do this, allow it to cool completely. Wrap each ear in plastic wrap, then place them in a freezer bag. Make sure to squeeze out as much air as possible. Frozen corn can last up to three months. When you’re ready to eat it, thaw in the fridge overnight before reheating. Enjoy the sweet summer flavor even in the colder months! Grilling corn takes about 15 to 20 minutes. Start by preheating your grill to medium-high heat. Wrap each ear in foil after brushing with garlic butter. Place them on the grill. Turn them every few minutes. The corn is done when it feels tender. Always check a piece to ensure it is cooked just right. You can use frozen corn, but fresh corn is best. If you use frozen corn, thaw it first. Grill it in a basket or on skewers. This method helps keep the corn from falling apart. The flavors of the garlic butter will still shine through. Garlic butter grilled corn pairs well with many dishes. Serve it with grilled meats like chicken or steak. It also complements salads and pasta dishes. For a light meal, try it with a fresh tomato salad. You can also enjoy it as a snack on its own. For the complete recipe, check out the Full Recipe link. In this blog post, we explored how to make delicious garlic butter grilled corn. We covered key ingredients, step-by-step grilling instructions, and tips for the best results. Remember to choose fresh corn for great flavor. You can also try variations to suit your taste or diet. Finally, proper storage and reheating ensure you enjoy leftovers. Enjoy this tasty dish with friends and family for a delightful treat. Grilled corn makes any meal better!
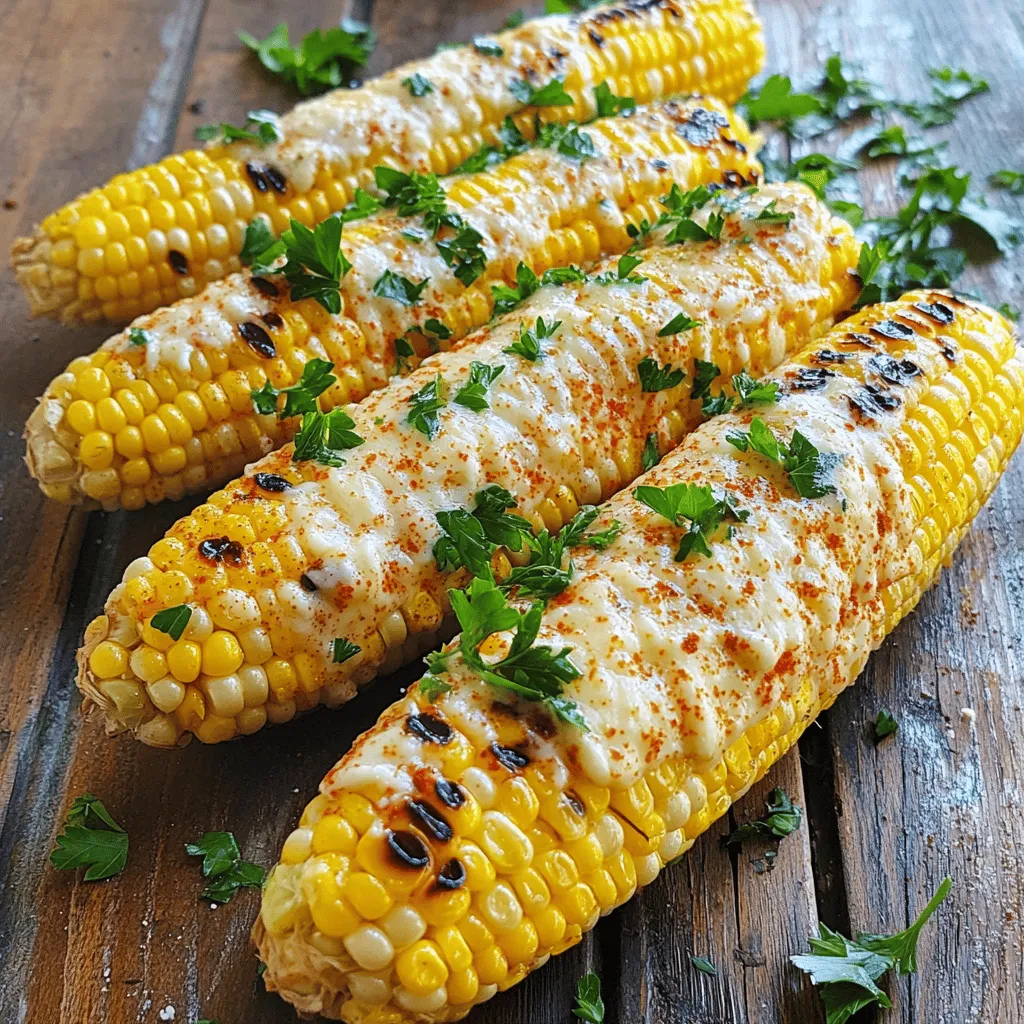
Garlic Butter Grilled Corn Tasty Summer Delight
If you crave a tasty summer treat, Garlic Butter Grilled Corn is the answer! This mouthwatering dish combines sweet, juicy corn with a rich garlic
- Cucumbers and their varieties: Choose firm cucumbers for the best crunch. I like using pickling cucumbers, but you can use any fresh cucumber. The size matters too! Smaller cucumbers yield a better texture. - The importance of fresh dill: Fresh dill gives your pickles their signature taste. Dried dill can work, but fresh dill brings a bright flavor. Look for sprigs that are vibrant and fragrant. - Spices and flavor enhancers: You need basic spices for great flavor. Garlic adds a nice punch. Mustard seeds and dill seeds give a unique taste. Black peppercorns add warmth, while red pepper flakes can spice things up. - Adjusting quantities for different batch sizes: This recipe makes about one quart. If you want more, just double the ingredients. Keep the same ratios for brine and spices. - Potential substitutes for common ingredients: If you run out of sea salt, table salt works too. For vinegar, apple cider vinegar can be a good choice. Just remember, it might change the flavor a bit. Start by washing your cucumbers well. Use cool water to remove dirt and pesticides. I like to scrub them gently with a vegetable brush. This step helps keep your pickles clean and fresh. Next, slice the cucumbers. You can cut them into spears or rounds based on your preference. I usually opt for spears as they fit nicely in jars and are easy to grab. To make the brine, gather a medium saucepan. Combine water, distilled white vinegar, sea salt, and granulated sugar. Bring this mix to a boil over medium heat. Stir until the salt and sugar dissolve completely. This step is key for a balanced flavor. Once it boils, remove it from heat and let it cool to room temperature. Cooling the brine prevents cooking the cucumbers when you pour it over them. Grab clean mason jars for your pickles. Start by placing garlic cloves, dill seeds, mustard seeds, black peppercorns, and optional red pepper flakes at the bottom. This layering adds great flavor. Next, pack the cucumber slices tightly in the jar. Make sure they fit snugly without too much space. Packing tightly helps the cucumbers stay crisp and absorb the brine better. Once your jars are filled, it's time to add the brine. Pour the cooled brine over the cucumbers until they are fully submerged. You might need to use a spoon to push them down. This ensures all cucumbers are covered. Seal the jars with lids and refrigerate them. Let them sit for at least 24 hours, but for the best taste, aim for 3 to 5 days. The longer they sit, the better the flavor! Enjoy your homemade dill pickles, which can last for months when stored properly. For the complete process, refer to the Full Recipe. To get crunchy pickles, start with fresh cucumbers. Look for firm, small ones. The skin should be bright and smooth. Chill your cucumbers in ice water for an hour before making pickles. This helps them stay crisp. Another trick is to add a few grape leaves or a piece of horseradish to the jar. These ingredients contain tannins that help keep pickles crunchy. You can mix flavors to make your pickles unique. Try adding sliced jalapeños for a spicy kick. If you like garlic, add more cloves to the jar. You can also use fresh herbs like thyme or oregano for a different taste. Experiment with spices, like coriander or dill weed. The more you play with flavors, the more fun your pickles will be! Sometimes pickles can turn out too salty or too soft. If your pickles are too salty, you can soak them in fresh water for a few hours. This will draw out some salt. For soggy pickles, check your brine. Use a higher vinegar ratio next time. Remember, refrigerate your pickles for at least 24 hours for best flavor. If you follow these tips, you’ll make great pickles every time! {{image_2}} You can make classic dill pickles or spice things up with heat. For spicy dill pickles, add red pepper flakes or sliced jalapeños to the brine. The spice level is up to you! Start with half a teaspoon of red pepper flakes, and adjust to your taste. This heat adds a fun kick to your pickles and pairs well with sandwiches or burgers. If you have a sweet tooth, sweet dill pickles are a great choice. Just add more sugar to the brine. Start with an extra tablespoon of sugar. Taste the brine first, then add more if you like it sweeter. Sweet dill pickles work well as a snack or as a side with barbecue dishes. They balance savory meals nicely. Get creative with other flavors. Try garlic dill pickles by adding more smashed garlic to the brine. For lemon dill pickles, add lemon slices along with the cucumbers. You can also use fresh herbs, like thyme or coriander, to infuse unique flavors. Each variation brings its own twist, making your pickling adventure exciting. Explore different herbs and spices to find your favorite blend as you enjoy the full recipe. To keep your dill pickles fresh, store them in the fridge. Use clean glass jars with tight lids. This way, they stay crunchy and tasty. Make sure the cucumbers stay submerged in the brine. If some float up, press them down with a clean spoon. Always check the jars for any leaks. If they leak, transfer the pickles to another jar. Homemade dill pickles last about 1 to 3 months in the fridge. They taste best when you eat them within the first month. Over time, they may lose crunchiness. If you want to enjoy them longer, consider canning them for shelf storage. But remember, once you open a jar, eat them within a month for the best flavor. Look for signs that your pickles may be bad. If you see mold on the surface, it’s time to toss them. A bad smell is also a sign that they are spoiled. If the brine changes color or if the cucumbers become mushy, discard them. Always trust your senses; if something seems off, don't eat them. Homemade dill pickles last about 1 to 3 months in the fridge. Keep them sealed in a jar and fully submerged in the brine. The vinegar helps preserve them. If you notice any odd smell or change in color, it’s best to toss them. Yes, you can use other vegetables like carrots, radishes, or green beans. Each veggie adds its own flavor and crunch. Just keep in mind that different vegetables may need different pickling times. Experiment and find what you like best! Pickling is safe when done right. Always use clean jars and fresh ingredients. For long-term storage, you can use a water bath canning method. This seals the jars so they last longer outside the fridge. Remember to follow safe canning guidelines to avoid spoilage. Homemade dill pickles pair well with sandwiches, burgers, and charcuterie boards. They add a nice crunch and tangy flavor. You can also enjoy them as a snack or side dish with cheese or crackers. The options are endless! For more ideas, check out the Full Recipe. Homemade dill pickles are a fun and tasty project. You learned about essential ingredients, like cucumbers and fresh dill. I shared tips on crafting the perfect brine and filling jars. You now know how to achieve crunchy pickles and customize flavors. Remember to store your pickles correctly to keep them fresh. With this knowledge, you can enjoy delicious pickles and impress your friends. Happy pickling!
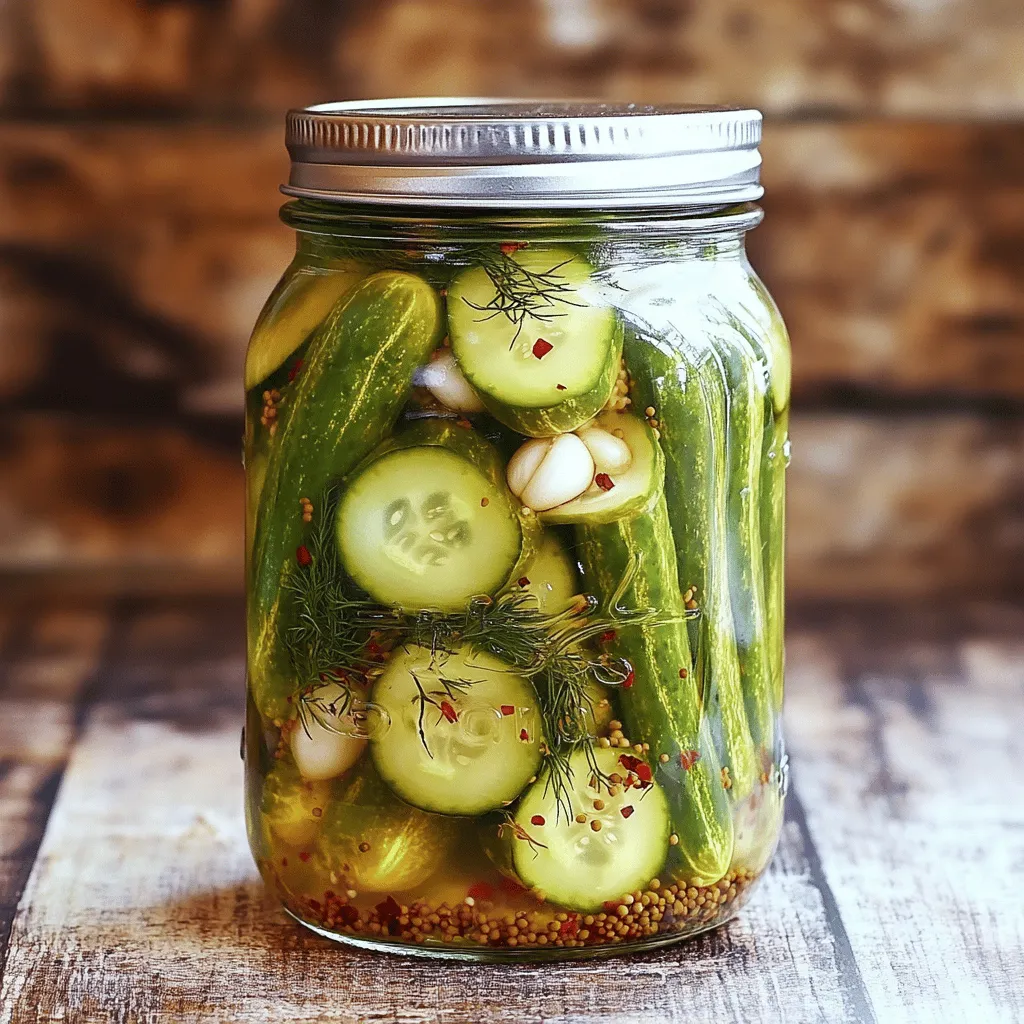
Homemade Dill Pickles Simple and Crunchy Recipe
Are you ready to make your very own homemade dill pickles? This simple and crunchy recipe will show you how to craft flavorful pickles right
- 4 cups sliced cucumbers - 1 cup sliced red onions - 1 cup sliced bell peppers (mixed colors) - 2 cups white vinegar - 1 cup water - 1 cup granulated sugar - 1/4 cup yellow mustard seeds - 1 tablespoon ground mustard - 1 tablespoon turmeric powder - 1 teaspoon celery seeds - 1 teaspoon garlic powder - 1 teaspoon salt - 1/2 teaspoon black pepper - Optional: Fresh dill sprigs for added flavor You can swap in different vegetables if you want. Try zucchini or green beans for a twist. If you prefer less sugar, use honey or maple syrup instead. For spice, adjust mustard and pepper amounts to taste. Cucumbers are low in calories but high in water. They keep you hydrated. Red onions add good nutrients and antioxidants. Bell peppers are rich in vitamins A and C. Mustard seeds have healthy fats, fiber, and minerals. They may help with digestion and lower inflammation. Start by slicing the cucumbers, onions, and bell peppers. Aim for even slices. This helps ensure all the pieces stay crunchy and soak up the brine well. Use a sharp knife for clean cuts. A mandoline slicer can help if you want perfect thickness. After slicing, mix all the vegetables in a large bowl. Set them aside for now. In a medium saucepan, combine the white vinegar, water, and sugar. Heat this mixture over medium heat. Stir until the sugar dissolves completely. This step is key because it makes the brine sweet and tangy. Next, add the mustard seeds, ground mustard, turmeric, celery seeds, garlic powder, salt, and black pepper. Keep heating this mixture until it simmers. The heat helps marry the flavors. Once the brine simmers, pour it over the mixed vegetables in the bowl. Make sure all the veggies are fully submerged. This ensures every bite is full of flavor. Let the mixture cool for about 30 minutes at room temperature. After cooling, transfer everything into jars. If you want, add fresh dill for extra flavor. Seal the jars tightly and refrigerate them for at least 24 hours. The longer they sit, the better they taste. For the full recipe, check out the Zesty Mustard Pickles. Using fresh ingredients is key for crunchy pickles. When you pick cucumbers, look for firm ones. Soft cucumbers can lead to mushy pickles. Always wash your veggies before slicing. After slicing, chill them for an hour. This helps them stay crisp in the brine. To boost flavor, consider adding dill or other herbs to your pickles. Fresh dill sprigs give a nice touch. You can also try dried herbs if fresh isn’t available. Adjusting spice levels is easy. If you like heat, add hot peppers or cayenne. For a milder taste, simply reduce the spices. Serve mustard pickles in small jars for a fun look. You can tie a ribbon around each jar for gifts. For parties, place pickles on a charcuterie board. They make a colorful addition next to meats and cheeses. You can also use them as a zesty topping on burgers or sandwiches. {{image_2}} To make sweet mustard pickles, simply adjust the sugar levels in the recipe. If you like a sweeter taste, add more sugar. You can start with 1 1/4 cups of sugar instead of 1 cup. This makes the pickles more vibrant in flavor. Taste the brine before pouring it over the veggies. You can always add more sugar if you want! If you enjoy heat, spicy mustard pickles are your best bet. Add hot peppers or spices to the mix. You can use sliced jalapeños or crushed red pepper flakes for a kick. Start with half a teaspoon of crushed red pepper in the brine. Adjust it to your taste. Remember, a little heat can make your pickles pop! For those in a hurry, quick refrigerator mustard pickles are the way to go. This method skips the long wait and lets you enjoy pickles sooner. Just prepare the brine as usual. Then, pour it over your veggies and refrigerate for only a few hours. In just a few hours, you can enjoy zesty, crunchy pickles. They won’t be as strong in flavor, but they’ll still be tasty! Check out the Full Recipe for more details. To keep your mustard pickles fresh, store them in the fridge. Use clean jars with tight lids. Make sure the pickles are covered with brine. This keeps them crunchy and flavorful. If possible, use glass jars. They do not affect the taste like plastic can. In the fridge, mustard pickles last about 2 to 3 months. After that, they may lose their crunch. Always check for any strange smells or colors before enjoying. If they look or smell off, it’s best to toss them. If you want to preserve mustard pickles, canning is a great option. Start by sterilizing your jars and lids. Fill the jars with pickles and brine, leaving a little space at the top. Seal the jars tightly and process them in a boiling water bath for 10 to 15 minutes. Let the jars cool completely before storing them in a dark, cool place. This method can help your pickles last for a year or more. For the full recipe, check out the instructions above! Mustard pickles need at least 24 hours in the fridge before you enjoy them. This time helps the flavors blend well. The longer you wait, the better they taste! You can let them sit for up to a week. I often find that waiting a few days really enhances the crunch and flavor. Yes, you can buy mustard pickles in many stores. Look for them in the condiment aisle or the pickle section. They are popular in some regions, so availability may vary. If you want to find the best ones, check local farmers' markets. You might also find unique handmade versions there. Mustard pickles are great with many meals! Here are some tasty ideas: - Serve them with grilled meats like burgers or chicken. - Add them to a charcuterie board for a zesty touch. - Use them in sandwiches for extra crunch. - Toss them in salads for a flavorful twist. These pairings make meals fun and delicious. You can also enjoy them straight from the jar! In this article, we explored the tasty world of mustard pickles. We covered essential ingredients, including cucumbers, onions, and vinegar. I shared tips for preparation and creative variations. You can make sweet or spicy pickles to fit your taste. Be sure to use fresh veggies for great crunch. Whether you enjoy them straight or as a side, mustard pickles add flavor. Try these steps and tips to create your own. Enjoy your delicious pickles and share them with others!
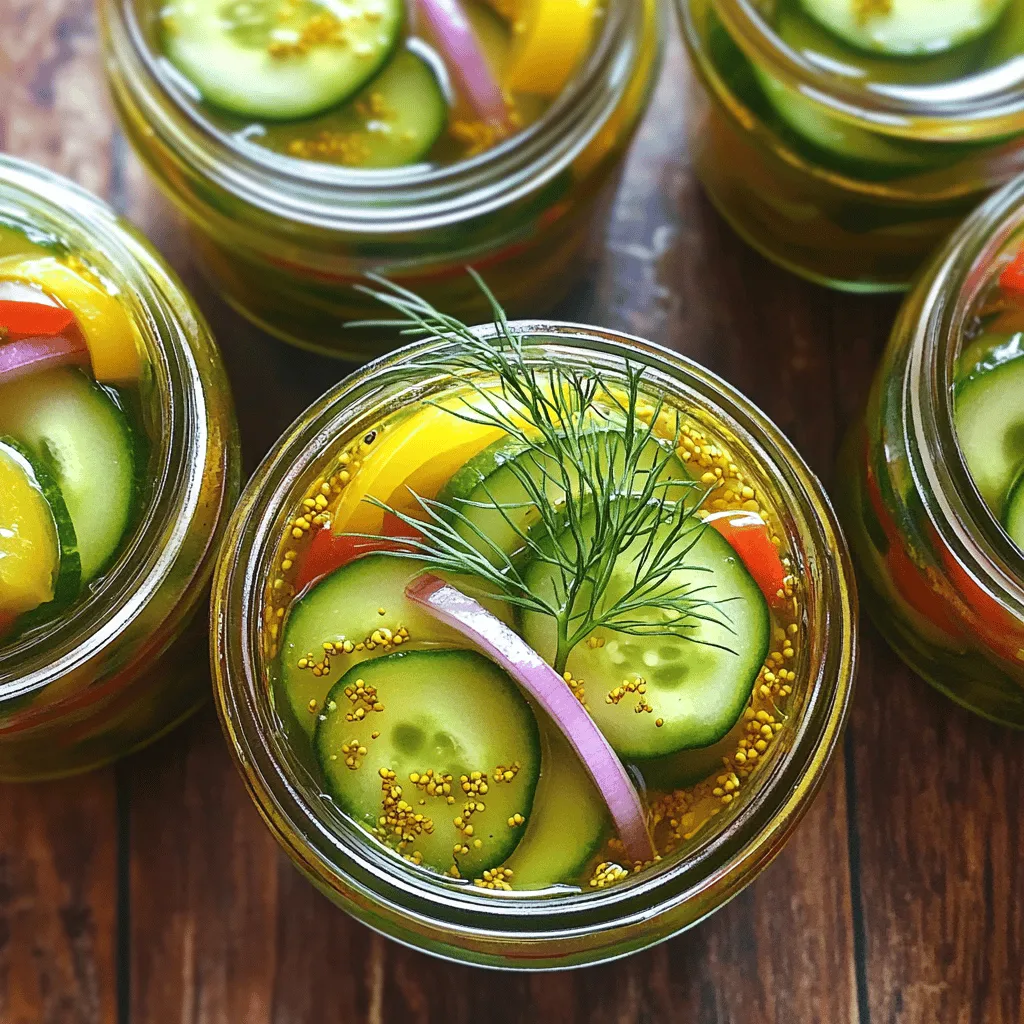
Mustard Pickles Packed with Flavorful Crunch
Are you ready to add a flavorful crunch to your meals? Mustard pickles are the perfect twist on classic pickling. With simple ingredients like cucumbers,