Appetizers

- 1 lb salmon fillets - 1 cup cherry tomatoes, diced - 1/4 cup fresh basil, chopped - 2 cloves garlic, minced - 1 tablespoon balsamic vinegar - 1 tablespoon olive oil - Salt and pepper to taste - 1 French baguette, sliced - 1/4 cup feta cheese, crumbled (optional) When I make bruschetta salmon, I focus on fresh and vibrant ingredients. The salmon fillets are the star of the dish. They should be fresh and firm, giving you a nice, flaky texture when cooked. Next, I love using cherry tomatoes. They are sweet and juicy, making them perfect for this dish. I dice them up to release their flavor and let them mix well with the other ingredients. Fresh basil adds a fragrant touch. I always chop it finely to spread that lovely aroma throughout the dish. Garlic is a must. It gives the bruschetta a nice kick and depth of flavor. For the extra zest, I use balsamic vinegar and olive oil. They blend perfectly with the tomatoes and herbs. I season with salt and pepper to enhance the taste. The French baguette is essential for the base. I slice it to get that perfect crunch. If you want a little extra flavor, crumbled feta cheese can be a great addition. These ingredients work together to create a bright and tasty appetizer. You can find the full recipe in the section above. Enjoy crafting this delightful dish! To make the bruschetta topping, start by mixing the ingredients. In a bowl, combine: - 1 cup cherry tomatoes, diced - 1/4 cup fresh basil, chopped - 2 cloves garlic, minced - 1 tablespoon balsamic vinegar - 1 tablespoon olive oil - Salt and pepper to taste Mix these well. This step is key to a fresh flavor. Once mixed, let it sit. Allowing flavors to meld makes the topping pop. The longer it sits, the tastier it gets. Now, let’s focus on the salmon. First, preheat your oven to 375°F (190°C). This is the correct oven temperature. While the oven heats, season the salmon. Place the fillets on a baking sheet lined with parchment paper. Sprinkle salt and pepper on top. Bake the salmon for about 15-18 minutes. The cooking time for optimal results is crucial. You know it's done when it flakes easily with a fork. This method keeps the salmon juicy and tender. Next, let’s toast the baguette. Slice the French baguette into 1/2-inch thick slices. This slicing technique helps with even toasting. Lay the slices on another baking sheet. Toast the baguette in the oven for about 5-7 minutes. The toasting duration for perfect crunch is important. You want them golden brown, not burnt. This will give your bruschetta a nice, crispy base. Once the salmon is ready, you can assemble your dish with the full recipe in mind. Enjoy your bruschetta salmon! When choosing salmon, look for bright color and firm texture. The fish should smell fresh, not fishy. I prefer wild-caught salmon for its rich flavor. You can buy quality fish at local markets, specialty seafood shops, or grocery stores with a good reputation. Always ask the fishmonger about the catch of the day for the best options. To balance flavors, use ripe tomatoes and fresh herbs. A splash of balsamic vinegar adds a nice kick. Avoid soggy bread by toasting the baguette until golden brown. This helps create a crispy base that holds the toppings well. You can brush the bread with olive oil before toasting for extra flavor. Pair your bruschetta salmon with a light salad or roasted vegetables. This adds color and freshness to your meal. For a beautiful presentation, stack the bruschetta on a serving platter. Garnish with extra basil leaves or a drizzle of balsamic glaze. Making your dish look appealing will impress your guests. For the full recipe, check the details above. Enjoy! {{image_2}} You can change the flavor of bruschetta salmon by choosing different tomatoes. Heirloom tomatoes add a sweet taste. They come in many colors and sizes. Grape tomatoes are small and juicy. They can make your dish bright and fresh. Just chop them up like you would cherry tomatoes. This small switch can create a whole new taste. You can mix in various herbs and spices for excitement. Try adding dill or parsley for a different twist. A sprinkle of red pepper flakes can give your dish a kick. You can also think about incorporating cheese. Instead of feta, you might enjoy goat cheese or mozzarella. Each cheese brings its own unique flavor, which can pair well with the salmon. If salmon isn’t your thing, you have options. Grilled chicken or shrimp can work well too. They take on the flavors of the toppings nicely. For vegetarians, you can use grilled eggplant or zucchini. These veggies have a great texture and absorb flavors well. Just adapt the recipe to suit your needs. Each alternative can deliver a tasty bruschetta experience. For the complete recipe, check the Full Recipe section. To keep bruschetta salmon fresh, store leftovers in an airtight container. This helps prevent drying out. Place any salmon and bruschetta topping separately to keep flavors intact. You can refrigerate them for up to three days. After that, the taste and texture may decline. Always check for any off smells or changes before enjoying. When reheating salmon, use the oven or a skillet for best results. Preheat your oven to 350°F (175°C) and place the salmon in a baking dish. Cover with foil to keep moisture in. Reheat for about 10 minutes or until warmed through. To maintain the bruschetta topping, heat it gently on the stove. Avoid high heat, as this can make the tomatoes mushy. Warm it just until it’s heated through, then combine with the reheated salmon. This method keeps each component flavorful and fresh. To make Bruschetta Salmon at home, gather your ingredients. You will need salmon fillets, cherry tomatoes, fresh basil, garlic, balsamic vinegar, olive oil, salt, pepper, and a French baguette. You can find the full recipe above. Start by mixing the diced tomatoes, basil, garlic, vinegar, and oil. While that sits, bake the salmon and toast the baguette slices. Once everything is ready, assemble your bruschetta with the salmon and topping. Yes, you can use canned salmon in this recipe. If using canned salmon, choose high-quality options. Drain the salmon and flake it into chunks. This can save time and still taste great. Just be sure to adjust the seasoning as canned salmon can be saltier than fresh. The best way to serve Bruschetta Salmon is warm and fresh. Arrange the toasted baguette slices on a platter. Spoon the tomato basil mix on each slice, then top with flaked salmon. If you like, sprinkle feta cheese on top for added flavor. This dish looks vibrant and is perfect for gatherings. Yes, you can prepare the bruschetta topping ahead of time. Mix the tomatoes, basil, garlic, vinegar, and oil and store it in the fridge. This lets the flavors blend nicely. Just remember to take it out of the fridge before serving to let it come to room temperature. You know the salmon is cooked through when it flakes easily with a fork. The color should change from bright pink to a lighter shade. If you have a food thermometer, the internal temperature should be 145°F (63°C). Cooking times may vary, so keep an eye on it. Bruschetta salmon combines fresh salmon, vibrant tomatoes, and aromatic basil. We explored how to prepare this dish, starting with the topping and baking technique. I shared tips for selecting quality salmon and suggested variations for different tastes. Remember, to achieve the best flavor, balance your ingredients well. With the right care, your bruschetta salmon will impress every time. Enjoy creating a delicious meal that’s sure to please!
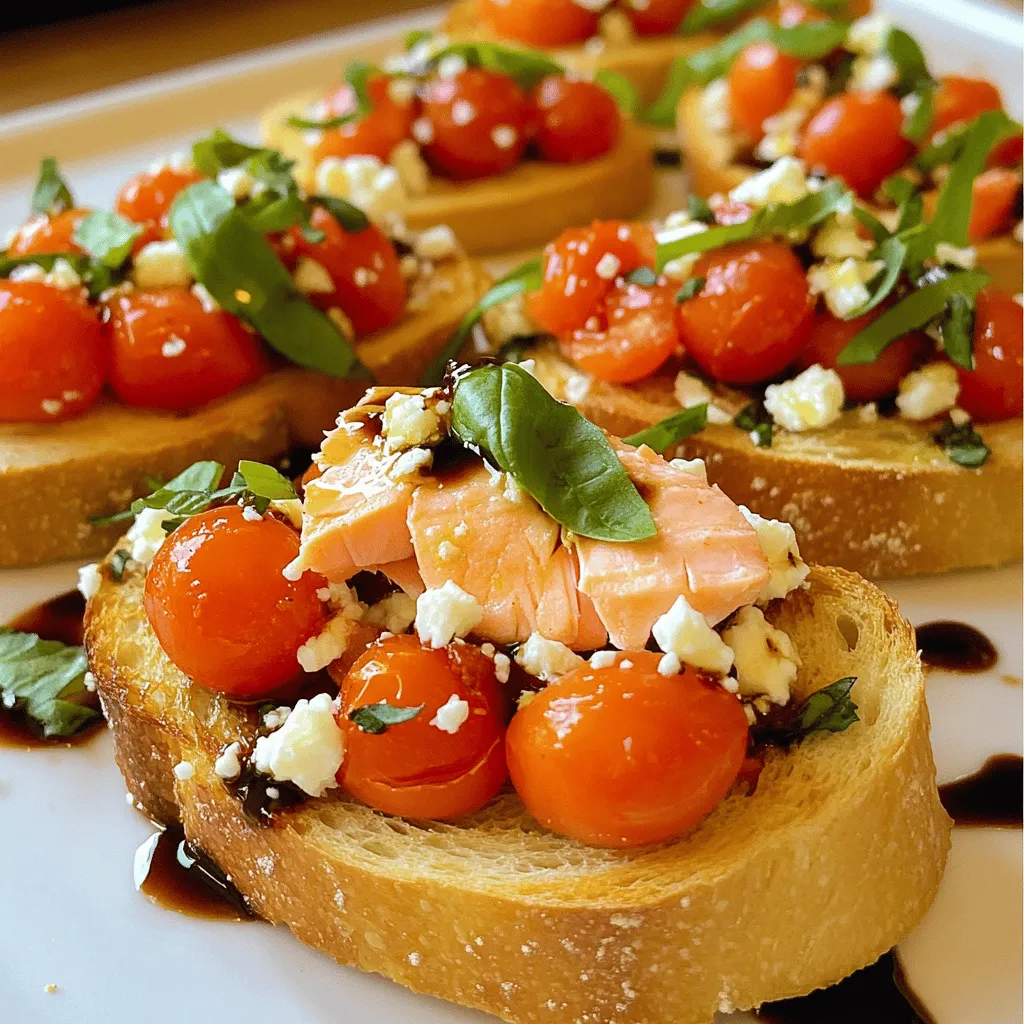
Bruschetta Salmon Delightful and Tasty Appetizer
If you’re searching for a delightful appetizer that impresses and satisfies, look no further than Bruschetta Salmon. This tasty dish combines the rich flavors of
- 2 medium zucchinis, grated - 1 cup breadcrumbs (preferably whole wheat) - 1/2 cup grated Parmesan cheese - 2 large cloves of garlic, minced - 2 large eggs, beaten - 1/4 cup fresh parsley, chopped - 1 teaspoon dried oregano - Salt and pepper to taste - Olive oil for frying Zucchini is the star here. It adds moisture and a mild flavor. Breadcrumbs help bind everything together and give a nice crunch. Parmesan cheese brings saltiness and richness to each bite. Garlic adds a punch of flavor, making these bites taste fresh and fragrant. Eggs act as a binder, keeping the mixture together during cooking. Finally, parsley and oregano add brightness and aroma to the dish. If you need a gluten-free option, use gluten-free breadcrumbs. For a dairy-free version, skip the Parmesan or use a nut-based cheese. If you're vegan, replace the eggs with flaxseed meal mixed with water. This will help bind the mixture just like eggs do. First, gather all your ingredients. You will need two medium zucchinis, breadcrumbs, Parmesan cheese, garlic, eggs, parsley, oregano, salt, and pepper. Grate the zucchinis using a box grater. Place the grated zucchinis in a large bowl and add a pinch of salt. Let them sit for ten minutes. This step is key for removing excess moisture. After ten minutes, drain the zucchinis by pressing them in a clean kitchen towel. This ensures the bites are not soggy. If you choose to bake your zucchini bites, preheat your oven to 375°F (190°C). In the bowl with the drained zucchinis, add breadcrumbs, grated Parmesan, minced garlic, beaten eggs, parsley, oregano, salt, and pepper. Stir the mixture well until all ingredients are combined. Form small patties, about the size of golf balls. Place them on a baking sheet lined with parchment paper. Lightly brush each patty with olive oil for crispiness. Bake them for 20-25 minutes. Flip them halfway for even cooking. You want them golden brown and delicious. If frying sounds better, heat about 1/4 inch of olive oil in a skillet over medium heat. Form the zucchini mixture into bite-sized patties as before. Carefully place the patties in the hot oil. Fry each side for about 3-4 minutes until they turn golden brown. Use a slotted spoon to transfer the fried bites to a paper towel-lined plate. This helps absorb excess oil. Enjoy the crispy, flavorful bites warm! For more detailed steps, check the Full Recipe. To get your zucchini garlic bites crispy, start by drawing out moisture. Grate the zucchinis and sprinkle them with salt. Let them sit for about 10 minutes. This pulls out extra water. After that, squeeze them dry in a towel. This step is key for a crunchy texture. If you bake, brush them lightly with olive oil. If frying, ensure your oil is hot before adding the bites. This helps them fry evenly. To boost the flavor, use fresh herbs like parsley or basil. These add a bright taste. You can also mix in some red pepper flakes for a little heat. Adding spices like smoked paprika can give a nice twist, too. For texture, consider using panko breadcrumbs instead of regular ones. They are lighter and crispier. This change can make a big difference in your bites. One common mistake is not draining the zucchini well. If you skip this step, the bites can turn out soggy. Another error is overcrowding the pan when frying. Leave space between bites. This ensures they cook evenly. Lastly, don’t skip the salt in your mixture. It brings out the flavors of the other ingredients. Follow these tips for a tasty snack! For the full recipe, check out the details above. {{image_2}} You can change the flavor of your zucchini garlic bites by adding herbs and spices. Try using fresh basil, thyme, or rosemary for a different taste. If you like heat, add red pepper flakes for a spicy kick. You can also use a mix of Italian seasoning for a savory touch. These small changes can make a big difference in flavor. Parmesan cheese is great, but you can use other cheeses too. Shredded mozzarella gives a gooey texture. Feta cheese adds a salty and tangy flavor. If you want a richer taste, try cheddar. Experimenting with cheese can change the bites’ flavor and texture, making them fun and unique. Adding more veggies or proteins makes these bites heartier. Grated carrots or spinach can boost nutrition and color. If you want protein, add cooked chicken, turkey, or even beans. You can mix these into the zucchini mixture before forming the patties. This will create a filling snack that packs a punch. For the full recipe, be sure to check out the details above! After you enjoy your zucchini garlic bites, store any leftovers in an airtight container. Keep them in the fridge for up to three days. This helps keep them fresh and tasty. If you want to keep them longer, consider freezing. When you're ready to eat your leftovers, you have a few options. You can reheat them in the oven. Set the oven to 350°F (175°C) and bake for about 10 minutes. This method keeps them crispy. You can also use a skillet on medium heat. Just add a little olive oil and heat for a few minutes. Both methods work well to bring back that fresh flavor. To freeze your zucchini bites, first, let them cool completely. Then, place them in a single layer on a baking sheet. Freeze for about one hour. After that, transfer the bites to a freezer-safe bag or container. Label them with the date. You can freeze them for up to three months. When you're ready to cook them, no need to thaw. Just bake or fry straight from the freezer. This way, you have a quick snack ready whenever you want. Yes, you can. To replace eggs, use 1/4 cup of applesauce or mashed banana. These options help bind the ingredients. You can also use flaxseed meal mixed with water. Combine 1 tablespoon of flaxseed meal with 2.5 tablespoons of water. Let this sit for about 5 minutes until it thickens. This will work well in the recipe. To make these zucchini bites gluten-free, use gluten-free breadcrumbs instead of regular ones. You can also pulse gluten-free oats in a food processor to make a breadcrumb texture. This simple swap keeps the bites light and crispy. Zucchini garlic bites taste great with many dips. I love serving them with marinara sauce for a classic touch. You can also try tzatziki, ranch, or garlic aioli for a tasty twist. Mix and match to find your favorite! This article covered how to make tasty zucchini bites from start to finish. We looked at key ingredients, shared cooking methods, and offered tips for crispiness and flavor. You can mix in herbs, spices, or different cheeses to make them your own. Storing and reheating leftovers is easy, too. Experiment and enjoy these bites at your next meal. You'll find that they are versatile and delicious.
Easy Zucchini Garlic Bites Flavorful and Simple Snack
Looking for a tasty snack? Try my Easy Zucchini Garlic Bites! They’re simple to make and burst with flavor. You can bake or fry them,
- Zucchinis: Zucchinis are the star of this dish. They bring moisture and a light flavor. Grating them makes them easy to mix into the batter. Aim for medium zucchinis for the best texture. - Grated Parmesan cheese: This cheese adds a rich flavor. It melts and helps bind the fritters together, giving them a nice crunch. Choose fresh grated Parmesan for the best taste. - Fresh herbs: Adding herbs like parsley or basil can boost the flavor. They bring a pop of freshness, making the fritters even tastier. Use about two tablespoons of chopped herbs in your batter. - Red pepper flakes: If you like spice, add red pepper flakes. They give a kick to your fritters. Start with 1/4 teaspoon for a little heat. - Other cheese options: You can use different cheeses for unique flavors. Feta or mozzarella can work well. Feel free to mix and match based on your taste. - Suggested dips for serving: Serve your fritters with dips like Greek yogurt or sour cream. These creamy dips balance the crunchiness and add extra flavor. Try adding fresh herbs to the dip for added zest. For the full recipe, check out my Crispy Air Fryer Zucchini Fritters 🥒. Start by grating the zucchinis. Use a box grater or a food processor for speed. Place the grated zucchini into a large bowl. Next, sprinkle one teaspoon of salt over the grated zucchini. Let it sit for about 10 minutes. This step draws out excess moisture, which is key for crispy fritters. After 10 minutes, grab a clean kitchen towel or cheesecloth. Squeeze the zucchini to remove as much liquid as you can. This step is very important. If you skip it, your fritters may turn out soggy. Discard the liquid. Now, your zucchini is ready for the next step! In the same bowl with your drained zucchini, add the following ingredients: - 1 cup all-purpose flour - 1/2 cup grated Parmesan cheese - 1/2 cup finely chopped green onions - 2 large eggs - 1 teaspoon garlic powder - 1/2 teaspoon black pepper - 1/4 teaspoon red pepper flakes (optional) Mix all the ingredients well. You want a thick batter that holds together. If it feels too wet, add a little more flour. If it's too dry, you can add a splash of water. The right consistency is key for perfect fritters. Before air frying, preheat your air fryer to 375°F (190°C). This helps the fritters cook evenly. While it's heating, lightly spray the air fryer basket with cooking spray or drizzle it with olive oil. Now, scoop about 2 tablespoons of the zucchini mixture. Form it into a patty and place it in the air fryer basket. Make sure to leave some space between each fritter. This allows hot air to circulate and cook them evenly. Air fry the fritters at 375°F for 10-12 minutes. Flip them halfway through cooking. This helps them get golden brown on both sides. Once they are done, remove the fritters and let them rest on a plate lined with paper towels. This will help absorb any extra oil. Serve warm and enjoy your crispy and flavorful zucchini fritters! For the full recipe, check out the detailed instructions above. To make your zucchini fritters crispy, adjust the cooking time based on your air fryer. Each air fryer heats differently. Check your fritters a few minutes early. If they are golden brown, they are done. If not, give them a few more minutes. Using cooking spray can help create a crisp layer. Just a light spray will do. Olive oil works too but may add more flavor. You can drizzle it over the fritters before cooking. Both methods work well, so try them and see which you prefer. Zucchini fritters taste great with a few dips. Greek yogurt is a classic choice. It adds creaminess and tang. Sour cream is also a nice option. You can add fresh herbs on top for color and flavor. For a fun twist, you can serve them with salsa or a spicy aioli. These add a kick that pairs well with the fritters. Serve them warm for the best taste and texture. If you want to prepare ahead, you can make the batter in advance. Just mix all the ingredients and store them in the fridge. This way, you can cook them fresh when you are ready to eat. When you are ready to serve, air fry the fritters as instructed. If you have leftovers, reheat them in the air fryer. This method will help keep them crispy. You can also warm them in the oven. Just make sure to watch them closely to avoid burning. For the full recipe, check out the detailed instructions above. {{image_2}} To boost flavor, add herbs and spices. Fresh parsley or basil brings a bright taste. You can also try dill for a unique twist. If you like heat, include more red pepper flakes. For those on a gluten-free diet, swap all-purpose flour for almond or chickpea flour. Both options keep the fritters tasty and vibrant. Feel free to mix in other veggies. Shredded carrots or bell peppers pair well with zucchini. You can even use cauliflower for a low-carb option. Just remember, maintaining texture is key. Squeeze out moisture from any veggie you use. This way, your fritters stay crispy and delicious. Personalize your fritters with toppings. A dollop of Greek yogurt or sour cream enhances flavor. You can also add salsa or a spicy aioli for a fun twist. For dressing, try a light vinaigrette with lemon juice and olive oil. This brightens up the dish and adds a fresh note. Check out the Full Recipe for more ideas! To store uncooked fritter batter, place it in an airtight container. Keep the container in the fridge. Use it within a day for the best taste. For cooked zucchini fritters, let them cool down first. Place them in a single layer in a container. You can also use paper towels between layers to avoid sogginess. To freeze fritters, first, let them cool completely. Then, lay them on a baking sheet in a single layer. Freeze for about one hour until firm. After that, transfer the fritters to a freezer bag. Remove as much air as possible before sealing. For reheating, thaw fritters overnight in the fridge. You can reheat them in the air fryer at 350°F for about five minutes. In the fridge, cooked zucchini fritters last for about three days. If you freeze them, they can last up to three months. Always check for signs of spoilage. If you see mold or if they smell off, it’s best to throw them away. Keeping them stored properly helps maintain their crispiness and flavor. You can check out the Full Recipe for more details on making and enjoying these fritters! To make your fritters crispy, follow these key tips: - Remove moisture: After grating the zucchinis, salt them and let them rest. This draws out excess water. Squeeze them tightly with a cloth to remove more moisture. - Use the right flour: All-purpose flour helps bind the mixture and gives a nice texture. - Preheat the air fryer: Starting with a hot air fryer ensures even cooking and crispiness. - Do not overcrowd: Leave space between fritters in the basket. This helps air circulate for even crisping. With these tips, you’ll get a crunchy outer layer and a soft inside. Yes, you can bake these fritters! Here’s how: - Preheat your oven: Set it to 400°F (200°C). - Use a baking sheet: Line it with parchment paper. This prevents sticking. - Shape the fritters: Place them on the sheet, leaving space in between. - Bake time: Bake for about 20-25 minutes, flipping halfway through. Expect a different texture. Oven-baked fritters may be less crispy than air-fried ones, but they still taste great! These fritters are versatile! Here are some ideas: - Dips: Serve with Greek yogurt or sour cream for creaminess. - Salads: A fresh green salad adds brightness. - Salsa: Tomato salsa or a spicy dip can enhance the flavor. - Grains: Pair with quinoa or rice for a complete meal. These sides will make your Air Fryer Zucchini Fritters a hit! For the full recipe, check the link above. Air fryer zucchini fritters are a tasty, healthy snack. We explored the key ingredients, like zucchini and Parmesan cheese, plus herbs for flavor. You learned how to prepare, mix, and air fry for perfect fritters. Tips helped ensure crispiness and inspired serving ideas. Variations let you customize your fritters. Finally, proper storage and freezing extend their life. Enjoy these fritters as a fun dish that everyone will love!
Air Fryer Zucchini Fritters Crispy and Flavorful Delight
Looking for a tasty way to enjoy zucchini? My Air Fryer Zucchini Fritters are your answer! These little bites pack a crispy texture and bold
For these yummy muffins, you need a few key items: - 1 ½ cups Bisquick mix - 1 cup grated zucchini (squeezed dry) - 1 cup shredded sharp cheddar cheese The Bisquick mix gives the muffins their light texture. Grated zucchini adds moisture and a fresh taste. Sharp cheddar cheese brings a rich flavor that pairs perfectly with the zucchini. To boost the flavor, we add simple seasonings: - 1 teaspoon garlic powder - 1 teaspoon onion powder - ½ teaspoon black pepper - ¼ teaspoon salt - ¼ teaspoon crushed red pepper flakes (optional for a kick) Garlic and onion powder provide savory depth. Black pepper adds a touch of heat. If you like spice, the crushed red pepper flakes are a fun option. For the wet part of the recipe, gather: - 2 large eggs - ½ cup milk - ¼ cup olive oil These ingredients help bind the muffins together. Eggs add richness, while milk keeps them soft. Olive oil brings moisture and a slight fruitiness. For the full recipe, check out the earlier sections. You will love how these flavors come together! 1. Preheat the oven: Start by setting your oven to 375°F (190°C). This ensures your muffins bake evenly. 2. Prepare the muffin tin: Lightly grease your muffin tin or line it with paper liners. This helps the muffins come out easily. 1. Combine dry ingredients: In a large bowl, mix 1 ½ cups of Bisquick mix, 1 teaspoon of garlic powder, 1 teaspoon of onion powder, ½ teaspoon of black pepper, and ¼ teaspoon of salt. Stir until everything blends well. 2. Whisk wet ingredients: In another bowl, whisk together 2 large eggs, ½ cup of milk, and ¼ cup of olive oil. Make sure they mix well. 1. Combine wet and dry mixtures: Pour the wet mix into the dry mix. Stir gently until just combined. Do not overmix, as this could make the muffins tough. 2. Fill muffin tin and bake: Fold in 1 cup of grated zucchini and 1 cup of shredded sharp cheddar cheese. Spoon the batter into the prepared muffin tin, filling each cup about ¾ full. Bake for 20-25 minutes. The tops should turn golden. Use a toothpick to check if they are done; it should come out clean. For the full recipe, refer to the instructions above to guide you through these steps in detail. Enjoy the process and the delightful muffins you’ll create! To make the best muffins, don’t overmix the batter. Mixing too much makes them dense. Mix just until you see no dry flour. You also need to use squeezed dry zucchini. This step is key. Excess moisture can make the muffins soggy. Squeeze the zucchini in a clean cloth or paper towel before adding it to the mix. Add crushed red pepper flakes for a bit of heat. A little goes a long way. This spice contrasts well with the cheese. You can also experiment with different cheeses. Try using pepper jack for a spicy kick or mozzarella for a milder taste. Mixing cheeses can create unique flavors. These muffins are great with toppings. Try a dollop of herbed cream cheese for extra flavor. Fresh herbs like parsley or chives can brighten the dish. Pair these muffins with a salad for a light meal. They also work well with soup, making a comforting combo. Enjoy these muffins warm for the best taste! Check out the Full Recipe for more details. {{image_2}} You can easily adapt this recipe to fit your needs. If you want gluten-free options, look for gluten-free Bisquick. Many brands offer this. Just check the package to make sure it works well in baking. If you need a dairy-free option, try using dairy-free cheese. Brands like Daiya and Violife make great substitutes. They melt well and taste good too. Want to boost the taste? You can add fresh herbs like chives or dill. These herbs give a nice touch of flavor. Just chop them finely and mix them in with the other ingredients. Another fun idea is to mix in cooked bacon or ham. This adds a savory twist. Just chop the meat into small pieces and fold it into your batter. If you're watching carbs, you can make low-carb muffins. Use almond flour instead of Bisquick. This change keeps the taste and texture without the extra carbs. For a vegetarian version, skip the meat and add more veggies. Try adding chopped bell peppers or spinach. These veggies add color and nutrients without changing the flavor much. These variations let you customize your Bisquick zucchini cheddar muffins. Whether you need gluten-free, dairy-free, or different flavors, you can make them just right. Check out the Full Recipe for all the details. To keep your muffins fresh, store them in the fridge. Place them in an airtight container. This helps them stay moist and tasty for longer. You can also freeze these muffins. Wrap each muffin in plastic wrap. Then, put them in a freezer bag. This method protects them from freezer burn. When it's time to enjoy your muffins again, reheating is easy. The best way is to use an oven. Preheat it to 350°F (175°C). Place the muffins on a baking sheet for about 10 minutes. This way, they stay warm and soft. You can also use a microwave. Heat each muffin for about 15-20 seconds. This method is quick but may make them a bit chewy. In the fridge, the muffins last about 3-4 days. Always check for any mold or off smells before eating. For longer storage, freezing is your best bet. These muffins can last up to 3 months in the freezer. Just remember to label your bags with the date. This way, you will know when to enjoy them best! For the full recipe, check earlier sections. Yes, you can use frozen zucchini. Just make sure to thaw and squeeze out the water. This step is important to avoid soggy muffins. Frozen zucchini works well because it still holds flavor. You might even find it more convenient when zucchini is out of season. These muffins pair well with many dishes. You can serve them with a fresh salad or a bowl of soup. They also make a great side for brunch with eggs or bacon. Another idea is to spread them with cream cheese or butter. Each option adds a tasty twist to your meal. To check if your muffins are done, look for a golden top. Insert a toothpick into the center of a muffin. If it comes out clean or with a few crumbs, they are ready. Baking time is usually 20 to 25 minutes. Keep an eye on them as ovens vary. Enjoy your warm muffins fresh from the oven! In this blog post, we explored making delicious Bisquick Zucchini Cheddar Muffins. We covered the key ingredients like Bisquick mix, zucchini, and cheese. You learned the step-by-step preparation and baking process. I shared tips on perfecting texture and enhancing flavor. We also talked about storage and variations for dietary needs. These muffins are easy to make and great for any meal. Whether for breakfast or a snack, these muffins are sure to please. Enjoy baking and sharing!
Bisquick Zucchini Cheddar Muffins Flavorful and Easy
If you’re looking for a quick and tasty way to enjoy zucchini, you’ve come to the right spot! These Bisquick Zucchini Cheddar Muffins are not
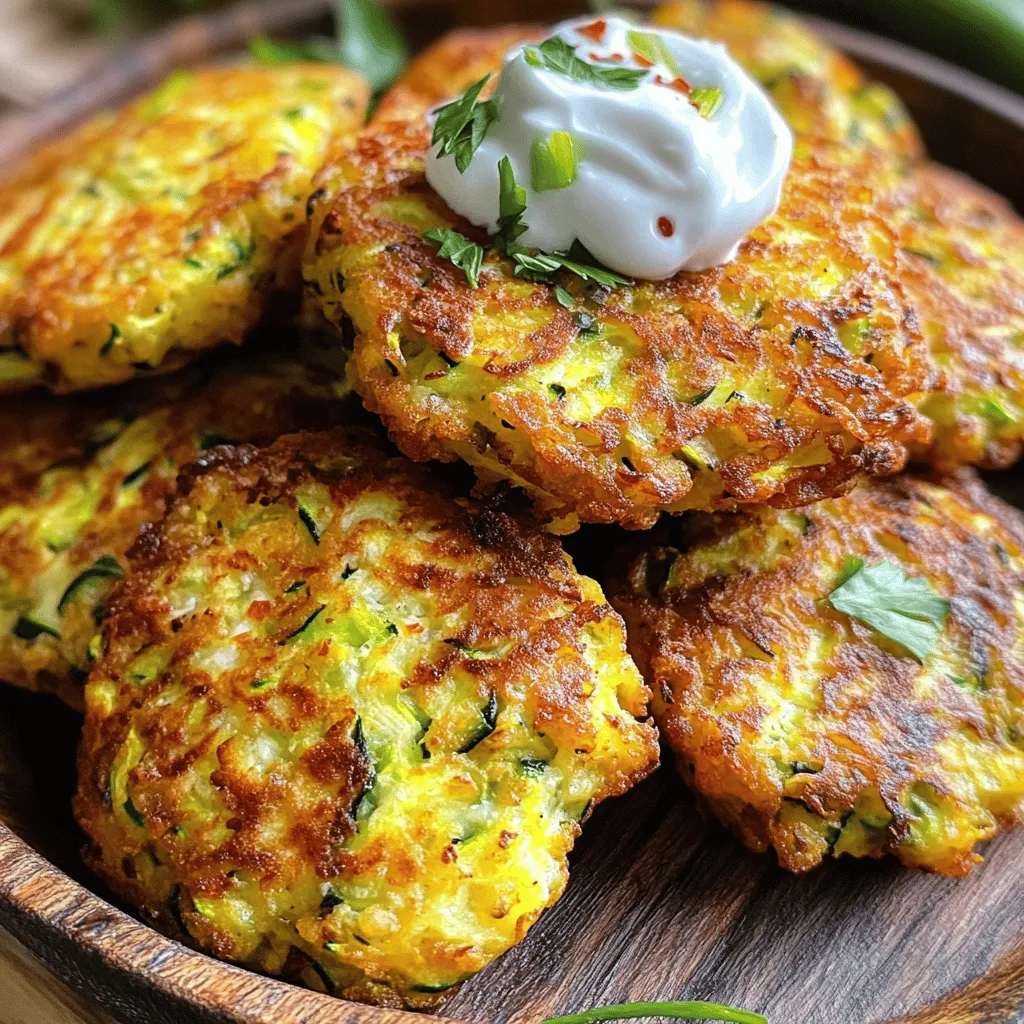
For crispy and flavorful zucchini and sweet potato fritters, you need a few key items. Here’s your ingredient list: - 1 medium zucchini, grated - 1 medium sweet potato, peeled and grated - 1/2 cup all-purpose flour (or gluten-free flour) - 1 large egg - 1/4 cup grated Parmesan cheese (optional) - 2 green onions, finely chopped - 1 clove garlic, minced - 1 teaspoon cumin powder - 1/2 teaspoon paprika - Salt and pepper to taste - Olive oil for frying 1. Zucchini and sweet potato: These are the stars of your fritters. Grating helps release moisture and create a better texture. 2. Pantry staples: Items like flour, egg, and spices are essential for binding and flavor. 3. Optional add-ins: Feel free to add ingredients like cheese or herbs for extra flavor. You can find the full recipe for these delicious fritters in the Zucchini & Sweet Potato Fritters section. Enjoy crafting these tasty bites! Start with preparing your vegetables. Grate the zucchini and sweet potato using a box grater. This gives a fine texture for the fritters. Place the grated veggies in a clean kitchen towel. Twist the towel tightly and squeeze out as much moisture as you can. Removing excess moisture is key to making crispy fritters. If you skip this step, your fritters might be soggy. Next, grab a large mixing bowl. Combine the drained zucchini and sweet potato with the flour, egg, and optional Parmesan cheese. Add finely chopped green onions, minced garlic, cumin, paprika, salt, and pepper. Mixing well is important to coat all the veggies with flour. The egg acts as a binder, holding the fritters together. Now, heat a non-stick skillet over medium heat. Add a tablespoon of olive oil to the skillet. Once the oil is hot, scoop about 2 tablespoons of the fritter mixture into the pan. Flatten it slightly with a spatula to form a nice pancake shape. Remember not to overcrowd the skillet. Cook for 4-5 minutes until golden brown, then flip and cook for another 4-5 minutes. When done, remove the fritters and place them on a paper towel-lined plate. This helps absorb extra oil. Repeat with the remaining mixture, adding more oil as needed. Enjoy your crispy and flavorful fritters! For the complete recipe, check out the Full Recipe. To make your fritters crispy, remove all moisture from the zucchini and sweet potato. This step is key. If you skip it, your fritters will be soggy. After grating, place the veggies in a clean kitchen towel. Squeeze tightly to drain excess liquid. Next, frying temperature matters. Heat your skillet to medium. If it’s too low, the fritters will absorb oil. If too high, they might burn. A good rule is to test with a small amount of batter. If it bubbles and sizzles, you’re ready to go! Dips can elevate your fritters! I love serving them with yogurt or a tangy sauce. A garlic aioli or spicy salsa also works well. These dips enhance the dish's flavor and add a fun twist. Pair fritters with light salads or roasted vegetables. A fresh arugula salad or steamed broccoli complements the fritters nicely. It adds color and balances the meal. Want to spice things up? Try adding herbs like parsley or cilantro. They bring freshness and depth to your fritters. You can also play with spices like chili powder or garlic powder for added heat. Cheese choices can change the taste too. If you prefer a different flavor, try feta or cheddar. These cheeses add richness and a delightful contrast to the sweet potato and zucchini. Experimenting with flavors makes cooking fun! For the full recipe, check out the [Full Recipe]. {{image_2}} You can easily change the taste of your fritters by adding different vegetables. Try grated carrots, spinach, or bell peppers for a fun twist. Each veggie brings its own flavor, making the fritters unique. You can also incorporate proteins into the mix. Adding cooked and crumbled bacon or diced chicken boosts protein and flavor. For a vegetarian option, try adding cooked lentils or chickpeas. If you need gluten-free fritters, simply swap the all-purpose flour for gluten-free flour. This keeps the fritters tasty while meeting your needs. If you prefer a vegan option, replace the egg with a flaxseed meal or unsweetened applesauce. Mix one tablespoon of flaxseed meal with three tablespoons of water. Let it sit for about five minutes until it thickens. This acts as a great binder. Using seasonal produce can make your fritters even fresher. In summer, add fresh corn or diced tomatoes. In the fall, add spices like nutmeg or seasonal squash. You can also tailor your fritters to holiday themes. For Halloween, try adding shredded carrots for a spooky look. During Thanksgiving, add herbs like sage or thyme for a festive touch. For the complete recipe, check out the [Full Recipe]. To keep your zucchini and sweet potato fritters fresh, store leftovers in the fridge. Place them in an airtight container. This helps prevent them from drying out. They can last up to three days in the fridge. When you're ready to eat, reheat them in a skillet over medium heat. This method keeps them crispy. You can also use a microwave, but this may make them soft. If you want to save fritters for later, freezing is a smart choice. First, let them cool completely. Then, lay them flat on a baking sheet. Freeze until solid, about one to two hours. After that, transfer them to a freezer bag or container. They can last up to three months in the freezer. To thaw, simply leave them in the fridge overnight. For a quick option, you can microwave them for a few minutes. To maintain the texture and flavor of your fritters, follow these tips: - Always remove excess moisture before cooking. This helps them stay crispy. - Store fritters in a single layer to avoid sticking. - For the best taste, eat them within a few days of cooking. - If you freeze them, label the bag with the date you made them. This keeps track of freshness. For the full recipe, check out the details in the earlier sections. Enjoy your cooking! Can I make these fritters ahead of time? Yes, you can prepare the fritter mixture ahead. Store it in the fridge for up to 24 hours. When ready to cook, just heat your skillet and fry the fritters as usual. This makes meal prep easy and quick. How can I ensure my fritters don’t fall apart? To keep your fritters intact, remove as much moisture as you can from the zucchini and sweet potato. Use a clean kitchen towel to squeeze out the liquid. Also, make sure to mix the batter well and let it rest for a few minutes. This helps bind the ingredients together. Caloric content and serving size Each fritter contains about 100 calories, depending on the size. A serving is typically 2-3 fritters, making this a tasty snack or side dish without too many calories. Health benefits of ingredients Zucchini is low in calories and high in vitamins. It adds fiber to your diet. Sweet potatoes are rich in beta-carotene, which helps with vision and skin health. Eggs provide protein and healthy fats. Together, these ingredients make a nutritious dish. Baking vs frying Frying gives a crispy texture, but baking is a healthier choice. To bake, preheat the oven to 400°F (200°C). Place the fritters on a lined baking sheet and bake for 20-25 minutes. Flip halfway for even cooking. Air fryer instructions for a healthier option Using an air fryer is simple. Preheat it to 375°F (190°C). Arrange fritters in a single layer, and cook for about 10-12 minutes. Shake the basket halfway to ensure even browning. This method uses less oil and still gives a nice crunch. For the full recipe, check out the Zucchini & Sweet Potato Fritters section! In this post, we explored zucchini and sweet potato fritters. We covered the key ingredients, preparation steps, and cooking techniques. You learned tips for crispy fritters and ideas for serving. We discussed variations and ways to store them. These fritters are versatile and delicious. Experiment with flavors to find your favorite. Enjoy your cooking and the tasty results!
Zucchini & Sweet Potato Fritters Crispy and Flavorful
Are you ready to spice up your meal routine? Zucchini and sweet potato fritters are crispy, flavorful bites that will delight your taste buds. Made
- 2 medium zucchinis - 1 cup panko breadcrumbs - 1/2 cup grated Parmesan cheese - 1 teaspoon garlic powder - 1 teaspoon onion powder - 1/2 teaspoon smoked paprika - 1/2 teaspoon salt - 1/4 teaspoon black pepper - 2 large eggs - 1 tablespoon Dijon mustard - Olive oil spray or cooking spray Crispy baked zucchini fries are a fun snack. You can make them in a flash. First, gather your ingredients. The star of the dish is the zucchini. It gives a fresh taste and a nice crunch. Panko breadcrumbs are key for that extra crisp. They help create a light texture. Parmesan cheese adds a savory flavor. The garlic and onion powders give the fries a tasty kick. Don't forget the smoked paprika! It brings a subtle, smoky depth to the mix. You will also need eggs. They help the breadcrumbs stick to the zucchini. Using Dijon mustard in the egg wash adds a nice zing. Finally, a light spray of olive oil makes everything crispy. This mix of ingredients makes a wholesome snack. You can enjoy these fries without the guilt! For the full recipe, check out the detailed instructions. Happy cooking! 1. Preheat your oven to 425°F (220°C). 2. Line a baking sheet with parchment paper. This helps the fries not stick. 1. In a mixing bowl, combine these dry ingredients: - 1 cup panko breadcrumbs - 1/2 cup grated Parmesan cheese - 1 teaspoon garlic powder - 1 teaspoon onion powder - 1/2 teaspoon smoked paprika - 1/2 teaspoon salt - 1/4 teaspoon black pepper 2. Stir the mix until everything is well blended. This step adds great flavor. 1. In a separate bowl, whisk together: - 2 large eggs - 1 tablespoon Dijon mustard 2. Whisk until smooth. This mix helps the crumbs stick to the zucchini. Now you are ready to coat your zucchini fries! Follow the next steps in the full recipe to make delicious crispy baked zucchini fries. To get the best crunch from your zucchini fries, use panko breadcrumbs. Panko is lighter and flakier than regular breadcrumbs. It helps create a crispier texture. You want that satisfying crunch with every bite. When applying oil spray, keep a few tips in mind. Hold the spray can about six inches from the fries. This distance helps coat them evenly. A light layer is all you need. Too much oil can lead to sogginess, which we want to avoid. Coating your zucchini properly is key for great results. First, dip each fry into the egg wash. Shake off any extra egg. This step helps the breadcrumbs stick better. Next, roll the zucchini in the breadcrumb mix. Press down gently to ensure full coverage. To avoid sogginess, act quickly after coating. Place the fries directly onto the baking sheet. This way, they stay crispy while baking. If you let them sit too long, moisture can build up. Remember, fresh is best for that delightful crunch. {{image_2}} You can spice up your crispy baked zucchini fries with various flavors. Try adding Italian seasoning for a classic taste. A pinch of cayenne pepper gives a nice kick. You could also use smoked paprika for a deeper flavor. Experiment with other spices, like cumin or chili powder, to find your favorite mix. If you want to switch things up, try different cheeses. Feta or cheddar can work well in place of Parmesan. For binders, you can use plain yogurt or a vegan mayo instead of eggs. This keeps the recipe fun and allows you to use what you have at home. These zucchini fries shine with the right dipping sauce. Marinara is a classic choice, offering a rich, tangy flavor. Ranch dressing adds a creamy touch. You might also enjoy them with a spicy aioli or a zesty salsa. The right sauce can elevate your snack into a true treat. Check the Full Recipe for more ideas! To keep your zucchini fries fresh, use an airtight container. Glass or plastic containers work great. Store them in the fridge for up to three days. This helps prevent them from getting soggy. To enjoy your fries crispy again, use the oven or an air fryer. Preheat your oven to 400°F (200°C). Place the fries on a baking sheet. Heat for about 10 minutes. This method helps restore their crunch. Avoid using the microwave, as it can make them soggy. You can freeze your zucchini fries for later. After baking, let them cool completely. Arrange them in a single layer on a baking sheet and freeze for 1-2 hours. Once frozen, transfer them to a freezer bag. When ready to eat, thaw in the fridge overnight. Bake them straight from the freezer at 425°F (220°C) for about 15-20 minutes. Enjoy your crispy baked zucchini fries anytime! For the full recipe, check out the details above. Yes, you can! Many veggies work well as fries. Try sweet potatoes, carrots, or eggplant. Each has its own flavor and texture. Cut them into similar shapes to keep cooking times even. You can season them just like zucchini. This way, you get variety in your snacks. To make these zucchini fries vegan, replace the eggs. You can use flaxseed meal mixed with water. Mix 1 tablespoon of flaxseed meal with 2.5 tablespoons of water. Let it sit until it thickens. You can also use aquafaba, the liquid from canned chickpeas, as a great egg substitute. For the cheese, try nutritional yeast for a cheesy flavor without dairy. You’ll know they are done when they turn golden brown. They should be crispy on the outside yet soft inside. If they are still pale, give them a few more minutes. A good sign is when they start to look crunchy and the edges curl slightly. This texture makes them perfect for dipping, adding to your enjoyment. This blog post covered a tasty zucchini fries recipe. You learned about the ingredients and how to prepare them. I shared step-by-step instructions for making crunchy fries. You also found tips for crispiness and possible variations. Storing tips ensure your leftovers stay fresh. Creating these zucchini fries is simple and fun. Enjoy experimenting with flavors and serving ideas. Discover how versatile veggies can be while having a delicious snack!
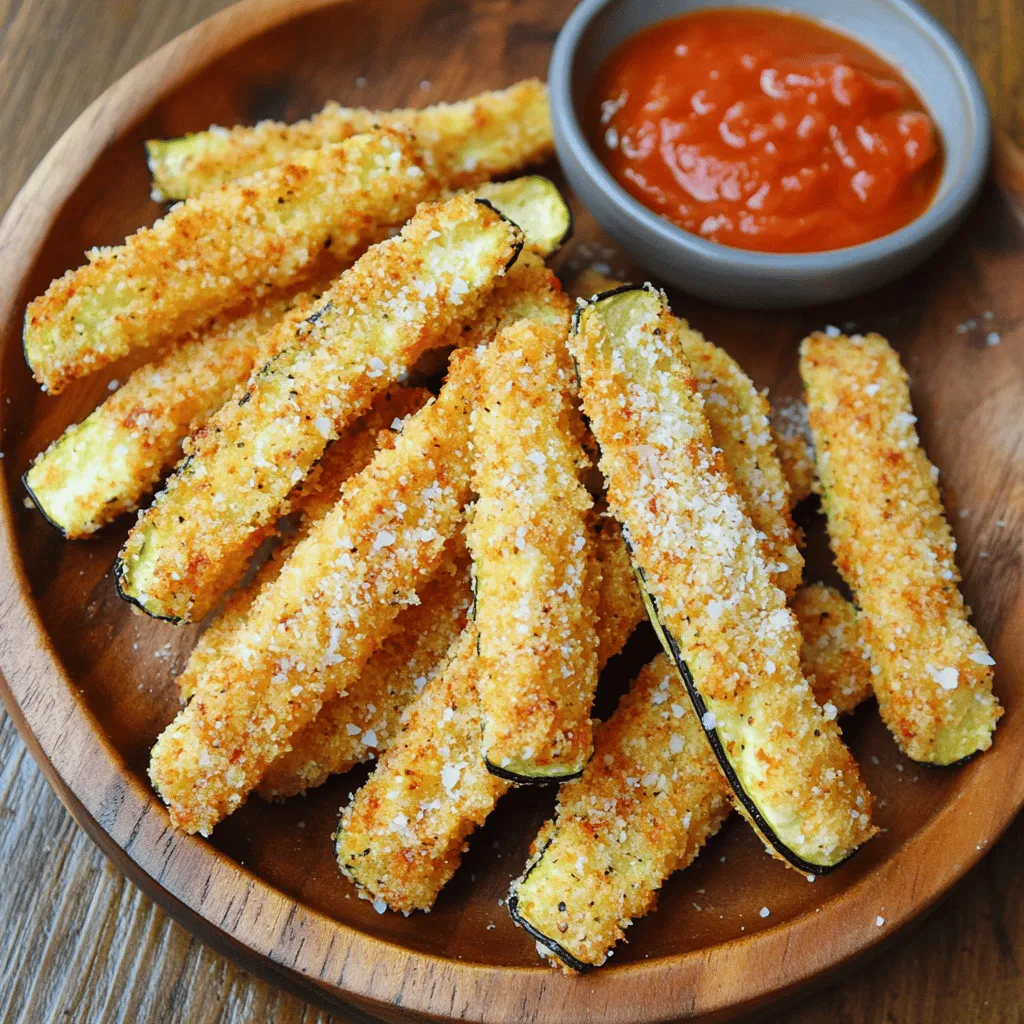
Crispy Baked Zucchini Fries Healthy Snack Option
Looking for a tasty snack that’s both crispy and healthy? You’ve found it! Crispy Baked Zucchini Fries are easy to make and perfect to satisfy
To make crispy cheesy zucchini fritters, gather these ingredients: - 2 medium zucchinis, grated - 1 teaspoon salt - 1 cup all-purpose flour - 1/2 cup grated Parmesan cheese - 1/2 cup shredded mozzarella cheese - 1 large egg - 1/4 cup green onions, finely chopped - 2 cloves garlic, minced - 1 teaspoon baking powder - 1/2 teaspoon black pepper - Olive oil for frying These simple ingredients come together to create a tasty dish. If you're missing some ingredients, don't worry. You can switch things up. - Instead of zucchinis, try grated carrots or yellow squash. - For a gluten-free option, use almond flour or a gluten-free blend. - Swap out Parmesan for feta cheese or cheddar for a different flavor. - Green onions can be replaced with chives or regular onions. These alternatives can add a fun twist to your fritters. Sometimes, you may need to substitute an ingredient. Here are some tips: - If you don’t have mozzarella, use any melty cheese like gouda or provolone. - You can skip the egg by using flaxseed meal mixed with water for binding. - Baking powder can be replaced with baking soda mixed with vinegar for a lift. These substitutions can help you work with what you have at home. For the full recipe, refer to the details above. First, grate the zucchinis. I like to use medium zucchinis for the best flavor. Place the grated zucchini in a clean kitchen towel or cheesecloth. Squeeze it to remove extra moisture. This step is key to crispy fritters. Next, add one teaspoon of salt to the zucchini and let it sit for about 10 minutes. The salt will draw out more moisture, helping the fritters stay crispy. In a large bowl, mix the drained zucchini with the following ingredients: - 1 cup all-purpose flour - 1/2 cup grated Parmesan cheese - 1/2 cup shredded mozzarella cheese - 1 large egg - 1/4 cup green onions, finely chopped - 2 cloves garlic, minced - 1 teaspoon baking powder - 1/2 teaspoon black pepper Mix everything until it's well combined. Heat olive oil in a large skillet over medium heat. You want enough oil to cover the bottom of the pan. Once the oil is hot, scoop spoonfuls of the mixture into the skillet. Flatten them slightly with the back of the spoon. Be careful not to overcrowd the pan, as this can lead to steaming instead of frying. Cook the fritters for about 3-4 minutes on each side. You want them to turn golden brown and crispy. When they are done, transfer the fritters to a plate lined with paper towels. This helps absorb any excess oil. Repeat the frying process until all the mixture is cooked, adding more oil as needed. To make sure your fritters are crispy, always remove excess moisture from the zucchini. Use a clean kitchen towel or cheesecloth for this. Also, do not skip the resting time after adding salt. It helps draw out moisture effectively. When frying, keep the oil hot but not smoking. This balance ensures a nice crust while keeping the inside moist. Serve the fritters warm and enjoy them right after cooking for the best texture. For the full recipe, refer to the details provided above. To fry your fritters well, use a hot skillet with olive oil. A medium heat works best to cook them evenly. Avoid overcrowding the pan. This helps the fritters stay crispy. Cook them in small batches for perfect results. To keep your fritters crispy, drain them well after frying. Place them on a paper towel-lined plate to absorb extra oil. You can also bake them briefly in the oven at 200°F (93°C). This keeps them warm and crispy until you serve. Serve the fritters warm on a platter. Garnish with fresh herbs like parsley or cilantro. They pair well with yogurt or sour cream for dipping. For a fun twist, serve them with a spicy salsa or a tangy sauce. These options enhance the flavors and make every bite exciting. You can find the Full Recipe for these tasty bites above. {{image_2}} You can make zucchini fritters even better with herbs and spices. Fresh herbs like basil or dill add a nice touch. You can also try dried herbs, like oregano or thyme. Just mix in one or two teaspoons into the batter. Spices like paprika or cayenne can bring heat. Start with a pinch, then adjust to taste. These additions enhance the flavor and make each bite exciting. While Parmesan and mozzarella work great, feel free to mix cheeses. Cheddar adds a sharp taste. Feta brings a salty kick. Even goat cheese can give a creamy texture. Just remember to keep the total cheese amount the same. This way, the fritters remain balanced and delicious. Cheese variations can make your fritters unique every time you cook. You can easily adapt this recipe for vegan or gluten-free diets. For vegan fritters, replace the egg with a flax egg. Mix one tablespoon of ground flaxseed with three tablespoons of water; let it sit until it thickens. For gluten-free fritters, use almond flour or gluten-free flour instead of all-purpose flour. Both options allow everyone to enjoy these crispy fritters. Check out the Full Recipe for more details on making these tasty variations. To keep your leftover fritters fresh, place them in an airtight container. Make sure to let them cool first. If you stack them, add a paper towel between layers. This helps absorb moisture and keeps them crispy. Store them in the fridge for up to three days. When you're ready to enjoy the fritters again, avoid the microwave. Instead, reheat them in a skillet. Add a little olive oil over medium heat. Cook for about two minutes on each side until they are hot and crispy. You can also use the oven. Preheat it to 350°F (175°C) and bake them for 10 minutes. You can freeze these fritters for later. First, let them cool completely. Then, place them in a single layer on a baking sheet. Freeze for about two hours. After that, transfer them to a freezer bag. Be sure to label the bag with the date. They can last up to three months in the freezer. When you want to eat them, thaw in the fridge overnight and reheat as mentioned above. For the full recipe, check out the main section. To keep zucchini fritters crispy, remove extra moisture. After grating the zucchinis, use a clean towel to squeeze out water. Add salt and let them rest for about 10 minutes. This draws out even more moisture. When mixing your batter, ensure it’s thick enough to hold together. Yes, you can make these fritters in advance. Prepare the batter, but do not fry them right away. Store the batter in the fridge for a few hours. When you are ready, simply heat your oil and fry them fresh. This keeps them crispy and tasty. Zucchini fritters pair well with many sides. You can serve them with yogurt or sour cream for dipping. A fresh salad adds nice crunch too. For a full meal, serve alongside grilled chicken or fish. Enjoy your tasty fritters with your favorite flavors! For the full recipe, check out the details above. This blog post explored ingredients, step-by-step instructions, and tips for making fritters. We covered every detail, from ingredient swaps to cooking techniques. Remember, using the right steps and tips yields perfect texture and flavor. Keep your fritters crispy by following the best practices shared. Finally, know how to store and reheat for the best taste later. Use this guide to impress friends and family with delicious fritters you made yourself!
Crispy Cheesy Zucchini Fritters Easy and Flavorful Dish
If you’re ready to whip up a dish that’s both crispy and cheesy, you’re in the right place! My Crispy Cheesy Zucchini Fritters are not
- 2 cups assorted mini bell peppers - 1 cup apple cider vinegar - 1/2 cup granulated sugar - 1 tablespoon sea salt - 1 teaspoon mustard seeds - 1 teaspoon red pepper flakes - Additional spices (e.g., cumin, dill) - Other pepper varieties (e.g., jalapeño, serrano) When I make sweet and spicy pickled peppers, I love using assorted mini bell peppers. They add great color and taste. You can find them in red, yellow, and orange. Each color brings its own sweetness. I suggest using about two cups for a good balance. Next, we need a tangy base. Apple cider vinegar works great here. It adds a bright flavor to the mix. One cup will give us enough acidity to balance the sugar. Speaking of sugar, we want half a cup to bring that sweet touch. It helps create a nice contrast with the spicy notes. For spices, I use sea salt. One tablespoon enhances all the flavors. Mustard seeds add a nice crunch and a bit of warmth. I use one teaspoon for just the right amount. Red pepper flakes add heat, so adjust this to your taste. One teaspoon is a good starting point. If you want to get creative, consider optional add-ins. You can add other spices like cumin or dill for extra flavor. You can also try different peppers, like jalapeños or serranos, if you like more heat. Experimenting with these ingredients can lead to some fun new flavors! For the full recipe and detailed steps, check the Sweet and Spicy Pickled Peppers recipe. First, wash the mini bell peppers. Rinse them under cold water. This step removes dirt and any chemicals. Next, slice the peppers. You can cut them into rings or halves. Rings look fun and work great on sandwiches. Halves are perfect for dipping. In a medium saucepan, combine water, apple cider vinegar, sugar, and salt. Use one cup of each. Heat the mixture over medium heat. Stir until the sugar and salt dissolve completely. This step is key for a balanced flavor. Once dissolved, add mustard seeds, coriander seeds, black peppercorns, red pepper flakes, and smashed garlic. Bring this mixture to a gentle boil. Now, it’s time to jar the peppers. Take sterilized jars and tightly pack the sliced peppers inside. Make sure to leave some space at the top. Carefully pour the warm pickling liquid over the peppers. Ensure they are fully submerged. Seal the jars with lids and let them cool to room temperature. Refrigerate them for at least 24 hours. The flavors will deepen as they sit. For the complete process, check the Full Recipe. Using sterilized jars matters a lot. Clean jars keep your pickled peppers safe. To sterilize, boil the jars in water for 10 minutes. Let them dry completely before filling. Store your jars in a cool, dark place. Your pickled peppers last longer when stored at the right temperature. A refrigerator is a great option. Want more heat? Use red pepper flakes! Start with just one teaspoon. Taste the pickling liquid and add more if needed. You can try other spices too. Add cumin for warmth or dill for freshness. These can change the flavor and make your peppers unique. Presentation is key! Serve your pickled peppers in a nice bowl. Drizzle some pickling liquid on top for shine. Garnish with whole peppercorns or parsley. This adds color and makes your dish look fancy. Your friends will be impressed! For the complete recipe, check out the Full Recipe section. {{image_2}} You can use different types of peppers for your pickled treat. Spicy peppers like jalapeños add a nice kick. If you prefer a milder flavor, sweet peppers work well. They balance the heat with their natural sweetness. Mixing both types creates a fun flavor contrast. Experimenting with different vinegars can change the taste a lot. White vinegar gives a sharper bite, while apple cider vinegar is sweeter. You can also add fruits like pineapple or peach. They bring a sweet twist that pairs nicely with the heat. This makes each bite exciting and new. Sweet and spicy pickled peppers have many styles worldwide. Latin-inspired versions often use bold spices and garlic. You might find them in tacos or on nachos. Asian recipes sometimes include soy sauce and ginger. This adds a unique twist that surprises the palate. Each region offers a chance to try something different. Sweet and spicy pickled peppers last about 2 to 3 weeks in the fridge. Keep them sealed tightly in a jar. Check for signs of spoilage, like mold or off smells. If they look or smell bad, it's best to toss them. For long-term storage, you can can your peppers. Use sterilized jars and follow safe canning practices to make them shelf-stable. Another option is to freeze your pickled peppers. Place them in airtight bags and remove as much air as possible. You can add sweet and spicy pickled peppers to many dishes. They are great on sandwiches, burgers, and salads. You can also use them as toppings for tacos or nachos. Serve them as appetizers on a charcuterie board. They add a fun pop of flavor and color to any meal. If you want the full recipe for these tasty treats, check out the section above. Sweet and spicy pickled peppers can last up to two months in the fridge. Make sure to keep them sealed in a jar. After opening, check for any signs of spoilage. If you see mold or an off smell, toss them out. Yes, you can use other types of vinegar. White vinegar gives a sharper taste. Rice vinegar adds a mild sweetness. Each type changes the flavor slightly. Experiment to find what you like best. These pickled peppers are great on burgers, sandwiches, and tacos. You can also add them to salads for a zesty kick. They work well in charcuterie boards, too. Try them with cheese and cured meats for a tasty treat. Absolutely! To make a larger batch, just double or triple the ingredients. Use bigger jars to store them. Just ensure you have enough pickling liquid to cover all the peppers. For quick pickling, use the microwave. Combine the vinegar, water, sugar, and salt in a bowl. Microwave until warm. Then, pour it over the sliced peppers in a jar. Let them sit for a few hours. They will be ready to eat sooner! For the full recipe, check out the Sweet and Spicy Pickled Peppers section! In this blog post, I shared how to make sweet and spicy pickled peppers. We explored the essential ingredients, from mini bell peppers to spices. You learned about each step, from prepping peppers to jarring them. I also provided tips for the best pickling practices. Remember, keep experimenting with flavors and variations. Whether you like it spicy or sweet, these pickles can enhance many meals. Enjoy your pickling journey and savor the bold taste of your homemade peppers!
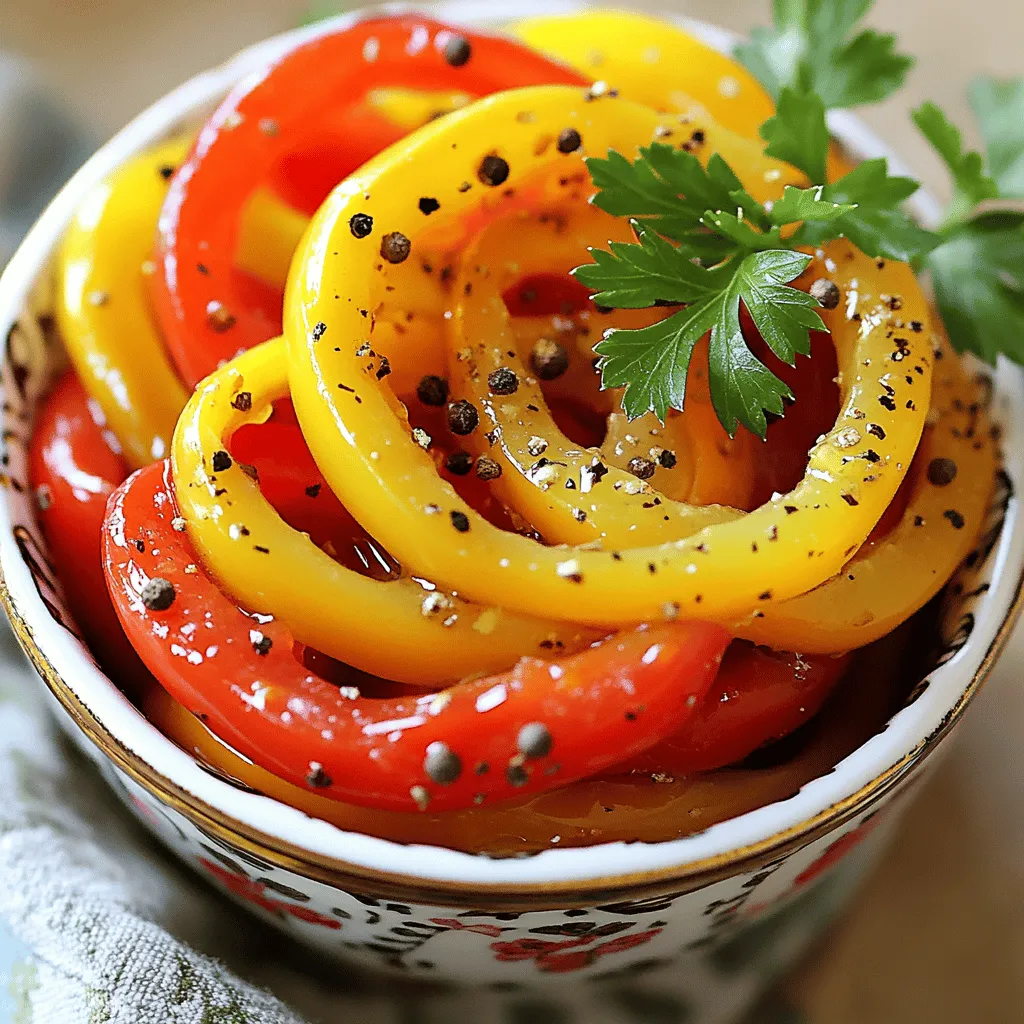
Sweet and Spicy Pickled Peppers Flavorful Easy Treat
Get ready to transform your meals with a burst of flavor! In this guide, I’ll show you how to make sweet and spicy pickled peppers
- 2 medium zucchini - 1 teaspoon salt - 1/2 cup all-purpose flour - 1/2 cup grated Parmesan cheese - 1/2 cup shredded mozzarella cheese - 2 large eggs - 1/4 cup green onions - 1 teaspoon garlic powder - 1/2 teaspoon black pepper - Olive oil spray To make baked zucchini fritters, you need only a few key ingredients. Start with two medium zucchini. Grate them and sprinkle with one teaspoon of salt. This helps draw out moisture, making your fritters crispier. Next, you’ll need half a cup each of all-purpose flour, grated Parmesan cheese, and shredded mozzarella cheese. These add flavor and structure to your fritters. The flour binds everything together while the cheeses give a nice, rich taste. For the extra kick, you’ll use two large eggs, a quarter cup of chopped green onions, and a teaspoon of garlic powder. These ingredients add flavor and moisture. Lastly, you will need a half teaspoon of black pepper for a bit of spice and olive oil spray to help them brown in the oven. This simple list makes it easy to whip up a batch of baked zucchini fritters. You can find the full recipe to guide you through the steps of preparation. First, you need to grate the zucchini. Use a box grater or a food processor. After grating, sprinkle it with salt. This helps to draw out the water. Let the zucchini sit for about 10 minutes. Once time is up, take a clean kitchen towel. Wring out the zucchini to remove excess moisture. This step is key to avoid soggy fritters. In a large bowl, add the drained zucchini. Then, mix in 1/2 cup all-purpose flour, 1/2 cup grated Parmesan cheese, and 1/2 cup shredded mozzarella cheese. Next, add 2 beaten large eggs and 1/4 cup chopped green onions. Don’t forget 1 teaspoon garlic powder and 1/2 teaspoon black pepper. Stir until all ingredients come together. Now, it’s time to preheat your oven. Set the temperature to 400°F (200°C). While the oven heats up, prepare a baking sheet. Line it with parchment paper to prevent sticking. Take a generous tablespoon of the zucchini mixture. Form it into a patty using your hands. Place the patty on the prepared baking sheet. Repeat this for the rest of the mixture. Make sure to leave space between each fritter. This helps them cook evenly. Before baking, lightly spray the tops of the fritters with olive oil. This gives them a nice crisp texture. Bake in the preheated oven for 20-25 minutes. Flip the fritters halfway through baking. Look for a golden brown color and a firm texture. After baking, let the fritters cool slightly. You can enjoy them warm or at room temperature. They taste great on their own or with a dip. For the full recipe, check the complete guide. To avoid soggy fritters, you must drain the zucchini well. After grating the zucchini, sprinkle it with salt. Let it sit for about 10 minutes. This helps draw out excess moisture. Afterward, use a clean kitchen towel to squeeze out as much water as you can. The drier the zucchini, the better your fritters will be. Adjusting seasoning is key for personal taste. If you love garlic, add more garlic powder. If you prefer a bit of heat, try adding a pinch of cayenne pepper. Always taste the mixture before baking. This way, you can ensure it’s just right for you. For a crispier finish, you can try a few different cooking methods. Instead of baking, you might pan-fry the fritters in a bit of olive oil. This adds a nice crunch. However, baking is healthier and easier. If you want the best of both worlds, bake them and then broil for the last few minutes. Using a food processor can save you time in prep. You can quickly grate the zucchini and chop the green onions in just seconds. This makes it easy to mix everything together. If you want to make these fritters often, a food processor is a great tool. Pair your fritters with dips or sauces to add flavor. A cool yogurt sauce or a spicy salsa works great. You can even try a tangy tzatziki, which complements the zucchini well. For sides, consider serving the fritters with a fresh salad or roasted veggies. A light garlic aioli also makes a wonderful dip. These fritters shine alongside simple sides that highlight their flavor. For the full recipe, check out the section above. Enjoy your cooking! {{image_2}} Using different cheeses adds flavor and a new twist to your fritters. Cheddar gives a sharp taste, while feta adds a creamy touch. You can mix them in or choose one favorite. Try a blend for extra depth. The key is to keep the cheese moist but not too wet. You can sneak in more veggies, too! Carrots bring sweetness and color. Spinach adds nutrition and a pop of green. Other options include bell peppers or corn. Just chop them small so they mix well. This way, you enhance the taste and texture of your fritters. If you need gluten-free fritters, swap all-purpose flour for almond flour or a gluten-free blend. Both options work well and keep the fritters light. Just be mindful of the flour type, as it may change the texture. Experiment to find your favorite mix. For a complete guide, check out the Full Recipe! To store leftovers, place the fritters in an airtight container. Keep them in the fridge for up to three days. The fritters taste best when fresh, but you can still enjoy them later. You can freeze fritters before or after baking. If freezing before baking, shape them into patties and place them on a baking sheet. Freeze them until firm, then transfer to a freezer bag. For freezing after baking, let them cool completely first. Then, store them in a bag or container. When you're ready to eat, it’s easy to reheat from frozen. To reheat in the oven, preheat to 375°F (190°C). Place the fritters on a baking sheet and bake for 15-20 minutes. If you prefer a toaster oven, set it to the same temperature and heat for about 10-15 minutes. Enjoy your fritters warm and crispy! For the full recipe, check out the section above. Yes, you can make baked zucchini fritters without eggs. If you have an egg allergy or follow a vegan diet, try using substitutes. Common options include: - Flaxseed meal: Mix 1 tablespoon of flaxseed meal with 3 tablespoons of water. Let it sit for 5 minutes to thicken. - Chia seeds: Use the same ratio as flaxseed meal for a similar effect. - Mashed banana: Use 1/4 cup of mashed banana for sweetness and moisture. - Applesauce: 1/4 cup of applesauce can also work well. These substitutes help bind the ingredients together, keeping your fritters intact. Baked zucchini fritters last about 3 to 4 days in the fridge. Store them in an airtight container to keep them fresh. They may lose some crispness over time. To maintain their quality, reheat them in the oven to restore some crunch. You can serve baked zucchini fritters with various sides and sauces. Here are some ideas: - Dipping sauces: Try tzatziki, ranch, or marinara sauce for added flavor. - Salads: A fresh green salad or coleslaw pairs well with the fritters. - Grains: Serve them alongside rice, quinoa, or couscous for a complete meal. - Yogurt: A dollop of plain yogurt adds creaminess and freshness. These options enhance your meal and make it more enjoyable. To make zucchini fritters crispier, follow these tips: - Remove excess moisture: After grating the zucchini, let it sit with salt. Squeeze out as much water as possible before mixing. - Use less flour: Adding too much flour can make fritters soft. Use just enough to hold the mixture together. - Spray with oil: Lightly spray the tops with olive oil before baking. This helps them brown and crisp up. - Bake on a wire rack: If possible, place the fritters on a wire rack set over a baking sheet. This allows air to circulate and helps them crisp on all sides. These tips will boost the crunch factor of your fritters! For the full recipe, check out the details above. Baked zucchini fritters are easy to make and delicious. We covered the key ingredients like zucchini, cheeses, and spices. The step-by-step guide helps form perfect fritters. Remember to drain the zucchini well for the best texture. You can customize the taste with different cheeses or veggies too. Store leftovers properly to enjoy them later. Overall, these fritters are a tasty addition to any meal. With these tips, your fritters will impress everyone at the table. Enjoy making and sharing them!
Baked Zucchini Fritters Flavorful and Easy Recipe
Are you ready to try a fun and tasty way to enjoy zucchini? My Baked Zucchini Fritters are not only flavorful but also easy to
- 4 medium zucchinis, sliced into rounds - 3 tablespoons olive oil - 4 cloves garlic, minced - 1 cup grated Parmesan cheese - 1 teaspoon Italian seasoning - 1 teaspoon red pepper flakes (optional for heat) - Salt and black pepper to taste - Fresh parsley, chopped (for garnish) When picking zucchinis, look for firm ones. They should feel heavy for their size. Avoid any with soft spots or blemishes. A bright green color means freshness. Choose smaller zucchinis for a sweeter taste. Larger zucchinis can be watery and less tasty. Fresh ingredients make a big difference. They enhance flavor and texture. Fresh garlic gives a strong aroma and taste. Quality Parmesan adds a rich, nutty flavor. Fresh herbs like parsley brighten up the dish. Using the best ingredients means a better meal. Always aim for fresh when cooking. This will elevate your Garlic Parmesan Roasted Zucchini to a new level. If you want the full experience, check out the Full Recipe. - Preheating the Oven Start by preheating your oven to 425°F (220°C). This heat level helps the zucchini roast well. - Combining Ingredients in Mixing Bowl In a large mixing bowl, gather your sliced zucchinis, olive oil, minced garlic, and Italian seasoning. Toss the mixture gently until each piece of zucchini gets a nice coat. - Spreading Zucchini Mixture on Baking Sheet Line a baking sheet with parchment paper. Spread your zucchini mixture evenly across the sheet. Make sure not to overcrowd them. - Roasting Time and Technique Roast the zucchini in the preheated oven for about 20-25 minutes. Check for tenderness and a crispy, golden cheese topping. - Garnishing with Parsley After roasting, let the zucchini cool for a couple of minutes. Then, sprinkle fresh chopped parsley on top for a pop of color. - Tips for Serving Warm or Cold This dish tastes great warm or cold. Serve it right away, or save it for later. Enjoy it as a side dish or a healthy snack! For more details, check the full recipe. To get the best flavor and texture, follow these tips: - Cut the zucchini into even rounds. This helps them cook uniformly. - Use a large baking sheet. Crowding the pan can lead to steaming instead of roasting. - Toss the zucchini with olive oil well. This helps the cheese stick and enhances flavor. - Roast at a high temperature. The heat helps create a nice, crispy top. Avoid these common missteps for perfect roasted zucchini: - Don’t skip the salt. It enhances the flavor and draws out moisture. - Avoid using too much oil. It can make the zucchini greasy. - Don’t undercook the zucchini. Make sure it's tender and slightly golden. - Avoid leaving out the cheese. Parmesan adds a rich flavor that makes this dish shine. To take your Garlic Parmesan Roasted Zucchini to the next level, consider these ideas: - Add fresh herbs like thyme or basil for a fragrant twist. - Incorporate lemon zest for a bright, zesty taste. - Experiment with flavored oils, like garlic-infused olive oil, for an extra punch. - Mix in other veggies, like bell peppers or cherry tomatoes, for added color and taste. For the full recipe, check out my detailed instructions. {{image_2}} You can switch up the cheese for your Garlic Parmesan Roasted Zucchini. Try using grated mozzarella for a gooey texture. Feta cheese adds a nice tang. If you like a sharp taste, go for aged cheddar. Each cheese brings a unique flavor and melts differently. Experiment and find your favorite! Don’t limit yourself to just zucchini. You can mix in other vegetables for more color and taste. Bell peppers add sweetness, while asparagus gives a crunch. Carrots bring a gentle earthiness. Just make sure to cut them into similar sizes for even cooking. This way, all the veggies roast perfectly together. You can spice up your zucchini by adding different herbs and spices. Try smoked paprika for a smoky flavor. Cumin can give a warm, earthy taste. Fresh basil or thyme adds a lovely aroma. Don’t be afraid to get creative! The Full Recipe allows you to make this dish your own. After you enjoy your Garlic Parmesan Roasted Zucchini, store any leftovers properly. Let the zucchinis cool down first. Place them in an airtight container. They can last in the fridge for about three days. Make sure to separate them from other dishes to keep them fresh. If you want to save them for later, freezing is a great option. First, cool the zucchini completely. Lay them flat on a baking sheet. Freeze them for a few hours until solid. Then, transfer the frozen pieces to a freezer bag. They can last in the freezer for up to three months. However, keep in mind that the texture may change upon thawing. To enjoy your Garlic Parmesan Roasted Zucchini again, reheating is key. Preheat your oven to 350°F (175°C). Place the zucchini on a baking sheet. Heat for about 10-15 minutes or until warm. This method keeps the cheese crispy. You can also microwave them for a quicker option, but the texture won't be the same. For the best flavor, try to reheat in the oven! It takes about 20 to 25 minutes to roast zucchini. The key is to preheat your oven to 425°F (220°C). This high heat helps the zucchini cook fast and get crispy. Check for tenderness and watch for golden cheese on top to know it's ready. You can prepare the zucchini ahead of time. Slice the zucchini and mix it with oil and spices. Store it in the fridge for up to 24 hours before roasting. When ready, just spread it on a baking sheet and roast it. Freshly made is best, but this method can save time. Garlic Parmesan Roasted Zucchini goes well with many dishes. Serve it with grilled chicken, fish, or steak. It also pairs nicely with pasta or rice dishes. You can even add it to salads for extra flavor. Yes, you can use dried herbs instead of fresh. Dried herbs have a strong flavor, so use less. A half teaspoon of dried Italian seasoning works well. Just remember to mix it in with the other ingredients for the best taste. To prevent sogginess, make sure to slice the zucchini evenly. Thin slices roast better and cook faster. Also, avoid overcrowding on the baking sheet. Give each piece space to allow steam to escape. This way, your zucchini stays crisp and tasty. For the full recipe, check out the Garlic Parmesan Blissful Zucchini. This blog post walks you through making Garlic Parmesan Roasted Zucchini. We covered everything from fresh ingredients to step-by-step cooking. Remember to choose quality zucchini and use the right heat while roasting. You can also try other cheeses or veggies for fun flavors. Lastly, store leftovers properly to enjoy this dish later. Follow these tips, and you will create a tasty side every time. Enjoy cooking!
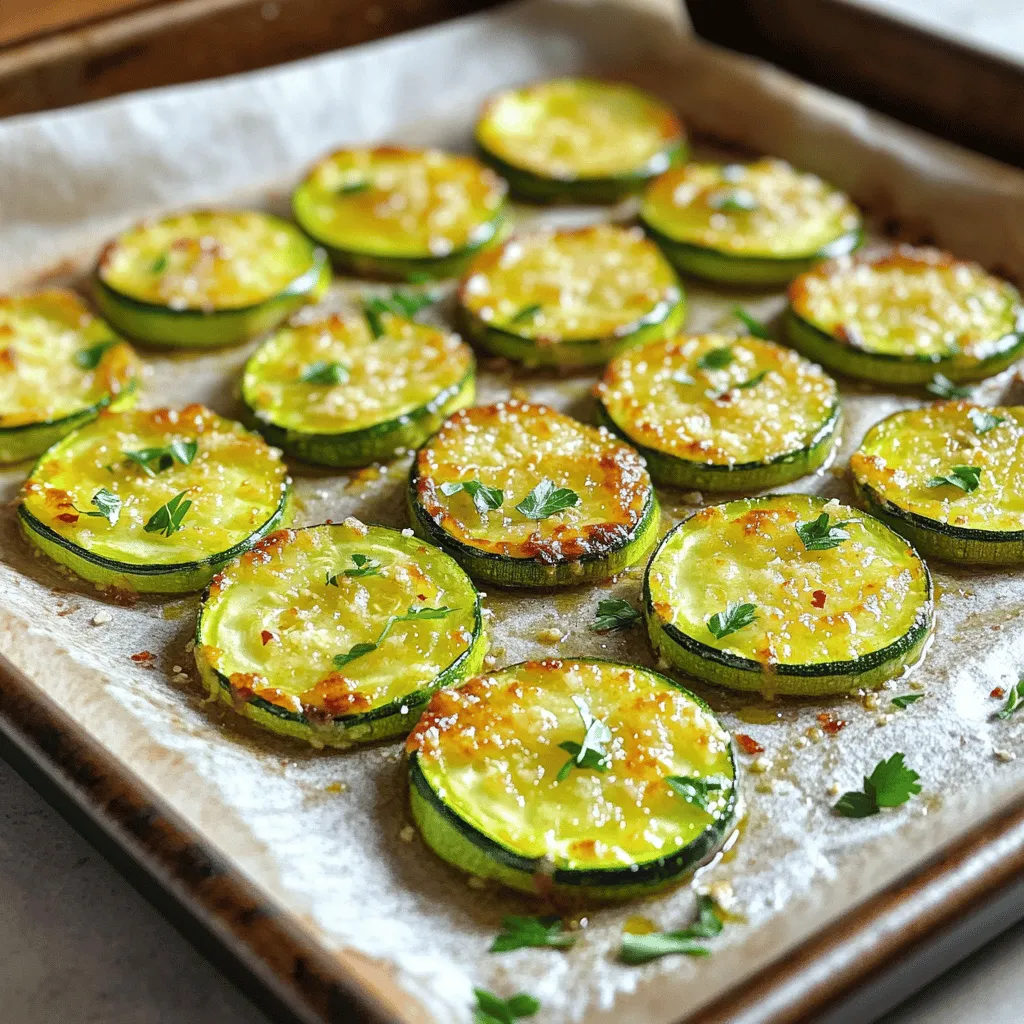
Garlic Parmesan Roasted Zucchini Flavorful Side Dish
If you’re looking for a tasty side dish, look no further! Garlic Parmesan Roasted Zucchini is packed with flavor and easy to make. With just