Appetizers

- 1 large ripe pineapple, finely diced - 2 medium tomatoes, diced - 1 small red onion, finely chopped - 1 jalapeño pepper, deseeded and minced - 1/4 cup fresh cilantro, chopped Fresh produce is key to a great pico de gallo. Start with a ripe pineapple. Choose one that feels heavy and smells sweet. The tomatoes should be firm and bright. A small red onion adds a bit of sweetness. For heat, use a jalapeño. Remove the seeds to tone it down. Finally, fresh cilantro brings a bright flavor. - Juice of 2 limes - Salt to taste - 1/2 teaspoon ground cumin (optional) Lime juice is a must for brightness. It balances the sweetness of the pineapple. Salt enhances all the flavors. If you want a smoky twist, add ground cumin. This adds depth and warmth to your salsa. - Tortilla chips - Grilled chicken - Seafood - Tacos Fresh pineapple pico de gallo works with many dishes. Serve it with crunchy tortilla chips for a snack. It pairs well with grilled chicken for a light meal. Try it with seafood for a tropical flair. You can also use it as a topping for tacos. It adds freshness and zing to every bite. 1. Start by cutting off the top and bottom of the pineapple. This helps it stand upright. 2. Stand the pineapple on its base. Carefully slice down the sides to remove the skin. 3. Make sure to cut off any eyes. They can be tough to eat. 4. Now, dice the pineapple into small cubes. Aim for pieces that are about half an inch. 1. In a large mixing bowl, combine the pineapple with 2 medium diced tomatoes. 2. Next, add in 1 small finely chopped red onion and 1 minced jalapeño pepper. 3. Toss in 1/4 cup of chopped cilantro for a fresh touch. 4. Squeeze the juice of 2 limes over the mixture. This adds a bright flavor. 5. Sprinkle salt to taste. You can also add 1/2 teaspoon of ground cumin if you want a smoky flavor. 1. Gently mix all the ingredients together. Be careful not to mash the pineapple. 2. Let the pico de gallo sit for 15-20 minutes at room temperature. This resting time helps the flavors meld together. 3. After resting, your fresh pineapple pico de gallo is ready to enjoy! To pick a ripe pineapple, look for a pineapple with a sweet smell. The skin should be golden-yellow. Press lightly on the fruit; it should give a little. Avoid pineapples that are too soft or have brown spots. To store a whole pineapple, keep it at room temperature. Once cut, store it in the fridge in an airtight container. The cut pineapple stays fresh for about three days. Adjust the salt and lime juice to suit your taste. Start with a little salt, then add more if needed. Fresh lime juice adds a bright flavor. If you want a smoky taste, consider adding ground cumin. Just half a teaspoon is enough to enhance the dish. Serve your pico de gallo in a colorful bowl for a fun touch. Pair it with tortilla chips on a large platter. You can also use it as a topping for grilled chicken or tacos. For garnishing, sprinkle fresh cilantro leaves on top. This adds extra color and flavor to your dish. {{image_2}} You can boost the flavor of your pineapple pico de gallo by adding other fruits. - Mango: This fruit brings a sweet and juicy taste. Dice it small and mix it in. - Kiwi: Kiwi adds a tangy and bright flavor. Its green color also makes the dish pop. - Papaya: Papaya has a soft texture and sweet flavor. It pairs well with pineapple's acidity. These fruits not only taste great but also add color and fun to your dish. Want to change how spicy your pico de gallo is? You have options! - Using different peppers: Try serrano or habanero peppers for more heat. Adjust the amount based on your taste. - Omitting jalapeño for milder taste: If you prefer less spice, just leave out the jalapeño. Your pico will still taste fresh and vibrant. Adjusting the heat lets you make this salsa perfect for everyone. Herbs can change the flavor of your pico de gallo. - Using mint or parsley: Instead of cilantro, try mint for a cool twist. Parsley is also a good option. - Incorporating other herbs: Fresh basil or chives can add unique flavors. Experiment with what you like best. These herb swaps can make your dish stand out and surprise your guests. To keep your fresh pineapple pico de gallo tasty, refrigerate it right away. Place it in a tight container. This will help keep the flavors bright and fresh. Avoid leaving it out at room temperature for long. When stored properly, it will stay good for a few days. If you want to save pico de gallo for later, freezing is a good option. Put it in a freezer-safe bag or container. Make sure to remove as much air as possible. This helps prevent freezer burn and keeps the taste. When you are ready, thaw it in the fridge overnight. When stored in the fridge, fresh pineapple pico de gallo lasts about 3 to 5 days. After that, the flavors may fade, and the ingredients can get mushy. Always check for any signs of spoilage before eating. If it smells off or looks strange, it’s best to throw it away. You can enjoy Fresh Pineapple Pico de Gallo with many dishes. It pairs well with: - Tortilla chips - Grilled chicken - Seafood like shrimp or fish - Tacos for a fresh topping These options enhance the dish's bright flavors. The salsa adds sweetness and crunch to savory meals. Try it with your favorite grilled meats for a tasty twist! Yes, you can make this salsa ahead of time! To keep the flavors fresh: - Prepare the pico de gallo a few hours before serving. - Store it in the fridge in an airtight container. This resting time allows the flavors to mix well. Just remember, the longer it sits, the softer the pineapple and tomatoes get. If you prefer a firmer texture, enjoy it fresh! To add heat to your pico de gallo, consider these tips: - Add more jalapeño pepper. Use the seeds for extra spice. - Mix in other spicy peppers, like serrano or habanero. - Include a dash of hot sauce for a quick kick. Taste as you go to find your perfect heat level. Adjusting spice makes the dish more fun and unique! Fresh pineapple pico de gallo is easy and fun to make. We covered the best fresh ingredients, step-by-step methods, and tips for perfecting flavors. You can also swap ingredients for variations that suit your taste. With mindful storage, your pico will stay fresh and flavorful. Enjoy it with grilled chicken, tacos, or as a dip. Experiment and find what you love most. You will amaze your friends and family with this simple dish!
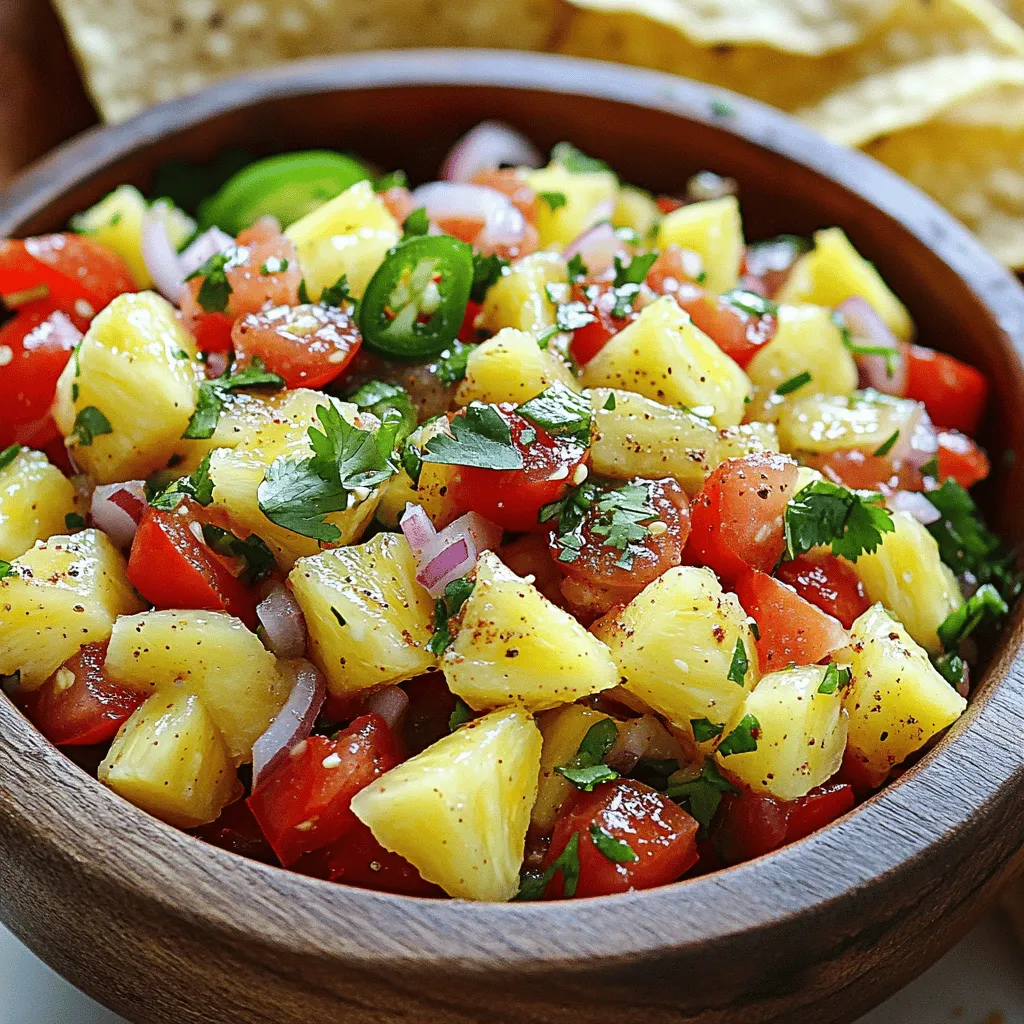
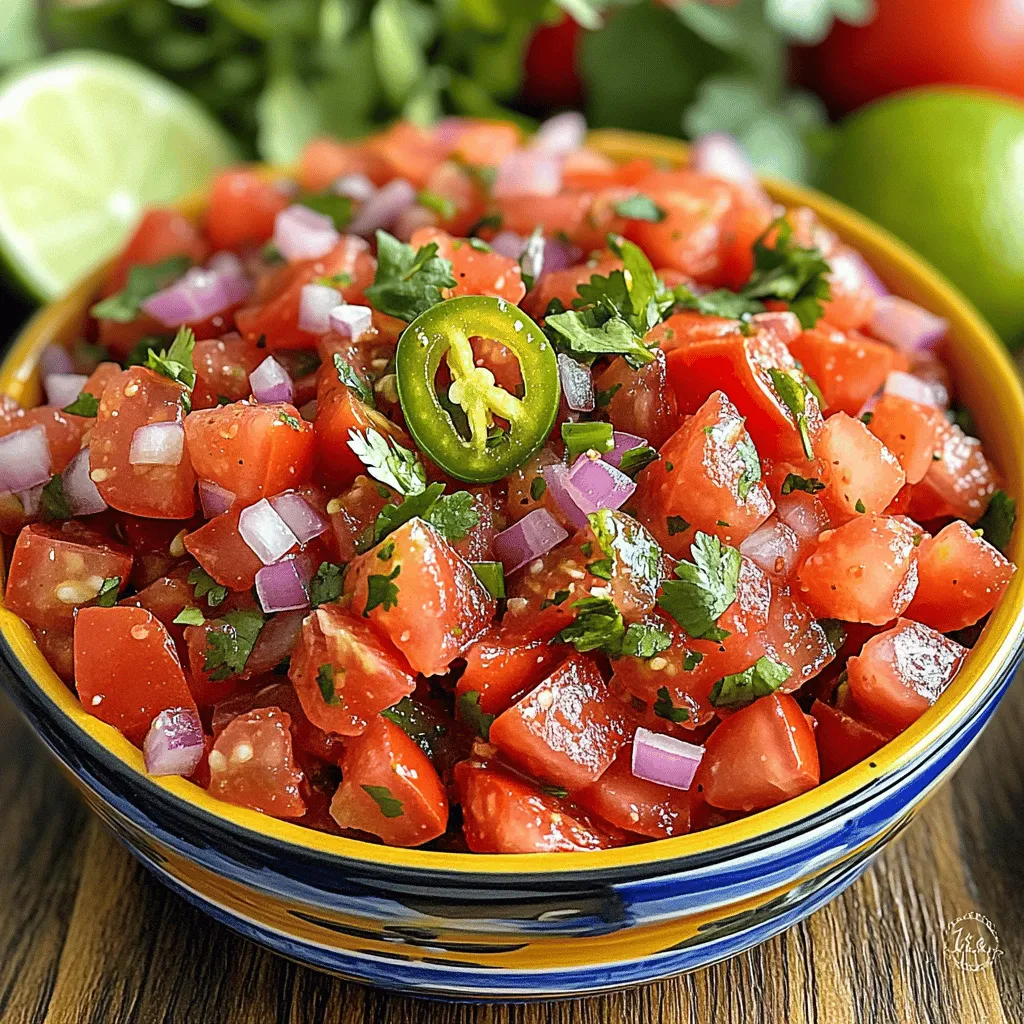
Fresh Pineapple Pico de Gallo Flavorful Summer Salsa
Summer is here, and it’s time to spice up your meals with something fresh and vibrant! Fresh Pineapple Pico de Gallo adds a tasty twist
- 1 pound Brussels sprouts, trimmed and halved - 4 cloves garlic, minced - 1/4 cup grated Parmesan cheese - 3 tablespoons olive oil - 1 teaspoon sea salt - 1/2 teaspoon black pepper - 1/2 teaspoon red pepper flakes (optional for a kick) - Fresh parsley, chopped (for garnish) - Lemon zest - Balsamic vinegar - Calories per serving: Approximately 120 - Macronutrient breakdown: - Protein: 4g - Carbohydrates: 8g - Fat: 9g I love using Brussels sprouts in this dish. They are so tasty when roasted! The garlic adds a punch of flavor. The Parmesan gives it a creamy touch. When you mix these ingredients, you create a wonderful dish. You might ask, why use olive oil? It helps the Brussels sprouts brown nicely. Salt and pepper enhance their natural taste. If you like spice, add red pepper flakes for a little kick. I often use lemon zest or balsamic vinegar for extra flavor. These ingredients brighten the dish. They make it even more special. In terms of nutrition, this dish packs a punch. Each serving is about 120 calories. It has a good mix of protein, carbs, and healthy fats. Enjoy this flavorful and healthy recipe! - Preheat the oven to 400°F (200°C). - In a large bowl, I combine the halved Brussels sprouts, minced garlic, olive oil, salt, pepper, and red pepper flakes (if you like heat). Toss everything well. Make sure the Brussels sprouts are coated nicely. - Spread the Brussels sprouts mixture in a single layer on a baking sheet. Use parchment paper for easy cleanup. - Roast in the oven for 20-25 minutes. Stir halfway through. Look for a golden brown color and crispy edges. - When they are done roasting, sprinkle grated Parmesan cheese evenly over the hot Brussels sprouts. - Return the baking sheet to the oven for another 5 minutes. This melts the cheese and makes it crispy. - Once finished, take them out and garnish with chopped fresh parsley before serving. Choose Brussels sprouts that are firm and bright green. This shows they are fresh. Avoid any that feel soft or have yellow leaves. Size matters, too. Look for small to medium sprouts for the best taste. When you pick them, feel the weight. Heavy sprouts are usually better. To get crispy Brussels sprouts, use high heat. Preheat your oven to 400°F (200°C) before roasting. Spread the sprouts in a single layer on the baking sheet. This helps them cook evenly. Don’t overcrowd the pan; give them space to brown. Stir them halfway through roasting. This ensures they crisp up on all sides. If they look golden brown, they’re likely perfect. To boost the flavor of your Brussels sprouts, consider adding lemon zest. This gives a fresh, bright taste. Balsamic vinegar can also add a nice tang. You can mix in other spices like garlic powder or onion powder for extra depth. For a spicy kick, add more red pepper flakes. Adjust seasonings to match your taste. {{image_2}} You can switch up the cheese in this dish. Try using feta cheese for a salty bite. Cheddar also works well for a sharp flavor. For a creamier option, use goat cheese. Each cheese gives the sprouts a unique twist. Experiment with your favorites and see what you love. If you want a vegan version, use nutritional yeast. It has a cheesy taste without dairy. You can also use dairy-free cheese shreds. Just look for brands that melt well. Adjust the seasoning to match your taste. These options let everyone enjoy this tasty dish. You can add other spices to enhance the flavor. Try garlic powder or onion powder for more depth. Fresh herbs like thyme or rosemary pair well, too. A squeeze of lemon juice adds brightness. For a kick, add a pinch of smoked paprika. Mixing flavors keeps this dish exciting and new. To store leftover Garlic Parmesan Roasted Brussels sprouts, let them cool first. Place them in an airtight container. These sprouts keep well in the fridge for up to 3 days. To keep the flavor fresh, avoid adding the Parmesan until you're ready to eat. When reheating Brussels sprouts, you want to keep them crispy. The best way is to use an oven. Preheat your oven to 350°F (175°C). Spread the leftovers on a baking sheet. Heat for about 10-15 minutes. This method helps maintain their texture and flavor. You can also use an air fryer for a quick fix. Just heat at 350°F (175°C) for 5-7 minutes. This will keep them nice and crispy. If you have extra Brussels sprouts, freezing is an option. First, blanch them in boiling water for 3 minutes. Then, cool them in ice water. Drain well and pack in freezer bags. Remove as much air as possible. They can last up to 3 months in the freezer. When you want to use them, thaw in the fridge overnight before reheating. Roast Brussels sprouts for 20 to 25 minutes at 400°F. Stir halfway through for even cooking. They should turn golden brown and crispy on the edges. Adjust the time for smaller or larger sprouts. Yes, you can make these Brussels sprouts ahead of time. Cook them as directed, then cool and store in the fridge. Keep them in an airtight container for up to three days. Reheat in the oven to restore crispness. These Brussels sprouts pair well with many dishes. Try them with grilled chicken or fish. They also go great with steak or pork. Serve them alongside a fresh salad for a complete meal. You learned how to prepare delicious Garlic Parmesan Roasted Brussels Sprouts. We covered key ingredients, easy steps, and tips for perfect results. You can mix it up with added flavors and variations. Storing leftovers is simple, ensuring you enjoy these sprouts later. Keep experimenting and find your favorite combos. Enjoy your cooking journey!
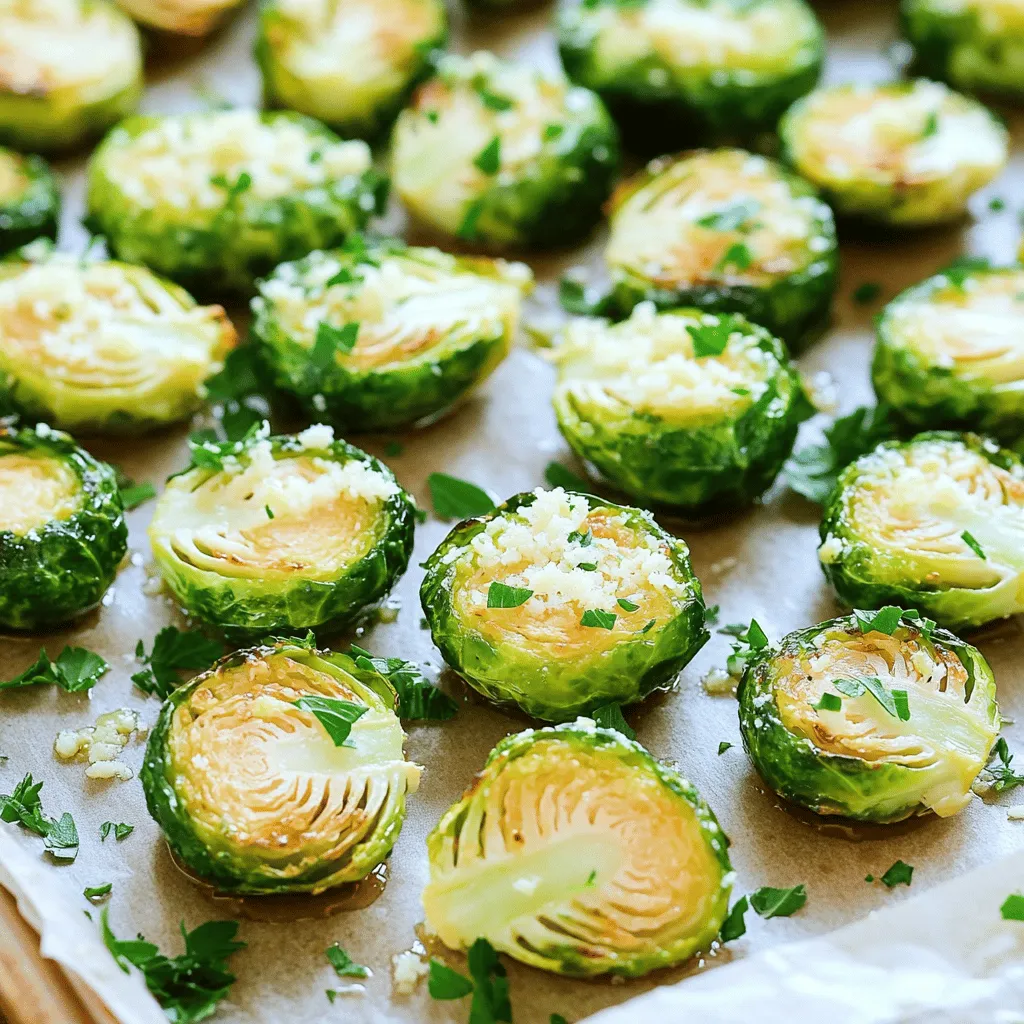
Garlic Parmesan Roasted Brussels Sprouts Delight
If you’re looking for a delicious side dish that’s both easy to make and packed with flavor, you’re in the right place! Garlic Parmesan Roasted
- 4 ripe peaches, diced - 1 cup cherry tomatoes, quartered - 1/2 cup fresh basil leaves, chopped - 1 tablespoon balsamic glaze - 1 tablespoon olive oil - Salt and pepper to taste - 1 French baguette, sliced - 1 cup ricotta cheese - Zest of 1 lemon Using fresh ingredients makes a big difference in flavor. For this recipe, you want ripe peaches. Look for peaches that give slightly when you press them. They should smell sweet and fruity. Choose cherry tomatoes that are firm and vibrant in color. Fresh basil should be bright green and fragrant. For the baguette, select one that is crusty on the outside and soft inside. It should feel light and airy. When selecting ricotta, go for a brand that uses whole milk. This makes it creamy and rich. Remember, the quality of your ingredients matters. Fresh, ripe fruits and veggies will give you the best peach bruschetta. If you want to learn how to make this dish, check out the Full Recipe. 1. Preheat your oven to 375°F (190°C). This step is key. You want the bread nice and crispy. 2. Take your French baguette and slice it into pieces. Aim for about half an inch thick. Lay the slices flat on a baking sheet. Brush one side of each slice with olive oil to add flavor. 3. Bake the baguette slices for 8-10 minutes. Watch them closely. You want them to turn golden brown and crispy. Take them out and let them cool for a minute. 4. While the bread bakes, prepare the peach and tomato topping. In a bowl, combine the diced peaches, quartered cherry tomatoes, and chopped basil. This mix gives your bruschetta a fresh taste. 5. Drizzle the balsamic glaze over the peach mix. Gently toss everything to combine. Season with salt and pepper to taste. This step brightens up the flavors. 6. In another bowl, mix the ricotta cheese with lemon zest. This adds a refreshing touch. Stir until smooth and creamy. 7. Now it's time to assemble the bruschetta. Take your cool baguette slices. Spread a generous amount of the lemon ricotta on each slice. 8. Top the ricotta with a heaping spoonful of the peach and tomato mix. The colors should pop! 9. If you like, drizzle just a bit more balsamic glaze on top. It adds a nice finish. 10. Serve immediately for the best taste. Enjoy your Best Peach Bruschetta! For a complete guide, check the Full Recipe. To make the perfect bruschetta, start with the bread. For the ideal toast level, use a French baguette. Slice it into pieces about half an inch thick. Brush one side with olive oil. Bake these slices at 375°F (190°C) for 8 to 10 minutes. You want them golden brown and crispy. Keep an eye on them so they don’t burn. Quality olive oil and balsamic glaze are crucial for flavor. Use extra virgin olive oil for the best taste. Drizzle a little balsamic glaze on top for a sweet touch. These two ingredients elevate your bruschetta and make it shine. Get creative with your flavors! Try adding some crushed nuts for crunch or a sprinkle of chili flakes for heat. You can also swap fresh basil for mint or cilantro for a different twist. Mix and match to find your favorite flavors. Each change can bring a new taste to your peach bruschetta. For the full recipe, check out the Best Peach Bruschetta section. {{image_2}} You can easily add your own spin to peach bruschetta. Here are some fun ideas to try: - Different toppings: Consider using chopped nuts like walnuts or almonds for crunch. You can also swap ricotta for goat cheese or cream cheese for a creamier texture. - Alternative herbs and spices: Fresh mint, cilantro, or thyme can add new flavors. A pinch of chili flakes can give your bruschetta a kick. - Variations for dietary restrictions: For a vegan option, skip the cheese and use avocado instead. You can also use gluten-free bread to make this dish suitable for those with gluten issues. These variations let you enjoy peach bruschetta in different ways. Each twist brings a new taste experience to your table. Try mixing and matching to find your favorite combination! Don’t forget to check the Full Recipe for guidance on making your base bruschetta. To keep peach bruschetta fresh, store its parts separately. This helps maintain texture and flavor. Place the baguette slices in a sealed bag. Avoid moisture to keep them crispy. For the peach and tomato topping, use an airtight container. This keeps the mix fresh for longer. The ricotta cheese should also have its own container. This prevents it from absorbing other flavors. When stored correctly, the peach topping lasts about three days. The ricotta will stay fresh for about four to five days. The baguette slices are best when eaten fresh, but you can keep them for two days in the fridge. For best results, eat your bruschetta within these timeframes. This ensures you enjoy the best flavors and textures. For the full recipe, refer to the earlier section. What type of bread works best for bruschetta? I love using a French baguette. Its crust is crispy and holds toppings well. You can also try ciabatta for a chewy texture. Both options add great flavor. Can you use canned peaches instead of fresh? Yes, you can use canned peaches. However, fresh peaches taste better. Canned peaches can be softer and sweeter. Drain them well before using to avoid extra moisture. How to make bruschetta ahead of time? You can prepare the peach topping a few hours before. Just store it in the fridge. Toast the bread right before serving. This keeps the bread crispy and delicious. Additional measures for food safety Always wash your fruits and veggies before using them. Keep any leftovers in a sealed container. Store them in the fridge and eat within two days for best taste. In this blog post, we explored making peach bruschetta from fresh ingredients. I shared step-by-step instructions, tips for perfecting the dish, and fun variations to try. Don’t forget to use quality olive oil for the best flavor. Remember to store any leftovers properly for freshness. I hope you feel inspired to create your own tasty peach bruschetta. Enjoy the bright flavors and impress your friends at your next gathering!
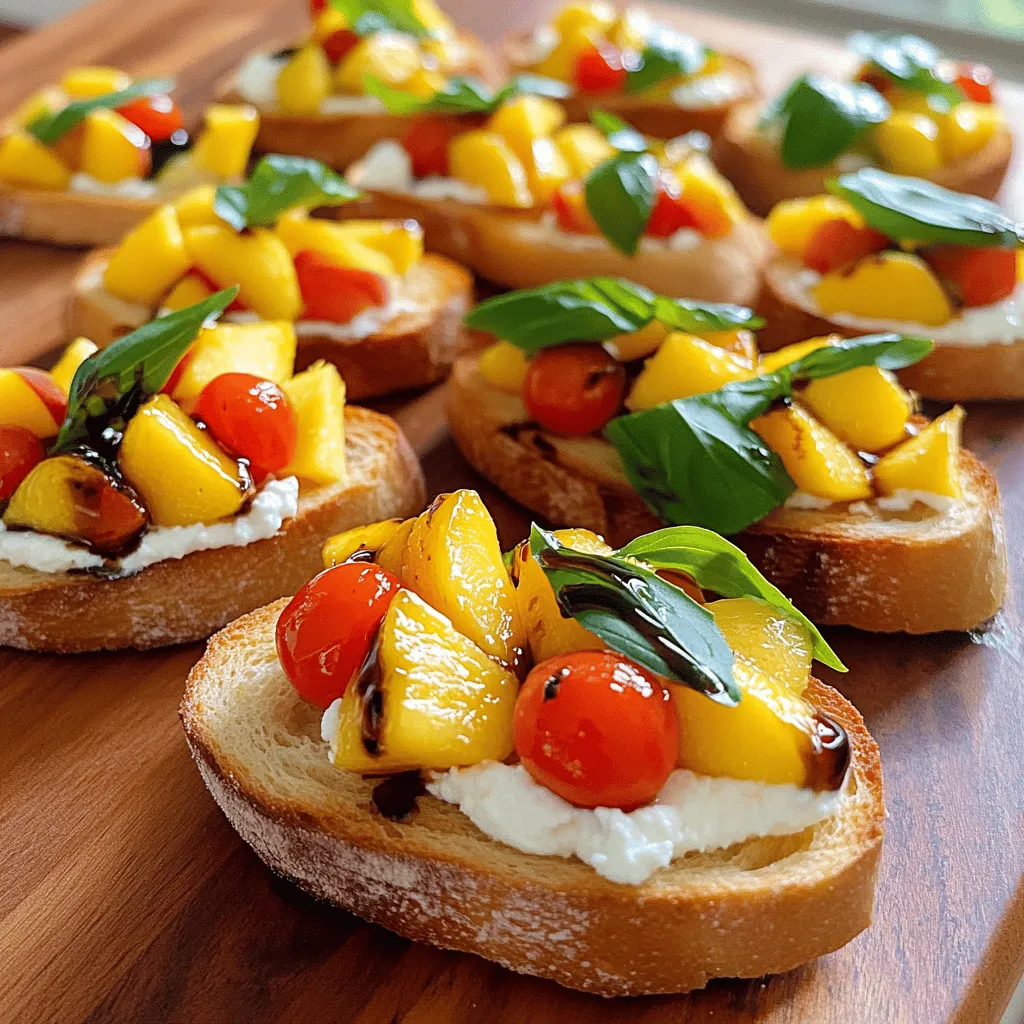
Best Peach Bruschetta Flavorful Summer Delight
Are you ready to elevate your summer gatherings with a burst of flavor? My Best Peach Bruschetta recipe brings together fresh peaches and tomatoes for
To make Mexican street corn, you will need: - 4 ears of fresh corn, husked - 1/2 cup mayonnaise - 1/2 cup sour cream - 1 cup crumbled Cotija cheese - Salt and pepper to taste These ingredients shine together, creating a rich and creamy base. Fresh corn is key. It gives the dish a sweet crunch. Mayonnaise and sour cream blend to create a smooth sauce. Cotija cheese adds a salty kick that balances the flavors. You can also enhance your corn with: - 1 teaspoon chili powder - 1/4 teaspoon cayenne pepper (optional) - 1/4 cup fresh cilantro, chopped - 2 tablespoons lime juice - Lime wedges for serving Chili powder and cayenne pepper give the corn a spicy twist. Fresh cilantro adds a burst of color and freshness. Lime juice brings a zesty brightness that ties everything together. Feel free to mix and match these optional ingredients based on your taste. For the full recipe, check out the detailed instructions to create this flavorful delight. Husk and Clean the Corn Start by husking the corn. Remove all the green leaves and silk strands. You want clean corn for grilling. Rinse the corn under cold water to wash off any dirt. This step keeps your corn fresh and tasty. Preheating the Grill Next, preheat your grill to medium-high heat. This is important for even cooking. A hot grill gives the corn nice char marks. It should take about 10 minutes to heat up. You can test the heat by holding your hand above the grill. If you can hold it there for two seconds, it’s ready. Placement and Cooking Time Place the corn directly on the hot grill. Space them out, so they don’t touch. Grill for about 10 to 12 minutes. Turn the corn every few minutes. This helps it cook evenly. You want those beautiful grill marks! Signs of Doneness The corn is done when it is tender and has nice char marks. You can check by poking a kernel with a fork. It should feel soft. If it’s hard, leave it on the grill a little longer. Mixing the Mayo-Sour Cream Mixture In a bowl, combine mayonnaise and sour cream. Add chili powder and lime juice. If you like heat, add cayenne pepper. Mix until smooth. This sauce gives the corn its creamy goodness. Adjusting Spices to Taste Taste the sauce. If you want more flavor, add salt and pepper. You can also add more lime juice for extra zing. Adjust it until you love the taste. This sauce is key for the perfect Mexican street corn. Now, you’re ready to enjoy this flavorful delight! For the full recipe, check out the details above. - Optimal Grill Temperature: Set your grill to medium-high heat. This helps the corn cook evenly and get nice grill marks. Too low, and it will take longer, too high, and you risk burning it. - Techniques for Even Grilling: Turn the corn every few minutes. This ensures all sides get that perfect char. Use tongs to handle the corn easily. Make sure to grill for about 10-12 minutes. Look for a nice golden color and tender kernels. - Pairing with Lime Wedges: Serve your corn with lime wedges. Squeezing fresh lime juice adds a bright zing. The acidity cuts through the richness of the mayo-sour cream mixture. - Presentation Tips: Place the corn on a wooden board or a colorful plate. Sprinkle extra Cotija cheese and cilantro on top for a beautiful finish. A vibrant display makes the dish even more tempting. - Adjusting Heat Levels: If you like spice, add more cayenne pepper to the mayo-sour cream mixture. You can also try different chili powders for unique flavors. Adjust according to your taste! - Adding Other Toppings: Feel free to experiment! Try adding diced jalapeños for heat, or crumbled bacon for a savory crunch. You can also mix in diced avocado for creaminess. This recipe is flexible, so make it your own! {{image_2}} You can make Mexican street corn without dairy. Use plant-based mayo and yogurt instead. These swaps keep the creamy texture while keeping it vegan. You can try cashew cream or almond yogurt for a richer taste. For added flavor, mix in smoked paprika or garlic powder. These small changes give your corn a new twist. Different regions have unique styles of elote. In some areas, street vendors add spicy salsa or avocado. Others use different cheeses, like feta or queso fresco. You can also try toppings like diced tomatoes or pickled onions. These ingredients add local flair and new flavors to your corn. You can explore local farmers' markets for fresh, seasonal produce. This adds a unique touch to your Mexican street corn. Enjoy creating your own version! For the full recipe, check out the details above. To store your leftover Mexican street corn, place it in an airtight container. This keeps it fresh. You can also wrap it in plastic wrap. Store it in the fridge right away. - Refrigeration Guidelines: Make sure it cools down first before storing. This helps keep the flavors intact. - Duration of Freshness: You can keep it in the fridge for about 3 to 5 days. After that, it may lose its taste and texture. When it comes to reheating, you want to keep the corn tasty. - Best Methods for Reheating: The best way to reheat is on the grill or in a skillet. Heat it on medium-low heat. This brings back that grilled flavor. - Avoiding Soggy Corn: If you use the microwave, be careful. Heat it for short bursts. This way, you avoid soggy corn. Always check it to see if it’s warm enough. You can enjoy your delicious Mexican street corn again! For the full recipe, check out the complete guide. Mexican street corn, or elote, is a tasty dish made with grilled corn. It comes from Mexico and is a popular street food. Vendors grill the corn on the cob and coat it with creamy sauce, cheese, and spices. The mix of flavors and textures makes it a delight. You get sweetness from the corn and tang from the sauce. Street corn is a fun way to enjoy corn and a great side dish or snack. Yes, you can use frozen corn if fresh corn isn’t available. Just thaw the corn first. Frozen corn may not have the same smoky flavor as grilled fresh corn. For the best results, try to grill the corn for added taste. If you can’t grill, sauté the thawed corn in a hot pan. This helps bring out its natural sweetness. To add heat, use cayenne pepper in the sauce. You can also sprinkle extra chili powder on top. If you want more spice, consider adding sliced jalapeños or hot sauce. Adjust the heat to your liking. Tasting as you go helps you find the perfect level of spice. Mexican street corn pairs well with many dishes. Try it with grilled meats like chicken or steak. It also goes great with tacos or quesadillas. For drinks, serve it with cold Mexican beer or fresh limeade. This adds a refreshing touch to your meal. Don’t forget to enjoy it with friends! For the full recipe, check out the [Full Recipe]. Grilled Mexican street corn is a tasty treat made with fresh corn, creamy sauce, and spices. You learned how to prepare and grill the corn to perfection and customize it with various toppings. Don't forget to try different flavors or serve it with lime for extra zest. Experiment with vegetarian or vegan options if you prefer. With a few tips for storage and reheating, you can enjoy this dish anytime. Now, it's time to fire up the grill and enjoy your delicious creation!
How To Make Mexican Street Corn A Flavorful Delight
If you crave a burst of flavor, Mexican street corn—also known as elote—is your answer! This simple dish takes fresh corn and transforms it into
Salsa comes in many styles. Each type brings unique flavors and textures. The classic tomato salsa is bright and fresh. You can also find fruit salsas like mango or pineapple. These add a sweet twist. A green salsa uses tomatillos and cilantro. It has a tangy kick. If you love heat, try a spicy salsa with extra peppers. Each type suits different dishes and tastes. To make a classic salsa, gather these simple ingredients: - 4 ripe tomatoes, diced - 1/2 cup red onion, finely chopped - 1 jalapeño, deseeded and minced - 1/4 cup fresh cilantro, chopped - 2 cloves garlic, minced - 1 lime, juiced - Salt and pepper to taste - 1 teaspoon cumin - Optional: 1 avocado, diced These ingredients blend well together. They create a vibrant and tasty salsa. The tomatoes serve as the base. The onion adds crunch and flavor. Jalapeño gives heat, while cilantro adds freshness. Garlic brings depth. Lime juice enhances all these flavors. Adding avocado gives a creamy texture. You can find the full recipe for this salsa above. Fresh ingredients change everything. They make your salsa bright and full of flavor. Use ripe tomatoes for the best taste. Fresh herbs like cilantro add a burst of freshness. Avoid dried herbs, as they lack flavor. Fresh lime juice brightens the mix. When you use fresh, your salsa will stand out. It will taste better and be healthier, too. Always choose the best ingredients for the best results. To make the best homemade salsa, gather these key ingredients: - 4 ripe tomatoes, diced - 1/2 cup red onion, finely chopped - 1 jalapeño, deseeded and minced - 1/4 cup fresh cilantro, chopped - 2 cloves garlic, minced - 1 lime, juiced - Salt & pepper to taste - 1 teaspoon cumin - Optional: 1 avocado, diced These ingredients bring bright flavors to your table. Fresh tomatoes provide sweetness. The red onion adds a nice crunch and a bit of bite. Jalapeños bring heat, but you can control this by removing the seeds. Cilantro gives a fresh, herbal note. Garlic adds depth, while lime juice brightens it all up. Cumin rounds out the flavor with a warm, earthy taste. If you love creaminess, add avocado for a delightful twist. You can play with these ingredients to change your salsa’s flavor. Try using different tomatoes, like cherry or heirloom, for unique tastes. Switch red onion for green onion for a milder flavor. Want something sweeter? Add diced mango or peach. For a smoky kick, toss in some roasted peppers. Experimenting with these swaps can lead to fun and tasty salsas! The spice level in your salsa is all about the jalapeño. If you want less heat, use half a jalapeño or leave out the seeds. For extra spice, add more jalapeños or even some diced habanero. You can also include a pinch of cayenne pepper. Always taste as you go to find the perfect heat level for you. Everyone has different tastes, so adjust it to match your crowd! For the full recipe, you can check out Zesty Fiesta Salsa . Start by washing all your fresh ingredients. I like to use ripe tomatoes for a sweet taste. Dice them into small pieces. Next, chop the red onion finely. This adds a nice crunch. If you enjoy heat, take a jalapeño, deseed it, and mince it. Always wear gloves to avoid touching your eyes! Finally, chop the fresh cilantro and mince the garlic. These ingredients will create a vibrant base for your salsa. In a medium-sized mixing bowl, add the diced tomatoes and chopped red onion. Then, toss in the minced jalapeño and cilantro. This mix brings out the colors and flavors. Next, stir in the minced garlic for a bold flavor. Squeeze one lime over the mixture. This adds a refreshing zing. Season with salt, pepper, and cumin. Mix everything well so each bite is packed with flavor. If you like creamy texture, fold in diced avocado now. Taste your salsa and adjust the seasoning if needed. Cover your bowl with plastic wrap. Place it in the fridge for at least 30 minutes. This chilling time allows the flavors to blend and deepen. The longer you chill, the better the taste! When you take it out, you’ll notice how the salsa has come together. It will be ready to serve with chips or as a topping for your favorite dishes. With this method, you ensure a delicious and zesty experience with every bite! For the complete guide, check the Full Recipe. {{image_2}} Letting your salsa sit is key. I recommend chilling it for at least 30 minutes. This waiting time helps flavors blend. The salt draws out juices from the tomatoes. It makes everything taste better. If you can, let it marinate longer, even overnight. This way, you get a burst of flavor in every bite. Many people rush their salsa. Don't skip chopping ingredients finely. Big chunks can ruin the texture. Also, avoid using old ingredients. Fresh tomatoes and herbs bring life to your dish. Be careful with salt. Too much can overwhelm the taste. Always start with a little, then adjust to your liking. When serving salsa, use a nice bowl. A bright dish adds to the fun. Pair your salsa with tortilla chips, tacos, or grilled meats. For a twist, serve it over fish or chicken. It adds a fresh touch. Remember to keep it cool if it's warm outside. Enjoy your salsa with friends and family for a great time! Mango salsa brings a vibrant flavor to your table. To make it, start with ripe mangoes. You want them to be juicy and sweet. Combine the mangoes with diced red onion and fresh cilantro. Add lime juice for a zesty kick. This salsa pairs well with grilled fish or chicken. The sweetness of mango balances spicy dishes nicely. If you love heat, try spicy salsa. Start with your classic salsa base. Use the same ingredients as zesty fiesta salsa. Now, increase the number of jalapeños or add serrano peppers. You can also include a dash of hot sauce for more heat. This salsa is great with tortilla chips or on tacos. It adds excitement to any meal. Roasted tomato salsa gives a smoky flavor. Start by grilling your tomatoes and jalapeños. This adds depth to the taste. Once roasted, chop them up and mix with red onion and cilantro. Don’t forget lime juice for brightness. The roasted flavors pair perfectly with grilled meats. This salsa is a standout at summer barbecues. For detailed recipes, check out the Full Recipe section. To keep your homemade salsa fresh, store it in an airtight container. Glass jars work well. Make sure to leave some space at the top. This allows for any expansion if the salsa ferments a bit. Always use a clean spoon when serving from the jar. This prevents germs from getting in. Fresh salsa can last about 5 to 7 days in the fridge. Make sure your fridge is set at 40°F or lower. If you notice any mold or a bad smell, throw it out. Always check before using. The flavor may change as it sits, so it's best to eat it fresh. You can freeze salsa if you want to keep it longer. Use a freezer-safe container and leave space at the top. Salsa can last for up to 3 months in the freezer. When you’re ready to use it, thaw in the fridge overnight. The texture may change, so it’s best for cooking or mixing into dishes. For a delicious option, try using the Zesty Fiesta Salsa in your favorite recipes. Homemade salsa can last about 3 to 5 days in the fridge. To keep it fresh, store it in an airtight container. The flavors may get stronger as it sits, making it even tastier. Always check for any off smells or changes in texture before eating. Yes, you can make salsa without tomatoes! You can use fruits like mango, pineapple, or even corn. These options give a sweet twist that is fun and fresh. Just mix your choice of fruit with onion, lime, and spices to create a new flavor. The best tomatoes for salsa are Roma tomatoes. They are sweet and firm, which makes them great for chopping. Other good choices include vine-ripened tomatoes and heirloom varieties. Always pick ripe tomatoes for the best flavor. To make salsa less spicy, remove the seeds from the jalapeño. You can also add more tomatoes to balance the heat. If you want to cool it down even more, mix in some diced avocado or a bit of sugar. You can use dried herbs in salsa, but fresh is better. Dried herbs are more potent, so use less. A good rule is to use one-third of the amount. Dried herbs can add a nice flavor, but fresh herbs make the salsa bright and lively. Homemade salsa adds flavor to any dish. We explored various types and important ingredients. Freshness is key for the best taste. You learned ingredient tips and how to adjust spice levels. Remember, the best salsa comes from simple, quality ingredients. Experimenting with different flavors will keep it fun and exciting. Enjoy making salsa that suits your taste. Happy salsa making!
Best Homemade Salsa Recipes for Tasty Dishes
Are you ready to elevate your meals with bold flavors? Homemade salsa is a game-changer! In this guide, I’ll share my best salsa recipes, from
- 4 large whole wheat tortillas - 1 cup cooked chicken, shredded - 1 cup cheddar cheese, shredded - 1/2 cup cream cheese, softened - 1/2 cup spinach, chopped - 1/2 cup red bell pepper, diced - 1 tablespoon garlic powder - 1 teaspoon onion powder - Salt and pepper to taste - Olive oil spray The main ingredients create a great balance of flavors. Whole wheat tortillas give a hearty base. Shredded chicken adds protein and keeps you full. Cheddar cheese brings a rich taste. Cream cheese helps bind everything together, making it creamy. Spinach adds color and nutrients. Red bell pepper gives a sweet crunch. Garlic and onion powders add depth. Salt and pepper enhance all the flavors. A light spray of olive oil helps crisp the wraps. - Different types of tortillas (flour, corn, gluten-free) - Alternative protein options (tofu, turkey, or beef) - Additional vegetables (mushrooms, zucchini, or tomatoes) You can customize the wraps to fit your taste. Try using flour or corn tortillas for a different texture. If you want to go meatless, tofu or turkey works well. Adding mushrooms or zucchini can boost the veggie power. You can mix and match these ingredients to make it your own. For the full recipe, check out the details. Start by mixing the filling ingredients in a bowl. Use these ingredients: - 1 cup cooked chicken, shredded - 1 cup cheddar cheese, shredded - 1/2 cup cream cheese, softened - 1/2 cup spinach, chopped - 1/2 cup red bell pepper, diced - 1 tablespoon garlic powder - 1 teaspoon onion powder - Salt and pepper to taste Stir everything well until it is evenly mixed. This helps ensure every bite is full of flavor. It’s important to have a good mix. You want every ingredient to shine through in the wrap. Next, let’s focus on how to wrap the filling. Lay a tortilla on a flat surface. Spoon about 1/4 of the filling mix into the center. Make sure to leave space around the edges. To wrap it, fold in the sides first. Then, roll it up from the bottom to the top. This method keeps the filling inside. If you wrap it too loosely, filling may spill out during cooking. Make sure to press down gently as you roll to seal it tight. Now it’s time to cook your wraps. First, set the air fryer temperature to 375°F (190°C). Lightly spray the air fryer basket with olive oil. This helps prevent sticking. Place the wraps seam side down. Do not overcrowd the basket. This allows hot air to circulate and cook them evenly. Spray the tops of the wraps with a bit more olive oil. Cook the wraps for 8-10 minutes. Keep an eye on them. You want them to be golden brown and crispy. Once they are done, carefully remove them and let them cool for a moment before slicing. Enjoy your Easy Air Fryer Snack Wraps! For more details, check the Full Recipe. To make the best air fryer snack wraps, follow these simple tips: - Best practices for even cooking: Always preheat your air fryer. This helps ensure even cooking and a crispy texture. - Using oil spray effectively: Lightly spray the wraps with olive oil. This adds flavor and helps them crisp up nicely. You can easily adjust the flavors in your wraps. Here are some ideas: - Recommendations for seasoning adjustments: Add your favorite spices, like cumin or paprika, to boost flavor. - Balancing textures and flavors: Mix soft ingredients, like cream cheese, with crunchy veggies, like bell peppers. This contrast makes each bite exciting. How you serve your wraps can enhance the meal. Consider these suggestions: - Complementary side dishes or dips: Serve with salsa or guacamole. These dips add extra flavor and fun. - Presentation ideas for serving guests: Arrange the wraps on a colorful platter. Garnish with fresh cilantro for a bright touch. For the full recipe, check out the Easy Air Fryer Snack Wraps section. {{image_2}} You can easily make these wraps vegetarian or vegan. For meat, use plant-based protein like tofu or tempeh. You can also add beans or lentils for more fiber and protein. Instead of cream cheese, try vegan cream cheese or hummus. This keeps the wraps creamy without dairy. Make sure to load up on veggies like mushrooms or zucchini for extra flavor and crunch. Spices can change the taste of your wraps. Try adding cumin or paprika for a smoky flavor. Fresh herbs like basil or cilantro can add a nice touch. You can also mix sweet and savory. Try adding a bit of honey or agave for sweetness. This can create a unique flavor that surprises your taste buds. Need more or less? Adjust the ingredient amounts easily. For larger servings, double the recipe. For smaller meals, cut the ingredients in half. This makes it simple for meal prep. You can prepare multiple wraps at once. Store them in the fridge or freeze for later. This way, you always have a tasty snack ready to go. For more details, check the Full Recipe. To keep your wraps fresh in the fridge, place them in an airtight container. They will last for about 3 days. If you have more wraps, consider freezing them. To freeze, wrap each one tightly in plastic wrap. Then, place them in a freezer-safe bag. This way, you can enjoy them later! When it's time to eat, you want your wraps crispy again. The best way to reheat them is in the air fryer. Set it to 350°F (175°C) and heat for about 5 minutes. Check them often to avoid burning. You can also use a skillet on medium heat. Cook for 2-3 minutes on each side. This keeps the outside crispy while warming the filling. Yes, you can! Cheese adds great flavor to your wraps. You can try mozzarella, feta, or pepper jack. Each cheese brings its own taste. Mozzarella offers a mild flavor and melts well. Feta adds a tangy touch. Pepper jack gives a nice spicy kick. Feel free to mix and match for fun flavors. There are many options for protein swaps. You can use turkey, tofu, or beef. Shredded turkey works well for a lighter touch. Tofu is great for a vegetarian option. Just make sure to press it first to remove extra water. Ground beef can also add a hearty flavor. Choose what fits your taste best. Watch for a golden brown color on your wraps. They should look crispy and firm. You can also gently press the top. If it feels hard, they are ready. Use a thermometer if you like. The inside should be around 165°F (74°C). Enjoy that warm and crispy goodness! This blog post covered how to make delicious snack wraps. We discussed the key ingredients, like whole wheat tortillas and chicken. I shared step-by-step instructions for preparing, wrapping, and cooking with an air fryer. We explored tips for customization and storage, helping you keep your wraps fresh. By using these ideas, you can create unique snacks that suit your taste. Enjoy making wraps that impress your family or friends!
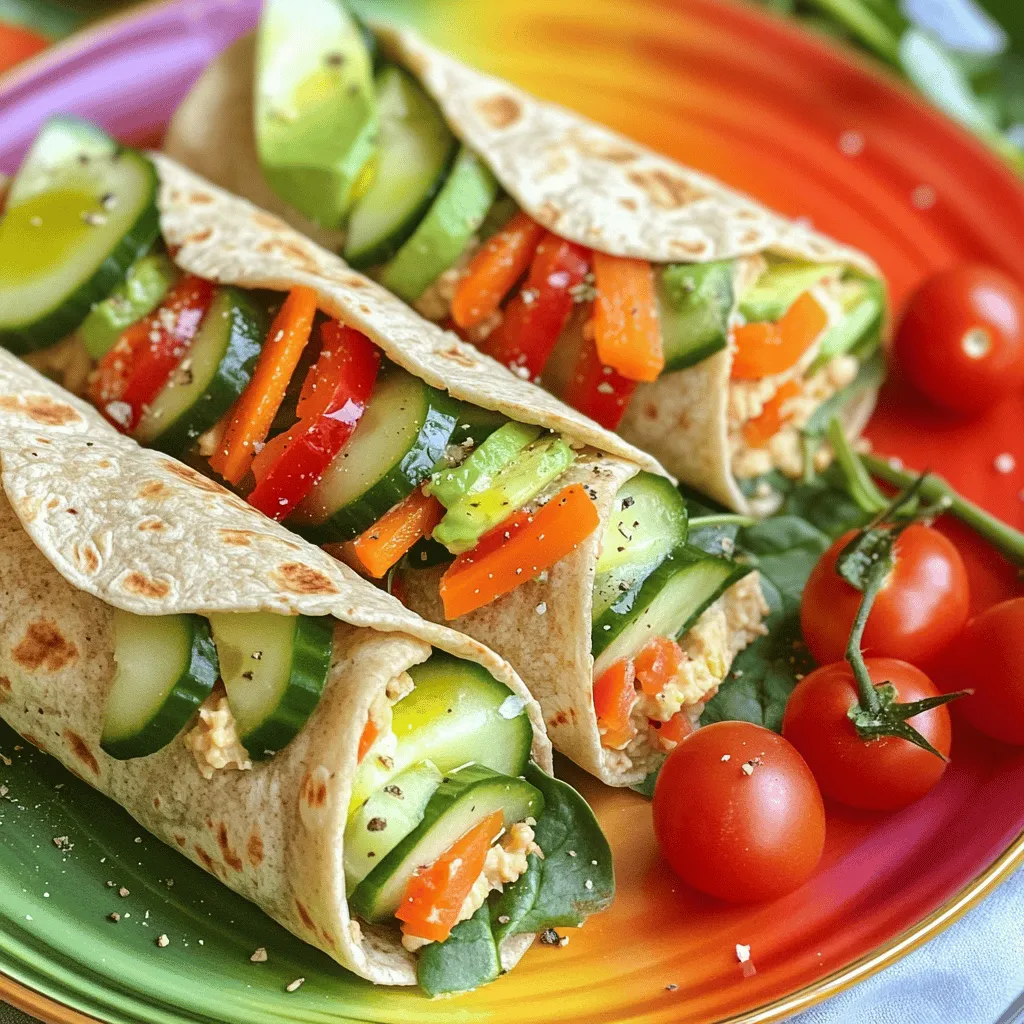
Easy Air Fryer Snack Wraps Simple and Tasty Dish
Are you ready to make snacks everyone will love? With these Easy Air Fryer Snack Wraps, you can create a tasty dish in no time!
- 4 large flour tortillas - 1 cup shredded mozzarella cheese - 1/2 cup shredded cheddar cheese - 4 tablespoons unsalted butter, softened - 4 cloves garlic, minced - 1 tablespoon fresh parsley, chopped (or 1 teaspoon dried parsley) - 1/2 teaspoon salt - 1/4 teaspoon black pepper - 1/4 teaspoon red pepper flakes (optional) The main ingredients for this recipe focus on simple but tasty items. Flour tortillas are soft and flexible. They hold all the cheesy goodness inside. I use a mix of mozzarella and cheddar cheese to give it a rich flavor. For flavor, I add garlic and butter. Garlic brings a strong taste that pairs well with cheese. The parsley adds a fresh touch. You can use fresh or dried parsley based on what you have. Seasoning is key, too. I add salt and pepper to enhance the taste. If you like a kick, try red pepper flakes. They give this dish a nice heat without overpowering the cheese. When you have these ingredients ready, you set the stage for a cheesy delight. This mix will turn simple tortillas into a garlic bread sensation. {{ingredient_image_1}} To start, grab a small mixing bowl. In this bowl, add: - 4 tablespoons unsalted butter, softened - 4 cloves garlic, minced - 1 tablespoon fresh parsley, chopped (or 1 teaspoon dried parsley) - 1/2 teaspoon salt - 1/4 teaspoon black pepper - 1/4 teaspoon red pepper flakes (optional) Mix these ingredients well until they are nice and smooth. This garlic butter will give your tortilla bread a great flavor. Next, lay out your 4 large flour tortillas on a clean surface. Take your garlic butter mix and spread a generous layer on one side of each tortilla. Make sure to cover it well. Now, sprinkle the shredded cheese over the buttered side. Use: - 1 cup shredded mozzarella cheese - 1/2 cup shredded cheddar cheese Once the cheese is on, carefully fold each tortilla in half. The cheese side should face in, forming a half-moon shape. Before cooking, preheat your air fryer to 350°F (175°C). This should take about 3 minutes. Place the folded tortillas in the air fryer basket. Make sure to arrange them in a single layer. If your air fryer is small, you might need to do this in batches. Now, air fry the tortillas for 6-8 minutes. Flip them halfway through cooking. You want them to be golden brown, and the cheese should be melted and bubbly. After cooking, let the tortillas sit for a minute. Then, slice them into wedges and enjoy! To get the best cheese melt, I love using a mix of mozzarella and cheddar. Mozzarella melts great and gives that gooey texture we all love. Cheddar adds a nice sharp taste. You can also try gouda or provolone for a twist. Just remember to shred your cheese for faster melting. To achieve a perfect golden crust, spread enough garlic butter on your tortillas. This adds flavor and helps them crisp up. Make sure your air fryer is preheated to 350°F. Place the tortillas in a single layer and flip them halfway through cooking. This ensures even browning. Serve your cheesy tortilla garlic bread with some tasty dips. Marinara sauce is a classic choice. You can also try sour cream or a spicy salsa. Adding a simple side salad can make it a meal. This dish pairs well with fresh herbs, like chopped parsley, for a pop of color. Pro Tips Use Fresh Garlic: Freshly minced garlic will provide a stronger flavor compared to pre-minced options, enhancing the overall taste of your garlic bread. Experiment with Cheese: Feel free to mix and match your favorite cheeses like provolone or gouda for a unique twist on flavor and texture. Don’t Overcrowd the Air Fryer: Ensure there's enough space between each tortilla for even cooking and crispiness; work in batches if necessary. Garnish for Presentation: A sprinkle of fresh parsley or a drizzle of olive oil after cooking can elevate the dish's appearance and flavor. {{image_2}} You can switch up the cheese for fun flavors. Try gouda for a smoky taste. Cream cheese adds a rich, creamy layer. If you love spice, pepper jack gives a nice kick. For a lighter option, use ricotta or feta cheese. Each choice changes the flavor and texture, keeping every bite exciting. Want to make it heartier? Add protein easily. You can layer in slices of cooked chicken or turkey. Shredded beef or pork also works well. For a meat-free option, black beans or refried beans are tasty and filling. Just be sure to keep the layers even. This way, every bite has great taste. Going plant-based? No problem! You can add more veggies for flavor. Try spinach, bell peppers, or mushrooms. They add color and nutrients. You can also use vegan cheese to keep it dairy-free. If you love herbs, add fresh basil or cilantro for a fresh kick. This makes the dish bright and healthy. To keep your Air Fryer Cheesy Tortilla Garlic Bread fresh, store leftovers in an airtight container. You can refrigerate them for up to three days. If you want to keep them longer, freeze them. Wrap each tortilla in plastic wrap or foil before placing them in a freezer bag. This method prevents freezer burn and keeps the taste intact. To bring back the crispy texture, reheat your tortillas in the air fryer. Set it to 350°F (175°C) and heat for about 3-4 minutes. This method revives the crunch and melts the cheese again. You can also use a skillet over medium heat. Just place the tortilla in the pan for a couple of minutes on each side. You can keep refrigerated leftovers for about three days. If frozen, they can last for up to three months. Always check for signs of spoilage before eating, like any off smells or unusual textures. Enjoy your cheesy delight fresh whenever you can! Yes, you can use corn tortillas. They add a nice flavor and crunch. Make sure they are fresh and flexible. Corn tortillas might need less cooking time. Keep an eye on them to prevent burning. If you prefer gluten-free options, corn is a great choice. You can tell they are done when they turn golden brown. The cheese should be melted and bubbly. Check the edges of the tortillas; they should be crisp. If they look slightly puffed, that’s a good sign too. Use tongs to flip them halfway through for even cooking. Yes, you can! You can use a skillet on the stove. Heat the skillet over medium heat. Cook each folded tortilla for 3-4 minutes on each side. You can also use an oven. Bake them at 375°F for about 10-12 minutes. Just make sure to flip them halfway for even cooking. You learned how to make delicious garlic cheese tortillas using simple ingredients. Start by mixing your garlic butter, then assemble and air fry for a tasty dish. Remember, you can customize it with different cheeses, proteins, or veggies. Store leftovers properly to enjoy them later. With practice, you'll get the perfect golden crust every time. Explore variations and keep it fun. Enjoy your cooking journey, and make it your own!
Air Fryer Cheesy Tortilla Garlic Bread Delight
Are you ready to elevate your snack game? In this post, I’ll show you how to make Air Fryer Cheesy Tortilla Garlic Bread that’s melty,
- 4 ripe tomatoes, diced - 1 medium red onion, finely chopped - 1 jalapeño pepper, minced (seeds removed for less heat) - 1 cup fresh cilantro, chopped - 2 cloves garlic, minced - Juice of 2 limes Fresh ingredients make this salsa shine. Ripe tomatoes are key. They should feel firm but slightly soft. Bright red tomatoes offer the best taste. Next, choose a red onion. It has a sweet bite that complements the salsa. A jalapeño pepper adds a nice kick. Remove the seeds if you want less heat. Fresh cilantro brings a burst of flavor. Use only the green leaves, as they are the most flavorful. Garlic adds depth and richness. Finally, lime juice brightens everything up. - 1 teaspoon ground cumin - Salt and pepper to taste Ground cumin gives the salsa a warm taste. Use just a teaspoon; it packs a punch. Salt and pepper help balance the flavors. Adjust these to your liking for the perfect blend. - Choosing ripe tomatoes: Look for tomatoes with smooth skin. They should feel heavy for their size. The scent should be sweet and fragrant. - Fresh herbs importance: Always use fresh herbs. Dried herbs lack the same vibrant taste. Fresh cilantro brings life to the dish. - Jalapeño heat levels: Jalapeños can vary in spice. Test a small piece before using it all. If it’s too hot, consider using less or choosing a milder pepper. Using quality ingredients makes a huge difference. For the best flavor, stick to fresh and ripe produce. This ensures your salsa is fresh and flavorful. Enjoy crafting this delightful dip with top-notch ingredients! To make our favorite garden salsa, start with your ingredients. Use a sharp knife for easy chopping. - Dice the ripe tomatoes into small pieces. - Finely chop the red onion. - Mince the jalapeño pepper, removing the seeds for less heat. - Chop the fresh cilantro and mince the garlic. Once you have all your fresh ingredients prepared, it’s time to mix them. In a large mixing bowl, combine the diced tomatoes, chopped red onion, and minced jalapeño. Add the cilantro and garlic. Make sure you mix well to combine all the flavors. This helps each bite taste fresh and bright. Now, let’s talk about flavor. After mixing, squeeze the juice of two limes into the bowl. This adds a nice tang. After adding the lime juice, sprinkle in the ground cumin. Season with salt and pepper to taste. For the best flavor, let the salsa rest for at least 30 minutes at room temperature. This allows the ingredients to meld together. You can also refrigerate it for a few hours if you want to make it ahead. When serving, consider pairing it with tortilla chips or tacos. You can also use it as a topping for grilled meats or fish. To make this salsa, gather a few simple tools: - A large mixing bowl to combine all your ingredients. - A sharp knife and cutting board for chopping and dicing. - Measuring spoons to ensure you add the right amount of cumin, salt, and pepper. With these tools, you can create a fresh and flavorful salsa that everyone will love. For the full recipe, check out the section above. To make your garden salsa even better, consider adding extra ingredients. You can mix in diced bell peppers for sweetness. If you like fruit, try adding diced mango or peaches. These fruits add a fresh twist to the salsa. You can also play with herbs. Basil or parsley can give a new taste. Adjusting spice levels is key. If you want more heat, leave some seeds in the jalapeño. You can also add a pinch of cayenne pepper or crushed red pepper flakes. For a milder salsa, remove all the seeds from the jalapeño. You can also use a milder pepper like a poblano. Choose the right serving dishes. A colorful bowl can make your salsa pop. A glass bowl shows off the vibrant colors of the salsa. You can also use a wooden board for a rustic look. Think about garnishes too. A sprinkle of chopped cilantro on top adds color. You can also add lime wedges on the side. This gives guests a fresh squeeze before eating. Preparing salsa in advance is great for parties. You can make it a few hours ahead or even a day before. This lets the flavors blend well. Keep it covered in the fridge for the best taste. For storage, use airtight containers. Glass jars work well and keep it fresh. When you store salsa, try to remove air. This helps keep it from spoiling fast. Enjoy your salsa fresh for up to a week! {{image_2}} You can change up your salsa by adding fruits. Mango or pineapple brings a sweet twist. These fruits add a tropical flavor to your garden salsa. Just dice them and mix them in. You will enjoy the nice contrast of flavors. Using different peppers also changes the taste. If you want more heat, try a serrano or habanero pepper. For a milder option, use bell peppers. Each pepper gives a unique flavor, making your salsa special. You can easily make this salsa vegan. All the ingredients are plant-based. Just skip any animal products, and you’re good to go. This way, everyone can enjoy your salsa. If you need gluten-free options, you’re in luck. This salsa is gluten-free as it is. Just watch out for any chips. Make sure they are gluten-free too. Salsa can be chunky or smooth. Some people love a chunky texture for a fresh bite. Others prefer a smooth blend for a dip. You can choose your style based on your taste. You can also use local ingredients for a unique twist. If you have fresh corn or black beans, toss them in. This adds a local flair to your salsa. Try these ideas for a fun, new taste! For the full recipe, check out our Favorite Garden Salsa. To store homemade salsa, keep it in the fridge. Use a clean, airtight container. Glass jars work well because they seal tightly. Make sure to allow the salsa to cool before putting it in the container. This helps keep it fresh for longer. You can freeze salsa for later use. Start by placing the salsa in freezer-safe containers. Leave some space at the top. Salsa expands when it freezes. When you want to use it, take it out and thaw it in the fridge overnight. This keeps the texture nice. After thawing, stir it well before serving. Homemade salsa lasts about 5 to 7 days in the fridge. Keep an eye on it to ensure it stays fresh. Signs of spoilage include a sour smell or discoloration. If you see mold or the texture changes, discard it. Always trust your senses when checking for freshness. To make salsa less spicy, you can remove the seeds and ribs of the jalapeño. These parts hold most of the heat. You can also add more tomatoes to balance the spice. Another option is to mix in some sugar or honey to counteract the heat. You might also blend in some diced avocado for a creamy texture that cools the heat. Yes, you can use canned tomatoes. They are often softer and easier to blend. Canned tomatoes have a rich flavor, but fresh tomatoes usually taste better. Canned tomatoes can be more convenient, especially when fresh ones are out of season. If you use canned, choose ones without added salt for better control over flavor. Homemade salsa lasts about 5 to 7 days in the fridge. Keep it in a sealed container to maintain freshness. If you see any signs of spoilage, like a change in color or smell, it's best to throw it away. For longer storage, consider freezing it. Just remember that the texture may change after thawing. In this blog post, I covered how to make fresh salsa using ripe tomatoes, jalapeños, and rich spices. You learned the best tips for picking ingredients and how to mix your salsa for great flavor. Remember, resting time is key for taste. Don't hesitate to try new variations or adjust spice levels to suit your taste. Whether you prepare it for a party or just enjoy it at home, fresh salsa can be a crowd-pleaser. Keep these tips in mind to create delicious salsa you’ll love sharing!
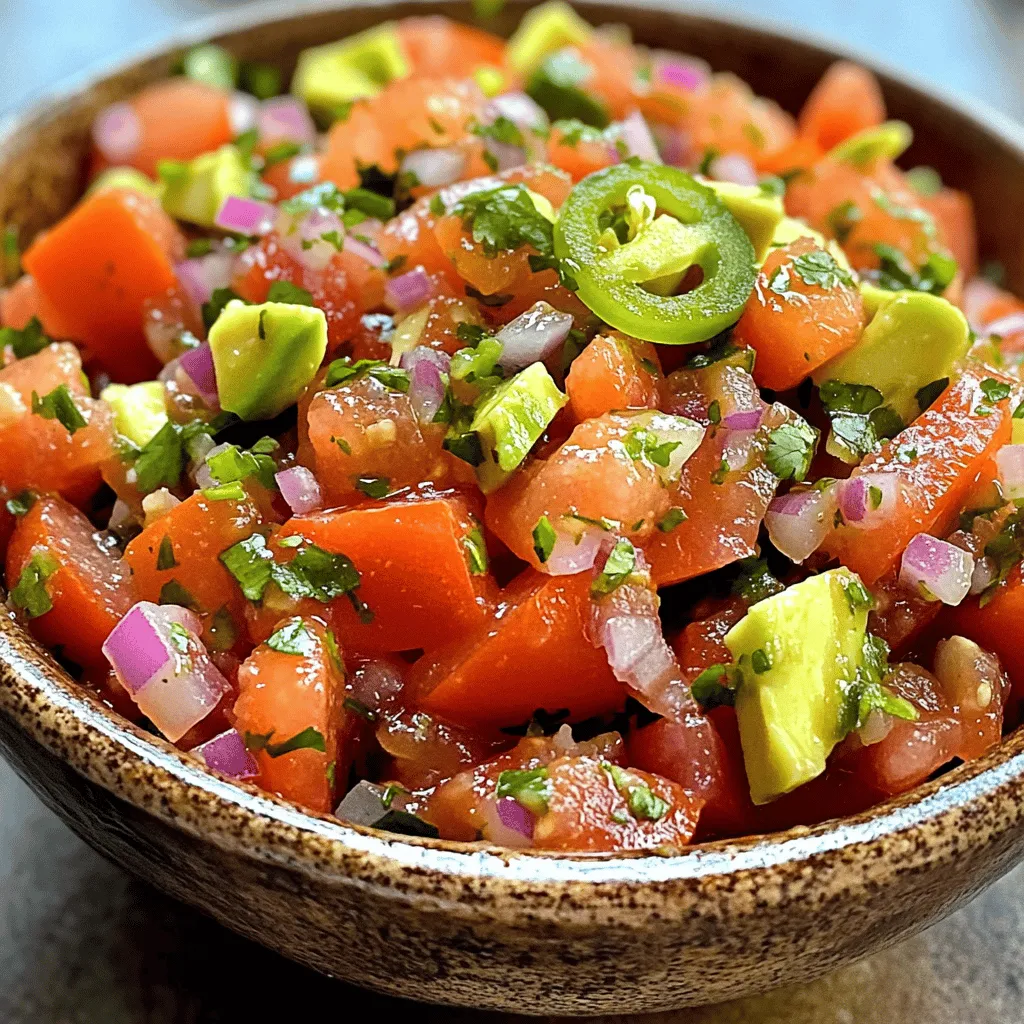
Our Favorite Garden Salsa Fresh and Flavorful Recipe
If you’re craving a burst of fresh flavor, our favorite garden salsa recipe will hit the spot. Made with ripe tomatoes, crisp red onion, and
Make-Ahead Lunchables are fun, easy, and quick to prepare. You can make them in just 15 minutes. They are perfect for busy days. You can store them in the fridge for up to five days. - Whole grain crackers - Sliced turkey or chicken breast - Cheddar cheese - Baby carrots - Cucumber - Grape tomatoes - Hummus - Ranch dressing or yogurt-based dip - Optional fruits for sweetness These ingredients work well together. You get protein from the turkey or chicken. Cheese adds flavor and calcium. Fresh veggies like carrots and cucumbers give crunch and color. Hummus or ranch dressing makes it fun to dip. If you like a sweet touch, add fruits like apple or grapes. You can mix and match based on your taste. This makes lunch exciting and healthy. To make your own Make-Ahead Lunchables, start by gathering your tools. You will need small containers or lunchboxes. These will help keep each part fresh and neat. I recommend using containers with separate compartments. This way, each item stays crunchy and tasty. You can prep these Lunchables in just 15 minutes. Next, let’s divide the ingredients. For each container, take 1/4 cup of whole grain crackers. This will be the base of your Lunchables. Then, add 1/4 cup of sliced turkey or chicken breast. This is a great source of protein. Now, include 1/4 cup of cubed cheddar cheese. Cheese adds flavor and creaminess. Now, let’s add some veggies. Divide 1/2 cup of baby carrots, 1/2 cup of cucumber slices, and 1/2 cup of halved grape tomatoes among the containers. These add color and crunch. You want a balanced mix of healthy foods that kids will love. Don’t forget the dips! Add a small cup of hummus and ranch dressing to each container. These will make your Lunchables more fun to eat. If you want a hint of sweetness, include a handful of sliced apple or grapes. Now comes the fun part: assembly! Place the crackers at the bottom of each container. Next, arrange the turkey or chicken and cheese neatly beside the crackers. Fill the rest of the space with the veggies. Make sure to leave room for the dips. Seal each container tightly. This keeps everything fresh. Store them in the fridge until you’re ready to eat. These Make-Ahead Lunchables can last for up to 5 days. Enjoy your healthy and fun lunches! For a full recipe, check out the Full Recipe section. When making your Make-Ahead Lunchables, plan ahead. Choose a day to prep. Set aside about 15 minutes. Gather your ingredients first. Use small containers or lunchboxes. This helps keep things neat. Portion each ingredient carefully. This keeps your meals balanced and fun. To boost flavor, try different cheeses. Pepper jack adds spice. Gouda gives a smoky taste. You can also change the meats. Use ham or roast beef for variety. Fresh herbs like basil or dill can add freshness. A sprinkle of salt or pepper enhances the taste too. Do you need to swap ingredients? No problem! Use rice cakes instead of crackers for crunch. If you prefer a vegan option, try chickpeas instead of meat. For cheese, use vegan cheese or skip it altogether. Swap hummus for guacamole for a creamy twist. You can even add nuts for extra protein. For the full recipe, check the earlier section. Enjoy making your own Lunchables! {{image_2}} You can easily make vegetarian Lunchables. Just swap the meat for more veggies or plant-based proteins. Try adding slices of avocado or roasted red peppers. You can also include some hummus for a protein boost. Here’s a simple mix: - 1 cup whole grain crackers - 1 cup cubed cheese (like cheddar or mozzarella) - 1/2 cup baby carrots - 1/2 cup cucumber rounds - 1/2 cup cherry tomatoes - 1/4 cup hummus - Optional: olives or bell pepper strips Feel free to get creative with your choices! If you need gluten-free options, pick gluten-free crackers. Many brands make tasty choices that work well. Instead of crackers, you can use rice cakes or veggie sticks. Here’s a gluten-free idea: - 1 cup gluten-free crackers - 1 cup sliced turkey or chicken breast - 1 cup cheese cubes - 1/2 cup carrot sticks - 1/2 cup celery sticks - 1/4 cup guacamole - Optional: fruit like berries for sweetness These will taste great and keep you full! Kids love fun shapes and colors. Use cookie cutters to make fun shapes out of cheese or fruit. You can also add a dip they love. Here’s a kid-friendly mix: - 1 cup fun-shaped crackers - 1 cup sliced turkey or ham - 1 cup cheese shapes - 1/2 cup sliced bell peppers - 1/2 cup apple slices - 1/4 cup ranch dressing - Optional: mini chocolate chips for a treat These will make lunchtime exciting for your little ones! To keep your Make-Ahead Lunchables fresh, use airtight containers. This helps lock in flavor and moisture. You can also use lunchboxes with separate compartments. This way, each food stays fresh. Avoid mixing wet and dry foods to keep everything crisp. These Lunchables stay fresh in the fridge for up to five days. After that, the taste and texture might change. Always check for any off smells or odd textures before eating. If you notice anything strange, toss it out for safety. Reheating is not usually needed for these Lunchables. They taste great cold. If you prefer warm meat or cheese, microwave them for a few seconds. Just be careful not to overheat. Enjoy your delicious meal prep without hassle! You can store Make-Ahead Lunchables for up to five days. Keep them in the fridge. Use airtight containers to keep them fresh. This way, the flavors stay great all week. Yes, you can customize the ingredients to fit your taste. Swap turkey for ham or use a different cheese. You can also change the veggies based on what you have. This makes every lunch unique and fun. For healthy dip alternatives, try these options: - Greek yogurt with herbs - Homemade guacamole - Salsa or pico de gallo - Nut butter for sweetness These dips add flavor and nutrition to your Lunchables. You can find many more ideas in the Full Recipe. This blog post explained how to make tasty, healthy Make-Ahead Lunchables. You learned the key ingredients and how to prepare them step by step. We also shared tips for meal prep and ways to customize your Lunchables. Different variations can suit any diet. In conclusion, making these lunch boxes is easy and fun. You can mix flavors and choose what you love. Enjoy your meal prep and make lunchtime exciting!
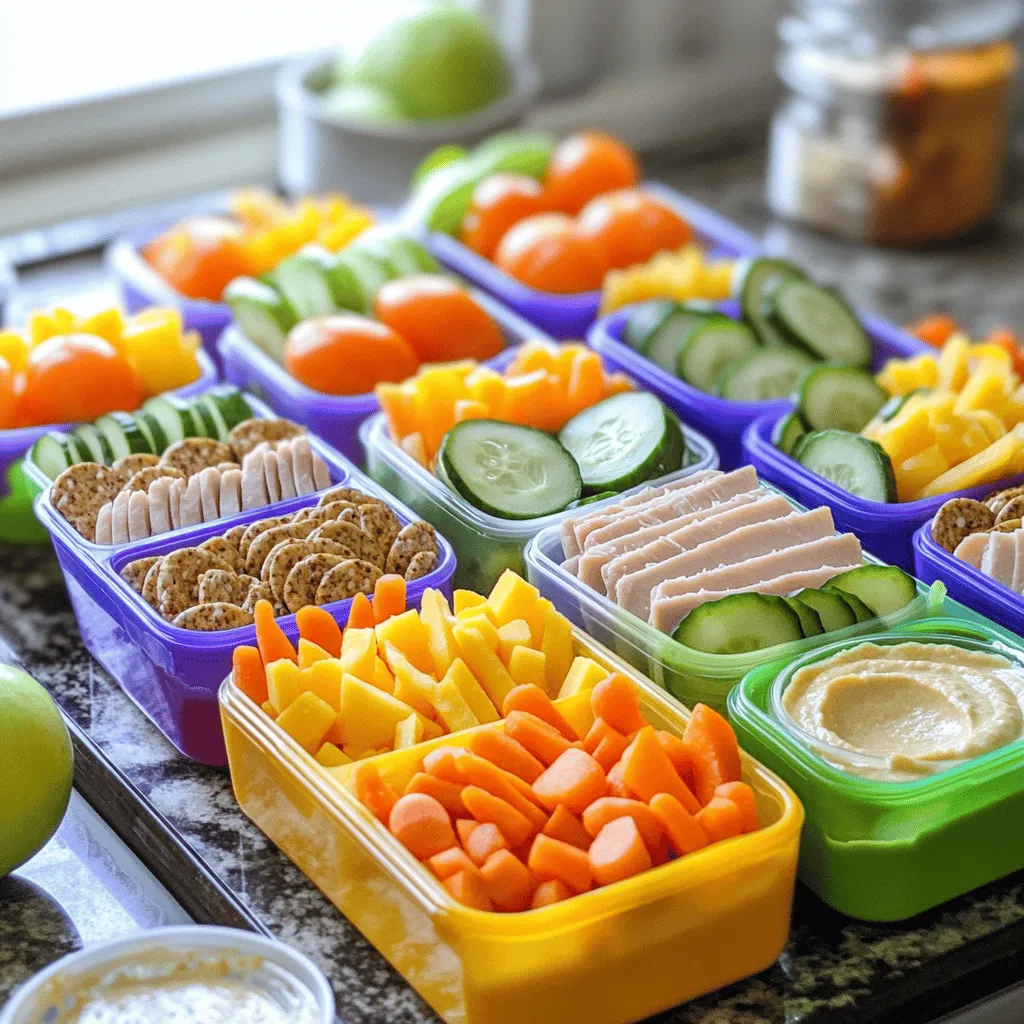
Make-Ahead Lunchables Easy Meal Prep Ideas
Are you tired of the same old boring lunches? I’ve got the solution for you: Make-Ahead Lunchables! These fun, easy meal prep ideas maximize taste
- 4 whole wheat tortillas - 1 cup hummus (any flavor) - 1 small cucumber, thinly sliced - 1 red bell pepper, thinly sliced - 1 small carrot, grated - 1 avocado, sliced - 1 cup baby spinach The main star of this recipe is the whole wheat tortillas. They are soft, easy to roll, and healthy for your toddler. Hummus adds creaminess and flavor. You can choose any flavor your child likes. Fresh veggies make the wrap colorful and crunchy. Sliced cucumber, red bell pepper, grated carrot, avocado, and baby spinach bring great nutrition and taste. - 1 tablespoon olive oil - Salt and pepper to taste A drizzle of olive oil adds richness. You can also sprinkle some salt and pepper to enhance flavor. These simple additions elevate the taste of the veggies without overpowering them. - Health advantages for toddlers - Importance of variety in meals These wraps offer many health benefits. Whole wheat tortillas provide fiber, which helps digestion. Hummus is packed with protein, making it filling. Fresh veggies add vitamins and minerals vital for growth. Offering a variety of foods helps toddlers develop healthy eating habits. It exposes them to different flavors and textures. The colorful nature of these wraps can make meals exciting. You can find the full recipe for Rainbow Veggie Wraps in the provided details. 1. Laying out tortillas Start by laying out your whole wheat tortillas. Place them on a clean surface. This makes it easy to spread the hummus. 2. Spreading hummus Next, spread an even layer of hummus on each tortilla. Leave a small border around the edges. This keeps the filling from spilling out when you roll. 1. Layering the vegetables On one side of each tortilla, layer your fresh veggies. Add sliced cucumber, red bell pepper, grated carrot, avocado slices, and baby spinach. This mix adds color and crunch. 2. Rolling the wraps Carefully roll the tortilla tightly from the veggie side. Tuck in the fillings as you go. This helps keep everything inside. 1. Slice options Once rolled, slice each wrap into bite-sized pieces or halves. This makes it easier for little hands to grab. 2. Presentation tips for a fun meal Arrange the veggie wraps on a colorful plate. Serve with a small bowl of extra hummus for dipping. Add a few cherry tomatoes on the side for a pop of color. Kids love fun food! Involving toddlers in meal prep makes lunch exciting. Let them wash veggies or spread hummus. This gives them a sense of ownership. You can also let them pick their favorite colors for the wraps. For colorful presentation, use a bright plate. Cut the wraps into fun shapes with cookie cutters. Add extra veggies or fruits on the side. Cherry tomatoes and apple slices add color and taste. Meal prepping saves time during busy weeks. Make wraps in bulk on weekends. Store them in the fridge for quick lunches. You can also chop veggies ahead of time. Keep them in a sealed container for freshness. For quick assembly, have all ingredients ready. Lay out the tortillas and the fillings. Let your toddler choose what goes in their wrap. This makes lunch quick and fun. Dairy-free alternatives make the wraps suitable for everyone. Use avocado or dairy-free cheese instead of regular cheese. These options add creaminess and flavor. Adding protein options keeps your toddler full. Include sliced turkey, chicken, or beans. These foods are tasty and healthy. You can also mix in nuts for extra crunch. For more details on how to make these wraps, check the Full Recipe. {{image_2}} You can switch up the tortillas for fun. Try spinach, tomato, or even rice paper. Each one offers a unique taste and color. You can also use pita bread for a different shape. It adds a fun twist to every bite. When it comes to spreads, hummus is great, but you can try other options too. Cream cheese or guacamole are tasty choices. Nut butter adds a sweet touch. Just ensure there are no nut allergies first. Using seasonal veggies can make your wraps more exciting. In spring, add fresh asparagus or radishes for crunch. Summer brings ripe tomatoes and zucchini. Fall is perfect for sweet bell peppers and squash. Winter can feature carrots and hearty greens like kale. Local produce is always a good idea. It’s fresher and often tastier. Check your local farmers' market for what's in season. Supporting local farms is also great for the community. Adding sweet items can make your wraps even better. Try slices of strawberries or apple for a fruity touch. Dried cranberries or raisins can also add sweetness. Zesty sauces can bring out more flavor. A splash of lemon juice wakes up the taste. You can use yogurt-based ranch or a mild salsa for added zest. Just make sure the flavors are kid-friendly. For a full recipe, check out the Rainbow Veggie Wraps 🥬. These ideas will help you keep lunch fun and tasty! To keep your Rainbow Veggie Wraps fresh, wrap them tightly in foil or plastic wrap. This helps keep the ingredients crisp and tasty. You can also use reusable containers with tight lids. Choose containers that fit the wraps snugly to avoid movement. These wraps can last up to three days in the fridge. Look for wilting veggies or a sour smell to spot spoilage. If they look or smell off, it's best to toss them. Yes, you can freeze these wraps! Wrap them in foil and place them in a freezer bag. They can last up to three months in the freezer. When you're ready to eat, thaw them overnight in the fridge. For a quick thaw, leave them out at room temperature for a couple of hours. Enjoy your easy lunch! For the full recipe, check out Rainbow Veggie Wraps 🥬. You can add protein and healthy fats to these wraps. Try adding cooked chicken, beans, or cheese. You can also include seeds like chia or hemp. These extras boost the fiber and protein levels. This helps keep your toddler full and happy. There are many fun fillings to try! You can use sliced turkey or cheese for a savory twist. For a sweet option, try adding bananas or strawberries. You can also mix in some cooked quinoa or lentils for extra texture. Kids love variety, so keep it fresh! Yes, you can use gluten-free tortillas! Look for brands made from rice or corn. These options are tasty and safe for those with gluten allergies. Just check the label to ensure they fit your needs. Your toddler will love them just as much! Make it a game! Let your toddler pick veggies at the store. You can also use fun shapes with cookie cutters. Try to serve new veggies with a dip they like, like hummus or yogurt. Praise them when they try something new. Make it fun and stress-free! In this post, I covered how to make nutritious wraps for toddlers using whole wheat tortillas, hummus, and fresh veggies. I shared tips on prep, assembly, and serving ideas. Remember to involve your little ones to make meal prep fun. Don't forget to explore variations and seasonality for exciting flavors! Proper storage will keep your wraps fresh and tasty. These healthy choices will help your toddlers enjoy diverse meals. Embrace creativity in their food and set the stage for lifelong healthy eating habits.
Super Easy Toddler Lunch Ideas for Busy Parents
Finding quick and easy lunch ideas for your toddler can feel like a challenge. As a busy parent, you want meals that are not only