Appetizers
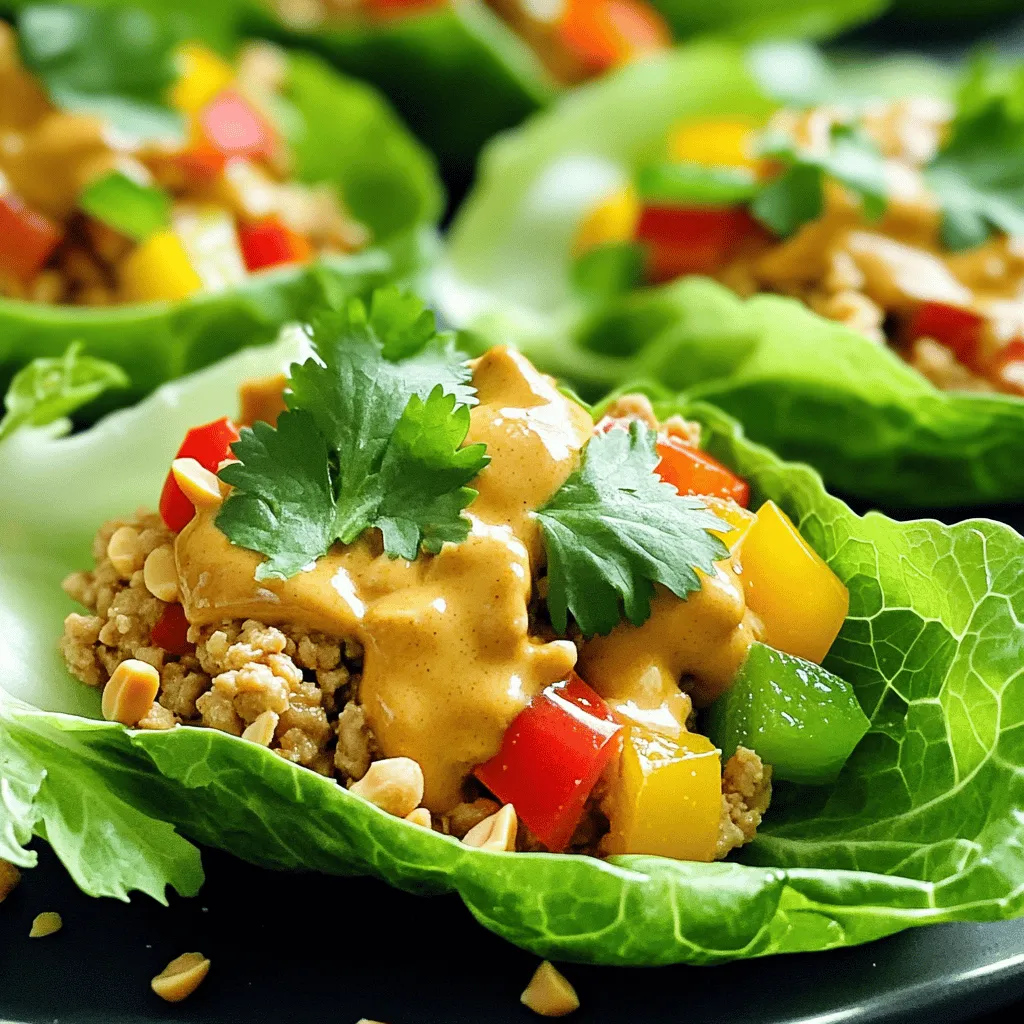
Minute Thai Peanut Chicken Lettuce Wraps Delightful Treat
Looking for a tasty meal that’s quick and fun? You’re in the right place! My Minute Thai Peanut Chicken Lettuce Wraps are a delightful treat
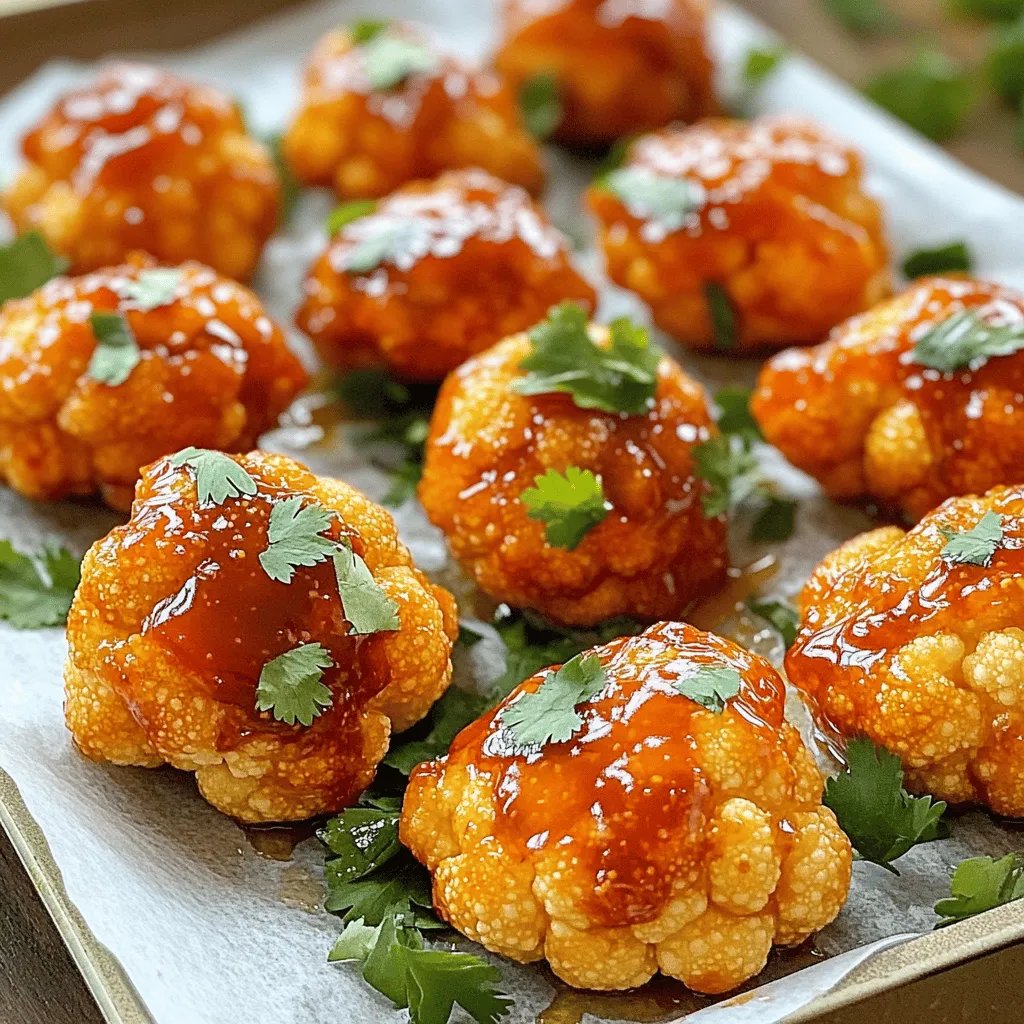
Air Fryer Honey Sriracha Cauliflower Wings Delight
Get ready for a flavor explosion with Air Fryer Honey Sriracha Cauliflower Wings! These crispy bites pack a sweet and spicy punch that will make
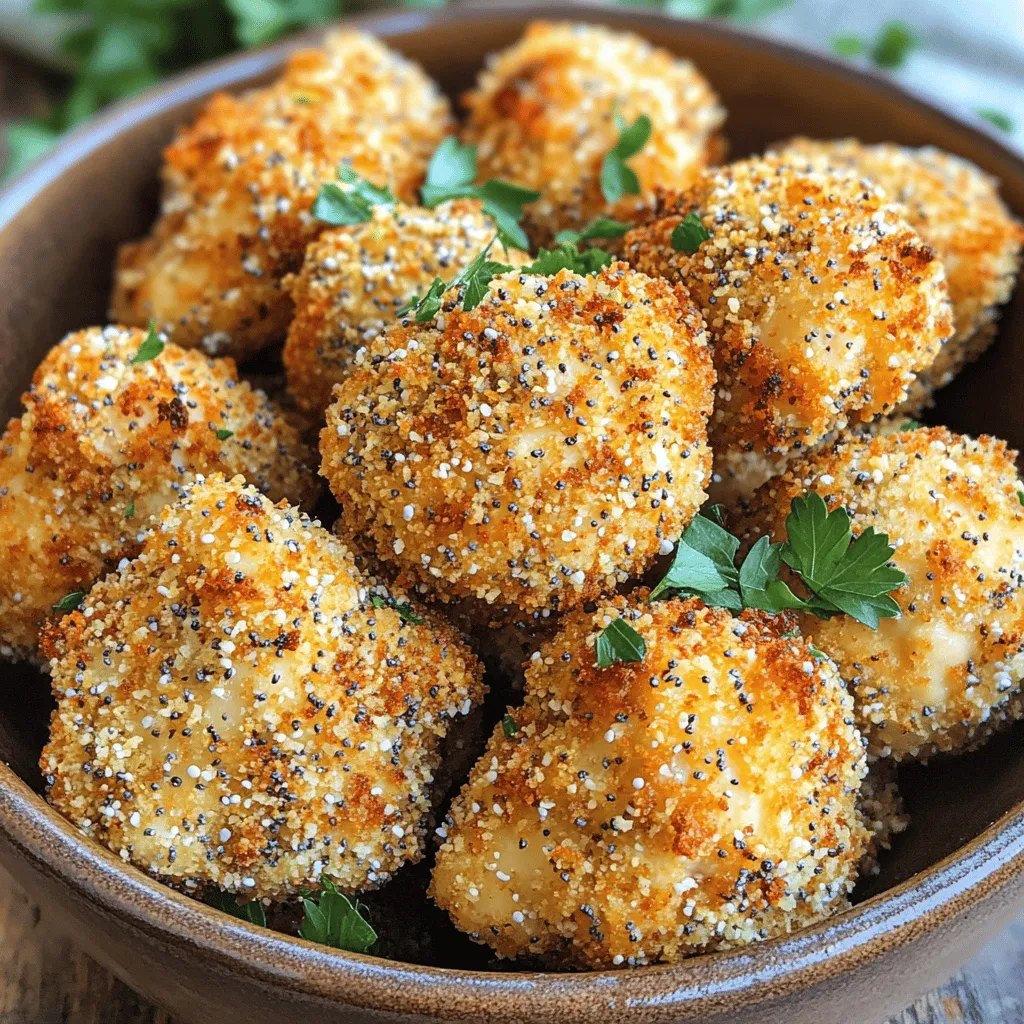
Air Fryer Everything Bagel Chicken Bites Delight
Get ready to elevate your snack game with my Air Fryer Everything Bagel Chicken Bites! These crispy, flavorful bites blend juicy chicken with the bold
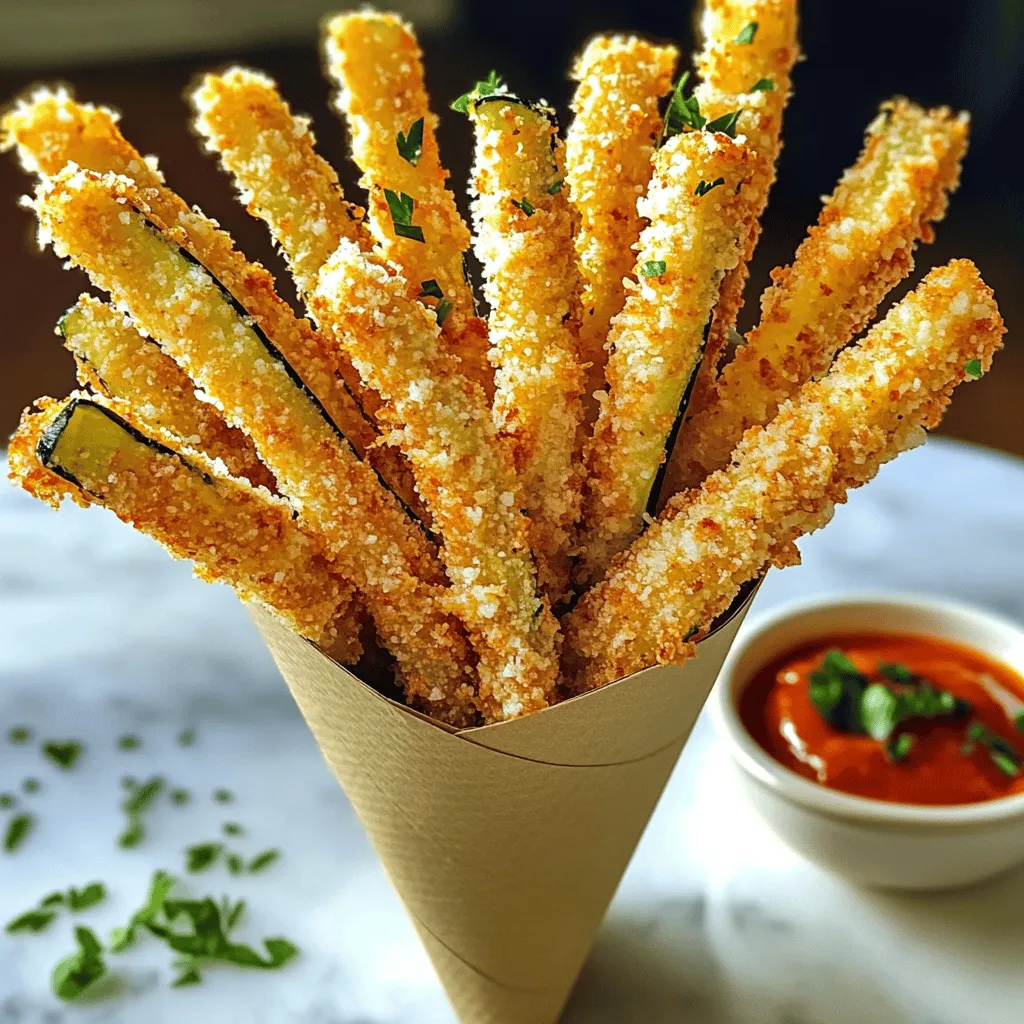
Crispy Parmesan Zucchini Fries Irresistible Snack Recipe
If you’re craving a delicious and healthy snack, look no further! Crispy Parmesan Zucchini Fries are not only easy to make, but they also pack
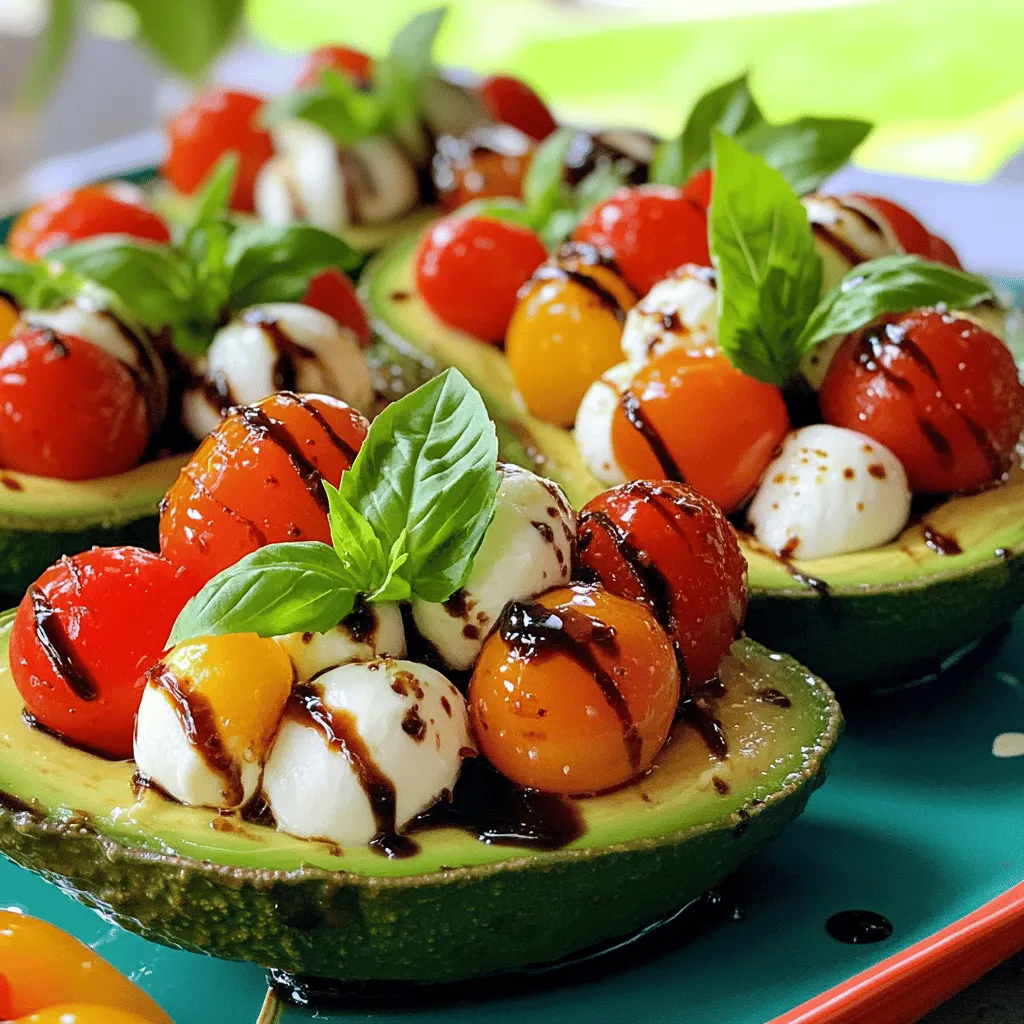
Caprese Stuffed Avocados Flavorful and Fresh Delight
Looking for a fresh and tasty dish? Caprese Stuffed Avocados are your answer! This delightful meal combines creamy avocados with juicy tomatoes, savory mozzarella, and

Crispy Garlic Parmesan Wings Flavorful Easy Recipe
Are you craving a delicious snack that’s easy to make? Look no further! My Crispy Garlic Parmesan Wings deliver bold flavor with a simple recipe.

Slow Cooker Salsa Verde Chicken Taquitos Delight
Are you ready to savor a delicious meal that’s both easy to make and packed with flavor? My Slow Cooker Salsa Verde Chicken Taquitos Delight
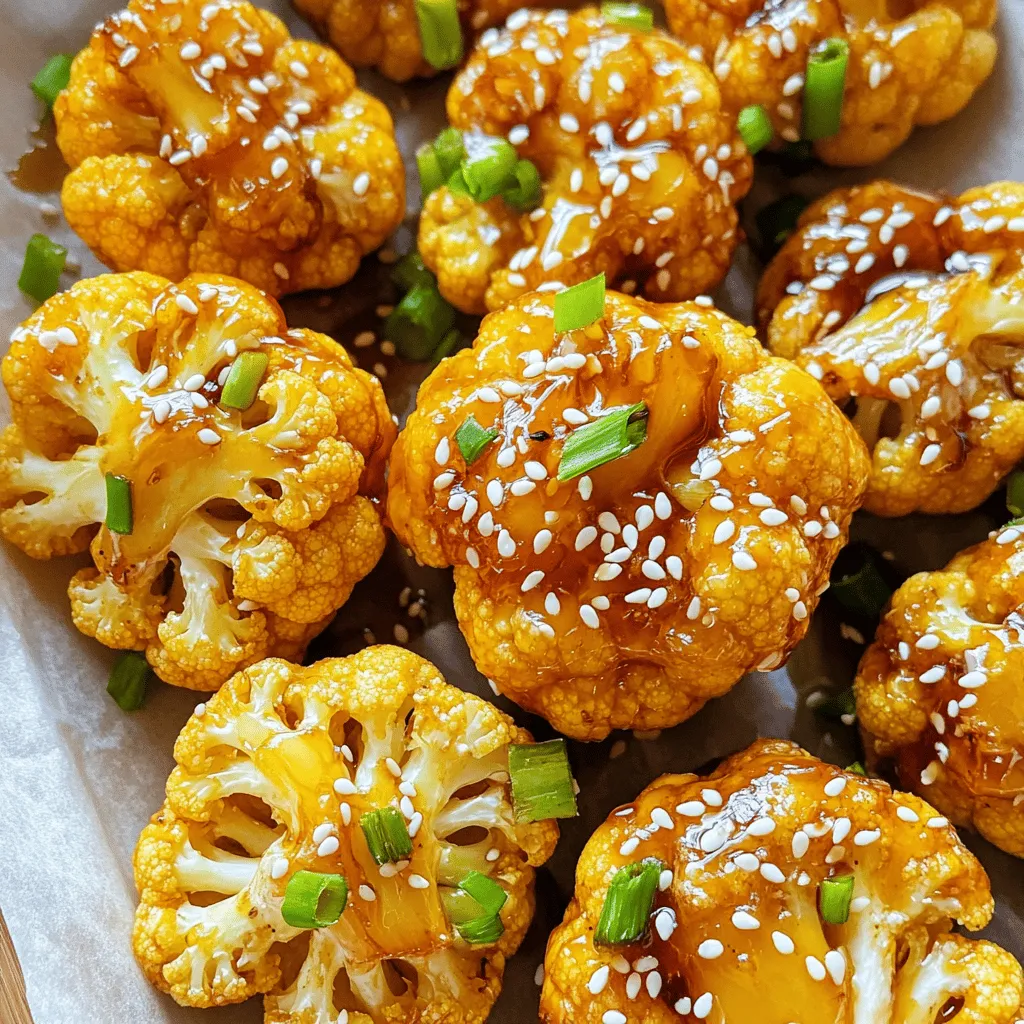
Air Fryer Honey Garlic Cauliflower Bites Delight
Are you ready to make a delicious snack that will impress your friends? Air Fryer Honey Garlic Cauliflower Bites are crunchy, sweet, and packed with
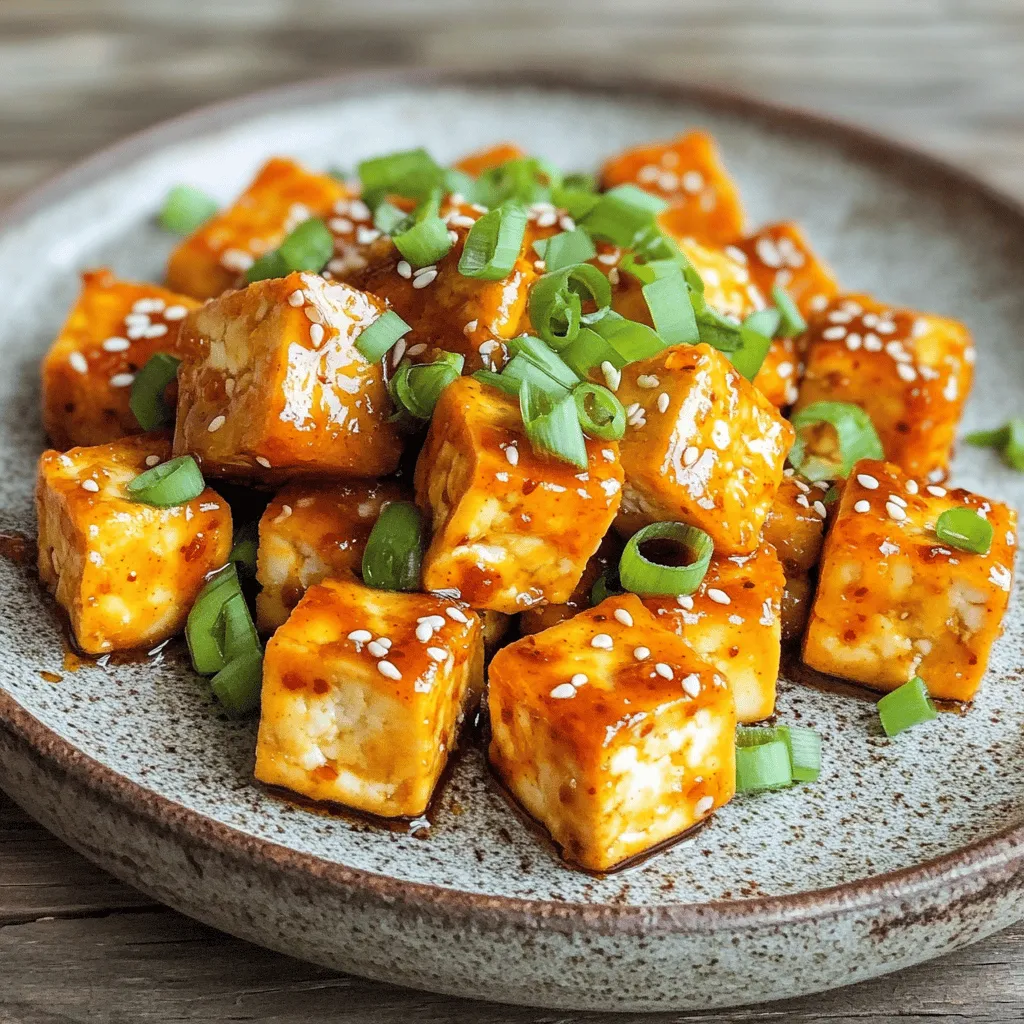
Air Fryer Sweet Chili Garlic Tofu Crispy Delight
Love crispy tofu with a kick? You’re in the right place! In this blog post, I’ll guide you through making Air Fryer Sweet Chili Garlic
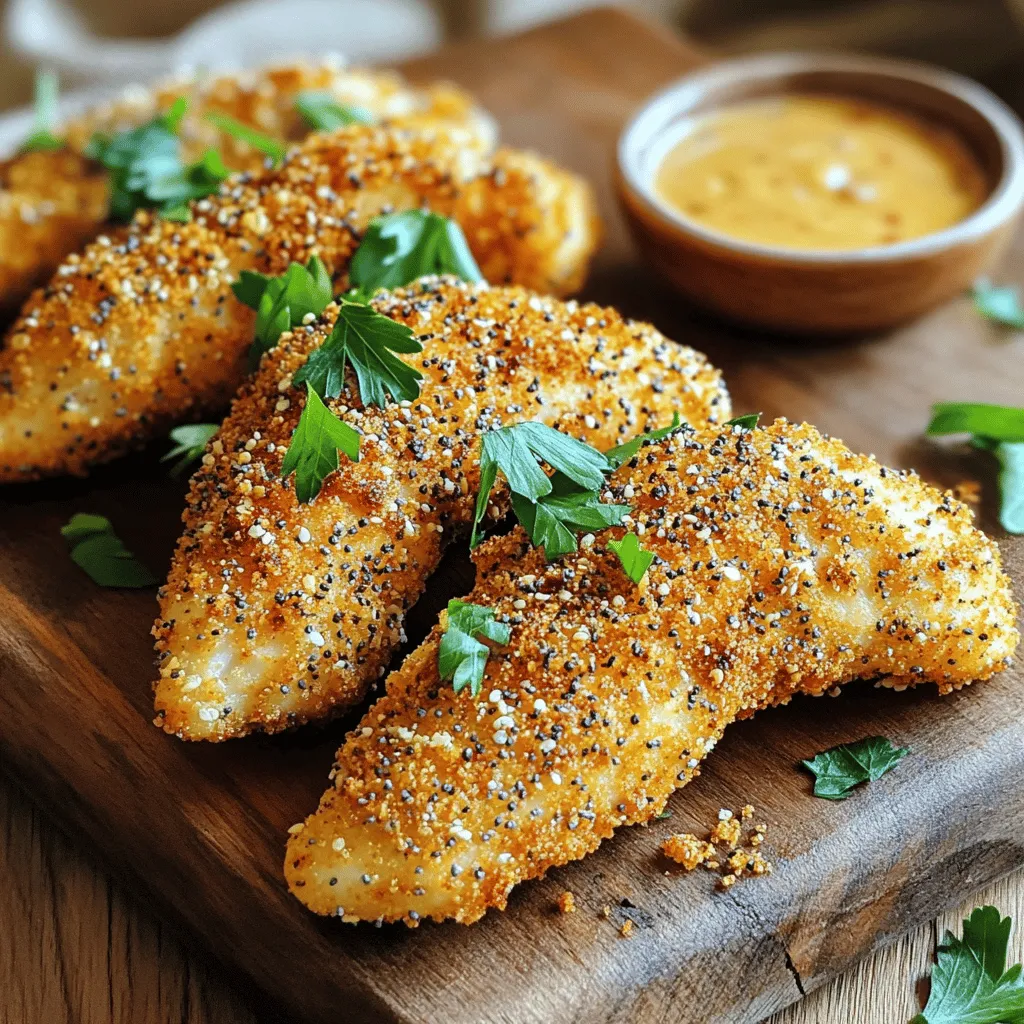
Everything Bagel Air Fryer Chicken Tenders Delight
Looking for a quick and tasty dinner? You’re in the right place! In this blog, I’ll show you how to make Everything Bagel Air Fryer