Appetizers
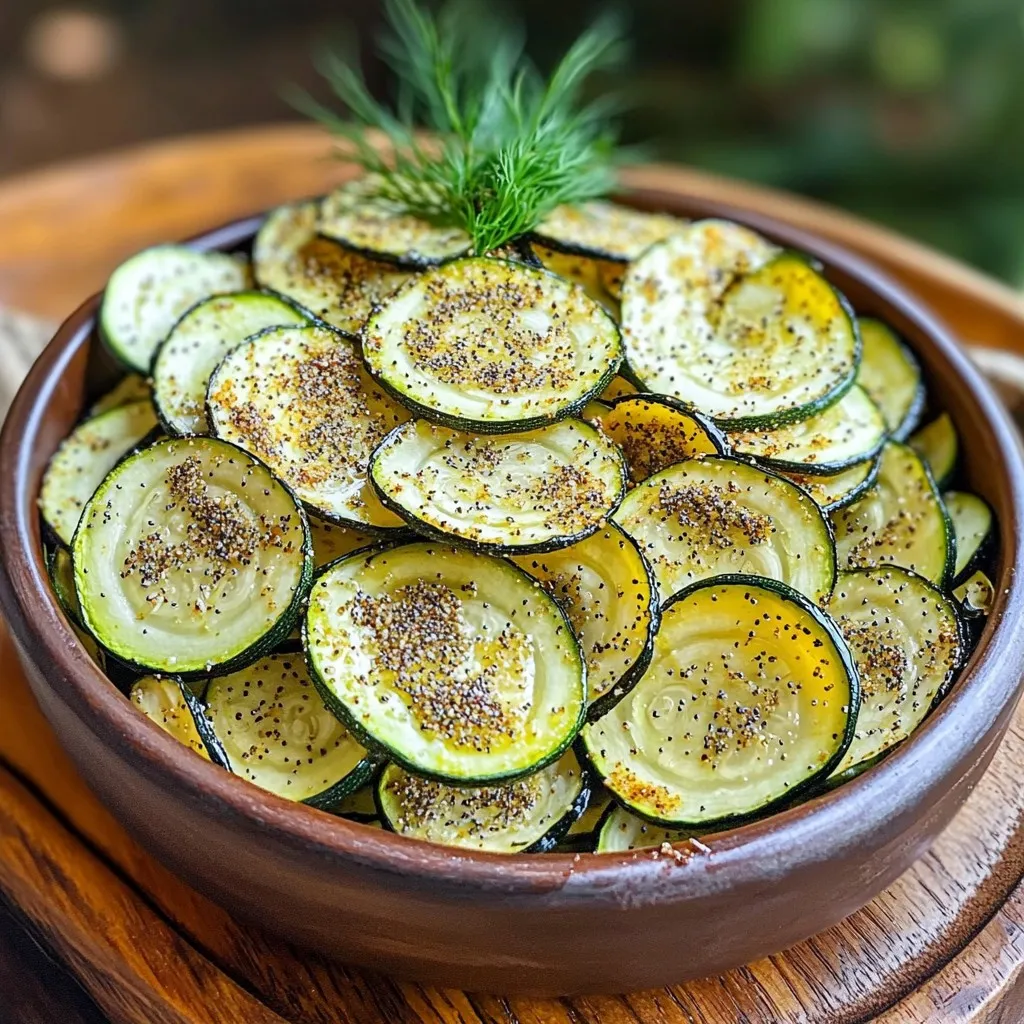
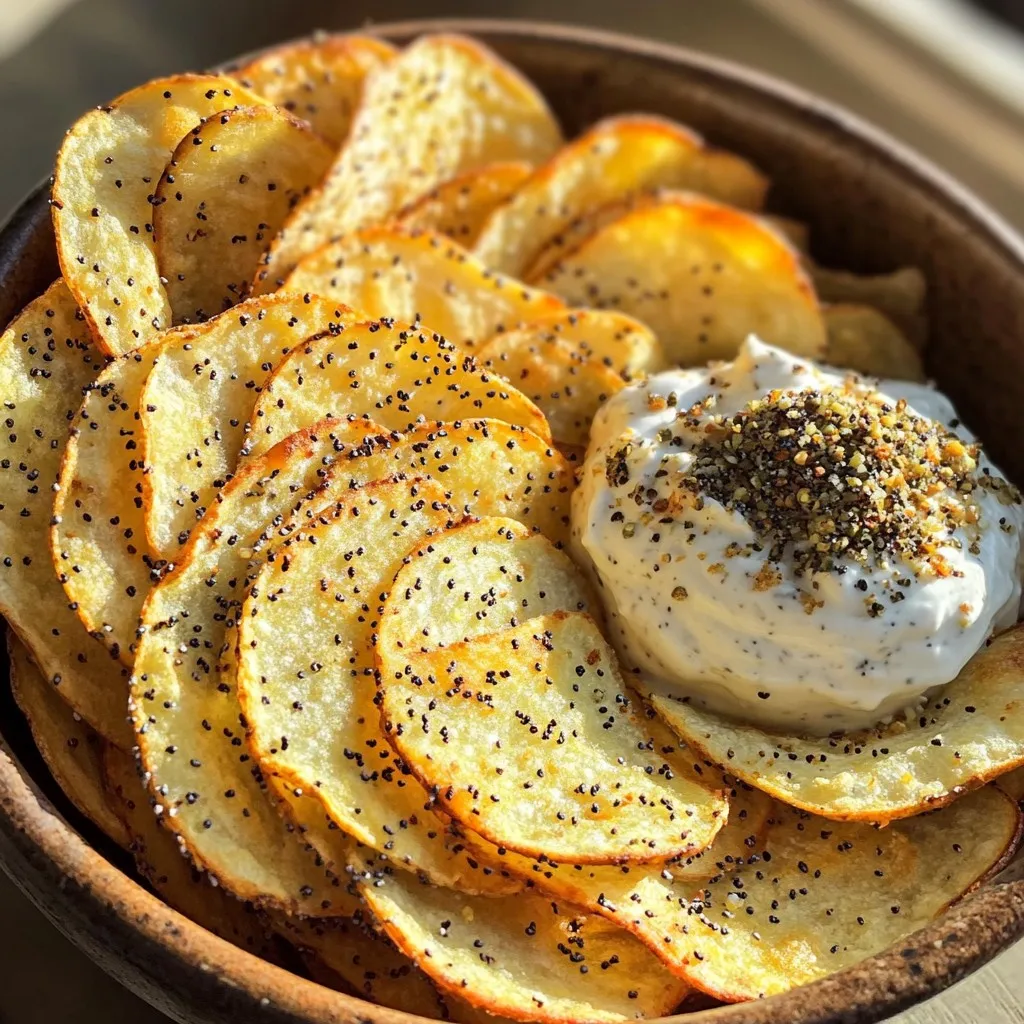
Air Fryer Everything Bagel Zucchini Chips Crunchy Snack
Are you ready to snack smarter? These Air Fryer Everything Bagel Zucchini Chips bring a tasty twist to your munching routine. With just a few
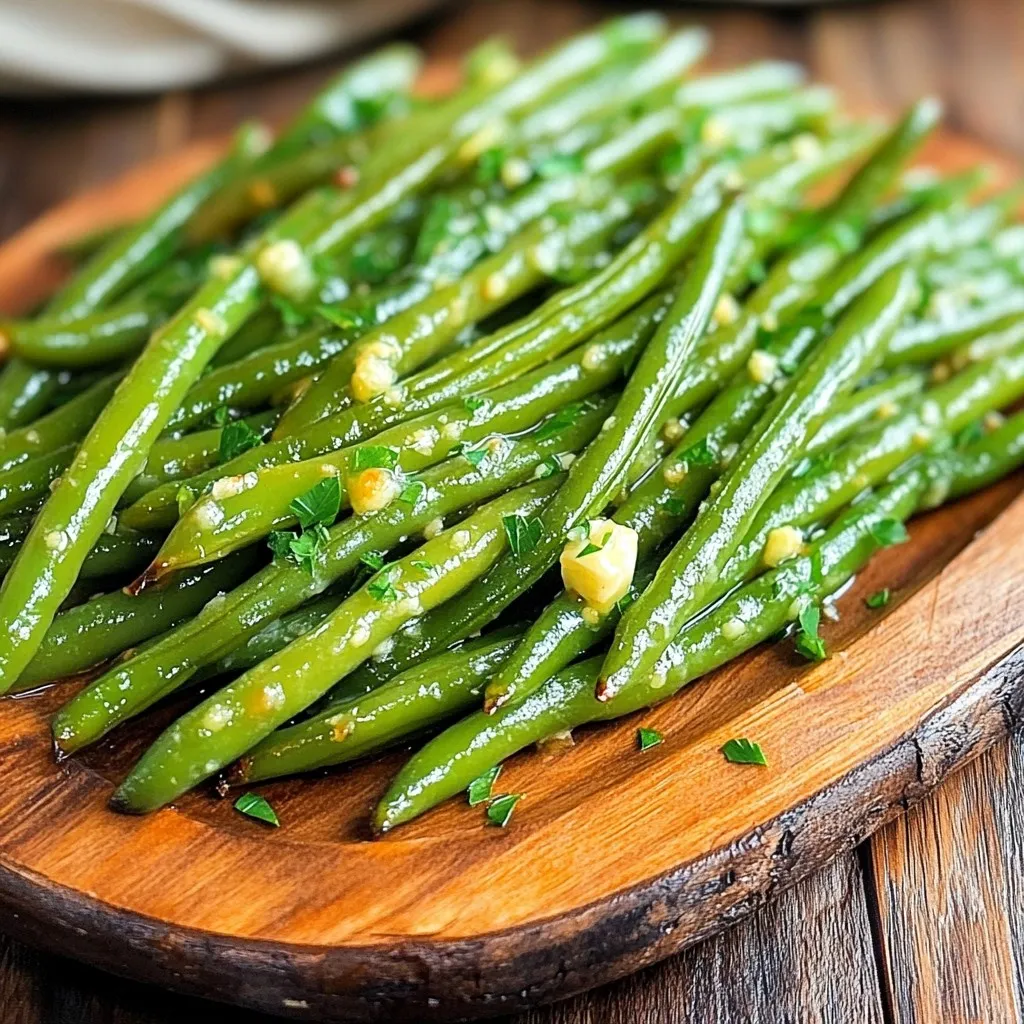
Air Fryer Garlic Butter Green Beans Tasty Side Dish
Looking for a quick and tasty side dish? You’ve found it! Air Fryer Garlic Butter Green Beans are simple, savory, and full of flavor. In
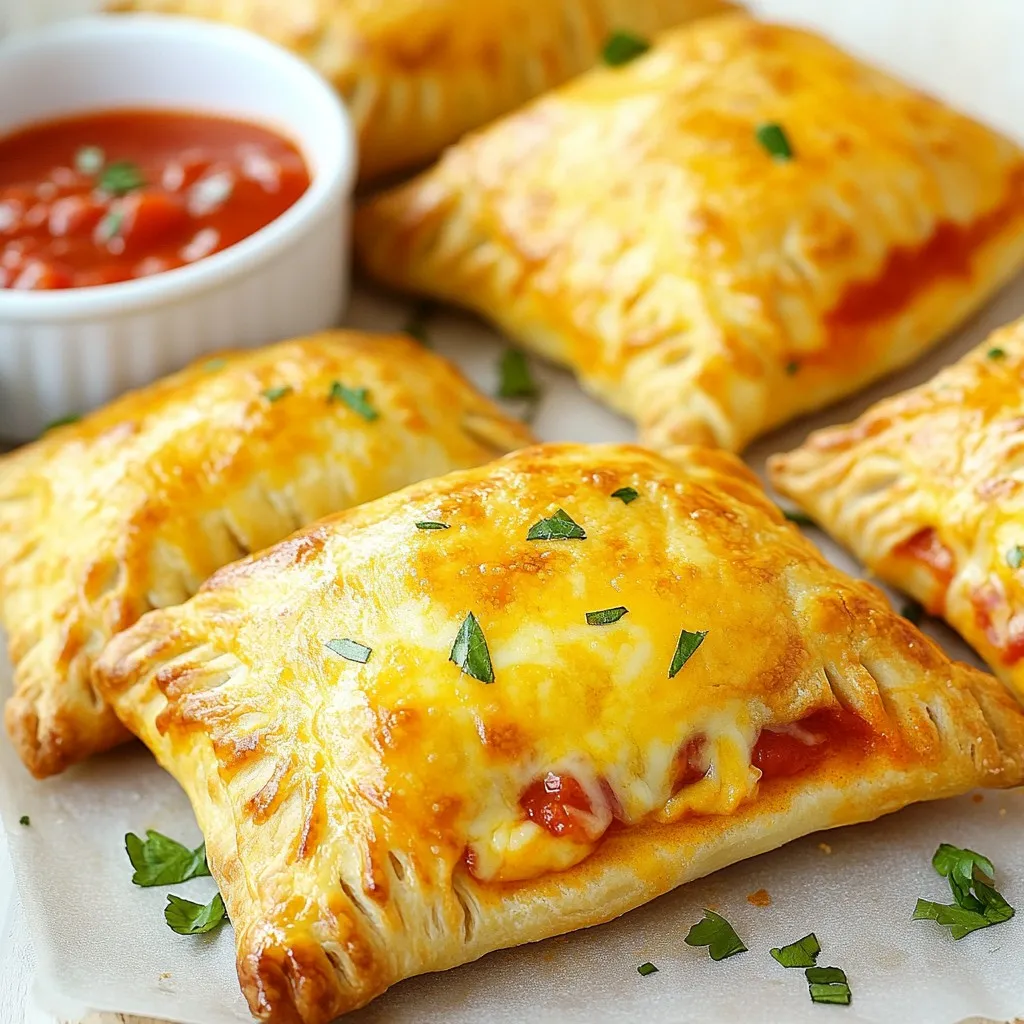
Cheesy Pizza Pockets Easy and Flavorful Recipe
Are you ready to treat your taste buds with cheesy goodness? This easy and flavorful Cheesy Pizza Pockets recipe is perfect for a snack or
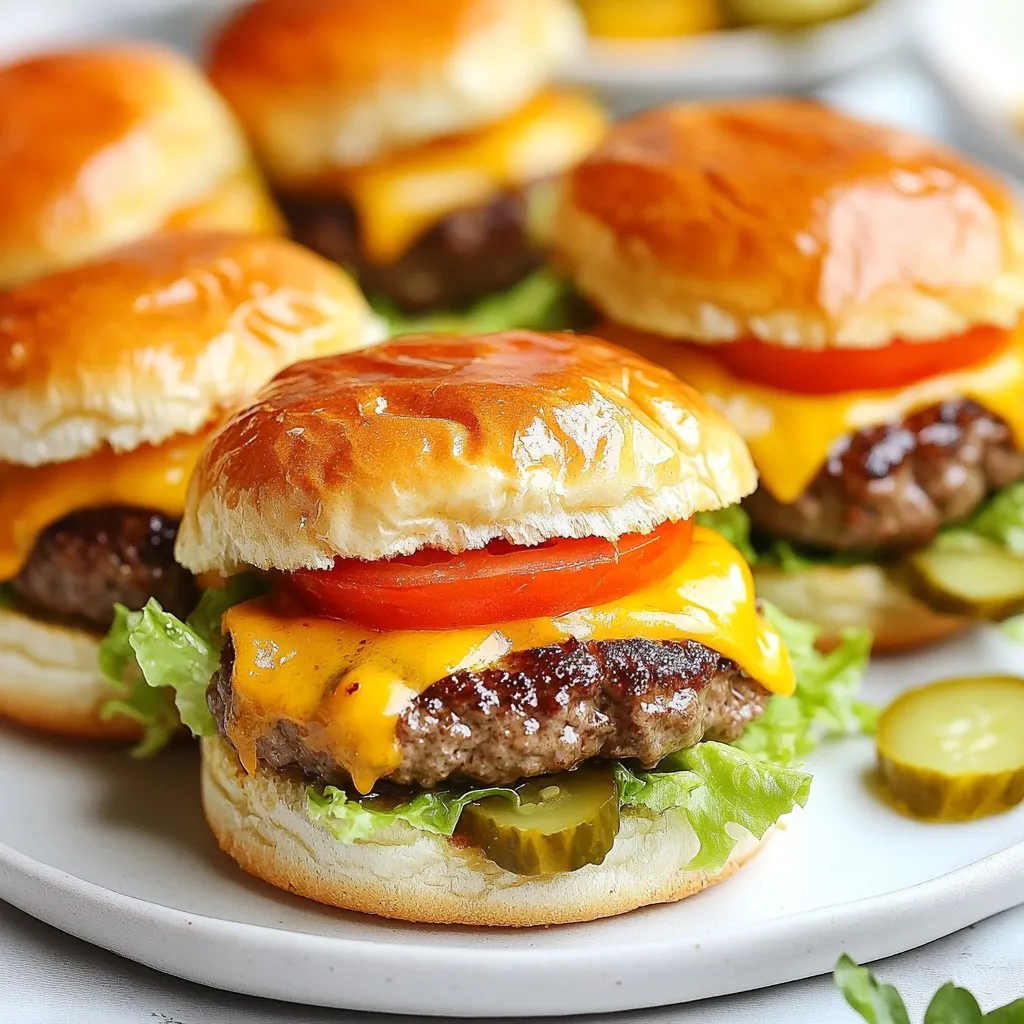
Cheeseburger Sliders Juicy and Flavorful Delight
Welcome to a tasty journey where I share my secret for the best cheeseburger sliders. These bite-sized delights burst with flavor, and they’re perfect for
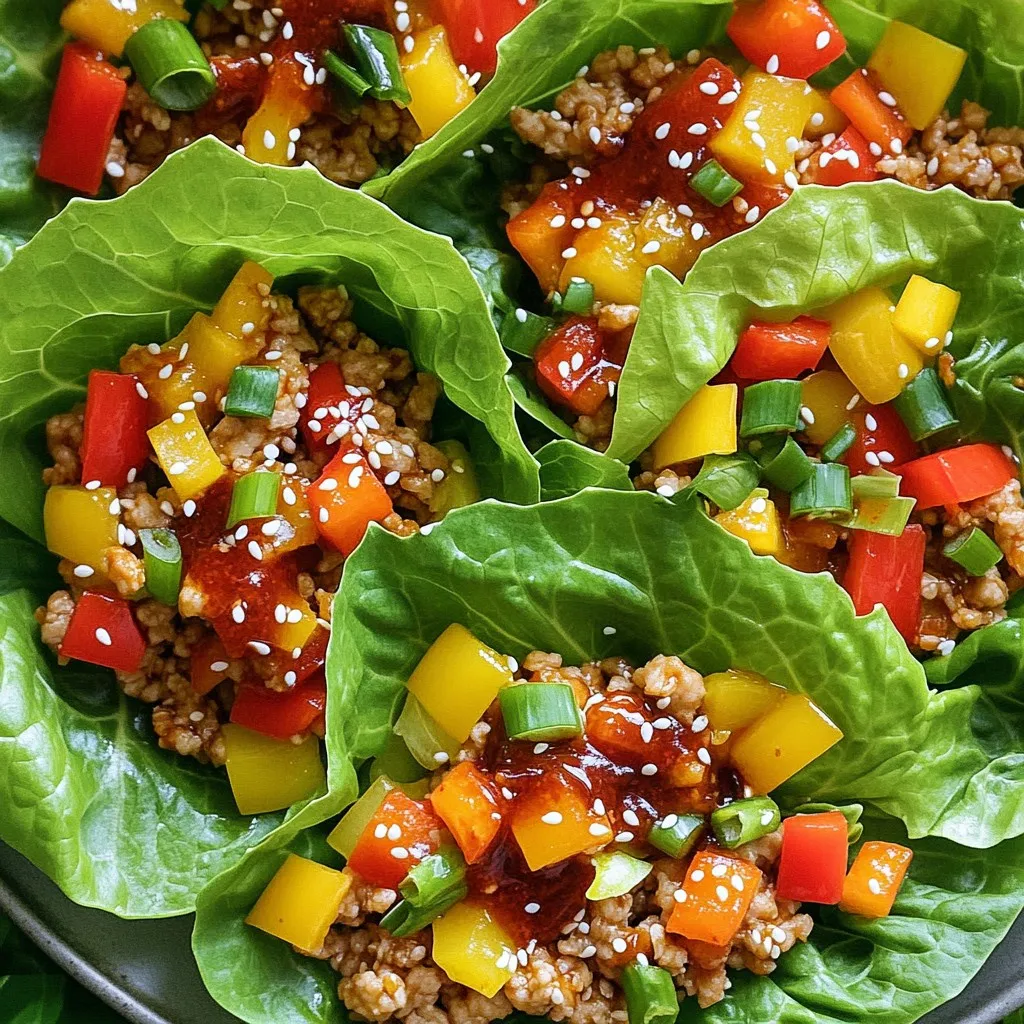
Viral Honey Sriracha Chicken Lettuce Wraps Recipe
Are you ready for a flavor explosion? These Viral Honey Sriracha Chicken Lettuce Wraps will make your taste buds dance! I’ll show you how to
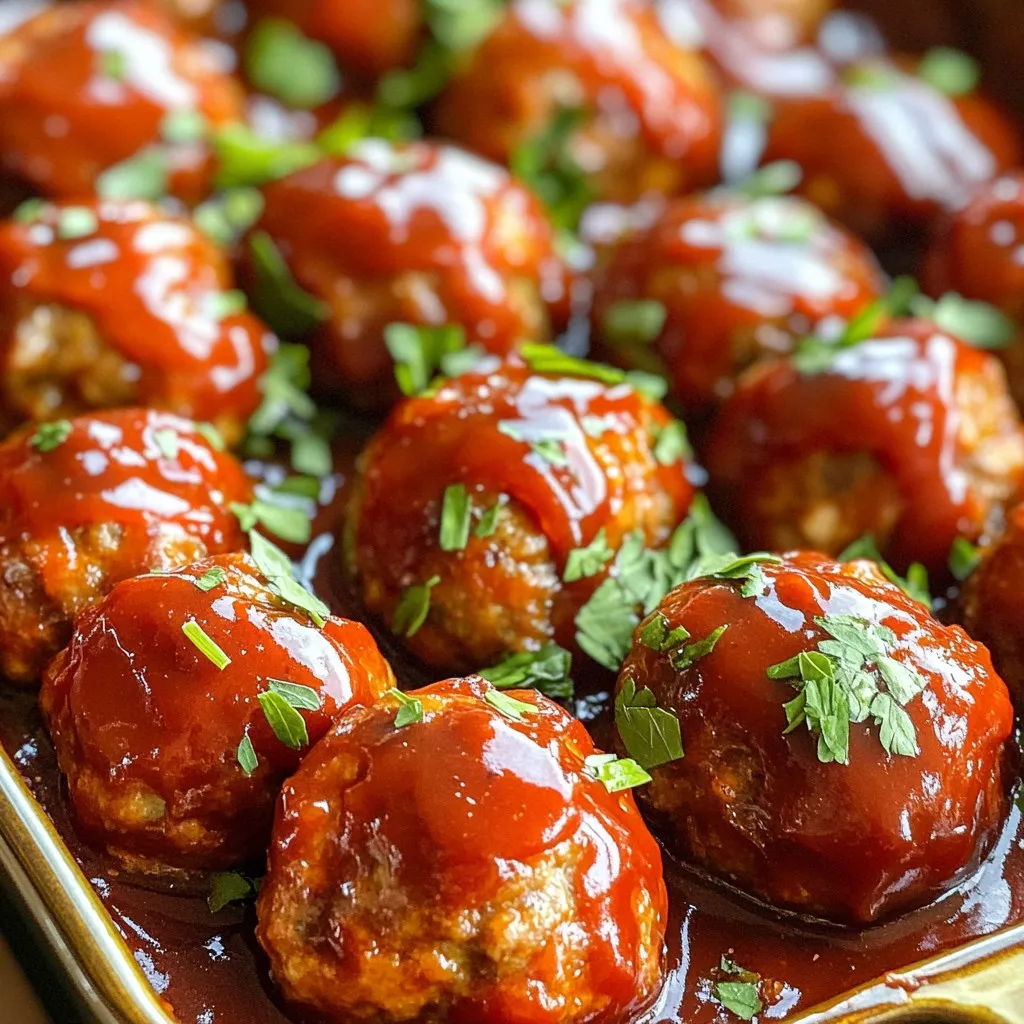
Slow Cooker Sweet & Spicy BBQ Meatballs Simple Recipe
Ready for a recipe that blends comfort and flavor? My Slow Cooker Sweet & Spicy BBQ Meatballs are a game-changer! With simple ingredients and easy
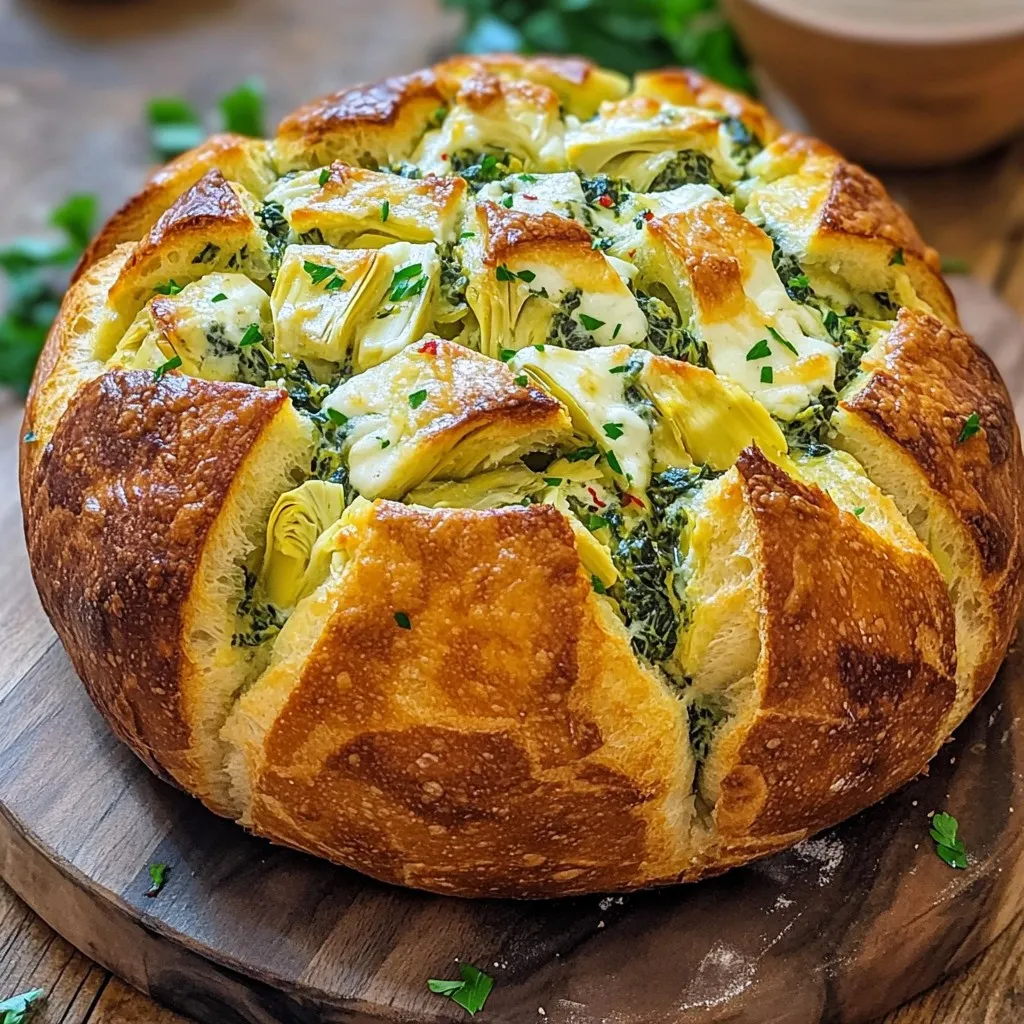
Cheesy Spinach Artichoke Pull-Apart Bread Delight
Are you ready to impress your friends with a crowd-pleasing snack? My Cheesy Spinach Artichoke Pull-Apart Bread will have everyone coming back for more. With
Air Fryer Everything Bagel Chips Crunchy Snack Idea
Do you love crunchy snacks that offer big flavor? I’ve got a winner for you! Air Fryer Everything Bagel Chips are easy to make and
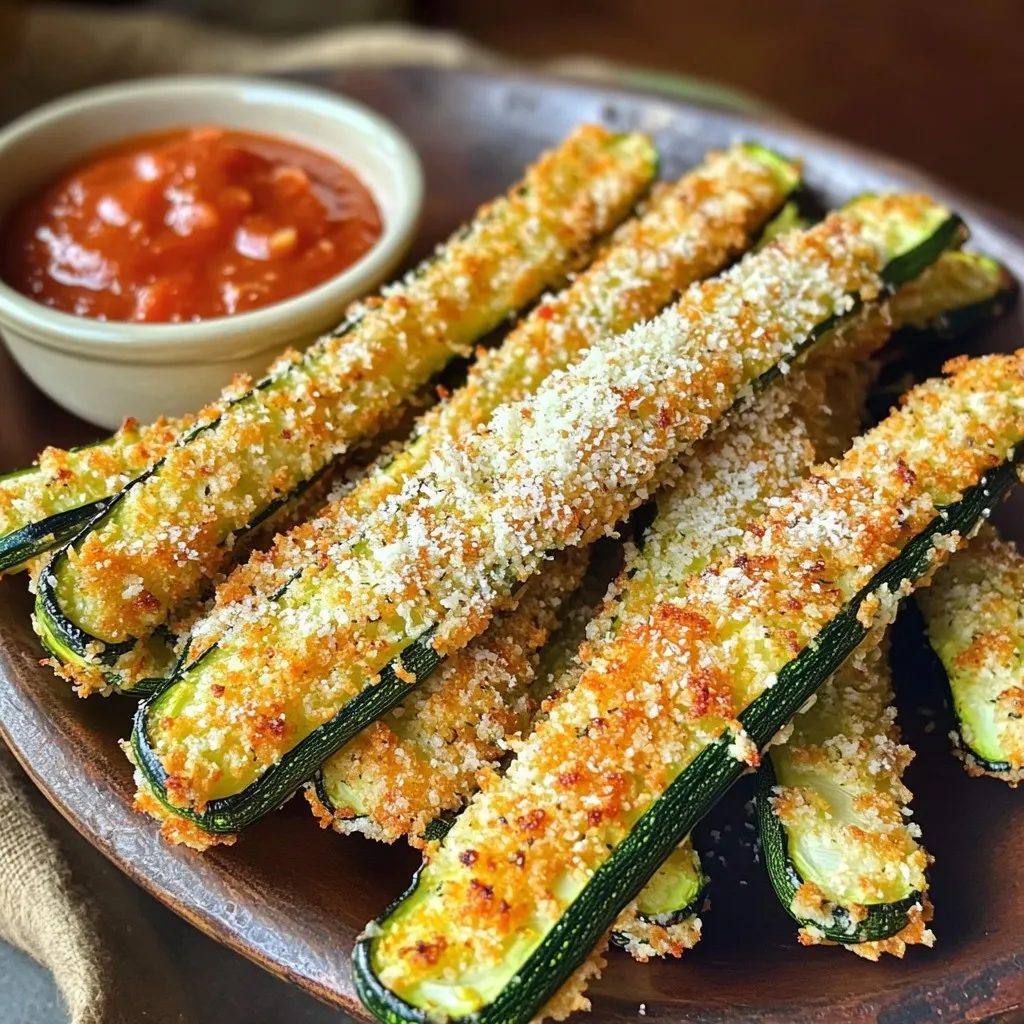
Air Fryer Parmesan Zucchini Fries Crispy and Delicious
Are you ready to enjoy a tasty treat that’s both crispy and healthy? Air Fryer Parmesan Zucchini Fries are the perfect snack or side dish.
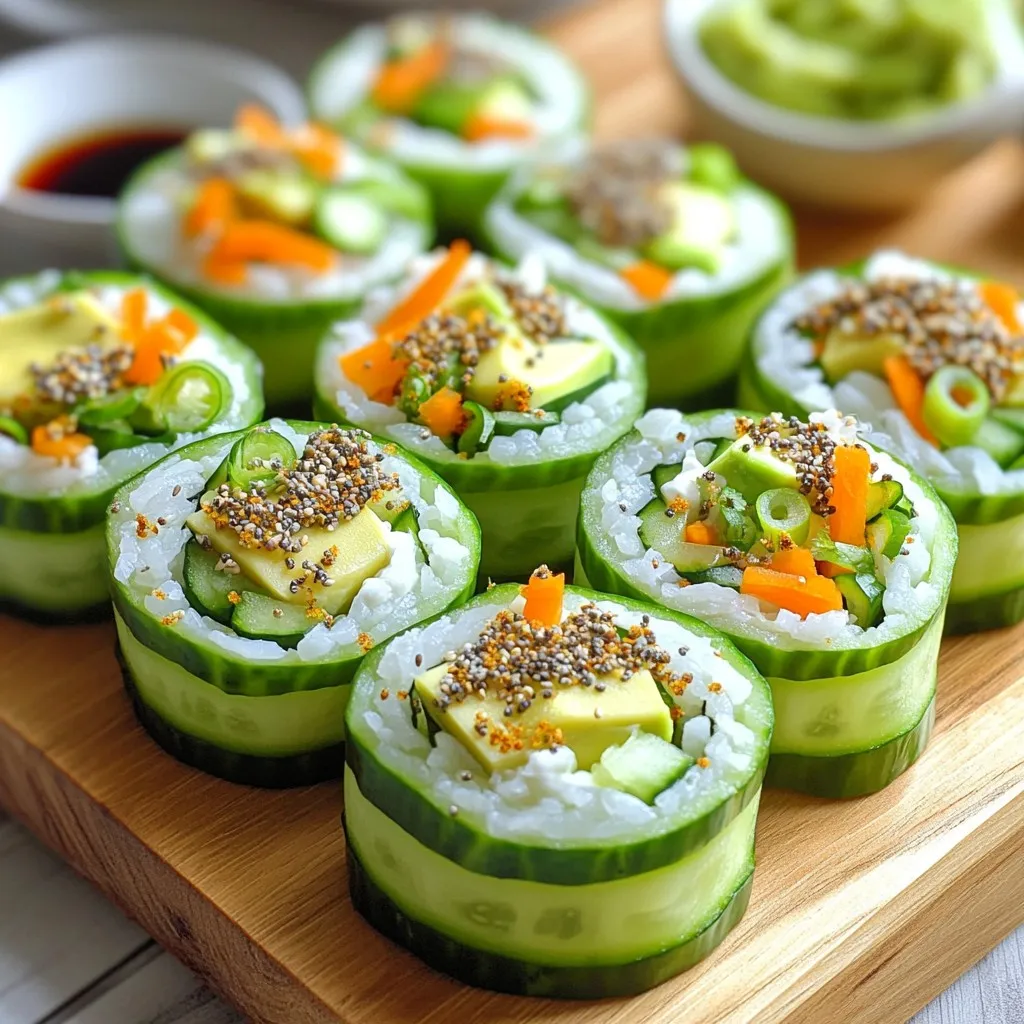
Everything Bagel Cucumber Sushi Rolls Fresh Delight
Are you ready to roll into a fresh culinary adventure? Everything Bagel Cucumber Sushi Rolls blend flavors you love into a fun, easy dish. Picture