Appetizers

Here’s what you will need for Cheesy Garbage Bread Delight: - 1 large loaf of Italian bread - 1 cup shredded mozzarella cheese - 1 cup shredded cheddar cheese - ½ cup cream cheese, softened - 1 cup mixed vegetables (bell peppers, onions, mushrooms), chopped - 1 cup cooked chicken or leftover rotisserie chicken, shredded - 2 tablespoons garlic butter (melted) - 1 teaspoon Italian seasoning - Salt and pepper to taste - Fresh parsley for garnish Each ingredient plays a big role in this dish. The Italian bread serves as a perfect vessel for all the cheesy goodness. The mozzarella and cheddar blend nicely to create that melty texture we love. Cream cheese adds richness and creaminess. The mixed vegetables give a fresh crunch. Shredded chicken adds protein and heartiness. Garlic butter enhances the flavor, while Italian seasoning brings everything together. Don’t forget to season with salt and pepper to wake up the flavors. Finally, fresh parsley adds a pop of color and freshness on top. For the full recipe, make sure to check the next section! - Preheat your oven to 375°F (190°C). - Slice the large loaf of Italian bread in half lengthwise. - In a mixing bowl, combine: - 1 cup shredded mozzarella cheese - 1 cup shredded cheddar cheese - ½ cup softened cream cheese - 1 cup chopped mixed vegetables (bell peppers, onions, mushrooms) - 1 cup shredded cooked chicken - 2 tablespoons melted garlic butter - 1 teaspoon Italian seasoning - Mix all the ingredients well until they blend together. - Add salt and pepper to taste. - Spread the cheese mixture evenly over the bottom half of the sliced bread. - Place the top half of the bread back onto the cheese-filled bottom half. - Wrap the entire loaf tightly in aluminum foil. - Bake it in the preheated oven for about 20-25 minutes. - Remove the foil and bake for another 10-15 minutes until the top is golden. - Let the bread cool for a few minutes before slicing. - Cut into thick pieces for serving. - Garnish with fresh parsley for a pop of color. - Serve with a side salad or dipping sauce for a complete meal. For detailed steps and measurements, check the Full Recipe. To make Cheesy Garbage Bread Delight, keep these tips in mind: - Cooking Time: Bake the bread for 20-25 minutes, then uncover it. Bake for another 10-15 minutes until golden. This helps the top crisp up nicely. - Oven Temperature: Set your oven to 375°F (190°C). This temperature balances cooking the filling and browning the bread perfectly. - Best Ingredients: Choose fresh vegetables for better flavor. Use high-quality cheeses for a rich taste. If you can, get fresh mozzarella and aged cheddar. I’ve seen many people make these errors: - Over or Under Seasoning: Taste your mixture before spreading it on the bread. You want it flavorful but not too salty. Add salt and pepper gradually. - Incorrect Baking Times: Don’t skip checking your bread. Every oven is different. If it looks golden brown, it’s likely done. To make your dish even better, try these ideas: - Additional Spices: Add red pepper flakes for heat or smoked paprika for a smoky taste. These spices can bring your bread to life. - Optional Toppings: Try adding sliced olives or cooked bacon on top before the final bake. These can add a nice crunch and extra flavor. For the full recipe, check the [Full Recipe]. Enjoy your cooking! {{image_2}} You can switch up the cheese in Cheesy Garbage Bread Delight. Try gouda for a smoky flavor or feta for a salty kick. These changes add new tastes and textures. If you want a meat-free meal, use chickpeas or lentils instead of chicken. These options pack protein and flavor. You still get the creamy goodness without the meat. Adding different vegetables can change the whole dish. Think about spinach, zucchini, or even jalapeños for some heat. Each veggie brings its own taste and crunch. You can also play with spices. A dash of paprika or chili flakes can add a fun kick. Don’t be afraid to experiment! Cheesy Garbage Bread Delight can be more than just a loaf. Slice it into sliders for a fun party dish. You can also cut it into mini bites for snacks. For dipping, try marinara or ranch dressing. These sauces complement the cheesy bread perfectly. Get creative and enjoy your tasty twist on a classic! To keep your Cheesy Garbage Bread Delight fresh, first let it cool. Wrap it tightly in plastic wrap or aluminum foil. Place it in an airtight container. This keeps moisture in and the bread soft. Store it in the fridge for up to three days. If you want to save it longer, you can freeze it. For freezing, wrap the bread in plastic wrap, then aluminum foil. This double wrap prevents freezer burn. You can freeze it for up to three months. When you want to eat it, just thaw it in the fridge overnight. To reheat your Cheesy Garbage Bread Delight, use the oven for the best results. Preheat the oven to 350°F (175°C). Unwrap the bread and place it on a baking sheet. Bake for about 10-15 minutes. This method keeps the bread crispy and the cheese gooey. You can also use a toaster oven for a quick fix. If you use a microwave, set it for a short time. Microwaving can make the bread chewy. Heat in short bursts of 10 seconds until warm. To maintain texture, always avoid high heat. Can I make Cheesy Garbage Bread Delight ahead of time? Yes, you can prepare it a day before. Just wrap it tightly and keep it in the fridge. Bake it fresh when you are ready to serve. This keeps the bread soft and cheesy. What can I substitute for cream cheese? You can use Greek yogurt or sour cream in place of cream cheese. Both will give a nice creaminess. They also add a slight tang to the dish, making it even better. Is this recipe suitable for freezing? Yes, it freezes well! Wrap it tightly in foil or plastic wrap before freezing. To enjoy, thaw it overnight in the fridge and bake as usual. How to ensure the bread stays crispy? To keep the bread crispy, do not wrap it too tightly in foil. Leave a little space for air. You can also bake it uncovered for the last few minutes. This helps the top get golden and crunchy. Can I customize the vegetable mix? Absolutely! Use any veggies you like. Spinach, zucchini, or even jalapeños can work great. Just chop them small so they mix well with the cheese. Are there gluten-free options for the bread? Yes, you can find gluten-free bread at most stores. Look for a sturdy loaf, as it holds the filling well. This way, you can still enjoy the cheesy goodness. What are some great dips to serve with this dish? Dips like marinara sauce or garlic butter are perfect. They add more flavor and moisture. A spicy ranch or a cheesy dip would also be fantastic choices. In this post, we explored how to make Cheesy Garbage Bread Delight. We covered the key ingredients, step-by-step instructions, and tips to perfect your dish. You learned ways to adapt the recipe and store leftovers. So, whether you enjoy it with friends or family, this dish is sure to impress. Get creative with flavors and have fun in the kitchen. Your delicious creation awaits!
Cheesy Garbage Bread Delight Tasty and Simple Recipe
Welcome to the world of Cheesy Garbage Bread Delight! If you love simple, tasty comfort food, you’re in the right place. This recipe packs a
- 2 large flour tortillas - 1 cup cooked chicken, shredded - 1 cup fresh mozzarella cheese, shredded The main ingredients set the stage for this dish. Flour tortillas give a soft and chewy base. Shredded cooked chicken adds protein and heartiness. Fresh mozzarella cheese melts beautifully, creating a delightful texture. - 1 teaspoon garlic powder - 1 teaspoon Italian seasoning - 1/4 cup sun-dried tomatoes, chopped Flavor enhancers are key for taste. Garlic powder brings a savory punch. Italian seasoning adds herbs for warmth. Sun-dried tomatoes introduce a sweet and tangy twist that makes each bite special. - 1/2 cup fresh spinach, chopped - Salt and pepper to taste - Olive oil spray Optional add-ins can boost nutrition and flavor. Fresh spinach gives a nice color and adds vitamins. Salt and pepper balance flavors perfectly. A light spray of olive oil helps the wraps crisp up in the air fryer. {{ingredient_image_1}} - First, preheat the air fryer to 375°F (190°C). This step ensures that the wraps cook evenly. - In a large bowl, combine 1 cup of shredded chicken, 1 cup of fresh mozzarella, 1/2 cup of chopped spinach, and 1/4 cup of sun-dried tomatoes. - Add 1 teaspoon of garlic powder, 1 teaspoon of Italian seasoning, and salt and pepper to taste. - Mix all the ingredients well until fully combined. This mix brings great flavor to your wraps. - Place a large flour tortilla flat on a clean surface. - Spoon half of the chicken mixture onto one half of the tortilla. Make sure to leave some space at the edges. - Fold the tortilla over the filling to form a half-moon shape. - Press down gently to seal the edges. Repeat this process for the second tortilla with the remaining filling. - Lightly spray the tops of the wraps with olive oil. This helps them get crispy in the air fryer. - Place the wraps in the air fryer basket in a single layer. Make sure they do not touch each other. - Air fry for 8-10 minutes until they are golden brown and crispy. Flip the wraps halfway through for even cooking. - Once cooked, carefully remove the wraps and let them cool for a minute. Then slice them in half for easy eating. Enjoy these delicious wraps with a side of marinara sauce for dipping! To get the best crispy wraps, always use olive oil spray. This oil helps the wraps brown nicely and adds flavor. Spray the tops of the wraps lightly before cooking. If you have many wraps, cook them in batches. This way, they won’t touch each other. Cooking in batches ensures even crispiness. You can change the taste by using different spices. Try adding chili powder for some heat or cumin for a smoky flavor. You might also want to swap out the fillings. Instead of chicken, use turkey or even tofu for a veggie option. You can also add more veggies like bell peppers or mushrooms to boost nutrition. These wraps pair well with many sides. Serve them with a fresh salad or some crispy sweet potato fries. For dipping, marinara sauce is a favorite choice. You can also try ranch or a spicy aioli for a creamy touch. Enjoy experimenting with different sides and dips! Pro Tips Use Fresh Ingredients: Fresh mozzarella and vibrant spinach will enhance the flavor and texture of your wraps. Adjust Seasoning: Feel free to add more garlic powder or Italian seasoning according to your taste preferences for a more robust flavor. Don't Overcrowd the Air Fryer: For even cooking, place the wraps in a single layer and avoid stacking them in the basket. Experiment with Fillings: Swap out the chicken or add additional vegetables like bell peppers or mushrooms for a unique twist on this recipe. {{image_2}} You can easily swap chicken for turkey or tofu. Turkey offers a leaner protein option, while tofu provides a plant-based choice. Both work well in wraps. For tortillas, try whole wheat or low-carb versions. Whole wheat adds fiber, while low-carb suits those watching carbs. Experiment with different cheeses for new tastes. Try sharp cheddar or creamy gouda. These cheeses melt beautifully. You can also add extra veggies like bell peppers or mushrooms. These veggies add crunch and nutrients, enhancing the wrap's flavor. For a kick, add spicy peppers or sauces. Jalapeños or sriracha can boost the heat. Adjust your seasoning for more spice if you like it hot. A little more garlic powder or chili flakes can make a big difference. These spicy twists keep each bite exciting! To keep your Air Fryer Chicken Mozzarella Wraps fresh, store them in the fridge. Place them in an airtight container. They stay good for up to three days. If you want them to last longer, wrap each one in plastic wrap before putting them in the container. This extra layer helps prevent dryness. The best way to reheat these wraps is in the air fryer. Set it to 375°F (190°C) and cook for about 5 minutes. This gives them a nice crisp again. You can also use a microwave, but the wraps might turn soft. If using a microwave, place a damp paper towel on top to keep moisture. To freeze your wraps, let them cool completely first. Then, wrap each one tightly in plastic wrap. Place the wrapped wraps in a freezer bag. They can stay in the freezer for up to two months. When you're ready to eat, thaw them overnight in the fridge. After that, reheat in the air fryer until hot and crispy. Enjoy your delicious meal anytime! You can use raw chicken, but you need to cook it first. To ensure safety, here are some steps: - Cook the chicken until it reaches 165°F (74°C). - You can grill, bake, or boil the chicken. - Shred the cooked chicken before mixing it with other ingredients. This keeps your wraps safe and tasty. You can serve these wraps with many sides. Here are some great options: - Marinara sauce for dipping - A fresh salad with light dressing - Crispy potato wedges - Steamed veggies like broccoli or carrots These sides add great flavor and balance to your meal. The total time for these wraps is about 20 minutes. Here’s the breakdown: - Prep time: 10 minutes - Cooking time: 8-10 minutes in the air fryer You can adjust the cooking time based on how crispy you like them. Just remember to flip them halfway for even cooking. In this post, we explored how to make Air Fryer Chicken Mozzarella Wraps, starting with key ingredients like flour tortillas, cooked chicken, and mozzarella cheese. We discussed flavor enhancers such as garlic powder and Italian seasoning, plus optional add-ins like fresh spinach. We outlined steps for prepping, assembling, and cooking the wraps, and I shared tips for perfectly crispy results. Feel free to try different variations to suit your taste. These wraps are quick, easy, and perfect for any meal. Enjoy your cooking adventure!
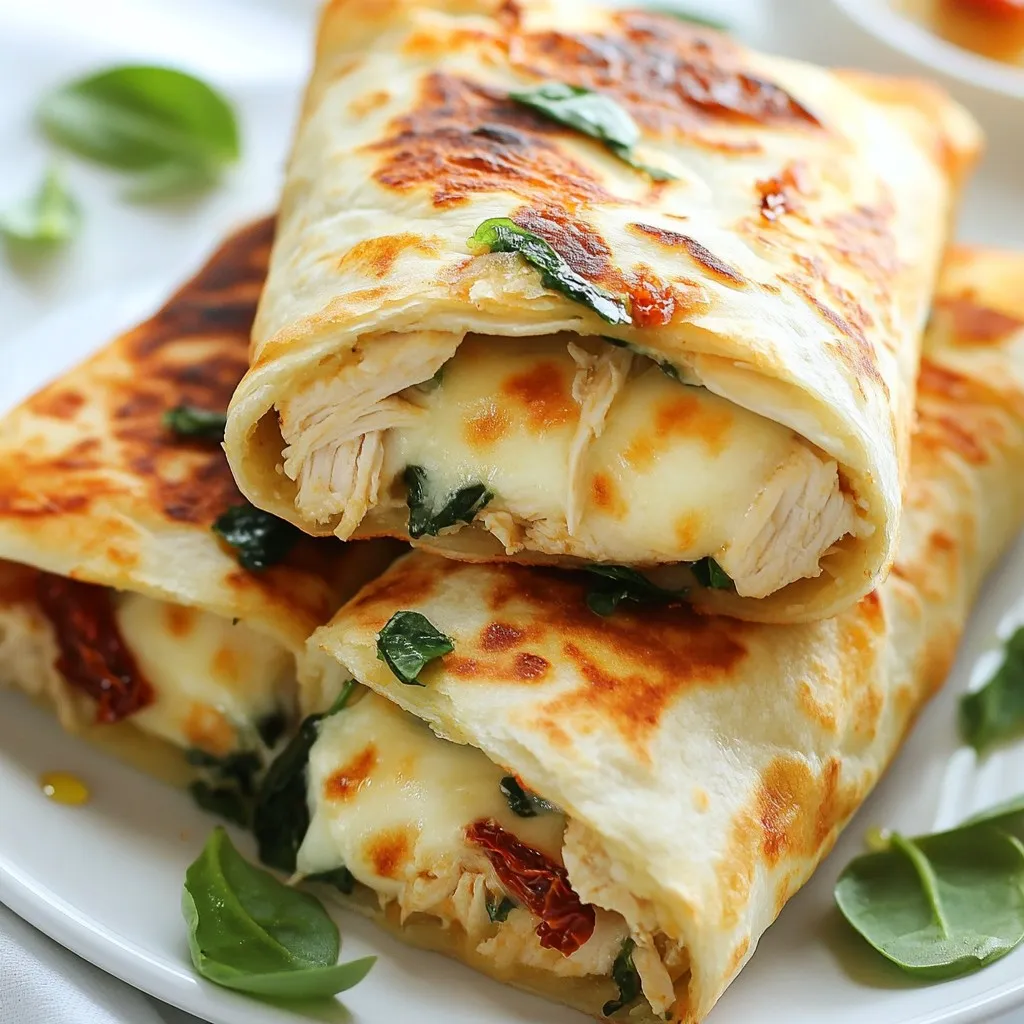
Air Fryer Chicken Mozzarella Wraps Irresistible Delight
Are you ready to discover a tasty treat? Air fryer chicken mozzarella wraps are easy to make and packed with flavor. Picture warm tortillas filled
- 4 slices of artisanal garlic bread (store-bought or homemade) - 2 cups shredded mozzarella cheese - 1 cup sharp cheddar cheese, shredded - 2 tablespoons unsalted butter, softened - 2 cloves garlic, minced - 1 tablespoon fresh parsley, chopped - Salt and pepper to taste - Skillet or frying pan - Mixing bowl - Spatula Gathering the right ingredients is key to making a great garlic bread grilled cheese. You need four slices of artisanal garlic bread. You can buy it or make it at home. The bread gives a strong flavor base. Next, you need two cups of shredded mozzarella cheese. This cheese melts well and pulls nicely. One cup of sharp cheddar cheese adds a lovely tang. You will need two tablespoons of unsalted butter. Softened butter mixes well with garlic. Speaking of garlic, you will use two cloves, minced. Garlic adds a robust flavor. A tablespoon of fresh parsley brings freshness to your dish. Finally, salt and pepper add depth. Don't forget to taste as you go! For tools, grab a skillet or frying pan for cooking. You also need a mixing bowl for the garlic butter. A spatula helps flip the sandwich easily. With these ingredients and tools, you're ready to create a savory delight. Enjoy the process and have fun with it! {{ingredient_image_1}} To start, grab a small bowl. You will mix the butter, minced garlic, chopped parsley, salt, and pepper. Make sure to blend them well. This garlic butter adds so much flavor. Next, take two slices of garlic bread. Spread half of the garlic butter mixture on one side of each slice. On the unbuttered side of one slice, layer one cup of shredded mozzarella cheese and half a cup of sharp cheddar cheese. This mix gives a great taste. Top with the second slice of garlic bread, buttered side up. Now, you have formed a delicious sandwich. Now, heat a skillet over medium heat. Once hot, add the sandwich to the pan. Cook for about 3-4 minutes on each side. You want the bread to be deeply golden and the cheese to melt. Remove the sandwich from the skillet, and slice it diagonally. Repeat this process with the other slices of garlic bread and cheese. Enjoy your tasty garlic bread grilled cheese! To boost flavor, try adding more spices. Red pepper flakes add heat. Italian herbs give depth. You can mix in some chopped sun-dried tomatoes too. Use a blend of cheeses for best taste. Mozzarella melts well, while sharp cheddar adds a rich flavor. You might also try gouda or fontina for a twist. Set your heat to medium for grilling. This helps the cheese melt without burning the bread. If the bread browns too fast, lower the heat. Flip the sandwich carefully to avoid mess. Use a spatula to press down gently. This helps the cheese melt evenly. Serve your grilled cheese on a rustic wooden board. This adds charm to your meal. Garnish with fresh parsley for color. A small bowl of marinara sauce makes a great dip. You can also serve a simple salad on the side. This adds freshness to the plate. Pro Tips Use Quality Bread: Opt for high-quality artisanal garlic bread for the best flavor and texture. Cheese Variations: Feel free to mix different cheeses like gouda or pepper jack for a unique twist. Low and Slow Cooking: Cook on medium-low heat to ensure the cheese melts perfectly without burning the bread. Extra Crunch: For an added crunch, sprinkle some Parmesan cheese on the outside of the bread before grilling. {{image_2}} What are the best substitutes for mozzarella and cheddar? You can try gouda or provolone. They melt well and add a rich taste. For a sharper flavor, use gruyere or fontina. Each brings a unique twist to your grilled cheese. Using flavored cheeses for different experiences? Consider using pepper jack for a spicy kick. You can also use herb-infused cheese for a fresh taste. These options make your sandwich stand out and keep it interesting. What are other types of bread to explore? Sourdough and ciabatta are great choices. Sourdough adds a tangy flavor, while ciabatta gives a nice crunch. Both types elevate your garlic bread grilled cheese. How do I make homemade garlic bread? To make homemade garlic bread, mix softened butter, minced garlic, and fresh parsley. Spread this mix on slices of your favorite bread. Bake until golden, then use it for your grilled cheese. What are some gluten-free options? Use gluten-free bread instead of regular bread. Many brands offer tasty options that work well in this recipe. Check labels to ensure they fit your diet. What about vegan alternatives? For a vegan version, use vegan butter and plant-based cheese. Brands like Daiya or Violife offer good choices. They melt well and taste great in your sandwich. To store your garlic bread grilled cheese, let it cool first. Place the slices in an airtight container. This keeps them fresh for up to three days in the fridge. Make sure to separate layers with parchment paper to avoid sticking. When it's time to eat, reheating is key. Use a skillet over low heat. This warms the sandwich evenly without burning the bread. Cook each side for about two to three minutes. You can also use an oven; wrap the sandwich in foil and bake at 350°F for about 10 minutes. If you want to freeze assembled sandwiches, wrap each one tightly in plastic wrap. Then, place them in a freezer-safe bag. They can last up to three months in the freezer. When you're ready to enjoy, take the sandwich out and let it thaw in the fridge overnight. After thawing, reheat it in a skillet or oven as mentioned before. This way, you get that melty cheese and crispy bread again! You can serve many sides with garlic bread grilled cheese. Here are some tasty options: - Soup: Tomato soup is a classic choice. It pairs well with the cheesy goodness. - Salad: A fresh green salad adds crunch and balance. Try a Caesar or garden salad. - Dips: Marinara sauce or pesto makes a great dip. They add extra flavor. - Pickles: Crunchy pickles bring a nice contrast to the creamy sandwich. Yes, you can easily make garlic bread grilled cheese vegan. Here are some ideas: - Vegan Butter: Use a plant-based butter instead of regular butter. - Vegan Cheese: Choose a vegan cheese that melts well. Look for options labeled as mozzarella or cheddar. - Garlic: You can still add minced garlic for flavor. It’s vegan-friendly! Cooking garlic bread grilled cheese is quick and easy. Here's the breakdown: - Prep Time: It takes about 10 minutes to prepare the ingredients. - Cooking Time: Grill each sandwich for about 3-4 minutes on each side. - Total Time: You can make this dish in about 20 minutes. It’s perfect for a quick meal! This blog post covers how to make a delicious garlic bread grilled cheese. You need simple ingredients like garlic bread, mozzarella, and cheddar. I shared step-by-step instructions, tips for the best flavor, and variations to inspire your own twist. As you experiment, feel free to use different breads or cheeses. Enjoy making this quick meal, and share it with family or friends. It's fun to create your own tasty version!
Garlic Bread Grilled Cheese Savory Flavor Delight
Get ready for a twist on your classic grilled cheese! In this post, I’ll show you how to make Garlic Bread Grilled Cheese, a savory
- 4 large russet potatoes - 1 can (15 oz) chili (meat or vegetarian) - 2 cups shredded cheddar cheese The main ingredients form the heart of your loaded chili cheese fries. The russet potatoes bring a great texture and flavor. Choose a chili that you love, whether it's meat-based or vegetarian. The shredded cheddar cheese adds creaminess and a rich taste. - ½ cup sour cream - 1 jalapeño, thinly sliced - 1/4 small red onion, finely chopped - Fresh cilantro, for garnish Toppings make your fries even better. Sour cream cools the heat from chili. Sliced jalapeño adds spice and crunch. Chopped red onion gives a fresh taste. Fresh cilantro is optional but adds color and flavor. - 1 tablespoon olive oil - Salt and pepper to taste Seasoning is key. Olive oil helps the fries crisp up nicely. Salt and pepper enhance all the flavors. Always taste as you go to find the right balance. {{ingredient_image_1}} 1. First, preheat your oven to 425°F (220°C). This helps the fries cook well. 2. Next, wash and scrub the russet potatoes. Make sure they are clean. 3. Cut the potatoes into fries about 1/4 inch thick. The size helps them cook evenly. 1. In a large bowl, toss the cut fries with olive oil, salt, and pepper. Ensure every fry gets coated well. 2. Spread the fries in a single layer on a baking sheet lined with parchment paper. This keeps them from sticking. 3. Bake the fries for 30-35 minutes. Flip them halfway through. This ensures they get golden and crispy. 1. While the fries bake, heat the chili in a saucepan over medium heat. You want it warm and ready. 2. Once the fries are crispy, take them out of the oven. Sprinkle the shredded cheddar cheese on top. 3. Return the fries to the oven for 5-7 minutes. Wait until the cheese is melted and bubbly. 4. Take the loaded fries out and top them with the heated chili. Make it as generous as you like! 5. Add dollops of sour cream, sliced jalapeños, and chopped red onion. These toppings add great flavor. 6. If you want, garnish with fresh cilantro. Serve the fries right away for the best taste! To get crispy fries, cut the potatoes evenly. Aim for 1/4 inch thick pieces. This helps them cook at the same rate. Soak the cut fries in cold water for at least 30 minutes. This removes excess starch. After soaking, dry them well with a towel. When baking, spread the fries out on the sheet. Keep them in a single layer. This helps them crisp up nicely. Bake at 425°F (220°C) for 30-35 minutes. Flip them halfway through for even baking. Look for a golden color when they are done. Using different types of cheese can change the game. Try pepper jack for a spicy kick. Or use a mix of cheddar and mozzarella for a creamy texture. Each cheese brings its own flavor to the dish. Add toppings to make it your own. Try diced tomatoes, green onions, or even avocado. These extras add freshness and crunch. You can also drizzle with hot sauce for extra heat. Avoid overcooking the fries. Check them frequently in the oven. Overcooked fries can turn soggy and lose their crunch. Don't forget to season the fries well. Under-seasoned fries will taste bland. Use salt and pepper to make them pop. When heating the chili, make sure it’s hot but not boiling. Underheating can make the dish less enjoyable. Aim for a warm, thick chili to top off your fries. Pro Tips Choose the Right Potatoes: For the best texture, use russet potatoes as they crisp up nicely and have a fluffy interior. Season Well: Don’t skimp on the salt and pepper when tossing the fries. Proper seasoning enhances the flavor significantly. Keep an Eye on the Cheese: Watch the fries closely when melting the cheese to prevent burning. You want it perfectly gooey! Customize Your Toppings: Feel free to add other toppings like diced tomatoes or olives for a personalized touch to your loaded fries! {{image_2}} You can make loaded chili cheese fries suit your diet. For a vegan version, use plant-based cheese and chili. This keeps the dish tasty and meat-free. Choose a chili with beans and veggies. Both options remain hearty and satisfying. If you need gluten-free fries, pick fresh potatoes and gluten-free chili. Many canned chilies are gluten-free. Always check the label to be safe. You can enjoy these fries without worry. Want to spice things up? Try international twists! For a Tex-Mex flair, add guacamole and salsa. You can use spicy queso instead of cheddar cheese. This adds more flavor and creaminess. For a Mediterranean touch, use feta cheese and olives. Drizzle some tzatziki sauce on top for extra zest. You can also play with chili styles. Try a spicy beef chili or a hearty white bean chili for different tastes. Loaded chili cheese fries make a great appetizer or a main dish. Serve them in a big bowl for sharing, or on a plate for individual servings. Pair them with drinks like iced tea or a cold beer. They also go well with a side salad or some fresh veggies. This adds balance and freshness to your meal. To store leftovers, let the loaded chili cheese fries cool down. Place them in an airtight container. Make sure to eat them within 3 days for the best taste. When reheating, use an oven or toaster oven. Set it to 350°F (175°C) and heat for about 10 minutes. This makes them crispy again. You can also microwave them, but they may get soggy. You can freeze these fries either before or after baking. If freezing raw, cut the potatoes and toss them with oil and seasoning. Spread them on a baking sheet and freeze until solid. Then, transfer them to a freezer bag. To freeze after baking, let them cool completely. Place them in a freezer-safe container. For the best texture, eat them within 2 months. When ready to bake, cook from frozen at 425°F (220°C) for about 30-35 minutes. In the fridge, the loaded chili cheese fries last about 3 days. To keep them fresh, store them in an airtight container. If you see any mold or a strange smell, it’s time to discard them. Always check your leftovers before eating. If they look or smell off, play it safe and throw them away. You can make simple swaps for healthier options. - Use sweet potatoes instead of russet potatoes. - Choose a lower-fat cheese. - Opt for a low-calorie sour cream or Greek yogurt. - Select a no-bean chili or one with lean meat. These changes can help lower calories without losing flavor. Yes, frozen fries work well! - Look for fries without added seasonings. - Cook them according to package directions. - Spread them out on the baking sheet. This ensures they get crispy and golden. A thick, hearty chili is ideal. - Try a beef or turkey chili for rich flavor. - Vegetarian chili adds a nice touch, too. - Chili with beans gives extra texture. The key is to choose a chili you love. You can easily swap ingredients! - Use a vegetarian or vegan chili. - Replace cheddar cheese with a plant-based cheese. - Swap sour cream for a vegan version or avocado. These changes keep the dish tasty and satisfying. You now have all you need to make delicious Loaded Chili Cheese Fries. We covered the key ingredients, cooking steps, and tips for crispy fries. With so many options and variations, this dish can suit everyone. Don’t forget to store leftovers properly to enjoy later. Whether you want a snack or a meal, these fries are sure to please. Dive in and create your version; it’s simple and fun! Enjoy your tasty creation and share it with others.
Loaded Chili Cheese Fries Delicious and Simple Recipe
Are you ready to indulge in a tasty treat that everyone loves? Loaded Chili Cheese Fries are simple to make and packed with flavor. With
- 1 package of pizza dough (store-bought or homemade) - 1 cup shredded mozzarella cheese - 1 cup sliced pepperoni - 1/2 cup marinara sauce (for dipping) - 1 teaspoon garlic powder - 1 teaspoon Italian seasoning - 1 tablespoon olive oil - Cornmeal (for dusting) These ingredients come together to create a tasty treat. You can use store-bought pizza dough for easy prep. Or, if you like, make your own. The mozzarella cheese melts perfectly, adding a gooey texture. Pepperoni adds that classic pizza flavor. The garlic powder and Italian seasoning give it a lovely aroma. You will also need marinara sauce for dipping. This adds a nice touch to each bite. Olive oil helps the spices stick to the dough and gives it a nice sheen. Cornmeal helps prevent sticking and adds crunch to the bottom. Gather these ingredients, and you are ready to make Cheesy Pepperoni Pizza Roll Ups! {{ingredient_image_1}} 1. Preheat your oven to 400°F (200°C). This step gets the oven hot for nice, crispy roll-ups. 2. On a lightly floured surface, roll out the pizza dough into a rectangle. Aim for about ¼ inch thick. This thickness helps with even cooking. 3. Brush the entire surface of the dough with olive oil. This adds flavor and helps the spices stick. 4. Sprinkle garlic powder and Italian seasoning evenly over the dough. These spices add a great taste. 1. Layer the sliced pepperoni across the dough. Leave a small border around the edges to avoid spills. 2. Sprinkle the shredded mozzarella cheese evenly over the pepperoni. This cheese will melt and bind everything together. 3. Starting from one long side, carefully roll the dough tightly into a log shape. Pinch the edges to seal well. This helps keep the filling inside. 4. Cut the rolled dough into 1 to 1.5-inch sections. These are your individual pizza roll-ups. 1. Arrange the roll-ups on a baking sheet lined with parchment paper. Leave some space between each piece for even cooking. 2. Bake in the preheated oven for about 15-20 minutes. Look for a golden brown color and bubbly cheese. This shows they are done! To make perfect pizza roll-ups, start by preheating your oven to 400°F (200°C). This ensures even cooking and a golden color. - Roll the dough to about ¼ inch thick for the best texture. - Brush the dough with olive oil for flavor and crispiness. - Use garlic powder and Italian seasoning to enhance the taste. When rolling, start from one long side. Roll the dough tightly to keep the filling inside. Pinch the edges well to seal them. This step is key to avoid any leaks during baking. For dipping, choose a good marinara sauce. Some popular brands are Rao’s, Classico, and Prego. These offer great flavors that match well with your roll-ups. Pair your roll-ups with a fresh salad or a light drink like lemonade or soda. This makes a perfect snack or meal combo. One common mistake is overstuffing the roll-ups. Too much filling can cause them to explode in the oven. Stick to a light hand when adding pepperoni and cheese. Another mistake is not preheating the oven properly. If the oven isn’t hot enough, the roll-ups won’t cook evenly. Always check that the oven reaches 400°F before baking. Pro Tips Use Cold Dough: Chilling your pizza dough for about 30 minutes before rolling it out can make it easier to handle and shape. Don’t Overfill: While it’s tempting to stuff the roll-ups with more cheese and pepperoni, overfilling can cause them to burst while baking. Brush with Egg Wash: For an extra golden and glossy finish, brush the tops of the roll-ups with an egg wash (beaten egg with a splash of water) before baking. Experiment with Fillings: Feel free to get creative with your fillings! Try adding veggies like bell peppers or mushrooms, or switch up the cheese for a different flavor. {{image_2}} You can make cheesy pepperoni pizza roll-ups even better with different fillings. Here are some ideas: - Veggie options: Adding bell peppers or mushrooms can make these roll-ups tasty and colorful. Just chop them small and spread them on the dough. - Different cheeses: Try using cheddar or provolone instead of mozzarella. Each cheese brings a new flavor that can surprise your taste buds. If you need to avoid gluten or carbs, don't worry! There are easy swaps: - Using gluten-free pizza dough: Many stores sell good gluten-free dough. It works just like regular dough and tastes great. - Cauliflower crust variation: You can also use cauliflower crust for a low-carb choice. Just make sure to shape it well so it holds the filling. Make your roll-ups unique with some fun flavor changes. Here’s how: - Adding extra spices or sauces: A pinch of red pepper flakes or a drizzle of hot sauce can give your snack an extra kick. Mix in herbs like basil for fresh taste. - Experimenting with different meats: Swap out pepperoni for salami, ham, or even cooked sausage. Each meat adds its own yummy flavor to the roll-ups. These variations can help you create a snack that fits your taste and diet. Get creative and enjoy your cooking! To store your pizza roll-ups, let them cool first. Place them in an airtight container. You can keep them in the fridge for about 3 to 4 days. This keeps the flavors fresh and tasty. For best results, separate layers with parchment paper to avoid sticking. If you want to freeze pizza roll-ups, wrap them tightly in plastic wrap. Then place them in a freezer-safe bag. They can last up to 2 months in the freezer. To enjoy them later, thaw them in the fridge overnight. For reheating, bake in a preheated oven at 350°F (175°C) for about 10-15 minutes. This method keeps them nice and crispy. Fresh pizza roll-ups are warm and soft. The cheese is gooey, and the pepperoni is flavorful. When reheated, they can lose some of that fresh taste. To keep them tasting great, cover them with foil while reheating. This helps retain moisture and flavor. Enjoying them fresh is best, but reheating can still be delicious! If you want to switch up the dough, consider these options: - Puff pastry: This gives a flaky texture. - Flatbreads: Use naan or lavash for quick roll-ups. - Biscuits: Store-bought biscuit dough makes a tasty twist. - Cauliflower crust: A great low-carb choice, too! - Tortillas: Perfect for a fun, crunchy version. These substitutes can change the flavor and texture of your roll-ups. Each option adds its flair! Yes, you can prep these roll-ups in advance! Here’s how: - Assemble the roll-ups: Follow the recipe and cut them, but don’t bake yet. - Store them: Place them on a baking sheet and cover with plastic wrap. Refrigerate for up to 24 hours. - Freeze for later: You can also freeze them. Just wrap each roll-up in foil. When you’re ready to bake, pop them in the oven straight from the fridge or freezer. Add a few extra minutes to the baking time if they're frozen. To check if your roll-ups are ready, look for these signs: - Color: They should be golden brown. - Cheese: It should be bubbly and slightly crispy. - Sound: Gently tap one; it should feel firm. For a precise check, use a food thermometer. The inside should reach 165°F (74°C). Enjoy that cheesy goodness! Making pizza roll-ups is simple and fun. We covered all the steps, from gathering the right ingredients to baking the perfect roll-ups. You learned how to assemble them and avoid common mistakes. Don’t forget the tips for storage and reheating. In the end, this dish is versatile. You can customize it to fit your taste. Whether you prefer classic or gluten-free, pizza roll-ups are a tasty treat. Enjoy experimenting and sharing this dish with friends and family!
Cheesy Pepperoni Pizza Roll Ups Tasty Snack Idea
Are you craving a cheesy snack that’s easy to make and full of flavor? Look no further! My Cheesy Pepperoni Pizza Roll Ups are the
- 2 cups rotisserie chicken, shredded - 1 bag tortilla chips (about 10-12 oz) - 1 cup shredded cheddar cheese - 1 cup black beans, drained and rinsed - 1 medium tomato, diced - 1 jalapeño, sliced (optional, for spiciness) - 1 avocado, diced - 1/2 cup sour cream - 1 tablespoon lime juice - 1/3 cup fresh cilantro, chopped - 1/4 cup green onions, sliced - 1/4 cup pickled jalapeños (optional) Rotisserie chicken nachos are fun and easy to make. You can use cooked chicken right from the store. This saves time and adds great flavor. The tortilla chips form a crispy base for all the toppings. The cheese melts beautifully, binding everything together. You can create layers of taste with black beans and fresh diced tomatoes. Sliced jalapeños add a kick if you like spice. Diced avocado gives a creamy touch. Don’t forget the seasonings! Lime juice adds brightness. Sour cream cools down any heat from the jalapeños. Fresh cilantro and green onions add a burst of freshness and color. Pickled jalapeños can bring extra tanginess. Gather all these ingredients and get ready to make a cheesy and savory delight! {{ingredient_image_1}} 1. First, preheat your oven to 375°F (190°C). This will help the nachos bake evenly. 2. In a large mixing bowl, combine 2 cups of shredded rotisserie chicken with 1 tablespoon of lime juice, salt, and pepper. Mix well until the chicken is coated. 1. On a large baking sheet, spread an even layer of tortilla chips. Aim for about 10-12 oz. 2. Next, evenly distribute the seasoned rotisserie chicken over the tortilla chips. 3. Sprinkle 1 cup of black beans over the chicken layer. This adds great flavor and texture. 4. Now, add diced tomatoes, jalapeño slices, and diced avocado on top. 5. Generously sprinkle 1 cup of shredded cheddar cheese over everything. This cheesy layer is key! 1. Place the baking sheet in the preheated oven. Bake for about 10-15 minutes. Look for bubbly and slightly golden cheese as your cue. 2. Once done, remove the nachos from the oven. Let them cool for a minute. 3. Top the nachos with dollops of sour cream. Sprinkle with chopped cilantro, sliced green onions, and pickled jalapeños if you like. 4. Serve immediately while hot and cheesy. Enjoy the delightful mix of flavors! - Best practices for layering nachos: Start with a base of tortilla chips. This helps hold the toppings in place. Add your rotisserie chicken next, followed by black beans and fresh toppings like tomatoes and jalapeños. Finish with a thick layer of cheese on top. This order keeps everything balanced and prevents soggy chips. - Avoiding soggy chips: To keep chips crispy, don’t overload them with toppings. Use just enough chicken, beans, and veggies so each chip stays crunchy. Baking them at a high temperature also helps. - Adjusting spice levels with jalapeños: If you love spice, add fresh jalapeño slices to the mix. For a milder taste, skip the fresh ones. You can also use pickled jalapeños for a tangy kick without too much heat. - Alternatives for dietary restrictions: If you need a dairy-free option, use vegan cheese or skip the cheese altogether. For gluten-free needs, choose gluten-free tortilla chips. You can also swap chicken for beans or veggies to create a filling vegan dish. - Perfect baking time: Bake your nachos at 375°F for 10 to 15 minutes. Watch for the cheese to melt and bubble. This means they’re ready. - Prepping in advance: You can prepare the chicken and toppings ahead of time. Just store them in the fridge. When ready to eat, layer them on chips and bake. This saves time and makes it easy to enjoy nachos on busy days. Pro Tips Use Fresh Ingredients: Fresh toppings like diced tomatoes and cilantro can elevate the flavor of your nachos significantly. Layer Wisely: For the best melt, layer your cheese between other toppings rather than just on top to ensure every chip is cheesy. Customize Your Heat: Adjust the amount of jalapeño to your taste. You can also add hot sauce for an extra kick! Serve Immediately: Nachos are best served right out of the oven to keep them crispy. Prepare toppings beforehand for quick assembly. {{image_2}} You can switch up the cheese in your nachos. Try Monterey Jack or pepper jack for more flavor. These cheeses melt well and give a creamy texture. If you want to skip the chicken, use ground beef or turkey. For a plant-based option, try black beans or lentils. Both add protein and taste. To spice things up, add chorizo to your nachos. This sausage brings a smoky flavor that pairs well with cheese. You can also use local spices, like taco seasoning or smoked paprika. These spices add depth and richness to each bite. Game day nachos are a fun treat. Load them with extra cheese, jalapeños, and guacamole for a crowd-pleaser. For a healthier twist, make vegetarian nachos with roasted veggies or beans. You can even create vegan nachos with a cashew cheese sauce. The choices are endless, and each theme brings its own flavor! To keep your nachos fresh, place them in an airtight container. This helps maintain their taste. Make sure the nachos cool down before sealing them. If stored properly, nachos last for about three days in the fridge. After that, they may lose their crunch and flavor. To reheat nachos, use the oven for the best results. Set your oven to 350°F (175°C). Place the nachos on a baking sheet. Heat them for about 10 minutes. This method keeps the chips crunchy. If you use a microwave, the chips may get soft. Heat for only 30 seconds at a time, checking often. You can freeze nachos, but it’s best to freeze them before baking. Layer the ingredients, then wrap them tightly in plastic wrap. Store them in a freezer-safe bag. When you’re ready to eat, bake them straight from the freezer. They can last up to two months in the freezer. How do you make nachos using rotisserie chicken? Start by shredding the rotisserie chicken. Mix it with lime juice, salt, and pepper. Spread tortilla chips on a baking sheet. Top them with the chicken, black beans, diced tomatoes, and jalapeños. Add a generous layer of cheddar cheese on top. Bake at 375°F for about 10-15 minutes until the cheese melts. Can nachos be made in advance? Yes, you can prep your nachos ahead of time. Layer the chips and toppings in an oven-safe dish, but wait to add cheese until right before baking. Cover and store in the fridge. Bake fresh when you’re ready to serve. What type of cheese works best for nachos? Shredded cheddar cheese is a classic choice. It melts well and adds great flavor. You can also mix in Monterey Jack or pepper jack for a twist. These cheeses enhance the overall taste and creaminess. How to keep nachos crispy when reheating? To keep nachos crispy, reheat them in the oven rather than the microwave. Place them on a baking sheet at 350°F for about 5-10 minutes. This method helps restore their crunch while melting the cheese. What can I add to rotisserie chicken nachos? You can add a variety of toppings. Think black olives, corn, or different peppers for extra flavor. Consider using salsa or guacamole for added taste. The options are endless, so feel free to get creative! Can I use gluten-free tortilla chips? Absolutely! There are many gluten-free tortilla chips on the market. Check the label to ensure they meet your dietary needs. These chips work well and still provide that satisfying crunch. You now know how to create tasty rotisserie chicken nachos. We covered the best ingredients, from cheese to toppings. I shared step-by-step instructions for perfect assembly and baking. You learned helpful tips to avoid soggy chips and customize flavors. Storage info ensures your nachos stay fresh. Enjoy making these nachos. They are perfect for any occasion. Get creative with toppings and variations to make them your own!
Rotisserie Chicken Nachos Cheesy and Savory Delight
Are you ready to elevate your snack game? My Rotisserie Chicken Nachos deliver a cheesy and savory delight perfect for any occasion. With tender chicken,
To make your cheesy breadsticks, you need a few key ingredients: - 2 cups all-purpose flour - 1 teaspoon instant yeast - 1 teaspoon sugar - 1 teaspoon salt - ¾ cup warm water - 2 tablespoons olive oil - 1 cup shredded mozzarella cheese - ½ cup grated Parmesan cheese - 2 cloves garlic, minced - 2 tablespoons fresh parsley, chopped - 1 teaspoon dried oregano These basic ingredients create a soft and cheesy treat. The flour and yeast form the dough, while the cheeses add flavor and richness. You can boost the taste of your breadsticks with these optional ingredients: - Red pepper flakes for heat - Extra herbs like thyme or basil - Different cheeses like cheddar or gouda Adding red pepper flakes gives a nice kick. You can mix in any herbs you like to make it your own. If you have dietary restrictions, here are some easy swaps: - Use gluten-free flour instead of all-purpose flour. - Replace mozzarella with a dairy-free cheese for a vegan option. - Swap olive oil with coconut oil for a different flavor. These substitutions help everyone enjoy cheesy breadsticks. You can keep the flavors while meeting your diet needs. {{ingredient_image_1}} To start, grab a large mixing bowl. Combine ¾ cup warm water, 1 teaspoon sugar, and 1 teaspoon instant yeast. Let this mix sit for 5 minutes. It should bubble up nicely. Next, add 2 cups all-purpose flour and 1 teaspoon salt. Mix until a dough forms. Knead this dough on a floured surface for about 5-7 minutes. You want it to feel smooth and elastic. After kneading, place it in a greased bowl. Cover it with a kitchen towel. Let it rise in a warm spot for 30-45 minutes until it doubles in size. Once the dough has risen, it's time to shape it. Gently punch it down to remove the air. Roll it out on a floured surface into a rectangle about ½ inch thick. Transfer the rolled dough onto a parchment-lined baking sheet. Be careful not to tear it. This dough will form the base of your cheesy breadsticks. Now comes the fun part—adding toppings! In a small bowl, mix 2 tablespoons olive oil, 2 cloves minced garlic, and 1 teaspoon dried oregano. Brush this mixture evenly over the dough. Next, sprinkle 1 cup shredded mozzarella cheese and ½ cup grated Parmesan cheese generously on top. Use a sharp knife or pizza cutter to cut the dough into sticks, but do not cut all the way through. Preheat your oven to 400°F (200°C). Bake the breadsticks for 15-20 minutes. They are ready when the cheese is bubbly and the edges turn golden brown. Once baked, remove them from the oven. Sprinkle with fresh parsley and optional red pepper flakes for a spicy kick. Let them cool slightly before pulling apart and serving warm. Enjoy! For the best dough, use warm water. It helps the yeast grow. Mix the water, sugar, and yeast first. Let it foam for about 5 minutes. This step wakes up the yeast, making your breadsticks rise well. When you add flour and salt, mix until a dough forms. Knead it for 5-7 minutes. It should be smooth and elastic. If the dough is too sticky, add a little more flour. Balance is key! To get that perfect, gooey cheese, use quality mozzarella. Shred it yourself for better melting. Preheat your oven to 400°F. This heat helps the cheese bubble and brown. Spread the cheese evenly over the dough. Don't skip the Parmesan! It adds a nice flavor. Bake until the cheese is bubbly and golden. Keep an eye on it so it doesn't burn. Serve the breadsticks warm for the best taste. They pair well with marinara sauce or garlic dip. You can add red pepper flakes for some heat. For a fresh touch, sprinkle with chopped parsley. Present them on a wooden board for a nice look. Add a small bowl of sauce for dipping. This makes your meal more fun and tasty! Pro Tips Use Fresh Ingredients: Always opt for fresh garlic and parsley to enhance the flavor of your breadsticks. Experiment with Cheeses: Feel free to mix different types of cheese, like cheddar or provolone, for a unique taste. Check Dough Consistency: If the dough is too sticky, add a little more flour while kneading, but avoid overdoing it. Serve Immediately: For the best texture and flavor, serve the breadsticks warm right out of the oven. {{image_2}} You can mix flavors in your cheesy breadsticks. Try different types of cheese like cheddar or gouda. Adding herbs can change the taste too. Consider using basil, thyme, or rosemary. For a spicy kick, sprinkle red pepper flakes or crushed black pepper. A dash of smoked paprika gives a unique flavor. Experiment with your favorite herbs and spices to make your breadsticks your own! Making these breadsticks gluten-free is easy. Use gluten-free flour instead of all-purpose flour. You can find pre-mixed blends that work well. For a vegan version, skip the cheese or use plant-based cheese. You can also use nutritional yeast for a cheesy flavor. Replace olive oil with a vegan butter to keep it rich. These options let everyone enjoy cheesy breadsticks. Dips can enhance your cheesy breadsticks. Serve them with marinara sauce for a classic touch. Garlic butter is another great option that pairs well. You can also try ranch dressing for a creamy dip. For something unique, serve with a spicy aioli. Each dip can bring out different flavors, making every bite exciting! After enjoying your cheesy breadsticks, let them cool first. Then, place them in an airtight container. This keeps them fresh. You can also wrap them in plastic wrap. Make sure they stay at room temperature for up to two days. If you have leftovers, refrigerate them for up to a week. To bring back that fresh taste, reheat your breadsticks in the oven. Preheat your oven to 350°F (175°C). Place the breadsticks on a baking sheet. Bake for about 5-10 minutes. This keeps them crispy. You can also microwave them. Heat for about 15-20 seconds. But be careful; microwaving can make them chewy. If you want to save some for later, freezing is a great option. After they cool, wrap each breadstick tightly in plastic wrap, then place them in a freezer bag. They can stay frozen for up to three months. When you are ready to eat them, thaw overnight in the fridge. Reheat them in the oven for the best results. Yes, you can make the dough ahead. Just follow the first steps of the recipe. After kneading, place the dough in a greased bowl. Cover it well and put it in the fridge. The dough can stay fresh for up to 24 hours. When you are ready, take it out and let it sit at room temperature for about 30 minutes before rolling it out. Mozzarella is the star cheese for breadsticks. It melts well and gives that stretchy texture we love. Parmesan adds a nice bite with its salty flavor. You can also mix other cheeses like cheddar or fontina for extra flavor. Just remember to keep the cheese amounts balanced to avoid overpowering the dish. To keep your breadsticks crispy, make sure to bake them until golden brown. Avoid overloading with cheese or toppings that have extra moisture. Brush just the right amount of olive oil and garlic mixture over the dough. Lastly, let them cool slightly before serving. This helps them firm up and enhances their texture. You now know how to make cheesy breadsticks at home. We covered the main ingredients and their tasty substitutes. The step-by-step instructions ensure you create perfect dough and melt cheese just right. I shared tips for a great texture and delicious pairings. You can explore flavor and dietary variations too. Lastly, I explained how to store and reheat leftovers. Enjoy bringing this joy to your table, and don’t be afraid to get creative!
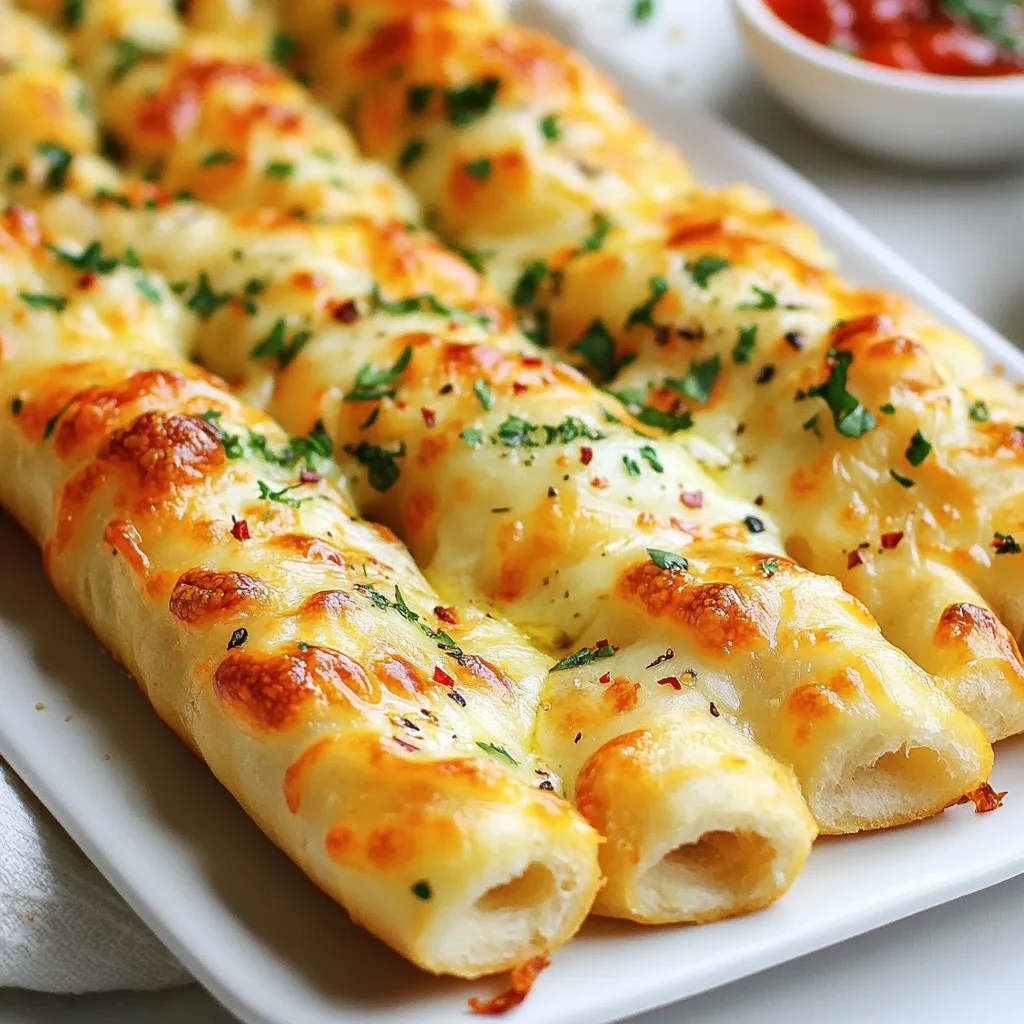
Homemade Cheesy Breadsticks Quick and Tasty Treat
Craving a warm, cheesy treat that’s quick to make? You’re in the right place! Homemade Cheesy Breadsticks are the perfect snack for parties, movie nights,
- 6 Hawaiian rolls, split in half - 1 cup shredded sharp cheddar cheese - 1/2 cup shredded mozzarella cheese - 1/4 cup cream cheese, softened - 2 tablespoons butter, softened - 2 tablespoons fresh basil, chopped - 1 tablespoon honey - Salt and pepper to taste You can swap Hawaiian rolls for dinner rolls if needed. For cheese, use gouda or provolone. Cream cheese can be changed to ricotta for a lighter option. If you don’t have fresh basil, dried basil works too, but use less. Honey can be replaced with agave syrup or maple syrup for sweetness. Using high-quality ingredients makes a big difference. Fresh cheese melts better and tastes richer. Good rolls add a nice sweetness and soft texture. Fresh herbs like basil bring bright flavors to your dish. Always aim for the best quality you can find. Your grilled cheese will taste amazing! {{ingredient_image_1}} To start, gather your ingredients. You will need 1 cup of sharp cheddar cheese, 1/2 cup of mozzarella cheese, and 1/4 cup of softened cream cheese. In a medium bowl, mix the cheddar and mozzarella together. Then, add the cream cheese. Stir until the cheeses blend well. Next, add 2 tablespoons of chopped fresh basil and 1 tablespoon of honey. Season this mixture with salt and pepper to taste. Now, let’s cook! First, take your 6 Hawaiian rolls and split them in half. Spread a thin layer of softened butter on the cut sides of each roll. Heat a skillet over medium heat. Place the bottom halves of the rolls in the skillet. Spoon the cheese mixture onto each bottom half. Then, place the top halves back on. Grill for 3-4 minutes, pressing down gently with a spatula. This helps the cheese melt. When the bottoms are golden brown, carefully flip each sandwich. Grill the other side for another 3-4 minutes until both sides are golden and the cheese is melted. To serve, slice each sandwich in half. Place them on a colorful platter. For a nice touch, garnish with a sprig of basil and drizzle some honey on top. This not only looks good but adds extra flavor. Enjoy your Hawaiian Roll Grilled Cheese warm for the best taste! To get that perfect grilled cheese texture, use a skillet over medium heat. Avoid high heat; it burns the bread. Spread butter on both sides of the rolls. This helps them crisp up nicely. Use a mix of sharp cheddar and mozzarella for flavor and stretch. Press down gently with a spatula while grilling. This helps the cheese melt evenly. Flip the sandwich carefully for even browning. Hawaiian Roll Grilled Cheese pairs great with dips. Try a simple marinara sauce. It adds a nice, tangy flavor. You can also use ranch or a creamy garlic dip. For sides, fresh fruit works well. Pineapple or melon add a sweet touch. Chips or a small salad also make good options. They balance the richness of the cheese. One common mistake is not using enough cheese. Too little cheese makes the sandwich dry. Another mistake is not letting the skillet heat enough. This leads to soggy bread. Avoid flipping too soon; let it brown first. Lastly, don’t skip seasoning. A pinch of salt and pepper makes a big difference in taste. Pro Tips Use Fresh Ingredients: Always opt for fresh basil and quality cheeses to enhance the flavor of your grilled cheese. Control the Heat: Cook on medium heat to ensure the cheese melts perfectly without burning the bread. Add a Twist: Experiment with different cheese combinations or add vegetables like spinach or tomatoes for extra flavor. Perfect the Grill: Use a cast-iron skillet for even heat distribution, resulting in perfectly golden, crispy sandwiches. {{image_2}} You can make your Hawaiian Roll Grilled Cheese even better by adding proteins or veggies. Try adding cooked bacon or sliced turkey for extra flavor. Grilled chicken works well too. If you want some crunch, add thin slices of bell peppers or spinach. These additions give you more taste and nutrition. Mix and match to find your favorite combo! While sharp cheddar and mozzarella are great, feel free to explore other cheese options. Gouda adds a nice smoky flavor, while pepper jack gives a spicy kick. For a creamy twist, try brie or fontina. You can also mix different cheeses for a richer taste. With so many choices, you can create a new grilled cheese each time! Don’t forget about seasonings and sauces to boost flavor. A sprinkle of garlic powder or red pepper flakes can add a nice zing. You can drizzle some balsamic glaze or sriracha on top for an exciting twist. Honey, which you already use, adds sweetness. The right sauce can turn a simple sandwich into something special. Experiment with flavors to find what you love! To store leftover grilled cheese, let it cool first. Wrap each sandwich in plastic wrap or foil. Place them in an airtight container. This keeps them fresh and prevents drying. Store in the fridge for up to three days. For the best reheating, use a skillet. Heat it over medium-low heat. Place the sandwich in the skillet and cover it with a lid. This keeps the cheese melting while the bread warms. Grill each side for about three minutes. You can also use a toaster oven for a crispy finish. If you want to freeze grilled cheese, wrap each sandwich well. Use plastic wrap and then foil. This helps prevent freezer burn. You can freeze them for up to three months. To reheat, let them thaw in the fridge overnight. Then, use the skillet method for a fresh taste. Yes, you can use other rolls. Try brioche or dinner rolls if you want. These types are soft, sweet, and work great. Each roll adds a unique taste. Just ensure they can hold the filling well. You can use ricotta or goat cheese instead. They both offer a creamy texture. If you seek a lighter option, try Greek yogurt. It adds a tangy flavor while keeping it creamy. Grilled cheese can last up to three days in the fridge. Wrap them well in plastic wrap or foil. This keeps them fresh and tasty. When ready to eat, reheat in a skillet for best results. We explored the key ingredients for great grilled cheese and discussed high-quality options. I shared detailed steps for preparation, cooking, and serving fun ideas. You learned tips for perfect texture, pairing sides, and avoiding common mistakes. We've covered tasty variations with proteins, vegetables, and flavor boosts. Finally, I provided storage info and answered your common grilled cheese questions. Now you're ready to make the best grilled cheese ever! Enjoy every bite!
Hawaiian Roll Grilled Cheese Quick and Tasty Recipe
If you’re craving a fun twist on a classic, Hawaiian Roll Grilled Cheese is a must-try! This quick and tasty recipe pairs sweet rolls with