Strawberry Cheesecake Overnight Oats Delightful Recipe
![Gather these simple and tasty ingredients to make your strawberry cheesecake overnight oats: - 1 cup rolled oats - 1 cup milk (dairy or non-dairy) - ½ cup Greek yogurt - 1 tablespoon cream cheese, softened - 2 tablespoons maple syrup or honey - ½ teaspoon vanilla extract - ½ cup fresh strawberries, hulled and sliced - 2 tablespoons crushed graham crackers (optional) - Pinch of salt These ingredients create a creamy and flavorful dish. The rolled oats serve as a hearty base. The milk adds moisture, while the Greek yogurt and cream cheese give a rich taste. Sweetness comes from maple syrup or honey, and the vanilla adds warmth. Fresh strawberries bring a burst of flavor, making each bite delightful. The graham crackers add a nice crunch, but they are optional. You can find the full recipe for step-by-step instructions on how to prepare this delicious meal. Enjoy! - In a large bowl, combine the rolled oats, milk, Greek yogurt, and softened cream cheese. - Add maple syrup or honey, vanilla extract, and a pinch of salt. - Mix well until everything is creamy and smooth. - Gently fold in the fresh, hulled, and sliced strawberries. - Divide the creamy mixture into two or three jars. - Seal the jars tightly with their lids. - Place the jars in the fridge overnight or for at least 6 hours. - In the morning, stir well and top with more sliced strawberries and crushed graham crackers before you serve. With this simple method, you create a delightful breakfast that tastes just like cheesecake! For the complete recipe, check out the [Full Recipe]. - Use rolled oats for best texture. They soak up liquid well and stay chewy. - Experiment with different sweeteners. Maple syrup or honey both work great. You can even try agave or stevia for a lower-calorie option. - Pair with yogurt for added protein. Greek yogurt boosts creaminess and nutrition. - Add nuts or seeds for extra crunch. Almonds, walnuts, or chia seeds enhance flavor and texture. - Use clear jars for a pretty display. Seeing the layers makes it more fun to eat. - Decorate with fresh mint or additional fruit. A sprig of mint adds color and a fresh taste. You can also use extra strawberry slices for a lovely touch. For the full recipe, check out the detailed steps to make this delightful dish! {{image_2}} You can switch up the flavor of your overnight oats easily. Here are two tasty options: - Chocolate Strawberry Cheesecake: Add cocoa powder to the base. Mix in dark chocolate chips for extra joy. The chocolate pairs great with strawberries. - Banana Cream Pie Overnight Oats: Use mashed bananas instead of strawberries. Add a bit of cinnamon for warmth. Top with crushed vanilla wafers for a fun crunch. You can customize your oats for different diets. Here are some ideas: - Dairy-free options: Use almond or coconut yogurt instead of Greek yogurt. Use almond or oat milk to keep it creamy. - Sugar-free alternatives: Replace maple syrup or honey with stevia or monk fruit. This keeps the oats sweet without added sugar. Using seasonal fruits keeps your oats fresh and exciting. Here are a few tips: - Seasonal fruits: In spring and summer, use berries like blueberries or raspberries. In fall, try apples or pears for a cozy twist. - Adjust spices: Add a pinch of cinnamon in the fall or nutmeg in winter. These spices make your oats feel like a warm hug. For the complete recipe, check out the [Full Recipe]. Store your strawberry cheesecake overnight oats in airtight containers. This keeps them fresh and tasty. You can keep them in the refrigerator for up to 3 days. If you want a quick breakfast, make a batch at the start of the week. Can overnight oats be frozen? Yes, you can freeze them! Just remember to use freezer-safe containers. When you're ready to eat, thaw them in the fridge overnight. This way, they stay creamy and delicious. How can you tell if your oats have gone bad? Look for any off smells or changes in texture. If they smell sour or feel slimy, it's time to toss them. Always check your ingredients, especially if you add fruit or yogurt. Freshness is key to enjoying your oats! To make overnight oats, you follow a simple method. First, mix rolled oats with milk and yogurt. Add some sweetener and a pinch of salt. Stir it all together until smooth. Then, fold in your favorite fruits. Pack the mixture into jars and seal them tightly. Place them in the fridge overnight. In the morning, just stir and enjoy! Yes, you can use instant oats, but there are some points to consider. Instant oats cook faster and can become mushy. They may not give you the same texture as rolled oats. Rolled oats soak up liquid better and stay chewier. If you prefer a creamier dish, instant oats may work. For a firmer bite, stick to rolled oats. Overnight oats offer several health benefits. They are high in fiber, which helps with digestion. The oats provide long-lasting energy. Greek yogurt adds protein, keeping you full longer. Fresh strawberries bring vitamins and antioxidants. Using honey or maple syrup gives natural sweetness without added chemicals. Together, these ingredients make a healthy and tasty breakfast. This blog post covered how to make delicious overnight oats. We discussed the key ingredients, step-by-step instructions, and helpful tips. You learned about variations to fit different tastes and dietary needs. I also shared storage tips to keep your oats fresh. Overnight oats are a fun and easy way to enjoy a healthy breakfast. Feel free to experiment with flavors and toppings. Enjoy your homemade creation!](https://stirredrecipes.com/wp-content/uploads/2025/06/ccc347c0-7682-4ce7-8082-5c7078e3eceb.webp)
Wake up to a tasty treat with my Strawberry Cheesecake Overnight Oats recipe! This dish is creamy, sweet, and packed with fresh fruit. It’s perfect for breakfast or a quick …
Wake up to a tasty treat with my Strawberry Cheesecake Overnight Oats recipe! This dish is creamy, sweet, and packed with fresh fruit. It’s perfect for breakfast or a quick …
![- Cooked chicken (2 cups, shredded) - Cooked rice (2 cups, white or brown) - Broccoli florets (1 cup, fresh or frozen) - Cheddar cheese (1 cup, shredded) - Cream of mushroom soup (1 cup, or homemade) - Milk (1/2 cup) - Seasoning (1 tsp garlic powder, 1 tsp onion powder, salt and pepper to taste) - Breadcrumbs (1/2 cup, optional, for topping) - Olive oil (2 tbsp, if using fresh broccoli) Gather these ingredients before starting. Fresh chicken adds great taste, but you can use leftover chicken. Cooked rice can be white or brown, depending on your choice. I like fresh broccoli for its crunch, but frozen works well, too. Cheddar cheese is key for that creamy texture. You can use cream of mushroom soup from a can or make it from scratch. Milk adds smoothness to the mix. For seasoning, garlic and onion powders bring out the flavor. Don't forget salt and pepper to taste. If you want a crispy top, add breadcrumbs mixed with olive oil. This dish is easy and delicious! Check the full recipe if you want to dive deep into the cooking steps. - Preheat the oven to 350°F (175°C). - If you use fresh broccoli, boil the florets for 2-3 minutes. - Drain the broccoli and set it aside. - In a large bowl, mix cooked chicken, cooked rice, and the drained broccoli. - Add cream of mushroom soup and milk to the bowl. - Sprinkle in garlic powder and onion powder, then mix well. - Taste and add salt and pepper as needed. - Fold in half of the cheddar cheese. - Transfer the mixture into a greased 9x13-inch baking dish. - Spread it evenly, then top with the remaining cheddar cheese. - If you want, mix breadcrumbs with olive oil and sprinkle on top. - Cover the dish with foil and bake for 25 minutes. - After 25 minutes, remove the foil. - Bake for an extra 10-15 minutes until the cheese bubbles and turns golden. - Once done, let it cool for a few minutes before serving. - This cooling step helps the casserole set nicely. For the full recipe, check out the details above. How to choose the best chicken for the casserole When picking chicken, look for fresh, high-quality meat. You can use rotisserie chicken for ease. Shredded chicken works best, as it blends well with other ingredients. Make sure it has no tough bits or skin. Importance of letting the casserole sit before serving Letting the casserole sit for a few minutes after baking helps it set. This makes it easier to serve and keeps it from being too runny. Cooling also allows the flavors to mingle better. Presentation ideas for an attractive dish Serve the casserole right from the baking dish for a homey touch. Add a sprinkle of fresh herbs or extra cheese on top for color. Pair it with a side salad for a bright contrast. You can also use colorful plates to enhance the visual appeal. Side dishes that complement the casserole This casserole pairs well with simple sides. Consider a fresh garden salad or roasted vegetables. Garlic bread also works well to soak up the cheesy goodness. These sides can balance the meal and add more flavor. Alternatives for cream of mushroom soup If you want to skip cream of mushroom soup, try using cream of chicken soup or a homemade white sauce. You can also blend cooked mushrooms with cream for a fresh taste. This keeps the dish creamy and delicious. Dairy-free options for cheese and milk For a dairy-free version, use plant-based cheese and milk. Look for brands that melt well for the best results. Nutritional yeast can add a cheesy flavor without dairy. These swaps keep the casserole creamy while meeting dietary needs. For the full recipe, check out the detailed instructions. Enjoy your cooking! {{image_2}} You can easily make this casserole gluten-free. Just swap the cream of mushroom soup for a gluten-free version. Use gluten-free breadcrumbs if you want a crunchy topping. For a vegetarian version, replace chicken with extra broccoli or chickpeas. You can also use vegetable broth instead of cream of mushroom soup. To add more flavor, use spices like paprika or Italian seasoning. Fresh herbs like thyme or parsley also work well. For cheese, try using mozzarella or gouda for a different taste. Mixing different cheeses can create a delightful flavor. Feel free to change up the veggies. Cauliflower or bell peppers work great instead of broccoli. For protein, turkey or tofu can be good alternatives. Cooked quinoa can also replace rice for a fun twist. You can mix and match to fit your taste! For the complete recipe, check out the [Full Recipe]. To reheat leftovers, it’s best to use the oven. Preheat it to 350°F (175°C). Place the casserole in an oven-safe dish. Cover it with foil to keep it moist. Heat for about 20 minutes or until warm. If you want to avoid sogginess, do not add extra liquid. You can freeze the casserole for later use. First, let it cool completely. Then, wrap it tightly in plastic wrap. Place it in a freezer-safe bag or container. This keeps it fresh for up to three months. When ready to eat, thaw it in the fridge overnight. Reheat in the oven for the best texture. Leftovers last about three to four days in the fridge. Make sure to store it in an airtight container. Watch for signs of spoilage like a sour smell or mold. If it looks or smells off, it’s best to toss it. For extra safety, always check before eating. This way, you enjoy your cheesy broccoli chicken and rice casserole without worry. How long does it take to make Cheesy Broccoli Chicken and Rice Casserole? It takes about 50 minutes to make this casserole. You spend 15 minutes prepping and 35 minutes baking. Can I make this casserole ahead of time? Yes, you can prepare it a day in advance. Just cover it and store it in the fridge until you're ready to bake. Can I use raw chicken in this recipe? I do not recommend using raw chicken. Always use cooked chicken for safety and flavor. Is this a good meal for meal prep? Absolutely! This casserole is perfect for meal prep. It keeps well in the fridge and reheats nicely. What should I do if the casserole is too dry? If your casserole is too dry, add a splash of milk or broth. Mix it in before serving for more moisture. How to get a crispy topping on the casserole? For a crispy topping, mix breadcrumbs with olive oil. Sprinkle this mix on top before baking. It adds texture and crunch. This blog post covered how to make a tasty Cheesy Broccoli Chicken and Rice Casserole. You learned about the ingredients, step-by-step instructions, and useful tips. We discussed variations and how to store leftovers. This dish is simple and versatile, making it great for any meal. Try it out and enjoy a warm, hearty meal. You'll impress your family or friends with your cooking skills!](https://stirredrecipes.com/wp-content/uploads/2025/06/457944d3-cca3-4a0c-ab73-dfa321cff4f1.webp)
Welcome to your new favorite comfort food! This Cheesy Broccoli Chicken and Rice Casserole is a simple, satisfying dish that’s perfect for busy weeknights. With tender chicken, fresh broccoli, and …
![- 12 oz fettuccine or spaghetti - 4 tablespoons unsalted butter - 4 cloves garlic, minced To make this dish, first, you need to pick your pasta. Fettuccine or spaghetti works best. I love how fettuccine holds the sauce. Next, unsalted butter adds a rich flavor. Minced garlic gives it that aromatic punch. - 4 cups vegetable broth - 1 cup heavy cream - 1 cup grated Parmesan cheese Vegetable broth is key for depth. It brings all the flavors together. Heavy cream makes the sauce rich and smooth. Grated Parmesan cheese melts beautifully, adding a salty, nutty taste. - 1 teaspoon garlic powder - 1 teaspoon Italian seasoning - Fresh parsley, chopped (for garnish) Garlic powder boosts the garlic flavor. Italian seasoning adds herbs that brighten the dish. Fresh parsley is perfect for garnishing, adding color and freshness. This simple list makes a delicious meal. Check the Full Recipe for the complete method! - Melt Butter and Sauté Garlic Start by placing a large pot or deep skillet on medium heat. Add 4 tablespoons of unsalted butter. Watch as it melts, filling your kitchen with a rich aroma. Next, add 4 minced garlic cloves. Sauté the garlic for 1-2 minutes. You want it fragrant but not burnt. This step builds a flavorful base for your pasta. - Add Vegetable Broth and Pasta Once the garlic is ready, pour in 4 cups of vegetable broth. Bring this mixture to a gentle simmer. Now it's time to add the pasta. You can use 12 oz of fettuccine or spaghetti. Stir the pasta well to coat it in the broth. - Stir and Simmer Let the pasta cook until it is al dente. This usually takes about 8-10 minutes. Stir occasionally to prevent sticking. The broth will reduce and flavor the pasta nicely. - Combine Cream and Cheese After the pasta is cooked, lower the heat. Pour in 1 cup of heavy cream and 1 cup of grated Parmesan cheese. Add 1 teaspoon of garlic powder and 1 teaspoon of Italian seasoning. Stir everything together. This will create a creamy and rich sauce. - Adjust Consistency If the sauce is too thick, add a little more vegetable broth. Mix until you reach your preferred consistency. Taste and season with salt and pepper. Follow these steps, and you'll create a delightful One-Pot Garlic Parmesan Pasta. For more details, check out the Full Recipe. Enjoy your cooking! - Stirring Techniques for No-Stick Pasta: Stir the pasta often while it cooks. This helps keep it from sticking together. Use a wooden spoon or a spatula to gently lift the pasta. Focus on the bottom of the pot where pasta likes to cling. - Ensuring Creamy Sauce: To make sure your sauce stays creamy, add the heavy cream slowly. Stir well after each addition to blend it in. If the sauce is too thick, add a splash of vegetable broth to loosen it up. - Alternative Pasta Options: If you want to switch up the pasta, use penne or fusilli. These shapes hold sauce well. You can also use whole grain or gluten-free pasta if needed. Just keep an eye on the cooking time. - Dairy-Free Variations: For a dairy-free version, swap heavy cream with coconut milk or a plant-based cream. Use nutritional yeast instead of Parmesan for a cheesy taste without dairy. - Pairing with Side Dishes: This pasta pairs well with a simple salad. A fresh green salad with a lemon vinaigrette works great. Garlic bread adds a nice crunch and flavor. - Best Wine Pairings: A light white wine like Pinot Grigio goes well with this dish. It enhances the garlic and Parmesan flavors. If you prefer red, a light Chianti also complements the meal nicely. For the full recipe, check [Full Recipe]. {{image_2}} To make your One-Pot Garlic Parmesan Pasta even better, you can add protein or veggies. - Chicken or Shrimp Variations: Cooked chicken or shrimp works great in this dish. Just add them when you mix in the cream and cheese. They will soak up the tasty sauce. This makes your meal heartier and more filling. - Vegetable Additions: You can toss in some fresh or frozen veggies like spinach, peas, or bell peppers. Add them when you mix in the pasta. They not only add color but also boost nutrition. While Parmesan cheese is classic, you can try other cheeses for fun flavors. - Using Different Types of Cheese: Mozzarella or Asiago can make your pasta creamy and rich. Just mix them in the same way as Parmesan. This gives a new twist to the dish. - Vegan Cheese Alternatives: If you prefer a dairy-free option, use vegan cheese. Look for brands that melt well. This way, you can enjoy a creamy pasta without dairy. If you like some heat, you can spice things up easily. - Adding Red Pepper Flakes: Sprinkle red pepper flakes into the pot when you sauté the garlic. Start with a small amount. You can always add more if you want more kick. - Adjusting Seasoning Levels: Taste your dish before serving. If you want it saltier or more flavorful, add a pinch of salt or some Italian seasoning. This is your chance to make it just right for your taste. To keep your One-Pot Garlic Parmesan Pasta fresh, store leftovers in the fridge. Place the pasta in an airtight container. This helps prevent moisture loss and keeps flavors intact. You can enjoy your pasta for up to three days. Use glass or plastic containers with tight lids for best results. Glass containers are great for reheating, while plastic ones are lighter to handle. Choose containers that fit your fridge space well. When reheating, you have two main options: microwave or stovetop. The microwave is quick and easy, but the stovetop can help maintain texture better. For microwave reheating, place pasta in a bowl. Add a splash of broth or cream to keep it moist. Heat in short bursts, stirring in between. Avoid overheating to keep the pasta from drying out. For stovetop reheating, use a non-stick skillet over low heat. Add a little broth or cream, then stir gently until warmed through. This method helps the pasta stay creamy. Always add a bit of liquid when reheating. This keeps the sauce from becoming thick and dry. Stir often to ensure even heating and preserve the dish's rich flavor. You can freeze One-Pot Garlic Parmesan Pasta if you want to keep it longer. This is a good way to save extra servings or meal prep for busy days. To freeze, let the pasta cool completely. Then, place it in freezer-safe containers. Make sure to leave some space for expansion. It lasts up to two months in the freezer. For thawing, move the container to the fridge overnight. For a quicker option, you can use the microwave on a defrost setting. Avoid thawing at room temperature to keep the pasta safe to eat. One-Pot Garlic Parmesan Pasta lasts about three to four days in the fridge. Store it in an airtight container. Make sure it cools before sealing it. This helps keep it fresh and tasty. If you want to enjoy it later, check for any signs of spoilage before eating. Yes, you can make this dish gluten-free! Just use gluten-free pasta instead of regular fettuccine or spaghetti. Many great brands offer gluten-free options that cook well. Follow the cooking time on the package for best results. Your dish will still be creamy and delicious. The best way to reheat leftover pasta is on the stovetop. Add the pasta to a skillet over low heat. You may want to add a splash of broth or cream to keep it moist. Stir it gently until heated through. This method helps maintain the creamy sauce. You can also use a microwave if you're in a hurry. Yes, you can use water instead of broth. However, using broth adds more flavor to the dish. If you use water, consider adding a pinch of salt or extra seasonings. This helps enhance the taste. The dish will still be good, but broth makes it richer. Absolutely! If you love garlic, feel free to add more. You can increase the minced garlic to six cloves or more. Just be careful not to burn it when sautéing. More garlic will add a stronger flavor to the dish. It’s a great way to enhance the taste! This pasta pairs well with many side dishes. A simple green salad works great. You can also serve garlic bread for a nice crunch. For a heartier meal, grilled chicken or shrimp complements the dish nicely. Choose what you like best! Yes, you can make this pasta ahead of time. Cook it and let it cool completely. Then store it in the fridge for up to four days. When ready to eat, just reheat it gently. This is perfect for meal prep or busy nights. This blog post shows how to make One-Pot Garlic Parmesan Pasta. We covered the essential ingredients, step-by-step instructions, and tips for success. You can easily adjust flavors with different cheeses or spice levels to fit your taste. Remember to store leftovers properly and reheat them to keep the pasta creamy. Enjoy trying different add-ins and variations. This dish is simple yet full of flavor. You can impress friends and family with this quick meal that is sure to please!](https://stirredrecipes.com/wp-content/uploads/2025/06/408f87d2-1786-4f99-afb9-016b12bf992e.webp)
Craving a quick and tasty meal? Try my One-Pot Garlic Parmesan Pasta! This dish combines garlic, creamy sauce, and pasta into a comforting, flavorful dinner that you can make in …
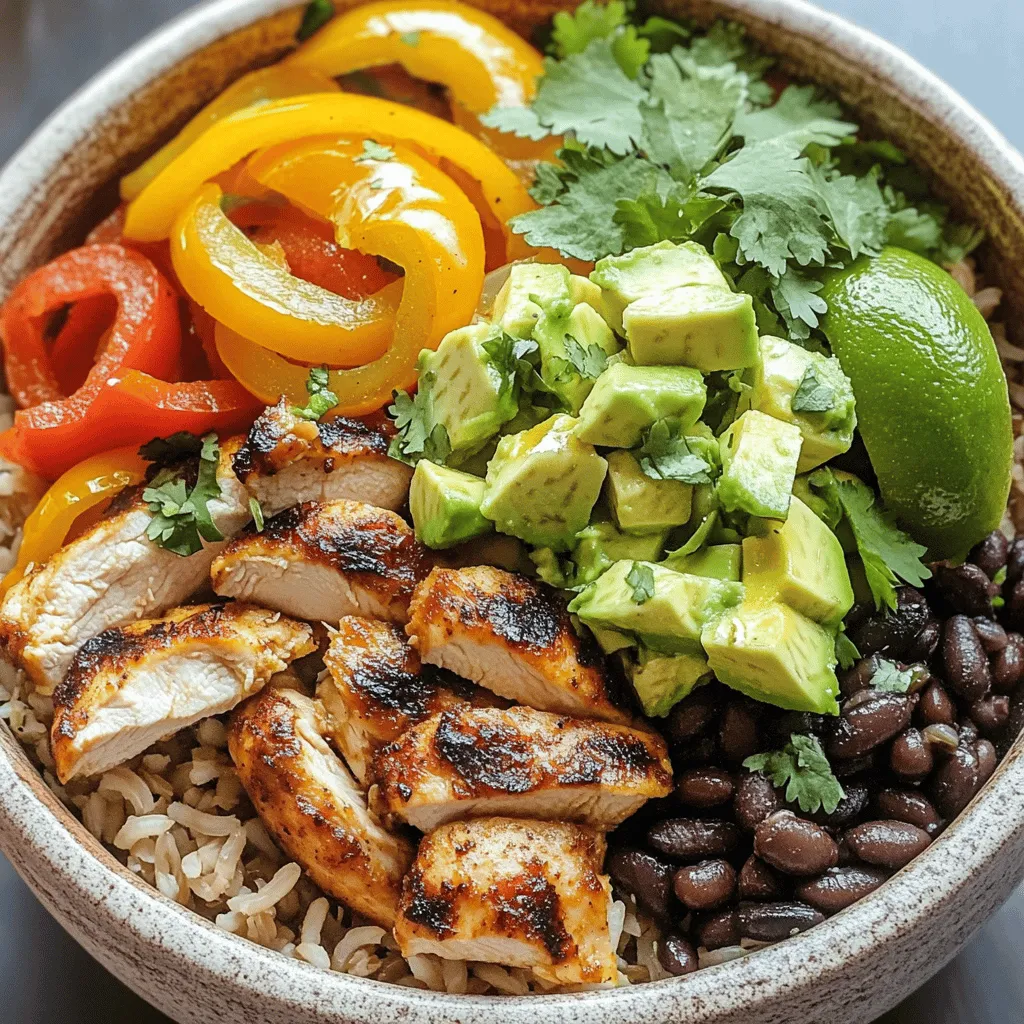
Are you ready to spice up your meal prep? This Flavorful Chicken Fajita Burrito Bowl is not just tasty but also easy to make. With tender chicken, colorful veggies, and …
![For quick and easy summer meals, you need simple items. Here’s what to gather for a delicious dish: - 1 cup quinoa, rinsed - 2 cups vegetable broth - 1 can (15 oz) chickpeas, drained and rinsed - 1 cup cherry tomatoes, halved - 1 cucumber, diced - 1/4 red onion, finely chopped - 1/4 cup parsley, chopped - 1/4 cup feta cheese, crumbled (optional) - Juice of 2 lemons - 3 tablespoons olive oil - 1 teaspoon cumin - Salt and pepper to taste These ingredients come together quickly. You can whip up a fresh meal in no time. Using fresh ingredients makes a big difference. Look for seasonal produce to brighten your dish. When you choose ripe, local veggies, you get more flavor. Fresh herbs also add a punch. They take your meal from good to great. For instance, parsley gives a nice finish to the quinoa salad. Don’t be afraid to change things up! You can add extra items to suit your taste. Here are some fun options: - Grilled chicken for added protein - Avocado for creaminess - Nuts for crunch These add-ins let you personalize your meal. Mix and match to find what you love. Want to try something unique? Consider adding spicy ingredients for a kick! Explore the [Full Recipe] for more ideas and inspiration. To make Zesty Quinoa and Chickpea Salad, follow these steps closely: 1. Cook the Quinoa: In a medium pot, mix 1 cup of rinsed quinoa with 2 cups of vegetable broth. Bring to a boil. Then, turn the heat down low, cover, and let it simmer for 15 minutes. The quinoa will be fluffy and the broth should be gone. 2. Make the Dressing: In a small bowl, whisk together the juice of 2 lemons, 3 tablespoons of olive oil, 1 teaspoon of cumin, salt, and pepper. 3. Combine Ingredients: In a big bowl, mix the cooked quinoa, 1 can of drained chickpeas, 1 cup of halved cherry tomatoes, 1 diced cucumber, 1/4 chopped red onion, and 1/4 cup of chopped parsley. 4. Dress the Salad: Pour the dressing over the salad. Gently toss everything together. 5. Serve: If you like, sprinkle 1/4 cup of crumbled feta cheese on top before serving. This dish is fresh, tasty, and perfect for summer. You can find the full recipe above. For other summer meals, keep it simple. Here are quick steps for each: - Grilled Peach and Arugula Salad: Grill peach halves until they show marks. Toss arugula with grilled peaches and drizzle with a mix of honey, balsamic vinegar, and olive oil. - Creamy Avocado and Lime Pasta: Cook pasta, then blend ripe avocados, garlic, lime juice, and basil. Mix with pasta and enjoy. - Spicy Cucumber and Mango Salsa: Dice cucumber, mango, red bell pepper, and red onion. Combine with lime juice and cilantro. Let it sit to enhance flavors. To achieve the best texture and flavor in your summer meals: - Choose Fresh Ingredients: Always use fresh, seasonal produce. This makes a big difference in taste. - Don’t Overcook: Be careful not to overcook vegetables. They should stay crisp and vibrant. - Tweak the Seasoning: Taste your dishes as you cook. Adjust salt, pepper, and spices to suit your palate. - Let Flavors Blend: Allow salads and salsas to rest for a few minutes after mixing. This helps the flavors come together. These tips can help elevate your summer meals, making them more delightful. Enjoy your cooking journey! To make summer cooking easy, I focus on quick methods. Grilling adds great flavor. It also cooks meals fast. Roasting vegetables brings out their natural sweetness. Steaming keeps them bright and crisp. These techniques work well with fresh ingredients. Adding herbs and spices can change a dish. Fresh herbs like basil or cilantro bring brightness. A splash of citrus, like lemon or lime, adds zest. Consider using flavored oils, such as garlic or chili oil, for extra depth. Don't forget to season with salt and pepper to taste. Meal prep can save time during the week. Cook grains like quinoa or rice in advance. Chop veggies and store them in the fridge. Make dressings ahead, too. You can mix them right before serving. This way, you can quickly assemble meals without stress. For a refreshing dish, try the Zesty Quinoa and Chickpea Salad [Full Recipe]. {{image_2}} You can easily adjust the ingredients to fit many diets. If you want a vegan option, swap the feta cheese in the Zesty Quinoa and Chickpea Salad for avocado. This keeps it creamy and adds healthy fats. For a gluten-free meal, use quinoa or rice pasta instead of regular pasta in the Creamy Avocado and Lime Pasta. These swaps let you enjoy great meals while staying true to your diet. Adding unique flavors can make classic dishes exciting. In the Grilled Peach and Arugula Salad, try using burrata cheese instead of goat cheese. It adds a rich, creamy texture that pairs well with the grilled peaches. For the Spicy Cucumber and Mango Salsa, toss in some diced pineapple for an extra sweet twist. This fruit addition brings a new level of freshness to the salsa. You can swap traditional ingredients for healthier options. For example, use whole wheat pasta in the Creamy Avocado and Lime Pasta. This adds fiber and helps you feel full longer. Instead of using regular olive oil, try extra virgin olive oil for a richer flavor in any salad dressing. It also provides more healthy fats. Making these simple changes can boost the health factor of your meals without losing taste. Storing leftovers correctly keeps your meals fresh and safe. First, let the food cool down to room temperature. This step helps avoid condensation in your storage containers. I like to use airtight containers to keep moisture in and air out. Label each container with the date, so you know when to eat it. Most summer meals stay good for three to four days in the fridge. To keep summer meals fresh, store them in the fridge right after cooking. Avoid leaving food out for more than two hours. If you plan to eat a meal later, separate it into smaller portions. This method cools the food faster and helps it stay fresh longer. Use fresh herbs or citrus zest before serving to brighten up flavors. Freezing is a great way to save meals for future use. Choose meals that freeze well, like soups or stews. Cool the food completely before putting it in freezer bags. Squeeze out as much air as possible to prevent freezer burn. Label the bags with the meal name and date. Most meals last up to three months in the freezer. When you're ready to eat, thaw in the fridge overnight before reheating. For a great summer meal, try the Zesty Quinoa and Chickpea Salad. This dish is not only fresh but also easy to store. Enjoy every bite! [Full Recipe] You can easily make these meals vegan by swapping out animal products. For instance, in the Zesty Quinoa and Chickpea Salad, leave out the feta cheese. Use a vegan cheese alternative or just skip it. For the Creamy Avocado and Lime Pasta, you can omit the Parmesan cheese or switch to a plant-based version. When using meat, replace it with tofu, tempeh, or legumes. Incorporate more vegetables to keep the dish hearty and satisfying. Always check sauces for hidden animal products like fish sauce or dairy. Side dishes can add variety to your meal. Here are some simple options: - Garlic bread pairs well with pasta dishes. - A light green salad complements any main dish. - Grilled veggies are great alongside any protein. - Roasted potatoes or sweet potatoes offer a nice contrast in texture. - Fresh fruit salads provide a sweet finish. These sides are quick to prepare and will enhance your dining experience. Yes, you can prepare these meals ahead of time. Many of these dishes taste even better after sitting for a while, as flavors meld together. - Zesty Quinoa and Chickpea Salad can be made a day in advance. Store it in the fridge, and add dressing just before serving. - Grilled Peach and Arugula Salad can have the peaches grilled ahead of time. Toss together right before serving for freshness. - Creamy Avocado and Lime Pasta is best made fresh, but you can prepare the sauce ahead. Just mix it with hot pasta when you are ready to serve. Being organized helps you enjoy your summer meals more. In this post, we covered tasty ingredients for your summer meals. You learned how to choose fresh items, follow simple steps, and customize recipes. I also shared key tips for cooking and storing food. Remember, you can mix and match ingredients to fit your taste and dietary needs. With these skills, you can enjoy fresh, fun meals all summer long. Now, get cooking and enjoy wholesome flavors!](https://stirredrecipes.com/wp-content/uploads/2025/06/5b3b6754-25ec-424d-98bf-cbc2d6e01137.webp)
Looking for fresh, light meals this summer? You’ve come to the right place! I’ll share 30 tasty recipes that are easy to prepare and perfect for warm days. From vibrant …
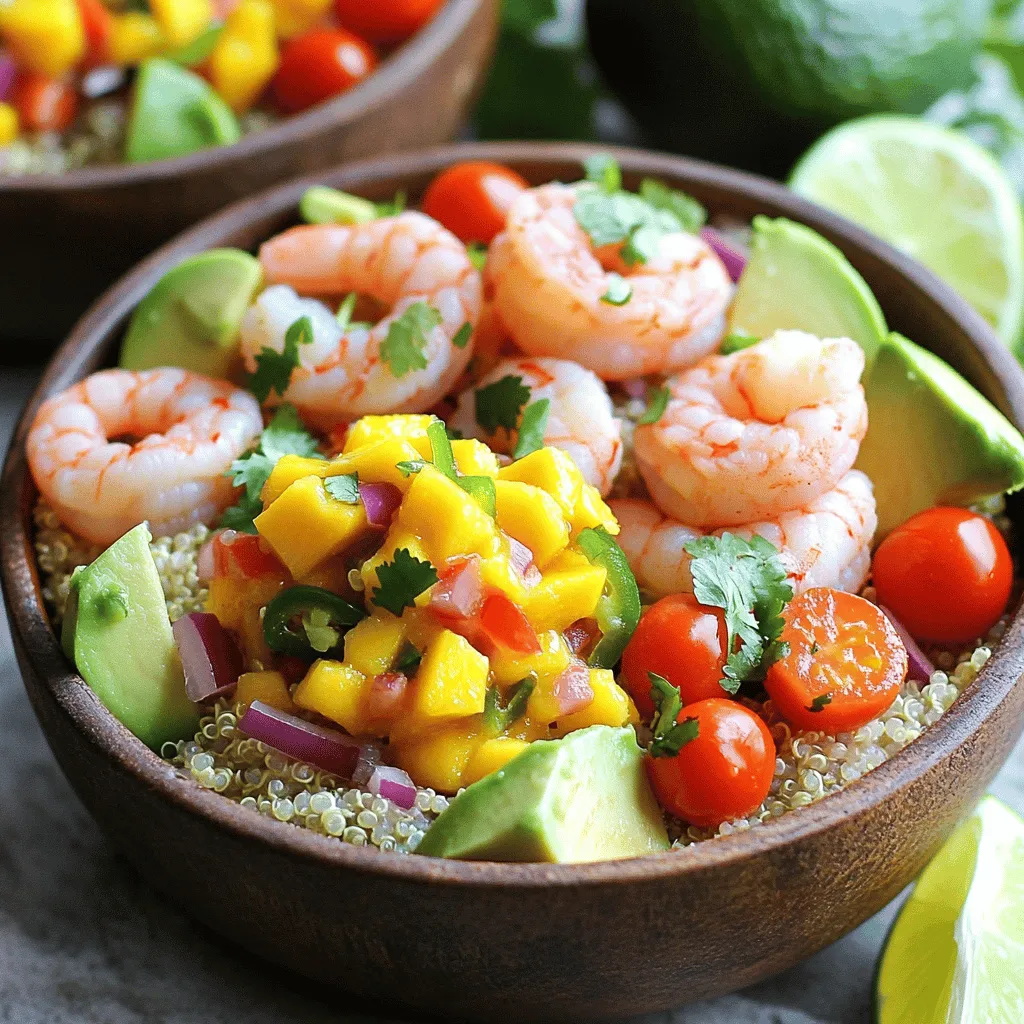
Looking for a fresh and easy meal that bursts with flavor? My Savory Shrimp and Avocado Bowls with Mango Salsa is your answer! This dish combines tender shrimp, creamy avocado, …
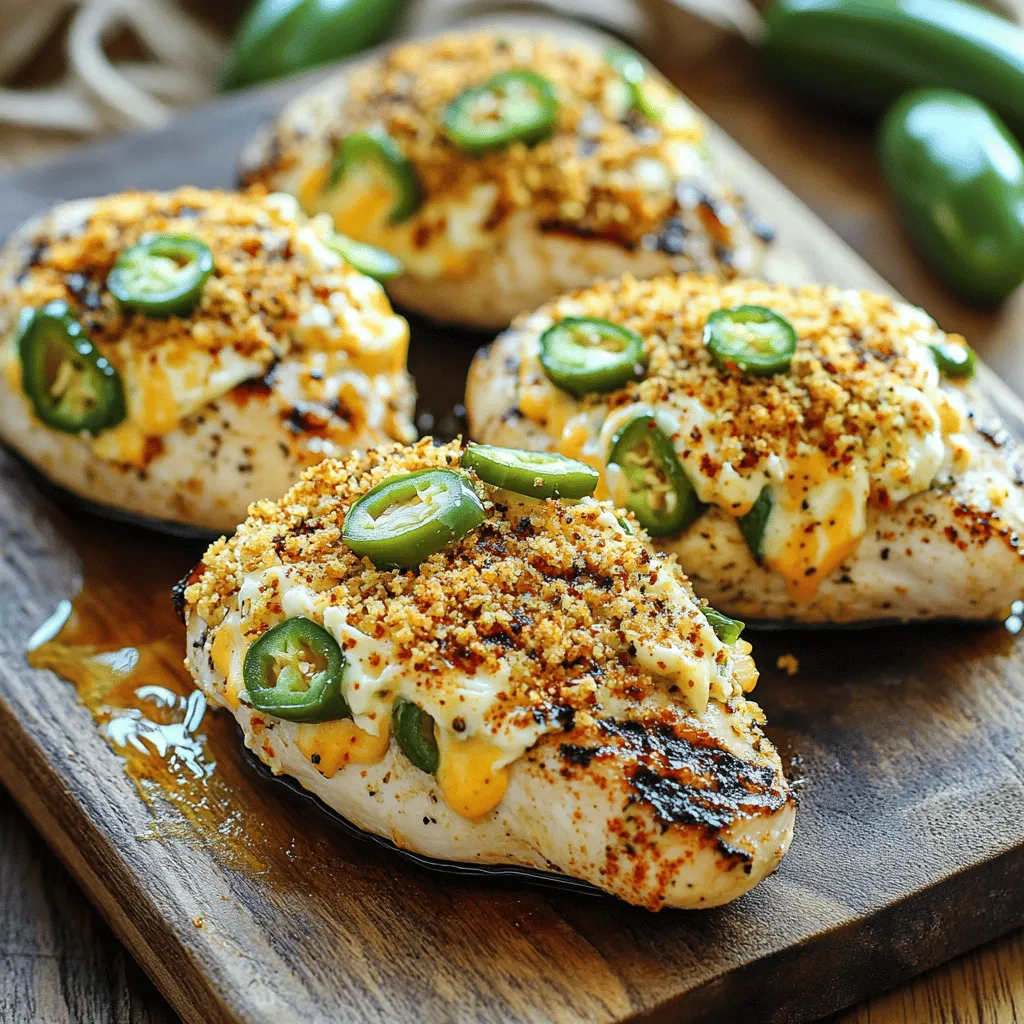
Are you ready to spice up your dinner routine? This Jalapeno Popper Grilled Chicken is the perfect blend of juicy chicken, creamy cheese, and a touch of heat. It’s simple …
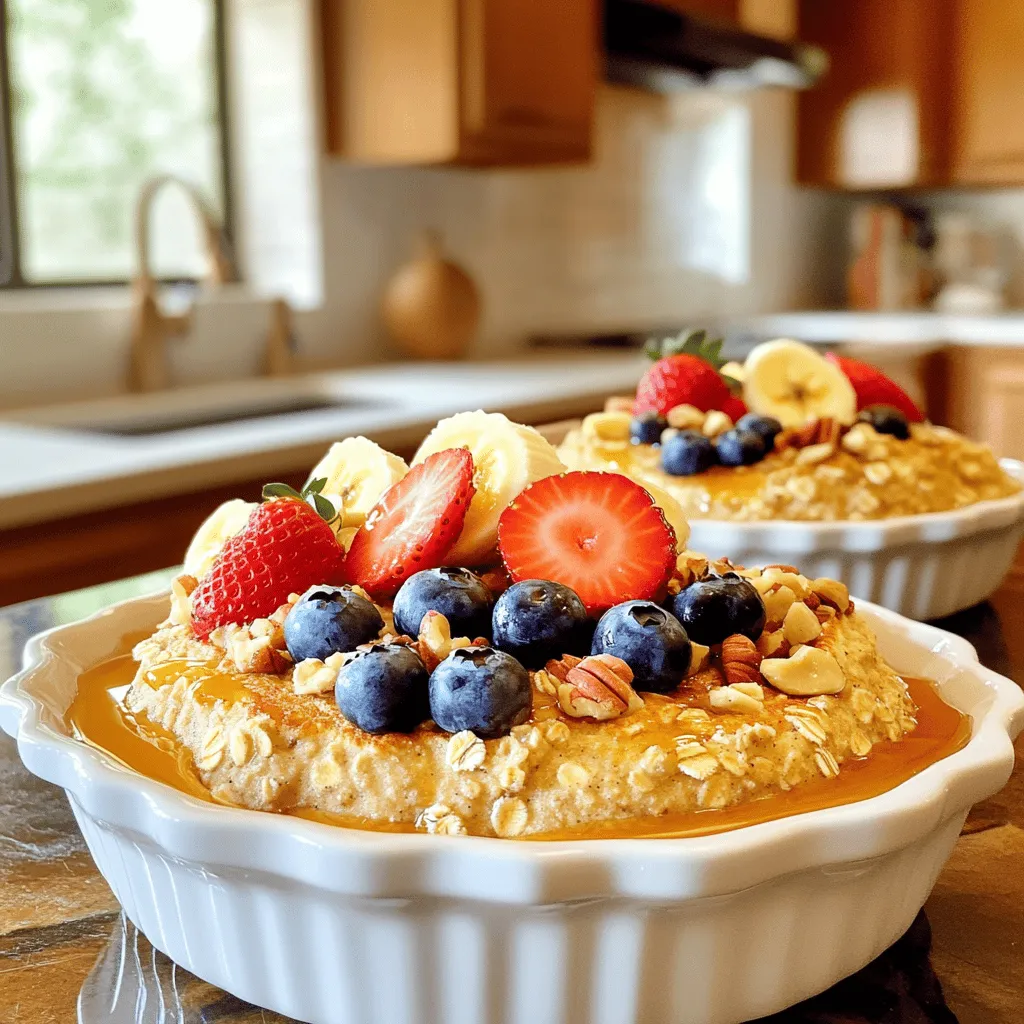
Are you looking for a healthy twist on breakfast? Try my Baked Protein Pancake Bowls! They are easy to make, packed with nutrition, and taste fantastic. With simple ingredients like …

Are you ready to enjoy a sweet treat without the guilt? These Healthy Chocolate Cookie Cups are simple to make and pack a rich, chocolatey flavor that you’ll love. With …
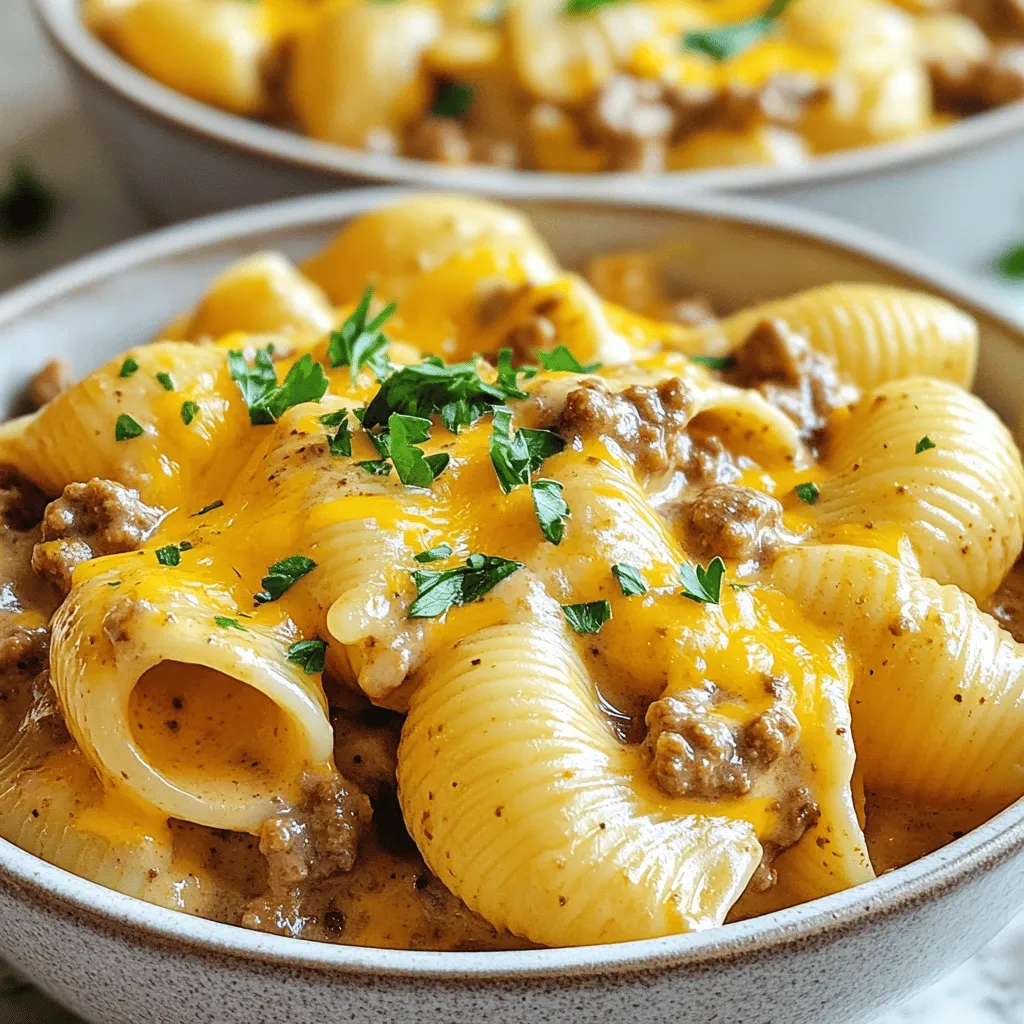
Are you ready for a cozy meal that warms your soul? This Creamy Beef and Shells recipe is simple and satisfying. With just a few easy steps, you can whip …