Skip to content
Stirred Recipes
  • Home
  • Appetizers
  • Desserts
  • Salads
  • Breakfast
  • Dinner
  • Privacy Policy
  • Contact
  • About

Chef Luca

Authentic Mexican Pickled Carrots Flavorful Twist Recipe

June 24, 2025 by Chef Luca
- 4 medium-sized carrots - 1 small white onion - 1 cup apple cider vinegar - 1 cup water - 1 tablespoon sugar - 1 teaspoon salt - 2 cloves garlic - 1 teaspoon dried oregano - 1/2 teaspoon cumin seeds - 1-2 jalapeños - Bay leaves (optional) Choose fresh, firm carrots for the best taste. Fresh vegetables bring out the flavors. If you can, buy organic carrots and onions. Organic produce tends to be cleaner and tastier. The choice matters when pickling. Look for bright colors and no soft spots. You can swap apple cider vinegar for white vinegar or rice vinegar. Each gives a different taste. Want a twist? Add spices like coriander or mustard seeds. You can also pickle radishes, cucumbers, or cauliflower alongside carrots. These add fun textures and flavors to your dish. To start, you need to prepare your vegetables properly. First, peel the carrots. Then, slice them into thin rounds. This helps them soak up flavor better. Next, take the onion and slice it thinly too. This will add a nice crunch and flavor. Now, let’s make the pickling liquid. In a medium saucepan, combine: - 1 cup apple cider vinegar - 1 cup water - 1 tablespoon sugar - 1 teaspoon salt - 2 cloves garlic, peeled and smashed - 1 teaspoon dried oregano - 1/2 teaspoon cumin seeds - Bay leaves (optional) Bring this mixture to a gentle boil over medium heat. Stir it occasionally. Make sure the sugar and salt dissolve. Once boiling, remove it from heat and let it cool for about 10 minutes. While the pickling liquid cools, let’s jar the vegetables. In a clean jar, layer the sliced carrots, onion, and jalapeños. Pack them tightly but don’t squish them. This makes sure each bite is full of flavor. Next, carefully pour the cooled pickling liquid over the vegetables. Make sure they are fully submerged. If they are not, add more water and vinegar in equal parts. Seal the jar with a lid and let it cool to room temperature. For the best flavor, refrigerate the jar for at least 24 hours. If you can wait, let it sit for 3 to 5 days. The longer it sits, the better the taste. Refrigeration is important to keep everything fresh and safe to eat. Enjoy your pickled carrots as a tasty side dish or topping! For the full recipe, check the earlier section. To make your pickled carrots just right, you can adjust the spice level. If you like heat, leave some seeds in the jalapeños. For less heat, remove all the seeds. This small step changes everything. You can also add a touch of sweetness. Try adding more sugar or some honey to the pickling mix. This balance gives depth to the flavor. One common mistake is not sealing the jar correctly. Always check that the lid is tight. If air gets in, the carrots can spoil. Another issue is not letting the pickling liquid cool. Pouring hot liquid over veggies can make them soggy. You should also avoid overpacking the jar. If you squish the veggies, they won't pickle well. Leave space for the liquid to flow around them. Pickled carrots pair well with tacos and sandwiches. They add a crunchy, zesty taste. You can also use them in salads for a fresh kick. Another fun idea is to top burgers with them. They give a bright pop of color and flavor. You can even serve them as a snack with chips or cheese. Get creative and enjoy! {{image_2}} In Mexico, pickled carrots change by region. Each area adds its flair. For example, in Baja California, you might find them with fresh lime juice and cilantro. In Oaxaca, they may include spices like allspice or cloves. These local touches create unique flavors, making every jar special. You can experiment with ingredients based on where you are or what you love. You can easily make this recipe vegan. Just skip any animal products, and you’re set! For gluten-free options, check your vinegar label. Most apple cider vinegar is gluten-free. If you want to store them for a long time, canning is a great choice. Use sterilized jars and follow safe canning practices. This keeps your carrots fresh and tasty for months. Pickled carrots are great in salads. Just toss them in for a crunchy bite. You can also add them to salsas for extra zing. They brighten up any dish! If you want to make gifts, pack pickled carrots in jars. Tie a ribbon around the lid, and you have a lovely present. Everyone loves homemade treats! For the full recipe, check the main article. Store your pickled carrots in a clean glass jar. Make sure to use a jar with a tight lid to keep out air. This helps keep your carrots crunchy and tasty. If you want them to last longer, refrigerate them. You can also can them for longer storage. Canning requires special jars and boiling, but it can keep them fresh for months. Pickled carrots will stay fresh in the fridge for about two to three weeks. You can tell if they are bad if they smell sour or look cloudy. If you see mold, throw them away. Always check for signs of spoilage before eating. Fresh, crisp carrots will taste great, so enjoy them while they are good. Don't toss that leftover pickling liquid! You can use it in other recipes. It makes a great salad dressing or marinade. You can also add it to soups for an extra kick. If you want more pickled veggies, just add more sliced carrots or other root vegetables to the jar. They will soak up that yummy flavor! You should let your pickled carrots sit for at least 24 hours. This time helps the flavors mix well. For the best taste, wait 3 to 5 days. The longer they sit, the better they taste. This marinating time allows the vinegar to soak into the carrots. It also makes the flavors bright and tangy. Yes, you can use many other vegetables for pickling. Some great options include: - Radishes - Cauliflower - Bell peppers - Green beans - Zucchini Mix and match to create your own unique blend. Each vegetable adds its own flavor and texture. They all pickle well with the same spices and vinegar. Pickled carrots are very versatile. You can serve them with: - Tacos - Sandwiches - Salads - Grilled meats - Rice dishes They add a crunchy and tangy kick to any meal. You can even snack on them straight from the jar! Pickled carrots are safe to eat for up to 2 months in the fridge. After that, they may lose their crunch and flavor. Always check for any signs of spoilage, like off smells or mold. If they look or smell strange, it's best to toss them. Remember to keep them sealed tightly to maintain freshness. For more ideas, check the Full Recipe for storing tips! Pickling carrots can transform simple veggies into a savory delight. We covered ingredients, preparation steps, and even regional variations. Always use fresh produce for the best taste. Remember to cool your pickling liquid properly and avoid overpacking jars. Try new flavors as you experiment with spices. Pickled carrots are great for salads or as a tasty snack. Enjoy the process and make it your own! Happy pickling!

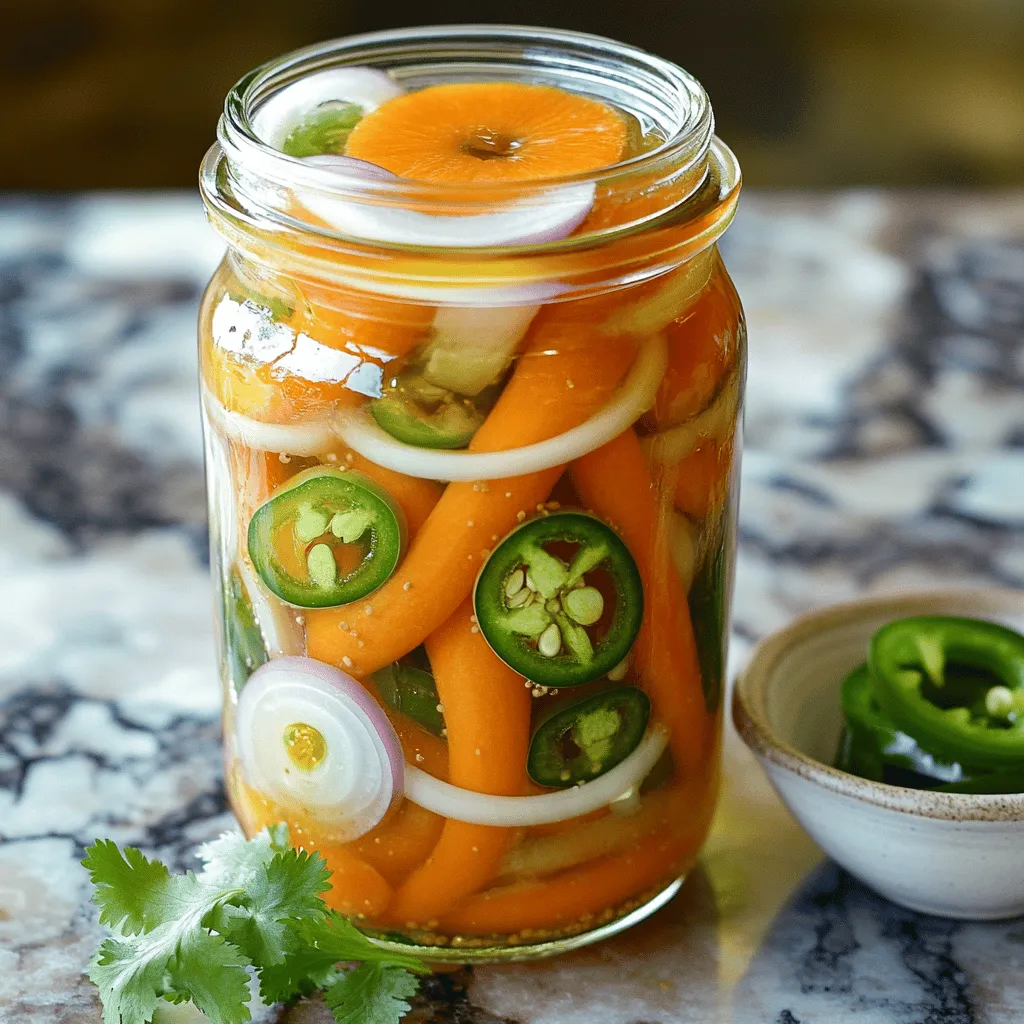
If you want to add a zesty twist to your meals, authentic Mexican pickled carrots are the way to go. Bursting with flavor and crunch, this easy recipe will elevate …

Read more

Categories Appetizers

Raspberry Lemon Cookies Delightful and Easy Recipe

June 23, 2025 by Chef Luca
- 1 cup unsalted butter, softened - 1 cup granulated sugar - 1 large egg - 1 teaspoon vanilla extract - Zest of 1 lemon - 2 cups all-purpose flour - 1 teaspoon baking powder - ½ teaspoon baking soda - ½ teaspoon salt - 1 cup fresh raspberries (or frozen, thawed and drained) These ingredients are key to making soft and tasty raspberry lemon cookies. The butter gives them a rich base. Granulated sugar adds sweetness, while the egg helps bind everything. Fresh raspberries bring a burst of flavor. Lemon zest adds a bright, fresh taste that lifts the cookies. - ½ cup powdered sugar (for icing) - 2 tablespoons lemon juice (for icing) - Additional flavorings You can add a drizzle of icing to make the cookies even better. The icing uses powdered sugar and lemon juice. This adds a sweet and tangy touch. Feel free to get creative with other flavorings if you'd like. You can mix in different extracts or spices to make them your own. To see the full recipe, check out the details above. 1. First, preheat your oven to 350°F (175°C). This helps the cookies bake evenly. 2. Next, line a baking sheet with parchment paper. This makes it easy to remove the cookies later. 3. In a mixing bowl, cream the softened butter and granulated sugar together. Mix for about 3-4 minutes until it’s light and fluffy. This step adds air, making the cookies soft. 1. Add the large egg, vanilla extract, and lemon zest to your butter mixture. Mix until everything blends well. 2. In another bowl, whisk together the all-purpose flour, baking powder, baking soda, and salt. 3. Gradually mix the dry ingredients into the wet ingredients. Stir until just combined; don't overmix. 4. Now, gently fold in the fresh raspberries. Be careful not to crush them too much. The dough will be thick but soft. 1. Use a tablespoon to drop dough onto the prepared baking sheet. Space them about 2 inches apart. 2. Bake your cookies for 12-15 minutes. The edges should look golden, and the centers should be set. They may seem a bit soft; that’s normal! They will firm up as they cool. 3. Allow the cookies to cool on the baking sheet for 5 minutes. Then, transfer them to a wire rack to cool completely. For the full recipe, check the detailed steps above. Enjoy your baking! To get the right texture, use softened butter. This helps the cookies become fluffy. Cream the butter and sugar for about 3-4 minutes. This makes a light and airy base. Bake at 350°F (175°C) for 12-15 minutes. The edges should be golden, while the centers stay soft. Drizzling the icing is easy! Use a spoon or a small bottle for control. Start in the center and let it flow outward. For a fun look, sprinkle fresh raspberries or lemon zest on top after icing. This adds color and flavor. If your cookies spread too much, check the butter. It should be softened, not melted. Chill the dough for 30 minutes before baking. This helps keep their shape. If your cookies turn out dry or dense, try adding a bit more butter or lemon juice. This will add moisture and flavor. {{image_2}} You can change the fruit in these cookies. Try using blueberries or cranberries for a new twist. Each fruit brings its own taste and color. You can also add zest from other citrus fruits like limes or oranges. This will give your cookies a fresh, bright flavor. Mixing these fruits with the lemon zest creates a fun blend. Experiment and find your favorite mix! If you need a gluten-free option, you can swap all-purpose flour for gluten-free flour. There are many good blends available. Just make sure to check the package for the right ratio. You can also use alternative sweeteners like honey or agave syrup. These will change the taste and texture a bit, but they work well in this recipe. How you serve these cookies can make a big difference. You might try different icing styles. Drizzle the icing in zigzags or use a simple glaze for a shiny finish. You can also stack the cookies on a decorative plate. Adding fresh raspberries or a sprinkle of lemon zest on top looks nice and adds a flavor boost. Use your creativity to make them look great! To keep your Raspberry Lemon Cookies fresh, store them in a cool, dry place. Use an airtight container to seal in the moisture. This helps cookies stay soft and tasty. You can stack them in layers with parchment paper in between to avoid sticking. You can freeze these cookies for later. To freeze, place them in a single layer on a baking sheet. Once frozen, move them to a freezer bag or airtight container. Make sure to label the bag with the date. They can last up to three months in the freezer. To thaw, just leave them at room temperature for about an hour. You can also warm them in the oven for a few minutes. This brings back the fresh-baked taste. If you want to enjoy them later, you can follow the Full Recipe for more tips on making these cookies perfect each time! How do I know when the cookies are done baking? You can tell when the cookies are done by checking the edges. They should be golden brown. The centers may look a bit soft, but that’s okay. They will set as they cool. If the edges are firm and the center is slightly puffy, your cookies are ready! Can I use frozen raspberries in the recipe? Yes, you can use frozen raspberries! Just make sure to thaw and drain them first. This helps prevent excess moisture in your dough. If you add them frozen, they may break apart and make your cookies wet. What can I substitute for butter in this recipe? If you want a dairy-free option, you can use coconut oil or vegan butter. Both work well in this recipe. Just ensure they are softened before mixing for best results. How long do Raspberry Lemon Cookies last? Raspberry Lemon Cookies can last about one week at room temperature. Store them in an airtight container to keep them fresh. You can also freeze them for up to three months if you want to save some for later. Just make sure they cool completely before freezing! Raspberry Lemon Cookies are fun to make and delicious to eat. We’ve covered the key ingredients, steps to bake them, and tips for success. I showed you how to vary flavors and store cookies for later. Remember, baking is about experimenting. Don’t hesitate to try new fruits or sweeteners. With practice, you’ll master the art of cookie-making. Enjoy each bite of your sweet creations!

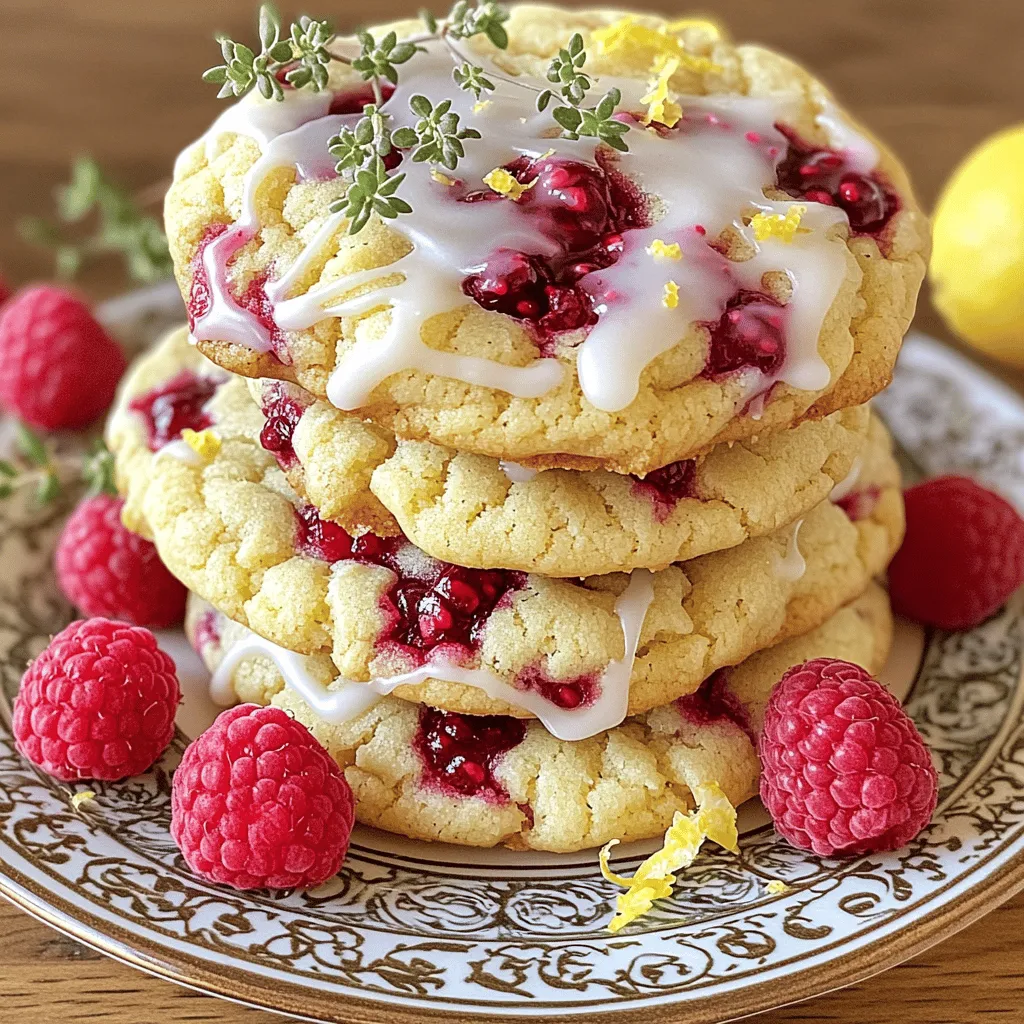
Are you ready to bake something delicious? These Raspberry Lemon Cookies are both easy and delightful! With a perfect blend of tart raspberries and zesty lemon, they’ll brighten any day. …
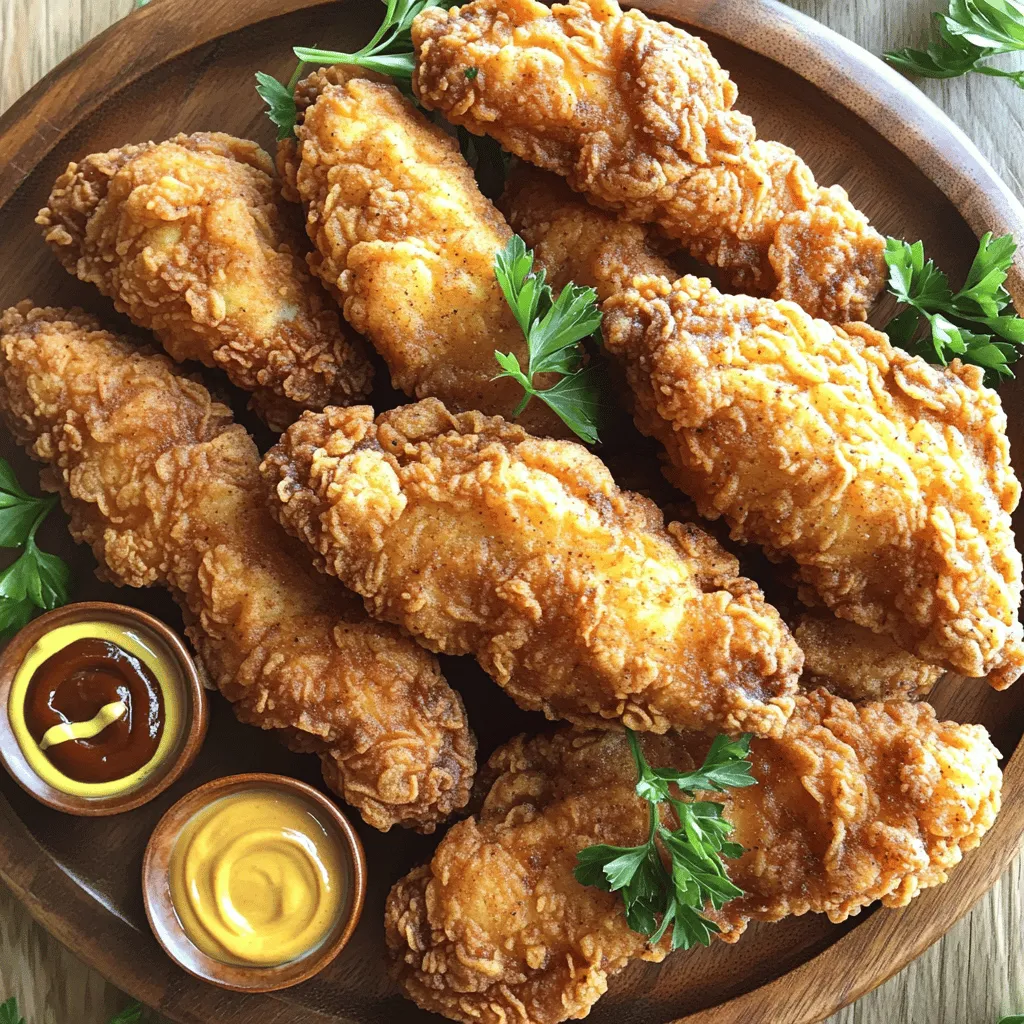
Read more

Categories Desserts

Savory Southern Fried Chicken Crunchy and Juicy Bite

June 23, 2025 by Chef Luca
For this recipe, use: - 4 pieces of chicken (legs and thighs) These parts give you tender meat and crispy skin. They absorb flavor well and cook evenly. You will need: - 2 cups all-purpose flour - 1 tablespoon garlic powder - 1 tablespoon onion powder - 1 tablespoon paprika - 1 teaspoon cayenne pepper (adjust to taste) - 1 teaspoon dried thyme - Salt and pepper to taste These spices add depth to your chicken. The paprika adds a nice color and flavor, while the cayenne gives it a kick. For marinating, you will need: - 2 cups buttermilk Buttermilk helps the chicken stay juicy. It also helps the flour stick during frying. Marinate the chicken for at least 4 hours or overnight for the best taste. This step is key for making your Southern fried chicken truly special. Check out the Full Recipe for complete instructions. Start by gathering your chicken pieces. I like to use legs and thighs for their juicy flavor. Place the chicken in a large bowl. Pour in the buttermilk until all pieces are covered. The buttermilk helps tenderize the chicken and adds flavor. Cover the bowl and refrigerate for at least 4 hours. For best results, marinate overnight. This step makes the chicken extra juicy. While the chicken marinates, prepare the flour mixture. In a separate bowl, combine the all-purpose flour, garlic powder, onion powder, paprika, cayenne pepper, thyme, salt, and pepper. Mix well until everything is blended. This mixture gives your chicken its crispy coating. You can adjust the cayenne pepper to make it spicier or milder, based on your taste. Once the chicken has marinated, it’s time to dredge. Remove each piece from the buttermilk, letting the excess drip off. Next, coat the chicken in the flour mixture. Press the flour onto the chicken to make a thick layer. Shake off any extra flour before frying. Now, heat about 1 inch of vegetable oil in a deep skillet over medium-high heat. The oil should reach about 350°F (175°C). Carefully place the coated chicken in the hot oil, skin-side down. Fry the chicken in batches if needed to avoid crowding. Cook for about 12-15 minutes on each side. The chicken should turn golden brown and reach an internal temperature of 165°F (74°C). Once cooked, transfer the chicken to a wire rack or a plate with paper towels. This helps drain any extra oil. Let the chicken rest for a few minutes before serving. Enjoy your savory Southern fried chicken with your favorite sides! For the complete recipe, check out the [Full Recipe]. To get that crunchy coating, start with a good marinate. Soak your chicken in buttermilk. This helps tenderize the meat and adds flavor. After marinating, use a thick flour mix. Combine flour with spices like garlic powder and paprika. Dredge the chicken well, pressing the flour onto the meat. This ensures the coating sticks nicely during frying. One big mistake is not letting the chicken rest after frying. If you cut into it right away, the juice will run out and make it dry. Another error is overcrowding the pan. Fry the chicken in batches to keep the oil hot. This helps achieve that perfect golden brown color. Lastly, don’t skip the buttermilk marination. It’s vital for flavor and texture. The right oil temperature is key. Heat the oil to 350°F (175°C). If it's too low, the chicken will soak up oil and turn greasy. If it’s too high, the outside cooks too fast while the inside stays raw. Use a thermometer for accuracy. Fry in small batches to keep the temperature steady. This way, you’ll get perfectly cooked, crunchy fried chicken every time. For a full recipe with all the details, check out the [Full Recipe]. {{image_2}} I love adding a kick to my Southern fried chicken. To make it spicy, use cayenne pepper. You can add more than the recipe calls for if you like heat. You can also mix in some hot sauce with the buttermilk. This gives the chicken a deep flavor. It makes each bite exciting and bold. Not in the mood to fry? Try oven-baked Southern chicken! You still get that crunch but without the oil. Coat the chicken like usual, then place it on a baking sheet. Bake at 425°F (220°C) for about 40 minutes. Flip the pieces halfway for even cooking. You still enjoy juicy chicken with a crispy skin! If you need gluten-free chicken, swap the flour. Use a gluten-free all-purpose mix instead. You can also use almond flour or cornstarch for a different texture. The taste stays great, and you won't miss the regular flour. Enjoy every bite without worry! For more details on making this dish, check out the Full Recipe. To keep your leftover fried chicken fresh, let it cool down first. Place it in an airtight container. If you don’t have a container, wrap it tightly in plastic wrap. You can store it in the fridge for up to four days. If you want it to last longer, freezing is the way to go. For the best taste when reheating, use the oven. Preheat it to 375°F (190°C). Place the chicken on a baking sheet lined with foil. Heat for about 20 minutes or until it warms through. This method keeps the skin crispy and the meat juicy. You can also use an air fryer. Set it to 350°F (175°C) and heat for about 10 minutes. To freeze fried chicken, wrap each piece in plastic wrap. Then, place them in a freezer bag. Remove as much air as you can before sealing. This keeps the chicken fresh and prevents freezer burn. You can freeze the chicken for up to three months. When ready to eat, thaw it in the fridge overnight before reheating. For the full recipe, check out the details above! The best oil for frying Southern fried chicken is vegetable oil. It has a high smoke point. This means it can handle high heat without burning. Other good options are peanut oil and canola oil. These oils do not change the flavor of the chicken, so it stays tasty. I recommend marinating the chicken for at least 4 hours. If you have time, marinate it overnight. This allows the buttermilk to soak in and tenderize the meat. The longer it sits, the better the flavor. Remember to keep it in the fridge while it marinates. Yes, you can use chicken breasts for Southern fried chicken. They will cook faster than thighs or legs. Make sure to cut them into even pieces to ensure even cooking. Keep an eye on the cooking time, so they don't dry out. Southern fried chicken goes well with many sides. Here are some tasty options: - Cornbread - Coleslaw - Collard greens - Mashed potatoes - Macaroni and cheese These sides complement the chicken's crispy, juicy goodness. They also add a nice variety to your meal. For the full recipe, check out the detailed steps above! In this post, we covered how to make Southern fried chicken, focusing on ingredients, steps, and tips. You learned how the right chicken, seasoning, and marinating boost flavor. The frying process ensures a crispy coating, while our variations offer fun twists. Lastly, proper storage keeps your leftovers fresh. Enjoying this meal can be simple and fun. Follow these steps, and you’ll impress everyone with your cooking!

Do you crave the crunch and juiciness of Southern fried chicken? You’re not alone! This dish is a beloved classic, and with the right steps, you can master it at …
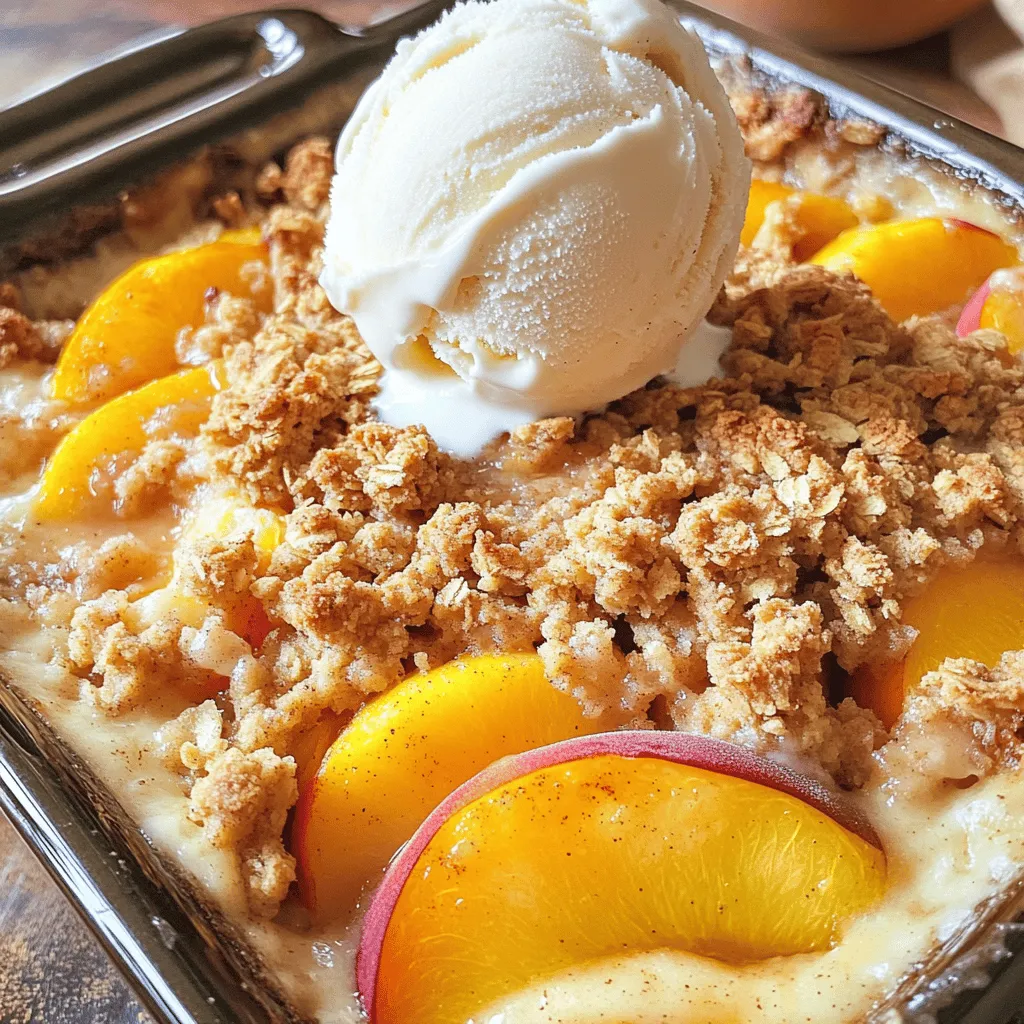
Read more

Categories Dinner

Peach & Strawberry Crisp Delectable Summer Dessert

June 23, 2025 by Chef Luca
- 4 large ripe peaches, sliced - 2 cups fresh strawberries, hulled and halved - 1 tablespoon lemon juice Fresh fruits are key for this crisp. I love using sweet peaches and juicy strawberries. They blend well together, creating a nice balance of flavors. First, slice your peaches into thin wedges. Make sure they are ripe for the best taste. Next, hull and halve your strawberries. Toss the fruit in a bowl with lemon juice. This adds brightness and helps keep the fruit fresh. - 1 cup rolled oats - 1/2 cup all-purpose flour - 1/3 cup brown sugar, packed - 1 teaspoon cinnamon - 1/4 teaspoon salt - 1/2 cup unsalted butter, melted Now, let's talk about the topping. It gives the crisp its crunchy texture. Start with rolled oats; they add a hearty bite. Mix in the flour to help bind everything. Brown sugar adds sweetness and a deep flavor. A touch of cinnamon gives warmth to the dish. Don’t forget the salt; it enhances all the flavors. Finally, pour over melted butter. This helps create that golden, crispy top. - Vanilla ice cream (for serving) Serving this crisp warm is a must. The best part? A scoop of vanilla ice cream on top. The creaminess of the ice cream pairs perfectly with the warm, fruity filling. You get a mix of hot and cold that is simply delightful. If you want a fun twist, try a flavored ice cream, like peach or strawberry. It adds an extra layer of flavor that elevates the dish. For the full recipe, check out the link above. - Preheat the oven to 350°F (175°C). - In a large bowl, combine the sliced peaches and halved strawberries. Add 1/4 cup of granulated sugar and 1 tablespoon of lemon juice. Gently toss the fruit to coat it well. This step brings out the sweet juices and balances the flavors. Once mixed, transfer the fruit to a greased 9x13 inch baking dish. - In another bowl, mix 1 cup of rolled oats, 1/2 cup of all-purpose flour, 1/3 cup of brown sugar, 1 teaspoon of cinnamon, and 1/4 teaspoon of salt. Stir these dry ingredients well until they are combined. - Pour in 1/2 cup of melted butter. Mix until the topping is crumbly and well combined. This creates a crunchy texture that pairs perfectly with the soft fruit. - Evenly layer the fruit mixture in the baking dish. - Spread the crisp topping over the fruit mixture. Make sure to cover all the fruit for an even bake. - Bake in the preheated oven for 30-35 minutes. You will know it’s done when the top is golden brown and the fruit is bubbling. The smell will fill your kitchen, making it hard to wait! For the full recipe, check out the [Full Recipe]. To make the best Peach & Strawberry Crisp, you need ripe fruits. Look for peaches that are slightly soft when you press them. They should have a sweet scent. For strawberries, choose bright red ones. They should be firm but not hard. Avoid any that look dull or have dark spots. To enhance flavor, add a pinch of cinnamon or nutmeg to your fruit mix. These spices bring out the sweetness. You can also try a bit of ginger for an extra kick. A golden-brown topping makes your dessert look and taste great. To achieve this, use melted butter in your topping mix. It helps the oats brown nicely. Bake until you see a rich golden color. Let your crisp cool for about 10 minutes after baking. This cooling time helps the fruit set. It also makes it easier to serve. If you cut it too soon, it may fall apart. One common mistake is overmixing the topping. Mix just until combined. Overmixing can make it tough instead of crumbly. Another mistake is serving it right out of the oven. Let it cool first. This helps the flavors meld together. It also prevents burns when you take a bite. For the full recipe, follow the steps closely for the best results. {{image_2}} You can switch up the fruits in your crisp. Try using mixed berries like blueberries, blackberries, or raspberries. They add a fun burst of flavor. Apples are also a great choice, especially sweet ones like Honeycrisp or Fuji. Their crunch contrasts well with the soft peaches and strawberries. If you want to explore tropical flavors, consider using mango or pineapple. These fruits bring a sunny taste to your dish. Combining peaches with tropical fruits can make a unique summer treat. If you're looking for a lighter option, consider gluten-free substitutes. You can use almond flour or coconut flour instead of all-purpose flour. This gives your crisp a nutty flavor and works well for those with gluten sensitivities. You can also cut back on sugar. Use just half the amount or swap granulated sugar for honey or maple syrup. This keeps the sweetness while making it a bit healthier. For a vegan version, swap butter for coconut oil or vegan butter. You can replace granulated sugar with coconut sugar or agave syrup. These changes keep the taste but remove animal products. If you're on a low-carb diet, use a sugar substitute like erythritol. You can also skip the oats and use nuts for the topping. This will keep your crisp crunchy while fitting into keto guidelines. You can find the full recipe at the beginning of this article. To store leftovers, let the crisp cool at room temperature. Then, cover it tightly with plastic wrap or foil. You can also place it in an airtight container. Refrigeration is best for short-term storage, while freezing is great for longer periods. If you choose to freeze, use a freezer-safe container. This keeps the flavors fresh and avoids freezer burn. To reheat for freshness, the best method is to use the oven. Preheat your oven to 350°F (175°C). Place the crisp in an oven-safe dish and cover it with foil. Heat for about 15-20 minutes until warm. You can also use the microwave for quick reheating but may lose some crispness. For serving, warm slices with a scoop of vanilla ice cream on top. This adds a lovely creaminess and contrast to the warm fruit. In the fridge, Peach & Strawberry Crisp lasts about 3-5 days. If you freeze it, it can last up to 3 months. Just make sure to wrap it well to keep out air. When ready to eat, thaw it in the fridge overnight before reheating. Enjoy the taste of summer any time! You can tell your crisp is ready when the top is golden brown. Look for bubbling fruit around the edges. The smell will fill your kitchen with sweetness. It usually takes about 30 to 35 minutes in the oven. If you see these signs, your dessert is done! Yes, you can prep this recipe in advance. You can slice the peaches and strawberries a few hours before baking. Just keep them in the fridge to stay fresh. You can also mix the crisp topping ahead of time. Store it in the fridge until you are ready to bake. This way, you save time on busy days! Absolutely! You can use many fruits in this crisp. Try apples for a fall twist. Berries like blueberries and raspberries work well too. For a tropical flavor, add pineapple or mango. Just choose ripe fruits that you enjoy. Each fruit will give a unique taste to your crisp! This blog post covered a delicious peach and strawberry crisp. We detailed fresh ingredients and a simple, step-by-step process. You learned how to prepare the fruit and make a crunchy topping. We shared tips for fruit selection and avoiding common mistakes. Variations and storage tips help you enjoy this dessert for days. Try this recipe to impress friends and family. It’s easy, tasty, and adaptable. Enjoy creating your own unique twist on this dessert!

Summer brings fresh fruit and sweet cravings. What better way to celebrate than with a Peach & Strawberry Crisp? This easy dessert combines juicy peaches and strawberries, topped with a …

Read more

Categories Desserts

Savory Southern Tomato Pie Easy and Flavorful Recipe

June 23, 2025 by Chef Luca
To make the perfect Southern tomato pie, you need a few key ingredients. This pie shines with fresh tomatoes and creamy goodness. Here’s what you’ll need: - 2 cups fresh ripe tomatoes, sliced - 1 teaspoon salt - 1 teaspoon black pepper - 1 cup mayonnaise - 1 cup shredded cheddar cheese - ½ cup crumbled feta cheese - 1 store-bought pie crust (or homemade if preferred) - 1 tablespoon olive oil - 1 teaspoon Dijon mustard These ingredients work together to create a rich, savory dish. The tomatoes add a burst of flavor, while the cheeses give a creamy texture. Herbs and cheeses elevate your tomato pie. I suggest using fresh basil and parsley for a garden-fresh taste. They add a nice aroma and flavor that brightens each bite. For cheese, cheddar and feta are my favorites. Cheddar melts beautifully, while feta adds a tangy kick. If you want to experiment, consider adding a few optional ingredients. Chopped green onions or garlic can add depth to your pie. You might also try adding cooked bacon or ham for extra richness. Each option brings a new twist to this classic dish. Remember, the goal is to enhance the flavors without overshadowing the tomatoes. For the full step-by-step instructions on how to prepare this delightful dish, check out the Full Recipe. Enjoy crafting your Southern tomato pie! First, slice the fresh tomatoes. Use about 2 cups. This is key for flavor. Next, sprinkle the sliced tomatoes with salt. This step draws out extra moisture. Place them in a colander and let them rest for 20 minutes. After that, gently pat the tomatoes dry with paper towels. This helps keep the pie from being soggy. Now, grab a mixing bowl. Combine mayonnaise, cheddar cheese, feta cheese, black pepper, basil, parsley, and Dijon mustard. Mix until everything blends well. Next, roll out your pie crust. Fit it into a 9-inch pie dish. Trim any excess crust hanging over the edges. Begin layering the pie. Start with half the tomato slices. Add half the cheese mixture next. Repeat this step with the rest of the tomatoes and cheese mixture. Finally, drizzle olive oil over the top for extra flavor. Preheat your oven to 375°F (190°C). Place the pie in the oven and bake for 30 to 35 minutes. You want the pie to be golden and bubbly. Once done, take it out and let it cool for 10 to 15 minutes. This cooling time helps it set. Now your Southern Tomato Pie is ready to slice and serve! For full instructions, check the Full Recipe. For a great crust, use a store-bought pie crust or make your own. Chill the dough before rolling it out. This makes it easier to work with. When you fit the crust into the pie dish, make sure there are no air bubbles. Press it down gently to avoid gaps. Pre-bake the crust for about 10 minutes. This step ensures a crispy base when you add the filling. Tomatoes are juicy, so draining them is key. Sprinkle salt on the sliced tomatoes and let them sit. This draws out moisture and keeps the pie from being soggy. When mixing the cheese and mayo, balance flavors with herbs like basil and parsley. This adds freshness to the dish. Using a mix of cheddar and feta gives a rich taste, while also adding creamy texture. One mistake is using too many tomatoes. Stick to the recipe for the best result. If you skip draining the tomatoes, your pie may turn out runny. Another pitfall is overbaking. Keep an eye on your pie and take it out when it’s golden brown. Lastly, let the pie cool before slicing. This helps it hold its shape better. For more detailed instructions, refer to the Full Recipe. {{image_2}} You can add bacon or ham for a meatier flavor. Cook the bacon until crispy. Chop it into small pieces. Layer it with your tomatoes and cheese mixture. This adds a nice salty bite. If you choose ham, smoked ham works well. Both options bring warmth and depth to the pie. Cheese can change the whole pie. While cheddar and feta are great, you can mix it up. Try mozzarella for a milder taste. Goat cheese adds creaminess and a tangy kick. Mixing cheeses can give new flavors. Just keep the same total amount of cheese. This way, the texture stays perfect. If you want a vegetarian or vegan pie, it’s easy to adapt. For a vegetarian version, skip the meat and add more veggies. Spinach or zucchini works great. For a vegan option, replace mayonnaise with cashew cream or vegan mayo. Use a plant-based cheese for flavor. This way, everyone can enjoy a slice. Feel free to explore these variations and make the recipe your own! Check out the Full Recipe for more details on making this delicious Southern dish. To store your leftover Southern Tomato Pie, let it cool completely. Wrap it tightly in plastic wrap or aluminum foil. You can also use an airtight container. This keeps the pie fresh for up to three days in the fridge. If you know you won't eat it soon, freezing is a great option. If you choose to freeze your Southern Tomato Pie, slice it first. This makes it easier to reheat later. Wrap each slice in plastic wrap, then place them in a freezer bag. Remove as much air as possible to prevent freezer burn. This way, it will last for about three months. When ready to enjoy, thaw it in the fridge overnight before reheating. To reheat, preheat your oven to 350°F (175°C). Place the pie or slices on a baking sheet. Cover it with aluminum foil to keep it moist. Bake for about 20-25 minutes, or until heated through. If you want a crispier top, remove the foil for the last five minutes. Enjoy your pie warm for the best flavor. You can use Greek yogurt instead of mayonnaise. It gives a nice tangy flavor. Sour cream works well too. Both options keep the pie creamy. You might even try a mix of yogurt and mustard for a unique taste. Remember to maintain the same amount in your recipe. Yes, you can make Southern Tomato Pie in advance. Prepare the pie and chill it before baking. Cover it tightly with plastic wrap. You can store it in the fridge for up to two days. When ready to enjoy, bake it right from the fridge. This saves time on busy days. The pie is done when it is golden brown on top. The filling should be bubbly and hot. You can check by inserting a knife in the center. If it comes out clean, your pie is ready. Allow it to cool for a bit before slicing. This helps it set nicely. Southern Tomato Pie mixes tasty ingredients and steps. From prepping tomatoes to creating a perfect pie, you can bring joy to your table. Remember to balance flavors and avoid common mistakes for the best result. Feel free to explore variations and make the recipe your own. When done, store leftovers right to enjoy later. With these tips and tricks, you’ll master this classic dish. Get ready to impress your friends and family with your cooking skills. Enjoy every slice!

Tomato pie is a tasty Southern classic. It combines fresh tomatoes, herbs, and cheese in a warm crust. In this easy recipe, I’ll guide you through each step to create …

Read more

Categories Dinner

Peach Crumble Bliss Delightful Dessert Recipe

June 23, 2025 by Chef Luca
For a great peach crumble, you need fresh, ripe peaches. They add sweetness and flavor. Use these fresh ingredients: - 4 ripe peaches, peeled and sliced - 1 tablespoon lemon juice - 1/4 cup granulated sugar - 1 teaspoon vanilla extract Baking needs some basic ingredients to create the perfect crumble. These are essential: - 1 cup rolled oats - 1/2 cup all-purpose flour - 1/2 cup brown sugar - 1/2 teaspoon cinnamon - 1/4 cup unsalted butter, melted - 1/4 teaspoon salt You can make your peach crumble even better with a few add-ins. Consider these options: - Chopped nuts for crunch - A pinch of nutmeg for warmth - Dried fruits like raisins or cranberries This recipe is simple and fun to make. You can find the full recipe above to guide you step by step. Start by washing your peaches. Make sure they are ripe and sweet. Use a peeler to remove the skin. Then, slice the peaches into thin wedges. Place the slices in a big bowl. Add one tablespoon of lemon juice. This keeps the peaches fresh and bright. Next, sprinkle in a quarter cup of granulated sugar. This helps the peaches release their juices. Add one teaspoon of vanilla extract for extra flavor. Gently toss everything together. Set the bowl aside while you mix the crumble. In a separate bowl, combine one cup of rolled oats and half a cup of all-purpose flour. Then, add half a cup of brown sugar and half a teaspoon of cinnamon. This mix creates that delicious crumble. Pour in a quarter cup of melted butter. Stir it all together until it looks crumbly. You want small clumps to form. This will create a nice texture on top of the peaches. Preheat your oven to 350°F (175°C). Grease an 8x8 inch baking dish. Spread the peach mixture evenly in the dish. Make sure every slice is covered. Next, sprinkle the crumble mixture on top. Spread it out so it covers all the peaches. Place the dish in the oven. Bake for 35-40 minutes. Look for a golden brown topping and bubbling peaches. Once done, remove it from the oven. Let it cool for about 10 minutes. This helps the juices settle. Enjoy your Peach Crumble Bliss! For the complete details, see the Full Recipe. Pick ripe peaches for the best flavor. Look for peaches that are fragrant and slightly soft. They should have a vibrant color. Avoid hard or overly soft peaches. If you can, try local peaches. They are often fresher and tastier. You can also mix in a few different peach varieties for added depth. A great crumble topping is key to your peach crumble bliss. Use cold butter for a flakier texture. Mix your dry ingredients before adding the melted butter. This helps create clumps. Don't over-mix; you want some small lumps for crunch. Bake until the topping is golden brown and crisp. Serve your peach crumble warm for the best taste. A scoop of vanilla ice cream really enhances the dish. Try drizzling honey on top for added sweetness. You can also add a sprinkle of cinnamon for warmth. This dish pairs well with whipped cream or yogurt, too. Enjoy it fresh for a delightful treat! {{image_2}} You can easily make a gluten-free peach crumble. Simply swap all-purpose flour for almond flour or oat flour. Both options give a nice texture. Use certified gluten-free oats to avoid any cross-contamination. This way, everyone can enjoy this tasty dessert. Want to add some crunch? Toss in chopped nuts like almonds or walnuts. They add a great flavor. You can also mix in spices like nutmeg for a warm touch. Just a pinch can change the whole taste. Feel free to play with these additions to match your taste. For a fun twist, add berries or cherries to the peach mixture. Blueberries or raspberries work well and add a burst of color. Cherries bring a sweet-tart flavor that pairs nicely with peaches. Make sure to adjust the sugar if your fruits are very sweet. This keeps the balance just right. To keep your leftover peach crumble fresh, place it in an airtight container. You can also cover it tightly with plastic wrap. Store it in the fridge for up to three days. Make sure it cools completely before storing. This helps keep the topping crisp and the peaches juicy. When you’re ready to enjoy your peach crumble again, preheat your oven to 350°F (175°C). Place the crumble in an oven-safe dish. Heat it for about 15 to 20 minutes. This warms it up while keeping the topping crunchy. You can also use a microwave for quick reheating. Heat it for about 30 seconds to 1 minute. Just keep in mind that the topping may soften in the microwave. You can freeze peach crumble for later! First, let it cool completely. Then, wrap it tightly in plastic wrap or foil. Place it in a freezer-safe container or bag. It can stay in the freezer for up to three months. When you want to eat it, thaw it in the fridge overnight. Reheat in the oven for the best taste. For a delicious treat, serve it warm with ice cream. Enjoy your Peach Crumble Bliss! You can tell the peach crumble is done by checking the topping. It should be golden brown and look crisp. The peaches will bubble around the edges. This bubbling shows the fruit is hot and juicy. If you see this, your crumble is ready. Yes, you can use frozen peaches! Just be sure to thaw them first. Drain any extra liquid to avoid a soggy crumble. If you skip this step, the texture might not be right. Frozen peaches work well, but fresh ones taste better. Serve the peach crumble warm for the best flavor. A scoop of vanilla ice cream on top makes it even better. You can also drizzle honey for extra sweetness. This combination creates a delightful dessert experience. For a fun twist, add some whipped cream too! For the full recipe, check out the details above. Peach crumble is a tasty treat made with fresh ingredients and simple steps. We explored how to prepare ripe peaches, mix crumble, and bake until golden. I shared tips for choosing the best peaches and keeping the crumble crispy. You can also try fun variations, like adding nuts or using berries. Remember to store leftovers properly and reheat for the best flavor. With these easy tricks, you’ll enjoy peach crumble that never disappoints. Get ready to impress your friends and family with this delightful dessert!

Are you ready to dive into a warm and fruity treat? My Peach Crumble Bliss dessert recipe is the perfect balance of sweet peaches and crunchy topping. It’s quick, easy, …

Read more

Categories Desserts

Crispy Fried Chicken Tenders Perfectly Crunchy Recipe

June 23, 2025 by Chef Luca
To make crispy fried chicken tenders, you need a few key ingredients: - 1 lb (450g) chicken tenders - 1 cup buttermilk - 1 teaspoon hot sauce (optional) - 1 cup all-purpose flour - 1/2 cup cornstarch - 1 tablespoon garlic powder - 1 tablespoon onion powder - 1 tablespoon paprika - 1 teaspoon salt - 1 teaspoon black pepper - Oil for frying These ingredients work together to create a tender chicken with a crunchy coating. Adding seasonings can really boost the taste of your chicken tenders. Here are some great ideas: - Add cayenne pepper for heat. - Mix in Italian herbs for a fresh taste. - Use lemon zest for a bright flavor. You can adjust these to fit your taste. Don't be afraid to experiment! You might not have everything listed. Here are some swaps you can try: - Swap buttermilk for yogurt or milk with a splash of vinegar. - Use whole wheat flour instead of all-purpose flour for a healthier option. - Cornstarch can be replaced with rice flour for a gluten-free version. These alternatives still give you tasty chicken tenders. Remember, the goal is to make it work for you! For the complete steps to make these delicious chicken tenders, check the Full Recipe. To start, gather your chicken tenders. You need 1 pound of fresh chicken. In a large bowl, mix 1 cup of buttermilk with 1 teaspoon of hot sauce, if you like spice. Place the chicken tenders in this mixture. Make sure they are fully submerged. Cover the bowl and put it in the fridge. Let them marinate for at least 1 hour. For the best flavor, marinate overnight if you can. This step keeps the chicken juicy and adds great taste. While the chicken marinates, prepare your dredging mixture. In a separate bowl, combine 1 cup of all-purpose flour and 1/2 cup of cornstarch. Add 1 tablespoon of garlic powder, 1 tablespoon of onion powder, and 1 tablespoon of paprika. Then, mix in 1 teaspoon of salt and 1 teaspoon of black pepper. Stir well to blend all the spices. This mixture gives the chicken its crispy coating. Set it aside until the chicken is ready. Heat 2-3 inches of oil in a deep pan or fryer. Use medium-high heat until the oil reaches 350°F (175°C). Carefully remove the chicken from the buttermilk. Let the excess drip off. Dredge each tender in your seasoned flour mixture. Make sure each piece is fully coated. Press gently so the coating sticks well. Now, in batches, place the coated chicken tenders in the hot oil. Fry them for about 6-8 minutes. Look for a golden brown color and ensure they are cooked through. Flip them occasionally for even cooking. Once done, transfer the chicken to a plate lined with paper towels. This helps absorb extra oil. Serve hot with your favorite dipping sauces. Enjoy your crispy fried chicken tenders! To get that perfect crunch, follow a few steps. Use buttermilk for marinating. It makes the chicken juicy and tender. Add hot sauce if you want a little kick. For the coating, mix flour and cornstarch. Cornstarch helps create a light and crispy crust. Make sure to coat each tender well. Press the coating onto the chicken. This will help it stick during frying. Many people make simple yet common mistakes. One mistake is not letting the oil heat enough. Oil should be around 350°F (175°C) before frying. If it’s too cool, the chicken will soak up oil and turn soggy. Another mistake is overcrowding the pan. Fry in small batches for even cooking. Lastly, don’t skip the marinating step. It adds flavor and moisture. Frying chicken takes some skill. First, use a deep pan or fryer. This allows even heat and better frying. Always monitor the oil temperature. Use a thermometer for best results. Once you place the chicken in the oil, don’t touch it too much. Let it cook undisturbed for a few minutes. Flip it gently when it’s golden brown. After frying, place the tenders on paper towels. This helps drain extra oil and keeps them crispy. For more detailed steps, check the Full Recipe. {{image_2}} To make spicy chicken tenders, add more hot sauce to the buttermilk. You can use two teaspoons instead of one. This adds heat and flavor. For extra spice, mix cayenne pepper into the dredging mix. Start with a half teaspoon and adjust to your taste. These spicy tenders are perfect for those who love a kick. If you want a lighter option, try baking the chicken tenders. First, marinate the chicken as usual. Then, coat them in the seasoned flour mix. Place them on a baking sheet lined with parchment paper. Spray a light layer of oil on top for crispiness. Bake at 400°F (200°C) for 20-25 minutes. Flip them halfway through for even cooking. This method gives you tasty tenders with less oil. For a gluten-free version, swap the all-purpose flour with gluten-free flour. You can also try using almond flour or chickpea flour. Make sure to check that all your ingredients are gluten-free. The process is the same, so you won’t miss out on the crunch. These options keep the flavor high while accommodating dietary needs. For the full recipe, check the section above. To keep your chicken tenders fresh, let them cool first. Place them in an airtight container. Make sure to layer them with parchment paper. This prevents them from getting soggy. Store the container in the fridge. They will last for about 3-4 days this way. When you're ready to eat your leftovers, reheating is key. Preheat your oven to 400°F (200°C). Place the chicken tenders on a baking sheet. Bake for about 10-15 minutes. This helps to regain their crunch. You can also use an air fryer. Set it to 375°F (190°C) and cook for 5-7 minutes. Both methods keep the tenders crispy. If you want to save your chicken tenders for later, freezing is a great option. First, let them cool completely. Wrap each tender in plastic wrap. Then, place them in a freezer-safe bag or container. They can last up to 3 months in the freezer. When you want to eat them, thaw in the fridge overnight. Reheat as mentioned earlier for the best taste. For more details, check the Full Recipe. The secret to crispy chicken tenders lies in the coating. I use a mix of flour and cornstarch. This mix creates a light crust that fries up crunchy. Marinating the chicken in buttermilk adds moisture and flavor. The acid in buttermilk helps tenderize the meat. Always make sure the oil is hot enough before frying. This helps seal the coating quickly, keeping it crispy. Yes, you can use chicken breasts. Cut them into strips about one inch wide. The cooking time may change slightly, so check for doneness. Chicken tenders cook faster than breasts due to their smaller size. Make sure to marinate them just as you would with tenders. This will keep them juicy and tasty. There are many great dipping sauces for chicken tenders. Here are some of my favorites: - Honey mustard - BBQ sauce - Ranch dressing - Buffalo sauce - Sweet and sour sauce Each sauce adds a unique flavor. Try them all to find your favorite! Enjoy your crispy fried chicken tenders with these tasty dips. For the full recipe, check out the earlier section. You learned how to make crispy fried chicken tenders with this guide. We covered key ingredients, like essential seasonings and tasty substitutions. The step-by-step instructions ensured perfect cooking every time. Tips helped you avoid common mistakes, while variations let you try new flavors. Lastly, I shared storage tips to keep your tenders fresh. Enjoy the process, and remember to have fun while cooking! Delicious chicken tenders await your table.

Are you ready to make the crispiest fried chicken tenders ever? This recipe delivers an unbeatable crunch and juicy chicken inside. I’ll guide you through essential ingredients, step-by-step instructions, and …

Read more

Categories Appetizers

Savory Best Chicken Wings Ever Recipe to Enjoy

June 23, 2025 by Chef Luca
- 2 pounds chicken wings - 1 tablespoon baking powder - Spice mix: - 1 teaspoon salt - 1 teaspoon black pepper - 1 teaspoon garlic powder - 1 teaspoon onion powder - 1 teaspoon smoked paprika - Optional ingredients: - 1 teaspoon cayenne pepper for heat - 1 cup honey - 1/4 cup soy sauce - 2 tablespoons apple cider vinegar - 1 tablespoon fresh ginger, grated - 1 tablespoon sesame oil - Garnishes: - 1 green onion, sliced - Sesame seeds The key to great chicken wings is in the ingredients. First, you need fresh chicken wings. I love using two pounds for a good batch that serves 4 to 6 people. The baking powder helps make the skin crispy. For the spice mix, I use salt, black pepper, garlic powder, onion powder, and smoked paprika. Each spice adds a layer of flavor. If you want a kick, add cayenne pepper. Now, let’s talk about the glaze. This glaze makes the wings sticky and sweet. Start with one cup of honey. The soy sauce adds saltiness. Apple cider vinegar gives it a nice tang. Grated ginger and sesame oil round out the flavor. Don’t forget garnishes! Sliced green onion and sesame seeds add a nice touch. These simple ingredients make your wings shine. For the full recipe, check out the details above. - Preheat your oven to 400°F (200°C). - Line a baking sheet with aluminum foil. - Place a wire rack on top of the baking sheet. - In a large bowl, mix together: - 1 tablespoon baking powder - 1 teaspoon salt - 1 teaspoon black pepper - 1 teaspoon garlic powder - 1 teaspoon onion powder - 1 teaspoon smoked paprika - 1 teaspoon cayenne pepper (optional) - Pat the chicken wings dry with paper towels. This helps them get crispy. - Toss the chicken wings in the spice mixture. Make sure they are well coated. - Arrange the wings in a single layer on the wire rack. - Bake the wings in the oven for 40-45 minutes. Flip them halfway through cooking for even crispiness. - While the wings cook, prepare the glaze. In a small saucepan, combine: - 1 cup honey - 1/4 cup soy sauce - 2 tablespoons apple cider vinegar - 1 tablespoon fresh ginger, grated - 1 tablespoon sesame oil - Heat the glaze over medium heat. Bring it to a gentle simmer and cook for about 5-7 minutes until it thickens. - Once the wings are golden brown, remove them from the oven. - Toss the baked wings in the honey glaze until they are well-coated. - Return them to the oven and bake for an additional 5-7 minutes. This sets the glaze and caramelizes it. - Finally, remove from the oven and garnish with sliced green onion and sesame seeds. Serve and enjoy! This recipe is the key to making the best chicken wings ever. You can find the full recipe above for more details. To get crispy chicken wings, start by drying them well. Patting them dry removes moisture. This step helps the skin crisp up nicely. Next, set your oven to 400°F (200°C). This heat is key for crispiness. Bake the wings for 40-45 minutes. Flip them halfway to ensure they cook evenly. You can add a twist to your wings by trying new spice mixes. A blend of paprika, garlic, and onion powder works well. You might also try adding herbs like thyme or oregano for something fresh. For the glaze, you can mix honey with different sauces. Try adding sriracha for heat or mustard for tang. This gives your wings a new taste each time. Baking is often better than frying for chicken wings. Baking reduces fat and makes cleanup easy. Frying can give a different crisp but adds oil. If you do fry, keep the oil hot for the best results. Use a meat thermometer to check for doneness. Wings should reach an internal temperature of 165°F (75°C). This ensures they are safe to eat. {{image_2}} You can cook chicken wings in many ways. Each method gives a unique taste. - Air fryer method for chicken wings: This method makes wings crispy with less oil. Preheat the air fryer to 400°F (200°C). Place the seasoned wings in the basket in a single layer. Cook for 25-30 minutes, flipping halfway for even cooking. This method is quick and easy. - Grilling chicken wings for smoky flavor: Grilling adds a nice smoky taste. Heat your grill to medium-high. Place the wings on the grill, turning them often for about 20-25 minutes. Use a meat thermometer to check for doneness. The wings should reach 165°F (74°C). There are many ways to spice up your wings. Try these fun flavor ideas. - Spicy buffalo-style chicken wings: For a classic taste, toss the baked wings in a mix of hot sauce and melted butter. Adjust the spice level to your liking. - Asian-inspired soy and ginger wings: Mix soy sauce, honey, and grated ginger for a sweet and savory glaze. Toss the cooked wings in this mix for an exciting twist. The right sauce or dip can elevate your wings. Here are some great options. - Best sauces to pair with chicken wings: Classic choices include buffalo sauce, barbecue sauce, and garlic parmesan sauce. Each adds a unique kick to your wings. - Recommended dips for chicken wings: Ranch dressing and blue cheese dip are popular. They cool down spicy wings nicely. You can also try a sweet chili sauce for a different flavor. Feel free to explore these variations to find your perfect wing experience! For a detailed recipe, check out the Full Recipe. To keep your chicken wings fresh, store them in the fridge. Place them in an airtight container right after they cool. This helps prevent moisture loss and keeps them tasty for later. You can enjoy leftover wings within three days. If you want to heat them again, do it in the oven or air fryer. This keeps them crispy. If you want to save wings for a longer time, freezing is a great option. First, let the wings cool completely. Then, place them in a single layer on a baking sheet. Freeze them for about two hours until they are solid. Once frozen, transfer the wings to a freezer-safe bag. Be sure to press out all the air. They will stay good for up to three months. When you are ready to eat, take them out and reheat. For the best results, bake them at 400°F (200°C) for 20-25 minutes. This will ensure they are hot and crispy again. Enjoy your Best Chicken Wings Ever! For the full recipe, check out the main article. Bake the chicken wings for 40 to 45 minutes at 400°F (200°C). This gives them a nice golden color and crispy texture. Flip them halfway for even cooking. Use a wire rack to let air circulate around the wings. This helps them crisp up nicely. Yes, you can prep chicken wings ahead of time. Season them and store them in the fridge for up to a day. This allows flavors to soak in. When you're ready, bake them as directed. You can also cook them fully, then reheat later. Just add a few extra minutes in the oven. Popular dipping sauces include ranch, blue cheese, and BBQ sauce. You can also try buffalo sauce for extra spice. Honey mustard is a sweet option. Each sauce brings a new taste. Feel free to mix and match for fun flavor combos. To ensure wings are crispy, dry them well before seasoning. Moisture leads to soggy wings. Use baking powder in your spice mix. It helps them get that perfect crunch. Bake at a high temperature and use a wire rack. This keeps the wings elevated, allowing heat to circulate. To add heat, use cayenne pepper in your spice mix. You can also toss the wings in a spicy sauce after baking. If you like it really hot, add more cayenne or hot sauce to the glaze. Adjust to your taste for the perfect kick. For the full recipe, check out Best Chicken Wings Ever. To make great chicken wings, you need quality ingredients and smart cooking. We covered essential spices, a tasty glaze, and methods for cooking. Follow the steps for crispy, flavorful wings every time. Remember to experiment with flavors and enjoy different cooking methods. Store your leftovers properly to keep them fresh. With these tips, you'll impress your friends and family. Enjoy making these wings and share your new skills!

Are you ready to make the best chicken wings ever? This savory recipe is simple, quick, and bursting with flavor. With just a handful of ingredients, you can whip up …

Read more

Categories Appetizers

Healthy Peach Crisp Simple and Delicious Dessert

June 23, 2025 by Chef Luca
- 4 ripe peaches, peeled and sliced - 1 tablespoon lemon juice - 1 tablespoon honey or maple syrup Fresh peaches are key to this dish. Choose ripe peaches for the best flavor. Lemon juice adds a tangy kick. Use honey or maple syrup for sweetness without refined sugar. - 1 cup rolled oats - 1/2 cup almond flour or whole wheat flour - 1/4 cup chopped nuts (such as walnuts or pecans) Rolled oats give a nice crunch. Almond flour or whole wheat flour adds fiber. Chopped nuts add texture and flavor. Feel free to mix nuts you like best. - 1 teaspoon cinnamon - 1/4 teaspoon salt - 1 tablespoon ground flaxseed (optional) Cinnamon brings warmth and depth. A bit of salt enhances all the flavors. Ground flaxseed is optional but great for extra nutrients. You can also add shredded coconut for a tropical twist. For the full recipe, check [Full Recipe]. Enjoy making this healthy peach crisp! 1. Preheat the oven: Start by preheating your oven to 350°F (175°C). This step is key for even baking. 2. Prepare peaches with lemon juice and sweetener: In a mixing bowl, take 4 ripe peaches, peel and slice them. Add 1 tablespoon of lemon juice and 1 tablespoon of honey or maple syrup. Toss gently until the peaches are coated. Spread this peach mixture evenly in your greased 8-inch square baking dish. 1. Mix dry ingredients: In another bowl, combine 1 cup of rolled oats, 1/2 cup of almond flour (or whole wheat flour), 1/4 cup of chopped nuts, 1 teaspoon of cinnamon, and 1/4 teaspoon of salt. If you want a nutritional boost, add 1 tablespoon of ground flaxseed and 1/4 cup of unsweetened shredded coconut. 2. Combine with melted coconut oil: Pour 3 tablespoons of melted coconut oil over the dry mixture. Mix well until everything is crumbly. This topping gives your crisp a delicious crunch. 1. Assemble layers in the baking dish: Evenly distribute the oat topping over the peach layer in the baking dish. Make sure it covers all the peaches. 2. Bake details and tips: Place the dish in the oven and bake for 30-35 minutes. Look for a golden-brown topping and bubbling peaches. If the topping browns too quickly, cover it with foil. Allow it to cool for a few minutes before serving. Enjoy your healthy peach crisp! For the full recipe, check the detailed steps above. To make your peach crisp even healthier, consider lowering the sugar. You can cut back on honey or maple syrup. Try using just a teaspoon, or leave it out entirely. The natural sweetness from ripe peaches often meets our taste needs. You can also explore alternative flour options. Instead of almond flour, you might use whole wheat flour or oat flour. These options add fiber and nutrients. They can also improve the texture of your crisp. Spice variations can really elevate your dish. Besides cinnamon, try adding nutmeg or ginger for a warm kick. These spices add depth and can transform the flavor profile. Nut alternatives can also give your peach crisp a unique twist. Use pecans or hazelnuts instead of walnuts. Each nut brings its own flavor and crunch. You can also skip the nuts for a nut-free version. For serving, pair your peach crisp with yogurt or ice cream. Greek yogurt adds creaminess and protein. Vanilla ice cream provides a sweet contrast to the tart peaches. Garnishing ideas for presentation can make your dish shine. Add fresh mint leaves for a pop of color. You might sprinkle some extra cinnamon on top. This makes your dish look and taste even better. Want the full details? Check out the Full Recipe for a step-by-step guide to make this dessert truly shine! {{image_2}} You can mix things up by using other fruits. Try using apples or plums instead of peaches. Both fruits have a sweet and juicy taste. You can also combine peaches with berries. Blueberries, raspberries, or strawberries add color and flavor. This mix brightens the dish and gives you more health benefits. If you need gluten-free options, use certified gluten-free oats and almond flour. This keeps the crisp tasty while making it safe for gluten-sensitive folks. For a vegan variation, swap honey for maple syrup. This simple change makes the dish plant-based and still delicious. To make your peach crisp extra special, add spices. Nutmeg and cinnamon work well together. A splash of vanilla extract can also enhance the flavor. Citrus zest, like lemon or orange, adds a fresh twist too. These small changes make a big difference in taste and make each bite exciting. To keep your Healthy Peach Crisp fresh, store it in the fridge. Place it in an airtight container to prevent moisture loss. This helps maintain its taste and texture. Use glass or plastic containers with tight lids. You can also cover the dish with plastic wrap if you don't have a container. If you want to save it for later, freezing is a great option. Let the peach crisp cool completely before freezing. Wrap it tightly in plastic wrap, then place it in a freezer-safe bag or container. This keeps it safe from freezer burn. When you want to enjoy it again, thaw it overnight in the fridge. To reheat, place it in the oven at 350°F (175°C) for about 15-20 minutes. You can also microwave it for a quick snack. In the refrigerator, your Healthy Peach Crisp lasts about 3 to 5 days. For the freezer, it can keep well for about 2 to 3 months. Remember to label your containers with the date. This way, you will know when it’s time to eat or toss it. Keeping track helps you enjoy your dessert at its best. Can I use frozen peaches? Yes, you can use frozen peaches. Just thaw them first. Drain any extra liquid. This keeps your crisp from getting too watery. How can I make it nut-free? To make it nut-free, simply skip the nuts in the recipe. You can use more oats or seeds for crunch. Try sunflower seeds or pumpkin seeds instead. What are the health benefits of the main ingredients? The main ingredients offer great health benefits: - Peaches: High in vitamins A and C. They help with skin health. - Oats: Good for heart health and help you feel full. - Almond flour: Low in carbs and high in healthy fats, which can aid weight loss. - Honey: A natural sweetener with antioxidants. How many calories per serving? This healthy peach crisp has about 200 calories per serving. This makes it a guilt-free treat. What can I do if the topping is soggy? If the topping is soggy, bake it a little longer. Check every five minutes. You want a golden brown color. You can also add more oats to absorb moisture next time. How to tell when the crisp is perfectly baked? The crisp is ready when the topping is golden brown. The peaches should be bubbling around the edges. This shows the flavors are melded together well. This article covered how to make a delicious peach crisp. We discussed fresh and dry ingredients. I shared simple steps from preparing to baking, along with helpful tips. You learned variations, storage info, and answered common questions. In summary, you have everything you need to create your peach crisp. Experiment with flavors and enjoy this tasty dish! Go ahead, gather your ingredients, and let the baking begin.

Are you craving a dessert that’s both healthy and delicious? This Healthy Peach Crisp is your answer! Packed with fresh peaches and wholesome ingredients, it’s simple to make. Whether you’re …

Read more

Categories Desserts

Peach Burrata Salad Fresh and Flavorful Delight

June 23, 2025 by Chef Luca
- 2 ripe peaches, sliced - 1 ball of burrata cheese - 4 cups mixed arugula and baby spinach - 1/4 cup balsamic glaze - 1/4 cup toasted pine nuts - 1 tablespoon olive oil - Fresh basil leaves for garnish - Salt and pepper to taste Choosing ripe peaches: Look for peaches that feel slightly soft to the touch. They should have a sweet aroma. The color should be a warm yellow or golden, with no green spots. Finding fresh burrata cheese: Choose burrata with a soft, creamy center. It should feel moist and not dry. Always check the date on the package for freshness. - Bowls for mixing - Serving platter - Knife and cutting board - Prepare the greens: Start by washing 4 cups of mixed arugula and baby spinach. In a large bowl, drizzle 1 tablespoon of olive oil over the greens. Season with salt and pepper to taste. Toss gently, so each leaf gets a light coat. This step adds flavor and helps the greens shine. - Slice the peaches: Take 2 ripe peaches and place them on a cutting board. Carefully cut each peach in half, removing the pit. Then, slice each half into thin wedges. The slices should be thick enough to hold their shape but thin enough to blend well with the other ingredients. - Assemble the salad layers: On a large serving platter, spread the dressed greens evenly. Next, layer the sliced peaches on top of the greens. Make sure to cover the greens well for a colorful presentation. - Adding burrata and toasted pine nuts: Tear 1 ball of burrata cheese into pieces and distribute them over the salad. Place the pieces among the peaches for a beautiful look. Then, sprinkle 1/4 cup of toasted pine nuts on top. This adds a delightful crunch and rich flavor. - Drizzling with balsamic glaze: Take 1/4 cup of balsamic glaze and drizzle it over the salad in a zigzag pattern. This step not only enhances the taste but also makes the dish visually appealing. - Garnishing with fresh basil: Finally, add fresh basil leaves on top of the salad. They not only bring a pop of green but also add a lovely aroma. - Serving suggestions for visual appeal: To impress your guests, serve the salad on a wooden or marble board. This rustic look adds charm. - Enhancing flavors with additional ingredients: Consider adding a drizzle of extra olive oil before serving. This adds shine and richness to the salad. You can also mix in some fresh herbs like mint for a unique twist. For a detailed look at the full recipe, check out the [Full Recipe]. To make the Peach Burrata Salad shine, balance is key. The sweet peaches, creamy burrata, and tangy balsamic glaze should dance on your palate. Aim for equal parts sweet, creamy, and tangy. This mix makes each bite exciting. Letting the salad rest for 10 minutes helps the flavors blend. This time allows the sweet peaches to soak in the olive oil and balsamic. You'll notice a change in taste that elevates the dish. Pair this salad with light entrées for a complete meal. Grilled chicken or fish complements the salad well. You can also serve it as a side dish at gatherings. The bright colors make it a showstopper. For a light lunch, enjoy it with a crusty baguette. The bread complements the creamy burrata. You can also add a glass of chilled white wine. If you need a vegan or dairy-free option, swap the burrata. Use a plant-based cheese that mimics its creaminess. You can also try avocado for a rich texture. For lower sugar options, skip the balsamic glaze. Instead, use a splash of lemon juice. This keeps the salad fresh and bright without added sweetness. This Peach Burrata Salad is versatile and easy to customize. You can find the full recipe to explore these ideas further. {{image_2}} You can change this salad with seasonal fruits. Try adding figs for a sweet twist. Strawberries also bring a nice berry flavor. Each fruit adds its own special taste. You can also swap the greens. Use kale or mixed baby greens instead of arugula and spinach. Different nuts like walnuts or almonds bring new textures and tastes too. Herbs and spices can boost the taste of your salad. Fresh mint or thyme adds freshness. Try a pinch of chili flakes for a little heat. You can also mix up the dressings. A citrus vinaigrette adds a bright touch. Or, use a creamy dressing for richness. Each choice builds new flavor layers. If you want a different texture, try ricotta or feta. Ricotta is creamy and light, while feta gives a salty bite. There are also great plant-based cheeses if you prefer dairy-free options. These alternatives can make the salad fit many diets. Each cheese choice brings its own flavor profile, making your salad unique. For the full recipe of Peach Burrata Salad, check out the detailed steps above. To store leftover Peach Burrata Salad, place it in an airtight container. Make sure to keep the salad in the fridge. This helps keep the flavors fresh. Avoid adding the balsamic glaze until you're ready to eat. This keeps the greens crisp. Use glass or plastic containers with tight seals. These types work best for keeping the salad fresh. If you have extra burrata, store that separately. This helps avoid sogginess. The salad lasts in the fridge for about three days. The key ingredients have different shelf lives. Peaches can stay fresh for up to five days. Burrata cheese is best used within two days once opened. Arugula and spinach last about three days as well. Signs the salad has expired include a sour smell or slimy greens. If the peaches look brown or mushy, it’s time to toss them. Always trust your senses when checking for freshness. You can get creative with leftover salad components. Try adding the greens to a wrap or sandwich. Mix the leftover peaches into yogurt or oatmeal. This adds a sweet twist to your breakfast. You can also blend the salad into a smoothie. Just toss everything in and blend until smooth. If you have extra burrata, use it on pasta or pizza. This adds a rich flavor to your dishes. Yes, you can prepare this salad ahead of time. To keep it fresh, follow these tips: - Prep the greens: Wash and dry the arugula and spinach early. Store them in a sealed container with a paper towel to absorb moisture. - Slice the peaches: Wait until just before serving to slice the peaches. This keeps them from browning. - Assemble just before eating: Layer the salad right before serving. This keeps the burrata creamy and the greens crisp. - Dressing: Keep the balsamic glaze separate until you serve the salad. This prevents sogginess. If you don’t have burrata, try these creamy alternatives: - Fresh mozzarella: It has a similar texture and taste. - Ricotta cheese: This gives a creamy feel but with a different flavor. - Feta cheese: This adds a tangy twist, though it is crumbly. - Cream cheese: It works if you want a richer taste. Selecting ripe peaches is key to this salad. Look for these traits: - Color: Choose peaches that have a deep golden hue. - Feel: Gently press the peach; it should yield slightly. - Fragrance: A sweet, fruity scent means it's ripe and juicy. - Smooth skin: Avoid peaches with wrinkles or blemishes. You can use these dressings to enhance your salad: - Homemade balsamic dressing: Mix balsamic vinegar with olive oil, salt, and pepper. - Lemon vinaigrette: Combine fresh lemon juice with olive oil for a zesty kick. - Honey mustard dressing: This adds sweetness and a bit of spice. - Store-bought options: Look for light vinaigrettes or creamy dressings that balance the flavors. For the full recipe, check out the Peach Burrata Delight! We explored how to make a refreshing Peach Burrata Salad with simple, tasty ingredients. Choosing ripe peaches and fresh burrata is key. After mixing the greens and assembling your salad, let the flavors blend for the best taste. Don't hesitate to try variations like figs or different cheeses. Remember, storing leftovers properly helps maintain freshness. This salad is a great choice for a light meal. Enjoy your delicious creation and share it with friends to impress them!

Get ready to refresh your summer meals with my Peach Burrata Salad! This dish combines juicy peaches, creamy burrata, and fresh greens for an explosion of flavor. With just a …

Read more

Categories Salads
Older posts
Newer posts
← Previous Page1 … Page86 Page87 Page88 … Page122 Next →

STIRRED RECIPES

Where every dish begins with a stir! 🍲✨

PAGES

Home About Contact Privacy Policy Terms & Conditions Cookie Policy GDPR Policy Copyright Policy Disclaimer

CATEGORIES

Appetizers Desserts Salads Breakfast Dinner

Contact

  • Pinterest
  • Mail
Copyright © 2026 Stirred Recipes. All rights reserved.