Delicious Applesauce Cake with Cinnamon Cream Cheese Frosting
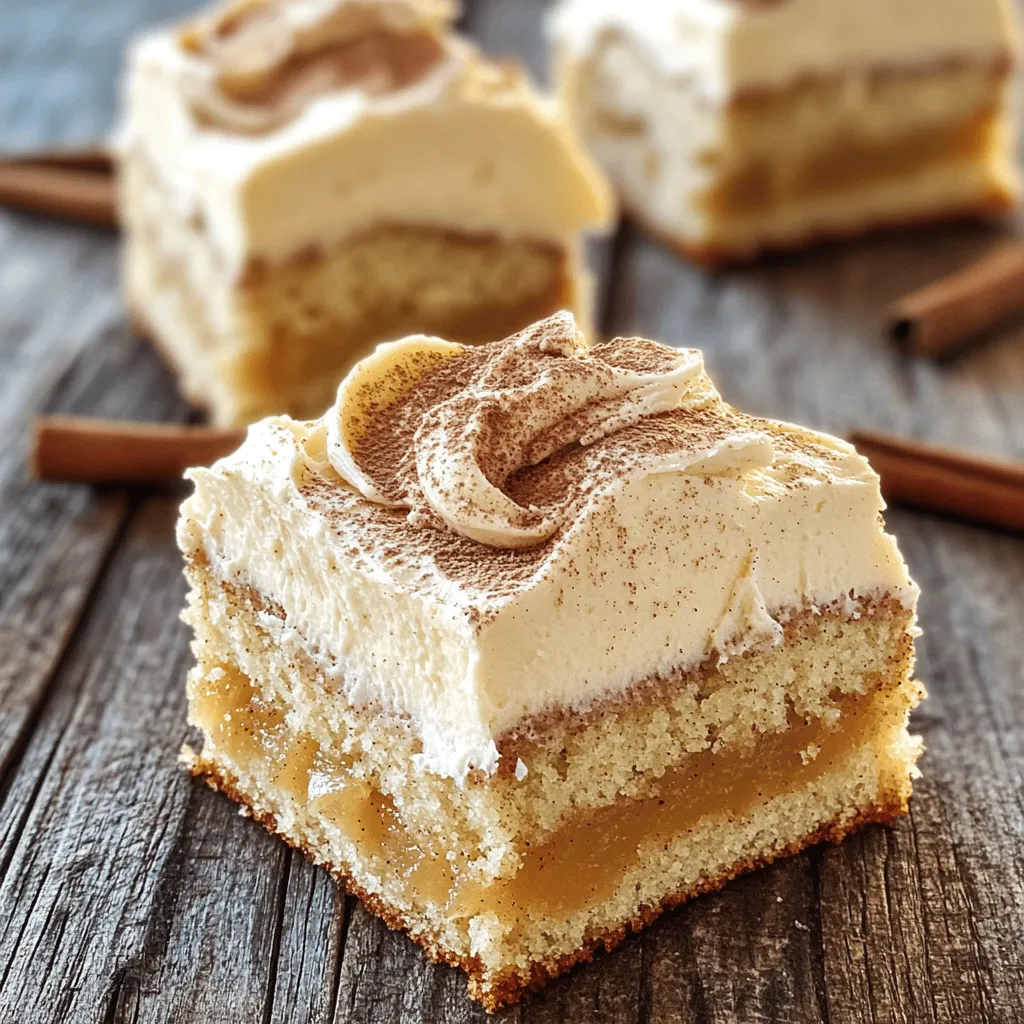
Are you ready to bake a cake that’s both delicious and simple? This applesauce cake, topped with cinnamon cream cheese frosting, is a perfect treat for any occasion. The moist, …
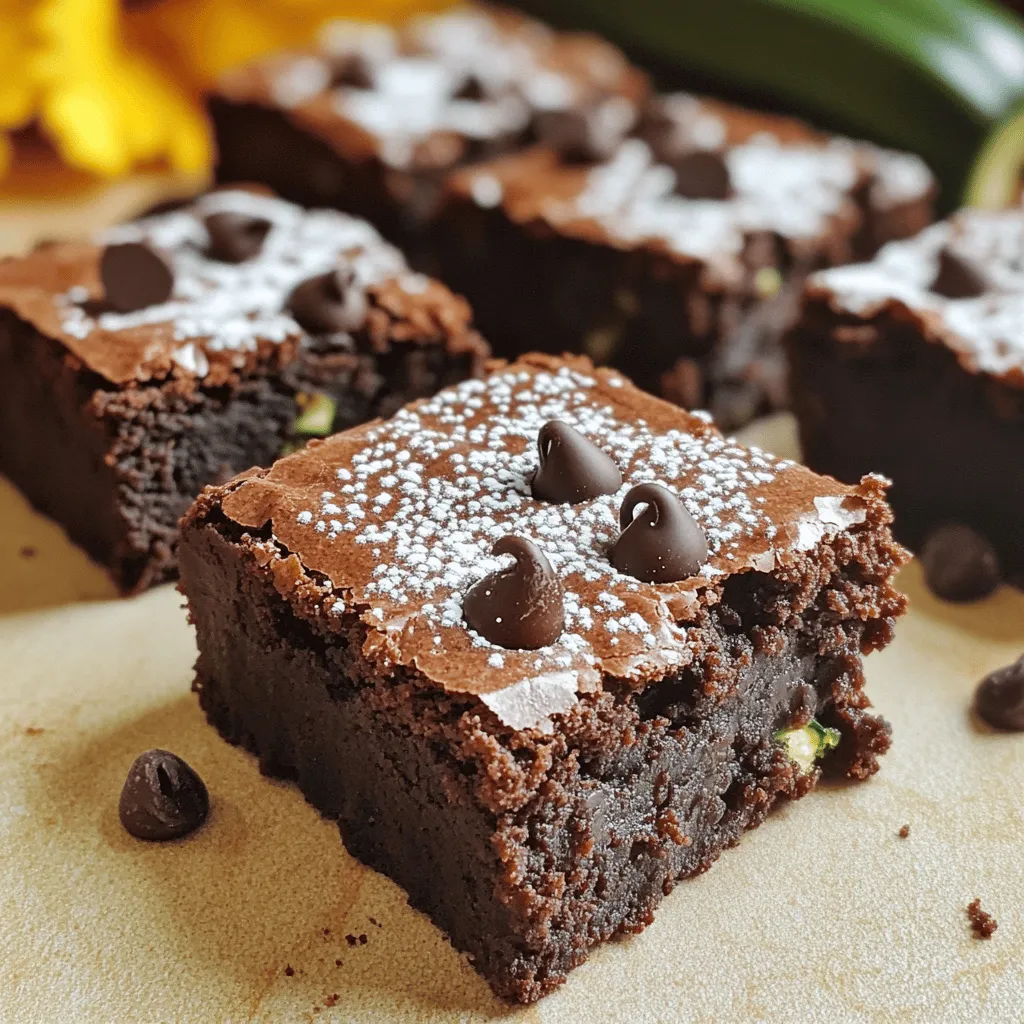
![To make healthy chocolate zucchini muffins, you need a few simple ingredients. These ingredients blend together to create a moist and tasty treat. Here’s the list: - 1 medium zucchini, grated - 1 cup whole wheat flour - 1/2 cup unsweetened cocoa powder - 1/2 cup coconut sugar (or brown sugar) - 1 tsp baking powder - 1/2 tsp baking soda - 1/4 tsp salt - 1/2 cup unsweetened applesauce - 1/4 cup vegetable oil (or melted coconut oil) - 2 large eggs - 1 tsp vanilla extract - 1/2 cup dark chocolate chips (optional) The zucchini adds moisture and nutrients. Whole wheat flour brings fiber and a nutty taste. Cocoa powder gives it that rich chocolate flavor. Sweeteners like coconut sugar keep it healthy while adding sweetness. Baking powder and baking soda help muffins rise. Eggs and oils keep the texture soft. You can add chocolate chips for extra indulgence. This recipe is not only simple but also fun to make. You can find the full recipe above! 1. Preheating the Oven Start by preheating your oven to 350°F (175°C). This ensures that your muffins bake evenly. 2. Mixing Wet Ingredients In a medium bowl, combine the grated zucchini, applesauce, vegetable oil, eggs, and vanilla extract. Mix them well until everything is blended nicely. 3. Combining Dry Ingredients In a separate large bowl, sift together the whole wheat flour, cocoa powder, coconut sugar, baking powder, baking soda, and salt. Make sure there are no lumps. Sifting helps keep your muffins fluffy. 4. Merging Wet and Dry Mixtures Pour the wet mixture into the dry mixture. Stir gently until just combined. Be careful not to overmix, as this can make your muffins tough. 1. Filling the Muffin Tin Spoon the batter into the prepared muffin tin, filling each cup about 3/4 full. This gives them room to rise without spilling over. 2. Baking Time and Tips Bake your muffins for 18-20 minutes. Insert a toothpick into the center of a muffin. If it comes out clean, they are done! 1. Cooling Instructions Allow the muffins to cool in the tin for 5 minutes. After that, transfer them to a wire rack to cool completely. This helps keep them from getting soggy. 2. Presentation Suggestions Serve warm with a drizzle of honey or maple syrup for a sweet touch. You can also dust them with powdered sugar or add a dollop of Greek yogurt on the side for extra creaminess. If you're feeling fancy, a sprinkle of chopped nuts on top adds a nice crunch. Enjoy your delicious muffins! For the complete recipe, check out the [Full Recipe]. Avoiding Overmixing When mixing your batter, stir gently. Overmixing can make your muffins tough. Aim for a few lumps in your batter for the best texture. This keeps them light and fluffy. Checking for Doneness Insert a toothpick into the center of a muffin. If it comes out clean, your muffins are ready. If it has wet batter, give them a few more minutes in the oven. Alternative Sweeteners You can use honey or maple syrup instead of coconut sugar. Just remember to reduce the liquid in your wet ingredients slightly. This keeps the right texture without adding too much moisture. Oil Variations If you prefer, use applesauce instead of oil. This makes the muffins lighter and less fatty. You can also try avocado oil for a healthier fat option without altering the flavor. Adding Spices Try adding a pinch of cinnamon or nutmeg to your batter. These spices bring warmth and a lovely aroma. You can also add a splash of espresso powder for a deeper chocolate taste. Incorporating Nuts or Seeds Chopped walnuts or pecans add a nice crunch to your muffins. You can also mix in sunflower seeds or chia seeds for extra nutrition. These add texture and healthy fats, making your muffins even better. For the complete recipe, be sure to check out the Full Recipe section. {{image_2}} You can play with flavors in these muffins. Here are two fun ideas: - Peanut Butter Chocolate Zucchini Muffins: Add 1/2 cup of creamy peanut butter to the wet mix. This will give your muffins a rich taste and a nice creaminess. Just reduce the oil by a tablespoon to balance the moisture. - Orange Zucchini Muffins: For a citrus twist, add the zest of one orange to the wet ingredients. You can also replace some cocoa powder with orange juice (1/4 cup) for a refreshing change. This gives a bright flavor that pairs well with chocolate. You can customize these muffins to fit different diets. Here are some ideas: - Gluten-Free Adaptations: Swap whole wheat flour for a gluten-free blend. Make sure it has xanthan gum for proper texture. You can also use almond flour or oat flour for a nutty taste. - Vegan Modifications: Replace eggs with flax eggs. Just mix 1 tablespoon of ground flaxseed with 3 tablespoons of water for each egg. Let it sit until it gels. Use a plant-based oil like coconut oil or canola oil instead of vegetable oil. These variations keep the health benefits while offering new tastes. You can try them all or mix and match your favorites. For the complete recipe, check out the [Full Recipe]. Room Temperature Storage You can store your Healthy Chocolate Zucchini Muffins at room temperature for up to three days. Keep them in an airtight container. This helps keep them moist and tasty. Place a paper towel at the bottom to absorb any extra moisture. Refrigeration Tips If you want them to last longer, refrigerate your muffins. They can stay fresh for about a week in the fridge. Just make sure to wrap them tightly in plastic wrap or place them in a sealed container. This will help prevent them from drying out. Freezing For long-term storage, freezing is your best option. These muffins freeze well for up to three months. Wrap each muffin in plastic wrap and then place them in a freezer bag. Be sure to remove as much air as possible. This keeps them fresh and avoids freezer burn. Thawing Instructions When you're ready to enjoy a muffin, take it out of the freezer. You can thaw it overnight in the fridge or leave it at room temperature for a few hours. If you want a warm muffin, pop it in the microwave for about 15-20 seconds. This will make it taste freshly baked again. For the full recipe, check out the Healthy Chocolate Zucchini Muffins section. Can I use shredded zucchini with skin on? Yes, you can. The skin adds fiber and nutrients. Just wash the zucchini well before grating. How do I know when they are done baking? Check with a toothpick. Insert it in the center. If it comes out clean, they are done. Can I add nuts to the recipe? Absolutely! Chopped walnuts or pecans add great crunch. Just fold them in gently before baking. How can I make it lower in calories? Use less sugar or replace it with a sugar substitute. You can also reduce the oil. Can I substitute eggs in this recipe? Yes, use flax eggs or applesauce. One egg equals 1 tablespoon of flaxseed mixed with 2.5 tablespoons of water. Are these muffins gluten-free? No, they are not unless you use gluten-free flour. Whole wheat flour contains gluten. What are the health benefits of zucchini? Zucchini is low in calories and high in water. It provides vitamins, minerals, and fiber. Eating zucchini helps with digestion and keeps you full longer. For the full recipe, check the Healthy Chocolate Zucchini Muffins section. You now have everything to make healthy chocolate zucchini muffins. We covered ingredients, steps, and tips. Remember to preheat your oven first and mix well. Check doneness with a toothpick. You can make these muffins your own with flavor twists or dietary needs. Store them right for fresh treats later. Enjoy baking these muffins; they are tasty and nutritious!](https://stirredrecipes.com/wp-content/uploads/2025/07/62f9b951-05b6-4a3f-afba-d6f67a0e31d5.webp)
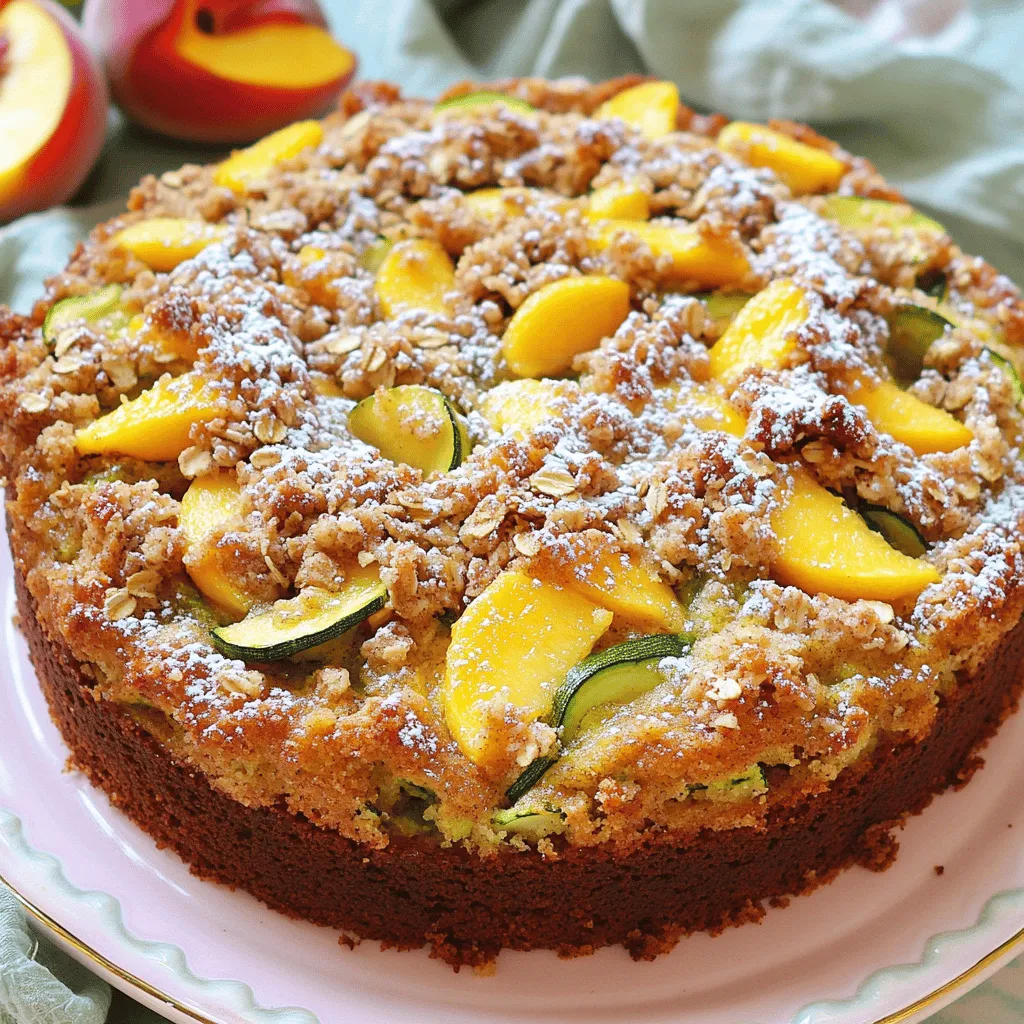
![For the Zucchini and Yellow Squash Casserole, here are the must-have ingredients: - 2 medium zucchinis, sliced - 2 medium yellow squashes, sliced - 1 cup cherry tomatoes, halved - 1 small onion, diced - 4 cloves garlic, minced - 1 cup shredded mozzarella cheese - 1/2 cup grated Parmesan cheese - 1 teaspoon dried oregano - 1 teaspoon dried thyme - Salt and pepper to taste - 2 tablespoons olive oil These ingredients work together to create a tasty and colorful dish. You can add a few extra ingredients to make your casserole even better: - 1/2 cup breadcrumbs (for a crunchy topping) - Fresh herbs like basil or parsley (for garnish) - Bell peppers, diced (for added crunch and color) - Red pepper flakes (for a little heat) Feel free to mix and match these options based on your taste. If you need to swap ingredients, here are some ideas: - For zucchini, use yellow squash or eggplant. - Instead of mozzarella, try cheddar or gouda cheese. - Use shallots or green onions instead of regular onion. - For a dairy-free option, replace cheese with nutritional yeast. These substitutes can help you adapt the recipe to what you have on hand or your dietary needs. Start by gathering all your ingredients. You will need: - 2 medium zucchinis, sliced - 2 medium yellow squashes, sliced - 1 cup cherry tomatoes, halved - 1 small onion, diced - 4 cloves garlic, minced - 1 cup shredded mozzarella cheese - 1/2 cup grated Parmesan cheese - 1 teaspoon dried oregano - 1 teaspoon dried thyme - Salt and pepper to taste - 2 tablespoons olive oil - 1/2 cup breadcrumbs (optional for topping) Wash and slice the zucchinis and yellow squashes. Dice the onion and halve the cherry tomatoes. Mince the garlic. Set everything aside for easy access. 1. Preheat your oven to 375°F (190°C). 2. Use a large skillet and heat the olive oil over medium heat. 3. Add the diced onions and cook until they turn clear, about 3-4 minutes. 4. Stir in the minced garlic and cook for another minute. 5. Add the sliced zucchinis and yellow squashes to the skillet. Sauté for about 5-7 minutes until they soften. 6. Mix in the cherry tomatoes, dried oregano, dried thyme, salt, and pepper. Cook for an additional 3-4 minutes. 7. Remove the skillet from heat and let the mixture cool slightly. 8. In a large bowl, combine the vegetables with half of the mozzarella and half of the Parmesan cheese. Stir well. 9. Transfer the mix to a greased 9x13-inch baking dish, spreading it evenly. 10. Top the casserole with the remaining mozzarella and Parmesan cheese. If using, sprinkle breadcrumbs on top. 11. Bake in the oven for 25-30 minutes. The cheese should be bubbly and the top golden brown. 12. Once done, remove from the oven and let it sit for 5 minutes before serving. - Ensure your skillet is hot before adding onions. This helps them cook evenly. - Do not rush the sautéing process. Let the zucchinis and squashes soften to improve the flavor. - When mixing the cheeses, make sure they are evenly distributed for a cheesy bite in every forkful. - If you like a crunch, use breadcrumbs on top. Bake until golden for added texture. Follow these steps for a delicious Zucchini and Yellow Squash Casserole. For the complete recipe, check out the [Full Recipe]. To make the best zucchini and yellow squash casserole, follow these steps: - Choose fresh veggies: Look for firm zucchinis and yellow squashes. They should feel heavy for their size. - Slice evenly: Cut your vegetables into similar sizes. This helps them cook evenly. - Preheat the oven: Always start with a hot oven. This ensures your casserole cooks right. - Grease your dish: Use a little olive oil or cooking spray. This helps prevent sticking. - Layer wisely: Spread your vegetable mix evenly in the baking dish. This helps with even cooking. Here are some common pitfalls: - Overcooking the veggies: Sauté them just until they soften. They will cook more in the oven. - Skipping seasoning: Don’t forget salt and pepper! They enhance the flavors of your dish. - Using too much cheese: While cheese is delicious, too much can make your casserole greasy. - Not letting it rest: Give your casserole 5 minutes to sit after baking. This helps it set. If you need to adjust cooking time, consider these factors: - Oven differences: Every oven is different. If yours runs hot, check your casserole early. - Vegetable moisture: If your zucchini or squash is watery, it may take longer to cook. - Size of dish: A deeper dish may require more time. A shallow dish cooks faster. - Bubbling cheese: Look for bubbling cheese and a golden top. This means it’s ready! For cooking specifics, refer to the [Full Recipe]. {{image_2}} You can add proteins to this casserole for a hearty meal. Chicken or turkey works well. Cook them first and mix them in with the veggies. You can also use cooked sausage for a spicy kick. If you want something lighter, try shrimp or tofu. Just make sure to season them well before mixing. Changing the spices can make your casserole unique. Try adding cumin for a warm taste. Smoked paprika adds a nice depth. You can also use Italian seasoning for a classic touch. If you love heat, sprinkle in some red pepper flakes. Don't be afraid to experiment with herbs like basil or dill. Each spice will bring a new twist to your dish. This casserole is easy to make vegetarian or vegan. For a vegan version, skip the cheese. Use a plant-based cheese or nutritional yeast for flavor. You can also add beans like black beans or chickpeas for protein. They add a nice texture and keep it filling. With these swaps, you still get a delicious, satisfying meal. Check out the Full Recipe for more tips on making this dish your own. To keep your Zucchini and Yellow Squash Casserole fresh, let it cool first. Once cool, place it in an airtight container. This helps keep the flavors locked in. You can store it in your fridge for up to three days. If you want to keep it longer, freezing is a great option. When it’s time to eat the leftovers, preheat your oven to 350°F (175°C). Place the casserole in a baking dish. Cover it with foil to prevent drying out. Heat for about 20 minutes or until it’s warm all the way through. You can also use the microwave. Just heat in short bursts, stirring in between, until hot. To freeze, let the casserole cool down completely. Cut it into portions for easy serving later. Wrap each piece tightly in plastic wrap, then place them in a freezer bag. You can freeze it for up to three months. When ready to cook, thaw it in the fridge overnight. Then, reheat it in the oven for the best taste and texture. Serve this casserole warm, right from the oven. I like to add fresh herbs like basil or parsley on top. They add color and burst with flavor. You can pair it with grilled chicken or a fresh salad. This dish is also great as a side for any meal. Yes, you can prepare this casserole a day ahead. Just follow the steps until you are ready to bake. Cover it with foil and place it in the fridge. When you are ready, bake it straight from the fridge. You might need to add a few extra minutes to the cooking time. Look for a bubbly top with a golden brown color. The cheese should melt and blend with the veggies. Insert a fork into the casserole to check if the squash is soft. If it is tender, your casserole is ready to enjoy. For the full recipe, refer to the earlier sections. This blog post covered key ingredients, preparation, and cooking steps for a great casserole. I shared best practices and common mistakes to help you succeed. You learned how to adjust cooking times and explore tasty variations. Storing and reheating tips ensured leftovers stay fresh and delicious. Remember, with a few simple changes, you can make this dish your own. Enjoy creating and sharing your perfect casserole!](https://stirredrecipes.com/wp-content/uploads/2025/07/34bebae0-03aa-4033-97fe-9ea61a9a66c3.webp)
![- Ground turkey - Zucchini - Bell pepper - Onion - Garlic To make a tasty turkey and zucchini skillet, you need fresh, simple ingredients. Ground turkey is the star here. It's lean and cooks quickly. Zucchini adds a nice texture and flavor. You can use one or two medium zucchinis, diced into cubes. A bell pepper, either red or yellow, brings color and sweetness. Finely chopped onion and minced garlic round out the base. These two ingredients create a fragrant aroma that fills your kitchen. - Dried oregano - Smoked paprika - Salt and black pepper Spices bring your dish to life. I love using dried oregano for its earthy taste. Smoked paprika adds a hint of warmth and depth. A little salt and black pepper are key to enhancing all the flavors. Just remember, you can adjust these to match your taste. - Fresh basil leaves To finish off your turkey and zucchini skillet, consider fresh basil leaves. They add a burst of color and a fresh flavor. Simply sprinkle them on top before serving for an extra pop! For the full recipe, check out the details above. 1. First, heat two tablespoons of olive oil in a large skillet over medium heat. This helps to get the right flavor. 2. Next, add the finely chopped onion. Sauté it for 2-3 minutes until it becomes soft and clear. 3. Then, stir in the minced garlic. Cook it for another minute. You want to smell that great aroma. 4. Now, increase the heat to medium-high and add the ground turkey. Cook it until it turns brown. Break it apart with a spatula for about 5-7 minutes. 1. Once the turkey is cooked, season it with dried oregano, smoked paprika, salt, and black pepper. Mix everything well. 2. Add the diced zucchinis and bell pepper to the skillet. Stir and cook for 5 minutes. This keeps the veggies crisp. 3. Next, fold in the halved cherry tomatoes. Cook for another 2-3 minutes until they soften slightly. 1. Remove the skillet from heat. 2. Garnish with fresh basil leaves. This adds a nice touch of color and freshness. 3. Serve your turkey and zucchini skillet warm. Enjoy this quick and flavorful meal! For the full recipe, check out the details above. - Choosing the right turkey: Use lean ground turkey. It has less fat and cooks well. Look for a turkey that is 93% lean or higher. This keeps the dish light and flavorful. - Ensuring vegetables maintain texture: Cut the zucchini and bell pepper into even pieces. This helps them cook at the same rate. Don’t overcook them. They should remain slightly crisp for the best texture. - Best side dishes to pair: Serve this dish with a side salad. A simple green salad with lemon dressing works great. Brown rice or quinoa also pairs well for a filling meal. - Ideal plates and presentation tips: Use a wide, shallow bowl to serve. This allows the colors to shine. Garnish with fresh basil leaves before serving. It adds a nice touch and fresh flavor. - Low-calorie substitutes: Replace ground turkey with chicken or turkey breast. You can also use cauliflower rice instead of brown rice. This cuts calories while adding fiber. - Incorporating more vegetables: Add more veggies like spinach or mushrooms. You can also mix in kale or carrots. This boosts nutrition and flavor without many extra calories. For the complete recipe, see the [Full Recipe]. {{image_2}} You can change the ground turkey for other meats. Ground chicken or beef works well. Each choice gives a different taste and texture. If you want to keep it light, try ground turkey. You can also swap out zucchini. Try bell peppers, squash, or even carrots. Each veggie adds its own flavor and nutrition. This lets you make the dish your own. Add more spices or sauces to kick up the taste. A dash of chili powder can add heat. If you like sweetness, a splash of soy sauce makes it savory. Incorporate fresh herbs for a bright flavor. Try thyme or cilantro mixed in. These herbs can change the taste and make it fresh. For a gluten-free dish, check your sauces. Most spices are gluten-free, but some sauces may contain it. Simple swaps keep the dish safe for all diets. If you want a vegetarian option, use plant-based meat or beans. Mushrooms also make a hearty substitute. This way, you can enjoy the meal without meat. For the full recipe, check the section above. To keep your Turkey and Zucchini Skillet fresh, use an airtight container. Glass or BPA-free plastic containers work well. Make sure to let the skillet cool down before sealing it. Store it in the fridge for up to three days. When you are ready to enjoy leftovers, you can reheat them in two ways. The stovetop is best for keeping flavors intact. Heat a pan over medium heat, then add the skillet contents. Stir often until warm. If you use a microwave, place the skillet in a microwave-safe bowl. Cover it with a lid or wrap to keep moisture in. Heat for one minute, then stir and check if it's hot. Repeat as needed. You can freeze the Turkey and Zucchini Skillet for longer storage. First, let it cool completely. Then, transfer it to a freezer-safe container or bag. Squeeze out as much air as possible before sealing. This dish can stay frozen for up to three months. When ready to eat, thaw it overnight in the fridge before reheating. For the complete recipe, check the Full Recipe section above to get started. It only takes 25 minutes to make this dish. You need 10 minutes to prep the ingredients and 15 minutes to cook. This quick meal fits well into busy days. You can easily whip it up for lunch or dinner. Yes, you can use frozen zucchini. Frozen zucchini is handy when fresh zucchini is not available. However, fresh zucchini has a better texture and flavor. If you use frozen, make sure to drain any extra water before adding it to the skillet. This helps keep the dish from becoming too watery. You can pair this skillet with many sides. Here are some great options: - Quinoa or rice for added fiber. - A fresh green salad for crunch. - Whole-grain bread to soak up flavors. - Roasted potatoes for a hearty side. Yes, this recipe is quite healthy! Ground turkey is a lean protein that is low in fat. Zucchini and bell peppers add vitamins and minerals. Olive oil provides healthy fats, while garlic boosts flavor with health benefits. This dish is packed with nutrients and can fit into many diets. For those looking to eat well, it’s a great choice. For the full recipe, check the section above. This blog post covers a great turkey and zucchini skillet recipe. We explored key ingredients and spices that enhance flavor. You learned step-by-step instructions and useful tips for cooking and serving. We also discussed variations and storage methods to keep your meal fresh. In the end, this dish is easy to make and adaptable for your needs. Enjoy this healthy meal with your favorite side, knowing you can customize it as you wish!](https://stirredrecipes.com/wp-content/uploads/2025/07/d7cdd01a-dca1-4c13-98c4-c40876795d8e.webp)

![- 1 medium zucchini, grated - 1 cup fresh blueberries - 1 cup all-purpose flour - 1/2 cup whole wheat flour In this recipe, zucchini adds moisture and a healthy twist. The fresh blueberries give a sweet burst in each bite. Combining all-purpose and whole wheat flour gives a nice texture to the muffins. - 1/2 cup granulated sugar - 1/4 cup brown sugar, packed - 1/4 cup unsweetened applesauce - 1/4 cup vegetable oil These sweeteners balance the flavor. Applesauce keeps the muffins moist and lowers the fat. The vegetable oil works well for a soft crumb. - 2 large eggs - 1 teaspoon vanilla extract - 1 teaspoon baking powder - 1/2 teaspoon baking soda - 1/2 teaspoon salt - 1 teaspoon ground cinnamon - 1/4 teaspoon nutmeg (optional) - 1/2 cup chopped walnuts or pecans (optional) Eggs bind the mix together, while baking powder and soda help them rise. Vanilla extract adds a warm flavor. Spices like cinnamon and nutmeg give a cozy touch. If you like, add nuts for crunch. For the complete preparation steps, check out the Full Recipe. 1. First, preheat your oven to 350°F (175°C). This step is key for even baking. 2. Next, line a muffin tin with paper liners or spray it with non-stick spray. This will help the muffins release easily. 3. In a large bowl, combine the grated zucchini, fresh blueberries, applesauce, vegetable oil, eggs, and vanilla extract. Mix well until everything is combined. 1. In a separate bowl, whisk together the all-purpose flour, whole wheat flour, granulated sugar, brown sugar, baking powder, baking soda, salt, cinnamon, and nutmeg if you choose to use it. This blend adds flavor and helps the muffins rise. 1. Gradually add the dry mixture to the wet mixture. Gently fold them together until just combined. Be careful not to overmix; a few lumps are fine. 2. If you like nuts, fold in the chopped walnuts or pecans at this stage. They add crunch and flavor. 3. Now, divide the batter evenly among the muffin cups, filling each about two-thirds full. 1. Place the muffin tin in the oven and bake for 18 to 22 minutes. Check for doneness by inserting a toothpick into the center of a muffin. It should come out clean. 2. Once baked, remove the muffins from the oven. Allow them to cool in the tin for about five minutes. After that, transfer them to a wire rack to cool completely. For the full recipe, refer to the [Full Recipe]. Enjoy these tasty muffins warm! To make great blueberry zucchini muffins, avoid overmixing. Mix the wet and dry ingredients until just combined. A few lumps are fine. Overmixing makes muffins dense and tough. Next, monitor your baking time closely. Start checking at 18 minutes. Insert a toothpick into the center. If it comes out clean, your muffins are done. If not, bake for a couple more minutes. You can boost the flavor by adding spices or nuts. Try adding a pinch of nutmeg or some chopped walnuts. These give extra texture and taste. Also, consider optional toppings before baking. Sprinkle a little sugar on top for a nice crunch. You can even add a few extra blueberries for a pop of color. When serving, presentation matters. Serve the muffins warm and dust them with powdered sugar. Place them on a beautiful platter. Add fresh blueberries and mint leaves as a garnish. This makes your muffins look as good as they taste! {{image_2}} You can change up the flavor of your muffins. Try adding different fruits like raspberries or cranberries. Both will create a nice twist. You can also add citrus zest from oranges or lemons. This zest gives a bright flavor that enhances the muffins. If you want to make gluten-free muffins, use gluten-free flour. This flour works well in most recipes and keeps the muffins fluffy. Just swap the all-purpose flour with a good gluten-free blend. The muffins will still taste great! For a vegan version, replace the eggs with flaxseed or applesauce. To use flaxseed, mix one tablespoon of ground flaxseed with three tablespoons of water. Let it sit for a few minutes until it gets thick. If you prefer applesauce, use a quarter cup for each egg. This keeps the muffins moist and delicious. For the full recipe, check out the complete preparation steps for Blueberry Zucchini Muffins. You can store blueberry zucchini muffins at room temperature or in the fridge. If you keep them at room temperature, place them in an airtight container. They stay fresh for about three days this way. If you prefer refrigeration, they will last a bit longer, up to a week. Just remember that cold muffins may lose some of their soft texture. Freezing muffins is a great option if you want to keep them longer. To freeze, let the muffins cool completely. Then, wrap each muffin in plastic wrap. Place them in a freezer bag and remove as much air as possible. They can stay frozen for up to three months. When you're ready to eat them, thaw them in the fridge overnight or warm them in the microwave. Blueberry zucchini muffins can last for several days when stored correctly. At room temperature, they last about three days. In the fridge, they can last up to one week. If you freeze them, they retain their taste for up to three months. Enjoy your muffins fresh, but know they can stay tasty for a while! Yes, you can use frozen blueberries. They work well in muffins. Just add them straight from the freezer. This keeps them from getting mushy. Frozen blueberries may tint the batter a little. But they still taste great! Fresh blueberries offer a burst of flavor. Use what you have on hand. To stop muffins from sticking, grease your muffin tin well. You can use cooking spray or line with paper liners. If using spray, make sure to cover the sides and bottom. This helps them pop out easily. Let the muffins cool for a few minutes in the tin. Then, gently remove them with a spoon or spatula. Yes, you can double the recipe! Just multiply each ingredient by two. Mix the wet and dry ingredients in separate bowls. Then, combine them as you would for a single batch. Use two muffin tins if needed. Keep an eye on baking time. They may take a few extra minutes to cook through. Leftover zucchini can be used in many ways. You can make zucchini fritters or add it to stir-fries. It also works well in salads. Try blending it into smoothies for extra nutrition. You can even freeze it for later use. Grate and pack it into bags. This way, it’s ready for your next recipe! For the complete preparation steps of Blueberry Zucchini Muffins, please refer to the [Full Recipe]. In this post, we explored how to make delicious blueberry zucchini muffins. You learned about the main ingredients like zucchini and blueberries, plus sweeteners and fats. The step-by-step instructions made it easy to follow along. We shared tips for perfect muffins and tasty variations to try. Remember, these muffins are versatile; you can freeze them or adjust the recipe to your taste. I hope you feel inspired to bake and enjoy these treats! Happy baking!](https://stirredrecipes.com/wp-content/uploads/2025/07/8f00fcdb-7d9e-439a-9dce-193686cfa52b.webp)

![To make this loaf, you need just four simple ingredients: - 2 cups finely grated zucchini (about 2 medium-sized zucchini) - 1 cup unsweetened cocoa powder - 1 cup maple syrup - 2 cups all-purpose flour Each ingredient plays a key role. The zucchini adds moisture and keeps the loaf soft. Cocoa powder brings that rich chocolate taste. Maple syrup adds sweetness and a hint of flavor. Flour gives the loaf structure. Using fresh zucchini is important. Look for firm, shiny skin and no soft spots. This ensures your loaf will be moist. Choose high-quality cocoa powder for the best flavor. Pure maple syrup is better than pancake syrup. It has a deeper taste that enhances the loaf. For the flour, all-purpose works best. It balances the texture without being too dense. If you have dietary needs, don't worry! You can swap ingredients easily. For gluten-free eaters, use a gluten-free flour blend. This keeps the texture light and fluffy. If you want a lower-sugar option, try using agave syrup instead of maple syrup. It still adds sweetness without being too heavy. For a vegan version, ensure your flour is free from animal products. You can also use flax eggs if you need an egg substitute. This 4 Ingredient Chocolate Zucchini Loaf is versatile and fun to make. You can adjust it to fit your tastes and needs! For the full recipe, check out the details above. To start, gather your ingredients. You need zucchini, cocoa powder, maple syrup, and flour. Grate the zucchini finely. You want it to blend well in the loaf. In a large bowl, mix the grated zucchini with the maple syrup. Stir until they combine smoothly. Next, sift in the cocoa powder and flour. Mix gently. You want a smooth batter, so don’t overmix. Just combine until no dry flour remains. This step is key to a tasty loaf. Preheat your oven to 350°F (180°C). Grease a 9x5 inch loaf pan or line it with parchment paper. This makes it easy to remove the loaf later. Pour the batter into the pan. Spread it evenly with a spatula. Place the pan in the oven and bake for 50-60 minutes. The time may vary slightly based on your oven. To check if your loaf is done, use a toothpick. Insert it into the center of the loaf. If it comes out clean, your loaf is ready. If there is batter on the toothpick, bake for a few more minutes. Let the loaf cool in the pan for 10 minutes. Then, transfer it to a wire rack. This keeps the bottom from getting soggy. Enjoy your delicious creation! For the full recipe, refer back to the earlier section. Mixing the batter right will make your loaf great. Start by grating the zucchini finely. This helps it blend well with other ingredients. In a large bowl, combine the zucchini and maple syrup first. Stir until you see a smooth mix. Next, sift the cocoa powder and flour into the bowl. Sifting helps avoid lumps. Mix gently. Stop as soon as there is no dry flour left. Overmixing can make the loaf tough. One big mistake is not prepping the zucchini. Make sure to squeeze out extra water from the grated zucchini. Too much water will make the loaf soggy. Another mistake is baking at the wrong heat. Always preheat your oven to 350°F (180°C). If your oven runs hot, check the loaf early. You want a toothpick to come out clean after 50-60 minutes. To boost flavor, consider adding some spices. A pinch of cinnamon or nutmeg can work wonders. You can also mix in vanilla extract for a sweet note. For texture, try adding chopped nuts or chocolate chips. They add crunch and richness. Just fold them in gently at the end. For the full recipe, visit the [Full Recipe] link. {{image_2}} You can easily add nuts or chocolate chips to your loaf. Walnuts or pecans work great. They add a nice crunch and extra flavor. You can also use dark or milk chocolate chips for more sweetness. Just fold them into the batter before pouring it into the pan. This simple addition makes each slice even more delicious. If you need a gluten-free option, swap the all-purpose flour. You can use a gluten-free flour blend instead. Make sure it is a 1:1 substitute. This way, you keep the same texture and taste. Other options include almond flour or coconut flour. Just remember to adjust the liquid in your recipe. These flours absorb more moisture, so you may need to add a bit of water or milk. Spices can take your loaf to the next level. Try adding a pinch of cinnamon or nutmeg for warmth. You can also add a splash of vanilla extract for a lovely aroma. These small tweaks can make a big difference. Experiment with different flavors to find what you love best. Each twist can create a unique version of this already tasty loaf. To keep your chocolate zucchini loaf fresh, wrap it tightly in plastic wrap. You can also place it in an airtight container. This helps keep moisture in and prevents it from drying out. Store it at room temperature for up to two days. If you want to keep it longer, consider freezing it. To freeze your loaf, ensure it is completely cool. Wrap it in plastic wrap, then place it in a freezer bag. This helps prevent freezer burn. When you're ready to eat, take it out and let it thaw in the fridge overnight. You can also thaw it at room temperature for a few hours. Chocolate zucchini loaf stays fresh for about 3 days at room temperature. If you freeze it, it can last up to three months. Always check for mold or an off smell before eating. For the best taste, enjoy it within a week. The flavors will be at their peak. For more detailed steps, check the Full Recipe. Yes, you can. Honey or agave syrup works well too. These sweeteners add a nice flavor. Choose one that you like best. Keep in mind that this may change the taste a bit. If you use a different sweetener, adjust the amount to match your taste. Check the texture before you mix it in. If it feels very wet or mushy, it’s too watery. You can squeeze out some liquid using a clean cloth or paper towel. This helps keep your loaf from being too soggy. Remember, you want the zucchini to add moisture, not overwhelm it. Yes, this recipe is vegan-friendly! It uses no eggs or dairy. The main ingredients are all plant-based. This makes it a great option for vegans. You can enjoy a tasty treat without any animal products. For the full recipe, check out the details above. This blog post covered how to make a tasty, 4-ingredient chocolate zucchini loaf. We explored key ingredients, tips for mixing, and baking steps. I shared ways to customize the loaf for your diet and preferences. Plus, we discussed storage tips to keep it fresh longer. In closing, this recipe is simple and adaptable. Make it your own, and share it with others. Enjoy baking and savor the delicious results!](https://stirredrecipes.com/wp-content/uploads/2025/07/957bc308-2962-45db-b228-064cdbc378f4.webp)