Chocolate Zucchini Cookies Simple and Tasty Delight
![- 1 cup grated zucchini - 1 cup all-purpose flour - 1/2 cup cocoa powder - 1/2 teaspoon baking soda - 1/4 teaspoon baking powder - 1/4 teaspoon salt - 1/2 cup brown sugar - 1/4 cup granulated sugar - 1/2 cup unsweetened applesauce - 1/3 cup vegetable oil - 1 teaspoon vanilla extract - 1/2 cup semi-sweet chocolate chips - 1/4 cup optional nuts (walnuts or pecans) The main ingredients for these cookies are simple. The star is the grated zucchini. It adds moisture and a subtle flavor. You need to squeeze the zucchini first. This helps remove excess water. The cocoa powder gives a rich chocolate taste. The sugars add sweetness and help with texture. - Additional chocolate chips - Spices like cinnamon or nutmeg You can make these cookies even better. Consider adding more chocolate chips. They make the cookies extra gooey. Spices like cinnamon or nutmeg can add warmth. Just a pinch can enhance the flavor. - Mixing bowls - Whisk - Baking sheet - Parchment paper - Cookie scoop or tablespoon For making these cookies, gather your tools. You need mixing bowls for combining ingredients. A whisk will help mix wet and dry items smoothly. A baking sheet lined with parchment paper is essential. It keeps the cookies from sticking. A cookie scoop or tablespoon makes portioning easy. Using these tools will help you create perfect cookies every time. For the full recipe, check out the [Full Recipe]. - Preheat the oven to 350°F (175°C). - Line the baking sheet with parchment paper. This makes cleanup easy. - In a medium bowl, combine: - 1 cup all-purpose flour - 1/2 cup cocoa powder - 1/2 teaspoon baking soda - 1/4 teaspoon baking powder - 1/4 teaspoon salt - Whisk these ingredients together well. - In a large bowl, beat together: - 1/2 cup brown sugar - 1/4 cup granulated sugar - 1/2 cup unsweetened applesauce - 1/3 cup vegetable oil - 1 teaspoon vanilla extract - Mix until smooth and creamy. - Gradually add the dry mixture to the wet mixture. - Stir just until combined, but don’t overmix. - Fold in: - 1 cup grated zucchini - 1/2 cup semi-sweet chocolate chips - 1/4 cup chopped walnuts or pecans (if using) - The batter will be thick and rich. - Use a cookie scoop or tablespoon to drop dough onto the prepared baking sheet. - Leave about 2 inches of space between each cookie. - Bake in the preheated oven for 12-15 minutes. - The edges should look set and tops glossy. - Cool the cookies on the sheet for 5 minutes, then transfer to a wire rack. - Let them cool completely before enjoying their rich, chocolatey goodness. For the full recipe, check out the detailed instructions above! To make moist cookies, always squeeze the grated zucchini. This step removes extra water. If you skip this, your cookies may turn out soggy. I recommend using fresh zucchini for the best taste. Mix the wet and dry ingredients gently. This helps keep the cookies light and fluffy, not dense. For even baking, make sure to space the cookie dough on the sheet. Leave two inches apart. This allows heat to circulate properly. Rotate the baking sheet halfway through baking. This ensures all cookies bake evenly. You can add spices like cinnamon or nutmeg for warmth. These spices pair well with chocolate. If you want crunch, add chopped walnuts or pecans. They give a nice texture and flavor boost. Adjusting sweetness is easy. Taste the dough before baking. If you like sweeter cookies, add a bit more sugar. You can also use dark chocolate chips for a richer flavor. One mistake is overmixing the batter. This makes cookies tough instead of soft. Mix just until the ingredients combine. Another common error is not squeezing moisture from the zucchini. This will lead to cookies that are too wet. Always remember to squeeze your zucchini well before adding it. For the full recipe, check out the [Full Recipe]. {{image_2}} You can make these cookies gluten-free! Simply substitute all-purpose flour with gluten-free flour. This swap keeps the cookies tasty and fun while making them safe for those with gluten sensitivities. I recommend using a blend that includes xanthan gum for the best texture. Want to make these cookies vegan? Replace the eggs by using flaxseed meal or chia seeds. To do this, mix one tablespoon of either with three tablespoons of water. Let it sit for about five minutes until it thickens. This will create a perfect binding agent in your cookie dough. You can add unique flavors to your cookies. Try mixing in a bit of peppermint extract for a fresh twist. Alternatively, sprinkle in some orange zest for a bright, citrusy note. Both options will give your cookies a fun and exciting flavor boost that everyone will love. To keep your cookies fresh, store them in an airtight container. This helps maintain their moisture and flavor. I recommend using a plastic or glass container with a tight lid. You can also layer parchment paper between cookies to prevent sticking. Keep them at room temperature for the best taste. Freezing cookies is simple. First, let the cookies cool completely. Then, place them on a baking sheet and freeze for about an hour. Once frozen, transfer the cookies to a freezer bag or container. Squeeze out as much air as you can before sealing. To thaw, simply remove cookies from the freezer and let them sit at room temperature for about 30 minutes. These cookies last about a week at room temperature. Look for signs of spoilage, like an off smell or dry texture. If you see any mold, toss them. For the best flavor, enjoy them within a few days. Yes, you can skip the zucchini, but it changes the cookies. Without zucchini, the cookies become drier and less soft. Zucchini adds moisture and a slight sweetness. You might want to add more applesauce to help with texture. To make chewier cookies, adjust the baking time. Bake them for a shorter time, about 10 to 12 minutes. You can also add a little more brown sugar. Brown sugar has more moisture than white sugar, which helps with chewiness. If you need a substitute for applesauce, try mashed banana. It adds sweetness and moisture. You can also use yogurt or pumpkin puree as alternatives. These options will keep your cookies moist and tasty. Yes, these cookies can be healthy. They have zucchini, which is full of vitamins. The whole recipe contains less sugar than most cookies. You can even use whole wheat flour for more fiber. Enjoy these cookies as a treat without guilt! For the full recipe, check out the complete guide to making Chocolate Zucchini Cookies! This blog post covers how to make delicious zucchini chocolate chip cookies. We discussed main ingredients, optional additions, and tools you need. Step-by-step instructions showed you how to mix, bake, and store your cookies. Tips for perfect texture and common mistakes to avoid were also included. In the end, these cookies are tasty and fun to make. Whether you prefer a gluten-free version or want to try different flavors, the choices are endless. Enjoy baking and sharing these treats with friends and family!](https://stirredrecipes.com/wp-content/uploads/2025/07/0ac8bf51-71eb-4bec-bdd8-c1497f60927c.webp)
Are you ready to dive into a cookie recipe that is both fun and delicious? These Chocolate Zucchini Cookies pack a tasty punch while sneaking in some veggies! You’ll love …
Are you ready to dive into a cookie recipe that is both fun and delicious? These Chocolate Zucchini Cookies pack a tasty punch while sneaking in some veggies! You’ll love …

Craving a dish that’s both crispy and packed with flavor? You’re in the right place! My Crispy Bang Bang Chicken Recipe is easy to make and sure to impress your …

Are you ready to indulge in a sweet treat that blends three delicious flavors? Rich Neapolitan Cake Pops are the perfect mix of chocolate, vanilla, and strawberry, all in a …
![- 1 cup finely grated zucchini (about 1 medium zucchini) - 1 cup granulated sugar - 1/2 cup brown sugar, packed - 1/2 cup vegetable oil - 2 large eggs - 1 teaspoon vanilla extract - 1 cup all-purpose flour - 1/3 cup unsweetened cocoa powder - 1/2 teaspoon baking soda - 1/2 teaspoon baking powder - 1/4 teaspoon salt - 1 cup semi-sweet chocolate chips These ingredients make the gooey texture and rich taste. The zucchini hides well in the chocolate, adding moisture without changing the flavor. It’s a sneaky way to add veggies to your dessert! - 1/2 cup chopped walnuts or pecans - Special toppings like powdered sugar or a drizzle of chocolate You can add nuts for crunch. They give texture and flavor. If you like, top the bars with powdered sugar or melted chocolate for a fun finish. These extras make your bars even more enjoyable. Check out the Full Recipe for more details! First, preheat your oven to 350°F (175°C). This step is key for even baking. Next, prepare your 9x13-inch baking pan. You can grease it or line it with parchment paper. This makes removing the bars easier later. Now, let’s mix our wet ingredients. In a large mixing bowl, whisk together 1 cup of granulated sugar, 1/2 cup of brown sugar, and 1/2 cup of vegetable oil until it looks smooth. Then, add 2 large eggs, one at a time. Mix well after each egg. Finally, stir in 1 teaspoon of vanilla extract. This mix will give your bars great flavor. Next, we need to incorporate the dry ingredients. In another bowl, combine 1 cup of all-purpose flour, 1/3 cup of unsweetened cocoa powder, 1/2 teaspoon of baking soda, 1/2 teaspoon of baking powder, and 1/4 teaspoon of salt. Gradually add this dry mix to the wet mixture. Stir until just combined. Be careful not to overmix, as this can make the bars tough. Now, it’s time to fold in our star ingredients. Add 1 cup of finely grated zucchini and 1 cup of semi-sweet chocolate chips to the batter. If you like nuts, you can add 1/2 cup of chopped walnuts or pecans too. Gently fold everything together until it’s mixed well. Pour the batter into your prepared pan and spread it evenly. Place it in the oven and bake for 25-30 minutes. To check for doneness, insert a toothpick in the center. It should come out with a few moist crumbs, but not wet batter. Once done, let the bars cool in the pan for about 10 minutes. Then, transfer them to a wire rack to cool completely. For a special treat, you can dust the cooled bars with powdered sugar or serve with vanilla ice cream. For the full recipe, check the detailed instructions above. To get the best results, you need to grate the zucchini well. Use a box grater or food processor. Grate it finely to help it blend into the batter. Remove excess moisture by squeezing the grated zucchini in a clean kitchen towel. This step helps keep the bars from getting soggy. Next, achieving the right consistency is key. The batter should be thick but smooth. Avoid overmixing after adding the zucchini and chocolate chips. This keeps your bars soft and gooey. You can boost the flavor of your bars with a few simple tweaks. Try adding a teaspoon of cinnamon or a pinch of nutmeg for warmth. You can also mix in some orange zest for a fresh twist. When it comes to chocolate, use semi-sweet chocolate chips for balance. Dark chocolate offers a rich taste, while milk chocolate adds sweetness. You can even try a mix of different chocolates for more depth. Cut the cooled bars into even squares for a neat look. Use a sharp knife to get clean edges. For a special touch, dust the bars with powdered sugar before serving. Pair these bars with a scoop of vanilla ice cream for a delightful treat. They also go well with a cup of coffee or milk. For a fun twist, serve them warm with whipped cream on top. For the full recipe, check out the details above! {{image_2}} If you want to make your gooey chocolate zucchini bars a bit healthier, you can make simple swaps. - Using whole wheat flour instead of all-purpose: This swap adds fiber and nutrients. Whole wheat flour gives a slight nuttiness to the bars. It can make them more filling too. Just substitute the same amount of whole wheat flour for all-purpose flour in the recipe. - Substituting applesauce for oil: This swap cuts down on fat. Applesauce keeps the bars moist. Use the same amount of applesauce as oil. This change also adds a hint of sweetness. You can make your bars unique by adding fun flavors and textures. - Adding spices like cinnamon or nutmeg: A touch of spice can boost the flavor. Just add about a teaspoon of cinnamon or nutmeg to the dry mix. These spices pair well with chocolate. They create a warm, cozy taste. - Experimenting with different types of nuts and chocolate: Try using almonds or hazelnuts instead of walnuts. You can also mix in dark chocolate chips or white chocolate for variety. This allows you to create your own favorite version of these bars. For the full recipe, check out the complete guide to making gooey chocolate zucchini bars! To keep your gooey chocolate zucchini bars fresh, store them in an airtight container. I recommend using a glass or plastic container with a tight lid. This helps to keep them moist and tasty. Place a piece of parchment paper between the layers if you stack the bars. It stops them from sticking together. These bars last about a week at room temperature. If you want them to last longer, keep them in the fridge. You can freeze these bars for up to three months. To freeze, first, let the bars cool completely. Then, cut them into squares. Wrap each square in plastic wrap. After wrapping, place them in a freezer-safe bag or container. When you're ready to eat them, take out the desired amount. Let them thaw in the fridge overnight. This keeps the texture and flavor nice. You can also warm them up in the microwave for a few seconds. Enjoy them fresh as if they were just baked! Can I use frozen zucchini in this recipe? Yes, you can use frozen zucchini. Just thaw and drain it well. This keeps the bars from being too wet. Fresh zucchini works best, but frozen is a good backup. How do I know when the bars are done baking? Check the bars after 25 minutes. Insert a toothpick in the center. If it comes out with a few moist crumbs, they are ready. If it has wet batter, bake longer. Can this recipe be made gluten-free? Yes, you can make these bars gluten-free. Use a gluten-free baking mix instead of all-purpose flour. This will keep the texture soft and moist. Suggestions for dairy-free chocolate options Look for dairy-free chocolate chips. Many brands offer great taste without dairy. You could also use dark chocolate. Just check the label for dairy content. Can I make these bars vegan? Yes, you can make them vegan. Replace eggs with flax eggs or applesauce. Use a plant-based oil and vegan chocolate chips for best results. What substitutions work best for sugar alternatives? You can use coconut sugar or maple syrup. If using syrup, reduce the liquid in the recipe slightly. Always check for sweetness levels as these options may vary. For the full recipe, check out the [Full Recipe]. This recipe shows how to make delicious zucchini bars using simple ingredients. We covered key ingredients, preparation steps, and baking tips. I hope you feel inspired to try adding your own flavors. You can even swap ingredients for healthier options. These bars not only taste great but are also easy to store and freeze. Enjoy your baking, and remember that experimenting in the kitchen can lead to amazing treats!](https://stirredrecipes.com/wp-content/uploads/2025/07/aad891c3-9193-407b-bbc2-edfc35c936ed.webp)
Are you ready for a dessert that’s easy to make and full of flavor? These Gooey Chocolate Zucchini Bars are not just a treat, they’re a delightful twist on your …
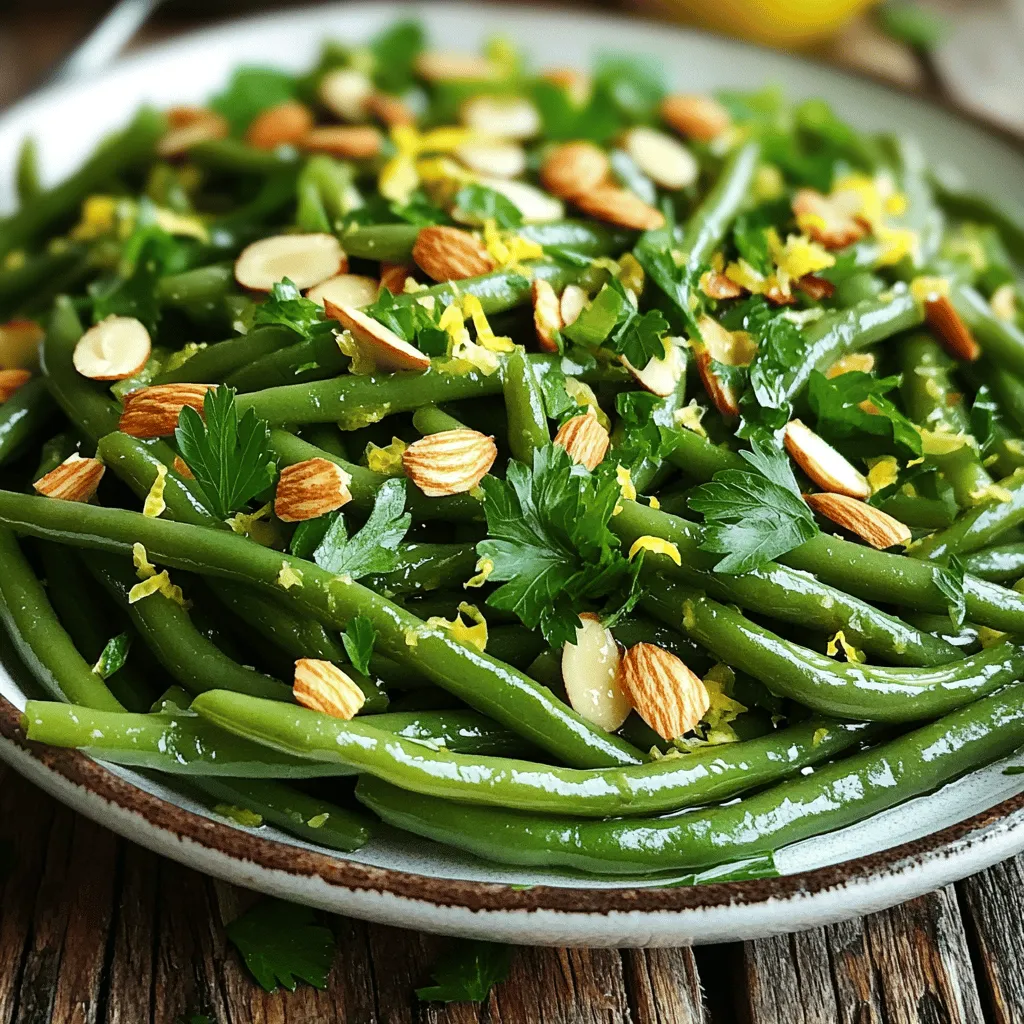
Are you ready to transform ordinary green beans into a fantastic gluten-free side dish? This simple recipe packs flavor and crunch, thanks to fresh ingredients like garlic, lemon, and almonds. …
. This cake is rich and moist, thanks to the zucchini! To make the best double chocolate zucchini cake, avoid overmixing the batter. Overmixing can lead to a dry cake. Stir just until you see no flour. This keeps your cake moist and tender. When selecting zucchini, look for firm and shiny skin. The best zucchini is small to medium-sized. Large zucchini can have tough skin and more seeds. Wash the zucchini well before grating. You want to keep all the fresh flavor. For a beautiful presentation, dust the cooled cake with powdered sugar or cocoa powder. This adds a nice touch and makes it look fancy. Serve it with whipped cream or a scoop of vanilla ice cream on the side. The creaminess balances the rich chocolate flavor perfectly. If you need a gluten-free cake, substitute all-purpose flour with almond flour. This change adds a lovely nutty flavor. You can also try a mix of gluten-free flour blends. For a dairy-free option, use coconut oil instead of butter. Replace regular chocolate chips with dairy-free chocolate chips. These small changes keep the cake delicious without the dairy. Check out the Full Recipe for all the details needed to make this cake perfect! {{image_2}} Error: Error code: 429 - {'error': {'message': 'Rate limit reached for gpt-4o-mini in organization org-zFeAnX8gJvsCtEtJubNX3NN3 on tokens per min (TPM): Limit 200000, Used 197943, Requested 2166. Please try again in 32ms. Visit https://platform.openai.com/account/rate-limits to learn more.', 'type': 'tokens', 'param': None, 'code': 'rate_limit_exceeded'}} To keep your double chocolate zucchini cake fresh, store it in an airtight container. This helps lock in moisture and flavor. Place the cake in the fridge if you plan to keep it for more than a couple of days. If you want to avoid a dry texture, wrap it tightly in plastic wrap before placing it in the container. If you want to save some cake for later, freezing is a great option. First, let the cake cool completely. Then, slice it into individual portions. Wrap each slice in plastic wrap. After that, place the wrapped slices in a freezer-safe bag or container. To enjoy later, thaw a slice in the fridge overnight. This helps keep it moist and tasty. When stored correctly, your cake can last up to a week in the fridge. If frozen, it can stay fresh for about three months. Always check for signs of spoilage before eating. If you notice any off smells, or if the cake looks dry or moldy, it’s best to toss it out. Enjoying this cake at its best makes all the difference! For the full recipe, check the link above. Yes, you can use frozen zucchini. However, it has more water than fresh zucchini. To fix this, thaw the zucchini first. Then, squeeze out the extra water with a clean towel. This helps keep the cake from getting too wet. For the best flavor, I recommend using unsweetened cocoa powder. It offers a rich taste without added sugars. Dutch-processed cocoa also works well. It has a smoother flavor and darker color. Choose based on your taste preference. This cake can be made vegan! Replace the eggs with flaxseed meal or applesauce. Use 1 tablespoon of flaxseed meal mixed with 2.5 tablespoons of water per egg. This helps bind the ingredients together. Also, choose dairy-free chocolate chips. To boost the chocolate flavor, add extra cocoa powder. Try adding an extra 2 tablespoons to the batter. You can also mix in more chocolate chips. Dark chocolate chips add great depth. For a fun twist, add chocolate chunks for a gooey texture. This recipe combines simple ingredients to create a rich and moist cake. You learned how to prepare, bake, and store it for the best results. With tips on variations, you can easily adapt the recipe to your taste preferences. Whether you choose to make it healthier or try different flavors, this cake is easy and fun to make. Enjoying it with friends or family makes it even better. Now, you’re ready to bake and impress with your delicious creation!](https://stirredrecipes.com/wp-content/uploads/2025/07/d7b71481-fa77-4685-bc15-aa0cce2d8274.webp)
Are you ready for a dessert that’s as delicious as it is sneaky? This Best Double Chocolate Zucchini Cake is a moist, rich treat that hides healthy zucchini inside. Perfect …
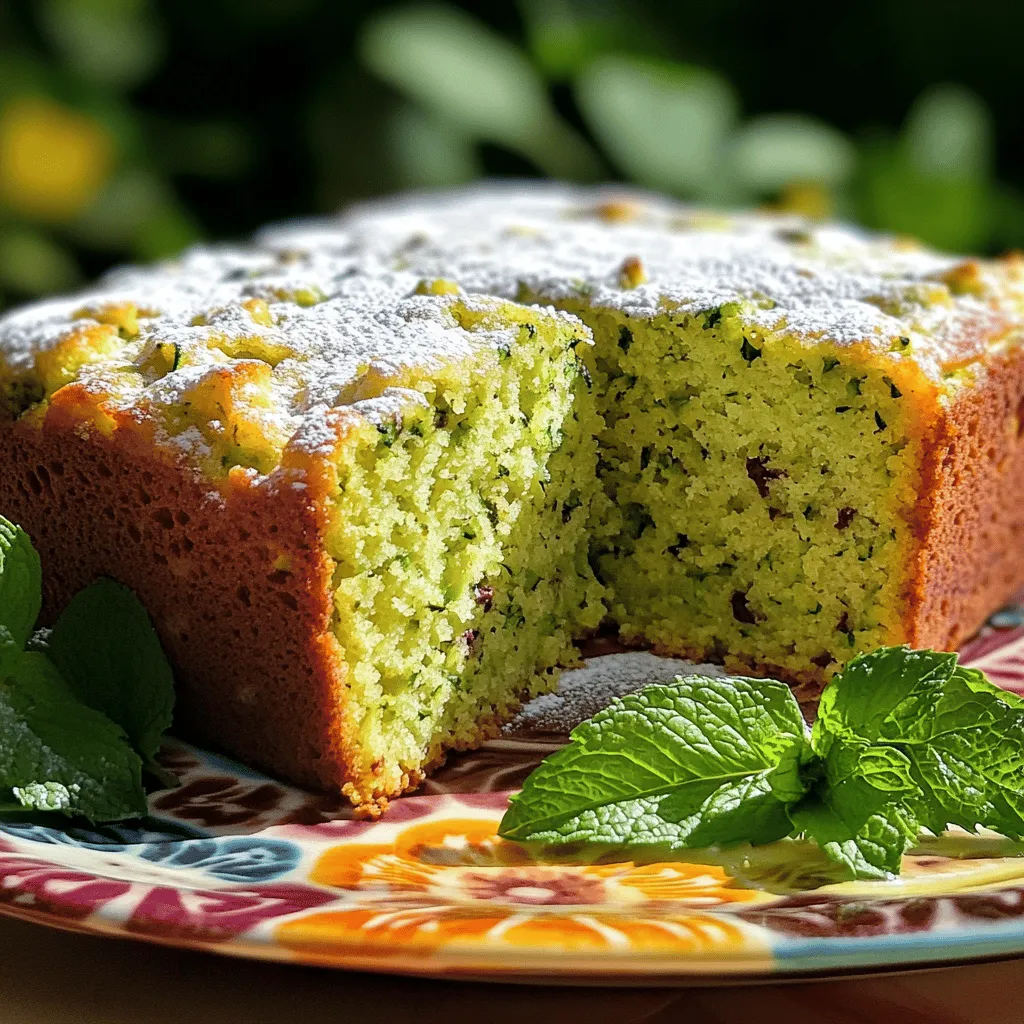
Are you ready to bake something delicious? This Simple One Bowl Zucchini Cake is quick, easy, and perfect for all skill levels. With just a few main ingredients and minimal …
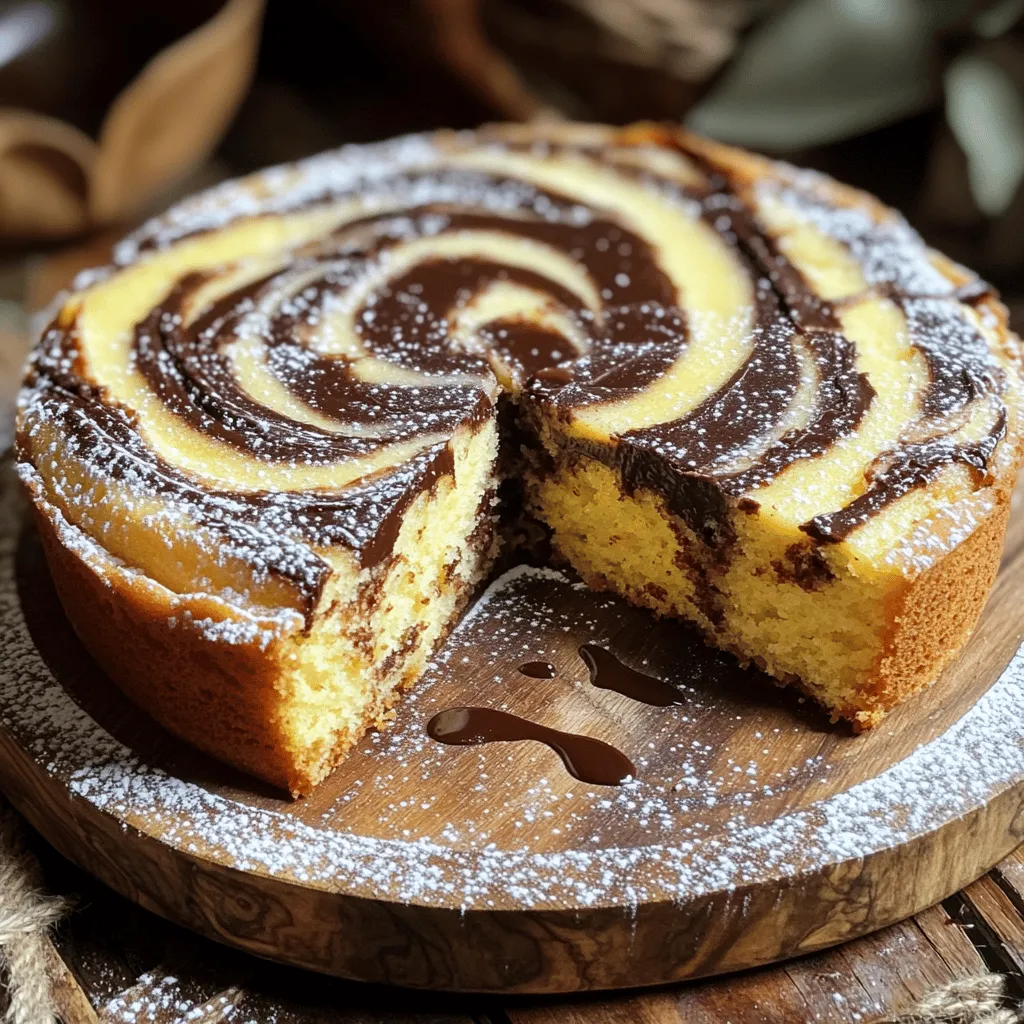
Are you ready to bake a cake that wows everyone? The Classic Marble Butter Cake is a true crowd-pleaser, blending rich vanilla and chocolate flavors in every slice. This delightful …
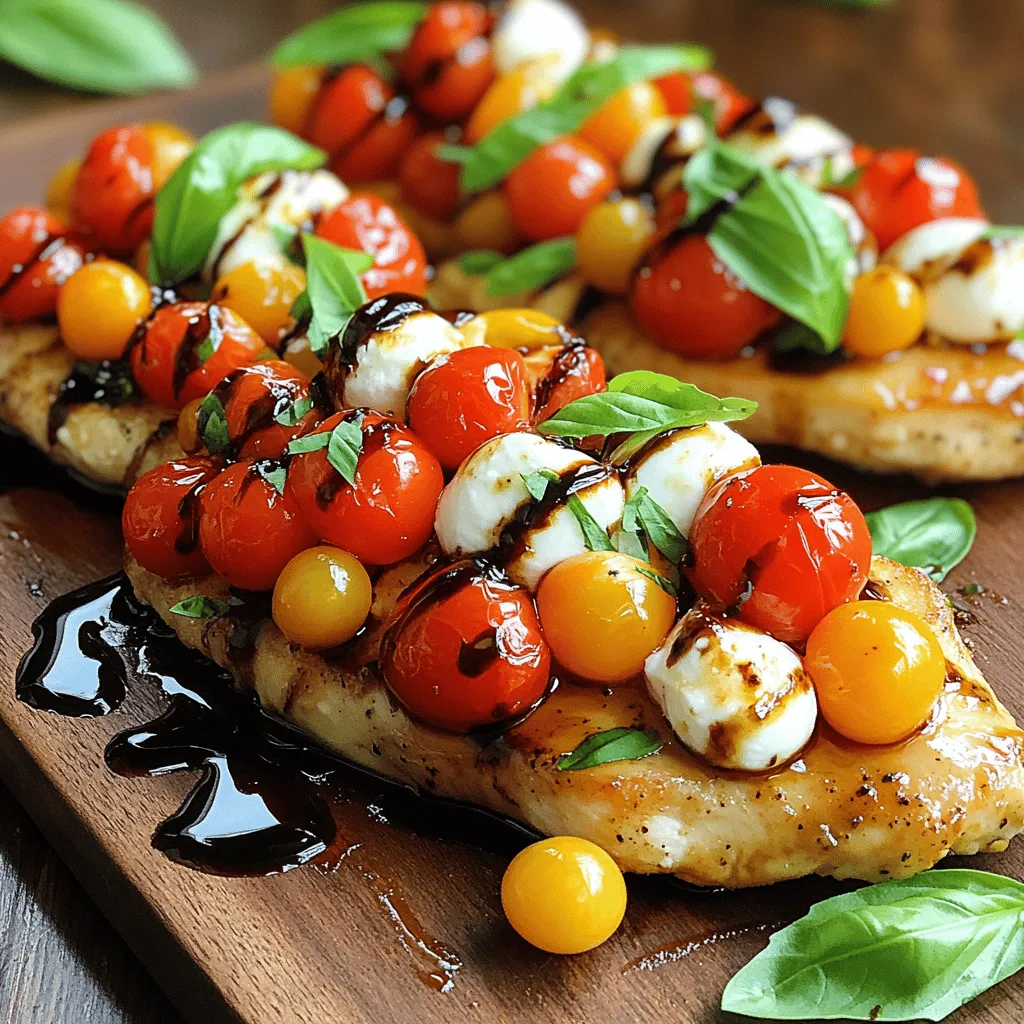
Bruschetta chicken is a tasty dish that’s easy to make and perfect for any meal. In this guide, I focus on each step to help you create a flavorful and …
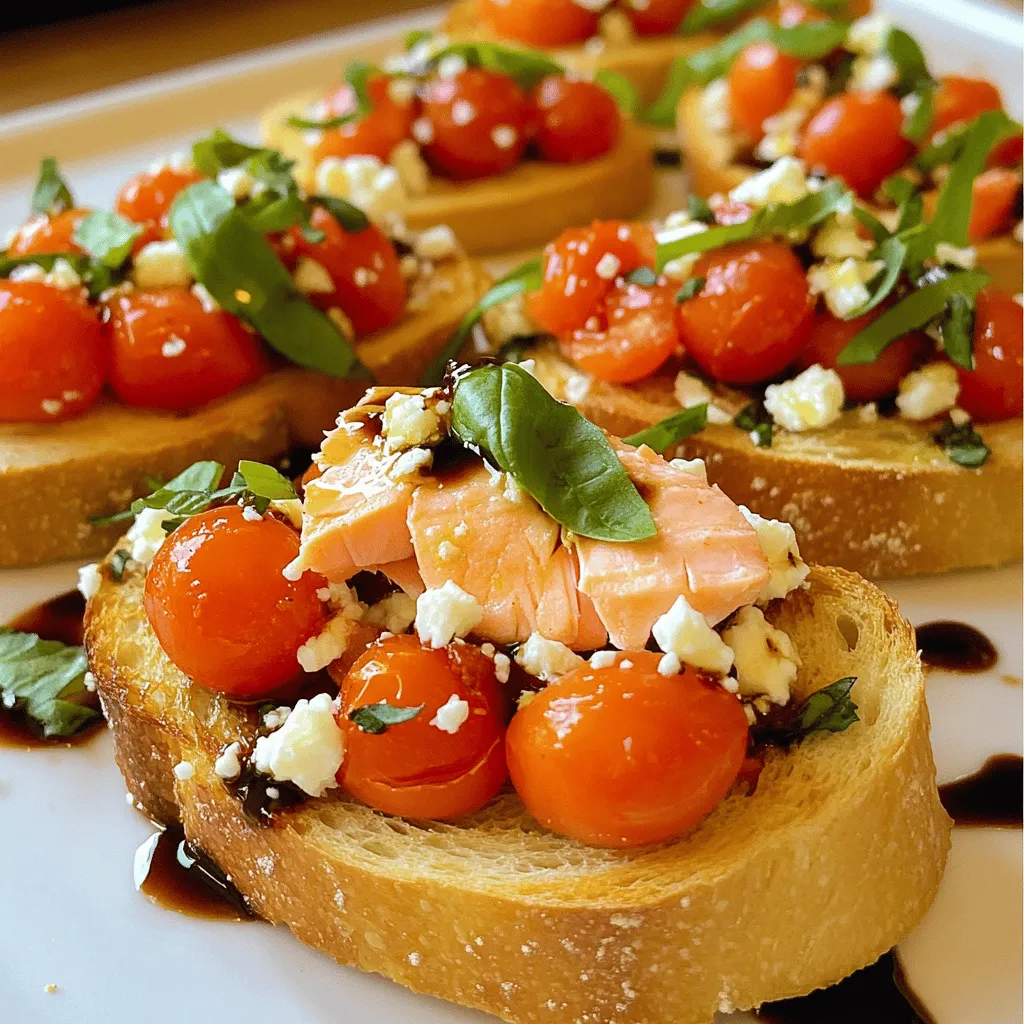
If you’re searching for a delightful appetizer that impresses and satisfies, look no further than Bruschetta Salmon. This tasty dish combines the rich flavors of salmon with fresh tomatoes, basil, …