Easy Balsamic Glaze Simple and Delicious Recipe
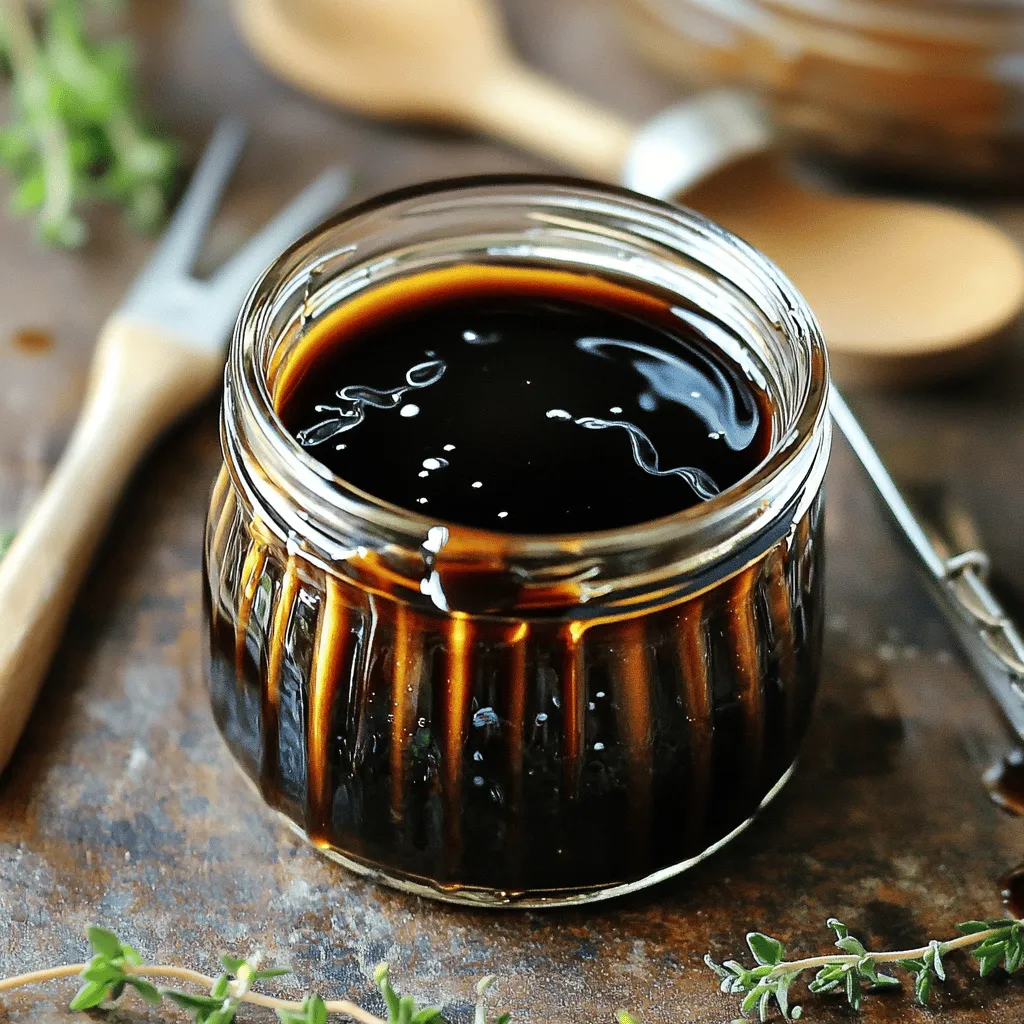
If you crave a simple yet delicious addition to your meals, look no further! This Easy Balsamic Glaze recipe will transform your dishes with just a few ingredients. In under …
If you crave a simple yet delicious addition to your meals, look no further! This Easy Balsamic Glaze recipe will transform your dishes with just a few ingredients. In under …
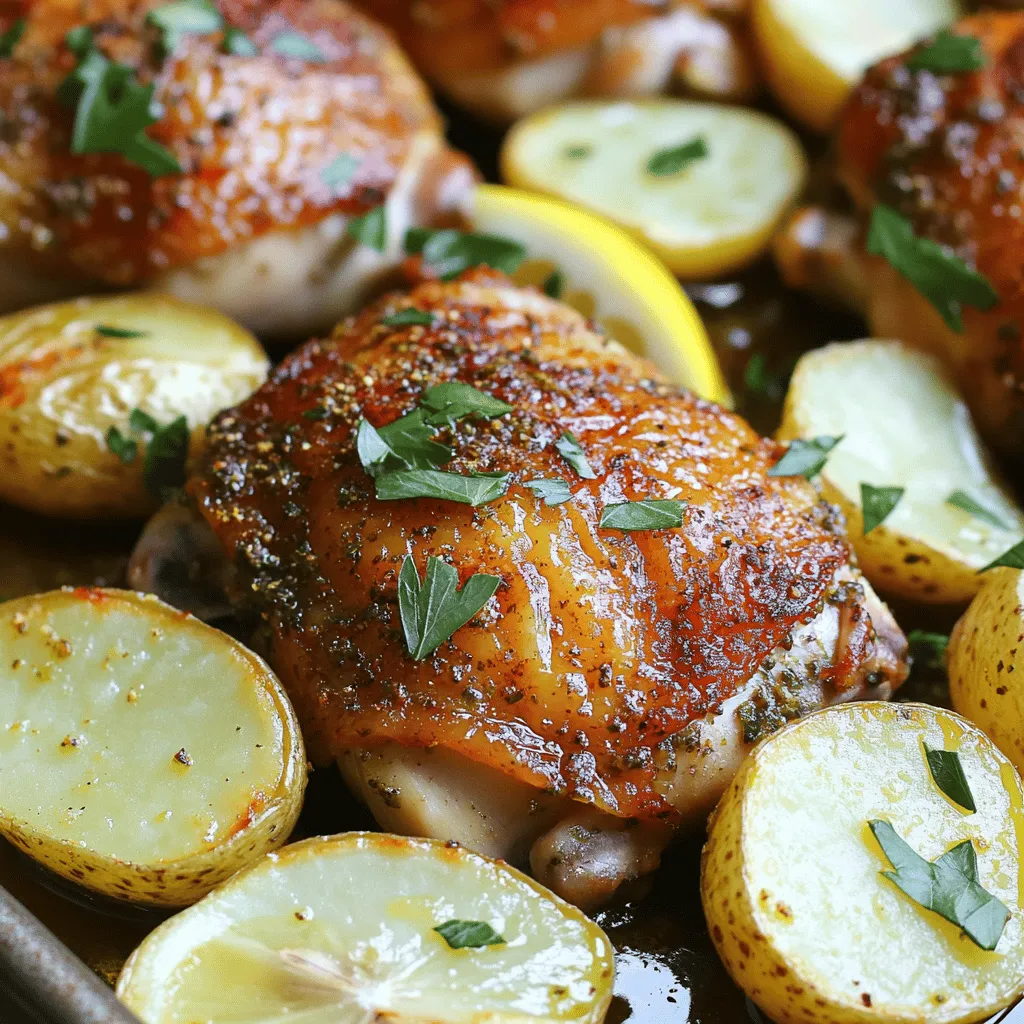
Looking for a quick meal that’s both keto-friendly and full of flavor? This Keto One-Pan Chicken & Potatoes dish is your answer! With juicy chicken thighs, tender baby potatoes, and …
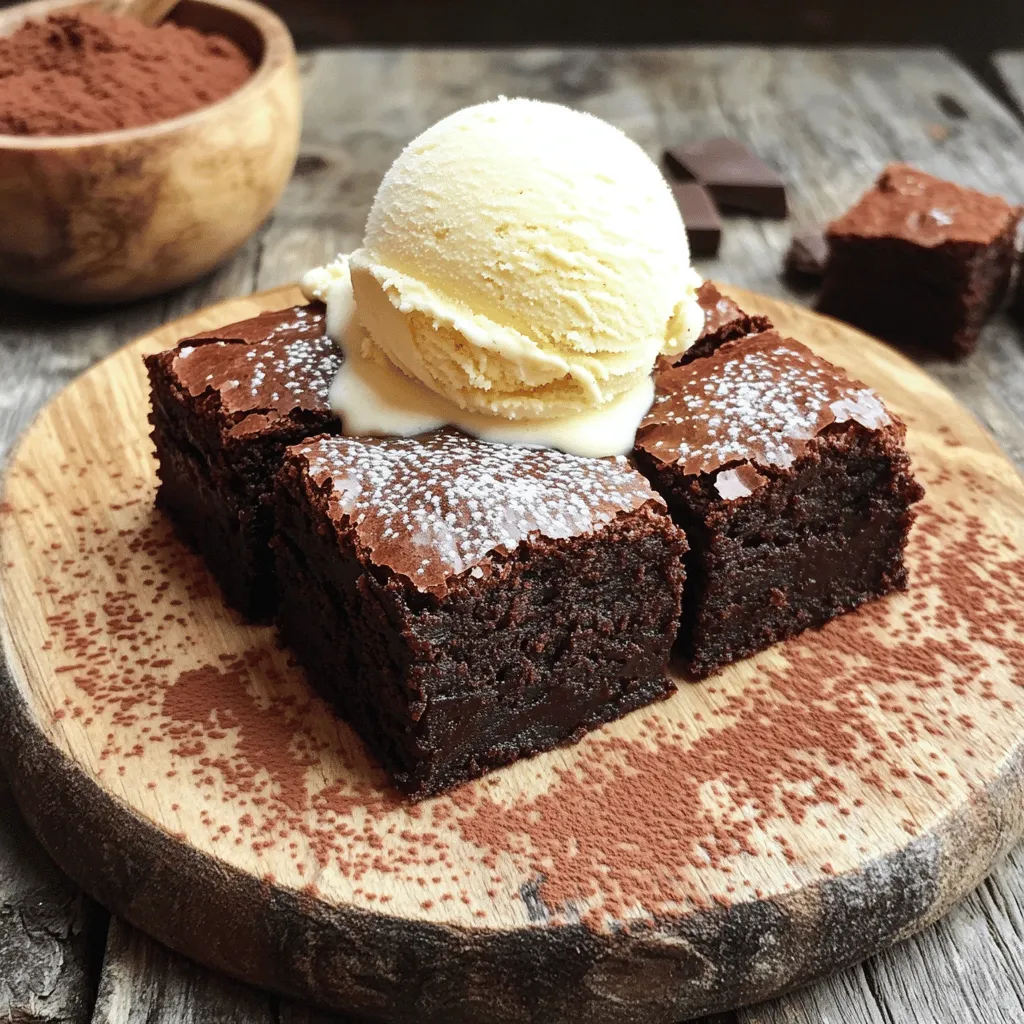
Welcome to the ultimate guide for brownie lovers! If you dream of fudgy, rich brownies that melt in your mouth, you’re in the right place. In this post, I’ll share …
![Napoleon Cake has roots in French cuisine. It is named after the famous French leader, but the name might confuse many. The cake likely came from Russia. Russian chefs adopted the French puff pastry. They created a layered dessert that became popular. The cake features layers of puff pastry and cream. It is rich and satisfying, perfect for special occasions. In many cultures, Napoleon Cake signifies celebration. It is often served at birthdays, weddings, and holidays. The layers symbolize unity and joy. Families cherish sharing this cake with loved ones. Each bite offers a taste of history and tradition. It connects people through shared experiences and memories. Serve Napoleon Cake chilled for the best taste. You can slice it into squares for easy serving. Decorate the top with powdered sugar and berries. Chocolate shavings add a nice touch, too. Pair it with a hot cup of tea or coffee. This combination makes for a delightful treat. You can find the Full Recipe to create this amazing dessert and impress your guests! To make a delicious Napoleon cake, you need the following: - 1 package of puff pastry (2 sheets), thawed - 2 cups whole milk - 1 cup granulated sugar - 1/3 cup all-purpose flour - 4 large egg yolks - 1 tsp vanilla extract - 1/4 tsp salt - 1/2 cup unsalted butter, softened - 1 cup heavy cream - 2 tablespoons powdered sugar - Fresh berries (strawberries or raspberries) for garnish - Chocolate shavings for decor When you gather your ingredients, consider these tips: - Puff Pastry: You can use store-bought or homemade puff pastry. If you want a lighter version, try phyllo dough. - Milk: Whole milk gives the best flavor and creaminess. You can use almond or oat milk for a dairy-free option. - Sugar: Granulated sugar works best, but you can use coconut sugar for a healthier choice. - Egg Yolks: They provide richness. If you need an egg-free version, try silken tofu blended until smooth. - Heavy Cream: This adds a lovely richness. Coconut cream is a good dairy-free substitute. Using high-quality ingredients makes a big difference. Here are some tips: - Freshness: Always check the expiry dates on dairy products. Fresh eggs yield better flavor and texture. - Butter: Use unsalted butter for better control over salt levels. Choose a good brand for the best flavor. - Vanilla Extract: Pure vanilla extract enhances the cake's taste. Avoid imitation vanilla for a richer flavor. With these ingredients and tips, you are ready to make a stunning Napoleon cake that will impress everyone. Don't forget to check the Full Recipe for detailed steps! To start, you need to make the puff pastry. First, preheat your oven to 400°F (200°C). This step is key for a nice puff. Grab a baking sheet and line it with parchment paper. Next, roll out each sheet of puff pastry. Make it thinner and larger, if you can. Don’t forget to trim it into a rectangle if you want a neat look. Use a fork to prick the surface. This helps keep it from puffing too much. Bake the pastry for 15-20 minutes until it turns golden brown. After baking, let it cool completely. Now, let’s make the pastry cream. In a medium saucepan, mix the whole milk, 1/2 cup of sugar, and salt. Heat this over medium heat until it steams. In a separate bowl, whisk together the flour and egg yolks until they are smooth. Once the milk is hot, slowly add half of it to the egg yolk mix, whisking as you go. Then pour this mix back into the saucepan. Cook while stirring constantly until it thickens and bubbles. Remove it from heat, then stir in the vanilla extract and softened butter. Let this cream cool to room temperature. It’s time to assemble the cake! Place one layer of puff pastry on a serving platter. Spread half of the cooled pastry cream over the top. Then, add the second layer of puff pastry and spread the remaining cream on top. Finally, place the last layer of puff pastry on top. Cover the cake with plastic wrap and refrigerate it for at least 4 hours. Chilling helps all the flavors blend well. Before serving, dust the top with powdered sugar. Garnish with fresh berries and chocolate shavings for a beautiful touch. For the full recipe, check out [Full Recipe]. Enjoy your delicious creation! {{image_2}} When making Napoleon cake, some mistakes can spoil the fun. Here are common ones to watch out for: - Overworking the Puff Pastry: If you roll it too much, the layers may not rise well. Keep it cold and work quickly. - Underbaking the Pastry: If the pastry isn’t golden brown, it may be soggy. Always bake until golden for a crisp texture. - Rushing the Pastry Cream: Cooking too fast can cause lumps. Stir slowly and watch closely for thickening. To make your Napoleon cake even better, try these tips: - Add Zest: A little lemon or orange zest in the pastry cream adds a fresh touch. - Use Infused Milk: Steep vanilla beans in the milk for a richer flavor. - Experiment with Cream: Swap heavy cream with flavored whipped cream, like coffee or chocolate. Presentation makes a big difference. Here are some ideas to impress: - Slice Neatly: Use a sharp knife for clean cuts and showcase the layers. - Garnish Creatively: Fresh berries and chocolate shavings make it look stunning. - Serve with a Sauce: Drizzle extra pastry cream or berry sauce on each plate for extra flair. By focusing on these tips, you can create a delightful Napoleon cake that shines at any gathering. For a full recipe, check out the detailed steps above. You can switch up the flavor of Napoleon cake with fun ideas. Try adding lemon zest to the pastry cream for a fresh twist. Chocolate lovers can mix cocoa powder into the cream for a rich taste. You might also add almond extract instead of vanilla. This gives the cake a nutty flavor that is warm and inviting. Don't be shy! Experimenting with flavors makes your cake unique. Layering is key to a great Napoleon cake. You can stack more than three layers if you want a tall cake. Use thin slices of fruit, like peaches or bananas, between the pastry layers. It adds color and taste. For a crunchy texture, consider mixing crushed nuts, like pistachios, into the cream. This will give your cake a delightful crunch in every bite. Using seasonal ingredients can elevate your cake. In spring, fresh strawberries can brighten the dish. In fall, pumpkin spice can bring warmth and comfort. Winter calls for rich flavors like dark chocolate or peppermint. Summer is perfect for berries or stone fruits. Incorporating seasonal ingredients not only adds flavor but also makes your cake feel fresh and relevant. Explore these variations to make your own delightful Napoleon cake. For a full recipe, check out the detailed steps above. Napoleon Cake can last about 3 to 4 days in the fridge. After that, the puff pastry can get soggy. To keep it fresh, store it in an airtight container. Yes, you can make Napoleon Cake a day in advance. After you assemble it, chill it overnight. This helps the flavors blend well. Just make sure to add any toppings right before serving. You can find Napoleon Cake at many bakeries or dessert shops. Some grocery stores may sell it too. If you want a special flavor, check a local bakery. They often have unique twists on this classic treat. - Other common questions related to preparation and variations: - Can I use different flavors for the cream? Yes! Try adding chocolate or coffee for new tastes. - What can I use instead of puff pastry? You can use phyllo dough or make a sponge cake for a different texture. - Is there a gluten-free option? Yes! Use gluten-free flour for the cream and a gluten-free pastry. If you’d like to try making this delightful treat, check out the Full Recipe above for a guide! Napoleon Cake is a delightful dessert with rich history and cultural ties. We explored its origins, key ingredients, and how to prepare it step-by-step. From assembly tips to tasty variations, making this cake can be simple and fun. Remember, perfection lies in avoiding common mistakes and using high-quality ingredients. Embrace creativity by trying different flavors or seasonal ingredients. Napoleon Cake offers joy for any occasion, making it a treat worth mastering. Enjoy every bite of this classic pastry!](https://stirredrecipes.com/wp-content/uploads/2025/07/e4a10cfc-1084-4741-a996-01a63448279b.webp)
If you’re looking for a show-stopping dessert, Napoleon Cake is a must-try! This delightful treat combines crispy layers of puff pastry with rich, creamy filling, making it perfect for any …

Looking for a simple yet delicious side dish? Balsamic sweet potatoes are your answer! This recipe combines the natural sweetness of sweet potatoes with tangy balsamic vinegar for a flavorful …
![To make dilled string beans, gather these simple ingredients: - 1 pound fresh string beans, trimmed - 2 tablespoons olive oil - 2 cloves garlic, minced - 1 lemon, zested and juiced - 1 tablespoon fresh dill, chopped (plus more for garnish) - 1 teaspoon Dijon mustard - Salt and pepper to taste Fresh string beans are low in calories and high in fiber. They support digestion and keep you full. They also provide vitamins A, C, and K. Garlic adds flavor and may help lower blood pressure. Olive oil brings healthy fats, which are great for your heart. Lemon juice brightens the dish and adds vitamin C. Dill has antioxidants that can help with digestion and reduce inflammation. When you choose string beans, look for bright green color. They should be firm and crisp. Avoid any that have brown spots or are wilted. If you can, smell them. Fresh string beans should have a sweet, grassy scent. Buy them when they are in season for the best taste. For the best flavor, try to use them within a few days of buying. To make dilled string beans, start with fresh and crisp string beans. Trim the ends to remove any tough parts. You will need a large pot for boiling, a bowl for ice water, and a skillet for cooking. Gather all your ingredients and tools before you begin. This makes the process smooth and fun. 1. Boil Water: Fill a large pot with water and add a good amount of salt. Turn the heat on high and wait for it to boil. 2. Blanch Beans: When the water is boiling, add your trimmed string beans. Cook them for 3-4 minutes. You want them bright green and just tender. 3. Ice Bath: After blanching, drain the beans right away. Quickly transfer them to a bowl of ice water. This stops the cooking. Once they are cool, drain them again. 4. Sauté Garlic: In a large skillet, pour in 2 tablespoons of olive oil. Heat it over medium heat. Add 2 cloves of minced garlic. Stir it for about 1 minute. You want it fragrant but not brown. 5. Heat the Beans: Add the blanched string beans to the skillet. Toss them in the garlic oil for 2-3 minutes until they are warm. 6. Mix Dressing: In a small bowl, combine the lemon zest, lemon juice, chopped dill, Dijon mustard, salt, and pepper. Mix it well. 7. Dress the Beans: Pour the lemon-dill dressing over the string beans. Toss them to coat evenly. Cook for 1 more minute. 8. Final Steps: Remove the skillet from heat. Taste the beans and adjust the seasoning if needed. Transfer the dilled string beans to a serving dish. For a finishing touch, sprinkle some extra fresh dill on top. This adds color and flavor. Your dilled string beans are now ready to enjoy. Follow the full recipe for even more details and tips! Blanching string beans helps keep their bright color and crisp texture. Start by boiling water in a large pot. Add salt to the water; this adds flavor. Once boiling, drop in the string beans. Blanch them for 3-4 minutes. They should look bright green and slightly tender. After blanching, quickly move the beans to a bowl of ice water. This stops the cooking. It also locks in their color. Drain the beans once cool. This method gives you the best results. You can easily adjust the flavor of your dilled string beans. Add more lemon juice for a tangy kick. If you love garlic, increase the minced garlic to three cloves. For a spicy twist, try adding red pepper flakes. Fresh herbs can also enhance the dish. Consider adding parsley or chives along with dill. Experiment with different mustards too. A whole grain mustard gives a nice texture. You can also use honey mustard for sweetness. These simple tweaks can create a unique flavor profile. Avoid overcooking the string beans during blanching. They should stay bright green and crisp. If they turn dull, they will lose flavor. Another mistake is skipping the ice bath. This step is crucial for stopping the cooking process. Be careful not to drown the string beans in dressing. You want them coated, not swimming. Lastly, don’t forget to taste and adjust seasoning. A pinch of salt or extra dill can make a big difference. For the complete recipe, follow the [Full Recipe]. Enjoy making these delightful dilled string beans! {{image_2}} You can change the flavor of your dilled string beans easily. Try using fresh herbs like basil or parsley instead of dill. Each herb gives a unique taste. For a spicy kick, add red pepper flakes. You can also use lemon thyme for a citrusy twist. Experimenting with different flavors can make the dish new each time. You can cook string beans in different ways. Roasting gives them a nice, crispy texture. To roast, toss the beans with olive oil and seasoning. Spread them on a baking sheet and roast at 425°F for about 15-20 minutes. This method enhances their natural sweetness. Sautéing is quick and keeps them tender. Just heat oil in a pan and cook the blanched beans for a few minutes. Choose the method based on the texture you enjoy most. Dilled string beans make a great side dish. Serve them with grilled chicken or fish for a light meal. You can also add them to a salad for extra crunch. Try pairing them with quinoa or rice for a heartier option. For special occasions, place the beans on a platter and sprinkle with extra dill. This makes the dish look appealing and fresh. Explore these ideas to enjoy your dilled string beans in various ways! To keep your dilled string beans fresh, store them in an airtight container. Place the beans in the container and seal it tightly. You can keep them in the fridge for up to three days. If you want them to last longer, freezing is a great option. Freezing dilled string beans is simple. Start by blanching them as you did in the recipe. After cooling the beans in ice water, drain them well. Spread them on a baking sheet in a single layer. This step helps keep them from sticking together. Freeze them for about an hour, then transfer the beans to a freezer-safe bag. Remove as much air as possible before sealing. They can stay frozen for up to six months. When you are ready to enjoy your frozen string beans, reheat them gently. You can use a microwave or sauté them in a skillet. For the microwave, place them in a bowl with a splash of water. Cover and heat for one to two minutes. If you use a skillet, add a little olive oil and heat over medium for about three to four minutes. This method helps keep their crispness and flavor intact. Enjoy your tasty dilled string beans again! To prepare string beans, I recommend blanching. First, bring a pot of salted water to a boil. Add the string beans and cook for 3-4 minutes. This keeps them bright green and crisp. After that, plunge them into ice water. This stops the cooking and helps retain color. Finally, drain them well and they are ready to use. This method gives you a nice texture and flavor. Yes, you can make dilled string beans ahead of time. Prepare the dish and let it cool. Store it in an airtight container. Keep it in the fridge for up to three days. When you are ready to serve, just reheat gently in a skillet. This dish tastes great even after a day or two. The flavors continue to meld, making it even more tasty. Dill and string beans offer many health benefits. String beans are low in calories and high in fiber. They also provide vitamins A, C, and K. Dill has antioxidants and may help with digestion. It can add flavor without extra calories or salt. Together, they make a healthy, tasty side dish. Enjoying dilled string beans is a smart choice for your meals. In this blog post, we explored making dilled string beans. We covered key ingredients, their benefits, and tips for fresh selection. You learned step-by-step cooking instructions and flavor enhancements. We discussed best practices for blanching and common mistakes to avoid. Variations offered creative twists while storage tips ensured you enjoy leftovers. Dilled string beans can be a healthy, tasty side for any meal. Try these tips, and you’ll impress everyone at the table!](https://stirredrecipes.com/wp-content/uploads/2025/07/46b232e9-760f-4ead-9b74-a9fe605cdf72.webp)
Are you ready to elevate your side dish game? My Dilled String Beans recipe is both delightful and straightforward. With fresh string beans and vibrant dill, you’ll impress everyone at …

Looking for an easy, tasty meal that your whole family will love? My Crockpot Creamy Ranch Chicken delivers big flavor with minimal effort. You’ll savor tender chicken smothered in a …

If you love chocolate and want something moist and rich, you’re in for a treat! My Chocolate Zucchini Bread is the perfect blend of healthiness and indulgence. You get the …

Looking for a simple and tasty meal that your family will love? Try my Sweet Hawaiian Crockpot Chicken! This dish combines juicy chicken thighs with a sweet and tangy sauce, …
 for detailed instructions. To keep your exquisite raspberry white chocolate cake roll fresh, store it in the fridge. Wrap it tightly in plastic wrap. This will stop it from drying out. You can also place it in an airtight container. If you want to save it longer, freeze the cake roll. Wrap it in plastic wrap and then foil. This helps keep the cake safe from freezer burn. In the fridge, the cake roll lasts about 3 to 5 days. After that, it may start to lose its flavor and texture. Look for signs of spoilage, like a sour smell or mold. If the cake feels dry or hard, it’s time to toss it. To reheat the cake roll, place slices in the microwave for about 10 to 15 seconds. This warms it gently and keeps it soft. Avoid overheating, as it may dry out. It’s not safe to refreeze once it has been thawed. Enjoy it fresh to savor the best taste! To stop the cake from sticking, I recommend using parchment paper. First, grease the pan with a thin layer of butter or cooking spray. Next, line the pan with parchment paper, pressing it into the corners. This will help the cake release easily once it's baked. When the cake is done, gently lift it out using the parchment. It’s a simple step that makes a big difference! Yes, you can make this cake roll ahead of time! After you assemble it, wrap it in plastic and store it in the fridge. It will stay fresh for up to three days. If you want to store it longer, you can freeze it. Just make sure to wrap it well to avoid freezer burn. Thaw it in the fridge before serving. For clean slices, use a sharp knife. I recommend warming the knife in hot water, then drying it. This helps the knife glide through the cake without tearing it. Start at one end and slice slowly. Aim for pieces about 1 inch thick for nice presentation. If you want to boost the chocolate flavor, consider adding chocolate chips to the batter. You can also use dark cocoa powder instead of regular cocoa powder. For an extra touch, drizzle some melted dark chocolate over the top before serving. It adds a rich flavor that pairs well with the raspberries. You can find pre-made cake rolls at local bakeries or grocery stores. Many places offer different flavors, so check out your options. If you prefer online shopping, several websites sell gourmet cakes. Just make sure to read reviews to find a trusted source! This cake roll combines simple ingredients with easy steps. You learned how to prepare the batter, bake, and assemble the cake. Remember the tips to avoid common mistakes, and feel free to explore flavor variations. Store your creation properly to enjoy it later. Baking can be fun and rewarding. With this guide, you can impress friends and family. Enjoy experimenting with different tastes and decorations. The result is a treat that looks great and tastes even better. Happy baking!](https://stirredrecipes.com/wp-content/uploads/2025/07/a258f6af-b2f3-4bda-8304-e9b9eb7381d0.webp)
Are you ready to impress your family and friends with a stunning dessert? This Exquisite Raspberry White Chocolate Cake Roll combines rich flavors and beautiful presentation. It’s not just a …