Brown Butter Dulce de Leche Rice Krispie Treats Delight
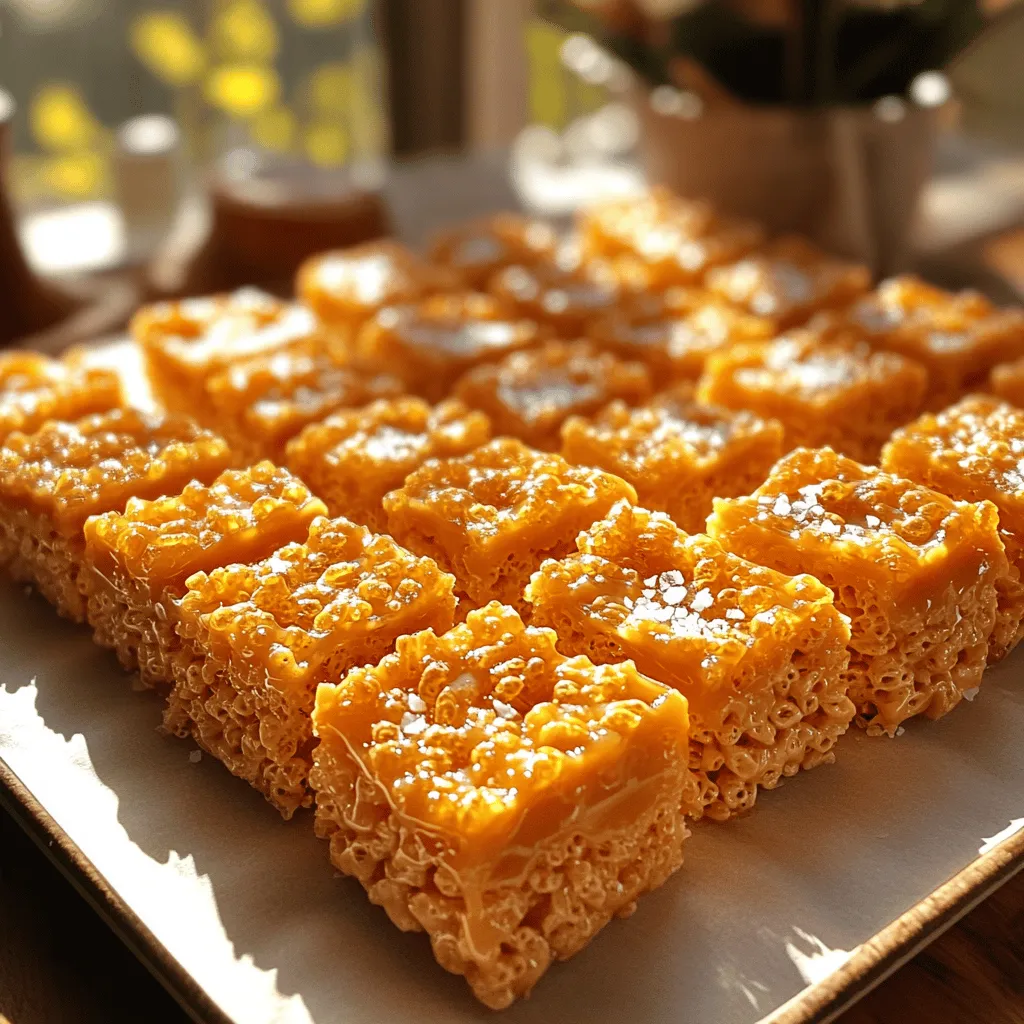
Get ready for a sweet twist on a classic treat! My Brown Butter Dulce de Leche Rice Krispie Treats combine crunchy cereal with rich, gooey dulce de leche. You’ll love …
Get ready for a sweet twist on a classic treat! My Brown Butter Dulce de Leche Rice Krispie Treats combine crunchy cereal with rich, gooey dulce de leche. You’ll love …

Looking for a meal that warms your heart and fills your belly? Tomato Tortellini Soup is just what you need! This soup blends fresh veggies, rich tomatoes, and tender tortellini …
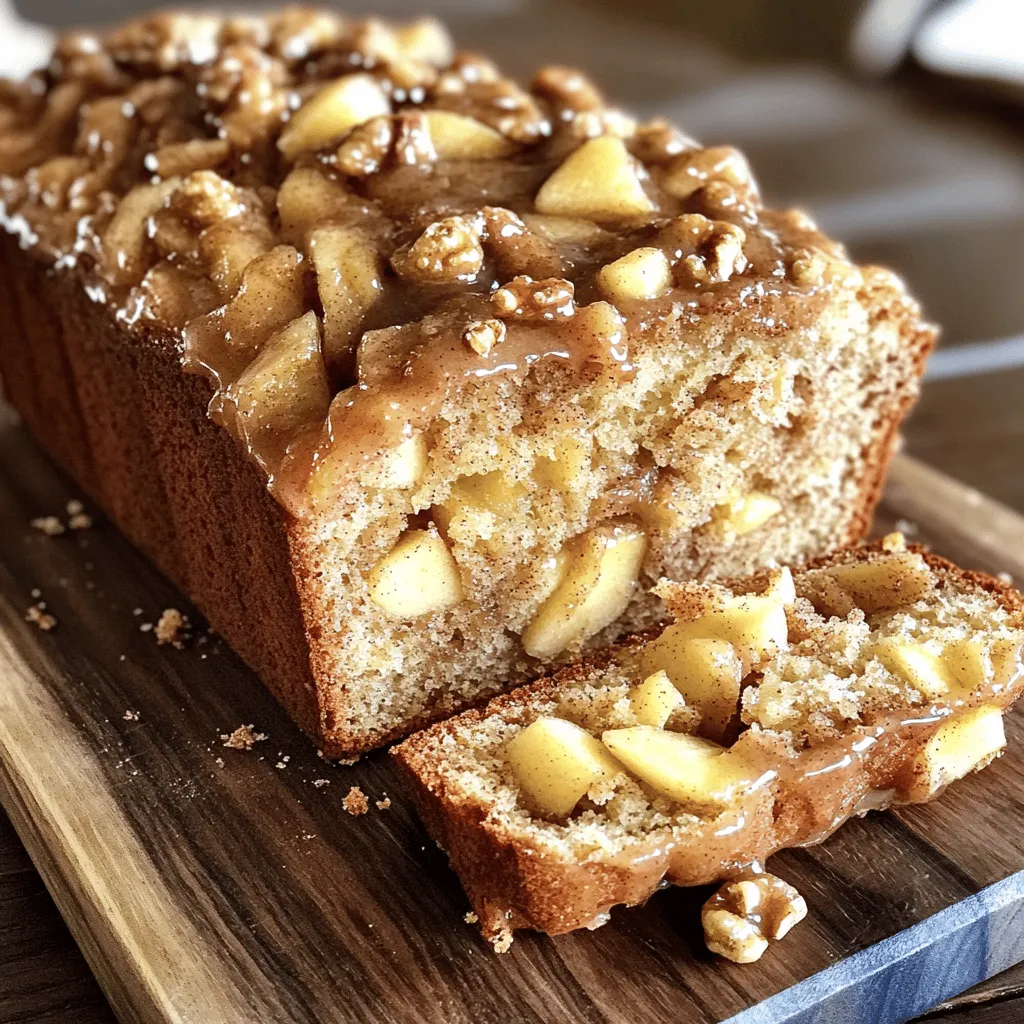
If you crave a warm, sweet treat that fills your kitchen with the smell of fall, you’ll love my Cinnamon Apple Bread recipe! It blends the cozy flavors of cinnamon …

If you’re looking for a delightful side dish that combines sweet and savory flavors, you’ve found it! My Roasted Carrots with Candied Pecans and Goat Cheese are both simple and …

If you’re looking for a dish that captures the essence of comfort food, potato gratin is it. This creamy, cheesy delight is perfect for family dinners and special occasions. I’ll …
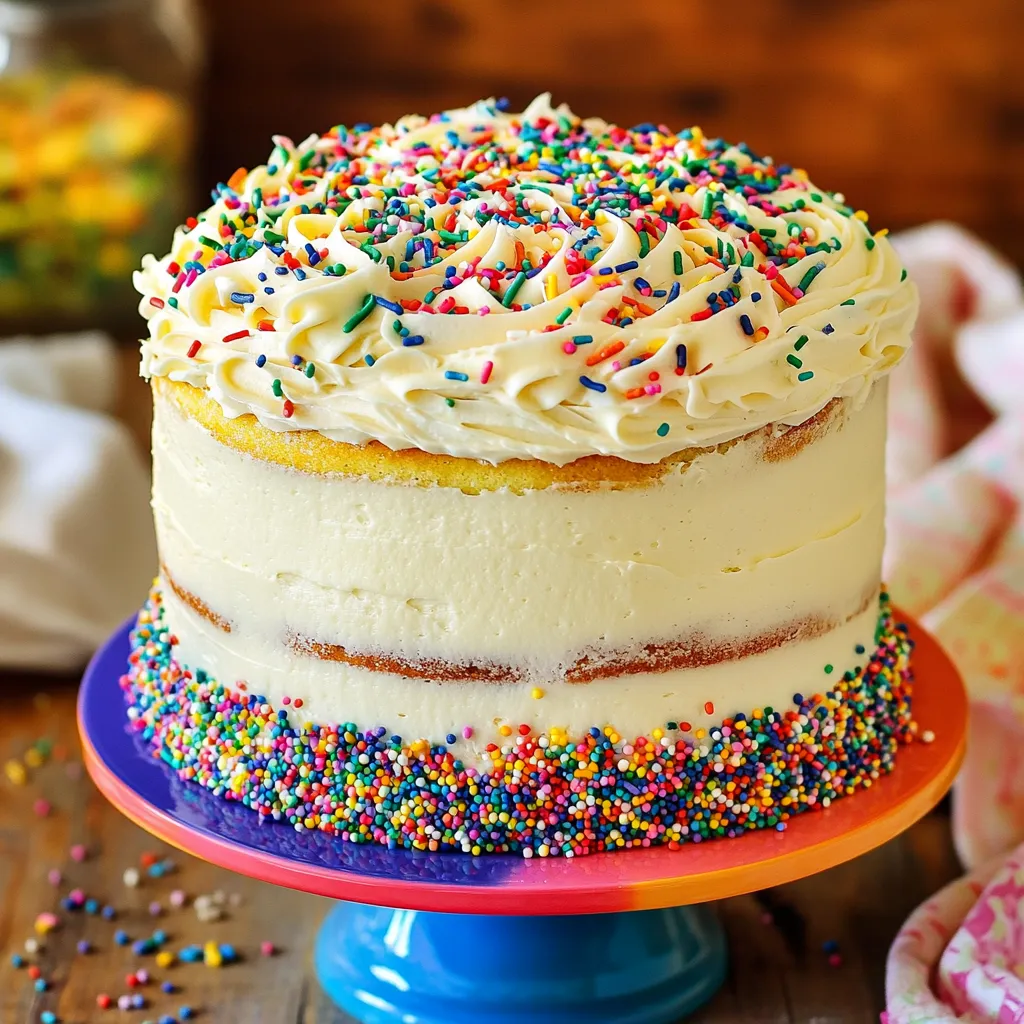
Are you ready to bake the most joyful Funfetti cake ever? This recipe combines soft, fluffy cake with colorful sprinkles, making it perfect for any celebration. I’ll guide you step-by-step, …
![Here are the ingredients you need for Triple Chocolate Chip Zucchini Bread: - 1 medium zucchini, grated - 1 cup all-purpose flour - 1/2 cup whole wheat flour - 1/2 cup unsweetened cocoa powder - 1 teaspoon baking soda - 1/2 teaspoon baking powder - 1/4 teaspoon salt - 1/2 cup granulated sugar - 1/2 cup brown sugar, packed - 1/2 cup vegetable oil - 2 large eggs - 1 teaspoon vanilla extract - 1/2 cup semi-sweet chocolate chips - 1/2 cup milk chocolate chips - 1/2 cup white chocolate chips This mix of ingredients gives the bread its rich taste and moist texture. The zucchini adds a secret ingredient that keeps it soft. You can enjoy the chocolate in three different ways: semi-sweet, milk, and white. Each type of chocolate brings its own sweetness and flavor. If you want to know how to make this, check the Full Recipe. - Preheat the oven to 350°F (175°C). - Grease and flour a 9x5 inch loaf pan. - In a medium bowl, mix the grated zucchini, sugars, oil, eggs, and vanilla extract. - In another bowl, whisk together the all-purpose flour, whole wheat flour, cocoa powder, baking soda, baking powder, and salt. - Pour the wet mix into the dry mix. Stir gently until just combined. - Fold in the three types of chocolate chips: semi-sweet, milk chocolate, and white chocolate. - Pour the batter into the prepared loaf pan. Smooth the top with a spatula. - Bake for 50-60 minutes. Check with a toothpick to see if it is done. This process gives you a rich, moist loaf that is hard to resist. For more details, check the Full Recipe. - Ensuring the correct oven temperature: Always check your oven's temperature with an oven thermometer. Preheat to 350°F (175°C) for best results. If your oven runs hot, the bread may bake too fast. - Properly measuring ingredients: Use dry measuring cups for flour and cocoa powder. Spoon the flour into the cup and level it off with a knife. This method prevents too much flour from making your bread dense. - Achieving the ideal moistness: Grate the zucchini finely and leave the skin on for extra moisture. Do not squeeze out the water; it keeps the bread tender. - Flavor balancing with different chocolate types: The mix of semi-sweet, milk, and white chocolate gives a rich taste. Each type adds a unique flavor. This balance keeps the bread from being overly sweet. - Serving suggestions for enhanced appeal: Slice while warm and serve with a dollop of whipped cream. Add a scoop of vanilla ice cream for a fun treat. - Garnishing ideas for an attractive finish: Dust the top with powdered sugar. For a touch of elegance, drizzle melted chocolate on top. Sprinkle extra chocolate chips for a delightful look. This recipe is sure to impress. For the full recipe, check the earlier section. {{image_2}} You can change a few ingredients to suit your taste. Try using different flours or sweeteners. For example, if you want a nutty flavor, swap some all-purpose flour for almond flour. This gives a unique taste and texture. You can also use honey or maple syrup instead of sugar for a natural sweetener. Adding nuts or dried fruits boosts flavor and texture. Walnuts or pecans add crunch. Dried cranberries or raisins bring a hint of sweetness. Mix these in when you fold in the chocolate chips for a delightful surprise in every bite. Seasonal changes can make this bread even more exciting. In autumn, add spices like cinnamon or nutmeg for a warm flavor. These spices pair well with chocolate and zucchini. In summer, you might want a fresh twist. Adding citrus zest, like lemon or orange, brightens the bread. This adds a refreshing taste that’s perfect for warmer days. For gluten-free options, use gluten-free flour blends. These blends work well and keep the bread moist. Just make sure to check the blends are safe if you have allergies. If you want a vegan version, replace the eggs with flax eggs or applesauce. This keeps the texture nice and moist. Use plant-based oil and dairy-free chocolate chips for a fully vegan treat. Explore these variations and find the one that makes your taste buds dance! For the full recipe, check the details above. To keep your Triple Chocolate Chip Zucchini Bread fresh, store it in an airtight container at room temperature. This helps maintain its soft texture and rich taste. If you want to keep it moist, you can add a slice of bread or a piece of parchment paper inside the container. This tiny trick helps keep moisture locked in. If you want to save some for later, freezing is a great option. Wrap the cooled bread tightly in plastic wrap or aluminum foil. Then, place it in a freezer-safe bag. This method keeps the bread safe for up to three months. To thaw, simply move it to the fridge overnight. You can also reheat it in the oven at 350°F (175°C) for about 10 minutes for that fresh-baked taste. This sweet treat is best enjoyed within a week. After that, it may start to lose its flavor and texture. Look for signs of staleness, like a dry crust or hard texture. If you notice any mold or an off smell, it's time to toss it. Enjoy every slice while it's still fresh! Can I use frozen zucchini in this recipe? Yes, you can use frozen zucchini. Just thaw it first and drain excess water. This keeps your bread from getting too wet. Frozen zucchini works well and saves time. How do I know when the bread is fully baked? Check with a toothpick. Insert it into the center. If it comes out clean, your bread is ready. If it has batter on it, bake a bit longer. Oven times can change, so keep an eye on it. What can I serve with Triple Chocolate Chip Zucchini Bread? This bread is great on its own. You can serve it warm or at room temperature. Try adding a scoop of ice cream or a dollop of whipped cream for extra fun. A hot cup of coffee or tea pairs well too. Why did my bread sink in the middle? If your bread sinks, it may be underbaked. Always test with a toothpick. Overmixing can also cause this. It adds too much air to the batter. Gently mix your ingredients to keep the bread light. How do I make my bread more chocolatey? Add an extra 1/4 cup of cocoa powder or chocolate chips. You can use all three types of chocolate chips for more flavor. Mixing in dark chocolate adds richness too. Can I reduce the sugar content? Yes, you can cut the sugar by 1/4 cup. Use ripe bananas or applesauce to replace some sugar. This adds natural sweetness and keeps the bread moist. What's the best way to make it dairy-free? To make this recipe dairy-free, swap the chocolate chips for dairy-free options. Use almond milk or coconut milk in place of regular milk. You can also use a vegetable or coconut oil instead of butter. For the full recipe, check [Full Recipe]. You now know how to make a tasty Triple Chocolate Chip Zucchini Bread. We covered key ingredients, easy steps, and helpful tips for the best results. The variations let you explore new flavors and adjustments for different diets. Lastly, proper storage ensures your bread stays fresh longer. Enjoy baking this delight, and share it with friends or family. Happy cooking!](https://stirredrecipes.com/wp-content/uploads/2025/07/23526631-ddb5-4cc4-9129-0d860c670499.webp)
Want a treat that surprises your taste buds? My Triple Chocolate Chip Zucchini Bread combines the rich flavor of chocolate with the freshness of zucchini. This delightful recipe is easy …

If you want to impress your family at dinner, try my Honey-Balsamic Glazed Carrots! This simple recipe transforms ordinary baby carrots into a sweet and tangy side dish. With just …
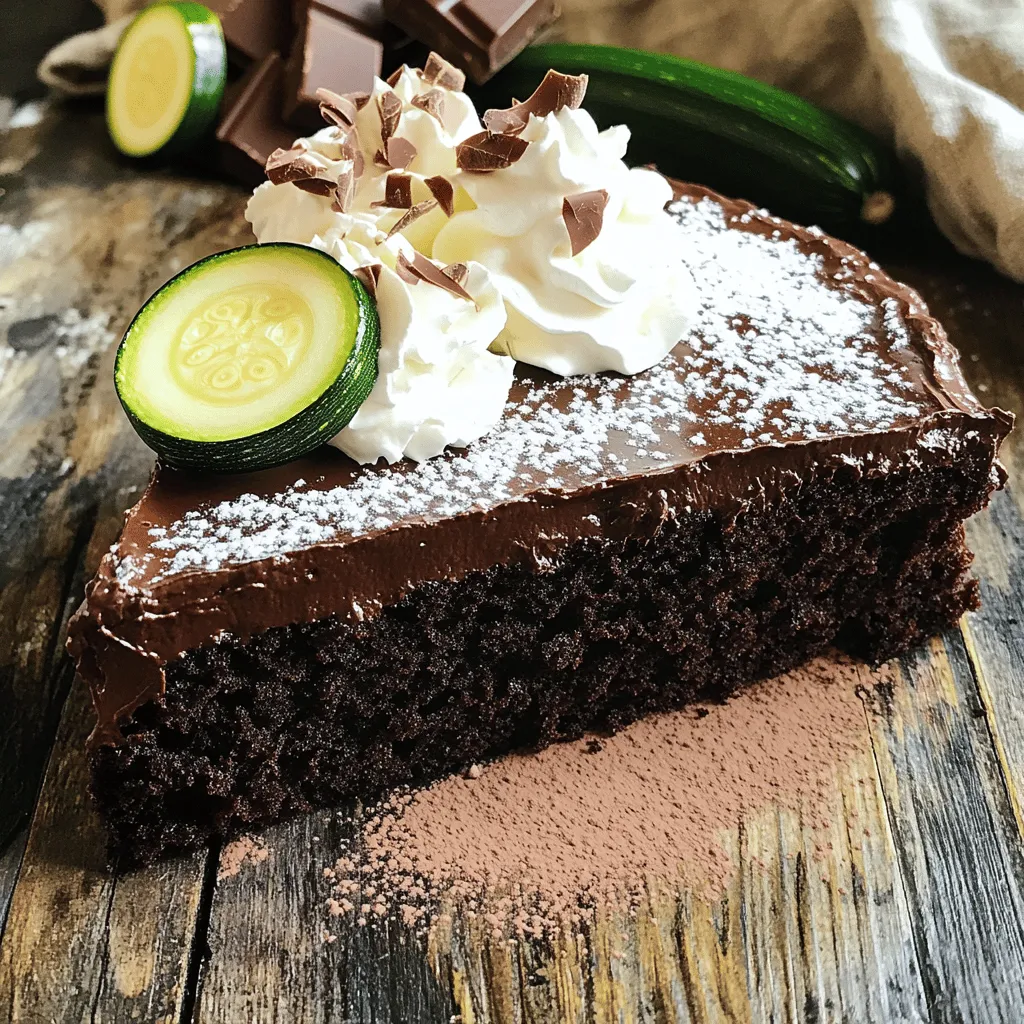
If you love chocolate cake and want a fun twist, you’re in the right place! This Zucchini Chocolate Cake is not only delicious, but it’s also simple to make. You …
 for more details and tips! To keep your zucchini bread moist, I recommend a few simple steps. First, always use fresh zucchini. Grate it and let it drain for a bit. This helps remove excess water. Second, add oil to your batter. The oil keeps the bread soft. Lastly, do not overmix the batter. Mix just until combined for the best texture. You can easily enhance the flavor of your double chocolate zucchini bread. Try adding a teaspoon of cinnamon or espresso powder. These spices deepen the chocolate taste. You can also use dark chocolate chips for a richer flavor. If you like nuts, add walnuts or pecans for a nice crunch. These options add both texture and taste. Many people make common mistakes when baking zucchini bread. One mistake is using too much flour. This makes the bread dry. Always spoon and level your flour for accurate measurements. Another mistake is not checking for doneness. Use a toothpick to test the center; it should come out clean or with a few crumbs. Lastly, don't skip the cooling step. Let the bread cool in the pan for 10 minutes before transferring it to a rack. This helps it set properly. For the full recipe, check out the complete guide on making this delicious treat! {{image_2}} You can boost your Double Chocolate Zucchini Bread with spices and extracts. Cinnamon adds warmth and pairs well with chocolate. A touch of nutmeg can brighten the flavor. Try adding a teaspoon of espresso powder to deepen the chocolate taste. If you want, a splash of almond or orange extract can add a twist. These small changes bring new life to the recipe. If you're looking for healthier options, consider these swaps. Use whole wheat flour instead of all-purpose flour for more fiber. You can also cut down sugar by using applesauce or mashed bananas. These substitutes keep the bread moist and sweet. Another choice is to use Greek yogurt instead of oil. This will lower fat and add protein, making your bread even better for you. Adding fruits and seeds can make your bread even tastier. Chopped apples or mashed ripe bananas work well with chocolate. You can also mix in nuts like walnuts or pecans for crunch. For a fun twist, throw in some chia or flax seeds. They offer healthy fats and extra fiber. Each of these add-ins can create a unique flavor profile for your Double Chocolate Zucchini Bread. To keep your Double Chocolate Zucchini Bread fresh, store it at room temperature. Place it in an airtight container or wrap it tightly in plastic wrap. This prevents it from drying out. It should last about 3 to 4 days this way. If you want it to last longer, consider freezing it. To freeze your bread, first let it cool completely. Wrap it tightly in plastic wrap or aluminum foil. Then, place the wrapped bread in a freezer-safe bag. This helps avoid freezer burn. You can freeze it for up to 3 months. Just remember to label the bag with the date. When you're ready to enjoy your frozen bread, take it out and thaw it in the fridge overnight. If you're in a hurry, you can leave it at room temperature for a few hours. To reheat, slice the bread and warm it in the oven at 350°F (175°C) for about 10 minutes. This will bring back its moist texture and rich flavor. For a special touch, consider adding a bit of butter while it warms. Enjoy your delicious treat! Yes, you can use frozen zucchini. Just thaw and drain it well. This helps keep your bread from getting too watery. Frozen zucchini works well in this recipe. To make this recipe dairy-free, use plant-based milk instead of regular milk. You can also use dairy-free chocolate chips. Coconut oil is a great alternative for butter, too. You can use mashed banana or unsweetened applesauce as an egg substitute. Each egg can be replaced with 1/4 cup of either fruit. This keeps the bread moist and adds flavor. Double Chocolate Zucchini Bread lasts about 3 to 4 days at room temperature. Store it in an airtight container. You can also refrigerate it for a week for better freshness. Yes, you can make mini loaves! Just adjust the baking time to about 25-30 minutes. Check for doneness with a toothpick. Mini loaves are perfect for sharing or gifting. This bread pairs well with a scoop of vanilla ice cream or a dollop of whipped cream. You can also enjoy it with a cup of coffee or tea for a nice treat. For the full recipe, check the section above. You learned how to make delicious zucchini bread today. We covered ingredient lists, useful tips, and baking steps. You now know how to keep the bread moist and avoid common mistakes. Adding flavors and variations can make your bread unique. Storing leftovers properly ensures your bread lasts longer. Finally, FAQs help answer any leftover questions. Enjoy baking and experimenting with this tasty treat!](https://stirredrecipes.com/wp-content/uploads/2025/07/a6ed1ed0-7598-4065-a416-93a22175fc8a.webp)
Are you ready to bake something truly special? My Double Chocolate Zucchini Bread recipe is rich, moist, and packed with flavor. This treat hides healthy zucchini inside, making it a …