Skip to content
Stirred Recipes
  • Home
  • Appetizers
  • Desserts
  • Salads
  • Breakfast
  • Dinner
  • Privacy Policy
  • Contact
  • About

Chef Luca

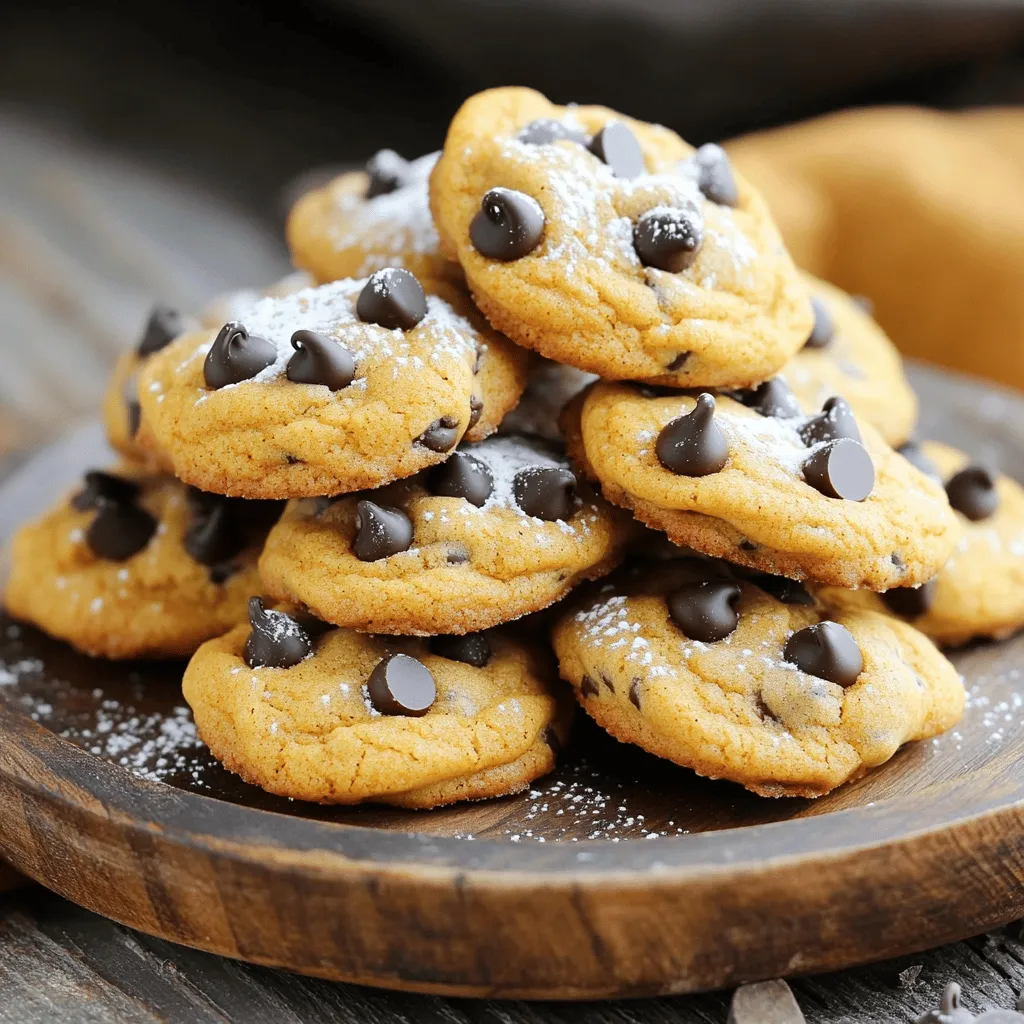
Pumpkin Cheesecake Cupcakes Delightful Fall Treat

July 21, 2025 by Chef Luca
- 1 cup graham cracker crumbs - 1/4 cup sugar - 1/2 cup unsalted butter, melted - 16 oz cream cheese, softened - 1 cup canned pumpkin puree - 3/4 cup sugar - 3 large eggs - 1 teaspoon vanilla extract - 1 teaspoon ground cinnamon - 1/2 teaspoon ground nutmeg - 1/4 teaspoon ground ginger - 1/4 teaspoon salt - Whipped cream and pumpkin spice for topping (optional) To create the best pumpkin cheesecake cupcakes, I focus on quality ingredients. Use fresh cream cheese for a rich taste. Look for pumpkin puree that has no added sugars or spices. It should be pure and smooth. For graham cracker crumbs, I like to crush whole crackers myself. This gives a better texture and flavor. If you have dietary needs, there are easy swaps. For gluten-free options, use gluten-free graham crackers. You can also choose a vegan cream cheese. For a dairy-free version, use coconut cream. These changes will still give you a great cupcake with a delicious taste. Check out the Full Recipe for more details on how to make these tasty treats! 1. Start by preheating your oven to 325°F (163°C). This step is key for even baking. 2. Line a muffin tin with cupcake liners. This helps with easy removal later. 3. For the graham cracker crust, mix 1 cup of graham cracker crumbs, 1/4 cup sugar, and 1/2 cup melted butter in a bowl. Mix well until the crumbs are coated. 4. Press about a tablespoon of the crumb mixture into each cupcake liner. This forms a tasty base. 5. Now, in a large bowl, beat 16 oz of softened cream cheese until smooth. This makes the filling creamy. 6. Gradually add 1 cup of canned pumpkin puree and 3/4 cup sugar. Mix until everything is combined. 7. Add 3 large eggs, one at a time. Mix on low speed after each egg until it's just combined. 8. Stir in 1 teaspoon of vanilla extract, 1 teaspoon ground cinnamon, 1/2 teaspoon ground nutmeg, 1/4 teaspoon ground ginger, and 1/4 teaspoon salt. Mix until the batter is smooth and well-blended. 1. Pour the pumpkin cheesecake batter into the prepared liners. Fill each about 3/4 full to allow for rising. 2. Bake for 20-25 minutes. The edges should be set, but the centers can be slightly jiggly. 3. Turn off the oven and crack the door open. Let the cupcakes cool inside for about 10 minutes. This helps prevent cracking. 4. Remove them from the oven and let them cool completely at room temperature. Then refrigerate for at least 2 hours before serving. 1. Serve the cupcakes chilled. Top them with whipped cream and a sprinkle of pumpkin spice for extra flair. 2. These cupcakes pair well with coffee, apple cider, or a warm cup of tea. They also go great with other fall desserts like pecan pie. For the complete recipe, check out the [Full Recipe]. To get the best texture and flavor for your pumpkin cheesecake cupcakes, follow these simple steps: - Use room-temperature cream cheese. This helps it mix smoothly. - Don’t overmix the batter. Mix until just combined to keep it light. - Fill the cupcake liners about three-quarters full for even baking. To prevent overmixing, add the eggs one at a time. Mix on low speed until just blended. This keeps your cupcakes fluffy and soft. For storing leftovers, place your cupcakes in an airtight container. They stay fresh in the fridge for up to five days. When reheating, use the microwave. Heat them for about 10-15 seconds. This warms them without drying them out. To elevate flavors, consider adding chocolate chips or caramel drizzle. These add a nice twist to the classic recipe. You can also adjust the spices. Try adding extra cinnamon or a dash of cloves for a warm, cozy flavor. Top with whipped cream and a sprinkle of pumpkin spice. These small changes make your cupcakes shine. For the full recipe, check out the detailed steps above to create your own delightful fall treat! {{image_2}} To make gluten-free pumpkin cheesecake cupcakes, swap the graham cracker crumbs. Use gluten-free graham cracker crumbs or almond flour instead. For the sugar, stick with regular options; it is gluten-free. Ensure all your other ingredients, like baking powder and vanilla, are also gluten-free. For a plant-based version, replace cream cheese with vegan cream cheese. Use silken tofu blended until smooth as another option. Instead of eggs, use flaxseed meal. Combine one tablespoon of flaxseed meal with three tablespoons of water for each egg. Choose a non-dairy milk like almond or oat milk in your mix. Ensure your sugar is vegan, too, as some sugars use bone char in processing. You can explore many fun flavors! Try adding cocoa powder to the batter for chocolate pumpkin cupcakes. Mix in chopped apples and a hint of cinnamon for spiced apple cupcakes. Another option is to swirl in some caramel sauce for a sweet twist. You can even add a splash of maple syrup for a richer flavor. All of these variations keep the spirit of fall alive while making each bite unique. For the full recipe, check the main section above. Pumpkin cheesecake cupcakes stay fresh in the fridge for about five days. To keep them tasty, seal them well. Use an airtight container or wrap them tightly in plastic wrap. This helps prevent them from drying out or absorbing other smells in the fridge. Freezing cupcakes is simple and great for later. First, let the cupcakes cool completely. Then, wrap each one in plastic wrap. Place the wrapped cupcakes in a freezer-safe bag or container. This keeps them safe from freezer burn. To thaw, take the cupcakes out of the freezer. Leave them in the fridge overnight or for a few hours at room temperature. This way, they stay moist and delicious. You can enjoy your pumpkin cheesecake cupcakes whenever you want! For the full recipe, check out the detailed instructions above. Can I use fresh pumpkin instead of canned? Yes, you can use fresh pumpkin. Just make sure to cook and puree it first. For best results, roast the pumpkin until soft. Then, blend it until smooth. This gives a fresh flavor. Do note that fresh pumpkin might have more water. You can strain it if needed. How do I know when the cupcakes are done? Check the edges of the cupcakes. They should be set while the center looks slightly jiggly. A toothpick inserted should come out mostly clean. Remember, they will firm up as they cool. What toppings work best? Whipped cream is a classic choice. You can also sprinkle pumpkin spice on top. For a twist, try caramel or chocolate drizzle. Nuts like pecans add a nice crunch too. Can they be made ahead of time? Yes, these cupcakes are great for making ahead. You can bake them a day or two early. Just store them in the fridge. They taste even better after chilling. How to modify for allergies and food preferences? For gluten-free, use gluten-free graham crackers. A dairy-free option can use vegan cream cheese. You can also swap eggs for flax eggs if needed. What's the best way to make them less sweet? To reduce sweetness, cut the sugar by a third. You can also use unsweetened pumpkin puree. Adding a hint of salt can help balance flavors too. These pumpkin cheesecake cupcakes are a treat you can't miss. We broke down every step, from selecting ingredients to serving suggestions. Plus, you can customize them to fit your needs. Whether you go gluten-free or vegan, there's a version for everyone. Remember to store them well for later enjoyment. Try different flavors or toppings to keep it exciting. I hope you enjoy making these cupcakes as much as I do. Happy baking!

Get ready to fall in love with pumpkin cheesecake cupcakes! These delightful treats mix creamy cheesecake with rich pumpkin flavor, making them perfect for autumn. In this blog post, I’ll …

Read more

Categories Desserts

Pumpkin Coffee Cake Irresistible and Flavorful Treat

July 21, 2025 by Chef Luca
Making pumpkin coffee cake is simple. You need a mix of wet and dry items. This blend creates a moist, flavorful cake. Each ingredient plays a role in taste and texture. Here are the must-have ingredients: - 1 cup canned pumpkin puree - 2 cups all-purpose flour - 1 cup granulated sugar - ½ cup brown sugar, packed - ⅓ cup vegetable oil - ½ cup plain Greek yogurt - 3 large eggs - 1 teaspoon vanilla extract - 1 teaspoon baking powder - 1 teaspoon baking soda - 1 teaspoon ground cinnamon - ½ teaspoon ground nutmeg - ½ teaspoon ground ginger - ¼ teaspoon salt These ingredients create the base of the cake. The pumpkin puree adds moisture and flavor. The sugars give sweetness and a lovely crumb. You can add a few fun options to change up your cake: - 1 cup chopped pecans (optional) - ½ cup brown sugar (for crumb topping) - 1 tablespoon ground cinnamon (for crumb topping) Pecans add a nice crunch and flavor. The crumb topping makes your cake even more special. Feel free to mix and match to find your favorite twist. For the full recipe, check out the complete guide. First, gather all your ingredients. You will need: - 1 cup canned pumpkin puree - 2 cups all-purpose flour - 1 cup granulated sugar - ½ cup brown sugar, packed - ⅓ cup vegetable oil - ½ cup plain Greek yogurt - 3 large eggs - 1 teaspoon vanilla extract - 1 teaspoon baking powder - 1 teaspoon baking soda - 1 teaspoon ground cinnamon - ½ teaspoon ground nutmeg - ½ teaspoon ground ginger - ¼ teaspoon salt - 1 cup chopped pecans (optional) - ½ cup brown sugar (for crumb topping) - 1 tablespoon ground cinnamon (for crumb topping) Now, preheat your oven to 350°F (175°C). Grease a 9x13 inch baking pan. You can also line it with parchment paper for easy cleanup. In a large mixing bowl, add the pumpkin puree, granulated sugar, brown sugar, vegetable oil, Greek yogurt, eggs, and vanilla extract. Mix until smooth. In another bowl, whisk the flour, baking powder, baking soda, cinnamon, nutmeg, ginger, and salt. Slowly add this dry mix to the wet ingredients. Stir gently until just combined. If you like nuts, fold in the pecans now. For the crumb topping, combine the ½ cup brown sugar and 1 tablespoon cinnamon in a small bowl. Pour half of the batter into the prepared pan. Spread it out evenly. Next, sprinkle half of the crumb mixture on top. Add the remaining batter and smooth it out. Finally, top it with the rest of the crumb mixture. Bake in the oven for 35-40 minutes. Check if it is done by inserting a toothpick into the center. If it comes out clean, your cake is ready. Once baked, let the cake cool in the pan for about 10 minutes. After that, transfer it to a wire rack to cool completely. For a nice touch, dust the cooled cake with powdered sugar. You can also add whipped cream and a sprinkle of nutmeg on each slice. This makes it look even more special and tasty! For the full recipe, refer to the earlier section. Baking can be tricky, but a few tips help. First, always measure your ingredients correctly. Use a scale for precision. Next, room temperature eggs and yogurt mix better. This helps create a smooth batter. Make sure your oven is at the right temperature before baking. An oven thermometer can help. Lastly, don’t rush. Let the cake cool well before cutting. Sometimes, cakes don’t turn out as planned. If your coffee cake is too dry, you might have overbaked it. Check the time closely. If it’s too wet, it may need more baking time. You can also check if your oven runs hot or cold. For a dense cake, ensure you mix the batter just enough. Overmixing can lead to a heavy texture. Want to take your pumpkin coffee cake to the next level? Add spices like cardamom or cloves for a warm kick. Swirl in some cream cheese for a rich filling. You can also mix in chocolate chips for a sweet surprise. Try adding fresh cranberries for a tart contrast. Finally, top with a glaze made from powdered sugar and milk for extra sweetness. For the complete recipe, check out the Full Recipe section. {{image_2}} You can make your pumpkin coffee cake even tastier by adding a cream cheese filling. This filling adds a rich, tangy flavor. To make it, mix together 8 ounces of softened cream cheese, 1/4 cup of sugar, and 1 egg. Spread half of the cake batter in the pan, add the cream cheese mix, and then top with the rest of the batter. This twist makes every bite creamy and delightful. Choosing nuts can change the taste of your cake. Pecans bring a sweet, buttery flavor. They pair well with pumpkin. Walnuts, on the other hand, add a bit of bitterness and crunch. You can use either, or mix both for a fun texture. If you want, you can also leave out nuts for a nut-free version. Just remember to adjust the recipe to your taste. If you need a gluten-free option, it’s easy to adapt your cake. Replace all-purpose flour with a gluten-free flour blend. Make sure the blend has a good mix of starches and proteins. You can also add a bit of xanthan gum to help with the texture. This way, even those with gluten sensitivity can enjoy a slice of this pumpkin coffee cake. Check out the Full Recipe for more details on how to make these variations. Store your pumpkin coffee cake in an airtight container. This keeps it fresh and moist. If you plan to eat it within a few days, keep it at room temperature. If you want to save it for longer, refrigerate it. Make sure it cools completely before you store it. To freeze pumpkin coffee cake, let it cool first. Wrap it tightly in plastic wrap. Then, place it in a freezer-safe bag. Label the bag with the date. You can freeze it for up to three months. When you are ready to enjoy it, just take it out and let it thaw in the fridge overnight. Reheat your pumpkin coffee cake in the oven for the best taste. Preheat the oven to 350°F (175°C). Place the cake on a baking sheet and cover it with foil. Heat for about 10 to 15 minutes. You can also use a microwave. Warm a slice for about 20 seconds. Enjoy your delicious treat warm, with a hint of spice! For the full recipe, check out the detailed instructions above. This pumpkin coffee cake stands out for its moist texture and rich flavor. The pumpkin puree adds a lovely sweetness while keeping the cake soft. Cinnamon, nutmeg, and ginger give it that warm, cozy vibe we all love. The crumb topping adds a crunchy layer, making each bite a delight. Together, these elements create a perfect treat for any time of day. Yes, you can use fresh pumpkin instead of canned. To do this, roast or steam the pumpkin until soft. Then, mash it well and measure it out. Fresh pumpkin may have a bit more water, so you might need to adjust the flour slightly. This swap can enhance the flavor and freshness of your coffee cake. To check if your coffee cake is done, insert a toothpick into the center. If it comes out clean or with a few crumbs, the cake is ready. If it has wet batter on it, give it a few more minutes. Baking times can vary, so keep an eye on it as it approaches the end of the baking time. Enjoy your delicious creation with this full recipe! This blog post covered how to make a tasty pumpkin coffee cake. We discussed the key ingredients and shared steps for preparation and baking. You learned tips for success and ways to add unique flavors. We also explored storage options and answered common questions. I hope you feel ready to create your own pumpkin coffee cake. Enjoy the process and the delicious results! Happy baking!

Are you ready to spice up your baking routine? This Pumpkin Coffee Cake is an irresistible treat that will warm your heart and home. With its rich flavors and simple …

Read more

Categories Desserts

Pumpkin Pie Cake Pops Delightful Fall Treat

July 21, 2025 by Chef Luca
- 1 box yellow cake mix - 1 cup canned pumpkin puree - 3 eggs - 1/3 cup vegetable oil - 1 tablespoon pumpkin pie spice - 1 teaspoon vanilla extract To make pumpkin pie cake pops, you start with some simple, tasty items. The yellow cake mix gives a soft base. The canned pumpkin puree brings that lovely fall flavor. You also need eggs for structure. Vegetable oil keeps the cake moist. Pumpkin pie spice adds warmth and depth. Lastly, vanilla extract rounds out the flavors. - 1 cup cream cheese frosting - 1 cup white chocolate chips - 1 tablespoon coconut oil For the coating, cream cheese frosting is key. It sticks the crumbled cake together. White chocolate chips melt down to create a sweet shell. Adding coconut oil to the chocolate helps it flow better when you dip. This combo makes the pops look great and taste amazing. - Sprinkles - Crushed graham crackers You can dress up your cake pops with sprinkles or crushed graham crackers. Sprinkles add color and fun. Crushed graham crackers give a nod to traditional pumpkin pie crust. These toppings let you personalize your treats. Get creative and make them your own! For the full recipe, check out the details above. - Preheat your oven to 350°F (175°C). - Grease a 9x13 inch baking pan or line it with parchment paper. - In a large bowl, mix 1 box of yellow cake mix, 1 cup of canned pumpkin puree, 3 eggs, 1/3 cup of vegetable oil, 1 tablespoon of pumpkin pie spice, and 1 teaspoon of vanilla extract. Mix until smooth. - Pour the batter into the prepared baking pan. Spread it evenly. - Bake for about 25-30 minutes. Check doneness with a toothpick. It should come out clean. - Let the cake cool completely in the pan. Then, transfer it to a wire rack. - Once cooled, crumble the cake into a large bowl until it's fine. - Gradually add 1 cup of cream cheese frosting. Mix with your hands or a spatula. Make sure it's moist and holds together. - Scoop small portions and roll them into balls, about 1 inch in diameter. Place them on a lined baking sheet. - Chill the cake balls in the fridge for about 30 minutes to firm up. - Melt 1 cup of white chocolate chips and 1 tablespoon of coconut oil in a microwave-safe bowl. Heat in 30-second intervals, stirring well after each. - Remove the cake pops from the fridge. Dip the tip of a lollipop stick in the melted chocolate. Insert it into the center of each cake pop. - Dip each cake pop fully into the melted chocolate. Let excess chocolate drip off. - Decorate by rolling them in sprinkles or crushed graham crackers while the chocolate is still wet. - Place the finished cake pops upright in a styrofoam block or rice-filled container. - Allow the chocolate to harden for about 10-15 minutes at room temperature or in the fridge. You can find the full recipe for these delightful treats above! To make great cake pops, start with the right mix. The cake should feel moist but not too wet. If it crumbles too much, add more frosting. If it’s too sticky, add some cake mix. Aim for a dough-like texture. Cooling times matter too. After baking, let the cake cool completely. This step helps the cake firm up. If you rush this, your pops may fall apart. Chill your rolled balls for about 30 minutes. This helps them stay round when dipped in chocolate. Melting chocolate can be tricky. You want it smooth, not burnt. Use a microwave-safe bowl to melt. Heat in 30-second bursts. Stir between each burst to avoid burning. If you see any lumps, keep stirring until smooth. You can also use a double boiler. Fill a pot with water and bring it to a simmer. Place a heat-safe bowl on top, making sure it doesn't touch the water. This method heats slowly and reduces the risk of burning. Get creative with toppings! You can use sprinkles, crushed graham crackers, or even nuts. For a fun touch, try adding colored sprinkles for a festive look. Use seasonal options too, like orange zest or cinnamon sugar. Think about themed decorations. For Halloween, add little candy eyes. For Thanksgiving, use leaf-shaped sprinkles. Each season brings a chance to mix it up! Try these tips to make your pumpkin pie cake pops even better. For the full recipe, check the detailed instructions above. {{image_2}} You can easily change the taste of your pumpkin pie cake pops. Adding spices can boost flavor. Try mixing in cinnamon, nutmeg, or ginger for a warm kick. If you want a twist, use a different cake mix. Spice cake or chocolate cake mixes work well too. They will give your pops a unique taste. If you have dietary needs, you can still enjoy these treats. For gluten-free options, choose a gluten-free cake mix. You can also make them vegan. Use a plant-based cake mix and swap eggs for applesauce. This way, everyone can join in on the fun without worry. Make your cake pops fit any occasion! For Halloween, use fun decorations like candy eyes or spooky sprinkles. You can even dip them in orange chocolate for a festive look. For Thanksgiving, consider adding fall-themed decorations like leaf sprinkles or edible glitter. These themed cake pops will surely impress your guests. For the complete recipe and step-by-step guide to making these delicious pumpkin pie cake pops, check out the Full Recipe. To keep your pumpkin pie cake pops fresh, store them in the fridge. Use an airtight container to avoid moisture loss. Place parchment paper between layers to prevent sticking. This method helps maintain flavor and texture, keeping them tasty for up to a week. For long-term storage, you can freeze the cake pops. Wrap each pop in plastic wrap and place them in a freezer bag. They can last up to three months in the freezer. To thaw, remove them from the freezer and let them sit at room temperature for about 30 minutes. This helps them keep their shape and taste. How long do cake pops last? When stored properly, they last about a week in the fridge. In the freezer, they hold their quality for three months. Check for signs of spoilage, like a change in smell or mold. If you notice any, it’s best to toss them. Enjoy your pumpkin pie cake pops for as long as possible! For the full recipe, check the earlier section. Yes, you can prepare these cake pops ahead of time. Make the cake and form the pops. After rolling them into balls, chill the pops in the fridge. Once firm, wrap them in plastic wrap. Store them in the fridge for up to three days before coating. This saves time on the day you plan to serve them. If you want an alternative to cream cheese frosting, try using buttercream. It is sweet and smooth. You could also use chocolate ganache for a rich flavor. If you need a dairy-free option, coconut cream works well. Just whip it until fluffy for a nice texture. To get a smooth chocolate coating, start with good-quality chocolate. Melt it slowly in the microwave or double boiler. Stir often to avoid burning. Dip each cake pop quickly and let the excess drip off. If needed, tap gently on the side of the bowl. This gives a nice, even layer. You learned how to make tasty pumpkin pie cake pops using simple ingredients. We covered the steps from mixing the batter to decorating with fun toppings. You also picked up tips for storing your treats. Now, get creative with flavors and decorations. Enjoy sharing them at parties or holidays. Remember, the fun is not just in making them, but in sharing the joy they bring. Happy baking!

Ready to bite into fall? These Pumpkin Pie Cake Pops are the perfect treat. Soft, sweet, and packed with pumpkin flavor, they’re simple to make and a hit at any …

Read more

Categories Desserts

MOIST Pumpkin Bread with Streusel Topping Delight

July 21, 2025 by Chef Luca
- 1 ½ cups all-purpose flour - 1 teaspoon baking powder - 1 teaspoon baking soda - ½ teaspoon salt - 1 teaspoon ground cinnamon - ½ teaspoon ground nutmeg - ½ teaspoon ground ginger - ¾ cup granulated sugar - ½ cup brown sugar, packed - ½ cup vegetable oil - 2 large eggs - 1 cup pumpkin puree (canned or fresh) - 1 teaspoon vanilla extract - ½ cup chopped walnuts or pecans (optional) The main ingredients make this pumpkin bread rich and moist. Flour gives the bread its structure. Baking powder and baking soda help it rise. Ground spices like cinnamon, nutmeg, and ginger add warmth and flavor. - ½ cup all-purpose flour - ¼ cup brown sugar, packed - ¼ teaspoon ground cinnamon - ¼ cup unsalted butter, melted The streusel topping brings a sweet crunch. The brown sugar adds depth. Butter helps bind it, creating those lovely crumbs we all love. - Cream cheese frosting - Spices variations (like cloves or allspice) Adding cream cheese frosting makes this treat even sweeter. If you love strong flavors, try adding cloves or allspice. These can elevate the taste of the bread. For the full recipe, check out the complete details to bake your own delicious moist pumpkin bread with streusel topping. First, preheat your oven to 350°F (175°C). This step is key for even baking. Next, prepare a loaf pan. You can grease it or line it with parchment paper. This way, your bread will come out easily. In a large bowl, whisk together the dry ingredients. You’ll need all-purpose flour, baking powder, baking soda, salt, cinnamon, nutmeg, and ginger. This mix gives your bread a warm flavor. In another bowl, combine granulated sugar, brown sugar, and vegetable oil. Mix them well until smooth. Add two eggs, one at a time, mixing well after each. Then, stir in the pumpkin puree and vanilla extract until it's all combined. Gradually add the dry mix to the wet mix. Stir gently until just combined. If you like, fold in walnuts or pecans for extra crunch. For the streusel, mix together flour, brown sugar, and cinnamon in a small bowl. Stir in melted butter until the mix looks crumbly. This topping will add a sweet crunch to your bread. Sprinkle the streusel evenly on top of the pumpkin batter before baking. Pour the batter into your prepared loaf pan and smooth the top. Bake in the preheated oven for 60-70 minutes. Check for doneness by inserting a toothpick into the center. If it comes out clean, your bread is ready. Let it cool in the pan for ten minutes before moving it to a wire rack. For the full recipe, refer to the details above. To make your pumpkin bread truly moist, start with fresh pumpkin puree. Fresh puree gives a richer taste. You can roast your own pumpkin or use a good-quality canned option. Both work well but fresh always shines. Next, avoid overmixing the batter. When you mix, do it just until combined. Overmixing can make the bread tough. For added flair, dust your bread with powdered sugar before serving. It makes the bread look pretty and inviting. Serve your slices warm, topped with butter or honey. This adds a lovely touch of sweetness and richness. It makes for a delightful treat with coffee or tea. One common mistake is not measuring ingredients properly. This can lead to dry or dense bread. Use a scale or measuring cups for accuracy. Another pitfall is opening the oven door too often while baking. This lets heat escape and can affect the rise. Keep the door closed until you check for doneness. {{image_2}} You can easily change the taste of your pumpkin bread. Adjust the spices to fit your liking. If you love nutmeg, add more of it. Want a little kick? Add extra ginger for warmth. You can also mix in chocolate chips for a sweet twist. Dried fruits like cranberries or raisins add a lovely texture. These small changes can take your pumpkin bread from good to great. If you need a gluten-free option, swap regular flour for a gluten-free blend. This keeps the bread tasty while fitting your diet. For vegan pumpkin bread, use flax eggs instead of chicken eggs. Simply mix one tablespoon of flaxseed meal with three tablespoons of water for each egg. Non-dairy milk can also replace regular milk. These swaps make it easy for everyone to enjoy this dish. Serve your pumpkin bread warm for the best experience. Toasted slices with butter melt in your mouth. Cream cheese adds a rich layer of flavor. Pair the bread with a warm drink, like coffee or spiced chai. The flavors complement each other perfectly. For an extra treat, try dusting your bread with powdered sugar. It looks nice and tastes amazing. For the full recipe, check out the details above. To keep your moist pumpkin bread fresh, store it at room temperature. Wrap the bread tightly in plastic wrap or place it in an airtight container. This way, it stays soft for up to one week. If you put it in the fridge, the bread can dry out quickly. So, avoid refrigeration if you can. If you want to save some pumpkin bread for later, freezing works great. Wrap the bread tightly in plastic wrap, then in aluminum foil. This extra layer helps keep out air. You can freeze it for up to three months. When you're ready to eat, thaw the bread in the fridge overnight. For a quicker method, leave it at room temperature for a few hours. To enjoy your pumpkin bread warm, you can reheat slices in the microwave. Just heat for 10-15 seconds. If you prefer a crispy edge, use a toaster oven. Set it to a low temperature and heat for about 5 minutes. To keep the bread moist, add a small piece of damp paper towel in the microwave. This tip helps retain moisture while warming the bread. To make pumpkin bread moist, add oil or applesauce. Both keep the bread soft. Use room temperature eggs, as they mix better. You can also add yogurt or sour cream for extra moisture. These ingredients help keep the bread tender and fluffy. Yes, you can use canned pumpkin. It is often more convenient and saves time. Canned pumpkin has a smooth texture and rich flavor. It is also consistent in moisture content. Fresh pumpkin may require more prep time and can vary in moisture. Check for visual cues. The top should look golden and slightly cracked. A toothpick test is best. Insert a toothpick into the center. If it comes out clean, the bread is done. If it has wet batter, bake a little longer. A sinking pumpkin bread may mean it was underbaked. Ensure your oven is at the right temperature. Overmixing the batter can also cause sinking. Try mixing until just combined. If the batter is too wet, add a bit more flour. Homemade pumpkin bread lasts about one week at room temperature. Store it in a cool, dry place. If you want it to last longer, refrigerate it for up to two weeks. For even longer storage, freeze it for up to three months. Pumpkin bread is a delightful treat you can easily make at home. We covered the key ingredients you need, like flour, pumpkin puree, and spices, as well as how to mix and bake them properly. I shared tips to keep your bread moist and tasty. You can also explore many variations and storage options. With these simple steps and ideas, your pumpkin bread will impress everyone. Enjoy your baking journey, and remember, the delicious slices will be worth the effort!

Craving a warm, comforting treat? Let me introduce you to my MOIST Pumpkin Bread with Streusel Topping! This recipe packs bold pumpkin flavor and a crunchy topping that will make …

Read more

Categories Desserts

How to Make Roasted Tomato Sauce Flavorful and Simple

July 21, 2025 by Chef Luca
- 2 lbs ripe Roma tomatoes - 1 medium onion - 6 cloves garlic - 3 tablespoons olive oil - Salt and pepper To create a rich and tasty roasted tomato sauce, you need ripe Roma tomatoes. They have a sweet flavor and low moisture. The onion adds depth, while garlic brings a wonderful aroma. Olive oil helps everything roast nicely. Lastly, salt and pepper enhance all the flavors. - 1 teaspoon dried oregano - 1 teaspoon balsamic vinegar - Fresh basil leaves for garnish You can add dried oregano for a classic taste. Balsamic vinegar adds a touch of sweetness. Fresh basil leaves make the dish look pretty and add fresh flavor. These optional ingredients can elevate your sauce even more. For the complete recipe, check out the Full Recipe section. Enjoy making your sauce! - Preheat the oven to 400°F (200°C). - In a large mixing bowl, combine the halved tomatoes, quartered onion, and unpeeled garlic. Pour in the olive oil, and sprinkle with salt, pepper, and dried oregano. Toss the mixture until the vegetables are well coated. - Spread the coated vegetables evenly on a baking sheet lined with parchment paper. Make sure there’s space between the tomatoes. - Roast in the preheated oven for 30-35 minutes. You want the tomatoes to become caramelized and soft. The garlic should be lightly browned. - After roasting, let the vegetables cool for a few minutes. - Squeeze the roasted garlic out of its skin into a blender or food processor. Add the roasted tomatoes and onions, along with any juices from the baking sheet. - Blend the mixture until smooth. If you want a hint of sweetness, add balsamic vinegar and blend again. - Taste the sauce and adjust the seasoning with salt and pepper as needed. This roasted tomato magic sauce is perfect right away, but you can also store it. Enjoy it over pasta, or store it in the fridge for up to a week. You can freeze it for longer storage. Check the [Full Recipe] for all the details! To make your roasted tomato sauce stand out, use the freshest tomatoes. Ripe Roma tomatoes are my go-to. Their flavor is sweet and rich. You can also try heirloom varieties for a unique taste. Next, don’t shy away from experimenting with herbs and spices. Fresh basil pairs well with tomatoes. Other good options include oregano, thyme, or a pinch of red pepper flakes for heat. Mix and match to find your perfect blend. Roasting longer can bring out deeper flavors. If you want a richer taste, add an extra 10 minutes to your roasting time. Just watch for burning. When blending, you can adjust the sauce's texture. For a chunky sauce, leave some bits. If you want it smooth, blend it longer. Add a splash of balsamic vinegar for sweetness if you like. This also helps balance the sauce's acidity. For the complete process, check out the Full Recipe. {{image_2}} You can make your roasted tomato sauce heartier by adding protein. Meat, like ground beef or turkey, works well. Sauté the meat in a pan before mixing it into the sauce. If you prefer a plant-based option, try adding beans like cannellini or black beans. They add protein and texture without meat. Just stir them in after blending your sauce. This extra step makes your dish more filling and satisfying. To take your sauce up a notch, consider adding spicy peppers. A pinch of red pepper flakes can give it a kick. For a more mellow heat, try diced jalapeños. Fresh or dried herbs can also change the flavor profile. Basil, thyme, or rosemary all work great. You can even mix and match for a unique taste. Using different tomato varieties can also enhance your sauce. While Roma tomatoes are sweet, try heirloom or beefsteak tomatoes for a richer flavor. Each type brings its own character to the sauce. Experimenting with these variations lets you create a sauce that’s just right for you. For the complete process, refer to the Full Recipe for roasted tomato magic sauce. You can store roasted tomato sauce in an airtight container. Make sure the lid fits snugly. This will keep the sauce fresh for up to one week in the fridge. The cold air will help preserve its great flavor. Always let the sauce cool down before sealing it. This prevents steam from building up inside the container. Freezing is a great option if you want to keep your sauce longer. Pour the cooled sauce into freezer-safe containers or bags. Leave some space at the top, as the sauce will expand when it freezes. Make sure to label the bags with the date. When you’re ready to use it, thaw the sauce in the fridge overnight. You can also use the microwave for quick thawing if needed. In the fridge, roasted tomato sauce stays good for about seven days. If you freeze it, you can enjoy it for up to six months. However, for the best taste and quality, use it within three months. Always check for any off smells or changes in color before using thawed sauce. If everything looks good, you’re ready to savor your homemade roasted tomato sauce! For the full recipe, refer to the earlier sections. Yes, you can use canned tomatoes. Look for whole or diced tomatoes. Canned tomatoes are often sweeter. They can save you time too. Just drain some liquid before roasting. Roasted tomato sauce lasts about six months in the freezer. Make sure to store it in airtight containers. Label them with the date for easy tracking. Absolutely! You can halve or double the recipe. Just keep the ingredient ratios the same. If you want more sauce, add more tomatoes and garlic. You can serve this sauce over pasta, pizza, or grilled veggies. It also works well in soups or as a dip. Add fresh herbs or cheese for extra flavor. For more ideas, check out the Full Recipe. This blog covers how to make roasted tomato sauce. We explored main and optional ingredients, along with simple steps to prepare and roast your veggies. You learned tips to enhance flavor and variations to customize your sauce. Plus, we discussed how to store it to keep it fresh. Overall, this sauce is easy to make and fun to tweak. You can enjoy it your way or share it with friends. Embrace your creativity in the kitchen, and make this sauce your new favorite!

Making roasted tomato sauce is easy and rewarding. With just a few simple ingredients, you can create a rich and tasty sauce that elevates any dish. I’ll guide you step-by-step, …

Read more

Categories Dinner

Caramel Apple Fudge Irresistible Fall Treat Recipe

July 20, 2025 by Chef Luca
This caramel apple fudge recipe mixes sweet and tart flavors. It is a great fall treat. You will need simple ingredients to make it. The full recipe is easy to follow. To make this fudge, gather these key items: - 2 cups granulated sugar - 1 cup unsweetened apple juice - 1 cup heavy cream - 1 cup unsalted butter - 1 teaspoon vanilla extract - 1 ½ cups semi-sweet chocolate chips - 1 cup chopped dried apples - ½ teaspoon sea salt Each ingredient plays a role in flavor and texture. The sugar and butter create a rich base. The apple juice adds a fruity kick. Heavy cream gives it a smooth texture, while chocolate chips add sweetness. You can add chopped walnuts for a nice crunch. They also bring healthy fats and protein. Another option is to sprinkle in spices like cinnamon or nutmeg for warmth. These spices deepen the flavor, making it taste like autumn. Start by lining an 8x8 inch baking dish with parchment paper. Leave some paper hanging over the edges. This helps you lift the fudge out later. Now, gather your ingredients. You need sugar, apple juice, cream, butter, vanilla, chocolate chips, dried apples, walnuts, and sea salt. In a medium saucepan, mix the granulated sugar, apple juice, and heavy cream. Stir it over medium heat. Watch for it to boil gently. Once it starts boiling, add the unsalted butter. Keep stirring constantly. You want to reach the soft ball stage, around 235°F. This usually takes about 10 to 15 minutes. After reaching the right temperature, take the pan off the heat. Stir in the vanilla extract, chocolate chips, and sea salt. Mix well until the chocolate is melted. Then, gently fold in the chopped dried apples and walnuts if you choose to use them. Pour the mixture into the lined baking dish. Spread it evenly with a spatula. Let the fudge cool at room temperature for about an hour. Then, move it to the fridge to set for at least two hours. Once firm, lift it out using the parchment paper. Cut it into squares or rectangles. Enjoy your delicious Caramel Apple Fudge! For more detailed steps, check out the Full Recipe. To get the right texture for your fudge, timing is key. Cook your caramel mixture until it hits the soft ball stage at 235°F. This temperature gives your fudge that creamy, smooth feel. Stir constantly to prevent burning. After mixing in the chocolate, let it cool a bit before adding the dried apples. This helps keep them intact. One common mistake is not stirring enough. If you leave the caramel mixture unattended, it can scorch. Another mistake is cutting the fudge too soon. If you cut it while it's still warm, it may fall apart. Last, don’t skip the sea salt. It balances the sweetness and enhances the flavors. Use a heavy-bottomed saucepan for even heat distribution. A candy thermometer is essential to reach the right temperature. A spatula helps mix ingredients well. Finally, parchment paper makes it easy to lift the fudge once it's set. You can find the Full Recipe to get all the details on these tips. {{image_2}} You can change up the nuts in your fudge for different tastes. Try pecans for a sweet crunch. Almonds give a nice flavor too. If you want a bit of heat, add chopped spicy nuts. You can also skip the nuts altogether if you want it nut-free. Think about adding mini marshmallows or crispy rice for extra texture. Spices can really boost the taste of your fudge. Cinnamon adds warmth, while nutmeg gives it a cozy feel. You can also try a pinch of ginger for a zesty kick. For extra depth, use maple extract instead of vanilla. This adds a lovely fall vibe to your fudge. Just remember, a little goes a long way! If you want a vegan version, swap out the butter for coconut oil. Use a non-dairy cream like coconut cream to keep it rich. For the chocolate chips, choose dairy-free chips. And instead of apple juice, use a plant-based milk for a different twist. This way, you can enjoy caramel apple fudge without dairy! For the full recipe, check out the Full Recipe section. To keep your caramel apple fudge fresh, place it in an airtight container. Make sure to separate layers with parchment paper. This helps avoid sticking and keeps the fudge intact. Store it in a cool, dry place away from sunlight. If you live in a warm area, the fridge is a better option. Caramel apple fudge can last up to two weeks when stored properly. If you keep it in the fridge, it may last a bit longer. Just check for any signs of spoilage, like changes in smell or texture. If you notice anything off, it's best to toss it out. If you want to keep your fudge for even longer, freezing is a great option. Cut the fudge into squares and wrap each piece in plastic wrap. Then, place them in a freezer-safe bag or container. Label the bag with the date. Your fudge can stay good for up to three months in the freezer. When you’re ready to enjoy it, let the fudge thaw in the fridge overnight. For a quick fix, you can also leave it at room temperature for a couple of hours. Yes, you can use fresh apples. However, fresh apples have more moisture. This may change the fudge's texture. If you want to use fresh apples, chop them finely and cook them. You can sauté them briefly in a pan to reduce moisture. This step helps maintain the fudge's creamy and firm texture. To make your fudge creamier, focus on the mixing process. Stir the mixture well while cooking. This helps to combine the ingredients smoothly. Also, use heavy cream instead of milk. The fat in heavy cream adds richness. If you want, you can add a bit more butter. This will enhance the creaminess. Caramel Apple Fudge pairs well with many treats. You can serve it with vanilla ice cream. The cold ice cream balances the rich fudge. Another great option is hot chocolate or coffee. These drinks enhance the sweet flavors. You can also add a drizzle of caramel sauce on top. This makes for a lovely presentation. For a fun twist, serve it with apple slices for dipping. You learned how to make caramel apple fudge. We covered essential ingredients, tips, and variations. You can create a creamy texture by adjusting cooking times. Remember to store your fudge properly to keep it fresh. With these steps, you can make a treat that everyone loves. Enjoy your delicious fudge and feel free to share your creations with others!

If you’re looking for a dessert that screams fall, you’ve found it! This Caramel Apple Fudge is rich, sweet, and full of the flavors we love as the leaves change. …

Read more

Categories Desserts

Pumpkin Gnocchi Delightful Recipe to Try Today

July 20, 2025 by Chef Luca
To make tasty pumpkin gnocchi, gather these key ingredients: - 2 cups pumpkin puree (fresh or canned) - 1 cup ricotta cheese - 2 cups all-purpose flour, plus extra for dusting - 1 egg - 1 teaspoon salt - ½ teaspoon nutmeg - ¼ teaspoon black pepper - 2 tablespoons olive oil - Fresh sage leaves for garnish - Grated Parmesan cheese for serving These ingredients create a soft, flavorful dough. The pumpkin gives a rich taste. The ricotta makes it creamy, while the nutmeg adds warmth. If you want to boost the flavor, consider these optional ingredients: - A pinch of cinnamon for warmth - A splash of cream for extra richness - Toasted walnuts for crunch - Lemon zest for brightness These extras can change the taste and make your dish unique. Feel free to mix and match based on your preference. You can customize this recipe with these substitutions: - Use sweet potato puree instead of pumpkin for a different flavor. - Replace ricotta with cottage cheese for a lighter option. - Swap all-purpose flour with gluten-free flour for a gluten-free version. Experimenting with these options can lead to fun new tastes. Enjoy finding your perfect blend! For the full recipe, check the details above. To start, gather your ingredients. In a large bowl, add the pumpkin puree, ricotta cheese, egg, salt, nutmeg, and black pepper. Mix it all together until it is smooth and creamy. This part is fun! Gradually add the flour, mixing it in with a fork or your hands. Keep mixing until the dough forms. It should feel soft, not sticky. If it is sticky, add a bit more flour. Once mixed, turn the dough onto a floured surface. Knead it gently for about two minutes. This step helps the dough become firm. Next, divide your dough into four equal pieces. Roll each piece into a long rope, about half an inch thick. This might take some practice, but it’s easy once you get the hang of it. Cut each rope into one-inch pieces to form your gnocchi. To add a nice touch, use a fork to press down on each piece. This creates small indentations. These indents help the sauce stick better later. Now, bring a large pot of salted water to a boil. Once boiling, drop the gnocchi into the water in batches. They will cook quickly! When they float to the surface, they are done. This usually takes about 2 to 3 minutes. Use a slotted spoon to remove them and place them on a plate. In a skillet, heat the olive oil over medium heat. Add the cooked gnocchi and sauté them for 2 to 3 minutes. They should turn lightly golden on the outside. Serve them hot, adding fresh sage leaves and a generous sprinkle of grated Parmesan cheese on top. For more details, check the Full Recipe. To make great pumpkin gnocchi, start with the best pumpkin. Use fresh or high-quality canned pumpkin puree. This gives your gnocchi a rich flavor. When mixing your dough, avoid adding too much flour. Too much flour makes the gnocchi tough. Aim for a soft and slightly sticky dough. This helps keep them light. Always use a floured surface when shaping. This prevents sticking and keeps them intact. One common mistake is over-kneading the dough. Knead it just until it comes together. Another mistake is not rolling the gnocchi evenly. If they are uneven, they may cook unevenly. Avoid boiling all the gnocchi at once. Cook them in batches to prevent clumping. Lastly, don’t skip the fork press. That little indent helps sauce cling better. You don’t need fancy tools to make gnocchi. A large mixing bowl is key for combining ingredients. Use a fork or your hands for mixing. A clean countertop or a large cutting board works great for kneading. Get a sharp knife for cutting the dough into pieces. A slotted spoon helps remove the gnocchi from boiling water. Finally, a skillet is perfect for sautéing them to perfection. For the full recipe, check out the complete instructions. {{image_2}} You can change the taste of pumpkin gnocchi with different sauces. A brown butter sage sauce is a classic choice. It brings a nutty flavor that pairs well with pumpkin. Just melt butter in a pan, add sage leaves, and let it cook until golden. You can also try a creamy Alfredo sauce for a rich option. For a lighter sauce, a simple olive oil and garlic mix works great too. Each sauce will give your gnocchi a new twist. Adding other vegetables can boost the flavor and nutrition of your gnocchi. Sweet potatoes or butternut squash blend well with pumpkin. You can even use mashed carrots for a sweeter taste. Just replace some of the pumpkin puree with your chosen vegetable. This way, you add variety while keeping the gnocchi soft and yummy. Experimenting with flavors can make your pumpkin gnocchi unique. Adding spices like cinnamon or allspice can enhance the sweetness. For a savory touch, try mixing in some grated cheese or herbs like thyme. You can also incorporate nuts for a crunchy texture. Toasted walnuts or pine nuts can add a delightful crunch. Each combination opens up a world of taste for you to explore. For the full recipe, check out my Pumpkin Gnocchi Delight! After enjoying your pumpkin gnocchi, you might have some left. To store it, let it cool first. Place the gnocchi in an airtight container. They will stay fresh in the fridge for up to three days. If you plan to eat them soon, this is the best way to keep them. Freezing gnocchi is a great way to save time. To freeze, spread the uncooked gnocchi on a baking sheet. Make sure they don’t touch each other. Freeze them for about an hour. Once firm, transfer the gnocchi into a freezer bag. They can last up to three months in the freezer. This makes it easy to whip up a meal any time you want. Reheating gnocchi is simple. If they are cooked and stored, you can reheat them in a skillet. Add a splash of broth or water to help them heat evenly. Cook over medium heat until warmed through, about five minutes. If they are frozen, boil them in salted water for about 3-4 minutes. Once they float, they are ready to enjoy. For extra flavor, sauté them in a bit of olive oil after boiling. Pumpkin gnocchi comes from Italy. It blends the classic potato gnocchi with pumpkin. This dish shows off the rich flavors of fall. Many Italian regions have their own versions. They often use fresh, seasonal ingredients. The use of pumpkin makes it unique and festive. Yes, you can make pumpkin gnocchi without ricotta cheese. You can replace it with mashed potatoes. Another option is to use a vegan cream cheese for a dairy-free version. The texture may change slightly, but it will still taste great. Just ensure your dough is soft and pliable. You know the gnocchi is cooked when it floats. Drop them into boiling water. As they cook, they will rise to the surface. This should take about 2-3 minutes. Once they float, use a slotted spoon to remove them. The best sauce for pumpkin gnocchi is a simple brown butter sauce. It adds a nice nutty flavor. You can enhance it with fresh sage or thyme. A light cream sauce works well too. It helps balance the sweetness of the pumpkin. Try to keep the sauce simple to let the gnocchi shine. For a complete guide, check the Full Recipe. Now you are ready to make delicious pumpkin gnocchi at home. We covered essential ingredients and simple steps for preparation. You learned tips for perfecting your dish and avoiding mistakes. I also shared tasty variations and smart storage tips. Cooking can be fun and creative. Enjoy making your own gnocchi, experimenting with flavors, and savoring your meals. Try different ingredients and sauces to find what you love best. Happy cooking!

If you’re ready to impress your taste buds, this Pumpkin Gnocchi recipe is for you! I’ll show you how to create soft, flavorful gnocchi that’s perfect for any meal. With …

Read more

Categories Dinner

Slow Cooker Garlic Herb Pot Roast Savory and Tender

July 20, 2025 by Chef Luca
The main ingredients set the stage for a tender pot roast. You need: - 3 to 4 pounds chuck roast - 4 cloves garlic, minced - 2 tablespoons fresh rosemary, minced The chuck roast is rich in flavor. It becomes tender as it cooks slowly. Garlic adds a nice punch. The fresh rosemary gives a classic touch to your dish. Adding vegetables enhances taste and nutrition. Here’s what you will need: - 4 medium carrots, cut into large chunks - 3 medium potatoes, cut into quarters - 1 large onion, quartered - Salt, pepper, and herbs Carrots bring sweetness and color. Potatoes soak up the juices and become fluffy. Onion adds depth to the flavor. Don’t forget to season well with salt, pepper, and your choice of herbs. Liquid keeps the roast moist and flavorful. Gather these ingredients: - 2 cups beef broth - 2 tablespoons olive oil - 1 tablespoon balsamic vinegar - 2 tablespoons cornstarch (optional, for thickening) Beef broth is the base for your gravy. Olive oil helps with searing and adds flavor. Balsamic vinegar gives a hint of sweetness. If you want a thicker gravy, use cornstarch at the end. For the full recipe, check the details mentioned above. First, pat the chuck roast dry. This helps create a good crust when searing. Next, season both sides with salt and pepper. This step adds great flavor. In a large skillet, heat olive oil over medium-high heat. Once hot, carefully place the roast in the skillet. Sear each side for about 4-5 minutes. Look for a nice brown crust to form. This adds depth to your dish. After searing, remove the roast from the skillet and set it aside. In a small bowl, combine minced garlic, rosemary, thyme, oregano, and balsamic vinegar. Mix well to create a flavorful marinade. Coat the seared roast with this mixture. Make sure to cover all sides. The herbs will infuse the meat with great taste as it cooks. Start by adding the chopped carrots, potatoes, and onion to the bottom of the slow cooker. These veggies will soak up all the yummy flavors. Now, place the seasoned roast on top of the vegetables. Pour in the beef broth around the roast. Ensure the liquid covers about halfway up the meat. This keeps the roast moist and tender. Finally, cover the slow cooker and set it to low for 8-10 hours. This long, slow cooking time helps break down the meat fibers. Trust me; you'll love how tender it becomes. For the full recipe, please refer to the earlier sections. To achieve a tender roast, use a chuck roast. Chuck has fat and collagen that break down during cooking. This gives you a moist and flavorful dish. Searing the roast locks in juices and adds depth of flavor. Heat olive oil in a skillet and brown the roast on all sides for about 4-5 minutes. This step is key for great taste. You can swap herbs to match your taste. Try thyme or parsley if you don't have rosemary. For a kick, add a pinch of red pepper flakes. Experimenting with spices can enhance the flavor. Consider adding smoked paprika for a warm note or garlic powder for more garlic flavor. Pot roast pairs well with classic sides. Try serving it with mashed potatoes or creamy polenta. Roasted vegetables also make a great side. For an appealing meal, slice the roast and arrange it on a large platter. Drizzle with gravy and garnish with fresh herbs. This adds a pop of color and makes your dish look inviting. For the full recipe, check out the Slow Cooker Garlic Herb Pot Roast recipe. {{image_2}} You can use several cuts for a pot roast. Each cut gives a different taste and texture. Chuck roast is the most common choice. However, brisket or round roast can also work well. - Alternative cuts for a pot roast: - Brisket - Round roast - Shoulder roast Cooking time may change based on the cut you choose. A round roast may need a shorter cooking time. Aim for 6-8 hours on low heat. Brisket may take longer, around 10 hours on low. Herbs can change the whole dish. You can use many types of herbs to make it your own. Rosemary and thyme are great, but don’t stop there. - Other herbs to experiment with: - Sage - Parsley - Bay leaves Fresh herbs give a brighter flavor. Dried herbs are easy to use and last longer. If you use dried herbs, use less. About one-third of the amount is ideal. You can make this dish vegetarian-friendly! Use plant-based meat or veggies instead of beef. - How to create a vegetarian-friendly version: - Use a hearty vegetable like mushrooms or jackfruit. - Replace beef broth with vegetable broth. For a rich flavor, add soy sauce or miso paste. These add depth to the dish without meat. You can still enjoy the comforting feel of pot roast, just without the meat. After enjoying your Slow Cooker Garlic Herb Pot Roast, you may have leftovers. To store them, let the pot roast cool first. Place it in an airtight container. You can keep it in the fridge for about 3 to 4 days. Always label the container with the date. This helps you know when to eat it. If you want to save the pot roast for later, freezing works well. Slice the roast into smaller pieces. This helps it freeze faster and thaw better. Wrap each piece in plastic wrap, then place it in a freezer bag. It can last up to 3 months in the freezer. For thawing, the best method is to move it to the fridge overnight. You can also thaw it in a bowl of cold water for a faster option. When reheating, use a slow cooker or microwave. Ensure it heats to 165°F to ensure safety. Adding a bit of beef broth while reheating keeps it moist. If you want to make more or less pot roast, adjusting the recipe is simple. For larger servings, increase the meat and vegetables. A good rule is to add about 1 pound of meat for every two extra servings. For smaller servings, you can cut the recipe in half. Cooking time may change slightly with the size of the roast. A larger roast might need an extra hour, while a smaller one could cook faster. Always check for tenderness; it should shred easily with a fork. What cut of meat is best for pot roast? I recommend using chuck roast for pot roast. It has a lot of fat, which makes it tender. The fat breaks down as it cooks, giving the roast a rich flavor. Can I cook pot roast on high instead of low? Yes, you can cook it on high. It will take about 4 to 6 hours. However, low heat gives the best flavor and tenderness. How do I know when the pot roast is done? The pot roast is done when it is tender and shreds easily with a fork. You can also check the internal temperature. It should reach at least 195°F for perfect tenderness. Can I use frozen meat in the slow cooker? It is best to thaw the meat first. Cooking frozen meat can lead to uneven cooking. This can affect flavor and texture. What should I do if the pot roast is too dry? If your pot roast is dry, add more broth after cooking. You can also shred the meat and mix it with the juices. This will help add moisture back. Is this pot roast recipe gluten-free? Yes, this pot roast recipe is gluten-free. Just ensure your beef broth is also gluten-free. How many calories are in a serving of pot roast? One serving of pot roast has about 400 calories. This can change based on the amount of meat and vegetables you serve. For a detailed look at the ingredients, check the Full Recipe. We explored the key elements of making a perfect slow cooker garlic herb pot roast. From selecting the best cut of meat to seasoning and cooking techniques, you gained practical tips and insights. The right ingredients, preparation, and cooking time make a big difference. Whether you stick to the classic recipe or try out variations, this dish can be a hit at your table. Remember, practice will help you perfect your pot roast skills and please your family. Enjoy your cooking journey!

Are you ready for a meal that melts in your mouth? My Slow Cooker Garlic Herb Pot Roast is the answer! With tender chuck roast, fresh herbs, and hearty vegetables, …

Read more

Categories Dinner

Non-Alcoholic Autumn Harvest Punch Tasty and Festive

July 20, 2025 by Chef Luca
- 4 cups apple cider - 2 cups cranberry juice - 1 cup sparkling water - 1 cup orange juice - 1 tablespoon fresh ginger, grated - 2 cinnamon sticks - 1/2 teaspoon ground nutmeg - 1 apple, thinly sliced - 1 orange, thinly sliced - Fresh cranberries for garnish - Optional: star anise for decoration Each ingredient plays a key role in the punch. The apple cider gives it a sweet base. The cranberry juice adds tartness. Use fresh ginger to bring warmth. The orange juice gives a bright flavor. The cinnamon sticks and nutmeg add spice. Slices of apple and orange enhance the look and taste. Fresh cranberries are perfect for garnish. You can play with flavors to make this punch your own. Try adding a few sprigs of mint for freshness. You can also add more spices like cloves for a deeper taste. If you want extra sweetness, mix in honey or maple syrup. For a fun twist, add star anise for decoration. This will impress your guests and make the drink festive. To make this punch, start with a large pitcher. First, mix together the apple cider, cranberry juice, and orange juice. Stir the juices well to blend them. Next, add the grated ginger, cinnamon sticks, and ground nutmeg. This spice mix gives the punch a warm taste. Stir gently to combine all these flavors. Then, put the pitcher in the fridge for at least one hour. Chilling helps the flavors mix better. When you mix the ingredients, do it slowly. This helps keep the carbonation in the sparkling water. Always add the sparkling water last, just before serving. It gives the punch a nice fizz. If you want a stronger spice taste, let the ginger and cinnamon sit longer in the juice mix. This way, they can release more flavor. Chilling the punch is key for a refreshing drink. It also allows the flavors to blend. Serve the punch in a large glass bowl or pitcher. This makes it easy for guests to serve themselves. Fill each glass with ice to keep the drink cold. Pour the punch over the ice right before serving. Garnish each glass with thin slices of apple and orange. Add a few fresh cranberries for color. You can even use star anise for a beautiful touch. Follow these steps for a tasty and festive drink. Check the Full Recipe for all the details! Making punch is simple, but there are a few traps. First, do not skip chilling time. If you serve it warm, the flavors won’t mix well. Second, avoid too much sweetness. Balance is key! Use tart juices like cranberry to offset sweet ones. Lastly, don’t forget the fizz. Adding sparkling water just before serving keeps the punch lively. To boost flavor, think about spices. Fresh ginger adds a nice kick. You can also add more cinnamon or nutmeg for warmth. If you want a more fruity taste, use fresh fruit slices. Apples and oranges bring a lovely color and taste. Try adding herbs like mint for a fresh twist. These small changes make a big difference! This punch fits any event! For a cozy gathering, serve in a big bowl with ice. Use clear glasses to show off the colorful fruit. At a party, offer it in a glass pitcher. It makes refills easy. If you want to impress, add a few star anise for decoration. It looks great and tastes amazing too. For autumn events, consider adding pumpkin spice cookies as a snack. They pair perfectly with the punch! For the full recipe and steps, check out the recipe section. {{image_2}} You can change many ingredients in the Autumn Harvest Punch. If you want a sweeter twist, try using pear juice instead of cranberry juice. It adds a nice smooth taste. For a spicier kick, use cloves or cardamom instead of cinnamon. You can also swap out orange juice for lemon juice for a tart flavor. This punch is not just for autumn. You can change it for winter too. Add peppermint extract and use pomegranate juice for a festive holiday drink. For spring, mix in fresh strawberries and lemon-lime soda. In summer, use watermelon juice and mint leaves to make it refreshing. Each season brings a chance to explore new tastes. Mix-ins can elevate your punch. Consider adding fresh herbs like mint or basil for a burst of flavor. You can also toss in some sliced strawberries or raspberries for color and sweetness. If you want a fizzy touch, try using flavored sparkling water like lemon or lime. These small changes can make your punch stand out at any gathering. For a full recipe, check out the Autumn Harvest Punch . To store leftover punch, use an airtight container. Pour the punch into the container and seal it tightly. This keeps the flavors fresh and prevents spills. If you have extra fruit slices, remove them before storing. They can make the punch soggy. Always refrigerate your punch. The cold helps keep it tasty and safe to drink. Store it in the fridge for up to three days. Before serving again, stir it gently. You may add fresh sparkling water to revive the fizz. The punch stays good for about three days in the fridge. After that, the flavors may fade. You can reuse some ingredients. The apple cider and cranberry juice work well in other drinks. Just mix them with sparkling water for a quick refreshment. For the full recipe, check out the details above and enjoy your punch! Serve this punch in a large glass bowl or pitcher. Use a ladle for easy serving. Fill each glass with ice before pouring the punch. This keeps the drink cold and refreshing. Garnish with apple and orange slices, and fresh cranberries. For a special touch, add a star anise. This gives the punch a festive look. Yes, you can prepare this punch ahead of time. Mix all the juices and spices in a pitcher. Chill it in the fridge for at least one hour. This helps the flavors blend well. Just before serving, add the sparkling water for fizz. If you make it too early, it may lose its sparkle. To adjust the sweetness, taste your punch before serving. If it needs more sweetness, add a bit more apple cider or cranberry juice. You can also mix in a little honey or agave syrup. Stir well after adding any sweetener. This way, you can find the perfect balance for your taste. Pair this punch with light snacks like cheese and crackers. Fresh fruit platters work well too. Consider pumpkin muffins or spiced cookies for a seasonal touch. Nut mixes or popcorn can also be great choices. These snacks will enhance the flavors of your Non-Alcoholic Autumn Harvest Punch. For the full recipe, check out the detailed section above. In this article, we explored the ingredients and steps for a tasty Non-Alcoholic Autumn Harvest Punch. You learned how to mix flavors, avoid common pitfalls, and serve it well. Remember, you can adapt this punch for other holidays or use different mix-ins. Store leftovers properly to keep them fresh. With these tips, you’re ready to impress at any gathering. Enjoy crafting your perfect punch!

Fall is here, and it’s time to sip on something festive! My Non-Alcoholic Autumn Harvest Punch is the perfect blend of flavors to celebrate the season. It’s tasty, refreshing, and …

Read more

Categories Appetizers

Chewy Maple Pumpkin Cookies Perfectly Holiday Treat

July 20, 2025 by Chef Luca
To make chewy maple pumpkin cookies, gather these ingredients: - 1 cup pumpkin puree - 1/2 cup unsalted butter, softened - 1/2 cup brown sugar, packed - 1/4 cup granulated sugar - 1/4 cup maple syrup - 1 large egg - 1 tsp vanilla extract - 2 cups all-purpose flour - 1/2 tsp baking soda - 1 tsp baking powder - 1 tsp ground cinnamon - 1/2 tsp ground nutmeg - 1/4 tsp ground ginger - 1/4 tsp sea salt - 1 cup chocolate chips (optional) You can make these cookies even if you don’t have all the ingredients. For pumpkin puree, use homemade puree or mashed sweet potato. If you need a butter substitute, try coconut oil or applesauce. You can also swap brown sugar for white sugar, but this may change the flavor slightly. For a dairy-free version, use a plant-based butter and non-dairy chocolate chips. Accurate measuring is key to great cookies. Use dry measuring cups for flour and sugar. Spoon the flour into the cup lightly, then level it off with a knife. For liquid ingredients, use a clear measuring cup. Check the measurement at eye level for the best accuracy. This helps ensure your cookies turn out chewy and delicious every time! Start by gathering all your ingredients. You need pumpkin puree, butter, and sugars. Make sure your butter is softened. This helps in creaming it easily. Preheat your oven to 350°F (175°C) and line a baking sheet with parchment paper. This will keep the cookies from sticking. In a large mixing bowl, cream the softened butter, brown sugar, and granulated sugar. Do this for about 2-3 minutes until it looks light and fluffy. Next, add the pumpkin puree, maple syrup, egg, and vanilla extract. Mix these until they are well combined. In another bowl, whisk the dry ingredients. This includes flour, baking soda, baking powder, and spices. Make sure to include cinnamon, nutmeg, ginger, and sea salt. Gradually mix the dry ingredients into the wet mix. Do this carefully until just combined. If you want to add chocolate chips, fold them in now. Scoop tablespoons of dough onto your prepared baking sheet. Space them about 2 inches apart. This gives them room to spread. Bake your cookies in the preheated oven for 10-12 minutes. You want the edges to be set with a slight golden color. Remember, they will firm up as they cool. After baking, let the cookies cool on the baking sheet for about 5 minutes. This helps them set properly. Then, transfer them to a wire rack to cool completely. For a fun presentation, stack the cookies in a cute jar tied with a ribbon. You can also serve them on a rustic wooden platter, dusted with powdered sugar. This adds a nice touch for any holiday gathering. Enjoy your chewy maple pumpkin cookies! For the complete recipe, check out the Full Recipe. To get that perfect chewy texture, use softened butter. Cream it well with sugars until fluffy. This helps add air and keeps the cookies light. Don't overmix your dough after adding flour. Just mix until you see no dry spots. This keeps the cookies from getting tough. Also, be sure to bake them until the edges are just set. The center will look soft, and that’s perfect! You can boost the flavor of these cookies with simple tweaks. Add more spices like cloves or allspice for warmth. A pinch of sea salt can enhance the sweetness too. If you want a deeper maple taste, use dark maple syrup instead of regular. For a fun twist, try adding nuts or dried fruits. They add texture and taste. One common mistake is using cold butter. Always use softened butter for the best results. Overbaking is another issue. Cookies continue to firm up after baking, so take them out when they look slightly underdone. Not measuring ingredients properly can also ruin the texture. Use a kitchen scale for accuracy. Follow the Full Recipe closely to ensure success. {{image_2}} You can easily make these chewy maple pumpkin cookies gluten-free. Just swap the all-purpose flour for a gluten-free blend. Look for blends with xanthan gum for best results. Mix the dry ingredients well to ensure they combine evenly. This way, everyone can enjoy these tasty treats. Feel free to get creative with add-ins. You can mix in nuts like walnuts or pecans for extra crunch. Dried cranberries or raisins add a nice sweet touch. For toppings, consider drizzling melted chocolate or a simple maple glaze. These extras can elevate the cookie experience. You can add different spices for seasonal flavors. Try cardamom or allspice for a unique twist. Pumpkin spice can enhance the fall vibe. You might also add a splash of orange zest for a fresh zing. Each change brings new life to this classic recipe. For the full recipe, check out the details above and have fun experimenting! To keep your chewy maple pumpkin cookies fresh, place them in an airtight container. Stack them with parchment paper between layers. This helps prevent sticking. Store them at room temperature for up to a week. If you want to keep them longer, consider freezing. To freeze cookies, first let them cool completely. Once cooled, place them in a single layer on a baking sheet. Freeze them for about an hour. This step helps keep their shape. After that, transfer the cookies to a freezer-safe bag or container. They can last up to three months in the freezer. When you're ready to enjoy them, just thaw at room temperature. These cookies have a great shelf life. At room temperature, they last about seven days. If frozen, they stay fresh for three months. Always check for any signs of spoilage before eating. Enjoy the chewy goodness of your cookies whenever you like with proper storage! If you don't have pumpkin puree, you can use butternut squash puree. It has a similar taste and texture. You can also try sweet potato puree or even applesauce for a different flavor. Just make sure the substitute is smooth and thick. Yes, you can make these cookies without chocolate chips. You can leave them out for a pure maple pumpkin flavor. If you want some crunch, try adding nuts like walnuts or pecans. Dried cranberries or raisins can also add a nice touch. You can tell the cookies are done when the edges are set and have a light golden color. The center may look soft but will firm up as they cool. If you press lightly on a cookie and it springs back, they are ready to come out of the oven. For the full recipe, check out the detailed instructions above. This blog post covered key points for baking tasty cookies. We looked at important ingredients, useful tips, and step-by-step instructions. I shared ways to customize your cookies and how to store them. Remember, cooking is fun. Mistakes are part of the process, but you can avoid them. Keep experimenting with flavors and enjoy your treats with friends and family. Happy baking!

Looking for the perfect holiday treat? Chewy Maple Pumpkin Cookies offer a warm blend of flavors that celebrate the season! In this guide, I’ll share easy ingredients, step-by-step baking tips, …

Read more

Categories Desserts
Older posts
Newer posts
← Previous Page1 … Page65 Page66 Page67 … Page122 Next →

STIRRED RECIPES

Where every dish begins with a stir! 🍲✨

PAGES

Home About Contact Privacy Policy Terms & Conditions Cookie Policy GDPR Policy Copyright Policy Disclaimer

CATEGORIES

Appetizers Desserts Salads Breakfast Dinner

Contact

  • Pinterest
  • Mail
Copyright © 2026 Stirred Recipes. All rights reserved.