Mini Grilled Cheese Sandwiches Fun and Tasty Treats
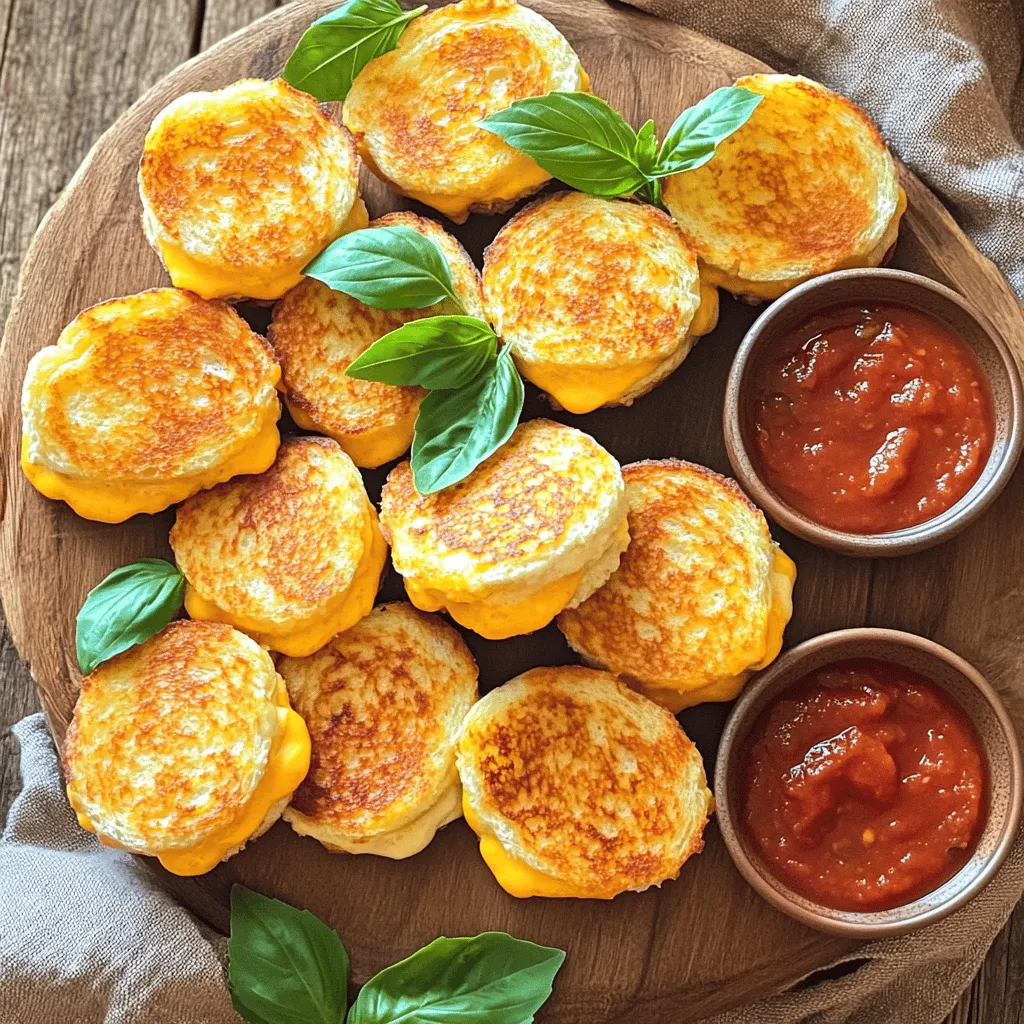
Who doesn’t love a warm, gooey mini grilled cheese sandwich? These fun and tasty treats are perfect for any occasion, whether it’s a party, snack time, or just a cozy …
Who doesn’t love a warm, gooey mini grilled cheese sandwich? These fun and tasty treats are perfect for any occasion, whether it’s a party, snack time, or just a cozy …

Get ready to impress your family with my Crispy Sesame Chicken with Honey Sauce! This dish is a perfect blend of crunchy chicken and sweet, rich sauce. In this blog, …
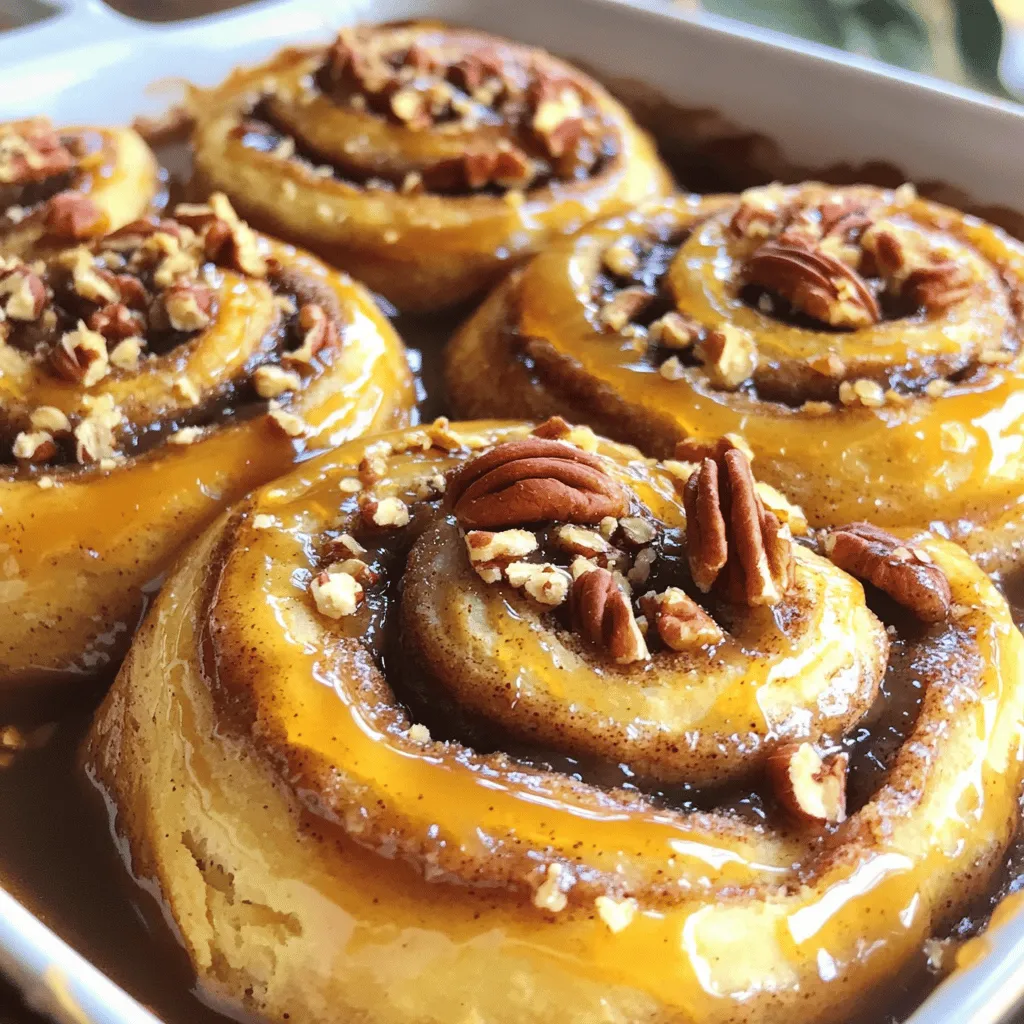
Are you ready to bake the most delicious Sticky Pecan Cinnamon Buns? These soft treats will make your kitchen smell heavenly. With a few simple ingredients and easy steps, you …
![- 100g almond flour - 100g powdered sugar - 70g egg whites (from about 2 large eggs) - 30g granulated sugar - 1 teaspoon pumpkin spice blend - 1/2 teaspoon vanilla extract The base of the macaron is almond flour. It gives a light and nutty flavor. Powdered sugar adds sweetness and helps make a smooth batter. Egg whites are key for the macaron's structure. They whip up into a fluffy foam. This foam is what makes the macarons rise and create that lovely shell. - 200g cream cheese, softened - 100g unsalted butter, softened - 100g powdered sugar (for filling) - 1 tablespoon maple syrup For the filling, I use cream cheese and butter. They create a rich and creamy texture. Mixing in maple syrup adds a sweet touch. This filling balances the spiced shell perfectly, making each bite delightful. - Variations of spices - Decorative toppings You can get creative! Add different spices, like nutmeg or cinnamon, for extra warmth. You might also top them with a sprinkle of pumpkin spice. This adds an eye-catching touch and enhances the flavor. For the full recipe, check out the [Full Recipe]. To start, you need to prepare your baking sheets. First, line two baking sheets with parchment paper. This prevents sticking. Next, draw 1.5-inch circles on the paper. These circles will guide your piping. Flip the parchment over afterward. This way, the ink won't touch your macarons. Now, let's mix the batter. Begin by sifting the dry ingredients. In a bowl, combine almond flour, powdered sugar, and pumpkin spice blend. This helps aerate the mix. Set it aside for later. Next, you'll whip the egg whites. Use a clean mixing bowl for this. Start on medium speed until the egg whites become foamy. Gradually add granulated sugar. Increase the speed to high. Whip until you see stiff peaks and a glossy texture. This step is key for light macarons. Once the batter is ready, it's time to pipe. Transfer the mix into a piping bag with a round tip. Pipe the batter onto the prepared sheets, using the circles as a guide. Aim for consistent sizes as you pipe. After piping, gently tap the baking sheets on the counter. This helps release any air bubbles. Let the piped macarons rest. Allow them to sit for 30-60 minutes. This forms a firm shell. While you wait, preheat your oven to 300°F (150°C). When the macarons are dry, bake them. Place them in the oven for 15-18 minutes. Check for doneness by gently touching the tops. After baking, let them cool completely on the sheets. For the full recipe, refer to the instructions above. To make perfect macarons, avoid these common pitfalls: - Overmixing: Be gentle when folding the dry ingredients into the egg whites. Overmixing causes flat shells. - Humidity: High humidity can ruin your macarons. Try to bake on dry days. - Egg Whites: Use aged egg whites. Let them sit in the fridge for a day or two. This helps them whip better. To check for doneness, gently touch the tops of the macarons. They should feel dry and firm. If they stick, let them sit longer. Finding the right balance of spices is key. Use one teaspoon of pumpkin spice blend for a classic taste. You can also mix in a hint of nutmeg or ginger for extra warmth. For fillings, think beyond cream cheese. Try flavored buttercreams or even chocolate ganache. Maple-flavored filling adds a nice twist too. To serve your macarons, use a decorative tray. Arrange them in a circle or a fun pattern. Dust a light sprinkle of pumpkin spice on top for extra flair. For garnishing, consider adding edible gold flakes or tiny pumpkin candies. These touches make your macarons look as good as they taste. {{image_2}} You can change the flavor of your pumpkin spice macarons in fun ways. One tasty option is to make chocolate pumpkin spice macarons. Just add cocoa powder to your dry ingredients. This adds a rich taste that pairs well with pumpkin spice. Another fun twist is using nut butter as a filling. Try almond, peanut, or cashew butter. These add a creamy texture and nutty flavor. You can mix the nut butter with some powdered sugar for added sweetness. Decorating your macarons can be just as fun as making them. You can use colorful fillings to make your macarons pop. Consider using bright shades of cream cheese frosting or adding food coloring to match the season. Themed designs are great for special occasions. For Halloween, you could pipe orange and black frosting. For Thanksgiving, try a leaf pattern with fall colors. Creativity makes your macarons even more special. Fall-inspired variations are a hit during autumn. You can add apple or caramel flavors to your macarons. These flavors mix perfectly with pumpkin spice. For holidays, think about festive flavors. Peppermint or eggnog can be great options for winter. These seasonal adaptations keep your macarons exciting year-round. For the full recipe, check out the detailed instructions above. Enjoy experimenting with these variations! To keep your macarons fresh, use an airtight container. This helps them stay soft and chewy. Avoid glass containers, as they can trap moisture. Instead, opt for plastic or silicone containers. You can store macarons at room temperature for up to two days. If you want them to last longer, refrigerate them. Just be sure to let them sit at room temperature for a bit before eating. You can freeze macarons to enjoy later. Here’s how: 1. Cool Completely: Ensure the macarons are fully cool. 2. Layer with Parchment: Place them in a single layer in a container. Separate layers with parchment paper. 3. Seal Well: Close the container tightly to prevent freezer burn. For thawing, take them out of the freezer. Let them sit in the fridge for a few hours. This helps maintain their soft texture. For best results, eat them within a month. Homemade macarons last about 3 to 5 days in the fridge. Look for these signs that your macarons have gone bad: - Texture Change: If they feel hard or dry, they are no longer good. - Smell: A sour or off smell means they should be discarded. - Discoloration: Any dark spots or changes in color indicate spoilage. To make the most of your pumpkin spice macarons, try the Full Recipe for perfect results every time! The secret to making macarons is in the technique. Start with fresh egg whites. Whip them until they form stiff peaks. Fold in the dry ingredients gently. You want to keep the air in the whites. This step makes the macarons light and airy. Practice makes perfect, so don’t get discouraged if they don’t turn out right the first time. You should stick with almond flour for macarons. Almond flour gives macarons their unique texture. Other flours can change the taste and feel. If you cannot find almond flour, you may try hazelnut flour. It offers a nutty flavor, but results can vary. To avoid cracks, ensure your macarons rest before baking. Let them sit until a firm skin forms. This usually takes 30 to 60 minutes. Also, check your oven temperature. Too hot can cause them to crack. Using an oven thermometer can help you monitor this. You can find pumpkin spice macarons at local bakeries during fall. Many online shops also sell them. Look for bakeries that focus on macarons. Websites like Etsy often feature smaller shops with unique flavors. Check reviews to find a reliable source. Yes, you can make macarons without a scale. Use measuring cups and spoons instead. One cup of almond flour weighs about 96 grams. One cup of powdered sugar weighs around 120 grams. Measure carefully for the best results. It's not as precise but can work in a pinch. For best results, refer to the Full Recipe for guidance. You’ve learned how to make delicious pumpkin spice macarons. We explored the key ingredients like almond flour and cream cheese. We then covered step-by-step baking instructions and shared tips to avoid mistakes. You can even add your unique twist with flavor and decoration variations. Remember, practice makes perfect. Don't be afraid to experiment with flavors and shapes. In time, you’ll impress your friends and family with your tasty treats. Enjoy your baking!](https://stirredrecipes.com/wp-content/uploads/2025/07/baeaa702-f720-482e-9ee2-55d5065b7fdb.webp)
Are you ready to fall in love with baking? These Pumpkin Spice Macarons are the perfect mix of flavor and fun, making them a delightful seasonal treat. I’ll guide you …
![To make moist pumpkin banana muffins, gather these ingredients: - 1 cup mashed ripe bananas (about 2 medium bananas) - 1 cup canned pumpkin puree - 1/2 cup vegetable oil - 1/2 cup brown sugar, packed - 1/4 cup granulated sugar - 2 large eggs - 1 teaspoon vanilla extract - 1 1/2 cups all-purpose flour - 1 teaspoon baking soda - 1/2 teaspoon baking powder - 1 teaspoon ground cinnamon - 1/2 teaspoon ground nutmeg - 1/2 teaspoon salt - 1/2 cup chopped walnuts or pecans (optional) - 1/2 cup chocolate chips (optional) When measuring ingredients, precision matters. Here’s a quick guide: - Use a dry measuring cup for flour and sugar. - Use a liquid measuring cup for oil and pumpkin puree. - Level off dry ingredients with a straight edge to avoid excess. - For mashed bananas, press them down in the cup, but don’t pack them too tightly. You can customize these muffins to suit your taste. Here are some ideas: - Swap vegetable oil for melted coconut oil for a different flavor. - Use honey or maple syrup instead of granulated sugar for a natural sweetener. - Add in 1/2 cup of dried fruit like raisins or cranberries for extra sweetness. - If you want a nut-free option, skip the nuts or replace them with seeds like sunflower or pumpkin seeds. These choices allow you to create your perfect moist pumpkin banana muffins. For the full recipe, check out the complete instructions. Start by preheating your oven to 350°F (175°C). This step is key for even baking. Next, grab a large bowl. Here, combine one cup of mashed ripe bananas, which is about two medium bananas, with one cup of canned pumpkin puree. Add half a cup of vegetable oil, half a cup of packed brown sugar, and a quarter cup of granulated sugar. Then, crack in two large eggs and pour in one teaspoon of vanilla extract. Whisk everything together until it’s smooth and well mixed. This mixture is where the magic begins! In a separate bowl, measure out one and a half cups of all-purpose flour. Add one teaspoon of baking soda, half a teaspoon of baking powder, one teaspoon of ground cinnamon, half a teaspoon of ground nutmeg, and half a teaspoon of salt. Whisk these dry ingredients together. This mix brings flavor and helps your muffins rise nicely. Now, it’s time to combine the wet and dry mixtures. Slowly add the dry mix into the wet bowl. Stir gently as you combine them. Be careful not to overmix! The batter should be slightly lumpy. If you want to add extras, like half a cup of chopped walnuts or pecans and half a cup of chocolate chips, fold them in now. This adds great texture and flavor. Spoon the batter into your prepared muffin tin. Fill each cup about two-thirds full. This gives them room to rise. Place the tin in your preheated oven and bake for 18 to 22 minutes. Check if they are done by inserting a toothpick in the center of a muffin. If it comes out clean, they are ready! Let the muffins cool in the tin for about five minutes, then transfer them to a wire rack. Enjoy them warm, drizzled with honey or maple syrup for a special treat. For the full recipe, refer to the earlier section. To make your muffins moist, use ripe bananas and canned pumpkin. Ripe bananas have more natural sugars, which add sweetness and moisture. Canned pumpkin puree brings in extra moisture and flavor. You can also use oil instead of butter. Oil keeps muffins soft and tender. Another tip is to avoid overbaking. Keep an eye on your muffins and remove them when a toothpick comes out clean. Mixing is key to great muffins. Start by combining wet ingredients in one bowl and dry ingredients in another. This helps you avoid overmixing. When you mix them together, stir gently until just combined. It's okay if the batter is lumpy. Lumpy batter makes for light, fluffy muffins. If you want to add nuts or chocolate chips, fold them in at the end. After baking, let the muffins cool in the tin for five minutes. This helps them set. Then, transfer them to a wire rack. Cooling completely helps keep them soft. Store your muffins in an airtight container. They stay fresh for up to three days at room temperature. For longer storage, freeze them. Just wrap them well to prevent freezer burn. Reheat them in the microwave for a quick warm-up. For the full recipe, check out the section above. {{image_2}} You can change the flavors of your muffins easily. Try adding peanut butter for a nutty taste. Swap in applesauce to make them even more moist. You can also use different spices, like ginger or allspice, for a unique twist. If you love chocolate, add cocoa powder for a rich flavor. Each choice brings a fun new taste to the muffins. Making these muffins gluten-free is simple. Use a gluten-free flour blend instead of all-purpose flour. This keeps the texture light and fluffy. For vegan muffins, replace the eggs with flaxseed meal. Mix one tablespoon of flaxseed meal with three tablespoons of water. Let it sit for a few minutes until it thickens. You can also use a plant-based oil instead of vegetable oil. These swaps make the muffins fit many diets. Seasonal add-ins can make these muffins special. In fall, add more cinnamon and nutmeg for warmth. Dried cranberries or raisins can add a sweet touch. During summer, fresh blueberries or chopped apples bring freshness. In winter, consider adding chopped nuts or even a hint of orange zest. Each of these options makes the muffins fun and festive. With these variations, you can enjoy Moist Pumpkin Banana Muffins in many ways. For a complete guide, check the Full Recipe. Store your leftover muffins in an airtight container. This keeps them fresh and moist. You can leave them at room temperature for up to three days. If you want to keep them longer, refrigerate them. Just know that refrigeration can change their texture a bit. To freeze your muffins, let them cool completely first. Then, wrap each muffin tightly in plastic wrap. Place them in a freezer-safe bag or container. You can freeze muffins for up to three months. When you are ready to eat them, just take them out and let them thaw at room temperature. To reheat your muffins, you can use the microwave or the oven. For the microwave, heat each muffin for about 15-20 seconds. For the oven, preheat it to 350°F (175°C). Place the muffins on a baking sheet and heat for about 5-10 minutes. This warms them nicely and helps restore some moisture. Enjoy your muffins warm for the best taste! To keep your muffins fluffy, don't overmix the batter. Mix until the dry and wet ingredients just blend. This keeps air pockets in the batter. Also, use fresh baking soda and baking powder for the best rise. Yes, you can use fresh pumpkins! First, cook the pumpkin until soft, then puree it. Make sure to drain excess water. Canned pumpkin is smooth and convenient, but fresh gives a unique taste. To mash bananas, use a fork or a potato masher. Aim for a smooth but slightly chunky texture. This helps the bananas blend well without turning into liquid. Ripe bananas work best, as they are sweeter and softer. To boost flavor, add spices like ginger or cloves. You can also mix in vanilla extract or citrus zest. Adding chocolate chips or nuts brings extra crunch and taste. Experiment until you find your favorite blend! You can add toppings like streusel, nuts, or seeds. Drizzling honey or maple syrup adds sweetness. For a fun twist, sprinkle powdered sugar on top. These add flavor and a nice look to your muffins. For the complete recipe, check out the [Full Recipe]. This article covered key steps to make great muffins. We went over ingredients, cooking tips, and variations. You learned how to mix and bake muffins for the best results. Remember to focus on moisture and flavor with optional add-ins. Proper storage helps keep your muffins fresh. Enjoy experimenting with new flavors and tips. With practice, your muffin skills will shine. Now, it's time to bake your perfect batch!](https://stirredrecipes.com/wp-content/uploads/2025/07/ba6e30d6-acfd-48ed-a154-7015bba57716.webp)
Are you ready to bake something delicious? These Moist Pumpkin Banana Muffins are a perfect treat. They combine sweet bananas and rich pumpkin for a flavorsome bite. This easy recipe …
![- 2 cups all-purpose flour - 1 ½ cups granulated sugar - ½ cup unsalted butter, softened - 1 cup whole milk - 3 large eggs - 1 tablespoon vanilla extract - 1 tablespoon baking powder - ½ teaspoon salt - 1 cup fresh strawberries, finely chopped - 1 cup heavy whipping cream - 2 tablespoons powdered sugar - Additional strawberries for decoration The ingredients for this Vanilla Strawberry Cake are simple and easy to find. You need flour, sugar, and butter as your base. The milk and eggs add moisture and richness. Vanilla extract gives it that lovely flavor. Fresh strawberries are key in this recipe. They bring sweetness and a vibrant color. You will also need heavy whipping cream for the frosting. It makes the cake light and fluffy. When you gather these ingredients, you can feel excited. Each one plays a role in making the cake taste amazing. - Prep Time: 20 mins - Cook Time: 25-30 mins - Total Time: 1 hr 30 mins - Servings: 10 This cake serves ten people. It takes about one hour and thirty minutes to make from start to finish. You can enjoy this delightful treat for any occasion. When it’s time to serve, remember to have extra fresh strawberries for decoration. This will make your cake look even more inviting. If you follow the [Full Recipe], you will have a beautiful cake ready to impress your friends and family. Step 1: Preheat the oven and prepare cake pans Start by preheating your oven to 350°F (175°C). Grease and flour two 9-inch round cake pans. This step helps the cake release easily after baking. Step 2: Creaming butter and sugar In a large bowl, cream together ½ cup of softened butter and 1 ½ cups of granulated sugar. Mix until the mixture is light and fluffy. This process adds air, making your cake soft. Step 3: Incorporating eggs and vanilla Add 3 large eggs to the butter and sugar mixture, one at a time. Mix well after each addition. Then, stir in 1 tablespoon of vanilla extract. This adds flavor and moisture to your cake. Step 4: Whisking flour, baking powder, and salt In a separate bowl, whisk together 2 cups of all-purpose flour, 1 tablespoon of baking powder, and ½ teaspoon of salt. This ensures that the baking powder is evenly distributed. Step 5: Combining wet and dry ingredients only until mixed Gradually add the dry mixture to the wet mixture, alternating with 1 cup of whole milk. Mix until just combined. Be careful not to overmix, as this can make the cake tough. Step 6: Folding in chopped strawberries Gently fold in 1 cup of finely chopped fresh strawberries into the batter. This adds delicious fruity flavor and beautiful color. Step 7: Dividing batter and baking Divide the batter evenly between the prepared cake pans. Smooth the tops with a spatula. Bake in the preheated oven for 25 to 30 minutes. Check with a toothpick; it should come out clean when done. Step 8: Cooling the cakes Once baked, remove the cakes from the oven. Let them cool in the pans for about 10 minutes. Then transfer them to wire racks to cool completely. This helps keep the cakes from getting soggy. For the full recipe, refer to the earlier section. Enjoy this delightful process of making your Vanilla Strawberry Cake! To make the best vanilla strawberry cake, start with the strawberries. Use fresh, ripe strawberries. Chop them small. This helps them blend well into the cake. You want even bites of strawberry in every slice. Toss the chopped strawberries in a bit of flour before adding them to the batter. This will help them stay suspended and not sink to the bottom. For the right cake texture, cream the butter and sugar well. This adds air and gives your cake a light feel. Mix until it looks fluffy and pale. When adding eggs, do it one at a time. This ensures each egg gets mixed in fully. To ensure even baking, use room temperature ingredients. Cold ingredients can cause uneven baking. Also, rotate the pans halfway through baking. This helps each side of the cake bake evenly. And always check for doneness with a toothpick. If it comes out clean, your cake is ready. Using whipped cream can elevate your cake. Whip it until stiff peaks form. This makes it easy to spread and pipe. For a neat look, use a spatula to smooth the cream on top and sides. You can also pipe it around the edges for a fancy touch. To decorate with strawberries, try slicing some in half and placing them on top. Whole strawberries can add a great pop of color. You can also create a fan shape with slices to make it more appealing. For serving suggestions, pair the cake with a scoop of vanilla ice cream. It adds a cool creaminess. You can also drizzle some strawberry puree around the plate for a splash of color. This makes the whole dish look more inviting. For special occasions, add mint leaves for a fresh touch. Check the Full Recipe for more details on ingredients and steps! {{image_2}} You can make your cake even better by adding lemon zest. Just a teaspoon will give a bright and fresh taste. You can also swap strawberries for other berries like raspberries or blueberries. Each berry brings its own flavor twist to the cake. If you need a gluten-free cake, use a gluten-free flour blend. This works well in the recipe. For a dairy-free option, switch the milk with almond or oat milk. You can use coconut cream instead of heavy whipping cream for a dairy-free frosting. Try making a layered version of the cake for extra fun. Use extra fillings like whipped cream and fruit between the layers. You can also switch up the frosting. Cream cheese frosting adds a tangy taste that pairs well with strawberries. For the full recipe, check out the details above. To keep your vanilla strawberry cake fresh, refrigerate any leftovers. Wrap the cake tightly in plastic wrap. This way, it will not dry out. You can also place it in an airtight container. If you have extra whipped cream, store it separately in the fridge. Use it within a few days for the best taste. You can freeze individual slices of cake for later enjoyment. First, wrap each slice in plastic wrap. Then, place them in a freezer-safe bag. Squeeze out the air before sealing. This helps prevent freezer burn. To enjoy the cake, take it out and let it thaw in the fridge overnight. Serve it cold or at room temperature for the best flavor. How to make a Vanilla Strawberry Cake from scratch? To make this cake from scratch, gather your ingredients. Start by creaming softened butter and sugar together. Add eggs one at a time, mixing well. Next, combine flour, baking powder, and salt in another bowl. Mix the dry and wet ingredients together, alternating with milk. Finally, fold in chopped strawberries. Bake in two pans at 350°F for about 25-30 minutes. For full details, refer to the Full Recipe. Can I use frozen strawberries instead of fresh? Yes, you can use frozen strawberries. Just thaw them first and drain excess liquid. This will help keep your batter from becoming too wet. Fresh strawberries give a better texture, but frozen will still work well in a pinch. What can I substitute for heavy whipping cream? You can use coconut cream or a non-dairy whipped topping as a substitute. If you want a lighter option, try using Greek yogurt. It will change the flavor a bit, but it will still be creamy and delicious. Why is my cake dense? A dense cake often comes from over-mixing the batter. Mix just until combined. Also, check if your baking powder is fresh. Old baking powder won't rise well, leading to a heavy cake. How do I know when the cake is fully baked? Insert a toothpick into the center of the cake. If it comes out clean or with a few crumbs, your cake is done. If it has wet batter on it, bake for a few more minutes. You’ve learned how to make a tasty Vanilla Strawberry Cake. The recipe is simple and uses fresh strawberries for great flavor. Our tips will help you bake it perfectly every time. You can even mix it up with different flavors or dietary adjustments. Whether for a party or just a treat, this cake shines. Enjoy sharing this delightful dessert with friends and family. Happy baking!](https://stirredrecipes.com/wp-content/uploads/2025/07/9323fbe0-16ac-4cc8-b5cf-218d288269d2.webp)
Are you ready to bake something truly delightful? This Vanilla Strawberry Cake is easy to make and incredibly tasty! You’ll impress your family and friends with its soft layers and …
. After enjoying your green chili stew, let it cool. Use an airtight container to keep it fresh. Store the stew in the fridge for up to four days. If you think you won’t eat it soon, freezing is a great option. To freeze the stew, use freezer-safe containers. Leave some space at the top, as the stew may expand when frozen. You can freeze it for up to three months. Label the containers with the date for easy tracking. When you are ready to eat it, just move it to the fridge to thaw overnight. Reheat the stew on the stove over medium heat. Stir it often to heat evenly. If it seems thick, add a splash of broth or water. You can also reheat it in the microwave. Place it in a microwave-safe bowl and cover it loosely. Heat in short intervals, stirring in between, until warm. Enjoy this hearty dish again with fresh lime and cilantro from the Full Recipe! To make green chili stew, start with a large pot. Heat two tablespoons of olive oil over medium heat. Add one large diced onion and cook until soft. Stir in three minced garlic cloves and cook for one more minute. Next, add one pound of ground turkey or chicken. Cook until browned. Then, mix in three cups of chopped green chilies and one can of diced tomatoes. Pour in two cups of broth and add spices. Bring to a boil, then simmer for thirty minutes. Add beans and corn, stir, and simmer for ten more minutes. Serve hot with cilantro and lime. You can find the full recipe above. The best way to prepare green chilies is to roast them first. Roasting brings out their rich flavor. To roast, place them under a broiler or on a grill. Cook until the skin blisters and darkens. After roasting, place the chilies in a bag to steam. This makes the skin easier to peel off. Once peeled, you can chop or slice them for your stew. Yes, you can use dried chilies instead of fresh. However, dried chilies have a different flavor and heat level. Rehydrate them by soaking in hot water for about twenty minutes. Once soft, chop them and add to your stew. Adjust the amount based on your heat preference. Dried chilies can give a deeper taste to the dish. We covered a lot about making green chili stew. You learned about the key ingredients, health benefits, and how to prepare and cook the dish. I shared tips for the best stew and options for different diets. We discussed how to store leftovers and answered common questions. Now it's time to create your own delicious stew. Keep the tips in mind, and enjoy every bite!](https://stirredrecipes.com/wp-content/uploads/2025/07/5bd727c8-f282-4316-ba40-64d67340c87e.webp)
Looking for a cozy dish that packs a punch? My Green Chili Stew is just what you need! This hearty and flavorful comfort dish combines the warmth of spices with …
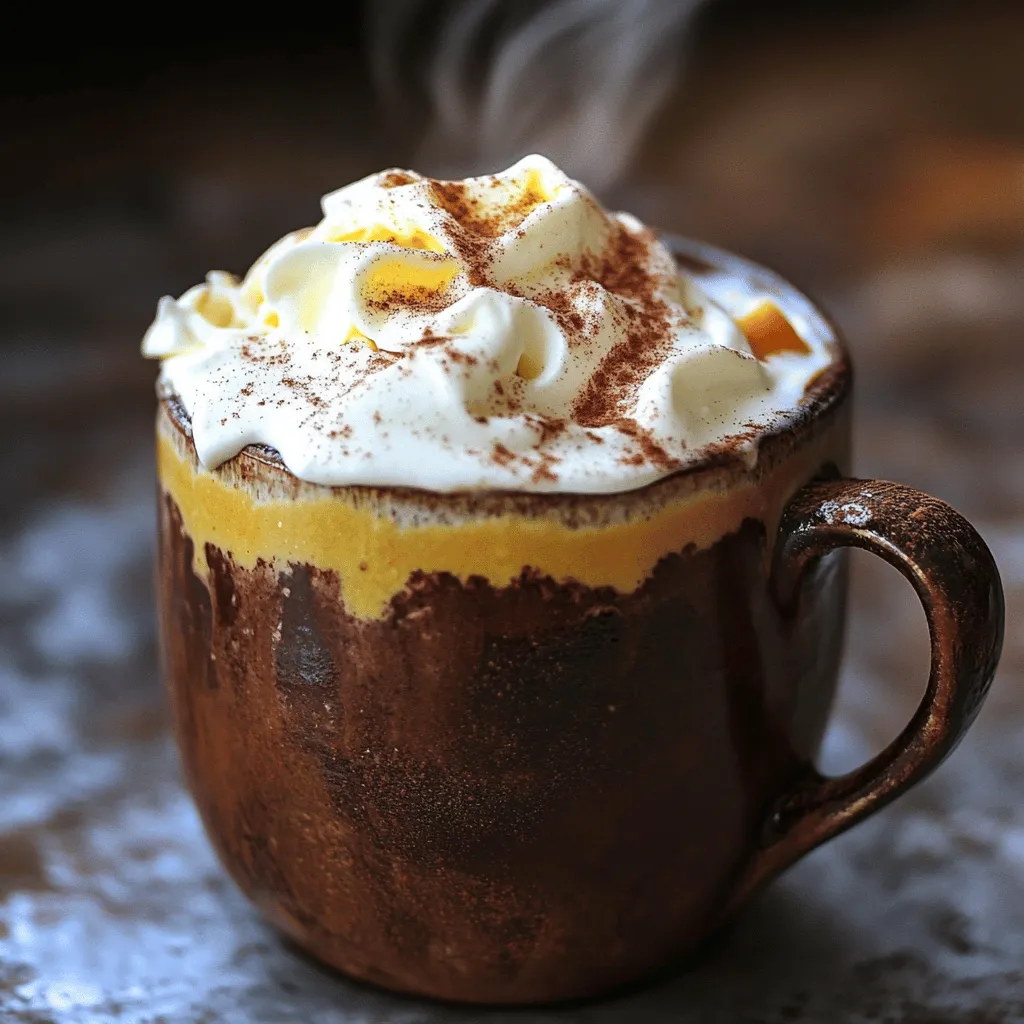
Fall’s favorite flavor is here! Pumpkin Spice Hot Chocolate combines cozy warmth and sweet spices in every sip. Imagine curling up with a steaming mug of rich chocolate and creamy …
![- 1 cup unsalted butter, softened - 1 cup brown sugar, packed - 1/2 cup granulated sugar - 1 large egg - 1/4 cup apple cider - 2 cups all-purpose flour - 1 tsp baking soda - 1 tsp ground cinnamon - 1/2 tsp nutmeg - 1/2 tsp salt - 1/2 cup chopped walnuts (optional) - 1/2 cup apple cider reduction (for drizzling) To make these apple cider cookies, gather all your ingredients first. The butter should be soft, so it mixes well. Use both brown and granulated sugar for a sweet balance. The apple cider adds a nice fall flavor. - If you have nut allergies, you can skip the walnuts. - You can use honey or maple syrup instead of granulated sugar. These choices make the cookies fit different diets while keeping them tasty. - Mixing bowls - Baking sheets - Parchment paper - Measuring cups and spoons Having the right tools helps you bake better. Use mixing bowls to blend your ingredients. Parchment paper prevents sticking. With these tools, you can make baking easier and more fun. For the full recipe, check the details above! 1. Preheat your oven to 350°F (175°C). Line a baking sheet with parchment paper. 2. In a large bowl, cream together 1 cup of softened unsalted butter, 1 cup of brown sugar, and 1/2 cup of granulated sugar. Mix until it becomes light and fluffy. 1. Beat in 1 large egg and 1/4 cup of apple cider. Mix until everything is well combined. 2. In another bowl, whisk together 2 cups of all-purpose flour, 1 tsp of baking soda, 1 tsp of ground cinnamon, 1/2 tsp of nutmeg, and 1/2 tsp of salt. 1. Gradually add the dry mix to the wet mix. Stir until it all comes together. If you want, fold in 1/2 cup of chopped walnuts. 2. Drop tablespoon-sized balls of dough onto the prepared sheet. Space them about 2 inches apart. 3. Bake for 10-12 minutes. Look for golden edges and set centers. 4. Once they are baked, cool the cookies on a wire rack. For the sweet touch, drizzle cooled cookies with apple cider reduction from the [Full Recipe]. Enjoy your tasty treats! To get the right texture in your apple cider cookies, start with room temperature butter. Cold butter makes dough too firm. Also, don't over-mix your dough. Mixing just until combined keeps cookies soft. To prevent spreading, chill the dough for at least 30 minutes. This helps them hold their shape when baking. You can make your cookies even tastier by adding spices. Consider using ginger, cloves, or allspice. These spices bring warmth and depth. Fresh apple cider gives a richer taste than store-bought. If possible, use local cider for the best flavor. Creating the apple cider reduction is simple. Simmer one cup of apple cider in a pot. Cook it on medium heat until it becomes syrupy, about 10 to 15 minutes. For a smooth drizzle, use a spoon or a small squeeze bottle. Practice makes perfect, so experiment with your drizzling technique for a beautiful finish. {{image_2}} You can easily change up apple cider cookies by adding fun ingredients. Try mixing in dried fruits like raisins or cranberries for a sweet burst. Chopped apples also work well, giving extra texture. For spices, consider adding ginger or allspice for a warm touch. If you want a sweeter treat, make a simple homemade frosting. A cream cheese frosting or a glaze with apple cider gives a nice twist. If you need gluten-free options, swap all-purpose flour for a gluten-free blend. Many stores sell these mixes that work well in cookies. You can also use almond or coconut flour. For a vegan version, replace the egg with a flax egg. Just mix one tablespoon of flaxseed meal with three tablespoons of water. Let it sit for a few minutes until it thickens. Use plant-based butter instead of regular butter for a vegan-friendly treat. Get creative with the shape of your cookies! You can shape the dough into bars for easy cutting. Alternatively, use cookie cutters for fun shapes like leaves or pumpkins. For special occasions, garnish your cookies with a sprinkle of cinnamon or a drizzle of melted chocolate. Stacking them on a wooden board or placing them in a jar adds a nice touch. Use a few apple slices as decoration for a lovely fall display. To keep your apple cider cookies fresh, store them in an airtight container. This helps lock in moisture and flavor. You can layer parchment paper between the cookies to prevent sticking. Place the container in a cool, dry place, away from sunlight. Avoid storing them in the fridge, as this can make them dry. You can freeze both cookie dough and baked cookies. To freeze the dough, scoop it into balls and place them on a baking sheet. Freeze for about two hours. Once frozen, transfer them to a freezer bag. For baked cookies, let them cool completely before wrapping them tightly. To thaw, simply take the cookies out and let them sit at room temperature for about 30 minutes. If you froze the dough, bake it straight from the freezer. Just add a minute or two to the baking time. Homemade apple cider cookies last about one week at room temperature. Look for signs of freshness like soft texture and strong apple aroma. If they become hard or lose their smell, it's time to toss them. Storing cookies properly helps maintain their taste and texture. You can prepare the dough a day in advance. Just wrap it tightly in plastic wrap and store it in the fridge. When you’re ready to bake, let the dough sit at room temperature for about 10 minutes before scooping. You can also bake the cookies ahead of time. Store them in an airtight container at room temperature for up to a week. If you want to keep them longer, freeze the baked cookies. Place them in a zip-top bag and freeze for up to three months. Yes, you can use whole wheat flour for a nuttier taste and added fiber. If you want a gluten-free option, almond flour or a gluten-free blend works well. Just note that different flours may change the cookie's texture. You might need to adjust the amount of flour used. Start with a smaller amount and add more until the dough feels right. These cookies pair beautifully with warm drinks like apple cider, tea, or coffee. If you want something sweet, try serving them with vanilla ice cream or whipped cream. For a fun twist, you can even crumble the cookies over yogurt or a fruit salad. Their sweet and spicy notes enhance many flavors. To keep your cookies soft, watch the baking time. Take them out when the edges are golden but the centers still look a bit underbaked. They will firm up as they cool. Also, make sure your butter is soft but not melted. This helps the cookies rise and stay tender. Using brown sugar also adds moisture, making for a soft, chewy cookie. In this post, we explored how to make delicious apple cider cookies. We went through all the needed ingredients, tools, and methods. I shared tips on achieving the right texture, enhancing flavors, and creative variations. You now have a clear path to bake your own cookies, store them, and even answer common questions. Baking cookies can be simple and fun. Enjoy the process and the tasty results!](https://stirredrecipes.com/wp-content/uploads/2025/07/ee15bd7a-6dfd-4a3a-af9a-1402f8263132.webp)
Fall is here, and that means it’s time for apple cider cookies! This recipe makes soft, chewy treats full of warm spices and sweet apple flavor. You can easily whip …
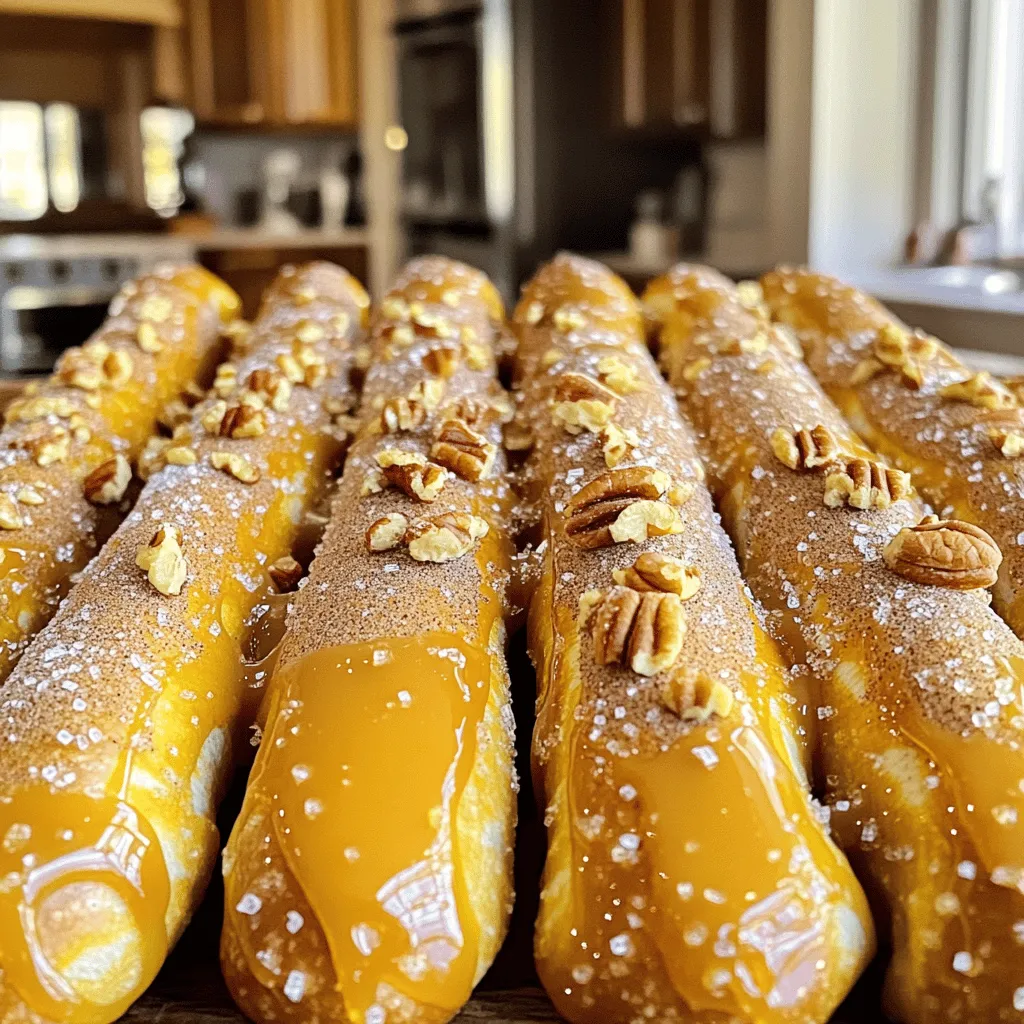
Fall is here, and it’s time to make some fun and tasty treats! These Fall Pretzel Rods are not just delicious; they’re a great way to get into the season’s …