Spiced Maple Doughnuts Irresistible Flavor Treat
![- 1 ½ cups all-purpose flour - ½ teaspoon baking powder - ¼ teaspoon baking soda - ½ teaspoon ground cinnamon - ¼ teaspoon ground ginger - ¼ teaspoon nutmeg - ½ teaspoon salt - ½ cup granulated sugar - 1 large egg - ½ cup buttermilk - ¼ cup unsalted butter, melted - 1 teaspoon vanilla extract - ½ cup pure maple syrup (plus extra for drizzling) - ½ cup powdered sugar (for glaze) To create the best spiced maple doughnuts, you need to gather these ingredients first. Each item plays a key part in bringing out those warm, sweet flavors. Flour gives structure to the doughnuts. Baking powder and baking soda help them rise. Spices like cinnamon, ginger, and nutmeg add warmth. Salt balances the sweetness. Granulated sugar sweetens the doughnuts, while buttermilk adds moisture and tang. Melted butter gives richness, and vanilla extract enhances the flavor. Don't forget the maple syrup! It’s the star of this recipe. It gives the doughnuts a sweet, earthy taste. The powdered sugar is for the glaze, making each bite even more delightful. You can find the complete recipe in the full recipe section. Happy baking! Preheating the Oven Start by preheating your oven to 350°F (175°C). This step is key for even baking. While the oven warms, lightly grease your doughnut pan with cooking spray or butter. This helps the doughnuts pop out easily. Mixing Dry Ingredients In a medium bowl, whisk together: - 1 ½ cups all-purpose flour - ½ teaspoon baking powder - ¼ teaspoon baking soda - ½ teaspoon ground cinnamon - ¼ teaspoon ground ginger - ¼ teaspoon nutmeg - ½ teaspoon salt Mix these ingredients well. This blend creates the spice base that makes these doughnuts so special. Combining Wet Ingredients In a separate large bowl, beat together: - ½ cup granulated sugar - 1 large egg Beat until light and fluffy. Then stir in: - ½ cup buttermilk - ¼ cup unsalted butter, melted - 1 teaspoon vanilla extract - ½ cup pure maple syrup Mix until everything is combined. This wet mixture brings moisture and flavor to your doughnuts. Filling the Doughnut Pan Now, gradually add the dry ingredients to the wet mixture. Stir gently until just combined. Do not overmix! Transfer the batter into a piping bag or a zip-top bag with the corner snipped off. Pipe the batter into the prepared doughnut pan, filling each cavity about halfway. Baking Time and Temperature Place the filled pan in the oven and bake for 10-12 minutes. The doughnuts are done when they spring back when pressed gently. Remove them from the oven and let them cool in the pan for about 5 minutes. After that, transfer them to a wire rack to cool completely. Making the Maple Glaze To make the glaze, combine: - ½ cup powdered sugar - A few tablespoons of maple syrup Mix until you reach your desired consistency. This glaze adds a sweet finish to your doughnuts. Drizzling Additional Maple Syrup Once the doughnuts are cool, dip the tops into the glaze. Let any excess drip off. For a special touch, drizzle some extra maple syrup on top before serving. This step makes each doughnut truly irresistible. For the full recipe, check [Full Recipe]. Avoiding Overmixing Mixing dough can be tricky. You want to combine the wet and dry ingredients just right. Overmixing makes doughnuts tough and less fluffy. Stir until you see no dry flour. A few lumps are okay. They help keep your doughnuts soft and airy. Knowing When to Remove from Oven Timing is key when baking. Set your timer for 10 minutes. Check the doughnuts by lightly pressing them. If they spring back, they are done. If they sink, bake for another minute or two. Remove them from the oven and let them cool for five minutes in the pan. Best Accompaniments Pair these doughnuts with coffee or tea. Their sweet and spicy flavors complement warm drinks well. For a treat, serve them with whipped cream or vanilla ice cream. This adds a creamy touch that contrasts nicely with the doughnuts. Presentation Ideas Make your doughnuts look special. Place them on a nice platter. Dust with powdered sugar for a snowy effect. You can also drizzle extra maple syrup on top. A sprinkle of cinnamon or nuts can add a splash of color and taste. Recommended Doughnut Pan Types Choose a non-stick doughnut pan for easy release. Silicone pans are great for popping out doughnuts with ease. Metal pans work well too, but be sure to grease them well. Tools for Easier Preparation Use a piping bag or a zip-top bag with the corner cut off to fill the pan. This makes it simple to get the batter into the doughnut molds without making a mess. A wire rack is also helpful for cooling your doughnuts evenly. For the complete recipe, check the Full Recipe. {{image_2}} You can easily make vegan spiced maple doughnuts by substituting egg and dairy. For the egg, choose a flaxseed or chia seed mixture. Just mix one tablespoon of flaxseed meal or chia seeds with three tablespoons of water. Let it sit for about five minutes until it thickens. This mixture works great as an egg replacer. For dairy, swap buttermilk with almond milk or oat milk. You can add a teaspoon of vinegar to make it tangy, like buttermilk. Use plant-based butter instead of regular butter. These changes keep the flavor and texture intact. If you need a gluten-free version, use flour alternatives like almond flour or coconut flour. These flours give a nice flavor but can change the texture. To ensure your doughnuts stay fluffy, add a bit of gluten-free baking powder. Mix in some cornstarch or tapioca flour to help bind the ingredients. This will give your doughnuts a lighter texture. Make sure to check your baking times, as they may vary with different flours. Want to add some fun? Consider adding nuts or chocolate chips to the batter. Chopped pecans or walnuts pair perfectly with the spices. Chocolate chips add a sweet twist that kids love. You can also explore infused maple syrup options. Try using cinnamon-infused maple syrup for an extra flavor kick. It adds warmth and depth to the doughnuts. These twists make each bite exciting and unique. For the full recipe, check below. To keep your spiced maple doughnuts fresh, place them in an airtight container. This helps lock in moisture and flavor. You can store them at room temperature for up to two days. If you want to keep them longer, refrigeration is an option. Just remember, the doughnuts may dry out a bit in the fridge. Freezing is perfect if you want to enjoy your doughnuts later. First, let them cool completely. Then, wrap each doughnut in plastic wrap. Place them in a freezer bag, squeezing out as much air as possible. This keeps them fresh for up to three months. When you're ready to eat one, take it out and let it thaw at room temperature. If you prefer, you can warm it in the microwave for about 10-15 seconds. This will make your doughnut soft and tasty again. For a special treat, drizzle some maple syrup on top after warming. - Key Steps to Follow To make spiced maple doughnuts, start by preheating your oven to 350°F (175°C). Grease a doughnut pan. Mix together the dry ingredients: flour, baking powder, baking soda, cinnamon, ginger, nutmeg, and salt. In another bowl, beat sugar and egg until fluffy. Add buttermilk, melted butter, vanilla, and maple syrup. Combine the wet and dry mixes gently. Pipe the batter into the pan, filling each cavity halfway. Bake for 10-12 minutes. Cool the doughnuts before glazing with maple syrup and powdered sugar. - Best Methods for Preparation Ahead Yes, you can prepare these doughnuts ahead. Bake them and let them cool completely. Store the cooled doughnuts in an airtight container at room temperature. They stay fresh for two days. You can also freeze them. Wrap each doughnut tightly in plastic wrap and place them in a freezer bag. Thaw at room temperature before glazing to enjoy them fresh. - Explanation of Spice Combination These doughnuts get their warm flavor from a mix of spices. We use ground cinnamon, ginger, and nutmeg. Cinnamon adds a sweet warmth. Ginger gives a slight kick. Nutmeg brings a rich, nutty taste. This blend creates a cozy vibe perfect for fall or any day you want a treat. The spices work well with the sweet maple syrup, making each bite a delight. In this post, you learned how to make spiced maple doughnuts. We covered all the ingredients, from flour to butter, and shared step-by-step instructions. I gave you tips on perfecting texture and various serving ideas. You saw options for vegan and gluten-free variations too. These doughnuts are not just tasty; they are fun to make. Enjoy them fresh or stored for later. Baking is about creativity, so don’t hesitate to try new flavors. Now, grab your ingredients and get started on this delicious treat!](https://stirredrecipes.com/wp-content/uploads/2025/07/5097db9f-4720-4355-a9bd-4ab467171f5c.webp)
Get ready to treat yourself with my Spiced Maple Doughnuts! These doughnuts are not just sweet—they’re packed with warm spices that will make your taste buds dance. I’ll guide you …
Get ready to treat yourself with my Spiced Maple Doughnuts! These doughnuts are not just sweet—they’re packed with warm spices that will make your taste buds dance. I’ll guide you …
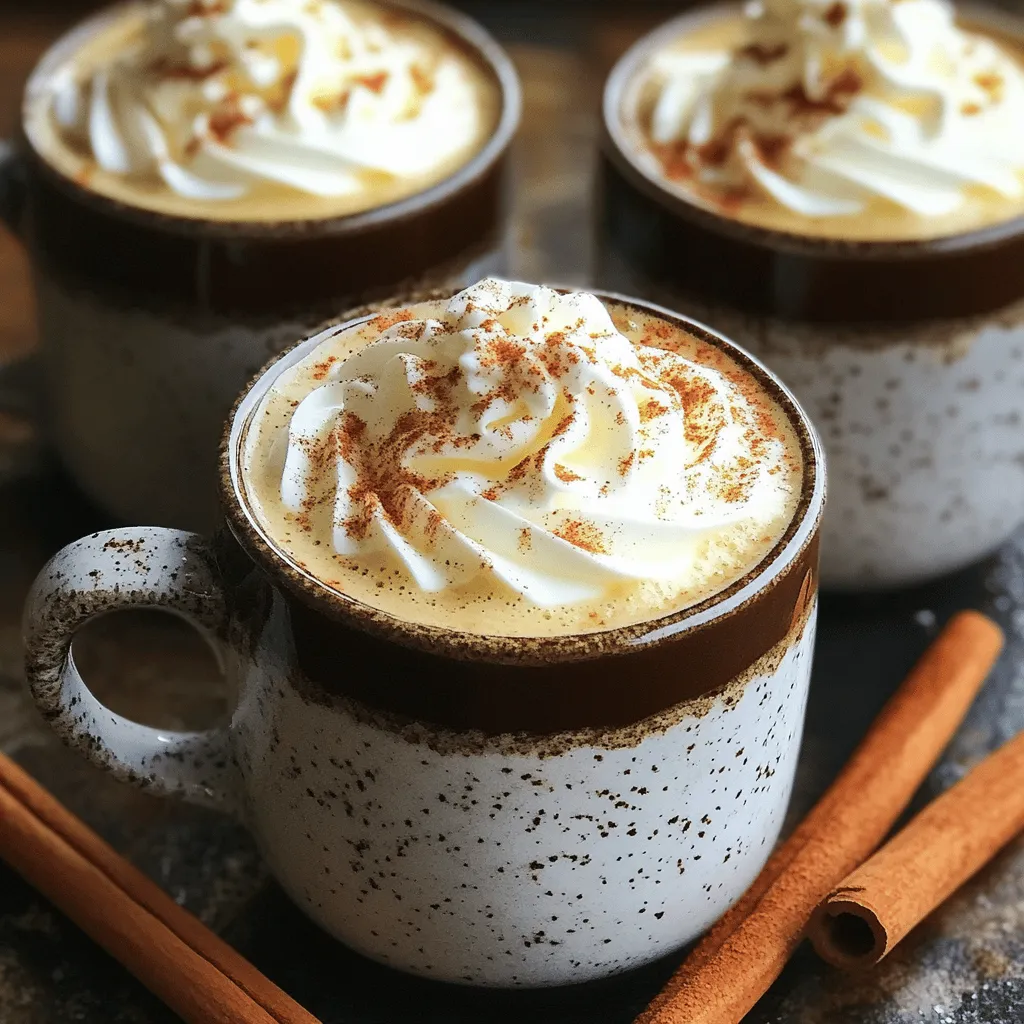
Want to spice up your morning routine? Homemade cinnamon coffee is both flavorful and simple to make! This cozy drink brings warmth and comfort to your day. In this recipe, …
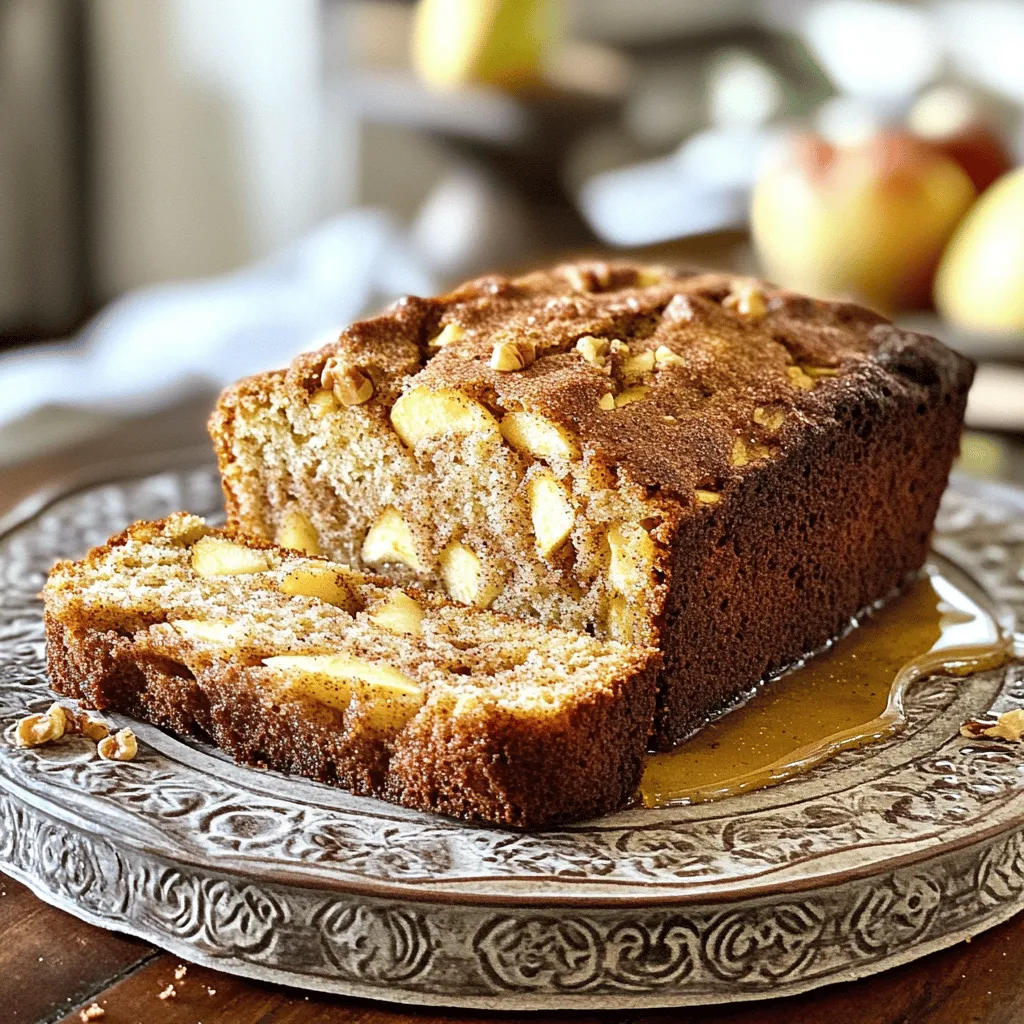
Are you ready to fall in love with baking all over again? This Apple Cinnamon Loaf will quickly become a favorite in your kitchen. With just a few simple ingredients, …
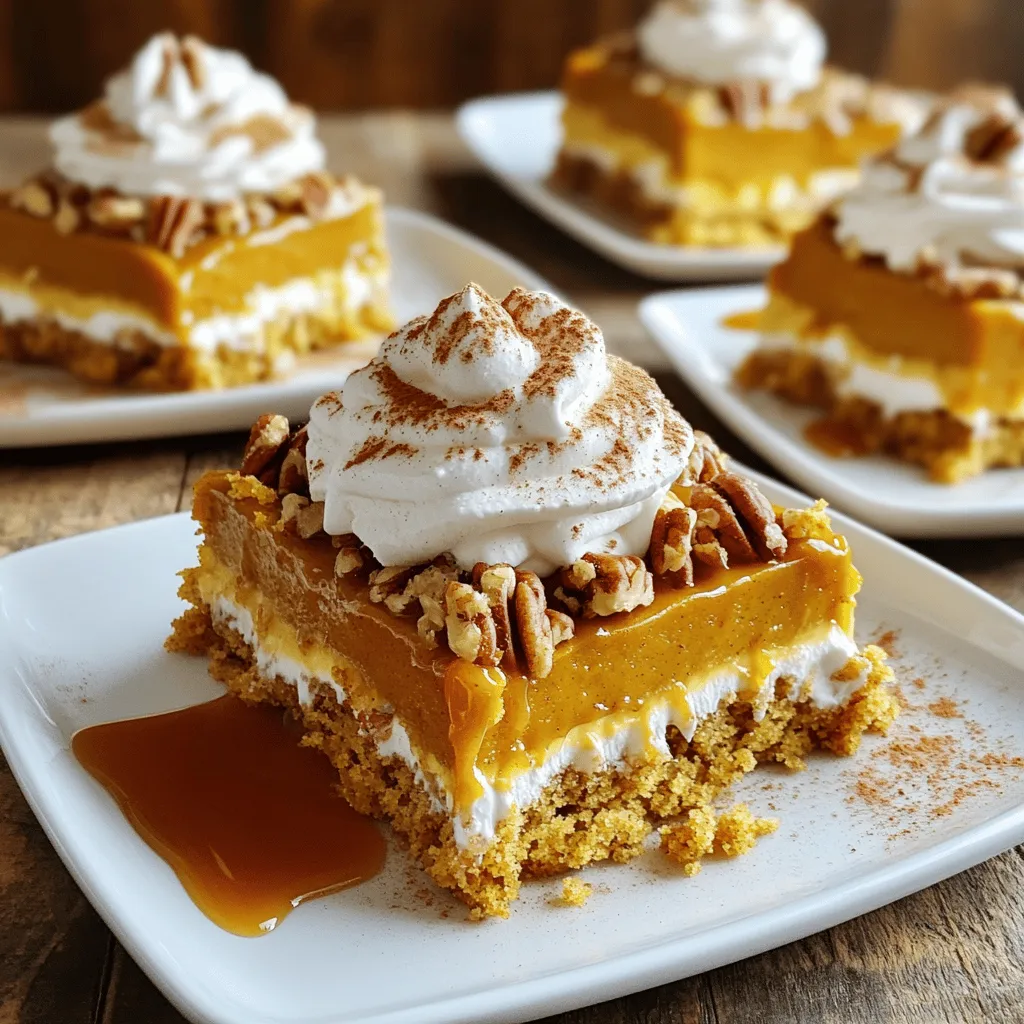
If you love the flavors of fall, you’re in for a treat! My Pumpkin Crunch Cake combines rich pumpkin, warm spices, and a crunchy topping. It’s simple to make and …
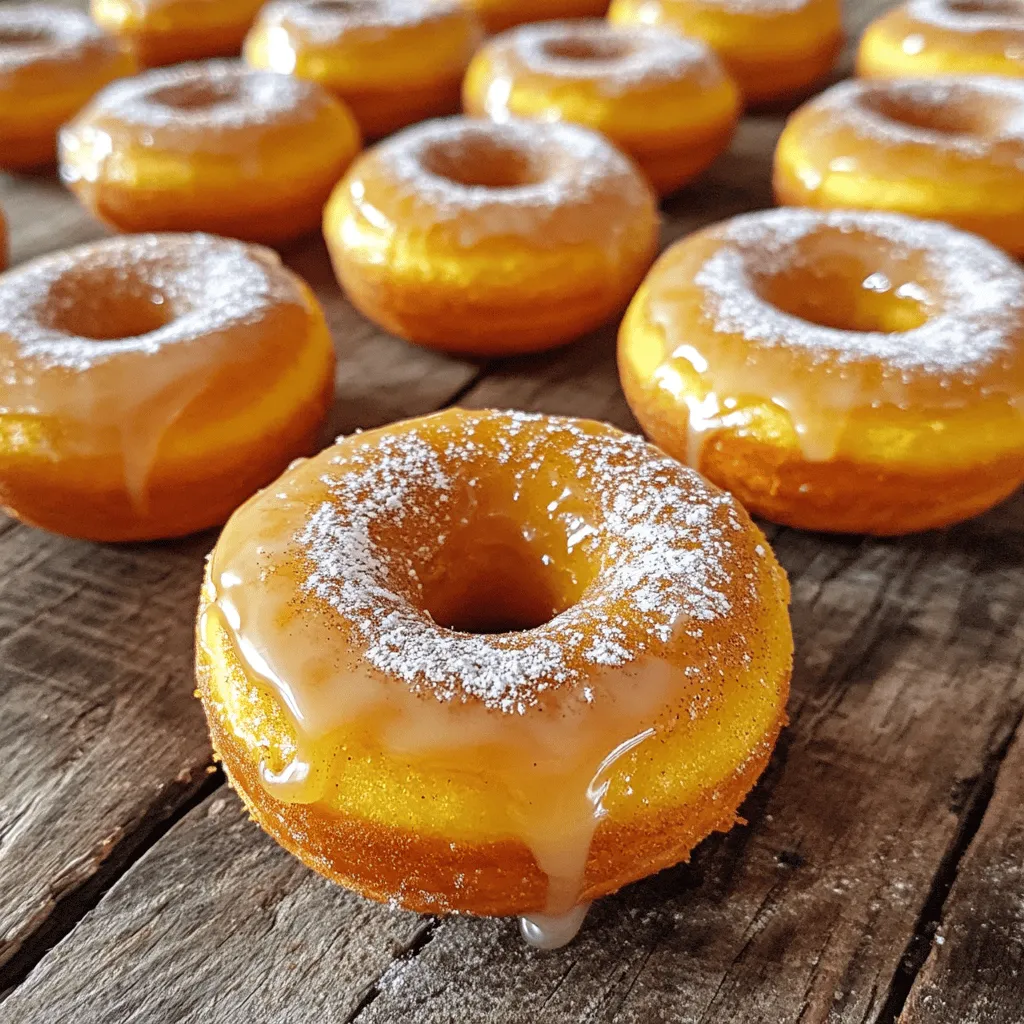
Get ready to enjoy one of autumn’s best treats: Easy Baked Pumpkin Donuts! This simple recipe is perfect for both beginners and seasoned bakers. With just a few key ingredients, …
![To make my Easy Pumpkin Bundt Cake, gather these simple ingredients. They mix well to create a soft, flavorful cake. Here's what you need: - 2 cups all-purpose flour - 1 teaspoon baking powder - 1 teaspoon baking soda - 1 teaspoon ground cinnamon - 1/2 teaspoon ground nutmeg - 1/2 teaspoon ground ginger - 1/4 teaspoon salt - 1 cup granulated sugar - 1 cup packed brown sugar - 1 cup vegetable oil - 4 large eggs - 1 can (15 oz) pure pumpkin puree - 1 teaspoon vanilla extract - 1/2 cup toasted pecans or walnuts (optional) Each ingredient plays a key role. The flour gives structure, while sugars add sweetness. The spices bring warmth and flavor. Pumpkin puree adds moisture and a lovely orange hue. You can use nuts for crunch, but they are optional. When you combine these elements, you create a delightful cake that captures the essence of fall. For the complete recipe, check the Full Recipe section. 1. Preheat oven and prepare the Bundt pan. Start by setting your oven to 350°F (175°C). Take a 10-cup Bundt pan and grease it with butter or cooking spray. Next, dust it with flour to stop the cake from sticking. 2. Mix dry ingredients. In a medium bowl, whisk together the following: - 2 cups all-purpose flour - 1 teaspoon baking powder - 1 teaspoon baking soda - 1 teaspoon ground cinnamon - 1/2 teaspoon ground nutmeg - 1/2 teaspoon ground ginger - 1/4 teaspoon salt This mix adds flavor and helps the cake rise well. 3. Combine wet ingredients. In a large bowl, mix these together: - 1 cup granulated sugar - 1 cup packed brown sugar - 1 cup vegetable oil Blend these until they are well combined. Then, add in 4 large eggs, one at a time. Make sure to mix well after each egg. Stir in 1 can (15 oz) of pure pumpkin puree and 1 teaspoon of vanilla extract until the mixture is smooth and creamy. 4. Fold wet and dry mixtures. Gradually add the dry ingredients to the wet mix. Stir until just combined. If you like, fold in 1/2 cup of toasted pecans or walnuts for some crunch. 1. Pour batter into the pan. Carefully pour your batter into the prepared Bundt pan. Use a spatula to smooth the top, ensuring it is even. 2. Bake and check for doneness. Place the pan in the preheated oven. Bake for 50-60 minutes. To check if it's done, insert a toothpick in the center. It should come out clean. 3. Cooling process. Once baked, let the cake cool in the pan for about 10 minutes. Afterward, invert it onto a wire rack to cool completely. This cooling step helps the cake set well and makes it easier to slice later. For the complete recipe, visit [Full Recipe]. - Ensuring proper measuring of ingredients Accurate measuring is key. Use dry measuring cups for flour and sugar. Level off the top for precision. A kitchen scale can help too. - Suggested tools for easy mixing and baking Use a large mixing bowl and a sturdy whisk. An electric mixer saves time and effort. A spatula will help scrape the bowl clean. - How to prevent sticking in the Bundt pan Grease your pan well with butter or oil. Dust it with flour to create a barrier. This way, your cake will slide out easily after baking. - Decorative ideas for serving Dust the cooled cake with powdered sugar for a snowy look. Place it on a beautiful cake stand for added charm. You can also use fall-themed plates for a festive touch. - Recommended garnishes Top the cake with toasted pecans or walnuts to add crunch. Fresh whipped cream or a scoop of vanilla ice cream pairs well too. - Glaze options for added flavor A simple glaze made from powdered sugar and milk adds sweetness. For a twist, add a splash of maple syrup or vanilla extract to the glaze. {{image_2}} You can easily change the flavor of your pumpkin bundt cake. Here are some fun ideas: - Adding chocolate chips or raisins: Stir in 1 cup of chocolate chips or raisins. It adds sweetness and texture. - Using different spices or flavor extracts: Try using allspice, cardamom, or even maple extract for a twist. Each will give your cake a new taste. - Incorporating various nuts: Add 1/2 cup of chopped pecans, walnuts, or almonds. Nuts add crunch and flavor. If you need to adjust for diet, here are some options: - Gluten-free flour alternatives: Use a gluten-free flour blend instead of all-purpose flour. This keeps the cake tasty for everyone. - Vegan options for ingredients: Replace eggs with flax eggs or applesauce. Use plant-based oils for a vegan-friendly cake. - Reducing sugar options: Cut back on sugar by using applesauce or a sugar substitute. This keeps the cake sweet while lowering calories. Feel free to explore these variations to make the Easy Pumpkin Bundt Cake your own! For the full recipe, refer to the main article. To keep your leftover cake fresh, wrap it well. Use plastic wrap or aluminum foil. You can also store it in an airtight container. This keeps moisture in and prevents drying out. Recommended storage containers: - Airtight cake keeper - Glass or plastic containers with lids - Resealable plastic bags You can store the cake on the countertop or in the fridge. If you keep it on the counter, it stays good for about three days. If you want it to last longer, put it in the fridge. It can last up to a week in the fridge. To freeze the cake, wait until it cools completely. Once cool, wrap it tightly in plastic wrap. Then, place it in a freezer bag. This helps prevent freezer burn. When you're ready to enjoy it, take it out of the freezer. Let it thaw in the fridge overnight. If you're in a hurry, you can leave it out at room temperature for a few hours. After thawing, serve it as you like. You can dust it with powdered sugar or add a glaze for a nice touch. Enjoy your delicious pumpkin bundt cake again! For the full recipe, check out my earlier section. - How can I tell when the pumpkin bundt cake is done baking? The cake is done when a toothpick inserted in the center comes out clean. This usually takes 50 to 60 minutes. Keep an eye on it after 50 minutes for best results. - Can I use fresh pumpkin instead of canned? Yes, you can use fresh pumpkin. Just cook and puree it. Make sure it is smooth and not too watery. - What are the best ways to serve pumpkin bundt cake? You can serve it plain or dusted with powdered sugar. A drizzle of glaze or whipped cream adds a nice touch too. - How long will the cake last once baked? The cake lasts about 4 to 5 days at room temperature. Store it in an airtight container to keep it fresh. - Can I make this recipe ahead of time? Yes, you can bake the cake a day or two in advance. Just wrap it well and store it at room temperature. - How can I adjust the recipe for a smaller bundt pan? To adjust the recipe, reduce the amounts of each ingredient by half. This works well for a smaller pan. - What should I do if the cake sticks to the pan? If the cake sticks, let it cool for 10 minutes. Then, gently run a knife around the edges to loosen it. - Can I make this cake without eggs? Yes, you can use flax eggs or applesauce as a substitute. This will keep it moist and tasty. - What’s the best way to make the cake more moist? Adding a bit more oil or using butter can help. Also, ensure not to overmix the batter for a lighter texture. For the full recipe, check out the details above! You learned how to make a delicious pumpkin bundt cake. We covered the key ingredients, step-by-step instructions, and helpful tips. You also discovered variations for different tastes and dietary needs. Proper storage and answers to common questions will keep your cake fresh and tasty. Remember, baking is all about finding joy in the process. Enjoy creating your perfect bundt cake!](https://stirredrecipes.com/wp-content/uploads/2025/07/e297aace-8997-43f3-a2d8-8a5a3a54d8a8.webp)
Fall is here, and it’s the perfect time for a warm, Easy Pumpkin Bundt Cake. This cake is simple to make and bursting with pumpkin flavor, paired with warm spices. …
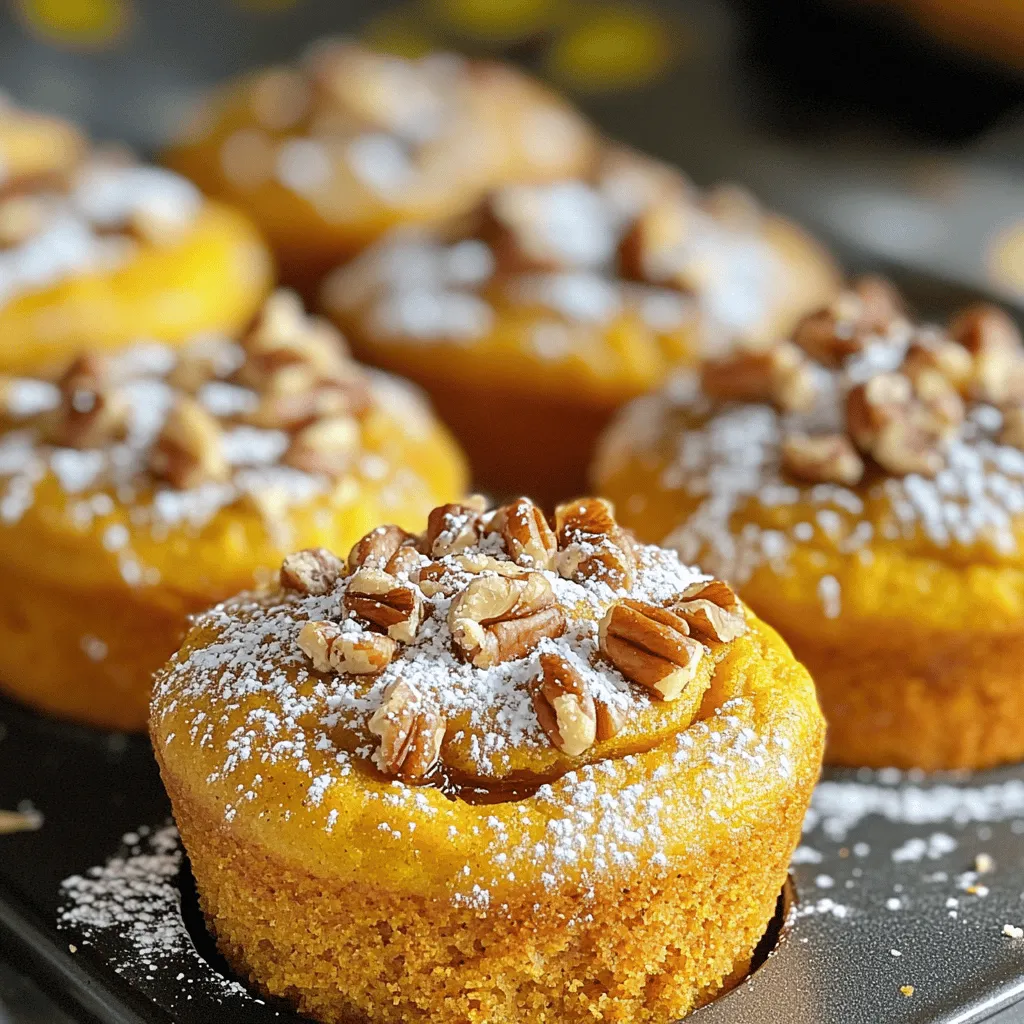
Welcome to the cozy world of baking! If you love the rich flavors of fall, you’ll adore these Pumpkin Muffins with Maple Filling. This simple recipe guide walks you through …
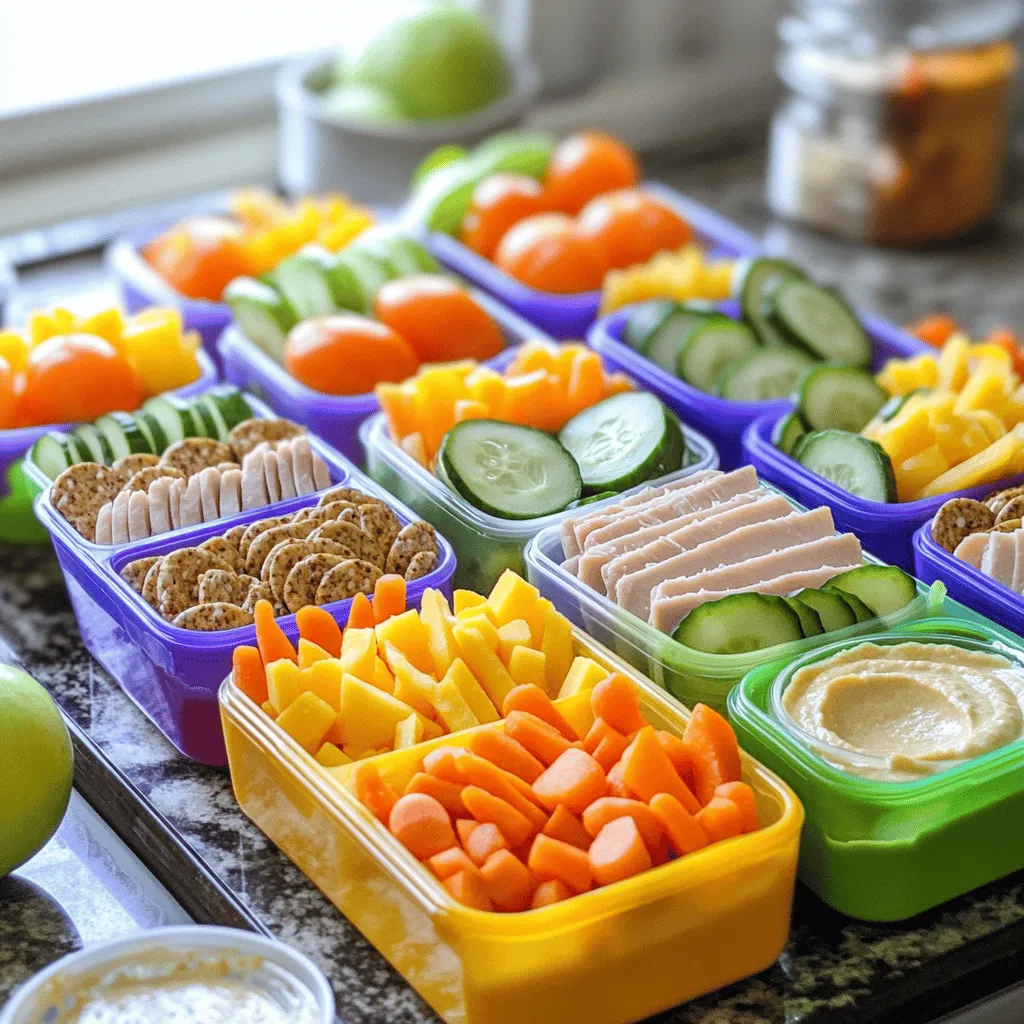
Are you tired of the same old boring lunches? I’ve got the solution for you: Make-Ahead Lunchables! These fun, easy meal prep ideas maximize taste while cutting down on your …
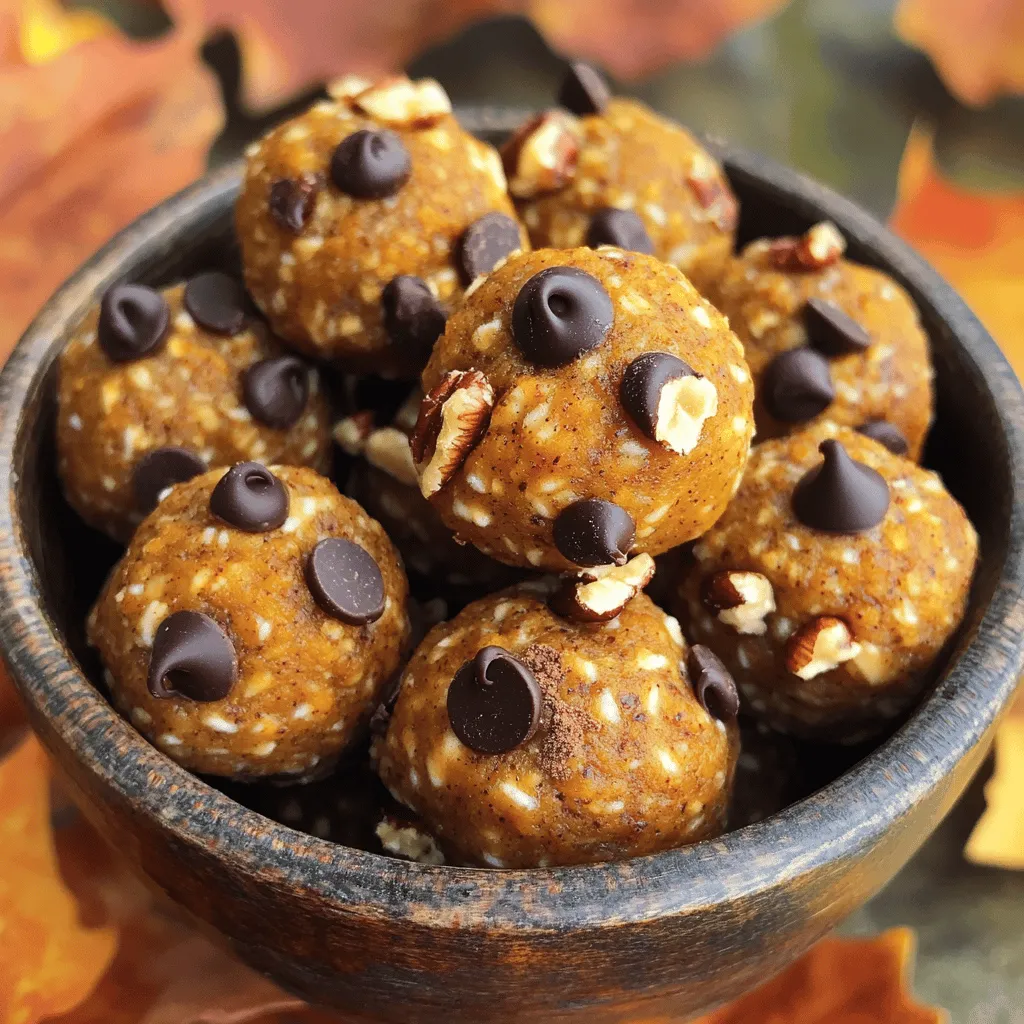
Fall is the perfect time for cozy flavors, and I have a treat for you! These Easy Fall Treats are simple, wholesome energy bites packed with pumpkin and spice. You’ll …
![Let's dive into the essential ingredients for making Chewy French Toast Cookies. These cookies are simple yet packed with flavor. You will need both dry and wet ingredients to create that perfect chewy texture. - 1 cup all-purpose flour - 1/2 cup rolled oats - 1/2 teaspoon baking powder - 1/4 teaspoon baking soda - 1/4 teaspoon salt - 1 teaspoon ground cinnamon - 1/4 teaspoon nutmeg The dry ingredients set the base for your cookies. Flour gives structure, while oats add a hearty texture. The baking powder and baking soda help them rise, ensuring they stay chewy. Salt enhances all the flavors, and spices like cinnamon and nutmeg bring that warm, cozy taste. - 1/2 cup unsalted butter, softened - 1/2 cup brown sugar, packed - 1/4 cup granulated sugar - 1 large egg - 1 teaspoon vanilla extract - 1/4 cup maple syrup The wet ingredients are where the magic happens. Softened butter makes the dough creamy. Brown sugar adds moisture and a rich flavor, while granulated sugar gives a bit of crunch. The egg binds everything together. Vanilla and maple syrup add that classic French toast flavor we all love. - 1/2 cup chopped pecans or walnuts - 1/4 cup raisins If you want to personalize your cookies, consider these add-ins. Nuts add crunch and richness. Raisins bring sweetness and a chewy texture. Feel free to mix and match your favorite toppings. For the complete recipe, check out the [Full Recipe]. Making these cookies is not just baking; it’s a fun way to enjoy a beloved breakfast treat in cookie form! - Preheat the oven to 350°F (175°C). - Line a baking sheet with parchment paper. - In a medium bowl, combine the dry ingredients: flour, oats, baking powder, baking soda, salt, cinnamon, and nutmeg. - In a large bowl, cream the softened butter, brown sugar, and granulated sugar until light and fluffy. - Add the egg, vanilla, and maple syrup to the butter mixture. Beat well until combined. - Gradually mix the dry ingredients into the wet mixture. Be careful not to overmix! - If you want, fold in the chopped pecans or walnuts and raisins. - Using a cookie scoop, drop rounded balls of dough onto the prepared baking sheet. Leave space between each one for spreading. - Bake in the preheated oven for 10-12 minutes. The edges should be lightly golden. The centers will firm up as they cool. Enjoy making these chewy French toast cookies with this full recipe! To get that perfect chewy texture, you need to start with softened butter. Softened butter blends well into the dough. It helps the cookies stay soft and chewy. Avoid using melted butter, as it can make the cookies spread too much. Also, be careful not to overmix the dough. When you mix too long, it can create tough cookies. Just mix until everything comes together. Choosing high-quality maple syrup makes a big difference in flavor. It adds sweetness and a rich taste. You can also play with spices to boost the flavor. Try adding a bit of ground ginger or cloves. These spices can give your cookies a warm, cozy taste. Just a little bit can turn a good cookie into a great one! Keep a close eye on your cookies after about 10 minutes of baking. The edges should turn light golden, while the centers may look soft. This is normal! Letting them cool is key for the perfect texture. Once they cool, they will firm up nicely. This step helps maintain that chewy goodness we all love. {{image_2}} You can make these cookies even more fun with some tasty twists. The cinnamon sugar variation is a classic. Just sprinkle a mix of cinnamon and sugar on top before baking. This adds a sweet crunch. Another great option is chocolate chip French toast cookies. Just fold in half a cup of chocolate chips into the dough. This will make them extra gooey and delicious. If you need a gluten-free option, swap all-purpose flour for gluten-free flour. This works great and keeps the cookies chewy. For those who prefer a vegan treat, you can use flax eggs. Mix one tablespoon of flaxseed meal with two and a half tablespoons of water. Also, replace butter with coconut oil. These swaps keep the flavor while fitting your diet. Cookies can change with the seasons! For fall, try pumpkin spice French toast cookies. Add pumpkin puree and pumpkin pie spice to the dough. This gives a warm, cozy flavor. In winter, consider an Almond Joy-inspired cookie. Mix in shredded coconut and chocolate chips. This adds a sweet, tropical twist to your cookies. You can find the full recipe to get started on these variations! Store your chewy French toast cookies in an airtight container at room temperature. This helps keep them fresh and tasty. They are best consumed within a week for optimal flavor and texture. If you want to save some cookies for later, freeze them for up to three months. Make sure to wrap them well to avoid freezer burn. When you’re ready to enjoy, thaw them at room temperature. This keeps them soft and chewy. To bring back their warm, fresh taste, warm the cookies in the microwave for a few seconds. If you want them crispy again, pop them in a toaster oven for a short time. This gives them a nice crunch. For the full recipe, check the [Full Recipe]. Yes, it may alter the texture but can be used. Whole wheat flour adds a nutty taste. It will make the cookies denser. Start with half whole wheat and half all-purpose if you want to test it. Adjust the sugar content based on your preference. You can add or reduce sugar as you like. Try adding a bit of brown sugar for a deeper flavor. If you want them less sweet, cut the sugar in half. Yes, substitute with a flax egg. To make one flax egg, mix 1 tablespoon of flaxseed meal with 2.5 tablespoons of water. Let it sit for a few minutes until it thickens. This method works well for binding. Absolutely! Chocolate chips, dried fruits, or seeds work well. Feel free to get creative! Try adding shredded coconut or even a sprinkle of sea salt on top. These additions can enhance the flavor and texture. The edges should be light golden; centers may look soft but will firm up as they cool. Check them around the 10-minute mark. If they look puffy and slightly shiny, they are likely ready to come out. This article covered key ingredients, steps, and tips for making delicious cookies. You learned how to mix dry and wet ingredients, plus how to create your own flavor variations. Remember, using quality ingredients can boost your cookie's taste. Don’t forget to store your cookies properly for the best texture. Now, it’s time to bake, share with friends, and enjoy your tasty creations!](https://stirredrecipes.com/wp-content/uploads/2025/07/a43e8471-3a75-40e1-af5e-993149dd166e.webp)
Imagine biting into a cookie that captures the warm, cozy flavors of French toast. My Chewy French Toast Cookies are easy to make and perfect for any time of day. …