Skip to content
Stirred Recipes
  • Home
  • Appetizers
  • Desserts
  • Salads
  • Breakfast
  • Dinner
  • Privacy Policy
  • Contact
  • About

Chef Luca

Chewy Pumpkin Cookies Perfect for Fall Baking

August 8, 2025 by Chef Luca
- 1 cup pumpkin puree - 1/2 cup granulated sugar - 1/2 cup packed brown sugar - 1/2 cup unsalted butter, softened - 1 large egg - 1 teaspoon vanilla extract - 2 cups all-purpose flour - 1 teaspoon baking soda - 1 teaspoon baking powder - 1 teaspoon ground cinnamon - 1/2 teaspoon ground nutmeg - 1/4 teaspoon ground ginger - 1/4 teaspoon salt - 1 cup chocolate chips or walnuts (optional) When I make chewy pumpkin cookies, I love using fresh pumpkin puree. It adds a natural sweetness and moisture. Canned pumpkin works too, but fresh gives a unique taste. The sugars in this recipe help create a soft, chewy texture. I use a mix of granulated and brown sugar. The brown sugar adds a slight caramel flavor that enhances the pumpkin. Butter plays a big role in the flavor. I always use unsalted butter to control the salt level. It makes the cookies richer. Don’t skip the vanilla extract! It adds depth to the cookie. The egg binds everything together and helps with the rise. For the dry ingredients, I use all-purpose flour to keep the cookies chewy. Baking soda and baking powder ensure the cookies rise just right. The spices bring warmth to the cookies. Ground cinnamon and nutmeg are classic fall flavors. Ginger adds a nice zing. The salt balances the sweetness. If you want a special touch, add chocolate chips or walnuts. They bring extra flavor and crunch. Check out the Full Recipe for more details on how to make these delicious treats! - Preheating the Oven Set your oven to 350°F (175°C). This helps the cookies bake evenly. - Preparing the Baking Sheet Line a baking sheet with parchment paper. This prevents cookies from sticking. - Creaming the Butter and Sugars In a large bowl, combine the softened butter, granulated sugar, and brown sugar. Mix until fluffy. This step adds air to your dough. - Incorporating Pumpkin and Egg Add the pumpkin puree, egg, and vanilla extract to the bowl. Stir until well mixed. The pumpkin makes the cookies moist and tasty. - Whisking the Dry Ingredients In another bowl, whisk together the flour, baking soda, baking powder, cinnamon, nutmeg, ginger, and salt. This ensures even spice distribution. - Mixing Wet and Dry Ingredients Gradually add the dry mix into the wet mix. Stir just until combined. Overmixing may lead to tough cookies. - Folding in Mix-ins (optional) If you want, fold in chocolate chips or walnuts for extra flavor. These add texture and sweetness to each bite. - Scooping the Dough Use a cookie scoop or tablespoon to drop the dough onto the baking sheet. Space each dollop about 2 inches apart. - Baking Time and Temperature Bake for 10-12 minutes. The edges should be set, and the tops lightly cracked. - Cooling Process After baking, let the cookies cool on the sheet for 5 minutes. Then transfer them to a wire rack to cool fully. This step prevents soggy bottoms. Follow these steps from the Full Recipe, and you’ll have perfect chewy pumpkin cookies in no time! Accurate measuring matters. Use dry measuring cups for flour and sugar. Too much flour makes cookies dry. Too little makes them too wet. Always level off your measuring cups. Choosing the right flour is key. All-purpose flour works best for chewy cookies. It has the right protein content. Avoid using cake flour. Cake flour can make cookies too light and fluffy. Spices bring warmth to the cookies. A blend of cinnamon, nutmeg, and ginger gives great flavor. You can adjust these spices to fit your taste. Try adding a touch more cinnamon for a stronger kick. Mix-ins add texture and fun. Chocolate chips work great for sweetness. Walnuts or pecans add crunch. You can even use dried fruits for a unique twist. Experiment to find your favorite combinations. Do not overmix the batter. Mix until just combined. Overmixing can make cookies tough. Gently fold in the dry ingredients. Cooling cookies is just as important. Let the cookies cool on the baking sheet for a few minutes. This helps them set properly. Then transfer to a wire rack. This prevents cookies from getting soggy. For the full recipe, check out the link provided. {{image_2}} You can make gluten-free pumpkin cookies easily. Use gluten-free flour blends like almond flour or oat flour. These options give a nice texture and flavor. You may also try coconut flour, but use less, as it absorbs more liquid. Always check the blend for xanthan gum. If it’s not in the mix, add about 1 teaspoon to help bind the cookies. Vegan pumpkin cookies are a great choice for plant-based diets. Replace the egg with a flaxseed egg. Just mix 1 tablespoon of ground flaxseed with 2.5 tablespoons of water. Let it sit for a few minutes to thicken. For butter, use coconut oil or vegan butter. These swaps keep your cookies moist and tasty. Adding dried fruits can enhance the flavor of your cookies. Try raisins, cranberries, or chopped dates. They bring natural sweetness and a chewy texture. You can also mix in nuts like pecans or walnuts for crunch. These seasonal add-ins make your cookies a treat for the senses. For the full recipe, check out the main article. To keep your chewy pumpkin cookies fresh, store them in an airtight container. Line the container with parchment paper to absorb any moisture. Keep them at room temperature for up to a week. If you want to keep them longer, consider freezing. To freeze your cookies, first let them cool completely. Place them in a single layer on a baking sheet. Put the baking sheet in the freezer for about an hour. Once frozen, transfer the cookies to a freezer bag. Remove as much air as possible before sealing. This helps prevent freezer burn. When you're ready to enjoy the cookies, take them out of the freezer. Leave them at room temperature for about 30 minutes. For a warm treat, pop them in the microwave for a few seconds. This will make them soft and chewy again. Chewy pumpkin cookies can last up to a week in the container. To keep them fresh longer, you can add a slice of bread. The bread helps absorb moisture and keeps the cookies soft. If you notice them getting hard, they may be past their prime. Enjoy them while they’re still tasty! For the full recipe, check out the Chewy Pumpkin Cookies recipe. To make pumpkin cookies fluffier, use a bit more baking powder. You can also try adding an extra egg white. This helps create a lighter texture. Remember to measure your flour correctly. Too much flour can lead to dense cookies. Also, don’t overmix the dough. Mix until just combined for the best results. Yes, you can use fresh pumpkin. Just make sure to cook and puree it well. Fresh pumpkin can add a lovely flavor. However, canned pumpkin is more convenient and consistent. If you choose fresh, ensure you get the right type. Sugar pumpkins work best for baking. Pumpkin cookies pair well with many treats. Serve them with a glass of milk or hot apple cider. They also taste great with cream cheese frosting. For a fun twist, try adding a scoop of ice cream on top. You can even make a pumpkin cookie sandwich! Chewy pumpkin cookies stay fresh for about 5 days at room temperature. Store them in an airtight container to keep them soft. If you want to keep them longer, you can freeze them. They can last up to 3 months in the freezer. Just remember to thaw them before enjoying! Yes, you can use pumpkin spice mix! It’s a great shortcut. Just use about 2 teaspoons of the mix for this recipe. Adjust to taste if you like stronger flavors. Pumpkin spice mix usually contains cinnamon, nutmeg, and ginger, so it works well in cookies. In this blog post, we explored how to make delicious pumpkin cookies. We covered essential ingredients, baking steps, and tips for perfect texture. Adding pumpkin not only adds flavor but also boosts nutrition. Remember to measure accurately and let your cookies cool. Whether you try the gluten-free or vegan versions, these cookies will delight. Enjoy experimenting with flavors and creating your own tasty treats. Happy baking!

Fall is here, and that means it’s time to bake something special! These chewy pumpkin cookies are the perfect treat, blending the warm flavors of pumpkin and spices. Whether you’re …

Read more

Categories Desserts

Slow Cooker Creamy Tomato Basil Chicken Delight

August 7, 2025 by Chef Luca
- 4 boneless, skinless chicken breasts - 1 can (28 oz) crushed tomatoes - 1 cup heavy cream - 1 tablespoon olive oil - 4 cloves garlic, minced - 1 medium onion, diced - 1 teaspoon dried oregano - 1 teaspoon dried basil - Salt and pepper to taste - Fresh basil leaves for garnish - Grated Parmesan cheese (optional) To make Slow Cooker Creamy Tomato Basil Chicken, you need simple and fresh ingredients. You will start with four boneless, skinless chicken breasts. These will be the base of your dish. A 28-ounce can of crushed tomatoes adds rich flavor and texture. Heavy cream gives the sauce its creamy touch. You will also need olive oil, minced garlic, and diced onion. These ingredients bring depth to the dish. Dried oregano and basil add a lovely herb taste. Don't forget to season with salt and pepper to enhance the flavors. For the finishing touch, fresh basil leaves and grated Parmesan cheese are great options. - Slow cooker - Skillet - Cutting board and knife For this recipe, you will need a slow cooker. It cooks the chicken to tender perfection. A skillet is essential for sautéing the garlic and onion. A cutting board and knife help you prep ingredients. With these tools, you are ready to create a delicious meal. Check out the Full Recipe for all steps! To start, we need to get our ingredients ready. First, heat one tablespoon of olive oil in a skillet over medium heat. Add four cloves of minced garlic and one medium diced onion. Sauté them for about 3-4 minutes until they turn soft and clear. This helps to bring out their flavor. Next, we move on to seasoning the chicken. Take four boneless, skinless chicken breasts and sprinkle salt, pepper, one teaspoon of dried oregano, and one teaspoon of dried basil on both sides. This step adds great taste to the chicken. Now, it’s time to layer everything in the slow cooker. Place the seasoned chicken breasts at the bottom. Pour the sautéed onion and garlic mixture over the chicken. Then, add one can of crushed tomatoes on top without stirring. This layering keeps the chicken moist while cooking. After layering, cover the slow cooker. You can set it to low heat for 6-7 hours or high heat for 3-4 hours. The chicken will cook slowly and become very tender. Once the cooking time is up, carefully take the chicken out of the slow cooker and place it on a plate. Use two forks to shred the chicken or chop it into bite-sized pieces. Now, let’s thicken the sauce. Stir in one cup of heavy cream into the tomato mixture left in the slow cooker. Mix it well, then return the shredded chicken to the pot. Stir everything together. Allow it to cook on low for an extra 15-20 minutes. This helps the flavors blend and the sauce to thicken. For the complete recipe, check the Full Recipe! To ensure tender chicken, always choose fresh, high-quality chicken breasts. The slow cooker is great for making the chicken juicy. Cooking on low heat for 6-7 hours is best. If you are in a hurry, you can use high heat for 3-4 hours. When it comes to adjusting seasoning, taste the sauce once it’s mixed. You can easily add more salt, pepper, or herbs to suit your taste. Fresh herbs add a bright flavor, so don’t skip the fresh basil at the end. For the best sides to accompany this dish, consider serving it with pasta or rice. Both soak up the creamy sauce well. A simple green salad or steamed vegetables also pairs nicely for balance. For presentation tips, serve the creamy tomato basil chicken in a nice bowl. Add fresh basil leaves and a sprinkle of grated Parmesan cheese on top. This makes the dish look even more inviting. One common mistake is overcooking chicken. Check for doneness at the lower end of the cooking time. If chicken is dry, it won’t taste good. Another mistake is skipping the sautéing step. Sautéing the garlic and onion first brings out their flavors. This step adds depth to the sauce, making the dish richer and more delicious. For the full recipe, check out the detailed steps above. {{image_2}} You can change the protein in this dish. Turkey works well if you want a leaner option. For a meatless meal, try using tofu. Just make sure to press the tofu first to remove excess water. You can also swap the heavy cream for coconut milk or cashew cream for a dairy-free option. Both keep the dish rich and creamy while meeting dietary needs. Feel free to get creative with spices. A pinch of red pepper flakes can add some heat. You can also mix in fresh herbs like parsley or thyme for added flavor. If you want to sneak in some veggies, chop up spinach or bell peppers and toss them into the slow cooker. They will cook down and blend well with the sauce. The creamy tomato basil chicken is great over pasta or rice. Pasta gives a nice bite, while rice makes it comforting and filling. If you want a lighter option, serve it in a bowl as a soup. Just add more broth or water to thin out the sauce. Either way, it’s a delicious meal that fits your mood. Try the Full Recipe for all the tasty details! After enjoying your Slow Cooker Creamy Tomato Basil Chicken, store any leftovers in a sealed container. Let it cool down first to avoid steam buildup. Place the container in the fridge. It keeps well for about three to four days. Make sure to label the container with the date. This helps you track freshness. If you want to save some for later, freezing is a great option. Use an airtight container or freezer bag. Leave some space at the top, as the sauce may expand. It’s best to freeze the chicken and sauce together. For reheating, thaw the mixture in the fridge overnight. You can heat it on the stove or in the microwave. Stir well to ensure even heating. Your creamy tomato basil chicken can last in the fridge for three to four days. In the freezer, it can stay good for up to three months. Always check for any off smells or changes in texture before using it again. Keeping track of dates helps make sure your meals are fresh and tasty. You can cook this dish on low for 6-7 hours. If you're short on time, use high heat for 3-4 hours. Cooking on low gives the chicken a tender texture. High heat works too but may not be as juicy. Yes, you can use fresh tomatoes! For this recipe, you need about 2-3 pounds of fresh tomatoes. Peel and chop them before adding. Fresh tomatoes add a nice touch but may not be as rich as canned. Absolutely! This dish is great for meal prep. You can cook it and store it in the fridge for up to four days. Portion it out into containers for easy lunches or dinners. Just reheat it gently on the stove or in the microwave. This recipe shows how to make Slow Cooker Creamy Tomato Basil Chicken easily. You learned about the key ingredients, kitchen tools, and step-by-step methods. While cooking, remember to avoid common mistakes for a perfect dish. You can even swap ingredients to suit your taste or serve it in different ways. Lastly, store leftovers properly to enjoy this meal later. With these tips, you will create a dish your family will love. Happy cooking!

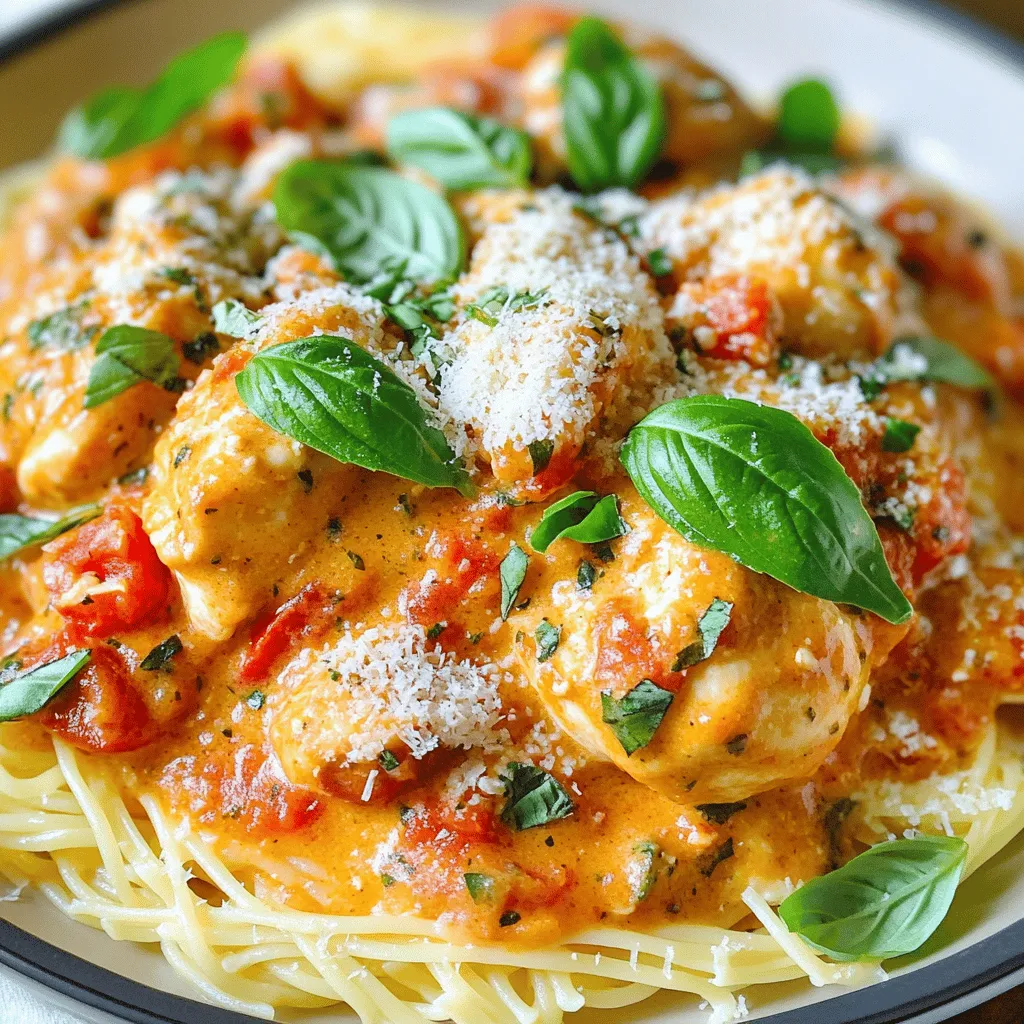
Get ready to wow your taste buds with my Slow Cooker Creamy Tomato Basil Chicken Delight! This simple yet rich dish combines juicy chicken with a velvety tomato cream sauce, …

Read more

Categories Dinner

Apple Pecan Cake Delightful and Simple Recipe

August 7, 2025 by Chef Luca
- 2 cups all-purpose flour - 1 ½ cups granulated sugar - 1 tsp baking powder - 1 tsp baking soda - ½ tsp salt - 1 tsp ground cinnamon - ½ tsp ground nutmeg - 1 cup unsalted butter, softened - 3 large eggs - 1 tsp vanilla extract - 2 cups peeled and chopped apples (preferably Granny Smith) - 1 cup pecans, chopped - ½ cup packed brown sugar - ¼ cup rolled oats - ½ tsp ground cinnamon The ingredients for the Apple Pecan Cake are simple yet essential for great flavor. First, let’s explore the dry ingredients. The flour gives structure, while the sugar adds sweetness. Baking powder and soda help the cake rise, and salt enhances all the flavors. Cinnamon and nutmeg bring warmth and depth. Next, we have the wet ingredients. Softened butter creates a rich texture. Eggs add moisture and help bind everything. Vanilla extract offers a sweet note, and the chopped apples bring tartness and freshness. Granny Smith apples work best here, as they hold up well in baking. Finally, the toppings add a delightful crunch. Chopped pecans provide nutty flavor and texture. Brown sugar gives sweetness and caramel notes, while rolled oats and cinnamon create an inviting crispy layer. When you combine these ingredients outlined in the Full Recipe, you create a cake that is both comforting and delicious. 1. Preheat your oven to 350°F (175°C). This step is key for even baking. 2. Grease and flour a 9x13 inch baking pan. This helps the cake release easily. 1. In a large bowl, whisk together the dry ingredients. Include flour, sugar, baking powder, baking soda, salt, cinnamon, and nutmeg. This gives your cake flavor. 2. In another bowl, cream together the softened butter and eggs. Mix until smooth. Then add in the vanilla extract. This adds richness. 1. Gradually combine the dry and wet mixtures. Stir until just combined. Avoid overmixing for a light cake. 2. Gently fold in the apples and pecans. Make sure they are evenly distributed for great taste in every bite. You can find the full recipe [here](#). Enjoy the process! - Make sure your butter is at room temperature. This helps it cream better. - Insert a toothpick into the center of the cake to check if it's done. If it comes out clean, your cake is ready! - If you want, you can use brown sugar instead of granulated sugar. This adds a nice flavor. - Try using different apples, like Fuji or Honeycrisp, for a sweeter taste. You can also swap pecans for walnuts or almonds if you prefer. - Serve the cake warm with a scoop of vanilla ice cream on top. It melts a bit and tastes amazing! - Pair your cake with coffee or tea. The warm spices in the cake go great with these drinks. For the complete recipe, check out the [Full Recipe]. {{image_2}} You can add more flavor to your Apple Pecan Cake by using spices. Try adding ginger or cloves for a warm kick. These spices pair well with apples and pecans. You can also mix in dried fruits like raisins or cranberries. This adds sweetness and texture to the cake. Each bite will surprise your taste buds! If you need a gluten-free option, you can use gluten-free flour. It works well in this recipe. For those who want a vegan cake, replace the eggs with applesauce. You can also use coconut oil instead of butter. These swaps keep the cake moist and tasty. Everyone can enjoy this delicious treat! You can change the size and shape of your cake. Bake it in different pan sizes for varied thickness. A round pan gives you a classic look. You can also make cupcakes or muffins. This makes serving easy for gatherings or lunchboxes. Plus, they bake faster than a full cake. Enjoy the fun of baking your way! To store your Apple Pecan Cake, let it cool first. Once cool, cover it with plastic wrap or foil. This keeps the cake moist and fresh. You can also place it in an airtight container. It will last in the fridge for about five days. If it’s hot outside, refrigerate it to avoid spoilage. If you want to keep the cake longer, freezing is a great option. Cut the cake into slices for easy serving. Wrap each slice in plastic wrap, then put them in a freezer bag. This keeps them fresh for up to three months. To enjoy, thaw the slices overnight in the fridge. Reheat them in the microwave for a few seconds, and they’ll taste fresh again. At room temperature, the cake lasts about two days. Make sure to keep it covered to protect it from air. Look for signs of spoilage, like mold or an off smell. If the cake feels dry or crumbly, it’s best to toss it. For the best flavor, eat it while it’s fresh. This is when the apples and pecans shine the most. For the full recipe, check the section above. To make the Apple Pecan Cake, follow these steps: 1. Preheat your oven to 350°F (175°C). Grease and flour a 9x13 inch baking pan. 2. In a large bowl, mix the dry ingredients: flour, sugar, baking powder, baking soda, salt, cinnamon, and nutmeg. 3. In another bowl, cream the softened butter until smooth. 4. Add the eggs, one at a time, and mix well. Then add the vanilla extract. 5. Slowly add the dry ingredients to the wet mixture until just combined. 6. Gently fold in the chopped apples and pecans. 7. Pour the batter into the prepared pan. Smooth it out with a spatula. 8. For the topping, mix brown sugar, oats, and cinnamon in a small bowl. Sprinkle it on top of the batter. 9. Bake for 35-40 minutes. Check with a toothpick; it should come out clean. 10. Cool the cake in the pan for about 10 minutes, then move it to a wire rack. This process makes a delightful cake you can enjoy with friends and family. For the full recipe, check out the recipe section above. Yes, you can use other nuts in this recipe. Here are some great options: - Walnuts: They add a rich taste and crunch. - Almonds: Sliced almonds give a nice texture. - Hazelnuts: These offer a unique flavor twist. - Cashews: They add creaminess and a soft crunch. Feel free to experiment with your favorite nuts. Just chop them up and add them like pecans. If your cake turns out dry, don't worry. Here are some tips to fix it: - Check your oven temperature. An oven that is too hot can dry out cakes. - Use fresh apples, as they add moisture. Granny Smith works well here. - Add a bit of applesauce to the batter next time. It keeps the cake moist. - Cover the cake with foil while baking if it browns too fast. These steps can help you achieve a moist and tasty cake every time. In this post, we covered the ingredients for a delicious apple pecan cake. We explored both dry and wet components, plus tasty toppings. I shared clear steps to mix and bake your cake perfectly. I offered tips and variations to make this cake your own. Baking can be fun and rewarding. With this recipe, you can impress friends and family. Enjoy your time in the kitchen and savor every bite of your cake!

Looking to impress your friends with a tasty dessert? My Apple Pecan Cake is both delightful and simple to make! With fresh apples and crunchy pecans, it’s perfect for any …

Read more

Categories Desserts

Pumpkin Cupcakes with Cinnamon Cream Cheese Delight

August 7, 2025 by Chef Luca
- 1 ½ cups all-purpose flour - 1 tsp baking powder - 1 tsp baking soda - 1 tsp ground cinnamon - ½ tsp ground nutmeg - ½ tsp ground ginger - ½ tsp salt - 1 cup canned pumpkin puree - ½ cup vegetable oil - ¾ cup brown sugar, packed - ½ cup granulated sugar - 2 large eggs - 1 tsp vanilla extract - 8 oz cream cheese, softened - ½ cup unsalted butter, softened - 2 cups powdered sugar - 1 tsp vanilla extract - 1 tsp ground cinnamon In this recipe, I choose simple, fresh ingredients. The dry ingredients form the base of our cupcakes. They add structure. Flour gives the cupcakes their shape. Baking powder and baking soda help them rise. The spices—cinnamon, nutmeg, and ginger—bring warmth and flavor. For the wet ingredients, we use canned pumpkin puree. It gives moisture and a lovely pumpkin taste. Vegetable oil keeps the cupcakes tender. The sugars add sweetness and depth. Eggs bind everything together while adding richness. Finally, vanilla extract enhances the overall flavor. The frosting is a treat on its own. Cream cheese and butter create a smooth texture. Powdered sugar sweetens it perfectly. A bit of vanilla and cinnamon brings everything together. The result is a creamy frosting that pairs well with the spicy cupcakes. For the full recipe, check the instructions that follow. - Preheat your oven to 350°F (175°C) and line a cupcake tin with paper liners. - In a medium bowl, whisk together 1 ½ cups all-purpose flour, 1 tsp baking powder, 1 tsp baking soda, 1 tsp ground cinnamon, ½ tsp ground nutmeg, ½ tsp ground ginger, and ½ tsp salt. Set aside. - In a large mixing bowl, combine 1 cup canned pumpkin puree, ½ cup vegetable oil, ¾ cup brown sugar, ½ cup granulated sugar, 2 large eggs, and 1 tsp vanilla extract. Whisk until smooth. - Gradually add the dry ingredients to the wet mixture, stirring gently until just combined. Be careful not to overmix. - Scoop the batter into the lined cupcake tins, filling each about 2/3 full. - Bake for 18-22 minutes. Check doneness with a toothpick; it should come out clean. - Let the cupcakes cool for 5 minutes in the tin before transferring them to a wire rack. - For the frosting, beat 8 oz of softened cream cheese and ½ cup of softened unsalted butter together until creamy. - Gradually add 2 cups of powdered sugar, 1 tsp vanilla extract, and 1 tsp ground cinnamon. Mix until smooth and fluffy. - Once the cupcakes are cool, use a piping bag or knife to generously frost each cupcake. To get the best texture for your pumpkin cupcakes, avoid overmixing. When you mix too much, the cupcakes can turn out dense. It’s okay if there are a few lumps in the batter. Also, use room temperature ingredients. This helps them mix better and gives you a softer cupcake. Want to take your cupcakes to the next level? Try adding chocolate chips or chopped pecans to the batter. They add a nice crunch and flavor. You can also experiment with flavored extracts, like almond or maple. This twist can make your cupcakes unique and delightful. For a clean and pretty finish, use a piping bag to frost your cupcakes. It gives them a professional look. If you want to add a little extra, sprinkle some crushed nuts or colorful sprinkles on top. This not only makes them pretty but also adds more texture and taste. For more details, you can check out the Full Recipe. {{image_2}} If you want gluten-free pumpkin cupcakes, you can easily make a swap. Just substitute all-purpose flour with a gluten-free flour blend. This change keeps the cupcakes light and fluffy while making them suitable for those who avoid gluten. It’s a simple swap that allows everyone to enjoy this tasty treat. For a vegan version, you can replace eggs with flax eggs. To make flax eggs, mix one tablespoon of ground flaxseed with three tablespoons of water. Let it sit for a few minutes to thicken. Use dairy-free butter and cream cheese to keep the frosting creamy and delicious. This option still gives you that rich pumpkin flavor without any animal products. You can change up the spices to create new flavors. For a unique twist, try adding cardamom or allspice. These spices add warmth and depth to the flavor profile. You might even experiment with a blend of cinnamon, nutmeg, and ginger for a fragrant cupcake that excites the taste buds. With these variations, you can adapt the pumpkin cupcakes to meet different dietary needs and flavor preferences. For the full recipe, check the [Full Recipe]. Keep your unfrosted pumpkin cupcakes in an airtight container at room temperature. They will stay fresh for up to 3 days. This way, you can enjoy the soft texture and warm spices. If you have frosted these cupcakes with the lovely cinnamon cream cheese frosting, refrigerate them. They will last for up to one week. Before serving, let them sit at room temperature for a bit. This helps bring out the best flavor and texture of the frosting. You can freeze your unfrosted cupcakes if you want to save some for later. They freeze well for up to 3 months. Make sure to wrap each cupcake tightly in plastic wrap or foil. Frost them after thawing to keep the cream cheese frosting fresh and fluffy. For the complete recipe, check out the Full Recipe. Yes, you can use substitutes like flaxseed meal or applesauce. To replace one egg, mix one tablespoon of flaxseed meal with three tablespoons of water. Let it sit for a few minutes until it thickens. You can also use a quarter cup of unsweetened applesauce as a substitute. Both options work well and keep the cupcakes moist. A toothpick inserted in the center should come out clean. If the toothpick has batter on it, the cupcakes need more time. Keep an eye on them after 18 minutes. The baking time is usually 18 to 22 minutes, depending on your oven. Yes, just ensure it's properly cooked and pureed before use. Fresh pumpkin can add a nice flavor. To prepare, roast the pumpkin until it is soft, then scoop out the flesh and blend until smooth. Be sure to measure the puree accurately for best results. You now have all the steps to make delicious pumpkin cupcakes. We covered the key ingredients, step-by-step instructions, and helpful tips. Remember, avoid overmixing for that perfect fluffy texture. You can also try cool variations, like gluten-free or vegan options. Storing them right keeps them fresh longer. Now, get baking and enjoy these tasty treats! Your friends and family will love them.

Indulge in the perfect fall treat with my Pumpkin Cupcakes with Cinnamon Cream Cheese Delight! These warm, spiced cupcakes are moist and full of flavor, making them a must-try for …

Read more

Categories Desserts

Baked Pumpkin Donuts Irresistible and Simple Recipe

August 7, 2025 by Chef Luca
To make baked pumpkin donuts, you need these key ingredients: - 1 cup pure pumpkin puree - 1/2 cup granulated sugar - 1/4 cup brown sugar, packed - 1/2 cup unsweetened applesauce - 2 large eggs - 1 teaspoon vanilla extract - 2 cups all-purpose flour - 1 teaspoon baking powder - 1 teaspoon baking soda - 1 teaspoon ground cinnamon - 1/2 teaspoon ground nutmeg - 1/4 teaspoon ground ginger - 1/4 teaspoon salt - 1/4 cup melted coconut oil or unsalted butter - Cinnamon sugar (for coating) These ingredients work together to give the donuts a warm, spiced flavor that screams autumn. The pumpkin puree adds moisture and a rich taste. The applesauce helps keep the donuts soft and tender. You can also add some optional ingredients to elevate your donuts: - Chopped nuts, like walnuts or pecans - Chocolate chips for a sweet twist - Dried fruit, such as cranberries or raisins - A dash of allspice for extra warmth These optional ingredients can make your donuts unique and fun to eat. Try mixing and matching them based on your taste. If you have dietary needs, here are some helpful substitutions: - Use a gluten-free flour mix instead of all-purpose flour. - Replace eggs with flaxseed meal mixed with water (1 tablespoon flaxseed + 2.5 tablespoons water). - Opt for a sugar substitute like stevia or coconut sugar. - Use applesauce as a dairy-free option instead of coconut oil or butter. These substitutions allow everyone to enjoy baked pumpkin donuts without worry. Just remember that these changes may alter the final texture and flavor slightly. For the full recipe, refer to the earlier section. To start, gather all your ingredients. You will need: - 1 cup pure pumpkin puree - 1/2 cup granulated sugar - 1/4 cup brown sugar, packed - 1/2 cup unsweetened applesauce - 2 large eggs - 1 teaspoon vanilla extract - 2 cups all-purpose flour - 1 teaspoon baking powder - 1 teaspoon baking soda - 1 teaspoon ground cinnamon - 1/2 teaspoon ground nutmeg - 1/4 teaspoon ground ginger - 1/4 teaspoon salt - 1/4 cup melted coconut oil or unsalted butter - Cinnamon sugar (for coating) Begin by preheating your oven to 350°F (175°C). Grease your donut pan with non-stick spray or oil. In a large bowl, whisk the pumpkin puree, granulated sugar, brown sugar, applesauce, eggs, and vanilla extract together. Make sure these ingredients mix well. In another bowl, sift the flour, baking powder, baking soda, cinnamon, nutmeg, ginger, and salt. Gradually mix the dry ingredients into the wet ingredients. Stir gently; avoid overmixing. Fold in the melted coconut oil or butter until it blends in fully. Spoon the batter into the donut pan. Fill each cavity about three-quarters full. Bake your donuts for 12 to 15 minutes. You know they are done when a toothpick poked in the center comes out clean. Let the donuts cool in the pan for about 5 minutes. After that, transfer them to a wire rack to cool completely. This step helps keep your donuts light and fluffy. Once cooled, it's time for the final touch! Toss the donuts in cinnamon sugar for added flavor. This gives them a sweet, spiced coat that is hard to resist. Serve these delightful donuts on a rustic platter for a beautiful presentation. Enjoy with a cup of cider or coffee. If you want the full recipe, check out the [Full Recipe]. To make the best baked pumpkin donuts, follow these tips: - Use pure pumpkin puree, not pumpkin pie filling. - Measure your flour correctly. Too much flour makes donuts dense. - Mix wet and dry ingredients separately before combining. This helps avoid lumps. - Do not overmix the batter. Stir until just combined for fluffier donuts. - Fill the donut pan only 3/4 full. This gives donuts room to rise. Here are some common mistakes to watch out for: - Forgetting to preheat the oven can lead to uneven baking. - Using old baking powder or baking soda can cause donuts to be flat. - Overbaking can make your donuts dry. Keep an eye on them. - Skipping the cinnamon sugar coating robs the donuts of extra flavor. - Not letting the donuts cool in the pan can lead to breakage. Having the right tools can help you bake better. Here are my top picks: - Donut Pan: A non-stick donut pan is essential for easy release. - Mixing Bowls: Use large bowls for easy mixing. - Whisk: A good whisk helps blend ingredients well. - Rubber Spatula: This is great for folding in wet and dry ingredients. - Cooling Rack: A wire rack allows air to circulate and cool donuts evenly. For the complete recipe, check out the Full Recipe. {{image_2}} You can spice up your baked pumpkin donuts with simple changes. Try adding a pinch of ground cloves or allspice for extra warmth. You can also mix in chocolate chips or chopped nuts for texture. Dried fruits, like cranberries or raisins, can add a sweet twist. Experiment with flavors to find your favorite combo! If you want gluten-free donuts, swap all-purpose flour with a gluten-free blend. Make sure it has xanthan gum for texture. For a vegan version, replace eggs with flax eggs. Just mix one tablespoon of flaxseed meal with three tablespoons of water. Let it sit until it thickens. Use a plant-based oil instead of butter or coconut oil. Icing and glaze can make your donuts even more fun. A simple glaze can be made with powdered sugar and milk. If you want a rich flavor, try maple syrup in your glaze. For a chocolate glaze, melt dark chocolate and drizzle it over the cooled donuts. You can also sprinkle with nuts or coconut for extra crunch. For the full recipe, check out the [Full Recipe]. To keep your baked pumpkin donuts fresh, store them in an airtight container. Place parchment paper between layers to avoid sticking. Keep the container at room temperature for up to three days. If you want to enjoy them longer, consider freezing. To freeze baked pumpkin donuts, first, let them cool completely. Then, wrap each donut in plastic wrap. Place the wrapped donuts in a freezer-safe bag. They can last for up to three months in the freezer. When you’re ready to eat them, remove the desired amount and let them thaw at room temperature. To warm your donuts, preheat your oven to 350°F (175°C). Place the donuts on a baking sheet and heat for about 5 to 8 minutes. This method keeps them soft and tasty. You can also use a microwave for 10-15 seconds if you need a quick fix. Baked pumpkin donuts stay fresh for about 3 days. Store them in an airtight container at room temperature. If they get too soft, you can pop them in the fridge. They taste best when eaten fresh, but you can also freeze them for up to 2 months. Just make sure to wrap them well. Yes, you can use fresh pumpkin! First, cook the pumpkin until soft. Then, mash it and strain it to remove extra moisture. This makes a tasty puree. Just keep in mind that fresh pumpkin may have a different flavor than canned. You might want to adjust your spices to match your taste. Baked pumpkin donuts pair well with many treats. You can serve them with hot coffee or chai tea for a cozy vibe. Cream cheese frosting or a simple glaze adds a nice touch. Fresh fruit, like apples or pears, also makes a great side. Try adding a scoop of vanilla ice cream for a fun dessert twist! For the full recipe, check out the details above. Baked pumpkin donuts are fun and easy to make. We covered key ingredients, tips, and variations to create your perfect donut. Remember to choose the right flavors and decorations to make it unique. Store extras properly to keep them fresh. Enjoy these donuts any time, with or without a friend. With this guide, you're ready to impress and have fun in the kitchen. Happy baking!

Are you ready to enjoy a tasty fall treat you can make at home? Baked pumpkin donuts are easy to whip up and perfect for cozy mornings or holiday gatherings. …

Read more

Categories Desserts

Delicious Pumpkin Cream Cheese Bread Easy Recipe

August 7, 2025 by Chef Luca
- 1 ¾ cups all-purpose flour - 1 teaspoon baking powder - ½ teaspoon baking soda - ½ teaspoon salt - 1 teaspoon ground cinnamon - ½ teaspoon ground nutmeg - ½ teaspoon ground ginger - 1 cup granulated sugar - ½ cup vegetable oil - 1 cup pumpkin puree (canned or fresh) - 3 large eggs - 1 teaspoon vanilla extract - 8 oz cream cheese, softened - ½ cup powdered sugar - 1 egg yolk (for the cream cheese filling) You need a mix of dry and wet items for this recipe. The dry ingredients help the bread rise and give it flavor. The wet ingredients make it moist and add sweetness. The cream cheese filling gives a rich taste that everyone loves. When you gather your ingredients, make sure they are fresh. Fresh ingredients make a big difference in flavor. For example, use pure vanilla extract instead of imitation. It makes your bread taste so much better. This recipe is simple, but it gives you a great reward. With just these ingredients, you can create a tasty treat. Check out the Full Recipe for more details on how to mix everything together and bake it to perfection. Preheat the oven to 350°F (175°C). Grease a 9x5-inch loaf pan. This step helps the bread release easily after baking. In a medium bowl, whisk together the following dry ingredients: - 1 ¾ cups all-purpose flour - 1 teaspoon baking powder - ½ teaspoon baking soda - ½ teaspoon salt - 1 teaspoon ground cinnamon - ½ teaspoon ground nutmeg - ½ teaspoon ground ginger Set this aside while you work on the wet mix. In a large mixing bowl, whisk together: - 1 cup granulated sugar - ½ cup vegetable oil - 1 cup pumpkin puree (canned or fresh) - 3 large eggs - 1 teaspoon vanilla extract Mix until everything is well blended. This creates a smooth and rich base for our bread. Gradually stir the dry ingredients into the wet mixture until fully incorporated. Be careful not to overmix. A few lumps are okay; they will bake out. In a separate bowl, beat together until creamy: - 8 oz cream cheese, softened - ½ cup powdered sugar - 1 egg yolk This cream cheese filling adds a delightful swirl to your bread. Pour half of the pumpkin batter into the prepared loaf pan. Dollop half of the cream cheese mixture over the batter. Repeat with the remaining pumpkin batter and cream cheese, creating a swirl pattern using a knife. Place the loaf pan in the preheated oven. Bake for 55-65 minutes or until a toothpick inserted in the center comes out clean. Let the bread cool in the pan for about 10 minutes before transferring it to a wire rack to cool completely. I encourage you to check out the Full Recipe for more details! When you mix the pumpkin batter, be gentle. Overmixing can make the bread tough. You want a soft, moist texture. Fold the mixtures slowly. It’s fine to have a few lumps. This keeps the bread light and fluffy. Swirling the cream cheese into the pumpkin batter makes it pretty. Use a knife or skewer for this. Dip it into the batter and swirl gently. Don’t mix it all together. You want a nice marbled look, not a blended mess. To check if your bread is ready, use a toothpick. Insert it in the center of the loaf. If it comes out clean, your bread is done. If it has batter on it, bake a little longer. This step is key to getting that perfect pumpkin cream cheese bread. For the full recipe, check the main article. {{image_2}} You can make your pumpkin cream cheese bread even better by adding fun extras. Try mixing in chocolate chips, chopped nuts, or dried fruit. These add-ins give the bread more texture and flavor. For example, walnuts or pecans can add a nice crunch. Chocolate chips bring a sweet surprise in each bite. Feel free to tweak the spices in your recipe. If you love warm flavors, add more cinnamon or nutmeg. You can also try new spices, like cloves or allspice. Just remember, a little goes a long way. Adjust the spices to fit your taste. Switching up your sweeteners can change the bread’s flavor. Instead of granulated sugar, use brown sugar for a deeper sweetness. Maple syrup is another tasty option. Each choice gives the bread a unique flavor profile. Experiment to find your favorite! For the full recipe, check out the ingredients and steps above. Store your pumpkin cream cheese bread in an airtight container. It stays fresh at room temperature for up to 3 days. This makes it easy to grab a slice for breakfast or a snack. If you want to keep it longer, put the bread in the refrigerator. It will last for up to a week. Just make sure it’s in an airtight container to keep it moist and tasty. To freeze your pumpkin cream cheese bread, wrap it tightly in plastic wrap. Then, wrap it in foil. This method helps keep it fresh for up to 3 months. When you’re ready to enjoy it, let it thaw in the fridge overnight. You can also warm it in the oven for a few minutes for that fresh-baked taste. For the full recipe, check out the complete guide on making pumpkin cream cheese bread! Yes, you can! Substitute cream cheese with dairy-free options like almond or cashew cream. You may also need to tweak the wet ingredients to keep the bread moist. I love to serve it warm. A dollop of whipped cream or a light dusting of powdered sugar makes it special. You could also enjoy it with a cup of coffee or tea. To check doneness, insert a toothpick into the center of the bread. If it comes out clean, it’s ready. If there’s batter on the toothpick, give it a few more minutes. Absolutely! This recipe has easy steps and clear instructions, making it great for all skill levels. Even if you are new to baking, you can make this delicious bread. Yes, homemade pumpkin puree is perfect for this recipe. Just make sure to strain it well to remove excess moisture. This will keep the bread from getting too soggy. You can warm individual slices in the microwave for a quick fix. Alternatively, to get a nice crispy texture, toast the slices. Both ways are tasty! This blog post covered all the key steps to make delicious Pumpkin Cream Cheese Bread. You learned about the essential ingredients, followed a clear step-by-step guide, and discovered helpful tips. I hope you feel ready to bake this treat. Enjoy experimenting with different spices and add-ins. Remember, the best part is sharing this moist, flavorful loaf with friends and family. Happy baking!

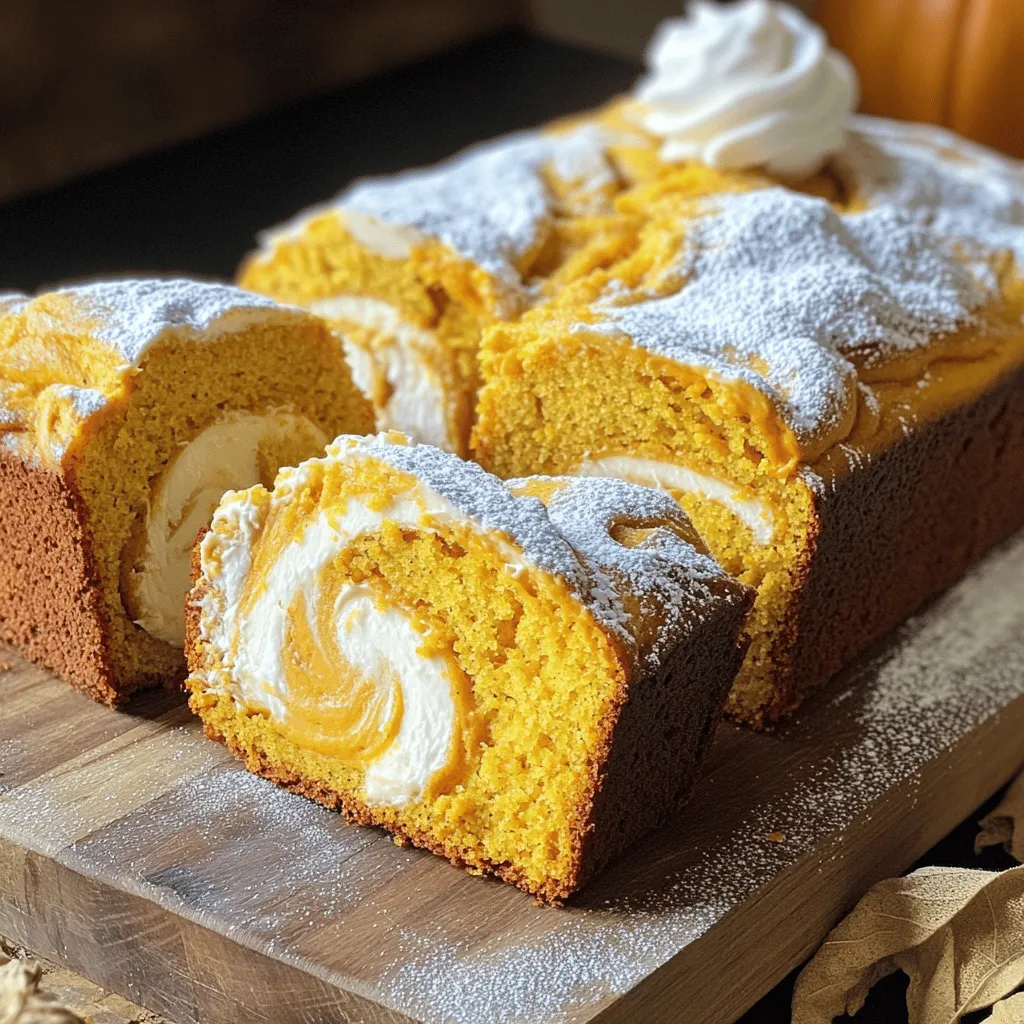
If you crave the cozy flavors of fall, you’ll love this Pumpkin Cream Cheese Bread recipe! It’s easy to make and combines the warm spices of pumpkin with a rich …

Read more

Categories Desserts

Apple Crisp Cheesecake Irresistible Dessert Recipe

August 7, 2025 by Chef Luca
To make a great apple crisp cheesecake, you need these ingredients: - For the Crust: - 1 ½ cups graham cracker crumbs - ⅓ cup granulated sugar - ½ cup unsalted butter, melted - For the Cheesecake Filling: - 24 oz cream cheese, softened - 1 cup granulated sugar - 3 large eggs - 1 teaspoon vanilla extract - 1 teaspoon cinnamon - For the Apple Filling: - 3 cups apples, peeled, cored, and diced (sweet varieties like Honeycrisp or Fuji work well) - ¼ cup brown sugar - 1 teaspoon cinnamon - 1 tablespoon lemon juice - For the Crisp Topping: - 1 cup rolled oats - ½ cup all-purpose flour - ½ cup brown sugar - ½ teaspoon cinnamon - ½ cup unsalted butter, melted You can swap some ingredients based on your needs: - Graham Cracker Crumbs: Use crushed cookies or gluten-free alternatives for crust. - Cream Cheese: Neufchâtel works if you want a lighter cheesecake. - Granulated Sugar: Coconut sugar can replace granulated sugar for a healthier choice. - Apples: Other sweet apples like Gala or Golden Delicious can be used. - Butter: Coconut oil can replace butter for a dairy-free version. Each slice of this apple crisp cheesecake has about: - Calories: 350 - Total Fat: 20g - Saturated Fat: 10g - Cholesterol: 85mg - Sodium: 250mg - Total Carbohydrates: 38g - Dietary Fiber: 2g - Sugars: 22g - Protein: 5g This dessert, while indulgent, offers a delightful treat. For the full recipe, check out the detailed instructions. Start by preheating your oven to 325°F (160°C). This step is key to getting the cheesecake just right. Next, grab a 9-inch springform pan. This type of pan helps the cheesecake come out easily. Line the bottom with parchment paper for easy removal later. In a medium bowl, mix 1 ½ cups of graham cracker crumbs, ⅓ cup of granulated sugar, and ½ cup of melted unsalted butter. Use a fork to combine the ingredients until they look like wet sand. Press this mixture into the bottom of your springform pan. Bake it for 10 minutes. This gives your crust a nice, firm base. Let it cool while you make the rest. For the apple filling, take 3 cups of peeled and diced apples. Sweet apples like Honeycrisp or Fuji work best. In a bowl, mix the apples with ¼ cup of brown sugar, 1 teaspoon of cinnamon, and 1 tablespoon of lemon juice. Stir until the apples are well-coated. Set this mixture aside so the flavors can blend. In a large bowl, beat 24 oz of softened cream cheese with an electric mixer until it is smooth. Gradually add 1 cup of granulated sugar while mixing. Add 3 large eggs one at a time, mixing until just combined. Finally, stir in 1 teaspoon of vanilla extract and 1 teaspoon of cinnamon. This mixture should be creamy and fluffy. Start by pouring half of the cheesecake filling into your cooled crust. Then, add the apple filling on top, spreading it evenly. Finally, add the rest of the cheesecake filling over the apples. Smooth the top with a spatula for an even layer. Now, let’s make the crisp topping. In a bowl, mix 1 cup rolled oats, ½ cup all-purpose flour, ½ cup brown sugar, and ½ teaspoon cinnamon. Drizzle in ½ cup of melted butter. Stir until crumbly. Sprinkle this topping over the cheesecake layers. Bake everything in the oven for 55-60 minutes. The center should be set but still jiggle slightly. Once done, turn off the oven and crack the door open. Let the cheesecake cool inside for 1 hour. After that, refrigerate it for at least 4 hours or overnight. This chilling time helps set the flavors and texture. One mistake is overmixing the cheesecake filling. If you mix too much, it can become too airy. This will make your cheesecake crack. Another common error is not letting the cheesecake cool slowly. If you rush this step, it may sink in the middle. Always allow the cheesecake to cool gradually. Lastly, avoid using too many wet apples. They can make the cheesecake soggy. To get a smooth filling, make sure your cream cheese is at room temperature. This helps it blend easily. When adding eggs, mix just until combined. Overmixing adds air, leading to cracks. For a creamy texture, bake the cheesecake in a water bath. This keeps the heat gentle, which helps prevent cracks. Serve your cheesecake chilled for the best flavor. You can drizzle caramel sauce on top for added sweetness. A sprinkle of cinnamon or nutmeg adds a nice touch. For a pop of color, add fresh apple slices on the side. A dollop of whipped cream also makes a lovely addition. You can find the Full Recipe in the earlier sections for all the details. {{image_2}} You can change the flavor of your cheesecake. Try using pumpkin spice for a warm twist. Just add pumpkin puree and pumpkin pie spice to the cheesecake filling. This makes it rich and cozy, perfect for fall. You can also swap apples for pears or berries for a fresh flavor. Need a gluten-free option? It's easy! Use gluten-free graham cracker crumbs for the crust. Also, switch out regular flour for almond flour or oat flour in the crisp topping. This keeps it tasty while being friendly for gluten-free diets. If you love bite-sized treats, try mini apple crisp cheesecakes! Use a muffin tin instead of a springform pan. Line the cups with paper liners. Fill them with the crust, then layer the cheesecake and apple filling. Bake for about 25-30 minutes. They are cute and perfect for parties. These variations allow you to play with flavors and make the dessert your own. For the full recipe, check out the complete steps provided earlier! To keep your apple crisp cheesecake fresh, store any leftovers in the fridge. Use an airtight container or cover the cheesecake with plastic wrap. This will prevent it from drying out. Leftovers should stay good for up to five days. If you want to enjoy them later, consider freezing. Freezing this cheesecake is easy. First, let the cheesecake cool completely. Then, wrap it tightly in plastic wrap. After that, place it in a freezer-safe container. This way, it won’t absorb any odors from the freezer. You can freeze it for up to three months. When you’re ready to eat, simply thaw it in the fridge overnight. If you want to warm up your cheesecake, avoid using the microwave. This could make it soggy. Instead, place the slices in a preheated oven at 300°F (150°C) for about 10-15 minutes. This will help restore its creamy texture. Remember to check often so it doesn’t get too warm. Enjoy your dessert at its best! For the full recipe, check back to ensure you have everything you need. You can tell the cheesecake is done when the edges look set, but the center still jiggles a bit. It should not look liquid. The jiggle means it will finish cooking as it cools. You can also check with a toothpick; it should come out mostly clean, but a little filling is okay. Yes, you can make this cheesecake a day or two ahead. Just bake it, cool it, and chill it in the fridge. This helps the flavors mix well. It tastes even better the next day as the apples soak up the flavors. I recommend using sweet apples like Honeycrisp or Fuji. They hold their shape well and add a nice sweetness. You can also mix in some tart apples like Granny Smith for balance. This mix gives a great flavor and texture to your cheesecake. After chilling, remove the sides of the springform pan. Cut the cheesecake into wedges. You can serve it plain or add some caramel sauce or whipped cream. This adds a nice touch and makes it look fancy. Enjoy the layers of flavor with each bite! This blog post covered all you need for a delicious Apple Crisp Cheesecake. We looked at ingredients, step-by-step instructions, and clever tips. I shared variations to try and showed how to store your cheesecake. Remember, making this dessert is fun and rewarding. With practice, you’ll impress friends and family every time you bake. Enjoy your tasty creation!

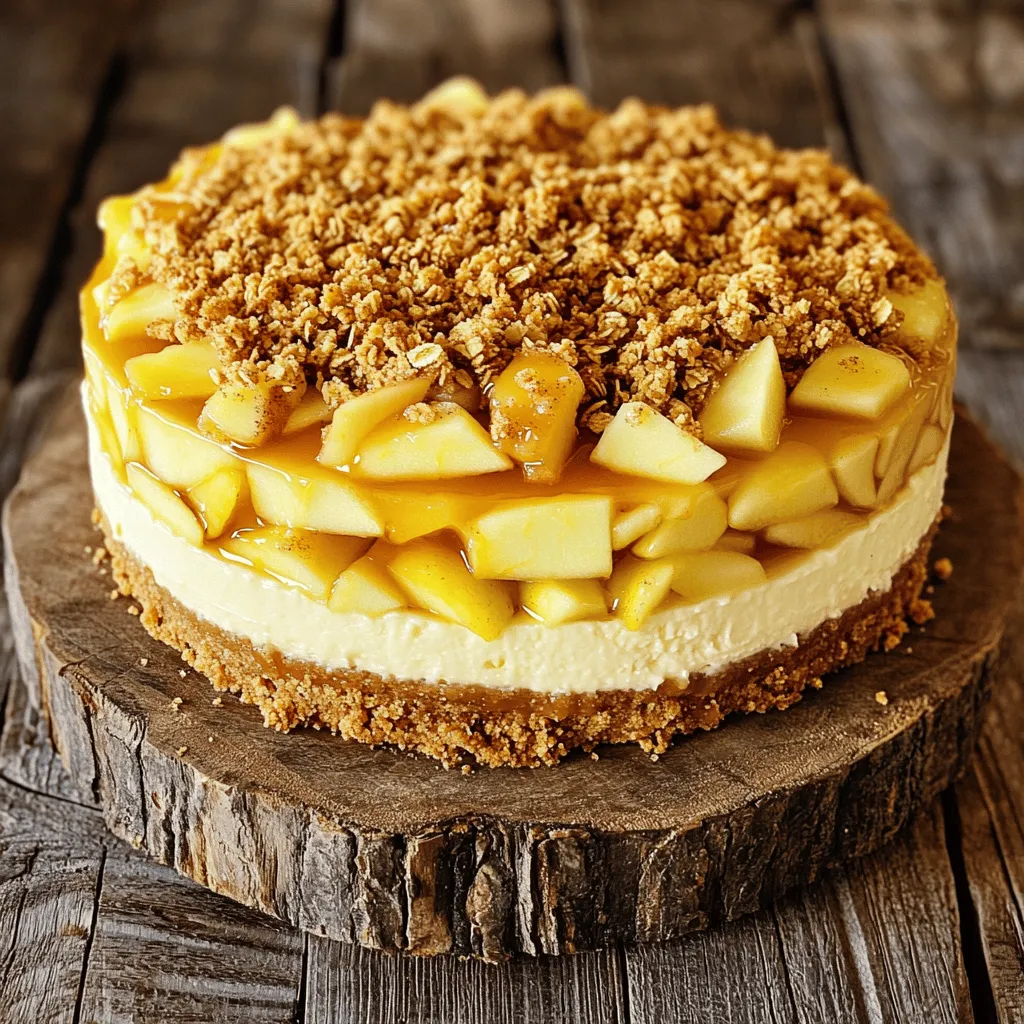
Are you ready to impress your family and friends with a dessert that combines sweet, tart apples and creamy cheesecake? The Apple Crisp Cheesecake is a showstopper that will have …

Read more

Categories Desserts

Satisfying Slow Cooker Chicken Pot Pie Recipe

August 7, 2025 by Chef Luca
- 1.5 lbs boneless, skinless chicken thighs, cut into bite-sized pieces - 3 cups mixed frozen vegetables (peas, carrots, corn, green beans) - 1 medium onion, diced - 2 cloves garlic, minced - 4 cups chicken broth - 1 cup heavy cream - 2 teaspoons dried thyme - 1 teaspoon dried rosemary - Salt and pepper to taste - 1/4 cup all-purpose flour - 2 pre-made pie crusts - Puff pastry alternative In this recipe, I use chicken thighs for their rich flavor and tenderness. Chicken thighs are perfect for slow cooking. They keep the dish moist as they cook. I add mixed frozen vegetables for a colorful touch and a healthy boost. Frozen veggies save time and add flavor. I use onion and garlic to enhance the taste of the dish. The chicken broth adds depth, while heavy cream makes it rich and creamy. The seasonings, like thyme and rosemary, bring warmth. Adjust the salt and pepper to fit your taste. For the crust, I recommend pre-made pie crusts for ease. They offer a flaky texture that pairs well with the filling. If you want a twist, use puff pastry. It creates a light and airy crust. This dish is about comfort, flavor, and ease. For the full recipe, check the link above. Enjoy making your slow cooker chicken pot pie! Start by cutting the chicken into bite-sized pieces. Use boneless, skinless chicken thighs for the best flavor. Next, grab your mixed frozen vegetables. These can include peas, carrots, corn, and green beans. Now, dice one medium onion. Make sure the pieces are small for even cooking. Then, mince two cloves of garlic. This adds a great aroma to the dish. In your slow cooker, combine the diced chicken, mixed vegetables, diced onion, and minced garlic. Pour four cups of chicken broth over the mixture. Season with two teaspoons of dried thyme and one teaspoon of dried rosemary. Add salt and pepper to your taste. Stir everything together well. Cover your slow cooker and set it to low for 6-7 hours. If you’re short on time, the high setting will work in 4 hours. The chicken should be cooked through and tender. To thicken the filling, whisk together one cup of heavy cream and a quarter cup of all-purpose flour in a small bowl. Gradually stir this mixture into the slow cooker about 30 minutes before serving. Now, roll out one of the pie crusts. Place it over the filling in the slow cooker. If you prefer puff pastry, just place it on top and press down the edges. Cover again and let it cook for an extra 30 minutes. This allows the crust to cook through. For a nice touch, garnish with fresh chopped parsley before serving. For the best presentation, serve the chicken pot pie in bowls. Add a scoop of filling and a slice of crust on top. The fresh parsley adds a lovely color contrast to the dish. Enjoy your comforting slow cooker chicken pot pie! - Adjusting seasoning to taste: Always taste your filling before serving. Add more salt or herbs if needed. This small step can make a big difference in flavor. - Using fresh herbs vs dried herbs: Fresh herbs add a bright taste. Use them if you have them. Dried herbs work just as well and are easy to store. - Tips for achieving a creamy filling: Mix heavy cream and flour well before adding to the slow cooker. This helps avoid lumps. Stir this mixture in about 30 minutes before serving. - Preventing a soggy crust: To keep the crust nice, cook it on high for the last 30 minutes. This gives it a chance to crisp up. If you use puff pastry, just press it down on top. - Meal prep suggestions: Chop your veggies and chicken in advance. Store them in the fridge for quick use later. This makes cooking easier on busy days. - Using leftover chicken: If you have leftover chicken, use it! Just skip the first cooking step. Add it with the broth and veggies to save time. Feel free to explore the Full Recipe for all the details! {{image_2}} For a gluten-free option, use gluten-free flour. This will help thicken the filling. You can also swap the pie crust for a gluten-free one. Many brands offer good choices that taste great. For dairy-free substitutions, try coconut cream instead of heavy cream. This gives a rich flavor without the dairy. To boost flavor, add a pinch of paprika or cayenne pepper. This will give your pot pie a little kick. You can also mix in extra veggies. Consider adding mushrooms or spinach for a nice twist. These add color and nutrition to your meal. Pair your chicken pot pie with a fresh salad. A simple green salad balances the meal well. You can also serve it with crusty bread for dipping. For creative toppings, sprinkle some crispy onions or fresh herbs on top. This adds texture and taste to every bite. To keep your slow cooker chicken pot pie fresh, store it properly. - Refrigeration tips: Place leftovers in an airtight container. They can stay in the fridge for up to 3 days. Always let the dish cool before sealing it. - Freezing guidance: For longer storage, freeze the pie. Wrap it tightly in plastic wrap, then foil. It can last up to 3 months in the freezer. Thaw in the fridge overnight before reheating. Reheating your chicken pot pie can be simple and effective. - Best methods for reheating: The oven works best for reheating. Preheat it to 350°F (175°C). Place the pie in a baking dish and cover it with foil. Bake for about 25-30 minutes. - Avoiding mushiness: To keep the crust crisp, don’t use the microwave. If you must, heat for a short time. Preparing meals in advance saves time and effort. - Make-ahead strategies: You can prep everything a day ahead. Chop the chicken and veggies, then store them separately. Mix them with broth and spices when ready to cook. - Portioning for easy meals: Divide the pot pie into single servings. This makes it easy to grab a meal on busy days. Store each portion in a small container. Slow cooker chicken pot pie takes about 7 hours on low or 4 hours on high. The prep time is around 20 minutes. This makes it easy to set up in the morning and enjoy a warm meal later. Yes, you can use fresh chicken. Just cut your chicken into bite-sized pieces. You may need to reduce the cooking time by about 30 minutes to ensure it doesn't overcook. Fresh chicken cooks faster, so keep an eye on it. To prevent a soggy crust, make sure to thicken the filling before adding the crust. You can also bake the crust separately for a short time before adding it on top. If it is already soggy, try cooking it longer on high. This helps crisp it up a bit. In this article, we covered how to make a delicious slow cooker chicken pot pie. We discussed essential ingredients, cooking steps, and helpful tips to enhance flavor and texture. You can customize this dish to fit dietary needs and personal tastes. Whether you choose a pre-made crust or a puff pastry, you'll create something satisfying. Remember, meal prep can save you time and effort. With these easy steps, you can enjoy a warm, comforting meal any day. Try it out, and savor every bite!

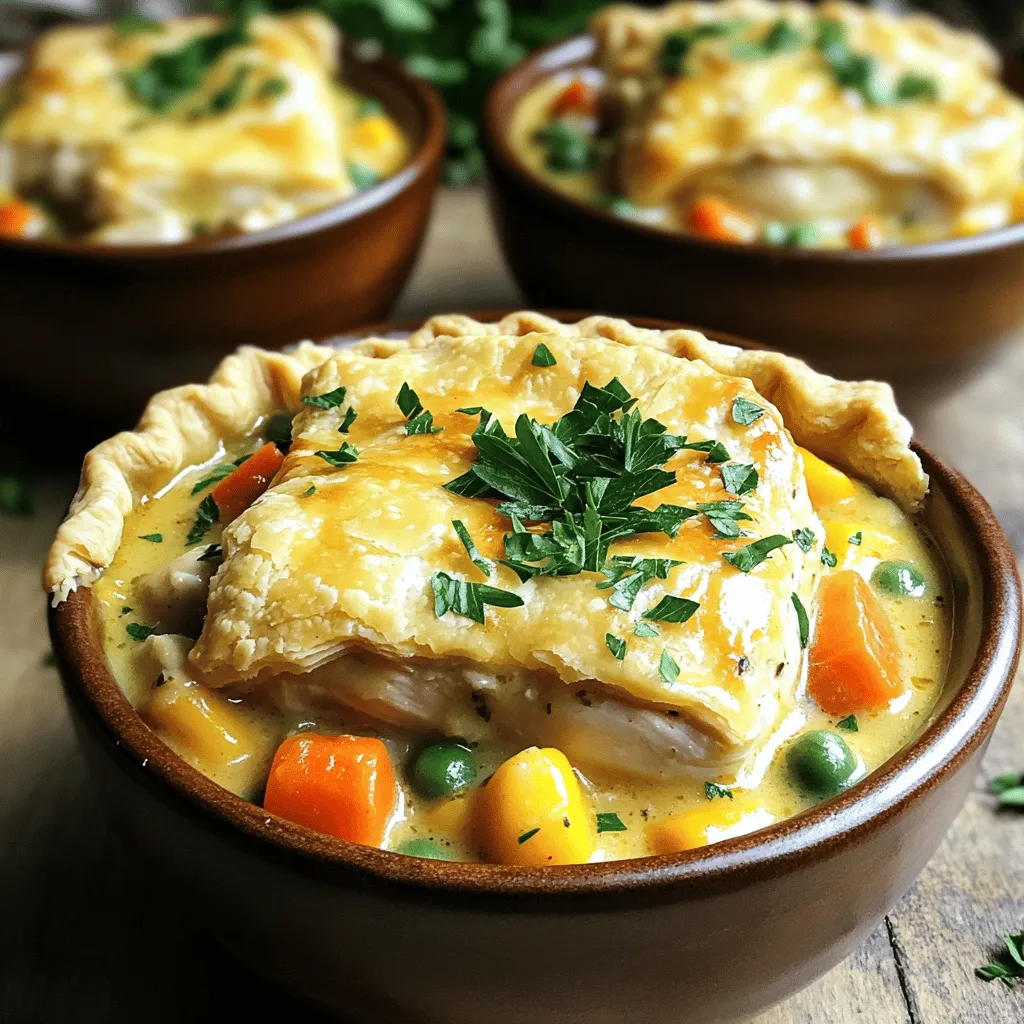
Craving comfort food that’s easy and tasty? My Satisfying Slow Cooker Chicken Pot Pie recipe is just what you need! With tender chicken, fresh veggies, and a creamy filling, it …

Read more

Categories Dinner

Pumpkin Bars with Brown Sugar Frosting Irresistible Treat

August 7, 2025 by Chef Luca
- 1 cup pumpkin puree (canned or fresh) - 1 cup granulated sugar - 1/2 cup brown sugar - 1/2 cup vegetable oil - 2 large eggs - 1 teaspoon vanilla extract - 1 1/2 cups all-purpose flour - 1 teaspoon baking powder - 1 teaspoon baking soda - 1 teaspoon ground cinnamon - 1/2 teaspoon ground nutmeg - 1/4 teaspoon ground ginger - 1/4 teaspoon salt - 1/2 cup butter, softened - 1 cup brown sugar - 1/4 cup milk - 2 cups powdered sugar - 1 teaspoon vanilla extract - 9x13 inch baking pan - Mixing bowls - Whisk and spatula - Saucepan for frosting When making pumpkin bars, you’ll need some key items. First, the pumpkin puree is essential. It gives the bars a rich flavor and moistness. You can use canned or fresh pumpkin. Both work well. Next, the sugars add sweetness. I like to combine granulated sugar and brown sugar for depth. The brown sugar brings a hint of caramel flavor. You also need vegetable oil for moisture and eggs to bind everything together. For spices, ground cinnamon, nutmeg, and ginger create that classic fall flavor. The flour, baking powder, and baking soda help the bars rise and stay fluffy. Don’t forget the salt! It balances the sweetness. Now, onto the frosting. You need butter and brown sugar, which create a creamy texture. Milk helps to make it smooth. Finally, powdered sugar adds sweetness and thickness. Before you start baking, gather all these ingredients and equipment. This will make the process smoother. If you're curious about the full recipe, check out the [Full Recipe]. 1. Preheat your oven to 350°F (175°C). This step is key for even baking. 2. In a large mixing bowl, combine these wet ingredients: - 1 cup pumpkin puree (canned or fresh) - 1 cup granulated sugar - 1/2 cup brown sugar - 1/2 cup vegetable oil - 2 large eggs - 1 teaspoon vanilla extract Mix these until they are smooth and well-blended. 3. In another bowl, mix the dry ingredients: - 1 1/2 cups all-purpose flour - 1 teaspoon baking powder - 1 teaspoon baking soda - 1 teaspoon ground cinnamon - 1/2 teaspoon ground nutmeg - 1/4 teaspoon ground ginger - 1/4 teaspoon salt Whisk well to combine. 4. Gently add the dry mix to the wet mix. Stir until just combined. Do not overmix; the batter should be thick and smooth. 5. Pour the batter into a greased 9x13 inch baking pan. Spread it evenly. 6. Bake for 25-30 minutes. Check doneness by inserting a toothpick. It should come out clean. Let the bars cool in the pan on a wire rack. 7. While the bars cool, melt 1/2 cup butter and 1 cup brown sugar in a saucepan over medium heat. Stir continuously. 8. Add 1/4 cup milk and bring to a boil. Then, remove from heat and let it cool slightly. 9. Gradually whisk in 2 cups powdered sugar and 1 teaspoon vanilla extract until smooth and fluffy. 10. Once the bars are cool, spread the brown sugar frosting evenly on top. Now, cut into squares and serve. For the full recipe, check the section above. To get the best pumpkin bars, ensure your pumpkin puree is not too watery. If it is, your bars may turn out soggy. Drain any excess liquid before using it. Also, avoid overmixing the batter. Gently stir the wet and dry ingredients together until just combined. This will help keep your bars light and fluffy. When making your brown sugar frosting, let the mixture cool slightly after boiling. This keeps the frosting from melting when you spread it on the bars. You can also adjust the sugar in the frosting. If you want it sweeter or less sweet, simply add more or less powdered sugar to your taste. For a lovely presentation, serve your pumpkin bars on a decorative platter. A simple dusting of cinnamon adds a nice touch. You can also garnish with pumpkin seeds or chopped pecans. This adds a nice crunch and enhances the overall look. For the full recipe, check out the complete guide! {{image_2}} You can change up the flavor of your pumpkin bars easily. Here are a few fun ideas: - Add chocolate chips: Fold in a cup of semisweet chocolate chips for a rich taste. - Include nuts: Toss in half a cup of chopped walnuts for crunch and flavor. - Experiment with spices: Try adding cloves or allspice instead of just cinnamon. This adds warmth and depth. These small changes can make your pumpkin bars unique and exciting! If you want to switch up the frosting, consider these options: - Cream cheese frosting: This adds a tangy flavor. Mix 8 oz of cream cheese with 1/2 cup of butter, 3 cups of powdered sugar, and vanilla. - Maple syrup glaze: Mix 1 cup of powdered sugar with 2 tablespoons of maple syrup and a bit of milk. This offers a sweet, fall-inspired twist. These alternatives can give your pumpkin bars a whole new personality! You can also make the recipe fit different diets with these swaps: - Coconut oil: Replace vegetable oil with coconut oil for a slight coconut flavor. It adds nice richness. - Gluten-free flour: Use a 1:1 gluten-free flour blend instead of all-purpose flour. This way, everyone can enjoy your treat. With these variations, your pumpkin bars can cater to different tastes and dietary needs, making them a hit for any gathering! For the full recipe, check out the details above. Keep your pumpkin bars covered at room temperature for 3-4 days. This helps keep them soft and moist. For long-term storage, refrigerate the bars in an airtight container. They will last up to a week. You can also freeze them for up to 3 months. You can freeze them either unfrosted or frosted. Just make sure to wrap them well. To enjoy your pumpkin bars warm, just warm them in the microwave for a few seconds. They taste great cold or at room temperature too. You can find the Full Recipe for more details. Yes, you can use homemade pumpkin puree instead of canned. Fresh pumpkin has a great taste. To make puree, cook the pumpkin until soft, then blend it. This adds a lovely texture and flavor to your bars. Cut into squares using a sharp knife for clean edges. A sharp knife helps keep the frosting intact. For best results, cut when the bars are completely cool. This way, you get nice, even pieces that look great on a plate. Absolutely! These bars can be made a few days in advance and stored. Keep them in an airtight container at room temperature. This helps the flavors develop even more. You can frost them right before serving for a fresh look. You can use coconut sugar or a mixture of granulated sugar and molasses. Coconut sugar gives a caramel-like taste. If you use granulated sugar, mix it with molasses in a 1:1 ratio. This makes a great substitute for brown sugar in the frosting. These pumpkin bars are simple to make and taste great. You learned about the key ingredients, how to bake them, and tips for the best texture. Variations let you change flavors, and storage ideas help keep them fresh longer. Feel free to try new frostings or add mix-ins like chocolate chips or nuts. Enjoy the joy of creating your own delicious pumpkin bars!

If you’re craving a sweet autumn treat that’s simple to make, you’re in the right place! These Pumpkin Bars with Brown Sugar Frosting are sure to delight your taste buds. …

Read more

Categories Desserts

How To Make Mexican Street Corn A Flavorful Delight

August 7, 2025 by Chef Luca
To make Mexican street corn, you will need: - 4 ears of fresh corn, husked - 1/2 cup mayonnaise - 1/2 cup sour cream - 1 cup crumbled Cotija cheese - Salt and pepper to taste These ingredients shine together, creating a rich and creamy base. Fresh corn is key. It gives the dish a sweet crunch. Mayonnaise and sour cream blend to create a smooth sauce. Cotija cheese adds a salty kick that balances the flavors. You can also enhance your corn with: - 1 teaspoon chili powder - 1/4 teaspoon cayenne pepper (optional) - 1/4 cup fresh cilantro, chopped - 2 tablespoons lime juice - Lime wedges for serving Chili powder and cayenne pepper give the corn a spicy twist. Fresh cilantro adds a burst of color and freshness. Lime juice brings a zesty brightness that ties everything together. Feel free to mix and match these optional ingredients based on your taste. For the full recipe, check out the detailed instructions to create this flavorful delight. Husk and Clean the Corn Start by husking the corn. Remove all the green leaves and silk strands. You want clean corn for grilling. Rinse the corn under cold water to wash off any dirt. This step keeps your corn fresh and tasty. Preheating the Grill Next, preheat your grill to medium-high heat. This is important for even cooking. A hot grill gives the corn nice char marks. It should take about 10 minutes to heat up. You can test the heat by holding your hand above the grill. If you can hold it there for two seconds, it’s ready. Placement and Cooking Time Place the corn directly on the hot grill. Space them out, so they don’t touch. Grill for about 10 to 12 minutes. Turn the corn every few minutes. This helps it cook evenly. You want those beautiful grill marks! Signs of Doneness The corn is done when it is tender and has nice char marks. You can check by poking a kernel with a fork. It should feel soft. If it’s hard, leave it on the grill a little longer. Mixing the Mayo-Sour Cream Mixture In a bowl, combine mayonnaise and sour cream. Add chili powder and lime juice. If you like heat, add cayenne pepper. Mix until smooth. This sauce gives the corn its creamy goodness. Adjusting Spices to Taste Taste the sauce. If you want more flavor, add salt and pepper. You can also add more lime juice for extra zing. Adjust it until you love the taste. This sauce is key for the perfect Mexican street corn. Now, you’re ready to enjoy this flavorful delight! For the full recipe, check out the details above. - Optimal Grill Temperature: Set your grill to medium-high heat. This helps the corn cook evenly and get nice grill marks. Too low, and it will take longer, too high, and you risk burning it. - Techniques for Even Grilling: Turn the corn every few minutes. This ensures all sides get that perfect char. Use tongs to handle the corn easily. Make sure to grill for about 10-12 minutes. Look for a nice golden color and tender kernels. - Pairing with Lime Wedges: Serve your corn with lime wedges. Squeezing fresh lime juice adds a bright zing. The acidity cuts through the richness of the mayo-sour cream mixture. - Presentation Tips: Place the corn on a wooden board or a colorful plate. Sprinkle extra Cotija cheese and cilantro on top for a beautiful finish. A vibrant display makes the dish even more tempting. - Adjusting Heat Levels: If you like spice, add more cayenne pepper to the mayo-sour cream mixture. You can also try different chili powders for unique flavors. Adjust according to your taste! - Adding Other Toppings: Feel free to experiment! Try adding diced jalapeños for heat, or crumbled bacon for a savory crunch. You can also mix in diced avocado for creaminess. This recipe is flexible, so make it your own! {{image_2}} You can make Mexican street corn without dairy. Use plant-based mayo and yogurt instead. These swaps keep the creamy texture while keeping it vegan. You can try cashew cream or almond yogurt for a richer taste. For added flavor, mix in smoked paprika or garlic powder. These small changes give your corn a new twist. Different regions have unique styles of elote. In some areas, street vendors add spicy salsa or avocado. Others use different cheeses, like feta or queso fresco. You can also try toppings like diced tomatoes or pickled onions. These ingredients add local flair and new flavors to your corn. You can explore local farmers' markets for fresh, seasonal produce. This adds a unique touch to your Mexican street corn. Enjoy creating your own version! For the full recipe, check out the details above. To store your leftover Mexican street corn, place it in an airtight container. This keeps it fresh. You can also wrap it in plastic wrap. Store it in the fridge right away. - Refrigeration Guidelines: Make sure it cools down first before storing. This helps keep the flavors intact. - Duration of Freshness: You can keep it in the fridge for about 3 to 5 days. After that, it may lose its taste and texture. When it comes to reheating, you want to keep the corn tasty. - Best Methods for Reheating: The best way to reheat is on the grill or in a skillet. Heat it on medium-low heat. This brings back that grilled flavor. - Avoiding Soggy Corn: If you use the microwave, be careful. Heat it for short bursts. This way, you avoid soggy corn. Always check it to see if it’s warm enough. You can enjoy your delicious Mexican street corn again! For the full recipe, check out the complete guide. Mexican street corn, or elote, is a tasty dish made with grilled corn. It comes from Mexico and is a popular street food. Vendors grill the corn on the cob and coat it with creamy sauce, cheese, and spices. The mix of flavors and textures makes it a delight. You get sweetness from the corn and tang from the sauce. Street corn is a fun way to enjoy corn and a great side dish or snack. Yes, you can use frozen corn if fresh corn isn’t available. Just thaw the corn first. Frozen corn may not have the same smoky flavor as grilled fresh corn. For the best results, try to grill the corn for added taste. If you can’t grill, sauté the thawed corn in a hot pan. This helps bring out its natural sweetness. To add heat, use cayenne pepper in the sauce. You can also sprinkle extra chili powder on top. If you want more spice, consider adding sliced jalapeños or hot sauce. Adjust the heat to your liking. Tasting as you go helps you find the perfect level of spice. Mexican street corn pairs well with many dishes. Try it with grilled meats like chicken or steak. It also goes great with tacos or quesadillas. For drinks, serve it with cold Mexican beer or fresh limeade. This adds a refreshing touch to your meal. Don’t forget to enjoy it with friends! For the full recipe, check out the [Full Recipe]. Grilled Mexican street corn is a tasty treat made with fresh corn, creamy sauce, and spices. You learned how to prepare and grill the corn to perfection and customize it with various toppings. Don't forget to try different flavors or serve it with lime for extra zest. Experiment with vegetarian or vegan options if you prefer. With a few tips for storage and reheating, you can enjoy this dish anytime. Now, it's time to fire up the grill and enjoy your delicious creation!

If you crave a burst of flavor, Mexican street corn—also known as elote—is your answer! This simple dish takes fresh corn and transforms it into a mouthwatering delight. With a …

Read more

Categories Appetizers
Older posts
Newer posts
← Previous Page1 … Page50 Page51 Page52 … Page122 Next →

STIRRED RECIPES

Where every dish begins with a stir! 🍲✨

PAGES

Home About Contact Privacy Policy Terms & Conditions Cookie Policy GDPR Policy Copyright Policy Disclaimer

CATEGORIES

Appetizers Desserts Salads Breakfast Dinner

Contact

  • Pinterest
  • Mail
Copyright © 2026 Stirred Recipes. All rights reserved.