Skip to content
Stirred Recipes
  • Home
  • Appetizers
  • Desserts
  • Salads
  • Breakfast
  • Dinner
  • Privacy Policy
  • Contact
  • About

Chef Luca

Biscuit-Top Chicken Pot Pie Comfort Food Delight

November 13, 2025August 9, 2025 by Chef Luca
- 2 cups cooked chicken, shredded - 1 cup carrots, diced - 1 cup frozen peas - 1 cup celery, diced - 1 medium onion, chopped - 3 tablespoons butter - 3 tablespoons all-purpose flour - 2 cups chicken broth - 1 cup whole milk - 1 teaspoon garlic powder - 1 teaspoon dried thyme - Salt and pepper to taste - 1 can refrigerated biscuit dough - Fresh herbs (parsley, rosemary) - Additional vegetables (potatoes, corn) - Cheese (cheddar or mozzarella) To make the best biscuit-top chicken pot pie, gather these key ingredients. I love using fresh chicken for a rich flavor. Shred it into bite-sized pieces. Diced carrots, peas, and celery add color and crunch. The onion brings a sweet taste when cooked. Butter and flour create the roux, which thickens the filling. Chicken broth and milk help make it creamy. Garlic powder and thyme add depth to the dish. Lastly, salt and pepper bring all the flavors together. For extra flavor, you can add fresh herbs like parsley or rosemary. If you want more veggies, try adding potatoes or corn. A sprinkle of cheese on top makes it even more tasty. These ingredients work together to create a warm, comforting dish that feels like a hug on a plate. {{ingredient_image_1}} To start, you need to shred the chicken. This gives the pot pie a nice texture. I use cooked chicken, which makes it quick. You can use leftovers or store-bought rotisserie chicken. Just be sure to pull it apart into small pieces. Next, you need to dice your vegetables. For this recipe, we use carrots, celery, and onion. I like to cut them into small bits. This helps them cook evenly and blend well in the filling. Now it's time to cook the filling. First, melt three tablespoons of butter in a skillet over medium heat. When the butter is bubbling, add the chopped onion, carrots, and celery. Sauté these for about five to seven minutes. You want them soft but not mushy. Next, it's time to create the roux. Sprinkle in three tablespoons of flour. Stir it for one minute. This will help thicken your filling later. Then, slowly whisk in two cups of chicken broth and one cup of whole milk. Keep stirring until there are no lumps. Let it cook for about three to five minutes. The mixture should thicken nicely. Now, add in the shredded chicken, one cup of frozen peas, one teaspoon of garlic powder, one teaspoon of dried thyme, and salt and pepper to taste. Mix it all well and take it off the heat. Pour the chicken mixture into a nine-inch pie dish. You want it to be evenly spread. Now, open the can of refrigerated biscuit dough. Separate the biscuits and arrange them on top of the chicken. Slightly overlap them for a nice look. Bake in the preheated oven at 425°F for 20 to 25 minutes. You want the biscuits to turn golden brown and be cooked through. After baking, let the pot pie cool for a few minutes. Then, it’s ready to serve! Choosing the right biscuit dough is key. I recommend using refrigerated dough. It saves time and still tastes great. Look for a brand that has a flaky texture. This helps create a nice rise when baking. To achieve golden biscuits, follow these tips: - Brush the tops with melted butter or milk before baking. - Bake at the right temperature. Set your oven to 425°F (220°C). - Do not crowd the biscuits; leave space for them to expand. Seasoning is crucial for a tasty filling. Use salt and pepper to enhance the flavors. Add garlic powder and dried thyme for more depth. You can also include fresh herbs if you have them. They bring a bright taste. When it comes to broth, you have options. Homemade broth gives great flavor. If you're short on time, store-bought works well too. Just choose a low-sodium version. This way, you can control the saltiness of your dish. Every oven is different. You may need to adjust cooking times. Keep an eye on your pot pie. It should bake for 20-25 minutes. If your biscuits are not golden after 25 minutes, let it bake a bit longer. To know when the dish is done, look for these signs: - The biscuits should be golden brown. - The filling should bubble around the edges. - A knife inserted should come out clean. Pro Tips Use Rotisserie Chicken: For a quicker option, use store-bought rotisserie chicken to save time on cooking and shredding. Customize Veggies: Feel free to add or substitute your favorite vegetables like corn, green beans, or bell peppers for a personal touch. Make it Creamier: For an extra creamy filling, add a splash of heavy cream or sour cream to the chicken mixture before baking. Check Biscuit Doneness: If the biscuits are browning too quickly, cover the pot pie with aluminum foil for the last few minutes of baking. {{image_2}} You can switch the chicken for other proteins. Try using turkey for a holiday twist. Ground beef also works well, giving a hearty flavor. If you want a meatless option, lentils are a great choice. They add protein and texture. You can use 1 cup of cooked lentils in place of chicken. This keeps your pot pie filling and satisfying. For a veggie version, swap the chicken for plant-based alternatives. You can use 2 cups of your favorite vegetables. Good options include mushrooms, zucchini, or bell peppers. A mix of carrots, peas, and corn also adds color. I love adding spinach for a burst of green. This way, your pot pie remains rich and tasty without meat. If you want a Southern-style pot pie, add some spices. A pinch of cayenne pepper or paprika gives it a nice kick. You can also use fresh herbs like parsley or thyme for extra flavor. For a gourmet twist, include creamy mushrooms. Sauté 1 cup of sliced mushrooms in butter before adding them to the filling. This adds depth and richness to your dish. To keep your biscuit-top chicken pot pie fresh, store it in the fridge. Place leftovers in an airtight container. This helps keep moisture in and prevents odors from other foods. Use glass or plastic containers with tight lids. They fit well in your fridge. When it’s time to eat again, you want your pot pie warm and tasty. The best way to reheat is in the oven. Preheat the oven to 350°F (175°C). Cover the dish with foil for even heating. Bake for about 15-20 minutes. This keeps the biscuits nice and crisp. If you use a microwave, heat in short bursts. Check every minute. The texture may not be as good as oven reheating. You can freeze your pot pie if you want to save it for later. You can freeze it before or after baking. If freezing before baking, wrap the dish tightly in plastic wrap and then foil. This helps prevent freezer burn. To freeze after baking, let it cool completely first. Then, wrap it well in plastic wrap. Store it in a freezer-safe container. To thaw, place the frozen pot pie in the fridge overnight. This helps it thaw slowly and evenly. If you’re in a hurry, you can thaw it in the microwave. Just be careful to not heat it too much. Yes, you can use frozen chicken. Just make sure to cook it first. You can boil or bake it until fully cooked. Shred it before adding it to the filling. This method saves time and works well. To thicken the filling, add more flour when making the roux. You can also cook it longer. Stir it often to prevent lumps. If it’s still too runny, try adding cornstarch mixed with water. This will help it set up nicely. If you can’t find biscuit dough, use puff pastry or homemade biscuit dough. You can also use croissants for a flaky topping. Just cut them into pieces and place them on top before baking. Leftover chicken pot pie lasts about 3 to 4 days in the fridge. Store it in an airtight container. This keeps it fresh and tasty for your next meal. Yes, you can make this dish in advance. Prepare the filling and store it in the fridge. You can also assemble the pie and keep it unbaked. Just bake it when you're ready to eat. This way, you have a warm meal ready in no time. This blog post covered a delicious chicken pot pie recipe, detailing ingredients, steps, and tips. You learned how to prep your filling, achieve the perfect biscuit topping, and explore variations. Storing leftovers and reheating were also discussed for your convenience. Embrace your creativity in the kitchen. Experiment with flavors, and enjoy the warm comfort of your homemade pot pie. Remember, cooking should be fun and rewarding!

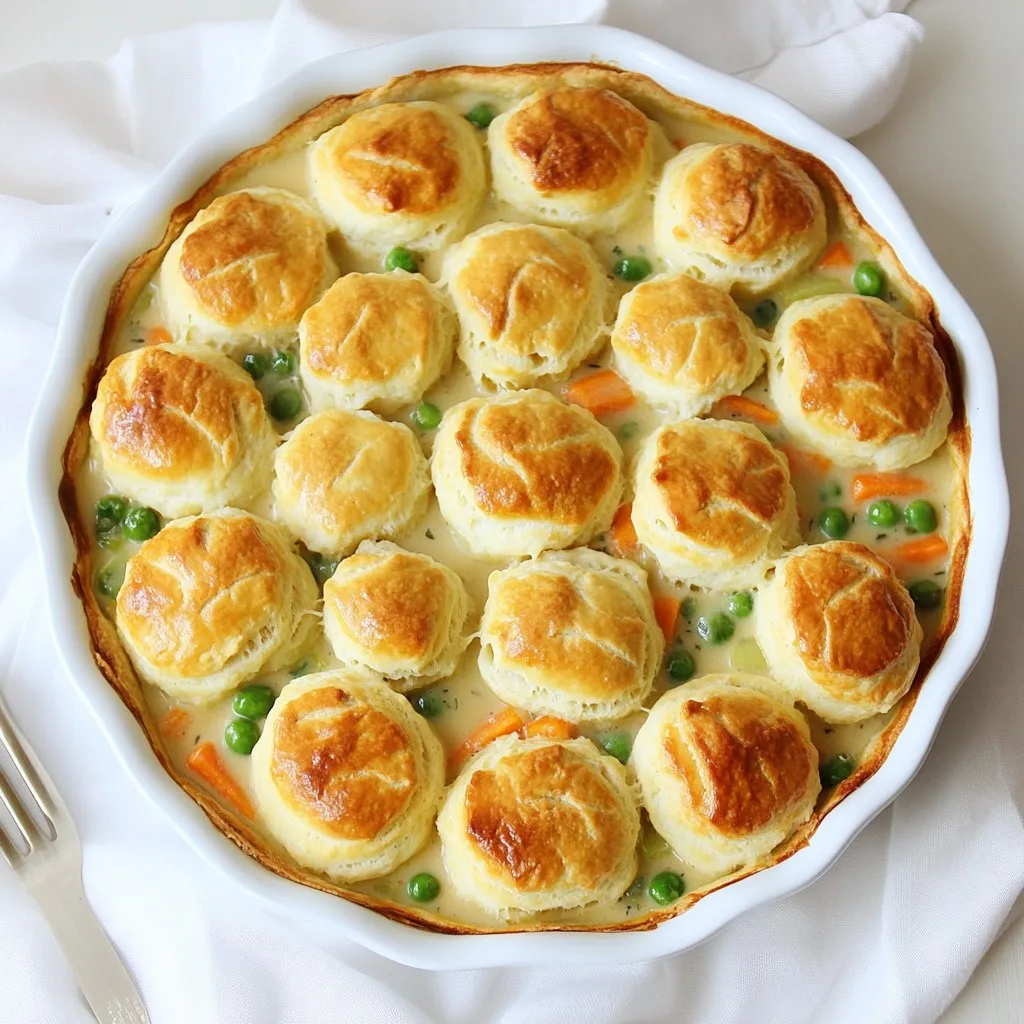
Craving comfort food? Look no further than my Biscuit-Top Chicken Pot Pie! This dish combines tender chicken, fresh veggies, and a flaky biscuit topping for a warm hug in a …

Read more

Categories Dinner

Crockpot Baked Ziti Perfectly Cheesy Comfort Meal

August 8, 2025 by Chef Luca
- 12 oz ziti pasta - 3 cups marinara sauce (homemade or store-bought) - 2 cups ricotta cheese - 2 cups mozzarella cheese, shredded - 1 cup grated Parmesan cheese - 1 tablespoon Italian seasoning - 1 teaspoon garlic powder - 1/2 teaspoon crushed red pepper flakes (optional) - 1/2 teaspoon salt - 1/2 teaspoon black pepper - 1 1/2 cups water - Fresh basil leaves for garnish (optional) When you gather your ingredients for Crockpot Baked Ziti, you want to make sure everything is fresh and flavorful. Start with ziti pasta. It holds sauce well and has a nice bite. Choose marinara sauce that excites your taste buds, whether homemade or from a jar. Next, ricotta cheese adds creaminess. Make sure to use good quality mozzarella cheese for that stretchy, melty goodness. Grated Parmesan cheese gives it a punch of flavor. Don’t forget the spices. Italian seasoning brings warmth, while garlic powder adds depth. If you like a little kick, add crushed red pepper flakes. Salt and black pepper round out the taste. Lastly, you need 1 1/2 cups of water. This helps the pasta cook just right in the crockpot. Fresh basil leaves can be a lovely finish. They add color and a fresh taste. With these ingredients, you're on your way to a cheesy, comforting meal. For the full recipe, check out the complete details! Start by boiling 12 oz of ziti pasta in salted water for about 5 minutes. You want it to be al dente, meaning it has a bit of bite to it. This pasta will cook more in the crockpot. After boiling, drain the pasta and set it aside. In a large bowl, mix together 2 cups of ricotta cheese, half of the mozzarella cheese, and half of the Parmesan cheese. Add 1 tablespoon of Italian seasoning, 1 teaspoon of garlic powder, and a pinch of salt and pepper. If you like heat, toss in 1/2 teaspoon of crushed red pepper flakes. Stir everything until well combined. This cheese mixture adds creaminess and flavor to your baked ziti. Now it's time to layer everything in the crockpot. Start by spreading a thin layer of 3 cups of marinara sauce on the bottom. Next, place half of the cooked ziti over the sauce. Add dollops of the ricotta mixture and then more marinara sauce. Repeat this layering process with the remaining ziti and cheese mixture. To ensure the pasta cooks evenly, pour 1 1/2 cups of water around the edges of the crockpot. This helps the pasta absorb moisture as it cooks. Finally, top the last layer with the remaining mozzarella and Parmesan cheese. Now you are ready to cook! Cover the crockpot and set it to low for 4-6 hours or high for 2-3 hours. The cheese should be bubbly and golden, and the pasta will be perfectly cooked. For the full recipe, refer to the details provided above. Enjoy your cheesy comfort meal! To avoid mushy pasta, cook the ziti just until al dente. This means it should still have a slight bite. Remember, the pasta will cook more in the crockpot. Balancing moisture levels is key. Add water around the edges of your crockpot. This helps the ziti cook evenly without soaking up too much sauce. To boost flavor, consider adjusting the seasoning. You can add a bit more garlic powder or Italian seasoning if you like. It makes the dish pop more. Using homemade marinara sauce can elevate your dish. Fresh herbs and ripe tomatoes add depth. However, a good store-bought sauce works well too when you’re in a hurry. Baked ziti pairs well with a simple side salad. A crisp green salad with vinaigrette complements the rich flavors. If you have leftovers, they make great meals! Reheat them for lunch or dinner. You can even turn them into baked ziti stuffed peppers. Just scoop some into halved peppers and bake until warmed through. For the full recipe, check out the details above. Enjoy making your Crockpot Baked Ziti a hit! {{image_2}} You can add ground beef, sausage, or chicken to your baked ziti. This gives the dish a hearty flavor. Ground beef works well. Sausage adds spice, and chicken keeps it light. Each meat changes the taste and texture. When you add meat, the cooking time may change. If you use raw meat, cook on high for 3-4 hours or low for 6-8 hours. If you use pre-cooked meat, you can shorten the time. Just ensure it heats through. If you prefer a meatless meal, you can use veggies instead. Spinach, mushrooms, or zucchini are great choices. They add flavor and nutrition. You can even mix in beans for protein. This keeps your dish filling while being fresh and healthy. Try to chop the veggies small, so they blend well with the pasta. Cooking time stays the same, making it easy to switch. For gluten-free baked ziti, use gluten-free pasta. Many brands now offer tasty options. Just make sure to check the package for cooking times. Gluten-free pasta can cook faster or slower than regular pasta. Adjust the water, too. You might need a bit more liquid to help with cooking. Follow the recipe closely, and you’ll have a delicious dish for everyone to enjoy. To keep your baked ziti fresh, store it in an airtight container. This helps prevent the dish from drying out. You can refrigerate it for up to 3 to 4 days. Make sure to let it cool before sealing it tight. This way, the steam won’t build up inside the container. If you need to save your baked ziti for later, freezing is a great option. First, let the dish cool completely. Then, cut it into portions. Wrap each portion tightly in plastic wrap, and then put it in a freezer-safe bag. It will stay good for about 2 to 3 months. To reheat frozen ziti, take it out of the freezer and let it thaw in the fridge overnight. You can heat it in the oven at 350°F (175°C) for about 30 minutes. Cover it with foil to keep it moist. If you’re in a rush, you can also microwave individual portions for a quick meal. For the full recipe, check out the Crockpot Baked Ziti Delight! Enjoy your cheesy comfort meal anytime you want! Crockpot Baked Ziti takes about 4 to 6 hours on low. If you use the high setting, it cooks in 2 to 3 hours. The slow heat gives all the flavors time to blend. Yes, you can make it ahead. Prepare all the layers and store them in the fridge. Just layer it in the crockpot when ready to cook. You can also freeze it. Just be sure to thaw it before cooking. You can use cottage cheese or cream cheese as a substitute for ricotta. Both options add creaminess but change the flavor a bit. Cottage cheese gives a lighter texture, while cream cheese offers a richer taste. You should cook the pasta until it's al dente. Cooking it briefly helps it stay firm. It will absorb moisture and cook fully in the crockpot. This keeps the pasta from becoming mushy and ensures a great texture. In this blog post, we explored a simple recipe for Crockpot Baked Ziti. We covered the ingredients, cooking steps, and tips to enhance flavor. You learned about storage options and how to adapt the recipe to your taste. Crockpot Baked Ziti is easy to make and offers many variations. With this guide, you can create a delicious meal that suits your needs. Enjoy sharing this tasty dish with friends and family!

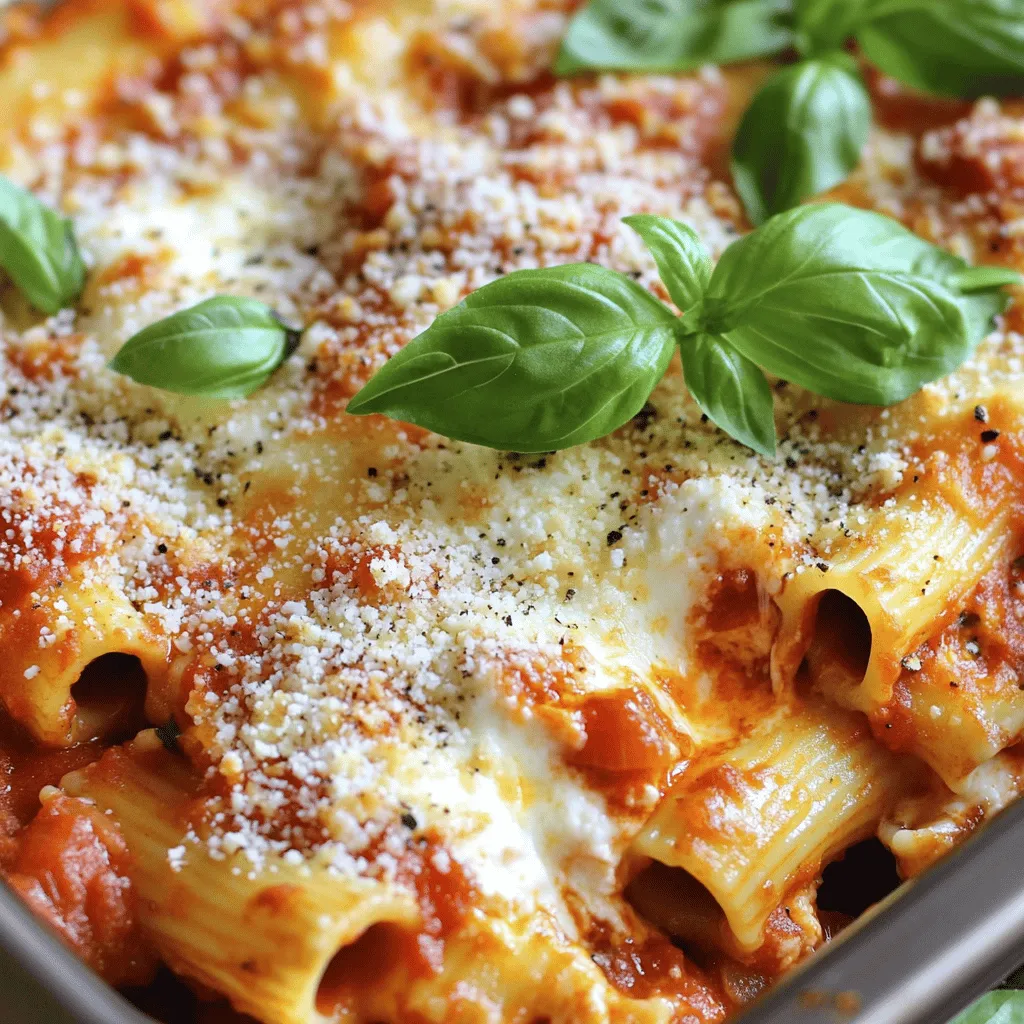
If you’re craving a warm, cheesy meal that requires minimal effort, look no further! Crockpot Baked Ziti combines al dente pasta, rich marinara, and a trio of cheeses for a …

Read more

Categories Dinner

Pumpkin Brown Sugar Shaken Espresso Flavorful Delight

August 8, 2025 by Chef Luca
- 2 shots of espresso or strong brewed coffee - 2 tablespoons pumpkin puree - 1 tablespoon brown sugar - 1/2 teaspoon pumpkin spice (or a mix of cinnamon, nutmeg, and ginger) - 1/2 cup milk (dairy or non-dairy) - Ice cubes Each ingredient plays a key role in the drink's flavor. The espresso gives a strong base. Pumpkin puree adds creaminess and a rich taste. Brown sugar sweetens the drink, giving it that warm, caramel-like flavor. Pumpkin spice brings a cozy aroma, perfect for fall. Milk rounds out the drink with a smooth texture. Ice keeps it cool and refreshing. - Whipped cream (optional for topping) - Additional pumpkin spice for garnish Adding whipped cream makes the drink feel like a treat. You can also sprinkle more pumpkin spice on top for extra flavor. If you want to switch things up, try flavored syrups like vanilla or caramel. For milk, use oat, almond, or soy for a different taste. Each type adds its unique flavor and texture. Experiment to find your favorite! - Espresso machine or coffee maker - Shaker - Glass for serving - Frother (optional) An espresso machine helps you make rich shots. If you don’t have one, a coffee maker works too. A shaker is key for mixing your ingredients well. You can serve your drink in any glass you like. A frother is fun for creating that creamy milk texture, but it’s not a must. You can shake the milk in a jar if you don't have one. To make the best Pumpkin Brown Sugar Shaken Espresso, start by brewing strong coffee. You can use espresso or strong brewed coffee based on your taste. Here are some tips: - Use fresh coffee beans for the best flavor. - Grind the beans just before brewing. - Aim for a coffee to water ratio of 1:2 for a strong brew. For espresso, here are some tips to achieve the perfect shot: - Use about 18-20 grams of coffee for double shots. - Tamp the coffee evenly and firmly in the portafilter. - Brew for about 25-30 seconds for the best flavor and crema. Now that you have brewed coffee, let it cool slightly. This step is key to getting the best flavor. Here’s how to mix your drink: 1. In a shaker, combine your pumpkin puree, brown sugar, pumpkin spice, and the cooled espresso. 2. Fill the shaker with ice cubes. 3. Secure the lid tightly and shake vigorously for about 15-20 seconds. This helps blend the flavors and chill the drink. Shaking is important. It creates a frothy texture and mixes the ingredients well. Presentation matters when serving this drink. Here are some tips: - Use a clear glass to show off the layers. - Pour frothed milk slowly over the espresso mix. This creates a beautiful layered look. - Top with whipped cream if you like and add a sprinkle of pumpkin spice for garnish. For food pairings, consider these ideas: - Serve with a slice of pumpkin bread. - Pair with a warm cinnamon roll for a cozy treat. This Pumpkin Brown Sugar Shaken Espresso is not just a drink; it’s an experience. Enjoy every sip of this flavorful delight! For the full recipe, check the earlier sections. To make a great Pumpkin Brown Sugar Shaken Espresso, watch out for common mistakes. One mistake is not cooling your espresso before shaking. Hot espresso can melt the ice quickly, making your drink watery. Let it cool for a few minutes. You can adjust the sweetness and spice levels easily. If you want a sweeter taste, add more brown sugar. For a spicier kick, increase the pumpkin spice. Try tasting as you mix, so you find your perfect blend. Frothing milk can be tricky. If you want smooth, thick foam, use a frother. You can also shake milk in a jar until frothy. Just be careful not to shake too hard or it may spill. To achieve the ideal texture, pour the frothed milk slowly. This will help create that lovely layered look. If your milk is too thick, try using less milk or frothing it less. You can adapt this recipe for different seasons. In summer, try making it iced with cold brew coffee. For winter, add peppermint extract for a festive twist. During the holidays, mix in some eggnog instead of milk. This adds a rich flavor that pairs well with pumpkin. You can also swap in different spices, like allspice or cloves, for a unique taste. For the full recipe, check out the main article! {{image_2}} You can use many spice blends to change the flavor of your drink. Try adding cardamom for a warm kick or allspice for a sweet touch. Each of these spices brings a unique profile. You can create a blend that speaks to your taste. For example, a dash of cayenne can add heat, while vanilla can give sweetness. To serve this drink hot, brew your espresso as you usually would. After that, mix it with pumpkin puree and sugar in a cup. Heat the milk gently on the stove or in the microwave, and pour it in. For iced versions, follow the recipe, but use cold milk. Fill your glass with ice first, then pour the shaken espresso mixture over it. This keeps your drink cool and refreshing. If you want a non-dairy drink, use almond, oat, or coconut milk instead of regular milk. All these options taste great and change the flavor. For toppings, you can look for vegan whipped cream made from coconut or soy. You can also sprinkle cinnamon or cocoa on top for an extra touch. These swaps make the drink tasty and inclusive for everyone. You can prepare some parts of this drink in advance. Brew your espresso and let it cool. Store it in an airtight container in the fridge for up to three days. Pumpkin puree and brown sugar mix well, too. You can blend them ahead of time and keep them in the fridge. Just note, it’s best to add pumpkin spice right before you shake. If you have leftovers, store them in a sealed container for up to two days. Freezing espresso is possible but may change its taste and texture. If you freeze it, pour the espresso into ice cube trays. This way, you can use them later in smoothies or cold drinks. For milk, freezing is trickier. When thawed, it can separate. If you must freeze it, use it in smoothies rather than in this drink. Always thaw slowly in the fridge to keep as much flavor as possible. Most of your ingredients have a good shelf life. Espresso is best used fresh, but brewed coffee lasts about three days in the fridge. Pumpkin puree can last about a week in the fridge once opened. Brown sugar stays good for months if sealed well. Milk, whether dairy or non-dairy, lasts about a week after opening. Always check for freshness before using. Pumpkin Brown Sugar Shaken Espresso is a coffee drink that mixes espresso, pumpkin puree, brown sugar, and spices. It has roots in the popular fall flavors that many love. This drink offers a sweet and spicy blend, perfect for cozy days. The drink became popular as coffee chains introduced pumpkin flavors in the fall. It adds a twist to the classic espresso, making it a delightful treat. Yes, you can! If you don't have espresso, you can use strong brewed coffee instead. Aim for a coffee with a bold flavor. Cold brew is another option to get a similar taste. Brew your coffee strong to match the espresso's richness. This way, you still enjoy the pumpkin and spice flavors. When ordering at coffee shops, simply ask for a Pumpkin Brown Sugar Shaken Espresso. If you want a less sweet drink, request less brown sugar. You can also ask for extra pumpkin spice for a stronger flavor. Many shops offer different milk options, so choose your favorite. If you prefer it hot, ask the barista if they can make it that way. This drink offers some nutritional benefits. Here are a few: - Calories: About 200 calories, depending on milk choice. - Protein: Milk adds protein, which helps you feel full. - Vitamins: Pumpkin is rich in vitamins A and C, great for your health. - Fiber: Pumpkin puree gives fiber, aiding digestion. The blend of flavors not only tastes good but can also be good for you. If you can't find pumpkin puree, you can use butternut squash puree as a substitute. It has a similar texture and flavor. Sweet potato puree also works well. Both options bring a tasty twist. Just remember that the flavor may change slightly, but it will still be delicious. You now know how to make the perfect Pumpkin Brown Sugar Shaken Espresso. We covered the main and optional ingredients, important equipment, and step-by-step brewing and shaking methods. Remember to adjust flavors to suit your taste. With tips on storage and variations, you can enjoy this drink year-round. The key is practice; you'll find your ideal mix with each try. Let's celebrate fall with this delightful drink! Enjoy every sip!

Craving a cozy fall treat to fuel your day? Look no further than my Pumpkin Brown Sugar Shaken Espresso. This flavorful delight combines bold espresso with rich pumpkin and sweet …

Read more

Categories Breakfast

Pumpkin Zucchini Bread Delicious and Easy Recipe

August 8, 2025 by Chef Luca
To make a delicious and moist pumpkin zucchini bread, gather these simple ingredients. Each one plays a key role in making this treat delightful. - Grated zucchini (1 cup, about 1 medium zucchini) - Pumpkin puree (1 cup, canned or fresh) - Vegetable oil (1/2 cup) - Brown sugar (3/4 cup) - Granulated sugar (1/2 cup) - Eggs (2 large) - Vanilla extract (2 teaspoons) - All-purpose flour (2 cups) - Baking soda (1 teaspoon) - Baking powder (1/2 teaspoon) - Ground cinnamon (1 teaspoon) - Ground nutmeg (1/2 teaspoon) - Ground ginger (1/4 teaspoon) - Salt (1/2 teaspoon) - Chopped walnuts or pecans (1/2 cup, optional) - Chocolate chips (1/2 cup, optional) Each ingredient adds flavor and moisture. The grated zucchini keeps the bread soft, while pumpkin brings a rich taste. Using a mix of sugars helps achieve the right sweetness. You can add nuts or chocolate chips to make it even more exciting! Don't forget to check the [Full Recipe] for more details. Mixing Wet Ingredients Start by grabbing a large mixing bowl. Add 1 cup of grated zucchini and 1 cup of pumpkin puree. Pour in 1/2 cup of vegetable oil, 3/4 cup of brown sugar, and 1/2 cup of granulated sugar. Crack in 2 large eggs, then add 2 teaspoons of vanilla extract. Mix everything well until it is smooth. This step blends the flavors and moisture. Combining Dry Ingredients In a separate bowl, whisk together 2 cups of all-purpose flour, 1 teaspoon of baking soda, 1/2 teaspoon of baking powder, 1 teaspoon of ground cinnamon, 1/2 teaspoon of ground nutmeg, 1/4 teaspoon of ground ginger, and 1/2 teaspoon of salt. Make sure to mix it well. This dry mix adds structure and spice to your bread. Folding in Optional Add-ins If you like, fold in 1/2 cup of chopped walnuts or pecans. You can also add 1/2 cup of chocolate chips for a sweet touch. Gently mix until just combined. Be careful not to overmix, as that keeps your bread light and fluffy. Preheating the Oven Preheat your oven to 350°F (175°C). Greasing and flouring a 9x5 inch loaf pan helps the bread release easily after baking. Pouring into Loaf Pan Pour the batter into the prepared loaf pan. Smooth the top with a spatula to ensure it bakes evenly. This helps form a nice, even crust. Baking Time and Testing for Doneness Bake the bread for 50 to 60 minutes. To check if it’s done, insert a toothpick into the center. If it comes out clean, your bread is ready. Let it cool in the pan for about 10 minutes. Then, transfer it to a wire rack to cool completely. Enjoy this delightful bread and savor its warm, cozy flavors! For the full recipe, check out the complete section above. Avoiding Overmixing When you mix your batter, do it gently. Overmixing can make your bread tough. Mix only until you see no dry flour. This keeps your bread soft and fluffy. Importance of Fresh Ingredients Always use fresh zucchini and pumpkin. Fresh ingredients bring out the best flavors. If your zucchini is soggy or old, your bread may not rise well. Freshness matters for taste and texture. Oven Temperature Accuracy Make sure your oven is at the right temperature. An oven thermometer can help. If it's too hot or too cold, your bread won't bake evenly. A correct temperature leads to a perfect loaf. Cooling and Storing Best Practices After baking, let the bread cool in the pan for 10 minutes. Then, move it to a wire rack. This helps it cool evenly. Store the bread in an airtight container. It stays fresh longer this way. You can also wrap it tightly in plastic wrap for added protection. {{image_2}} You can boost the flavor of your pumpkin zucchini bread. Try adding spices like allspice or cloves. A touch of lemon or orange zest can brighten the taste. Just a teaspoon or two will do wonders. These flavors mix well with the pumpkin and zucchini. They create a warm, cozy feeling in every bite. If you love chocolate, add chocolate chips to your bread. They melt and create a rich sweetness. You can also swap them with dried fruit or nuts. Raisins, cranberries, or even pecans work great. This change adds a different texture and flavor. Experiment to find what you like best! To make this bread gluten-free, swap all-purpose flour for a gluten-free blend. Many brands offer great options. Just make sure it has xanthan gum for the right texture. Your bread will still be soft and tasty. This way, everyone can enjoy your delicious treat. You can easily turn this recipe vegan. Replace the eggs with flax eggs. To make a flax egg, mix one tablespoon of flaxseed meal with three tablespoons of water. Let it sit for a few minutes until it thickens. You can also use plant-based oil instead of vegetable oil. This keeps the bread moist and flavorful. These simple swaps keep the spirit of the recipe while catering to different diets. For short-term storage, keep your Pumpkin Zucchini Bread in the fridge. Wrap it tightly in plastic wrap or place it in an airtight container. This keeps the bread fresh and moist. It can stay good for about a week. If you plan to eat it soon, you can also leave it at room temperature for a couple of days. Just make sure to cover it well to prevent drying out. To store Pumpkin Zucchini Bread for a longer time, freezing is a great option. First, let the bread cool completely. Then, wrap it tightly in plastic wrap and foil. This helps prevent freezer burn. You can freeze it for up to three months. When you are ready to eat it, just thaw it in the fridge overnight. For a quick fix, you can microwave a slice for about 30 seconds. Enjoy it warm! You can find the full recipe for this delicious bread above. You can make gluten-free Pumpkin Zucchini Bread easily. The best gluten-free flour choices include almond flour, coconut flour, or a blend of gluten-free all-purpose flour. Each option works well and gives a nice texture. I suggest using a mix of these flours for the best taste and feel. Yes, you can use fresh pumpkin instead of canned. To prepare fresh pumpkin, start by roasting it. Cut the pumpkin in half, remove the seeds, and place it cut-side down on a baking sheet. Roast it at 400°F (200°C) for 45 minutes. Once it's soft, scoop out the flesh and blend it until smooth. This gives your bread a fresh taste. If you want to make this bread without eggs, there are great options. You can use unsweetened applesauce, mashed banana, or flaxseed meal mixed with water. Use 1/4 cup of applesauce or mashed banana for each egg. For flaxseed, mix 1 tablespoon of ground flaxseed with 2.5 tablespoons of water. Let it sit for five minutes before adding it to your mix. To test if the bread is done, use a toothpick. Insert the toothpick into the center of the bread. If it comes out clean or with a few crumbs, your bread is ready. The top should be golden-brown and spring back when gently pressed. This means you have baked a perfect loaf. This post covered the key ingredients and steps for making delicious pumpkin zucchini bread. You learned about mixing wet and dry ingredients, baking tips, and how to store the bread. I shared variations to suit different tastes and dietary needs, too. Always use fresh ingredients and avoid overmixing for the best texture. Enjoy every slice, and remember that baking is all about fun and creativity!

Are you ready to transform your baking routine? This Pumpkin Zucchini Bread recipe is not only delicious but also super easy to make. Imagine the rich flavors of pumpkin and …

Read more

Categories Desserts

Homemade Gingerbread Latte Irresistible Holiday Drink

August 8, 2025 by Chef Luca
- 1 cup brewed strong coffee or espresso - 1 cup milk (dairy or non-dairy) - 2 tablespoons gingerbread syrup - 1/4 teaspoon ground cinnamon - 1/4 teaspoon ground ginger - 1/4 teaspoon vanilla extract - Whipped cream (for topping) - Crushed gingerbread cookies (for garnish) - Cinnamon stick (for optional garnish) If you want to switch up the milk, try oat, almond, or soy. Each has a unique taste and texture. For those who need a sugar-free option, look for vegan gingerbread syrup. This will keep your drink tasty without added sugar. You can use shelf-stable syrup or fresh gingerbread syrup, depending on what you have on hand. For the best coffee, choose strong beans like dark roast or espresso blends. Look for beans that are freshly roasted for a rich flavor. When it comes to milk, some types froth better than others. Whole milk gives a creamy texture, while almond milk is lighter. If you want to make your own gingerbread syrup, it’s easy and can taste better than store-bought. To start, choose a strong coffee or espresso. The best coffee-to-water ratio is 1:15. This means for every 1 gram of coffee, use 15 grams of water. For brewing, I recommend two methods: - French Press: Coarsely grind your coffee. Add it to the French press and pour in hot water. Let it steep for 4 minutes, then press down the plunger. - Espresso Machine: Use finely ground coffee. Pack it into the portafilter and brew according to your machine's instructions. A shot of espresso adds a rich base for your latte. Next, heat the milk carefully. Pour your milk into a small saucepan over medium heat. Stir it often to avoid burning, until it steams but does not boil. For a frothy finish, you can use a milk frother. Just dip the frother into the milk and turn it on. Move it up and down to create foam. This gives your latte that café feel. Now, it’s time to bring the flavors together. In a bowl, mix: - 2 tablespoons of gingerbread syrup - 1/4 teaspoon of ground cinnamon - 1/4 teaspoon of ground ginger - 1/4 teaspoon of vanilla extract Stir these together until smooth. Then, in a large mug, pour in your hot coffee. Add the gingerbread mixture and mix well. This ensures every sip is full of flavor. Slowly pour in the steamed milk, using a spoon to hold back the foam at first. Once mixed, top with the foam for a creamy finish. Finally, finish your latte with whipped cream, crushed gingerbread cookies, and an optional cinnamon stick for garnish. Enjoy your homemade gingerbread latte! For the full recipe, refer to the recipe details above. To get the best froth, heat your milk just right. Aim for steaming, not boiling. Use a milk frother if you have one. It makes a creamy foam that feels good in your mouth. If you do not have a frother, whisking can also work. Just whisk until the milk is light and fluffy. When pouring milk into your coffee, hold back the foam at first. After mixing, add the foam on top. This helps create a velvety finish that makes your latte feel special. Gingerbread lattes shine with the right spices. Besides ginger, add a pinch of nutmeg or cloves. They blend well and deepen the flavor. Sweeteners can also change your drink. Try brown sugar or honey for a richer taste. If you want less sugar, use a sugar substitute. Each option gives your latte a unique twist. A beautiful drink starts with creative garnishing. Top your latte with whipped cream. Then, sprinkle crushed gingerbread cookies on top for a fun crunch. A cinnamon stick adds a festive touch, too. To make your drink more seasonal, use holiday-themed mugs. You can also add a festive straw. These small touches make your gingerbread latte look as good as it tastes. {{image_2}} You can make this gingerbread latte even more special with some tasty seasonal add-ins. For a twist, try adding pumpkin spice. It gives your latte a warm, cozy flavor. Just mix in a tablespoon of pumpkin spice syrup or 1/4 teaspoon of pumpkin spice blend. This will bring out the fall vibes. During winter holidays, peppermint can add a refreshing kick. You can add a splash of peppermint syrup or a crushed candy cane on top. It pairs well with the gingerbread notes and makes your drink festive. If you prefer dairy-free options, you can easily switch the milk. Coconut milk works great for a creamy texture. It adds a hint of sweetness that enhances the gingerbread flavor. You can also try using nut milks like almond or cashew. Each gives a unique taste that can make your latte fun and different. You can enjoy a delicious iced gingerbread latte too! To adapt the recipe, brew your coffee and let it cool. Once it's cold, pour it over ice in a tall glass. Then, mix in your gingerbread syrup and milk. Stir well. For extra froth, try blending the milk with ice before adding it to your coffee. This will give you a refreshing drink that still tastes like the holidays. To store gingerbread syrup, keep it in a clean glass jar. Seal it tightly and place it in the fridge. It will last for about two weeks. If you have used coffee grounds, let them cool first. Store them in an airtight container. This way, they stay fresh for up to a week. You can prep your gingerbread syrup in advance. Just make a larger batch and store it in the fridge. This saves time on busy mornings. For gatherings, you can batch-make lattes. Brew coffee, mix in the syrup, and heat milk in a large pot. Serve in big mugs for all your friends and family. When reheating milk, do it slowly over low heat. Stir often to keep it smooth. If you use a microwave, heat in short bursts. This avoids overheating and burning. For coffee, add a splash of fresh brewed coffee to your reheated cup. This helps it taste fresh again. For a great latte, use strong brewed coffee or espresso. I recommend medium to dark roast beans. Brands like Lavazza or Illy work well. They give a rich flavor that blends nicely with milk. Yes, making gingerbread syrup at home is easy. Combine equal parts of water and sugar in a pot. Add spices like ginger, cinnamon, and nutmeg. Simmer until the sugar dissolves. Let it cool, and you have your homemade gingerbread syrup. To make a vegan gingerbread latte, swap cow's milk for any plant-based milk. Almond, oat, or soy milk works great. Make sure your gingerbread syrup is vegan, too. This way, you can enjoy the same rich taste. You can add more spices like nutmeg or cloves for added warmth. If you like it sweeter, add more gingerbread syrup. For a fun twist, try adding a hint of peppermint or vanilla. Each change can create a whole new flavor. Avoid using low-quality coffee, as it can make your latte bitter. Make sure your milk is heated but not boiled. This keeps the texture smooth. Stir well to mix all flavors. These tips help you achieve the best taste. You now have everything you need to make a delicious gingerbread latte. We covered key ingredients, step-by-step instructions, and helpful tips. Remember to choose quality coffee and milk for the best taste. Don’t be afraid to try variations or make it dairy-free. This comforting drink can brighten up any season. Enjoy crafting your perfect cup!

Craving a cozy holiday drink? You can’t go wrong with a homemade gingerbread latte! This festive beverage combines strong coffee and creamy milk with warm spices, making it a perfect …

Read more

Categories Breakfast

Best Peach Bruschetta Flavorful Summer Delight

August 8, 2025 by Chef Luca
- 4 ripe peaches, diced - 1 cup cherry tomatoes, quartered - 1/2 cup fresh basil leaves, chopped - 1 tablespoon balsamic glaze - 1 tablespoon olive oil - Salt and pepper to taste - 1 French baguette, sliced - 1 cup ricotta cheese - Zest of 1 lemon Using fresh ingredients makes a big difference in flavor. For this recipe, you want ripe peaches. Look for peaches that give slightly when you press them. They should smell sweet and fruity. Choose cherry tomatoes that are firm and vibrant in color. Fresh basil should be bright green and fragrant. For the baguette, select one that is crusty on the outside and soft inside. It should feel light and airy. When selecting ricotta, go for a brand that uses whole milk. This makes it creamy and rich. Remember, the quality of your ingredients matters. Fresh, ripe fruits and veggies will give you the best peach bruschetta. If you want to learn how to make this dish, check out the Full Recipe. 1. Preheat your oven to 375°F (190°C). This step is key. You want the bread nice and crispy. 2. Take your French baguette and slice it into pieces. Aim for about half an inch thick. Lay the slices flat on a baking sheet. Brush one side of each slice with olive oil to add flavor. 3. Bake the baguette slices for 8-10 minutes. Watch them closely. You want them to turn golden brown and crispy. Take them out and let them cool for a minute. 4. While the bread bakes, prepare the peach and tomato topping. In a bowl, combine the diced peaches, quartered cherry tomatoes, and chopped basil. This mix gives your bruschetta a fresh taste. 5. Drizzle the balsamic glaze over the peach mix. Gently toss everything to combine. Season with salt and pepper to taste. This step brightens up the flavors. 6. In another bowl, mix the ricotta cheese with lemon zest. This adds a refreshing touch. Stir until smooth and creamy. 7. Now it's time to assemble the bruschetta. Take your cool baguette slices. Spread a generous amount of the lemon ricotta on each slice. 8. Top the ricotta with a heaping spoonful of the peach and tomato mix. The colors should pop! 9. If you like, drizzle just a bit more balsamic glaze on top. It adds a nice finish. 10. Serve immediately for the best taste. Enjoy your Best Peach Bruschetta! For a complete guide, check the Full Recipe. To make the perfect bruschetta, start with the bread. For the ideal toast level, use a French baguette. Slice it into pieces about half an inch thick. Brush one side with olive oil. Bake these slices at 375°F (190°C) for 8 to 10 minutes. You want them golden brown and crispy. Keep an eye on them so they don’t burn. Quality olive oil and balsamic glaze are crucial for flavor. Use extra virgin olive oil for the best taste. Drizzle a little balsamic glaze on top for a sweet touch. These two ingredients elevate your bruschetta and make it shine. Get creative with your flavors! Try adding some crushed nuts for crunch or a sprinkle of chili flakes for heat. You can also swap fresh basil for mint or cilantro for a different twist. Mix and match to find your favorite flavors. Each change can bring a new taste to your peach bruschetta. For the full recipe, check out the Best Peach Bruschetta section. {{image_2}} You can easily add your own spin to peach bruschetta. Here are some fun ideas to try: - Different toppings: Consider using chopped nuts like walnuts or almonds for crunch. You can also swap ricotta for goat cheese or cream cheese for a creamier texture. - Alternative herbs and spices: Fresh mint, cilantro, or thyme can add new flavors. A pinch of chili flakes can give your bruschetta a kick. - Variations for dietary restrictions: For a vegan option, skip the cheese and use avocado instead. You can also use gluten-free bread to make this dish suitable for those with gluten issues. These variations let you enjoy peach bruschetta in different ways. Each twist brings a new taste experience to your table. Try mixing and matching to find your favorite combination! Don’t forget to check the Full Recipe for guidance on making your base bruschetta. To keep peach bruschetta fresh, store its parts separately. This helps maintain texture and flavor. Place the baguette slices in a sealed bag. Avoid moisture to keep them crispy. For the peach and tomato topping, use an airtight container. This keeps the mix fresh for longer. The ricotta cheese should also have its own container. This prevents it from absorbing other flavors. When stored correctly, the peach topping lasts about three days. The ricotta will stay fresh for about four to five days. The baguette slices are best when eaten fresh, but you can keep them for two days in the fridge. For best results, eat your bruschetta within these timeframes. This ensures you enjoy the best flavors and textures. For the full recipe, refer to the earlier section. What type of bread works best for bruschetta? I love using a French baguette. Its crust is crispy and holds toppings well. You can also try ciabatta for a chewy texture. Both options add great flavor. Can you use canned peaches instead of fresh? Yes, you can use canned peaches. However, fresh peaches taste better. Canned peaches can be softer and sweeter. Drain them well before using to avoid extra moisture. How to make bruschetta ahead of time? You can prepare the peach topping a few hours before. Just store it in the fridge. Toast the bread right before serving. This keeps the bread crispy and delicious. Additional measures for food safety Always wash your fruits and veggies before using them. Keep any leftovers in a sealed container. Store them in the fridge and eat within two days for best taste. In this blog post, we explored making peach bruschetta from fresh ingredients. I shared step-by-step instructions, tips for perfecting the dish, and fun variations to try. Don’t forget to use quality olive oil for the best flavor. Remember to store any leftovers properly for freshness. I hope you feel inspired to create your own tasty peach bruschetta. Enjoy the bright flavors and impress your friends at your next gathering!

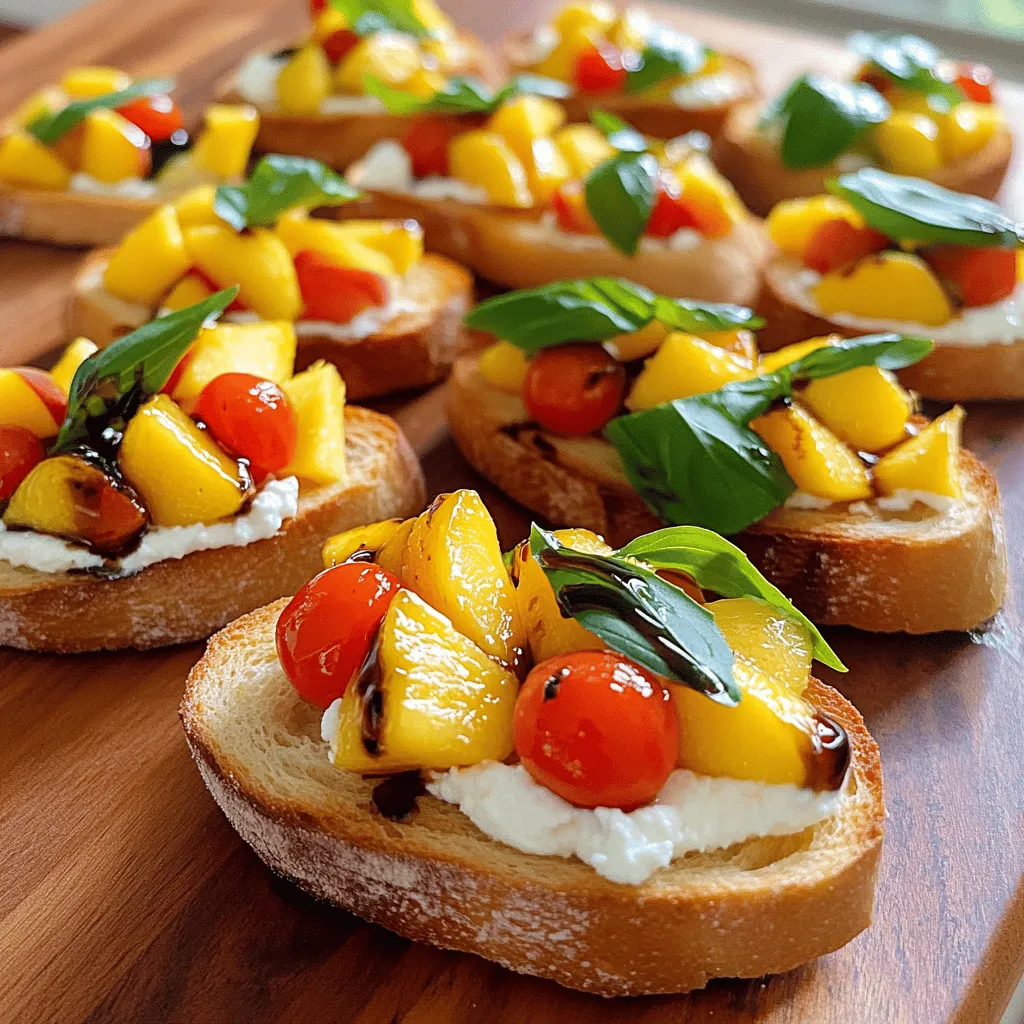
Are you ready to elevate your summer gatherings with a burst of flavor? My Best Peach Bruschetta recipe brings together fresh peaches and tomatoes for a delightful treat that everyone …

Read more

Categories Appetizers

Easy Zesty Southwest Chicken Salad Flavor Boost

August 8, 2025 by Chef Luca
- 2 boneless, skinless chicken breasts - 1 tablespoon olive oil - 1 teaspoon chili powder - 1 teaspoon cumin - 1/2 teaspoon garlic powder - Salt and pepper, to taste - 4 cups mixed salad greens (spinach, romaine, and arugula) - 1 cup cherry tomatoes, halved - 1 medium avocado, diced - 1/2 cup corn (fresh, canned, or frozen) - 1/3 cup black beans, rinsed and drained - 1/4 cup red bell pepper, diced - 1/4 cup red onion, finely chopped - Juice of 1 lime - 1/4 cup cilantro, chopped Using fresh ingredients makes a big difference. Fresh chicken gives you juicy meat. Choose organic chicken when possible. It tastes better and is healthier. For the greens, look for vibrant colors. They should feel crisp, not wilted. Fresh herbs like cilantro add a bright flavor. When picking avocados, choose ones that yield slightly when pressed. This means they are ripe and ready to eat. If you can't find certain items, don't worry. You can swap them out. For chicken, try grilled shrimp or tofu. They work great in salads too. If you want a different green, use kale or mixed lettuce. Canned corn is fine, but fresh or frozen corn tastes sweeter. You can also skip the beans for a lighter salad. If you want more heat, add jalapeños or a spicy dressing. Use lime juice from a bottle if you don’t have fresh limes. Just remember to adjust to taste. For the full recipe, check the details above. Start by preheating your grill or grill pan over medium-high heat. This step ensures even cooking. In a small bowl, mix together the olive oil, chili powder, cumin, garlic powder, salt, and pepper. This spice rub adds great flavor to the chicken. Generously coat both sides of the chicken breasts with this mix. Now, grill the chicken for about 6-7 minutes on each side. You want the inside to reach 165°F (75°C). Once done, take the chicken off the grill and let it rest for 5 minutes. This helps keep it juicy. While the chicken rests, gather a large bowl. Add the mixed salad greens, cherry tomatoes, diced avocado, corn, black beans, red bell pepper, and red onion. Each ingredient brings its own taste and crunch. After slicing the grilled chicken into strips, add it to this colorful mix. It’s all about balance and fresh flavors here. Squeeze the juice of one lime over the salad. This adds a bright, zesty kick. Next, sprinkle the chopped cilantro on top for a fresh herb flavor. Gently toss everything together until the salad is well combined. You want the dressing to coat every bite. Serve the salad in large bowls. For extra flair, garnish with more cilantro and lime wedges on the side. This makes the dish inviting and fun to eat. Enjoy your Easy Zesty Southwest Chicken Salad! To get juicy chicken, start with good quality meat. Use boneless, skinless chicken breasts for best results. Before grilling, marinate the chicken in olive oil and spices. This adds flavor and keeps it moist. Preheat your grill to medium-high heat. Grill the chicken for about 6-7 minutes on each side. Make sure it reaches 165°F (75°C). Let the chicken rest for five minutes before slicing. This helps keep the juices inside. Dressing can make or break your salad. I love to use a zesty lime vinaigrette. Just mix lime juice, olive oil, salt, and pepper. It adds a bright punch. You can also try a creamy dressing, like ranch or avocado. To keep it fresh, drizzle the dressing just before serving. This way, your salad stays crisp and delicious. A beautiful salad is fun to eat. Serve your salad in large, colorful bowls. Add a sprinkle of extra cilantro on top for a fresh touch. Lime wedges on the side add a nice pop of color. You can also layer the ingredients for a nice look. Keep the grill marks on the chicken visible for a rustic feel. For the full recipe, check the Easy Zesty Southwest Chicken Salad section. {{image_2}} You can boost your salad with extra protein. Try adding grilled shrimp or tofu for a change. If you like, you can use leftover steak or pork. Just cut it into small pieces and mix it in. Eggs are also a great choice. Hard-boiled eggs add creaminess and a nice texture. This salad can easily fit a vegetarian or vegan diet. Skip the chicken and add chickpeas or lentils instead. They are high in protein and add a nice bite. You can also toss in some nuts or seeds for extra crunch. Nuts like almonds or sunflower seeds work well. Using seasonal ingredients can change the flavor of your salad. In summer, add fresh peaches or berries for sweetness. In fall, try roasted sweet potatoes or butternut squash. These seasonal swaps keep your salad fresh and exciting. They also help you enjoy what's local and in season. To store leftovers, let the salad cool first. Place it in an airtight container. Store it in the fridge for up to three days. Keep the dressing separate if possible. This helps keep the greens fresh and crisp. If you have leftover chicken, you can reheat it. Use a microwave or a skillet. Heat until the chicken is warm but not dry. Avoid reheating the salad mix, as it tastes best fresh. The shelf life of the salad’s key ingredients varies: - Chicken: Cooked chicken lasts about 3-4 days in the fridge. - Avocado: Once cut, it should be eaten within 1 day. - Salad Greens: Mixed greens stay fresh for about 3-5 days. - Corn and Beans: If canned, they can last several months unopened. Once opened, use them within 3-4 days. For more details, check out the Full Recipe, where I share all the ingredients and steps for this tasty dish. Yes, you can make this salad ahead. Prepare the ingredients and store them separately. Keep the chicken in the fridge for up to three days. Mix the salad just before serving. This keeps the greens fresh and crisp. Several dressings work well with this salad. A simple lime vinaigrette adds brightness. You can also try a creamy avocado dressing for richness. For a kick, use a spicy ranch dressing. Each option enhances the zesty flavors. To adjust the spiciness, change the amount of chili powder. Start with less if you prefer mild. You can also add diced jalapeños for extra heat. If it gets too spicy, balance it with more avocado or sour cream. For the full recipe, check out Easy Zesty Southwest Chicken Salad. It includes all the steps and tips for making this tasty dish. In this post, we explored tasty salad options. We covered ingredients, cooking steps, and storage tips. I shared ways to enhance flavor and presented variations for everyone. Remember to try different dressings and ingredient swaps. You can easily adjust spice levels to your taste. This salad can be prepped ahead, making it perfect for busy days. Enjoy your fresh, healthy meal knowing you have great options!

Are you ready to spice up your lunch with a burst of flavor? My Easy Zesty Southwest Chicken Salad is your perfect go-to. It’s packed with vibrant ingredients and simple …

Read more

Categories Salads

Irresistible Apple Muffins with Crumb Topping Recipe

August 8, 2025 by Chef Luca
- 2 cups all-purpose flour - 1 cup granulated sugar - 1 tablespoon baking powder - 1 teaspoon baking soda - 1 teaspoon ground cinnamon - ½ teaspoon salt - 1 large egg - 1 cup buttermilk (or milk with 1 tablespoon vinegar added) - ½ cup vegetable oil - 1 teaspoon vanilla extract - 2 cups peeled and diced apples (such as Granny Smith or Honeycrisp) Crumb Topping: - ½ cup rolled oats - ½ cup brown sugar - ½ teaspoon ground cinnamon - ¼ cup all-purpose flour - ¼ cup cold butter, cubed I use precise measurements for the best results. Always use level cups for flour and sugar. This keeps the muffins light and fluffy. The baking powder and baking soda help the muffins rise. Using fresh apples brings out the best flavor. The buttermilk adds moisture and tang. If you can’t find buttermilk, mix milk with vinegar as a substitute. You can swap granulated sugar for brown sugar for a richer taste. If you want a healthier muffin, try whole wheat flour instead of all-purpose flour. For a nutty crunch, add ½ cup of chopped nuts to the batter. Start by gathering all your ingredients. You need flour, sugar, baking powder, baking soda, cinnamon, salt, an egg, buttermilk, vegetable oil, vanilla, and apples. For the crumb topping, you will need rolled oats, brown sugar, cinnamon, flour, and cold butter. Preheat your oven to 350°F (175°C). Line your muffin tin with paper liners or spray it with cooking spray. 1. In a large bowl, mix the flour, sugar, baking powder, baking soda, cinnamon, and salt. Stir this until it's well combined. 2. In another bowl, whisk the egg, buttermilk, vegetable oil, and vanilla. Mix until everything blends together. 3. Pour the wet mix into the dry mix. Stir gently until just combined. Don’t overmix; a few lumps are okay. 4. Now, fold in the diced apples. Make sure they spread evenly in the batter. 5. For the crumb topping, mix the rolled oats, brown sugar, cinnamon, flour, and cold butter in a different bowl. Use your fingers or a pastry cutter to make it crumbly. 6. Scoop the muffin batter into the prepared muffin cups. Fill each about ¾ full. 7. Generously sprinkle the crumb topping on top of each muffin. Bake the muffins in the oven for 18-20 minutes. Check if they are done by inserting a toothpick in the center. If it comes out clean, they're ready! Once baked, let them cool in the tin for about 5 minutes. Then, transfer them to a wire rack to cool completely. Serve them warm for the best taste! You can also dust them with powdered sugar or pair them with whipped cream. Enjoy your creations! For the complete recipe, see the Full Recipe. Mixing the batter well is key to tasty muffins. Start with dry ingredients. In a big bowl, blend flour, sugar, baking powder, baking soda, cinnamon, and salt. Make sure they mix well. Next, whisk the wet ingredients in a separate bowl. This includes the egg, buttermilk, oil, and vanilla. When you combine wet and dry, stir gently. You want to mix just until it comes together. Overmixing can make the muffins tough. It's okay if you see a few lumps; they will bake out. Lastly, fold in your diced apples carefully. This keeps them from breaking apart. A great crumb topping adds texture and flavor. Start with rolled oats, brown sugar, cinnamon, and flour in a bowl. Mix these dry ingredients together first. Then, add cold butter in small cubes. Use your fingers or a pastry cutter to blend. You want a mixture that looks like coarse crumbs. Make sure not to melt the butter. Cold butter helps create a crunchy topping. Once mixed, sprinkle it generously on top of your muffin batter. This will bake into a sweet, crispy layer. Many mistakes can happen when baking muffins. Here are a few to watch for: - Not measuring ingredients: Always use the right measurements for success. - Using warm ingredients: Cold or room temperature ingredients work best. - Overfilling muffin cups: Fill them about ¾ full. This allows room for rising. - Skipping the toothpick test: Check muffins with a toothpick before you take them out. If it comes out clean, they are ready. For a foolproof baking experience, follow these tips closely. You’ll end up with perfect apple muffins each time! For the full recipe, check out the details above. {{image_2}} You can add a twist to your apple muffins with spices and nuts. Try adding nutmeg for warmth. A pinch of ginger can bring a nice zing. If you want crunch, mix in chopped walnuts or pecans. They pair well with the apples. You can even add raisins for extra sweetness. These small changes make a big difference. To make your muffins healthier, swap some flour for whole wheat flour. This adds fiber and nutrients. You can also cut the sugar by using applesauce. It keeps the muffins moist while reducing calories. If you like, try using honey or maple syrup instead of sugar. These options add natural sweetness. Change your muffins with seasonal fruits. In fall, add pumpkin puree for a cozy flavor. Mix in dried cranberries for a tart kick during winter. You can even use fresh blueberries in the summer. Each season brings new tastes to explore. Enjoy the versatility of these muffins! After baking your apple muffins, let them cool completely. This step is key to keeping them fresh. Place them in an airtight container. You can also wrap them in plastic wrap. Store them at room temperature for up to three days. If you want them to last longer, consider freezing them. To freeze your muffins, first, cool them completely. Then, wrap each muffin in plastic wrap. Place the wrapped muffins in a freezer bag or a freezer-safe container. Label the bag with the date. You can freeze them for up to three months. When you want one, just take it out and let it thaw at room temperature. For the best taste, reheat your muffins in the oven. Preheat your oven to 350°F (175°C). Place the muffins on a baking sheet. Heat them for about 10 minutes. You can also microwave them for about 20-30 seconds. However, the oven will keep the crumb topping crispier. Enjoy your muffins warm for the best flavor! For the complete recipe, check the Full Recipe. Yes, you can! You may swap apples for other fruits like pears or berries. Each fruit adds its own taste. Use fruit that is soft when cooked. Make sure to chop them small. This keeps your muffins light and moist. Muffins may not rise due to old baking powder or baking soda. Check their dates before use. Overmixing the batter can also cause flat muffins. Mix until just combined. Lastly, ensure your oven is at the right temperature. An oven thermometer can help with this. To check, insert a toothpick into the center of a muffin. If it comes out clean, they are done. If wet batter sticks to the toothpick, bake for a few more minutes. Muffins should also look golden brown on top. Trust your eyes and the toothpick test! For the full recipe, refer to the [Full Recipe]. This blog post shared how to make delicious apple muffins. You learned the key ingredients and their amounts. We covered how to prepare and bake the muffins step-by-step. You also found tips for mixing batter and making the crumb topping. Variations like spices and healthy swaps were discussed. Finally, I shared how to store and reheat leftovers. Baking can be fun and rewarding. I hope you feel ready to try these muffins. Enjoy making them!

Are you ready to bake the most delicious Apple Muffins with Crumb Topping? This easy recipe combines tasty apples and a crunchy topping to create a treat everyone will love. …

Read more

Categories Desserts

Apple Cider Cookies Scrumptious and Easy Treat

August 8, 2025 by Chef Luca
Making apple cider cookies is simple and fun. You will need fresh ingredients that add flavor and texture. - 2 cups all-purpose flour - 1 teaspoon baking soda - 1 teaspoon ground cinnamon - 1/2 teaspoon ground nutmeg - 1/2 teaspoon salt - 3/4 cup unsalted butter, softened - 1 cup brown sugar, packed - 1/2 cup granulated sugar - 1 large egg - 1 teaspoon vanilla extract - 1/4 cup apple cider (not hard cider) - 1 cup chopped apples (preferably Granny Smith or Honeycrisp) - 1/2 cup chopped walnuts or pecans (optional) - 1/4 cup powdered sugar for dusting These cookies shine with the flavors of fall. The apple cider gives them a unique taste. Using fresh apples adds great texture. I recommend Granny Smith or Honeycrisp for the best results. The nuts are optional but add a nice crunch. You can find the full recipe to guide you through each step. Enjoy baking! 1. Preheat your oven to 350°F (175°C). Line two baking sheets with parchment paper. 2. In a medium bowl, whisk together: - 2 cups all-purpose flour - 1 teaspoon baking soda - 1 teaspoon ground cinnamon - 1/2 teaspoon ground nutmeg - 1/2 teaspoon salt 3. In a large bowl, use an electric mixer to beat: - 3/4 cup unsalted butter, softened - 1 cup brown sugar, packed - 1/2 cup granulated sugar Mix until light and fluffy, about 2-3 minutes. 4. Add 1 large egg and 1 teaspoon vanilla extract to the butter mixture. Mix well until smooth. 5. Pour in 1/4 cup apple cider gradually. Mix until the batter is smooth. 6. Gradually add the dry ingredients to the wet mixture. Mix until just combined. Do not overmix. 7. Fold in: - 1 cup chopped apples (preferably Granny Smith or Honeycrisp) - 1/2 cup chopped walnuts or pecans (optional) Make sure they are evenly distributed. 8. Using a tablespoon or cookie scoop, drop spoonfuls of dough onto the prepared baking sheets. Space them about 2 inches apart. 9. Bake in the preheated oven for 10-12 minutes. The edges should turn golden brown. The centers can look slightly underbaked for a chewy texture. 10. Let the cookies cool on the baking sheets for 5 minutes. Then, transfer them to a wire rack to cool completely. 11. Once cooled, dust the cookies with 1/4 cup powdered sugar for a sweet finish. Enjoy making these cinnamon-infused apple cider cookies! For the complete process, see the Full Recipe. - Set your oven to 350°F (175°C). This heat helps cookies bake evenly. - Bake for 10-12 minutes. The edges should turn golden brown. - Look for a slight shine in the center. This means they are perfect. - Try adding a pinch of ginger for warmth. Nutmeg also works well. - For chewiness, do not overmix the dough. Fold ingredients gently. - Chilling the dough for 30 minutes can enhance the flavors. - Arrange cookies on a colorful plate. This makes them more inviting. - Dust with powdered sugar for a snowy look. - Add apple slices or cinnamon sticks for a festive touch. - Serve with warm apple cider for a cozy feel. This recipe is a joy to make and share! You can find the Full Recipe to enjoy these delightful cookies. {{image_2}} You can easily swap some ingredients in this cookie recipe. For a gluten-free option, use gluten-free flour. This works well and keeps the cookies tasty. You can also try different sugars. Instead of brown sugar, use coconut sugar for a deeper flavor. Or, use white sugar for a lighter taste. Each swap can change the cookie's character while keeping it delicious. Want to mix up the taste? Add chocolate chips or dried fruits to the dough. Chocolate chips give a sweet twist, while dried fruits like cranberries add chewiness. You can also change spice levels. If you love cinnamon, add more! If you prefer a milder flavor, cut back a bit. Make the cookies your own by adjusting these flavors. If you're looking for eggless options, use flaxseed meal. Mix one tablespoon of flaxseed meal with three tablespoons of water. Let this sit to thicken, then add it to the dough. This works just as well. For nut-free recipes, skip the walnuts or pecans. You can replace them with seeds like sunflower or pumpkin for crunch. These options make the cookies safe for all to enjoy. For the full recipe, check here: [Full Recipe]. To keep your apple cider cookies fresh at room temperature, place them in an airtight container. This helps maintain their soft texture. You can stack the cookies neatly, but use parchment paper between layers to prevent sticking. Always store them in a cool, dry spot away from sunlight. If you want to enjoy these cookies later, freezing is a great option. Wrap each cookie in plastic wrap and place them in a freezer bag. This keeps them fresh for about three months. When you're ready to eat, remove them from the freezer and let them thaw at room temperature. To maintain texture, heat them in a low oven for a few minutes. When stored properly, apple cider cookies can last about one week at room temperature. Look for signs that they are no longer fresh, such as a hard or dry texture. If they smell off or have visible mold, it’s time to toss them. Keeping an eye on these details helps you enjoy your treats at their best. Can I use hard cider instead of apple cider? No, stick with apple cider. Hard cider has alcohol and will change the taste. It can also affect the cookie's texture and rise, making them less tender. How can I make these cookies less sweet? You can reduce the sugars. Try using 3/4 cup of brown sugar instead of 1 cup. You can also skip the powdered sugar dusting on top. This helps cut down on sweetness. Best ways to enjoy apple cider cookies? Serve them warm with a glass of apple cider. They pair well with coffee or tea too! For a fun twist, try adding a scoop of vanilla ice cream on top. How to double the recipe successfully? To double the recipe, just multiply each ingredient by two. Make sure you have enough space on your baking sheets. You might need to bake in batches if your oven cannot fit them all. Substitutions for missing ingredients? If you run out of butter, you can use coconut oil or margarine. For apples, any firm fruit works. If you don’t have walnuts or pecans, just leave them out or use chocolate chips instead. What is the best way to measure flour? Always spoon flour into a measuring cup. Avoid scooping directly from the bag. This prevents packing the flour, which leads to too much in your dough. Level it with a knife for accuracy. Should I chill the cookie dough before baking? Chilling the dough helps the cookies spread less. If you want thicker cookies, chill for 30 minutes. If you prefer a chewier texture, go ahead and bake right away. This blog post shared a simple and tasty apple cider cookie recipe. You learned the main ingredients, easy steps, and helpful tips to bake them perfectly. With suggested variations, you can customize these cookies for any taste. You also found smart ways to store them for later enjoyment. Bake these cookies and enjoy the warm flavors. Whether for a special event or just for fun, they are sure to please. Happy baking!

Looking for a cozy treat this fall? These Apple Cider Cookies are scrumptious and easy to make. With warm spices and fresh apples, they capture the taste of autumn in …

Read more

Categories Desserts

Slow Cooker Cheesy Scalloped Potatoes Rich Comfort Dish

August 8, 2025 by Chef Luca
- 4 large russet potatoes, thinly sliced - 2 cups shredded cheddar cheese - 1 cup heavy cream - 1 cup milk - 1 medium onion, finely chopped - 2 cloves garlic, minced - 1 teaspoon fresh thyme - 1 teaspoon paprika - Salt and pepper to taste - 1 cup grated Parmesan cheese (for topping) - Fresh chives or parsley for garnish (optional) When it comes to making Slow Cooker Cheesy Scalloped Potatoes, the ingredients are key. The russet potatoes serve as the main base. Their starchy texture makes them perfect for this dish. Thinly slicing them ensures they cook evenly. I love using fresh cheddar cheese for its rich flavor. Heavy cream and milk create a lovely creamy sauce. Next, we have aromatics. Chopped onions and minced garlic bring a depth of flavor. Fresh thyme and paprika add a hint of earthiness and warmth. Salt and pepper will enhance all the flavors in this dish. For the topping, I always use grated Parmesan cheese. It melts beautifully and adds a nice crust. Fresh chives or parsley can brighten the dish when served. These ingredients come together to create a dish that is warm, cheesy, and comforting. If you want the full details on how to combine these ingredients, check out the Full Recipe. - Wash and peel the russet potatoes. - Slice potatoes using a mandoline or sharp knife. Start with clean hands and a clean workspace. Take the potatoes and wash them well. Peeling is next; you want a smooth surface. Then, slice the potatoes thinly. I recommend using a mandoline for even slices. If you don't have one, a sharp knife will work too. Just make sure the slices are even so they cook well. - First layer of potatoes, onions, and cheese. - Pour half of the cream mixture. In your slow cooker, lay down the first layer of sliced potatoes. Spread them evenly to cover the bottom. Next, add half of the chopped onions on top. Sprinkle half of the shredded cheddar cheese over the onions. This builds a great flavor base. Now, pour half of the cream mixture over the layers. The cream will soak into the potatoes and keep them moist. - Cover and cook on low for 6-8 hours. - Adding Parmesan cheese for crust 30 minutes before serving. Once your layers are complete, cover the slow cooker with the lid. Set it to cook on low for 6 to 8 hours. The longer you cook, the softer the potatoes become. About 30 minutes before serving, sprinkle the grated Parmesan cheese on top. This will create a delicious cheesy crust. After that, let it sit for a bit before serving. Enjoy your rich comfort dish! For the full recipe, check the detailed instructions. For a rich and creamy texture, I recommend using heavy cream. Heavy cream gives the dish a smooth base that makes each bite feel indulgent. You can use milk, but it won't be as rich. Thin potato slices are key. Aim for slices about 1/8-inch thick. This allows the potatoes to cook evenly and absorb all that creamy goodness. Adding herbs and spices can transform your dish. Fresh thyme brings a lovely earthiness. You can also try rosemary or oregano for a twist. For cheese, I love using sharp cheddar for its bold flavor. Mixing in Gruyère or Monterey Jack adds another layer of taste. These cheese combinations create a delightful melt that keeps you wanting more. Pair these cheesy scalloped potatoes with meats like roasted chicken or grilled steak. They also go well with a fresh salad for a balanced meal. For presentation, serve them in the slow cooker. This keeps them warm and inviting. Garnish with fresh chives or parsley for a pop of color. It makes the dish look beautiful and adds a hint of freshness. For the complete process, don't forget to check the Full Recipe. {{image_2}} You can enjoy this dish even if you avoid gluten. Use gluten-free flour for thickening. Replace heavy cream with coconut cream or almond milk for a dairy-free option. Nutritional yeast can mimic cheese flavor for a vegan touch. To add a savory kick, toss in cooked bacon or diced ham. This adds depth and richness. You can also mix in vegetables like fresh spinach or colorful bell peppers. These ingredients not only add flavor but also make the dish more nutritious. If you prefer oven-baked cheesy scalloped potatoes, layer the ingredients in a baking dish. Bake at 350°F for about 1 hour, or until the potatoes are tender. For a quicker option, use an Instant Pot. Set it to high pressure for 20 minutes. Quick release the steam, and you’ll have creamy potatoes in no time! Check the [Full Recipe] for detailed steps. To keep your cheesy scalloped potatoes fresh, place leftovers in an airtight container. Make sure to cool them to room temperature first. Store them in the fridge for up to 3 days. You can freeze cheesy scalloped potatoes for longer storage. Just make sure to use a freezer-safe container. They can last in the freezer for about 2 months. To reheat without losing texture, use the oven. Preheat your oven to 350°F (175°C). Place the potatoes in an oven-safe dish and cover it with foil. Heat them for about 20-30 minutes, or until warmed through. You can also microwave portions for a quick fix, but the oven gives a better texture. In the fridge, expect your cheesy scalloped potatoes to last about 3 days. If frozen, they should be safe for about 2 months. Always check for signs of spoilage, like off smells or mold. If you see any, it's best to throw them away. Yes, you can prepare this dish a day before. Slice the potatoes and mix the cream. Layer them in the slow cooker and cover. Store in the fridge overnight. In the morning, cook as usual. This makes for a quick and easy meal. For scalloped potatoes, russet potatoes work best. They are starchy and creamy when cooked. Yukon Gold potatoes are also great. They hold their shape better and have a buttery flavor. Avoid waxy potatoes, as they won't give that creamy texture. To add some heat, try adding cayenne pepper or crushed red pepper. You can also mix in jalapeños or hot sauce. Adjust the amount to fit your taste. A little spice can really enhance the creamy flavor. To make this dish healthier, consider using low-fat cheese and skim milk. You can also swap heavy cream for a lighter option, like Greek yogurt. Adding more veggies, like spinach or broccoli, can boost nutrition, too. In this post, we explored how to make creamy, cheesy scalloped potatoes. We covered essential ingredients like russet potatoes and cheddar cheese. The cooking methods ensure a rich flavor and perfect texture. We also discussed various tips and variations to customize. These potatoes can impress at any meal. Use the guidance here to create your version. Enjoy this dish fresh or as leftovers. With a few tweaks, you can make it your own. Dive into your cooking adventure!

Looking for the ultimate comfort food? Look no further! My Slow Cooker Cheesy Scalloped Potatoes bring creamy goodness to your plate with minimal effort. Just layer thinly sliced russet potatoes, …

Read more

Categories Dinner
Older posts
Newer posts
← Previous Page1 … Page49 Page50 Page51 … Page122 Next →

STIRRED RECIPES

Where every dish begins with a stir! 🍲✨

PAGES

Home About Contact Privacy Policy Terms & Conditions Cookie Policy GDPR Policy Copyright Policy Disclaimer

CATEGORIES

Appetizers Desserts Salads Breakfast Dinner

Contact

  • Pinterest
  • Mail
Copyright © 2026 Stirred Recipes. All rights reserved.