Slow Cooker Beef Stroganoff Flavorful Comfort Meal

Are you ready to dive into a cozy, delicious meal that warms your heart? Slow Cooker Beef Stroganoff is the perfect dish for busy days or chilly nights. With simple …
Are you ready to dive into a cozy, delicious meal that warms your heart? Slow Cooker Beef Stroganoff is the perfect dish for busy days or chilly nights. With simple …

Are you tired of store-bought coffee creamers that are packed with preservatives? You’ve come to the right place! In this post, I’ll guide you through making a rich and creamy …

Looking for a dessert that will wow your family and friends? You’ve found it! These Oreo Cheesecake Cookie Cups are both creamy and crunchy, offering the best of both worlds. …

If you crave a warm bowl of comfort, this Instant Pot Chicken Tortilla Soup is for you! With tender chicken, zesty spices, and a hint of crunch, this dish is …

Welcome to the world of Chocolate Chip Pumpkin Blondies! If you love rich flavors and cozy treats, you’re in the right place. These blondies blend sweet chocolate chips with warm …

If you’re looking for a delicious side dish that’s both easy to make and packed with flavor, you’re in the right place! Garlic Parmesan Roasted Brussels Sprouts Delight will transform …

Want a meal that’s warm, tasty, and easy? Slow Cooker Butter Chicken is your answer! This dish combines creamy sauce and tender chicken, making it a winner at any table. …
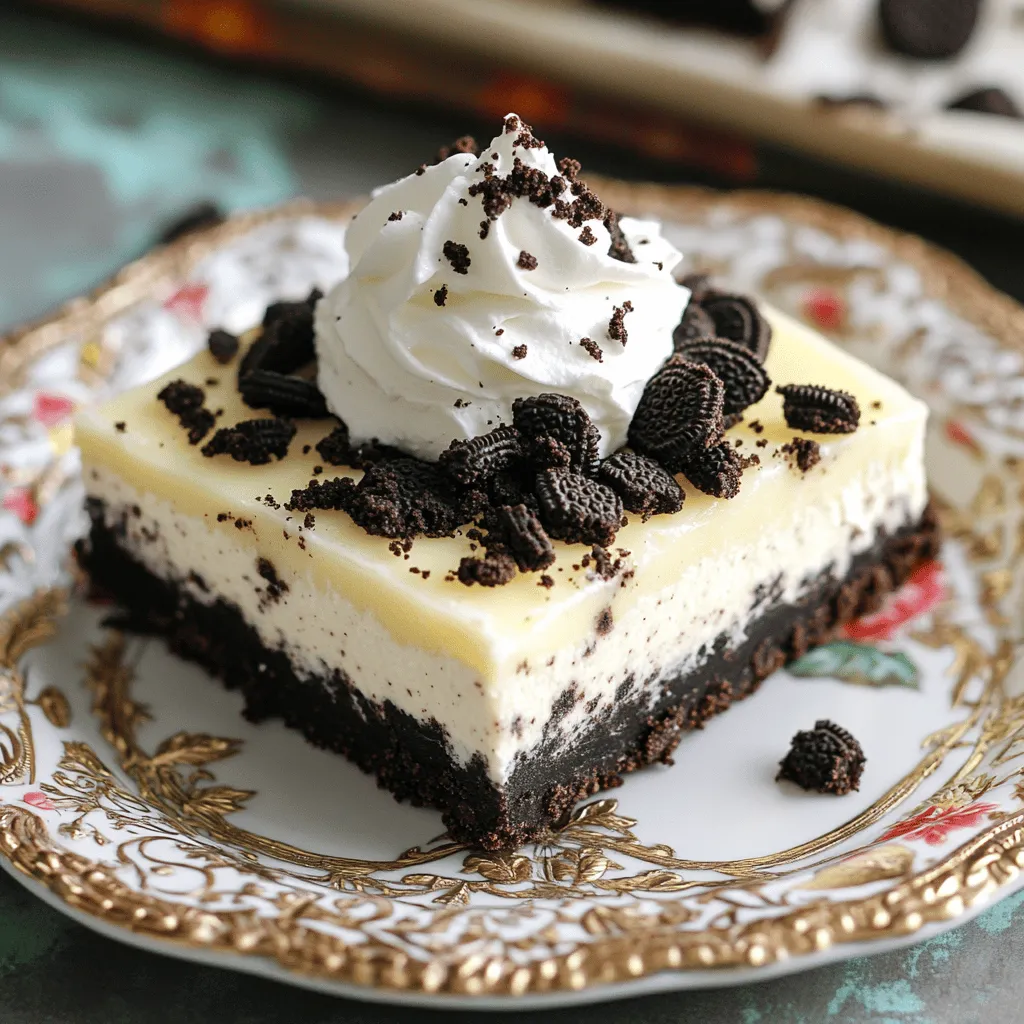
Are you ready to indulge in a sweet treat that’s easy to make? These No-Bake Oreo Cheesecake Bars are a dessert lover’s dream come true! With a simple list of …

If you want a quick and tasty dinner, try my Sheet Pan Fajita Salmon. This meal packs bold flavors with minimal clean-up. You only need a few key ingredients: salmon …
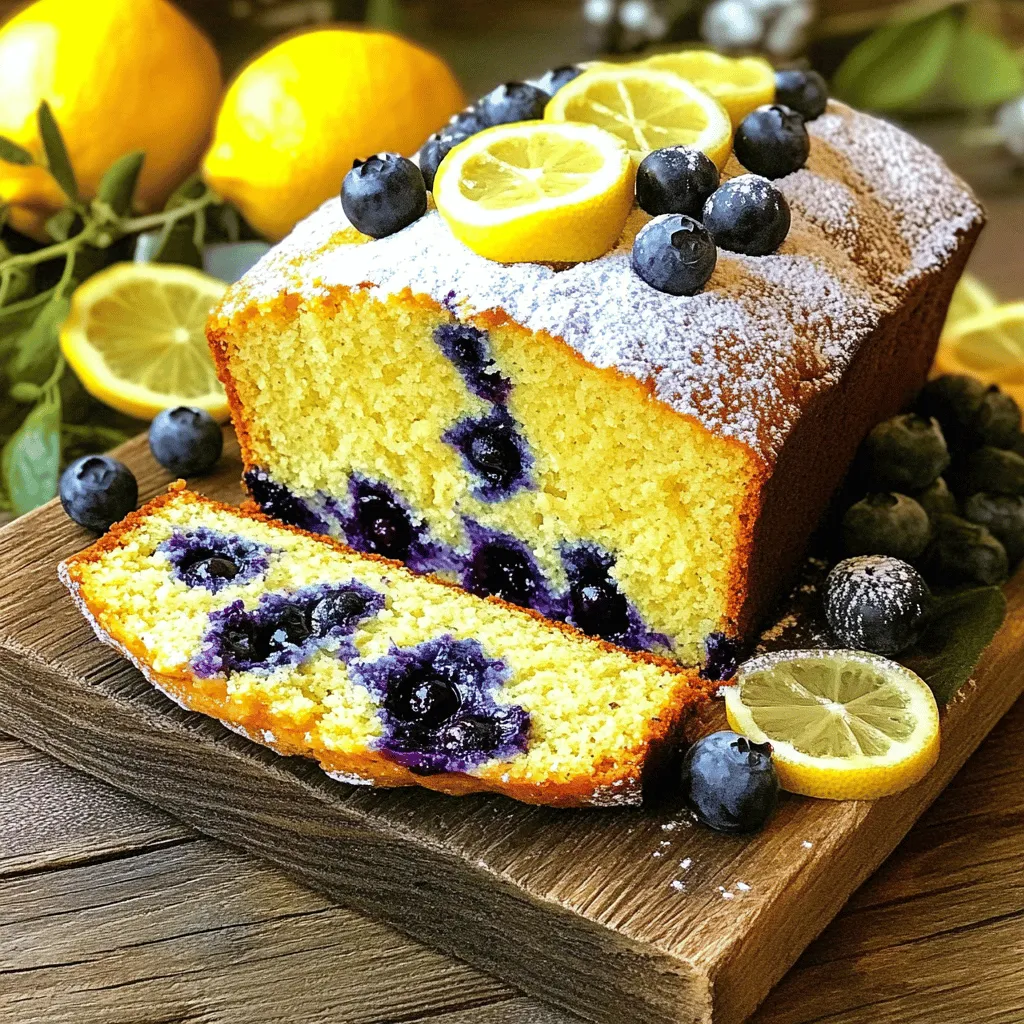
If you’re craving a sweet treat that combines fresh flavors and is easy to make, you’re in the right place! My Lemon Blueberry Yogurt Loaf is juicy, zesty, and sure …