Skip to content
Stirred Recipes
  • Home
  • Appetizers
  • Desserts
  • Salads
  • Breakfast
  • Dinner
  • Privacy Policy
  • Contact
  • About

Chef Luca

One-Pan Harvest Chicken & Veggie Bake Delight

August 15, 2025 by Chef Luca
For the One-Pan Harvest Chicken & Veggie Bake, you will need: - 4 boneless, skinless chicken thighs - 2 cups Brussels sprouts, halved - 1 cup butternut squash, diced - 1 red onion, cut into wedges - 2 apples, cored and sliced - 3 cloves garlic, minced - 2 tablespoons olive oil - 1 teaspoon dried thyme - 1 teaspoon dried rosemary - 1/2 teaspoon smoked paprika - Salt and pepper to taste - Fresh parsley for garnish (optional) Each ingredient plays a key role in flavor and texture. The chicken thighs bring protein and richness. The Brussels sprouts and butternut squash add crunch and sweetness. Apples lend a fruity touch, while garlic and herbs infuse the dish with aroma. Two tablespoons of olive oil help everything cook evenly. Remember to season with salt and pepper to enhance all the flavors. I recommend using fresh ingredients for the best taste. Fresh Brussels sprouts and butternut squash have a vibrant flavor. Apples should be crisp for the right texture. If you use frozen vegetables, the bake may turn out soggier. Frozen items can lose their crunch and flavor during cooking. For this dish, fresh ingredients truly shine and make a huge difference in the final result. Start by preheating your oven to 400°F (200°C). This step is key. A hot oven ensures the chicken cooks well and the veggies get crispy. Set a timer for a few minutes. You want it hot when you add the food. Grab a large mixing bowl. Add 2 cups of halved Brussels sprouts, 1 cup of diced butternut squash, 1 red onion cut into wedges, and 2 sliced apples. These ingredients add color and flavor. Next, add 3 cloves of minced garlic, 2 tablespoons of olive oil, 1 teaspoon of thyme, 1 teaspoon of rosemary, and 1/2 teaspoon of smoked paprika. Sprinkle in salt and pepper to taste. Toss it all together. Make sure each piece is coated in oil and herbs. This step enhances taste and helps with cooking. Now, take your chicken thighs. You need 4 boneless, skinless ones. Season them with salt and pepper on both sides. This brings out the chicken's natural flavor. Make space in the center of your veggie mix on the baking sheet. Place the chicken thighs there. Nestling them among the veggies helps them soak up all the great flavors. Now, your dish is ready to bake! To achieve juicy chicken, use boneless, skinless thighs. They cook evenly and stay moist. Season the chicken with salt and pepper before baking. Place the chicken in the center of the veggies. This helps it cook in the steam from the vegetables. Bake until the internal temperature reaches 165°F. This ensures safe eating and great flavor. For tender veggies, cut them into similar sizes. This helps them cook evenly. Brussels sprouts and butternut squash should be halved and diced, respectively. Toss them well with oil and herbs. This adds flavor and helps with browning. Bake until they are soft and caramelized. This brings out their natural sweetness. For a rustic look, serve directly from the baking sheet. This creates a homey feel. Garnish with fresh parsley to add a pop of color. You can also drizzle a little extra olive oil on top before serving. Pair this dish with crusty bread or a simple salad for a complete meal. {{image_2}} You can switch up the veggies in this dish. If you don’t have Brussels sprouts, try green beans or broccoli. Carrots add a nice touch, too. Butternut squash works well, but sweet potatoes can be a great swap. Choose your favorites for a personal twist! While chicken thighs shine in this recipe, you can use other proteins. Try chicken breasts if you prefer leaner meat. Turkey thighs are another tasty option. For a seafood twist, salmon fillets work great. Just adjust the cooking time to ensure everything cooks evenly. To make this dish vegetarian, skip the chicken. Add more hearty veggies like mushrooms and zucchini instead. Chickpeas or lentils can add protein and texture. You can also toss in some quinoa for a filling meal. Enjoy all the flavors while keeping it plant-based! To store leftovers, let the dish cool first. Place the chicken and veggies in an airtight container. Keep it in the fridge for up to three days. Make sure it’s sealed well to avoid drying out. Label the container with the date to track freshness. When you are ready to eat, reheat the leftovers. You can use the oven or microwave. For the oven, preheat it to 350°F (175°C). Place the dish on a baking sheet and cover it with foil. Heat it for about 20 minutes or until warm. If you use a microwave, heat in short bursts. Stir in between to ensure even heating. If you want to freeze the dish, it’s best to do it right away. Store the cooled chicken and veggies in a freezer-safe container. You can also use freezer bags for easy storage. This can last for up to three months in the freezer. When ready to eat, thaw it overnight in the fridge. Reheat as instructed above. You can tell when the chicken is done by checking its internal temperature. Use a meat thermometer to ensure it reaches 165°F (75°C). The meat should look white, not pink. If you cut into the chicken and the juices run clear, then it's ready to eat. This step is key for food safety. Yes, you can prepare this dish ahead of time. Chop the veggies and season the chicken. Store them in the fridge for up to 24 hours. When ready to cook, just spread the veggies on the baking sheet, add the chicken, and bake. This saves you time on busy days. This dish pairs well with many sides. You can serve it with rice or quinoa for a hearty meal. A simple green salad also works great to add freshness. If you want to keep it rustic, enjoy it with crusty bread to soak up the juices. In this post, we covered how to make a delicious One-Pan Harvest Chicken & Veggie Bake. We looked at the right ingredients and measurements, and discussed fresh versus frozen options. You learned key steps like preheating the oven and cooking the chicken perfectly. We also shared tips for tender veggies and serving ideas. Don’t forget about variations, storage, and reheating. This dish is simple and fun to make, making it perfect for any meal. Enjoy your cooking and the tasty results!

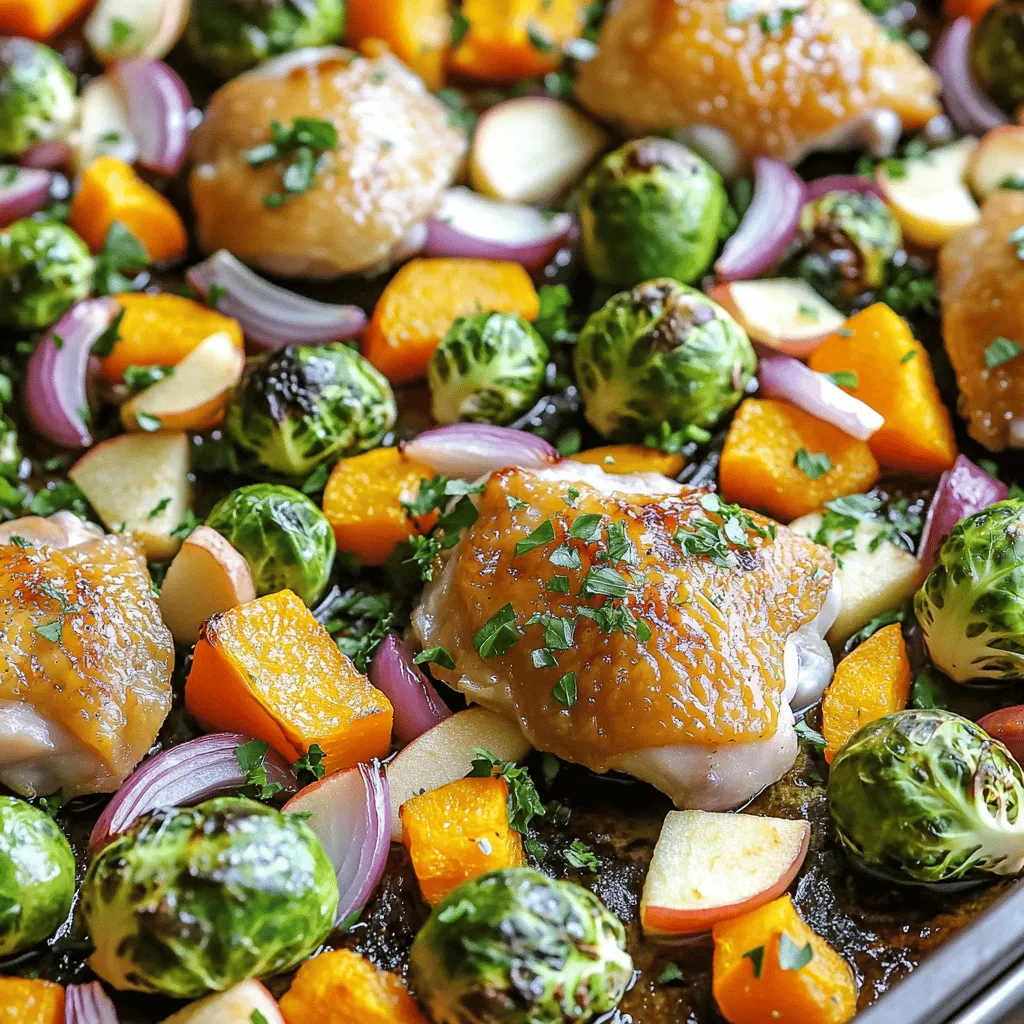
Are you ready to savor the season with a tasty One-Pan Harvest Chicken & Veggie Bake? This simple recipe brings warmth and flavor to your table using fresh ingredients. In …

Read more

Categories Dinner

Maple Glazed Sweet Potato Donuts Tasty Treat Recipe

August 15, 2025 by Chef Luca
To make delicious maple glazed sweet potato donuts, you will need: - 1 cup cooked sweet potato, mashed - 1 cup all-purpose flour - 1/2 cup brown sugar - 1/4 cup maple syrup - 1/4 cup milk (or plant-based milk) - 1 large egg - 1 tablespoon baking powder - 1/2 teaspoon cinnamon - 1/4 teaspoon nutmeg - 1/4 teaspoon salt - 1/2 cup powdered sugar (for glaze) - 2 tablespoons maple syrup (for glaze) - 1 tablespoon milk (for glaze) You can easily change some ingredients if needed: - Use canned sweet potato instead of fresh. Just drain and mash it well. - Swap all-purpose flour for whole wheat or almond flour for a different taste. - Replace brown sugar with coconut sugar for a healthier option. - Try maple extract if you want a stronger maple flavor. - For a vegan version, use flax eggs and plant-based milk. These swaps keep the essence of the recipe while allowing for personal touches! Each donut has roughly: - Calories: 150 - Protein: 2g - Total Fat: 3g - Carbohydrates: 30g - Fiber: 1g - Sugar: 8g These tasty treats are a balance of sweetness and nutrition. Enjoy them as a snack or breakfast! Start by preheating your oven to 350°F (175°C). Grease your donut pan well. In a large bowl, mix 1 cup of mashed sweet potato, 1/2 cup of brown sugar, and 1/4 cup of maple syrup. Stir until smooth. Next, crack in 1 egg and pour in 1/4 cup of milk. Whisk until you have a creamy mixture. In another bowl, mix 1 cup of all-purpose flour, 1 tablespoon of baking powder, 1/2 teaspoon of cinnamon, 1/4 teaspoon of nutmeg, and 1/4 teaspoon of salt. Slowly combine the dry mix into the wet mix. Fold gently; don't overmix, or the donuts may get tough. Spoon the batter into the greased donut pan, filling each cavity about 2/3 full. This helps them rise nicely. Bake the donuts for 10-12 minutes. Use a toothpick to check; it should come out clean when they are done. Let the donuts cool in the pan for about 5 minutes. After that, transfer them to a wire rack. This helps them cool completely and keeps them fluffy. In a small bowl, mix 1/2 cup of powdered sugar with 2 tablespoons of maple syrup and 1 tablespoon of milk. Stir until you get a smooth glaze. Once the donuts are cool, dip the tops into the glaze. Let any extra glaze drip off. Finally, place the glazed donuts back on the wire rack to set. To get the best texture, start with cooked sweet potatoes. You can bake or steam them. Once cooked, mash them until smooth. Avoid lumps for a better donut. If you want a richer taste, use a bit of brown sugar. This adds warmth and depth to the sweet potato. Store these donuts in an airtight container. This keeps them soft and moist. If you have leftovers, place a piece of bread in the container. The bread helps to keep them fresh. Enjoy the donuts within three days for the best taste. Adding spices can make these donuts special. Use cinnamon and nutmeg as in the recipe. You can also try ginger or allspice for a twist. A pinch of vanilla extract adds sweetness without extra sugar. Experiment with different flavors to find your favorite! {{image_2}} You can change the glaze to suit your taste. Try a chocolate glaze for a rich twist. Mix melted chocolate with a bit of cream. Drizzle it over the cooled donuts. You can also make a vanilla glaze. Just mix powdered sugar, vanilla extract, and a splash of milk. For toppings, consider crushed nuts or shredded coconut. Sprinkle these on top right after glazing. To make these donuts vegan, use a flax egg instead of a regular egg. Mix one tablespoon of flaxseed meal with three tablespoons of water. Let it sit for a few minutes until it thickens. For milk, choose any plant-based option like almond or oat milk. To make the donuts gluten-free, swap all-purpose flour for a gluten-free blend. Check the blend has a binding agent, like xanthan gum, to hold the batter together. You can add fun mix-ins to the batter. Chopped pecans or walnuts give a nice crunch. Add about half a cup to the batter before baking. For a sweeter touch, fold in mini chocolate chips. Dried fruits like cranberries or raisins also work great. These additions can make your donuts even more exciting and tasty! Maple glazed sweet potato donuts pair well with many drinks. For a warm option, serve them with hot coffee or tea. The rich flavors mix nicely with the sweet notes of the donuts. If you prefer something cold, try iced coffee or a creamy milkshake. Both drinks balance the sweetness and enhance the flavor. Get creative with your serving ideas! Arrange the donuts on a tiered stand for a fun look. You can also slice them in half and add a scoop of ice cream in the middle for a tasty treat. For a brunch, serve them with fresh fruit or yogurt for a healthy twist. You can even make a donut sandwich with your favorite spread, like peanut butter or cream cheese. Make your maple glazed sweet potato donuts shine at special events. Use a decorative platter to display them. Dust the tops with extra powdered sugar for a touch of elegance. Add a sprinkle of cinnamon or small maple leaf decorations for a seasonal feel. These small details turn simple donuts into a stunning centerpiece for any gathering. Yes, you can use canned sweet potato. Just make sure to drain it well. Canned sweet potato saves time and is easy to use. It will still give you a tasty donut. These donuts stay fresh for about three days. Store them in an airtight container. This keeps them soft and moist. If you want to enjoy them longer, consider freezing. Absolutely! You can freeze these donuts. Place them in a freezer-safe bag. They will stay good for about three months. Just remember to let them cool before freezing. To reheat, use the oven or microwave. For the oven, preheat to 350°F and warm for about 5 minutes. If using the microwave, heat for 10-15 seconds. This will keep them soft and delicious. We explored the tasty world of maple glazed sweet potato donuts. You learned about key ingredients, step-by-step baking, and creative serving ideas. I shared tips for perfect textures and ways to store your treats. You can also try variations like vegan options or fun toppings. These donuts are great for any occasion. Dive into making them, and enjoy each bite. Your friends and family will love them just as much as you will. Happy baking!

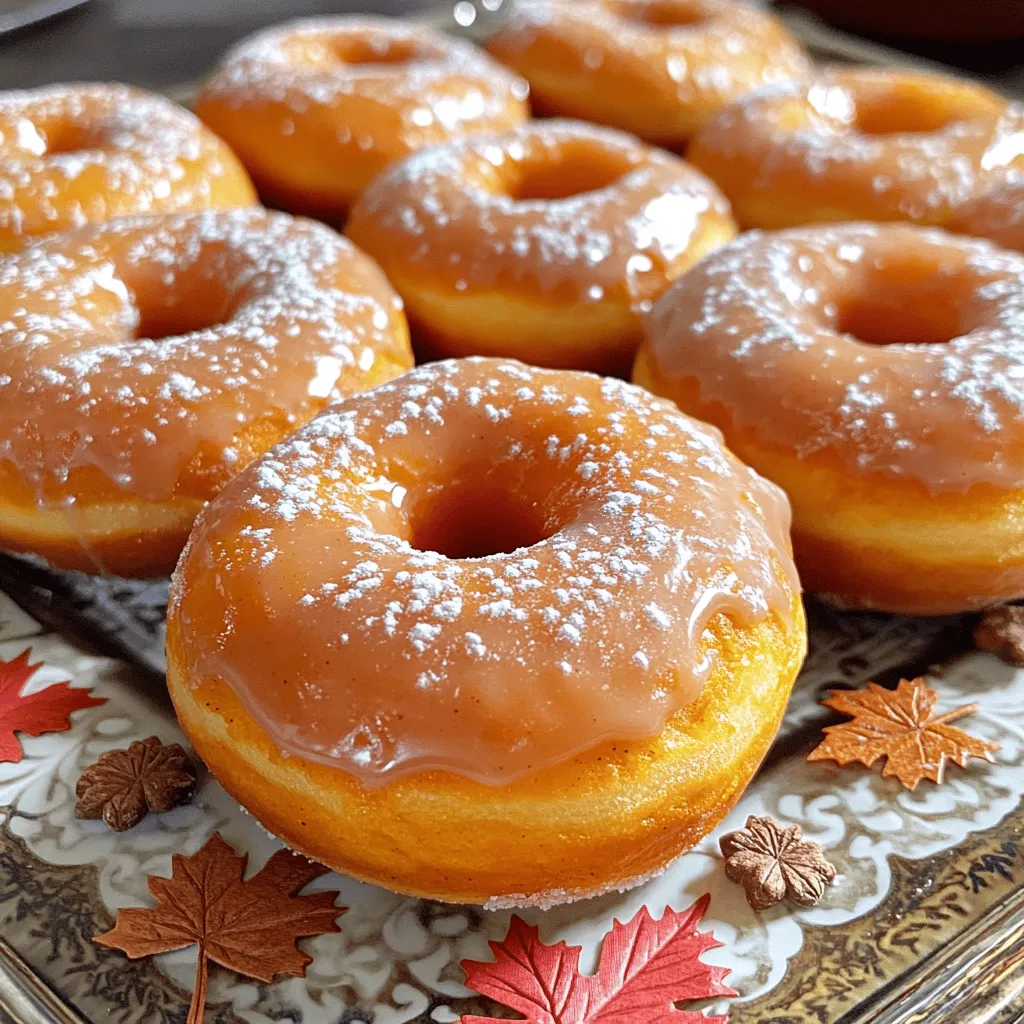
If you love sweet treats, you’ll adore these Maple Glazed Sweet Potato Donuts. They’re fluffy, flavorful, and packed with nutrition. In this post, I’ll share the easy steps to make …

Read more

Categories Desserts

Salted Caramel Apple Upside-Down Cake Delight

August 15, 2025 by Chef Luca
- 4 medium apples (such as Granny Smith or Honeycrisp), peeled, cored, and sliced - 1 cup granulated sugar - 1/2 cup unsalted butter, plus 2 tablespoons for the batter - 1/2 teaspoon sea salt - 1 teaspoon ground cinnamon - 1 1/2 cups all-purpose flour - 1 1/2 teaspoons baking powder - 1/4 teaspoon baking soda - 1/2 teaspoon salt - 2 large eggs - 1 teaspoon vanilla extract - 3/4 cup whole milk You need a few key tools for this cake. Gather these items: - 9-inch round cake pan - Medium saucepan - Large mixing bowl - Whisk - Spatula - Parchment paper - Measuring cups and spoons You can make this cake even better with a few add-ins. Consider these: - Chopped nuts (like walnuts or pecans) for crunch - Dried cranberries for a tangy twist - Extra spices, like nutmeg or ginger, for warmth - A splash of bourbon or rum in the batter for depth Start by preheating your oven to 350°F (175°C). Grease a 9-inch round cake pan with cooking spray or butter. Make sure to line the bottom with parchment paper. This step helps prevent sticking and ensures easy removal. In a medium saucepan, melt 1/2 cup of unsalted butter over medium heat. Once melted, add 1 cup of granulated sugar, 1/2 teaspoon of sea salt, and 1 teaspoon of ground cinnamon. Stir the mixture gently until it bubbles. This creates a rich caramel that will be the base for your cake. Carefully pour the caramel into the prepared cake pan. Spread it evenly across the bottom. Next, take 4 medium apples, peeled, cored, and sliced. Arrange the apple slices on top of the caramel. Overlap them slightly in a circular pattern for a beautiful look. Set the pan aside while you prepare the cake batter. In a large mixing bowl, whisk together 1 1/2 cups of all-purpose flour, 1 1/2 teaspoons of baking powder, 1/4 teaspoon of baking soda, and 1/2 teaspoon of salt. In another bowl, beat 2 tablespoons of butter with 3/4 cup of sugar until light and fluffy. Add 2 large eggs, one at a time, and 1 teaspoon of vanilla extract. Mix until well combined. Gradually add the dry ingredients to this mixture, alternating with 3/4 cup of whole milk. Mix until just combined. Gently pour the cake batter over the arranged apples in the pan. Smooth the top with a spatula. Bake in the preheated oven for 35-40 minutes. Check doneness by inserting a toothpick into the center of the cake. It should come out clean when done. Once baked, let the cake cool in the pan for about 10 minutes. After cooling, place a serving plate on top of the pan. Carefully invert the cake onto the plate. If needed, tap the bottom of the pan gently to release it. For a final touch, sprinkle a little extra sea salt on top to enhance the caramel flavor. To keep your caramel from burning, use a medium heat. Stir it gently as it cooks. Watch for a light golden color. If it gets too dark, it may taste bitter. Remove it from the heat once it bubbles gently. This gives you that perfect sweet flavor without the burn. When slicing apples, use a sharp knife. Aim for even slices, about 1/4 inch thick. This helps them cook evenly. Choose apples like Granny Smith or Honeycrisp for the best taste. These apples hold their shape and add a nice tartness. Arrange them in a circular pattern for a beautiful look. If your cake doesn’t rise, check your baking powder’s freshness. Old baking powder can cause a flat cake. If the caramel sticks, let the cake cool longer before inverting. Tap the pan gently to help it release. For a dry cake, avoid overmixing the batter. Mix just until combined for a moist texture. {{image_2}} You can use many types of apples in this cake. Granny Smith apples are tart and hold their shape well. Honeycrisp apples are sweet and juicy. They add great flavor. If you want more sweetness, try Fuji apples. For a unique twist, use Gala apples. They have a lovely sweet taste and soft texture. If you need a gluten-free version, swap the all-purpose flour. Use a gluten-free flour blend instead. This blend works well in most recipes. Just make sure it has xanthan gum for the right texture. You can also use almond flour for a nutty flavor. It adds depth to your cake. To make this cake even better, add spices like nutmeg or ginger. These spices bring warmth and a cozy feel. You can also mix in chopped nuts like pecans or walnuts. They add crunch and richness. For a caramel boost, drizzle some extra caramel sauce on top. It makes a delicious treat. To keep your Salted Caramel Apple Upside-Down Cake fresh, store it in an airtight container. Place it at room temperature for up to three days. If you want it to last longer, refrigerate it. Just make sure to cover it well to avoid dryness. You can freeze this cake for later enjoyment. First, let the cake cool completely. Wrap it tightly in plastic wrap, then in aluminum foil. This double wrapping keeps moisture in and prevents freezer burn. You can freeze it for up to three months. When you're ready to eat it, thaw it in the fridge overnight. To reheat the cake, slice it into pieces. Place the slices on a microwave-safe plate. Heat it in the microwave for about 15-20 seconds. This warms it nicely without drying it out. For a crispy top, you can place the slices in a toaster oven for a few minutes. Serve warm, and if you like, drizzle extra caramel sauce on top! Yes, you can make this cake a day in advance. Just bake it, then let it cool. Once cool, cover it with plastic wrap. Keep it at room temperature overnight. This will let the flavors meld together. Before serving, you can warm it slightly in the oven. If you need a butter substitute, use coconut oil or vegetable oil. You can also try unsweetened applesauce for a healthier option. This will change the taste slightly but will still keep the cake moist and tasty. To check if your cake is done, insert a toothpick into the center. If it comes out clean, the cake is ready. If it has batter on it, it needs more time. Bake it for a few more minutes and check again. This blog post covered all you need to make a delicious apple caramel cake. You learned about the ingredients, equipment, and tips to make baking easy. I shared steps to prepare and bake the cake, plus options for variations and storage. Remember, even small changes can add big flavor. Don't be afraid to try new ideas. With practice, you will master this recipe and impress everyone. Enjoy baking your cake!

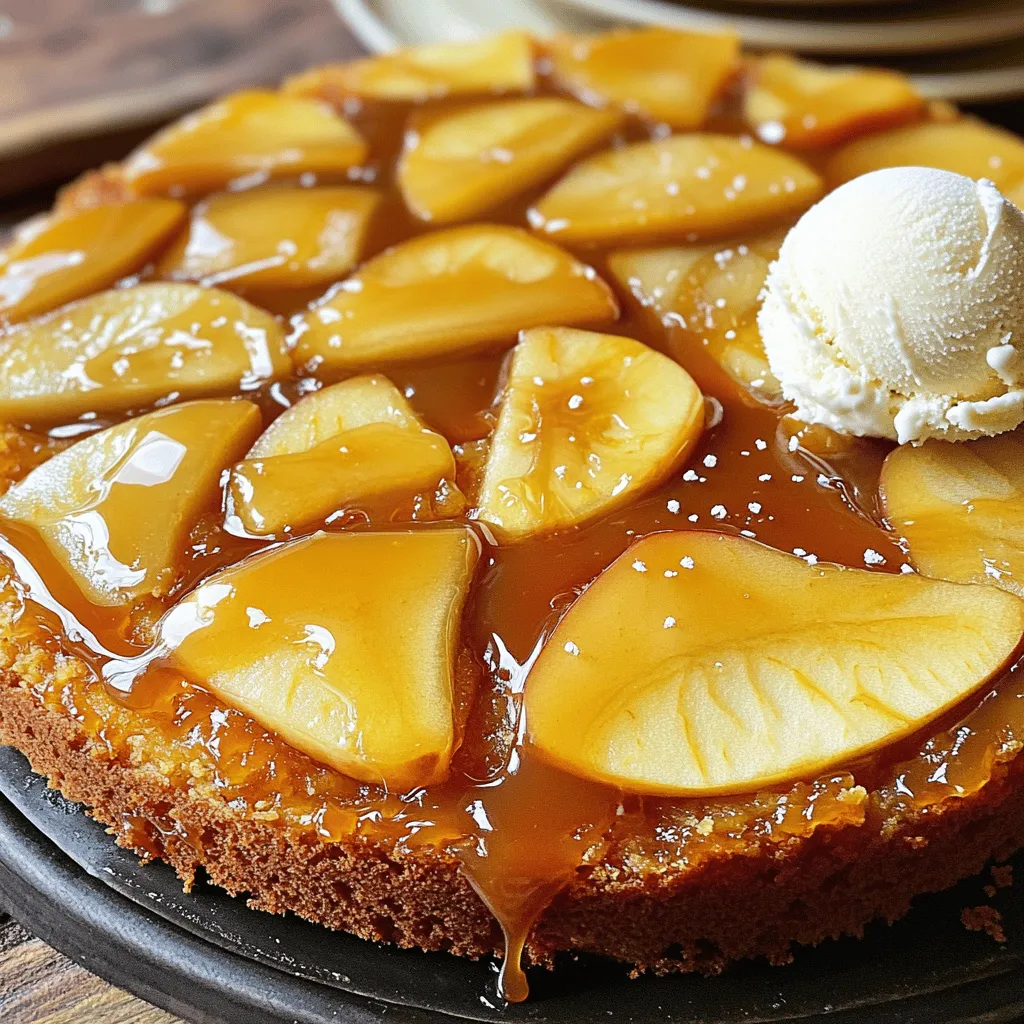
Get ready to impress with your baking skills! This Salted Caramel Apple Upside-Down Cake is not only beautiful but also bursting with flavor. I’ll guide you through making a soft, …

Read more

Categories Desserts

Creamy Pumpkin Protein Smoothie Healthy and Tasty Option

August 15, 2025 by Chef Luca
- 1 cup canned pumpkin puree - 1 banana, frozen - 1 scoop vanilla protein powder - 1 cup almond milk (or any milk of choice) - 2 tablespoons almond butter (or peanut butter) - 1 tablespoon maple syrup (optional, for sweetness) - 1 teaspoon cinnamon - 1/2 teaspoon nutmeg - 1/4 teaspoon grated ginger (optional) - Ice cubes (optional, for a thicker texture) This smoothie packs a powerful punch! Each serving contains about: - Calories: 250 - Protein: 13g - Carbohydrates: 34g - Fats: 10g - Fiber: 6g It offers a good balance of protein, carbs, and healthy fats. Pumpkin puree is rich in vitamins A and C. It boosts your immune system. It also provides fiber, which aids digestion. Bananas add natural sweetness and potassium. This helps with muscle function and energy levels. Protein powder supports muscle growth and repair. It keeps you feeling full longer. Almond butter offers healthy fats and protein. It’s great for heart health and energy. Maple syrup adds a touch of sweetness. It contains antioxidants that fight inflammation. Cinnamon and nutmeg give warmth and flavor. They also have anti-inflammatory properties. This smoothie combines health and taste in every sip! To start, gather all your ingredients. You will need: - 1 cup canned pumpkin puree - 1 frozen banana - 1 scoop vanilla protein powder - 1 cup almond milk (or any milk you like) - 2 tablespoons almond butter (or peanut butter) - 1 tablespoon maple syrup (optional) - 1 teaspoon cinnamon - 1/2 teaspoon nutmeg - 1/4 teaspoon grated ginger (optional) - Ice cubes (optional) Next, measure out the ingredients and set them on your counter. This helps keep things organized. Now, grab your blender. Add the canned pumpkin puree, frozen banana, and protein powder to the blender. Pour in the almond milk. Then, add the almond butter, maple syrup (if you want it sweeter), cinnamon, nutmeg, and ginger. Blend everything on high until it is smooth and creamy. You may need to pause and scrape down the sides to make sure everything mixes well. If you want a thicker smoothie, toss in a handful of ice cubes and blend again. This gives your smoothie a nice, frosty texture. Always taste your smoothie before serving. You can add more sweetness or spice if needed. Adjusting flavors makes the drink perfect for your taste. To make your smoothie creamier, I recommend adding more almond butter. This nut butter adds a rich texture and flavor. You can also use full-fat coconut milk instead of almond milk. It gives a nice, thick feel. Another trick is to add a few ice cubes while blending. This makes the drink colder and thicker. Taste your smoothie before serving. If it needs more sweetness, add a bit of maple syrup. Start with one teaspoon, then blend and taste again. If you prefer a less sweet drink, skip the syrup. The banana and pumpkin already add some natural sweetness. Pour your smoothie into chilled glasses for a refreshing look. You can top it with a sprinkle of cinnamon or some chopped nuts. This adds a nice crunch. For a fun twist, serve it in a pumpkin-shaped cup. Enjoy your creamy pumpkin protein smoothie any time of the day! {{image_2}} You can easily tweak the flavors in your creamy pumpkin protein smoothie. Here are some fun ideas: - Chocolate: Swap out the vanilla protein powder for chocolate. This adds a rich, sweet taste. - Coffee: Add a splash of cold brew coffee for a morning kick. It pairs well with pumpkin. - Vanilla Extract: A teaspoon of vanilla extract can enhance the flavor. It gives a lovely warmth. If you have dietary needs, don’t worry. You can adjust the recipe to fit your preferences: - Nut-Free: Use sunflower seed butter instead of almond butter. This keeps it nut-free and tasty. - Dairy-Free: Stick to almond milk or coconut milk. Both options work great for a creamy base. - Protein Powder Alternatives: If you’re vegan, choose a plant-based protein powder. This keeps your smoothie plant-friendly. Feel free to swap ingredients based on the season. This keeps your smoothie fresh and fun: - Fall: Use pumpkin spice instead of cinnamon and nutmeg. It brings a cozy flavor. - Winter: Add a pinch of cloves for a warm, spiced taste. It’s perfect for chilly days. - Spring/Summer: Use fresh fruit like mango or pineapple instead of banana. This adds a bright, fruity twist. You can store your creamy pumpkin protein smoothie in the fridge. Use a sealed jar or container. It stays fresh for up to two days. Before drinking, give it a good shake. This helps mix any separation that may happen. If you want to save your smoothie for later, freeze it. Pour the smoothie into ice cube trays or freezer bags. It can last up to three months in the freezer. When you're ready to drink it, thaw it in the fridge overnight. Then, blend it again for a smooth texture. You can enjoy your smoothie cold or warm. If you prefer it warm, heat it gently on the stove. Stir it often to prevent burning. Do not microwave it, as this can change the texture. Always check the temperature before drinking. To make this smoothie vegan, swap the protein powder for a plant-based option. Use almond milk or any nut milk instead of dairy milk. Choose almond butter or peanut butter, as both are vegan-friendly. Skip the maple syrup if you want, or use agave syrup for sweetness. Yes, you can use fresh pumpkin. Cook and puree the pumpkin until smooth. Fresh pumpkin may have a different taste, so adjust spices to your liking. Make sure to remove the skin and seeds before cooking. This will add a nice home-cooked feel to your smoothie. To make your smoothie thicker, add more frozen banana or ice cubes. You can also blend in extra almond butter for a creamier texture. If you want, reduce the amount of milk you use. Just remember, blend well to mix everything evenly and enjoy the thick goodness! This article covered ingredients for smoothies, their nutritional benefits, and preparation steps. I shared tips for creaminess, sweetness, and various flavor options. You learned about short and long-term storage ideas, plus how to reheat if needed. Remember, making smoothies is fun and flexible. Use what you have. Experiment with flavors and storage methods. Enjoy your delicious creations!

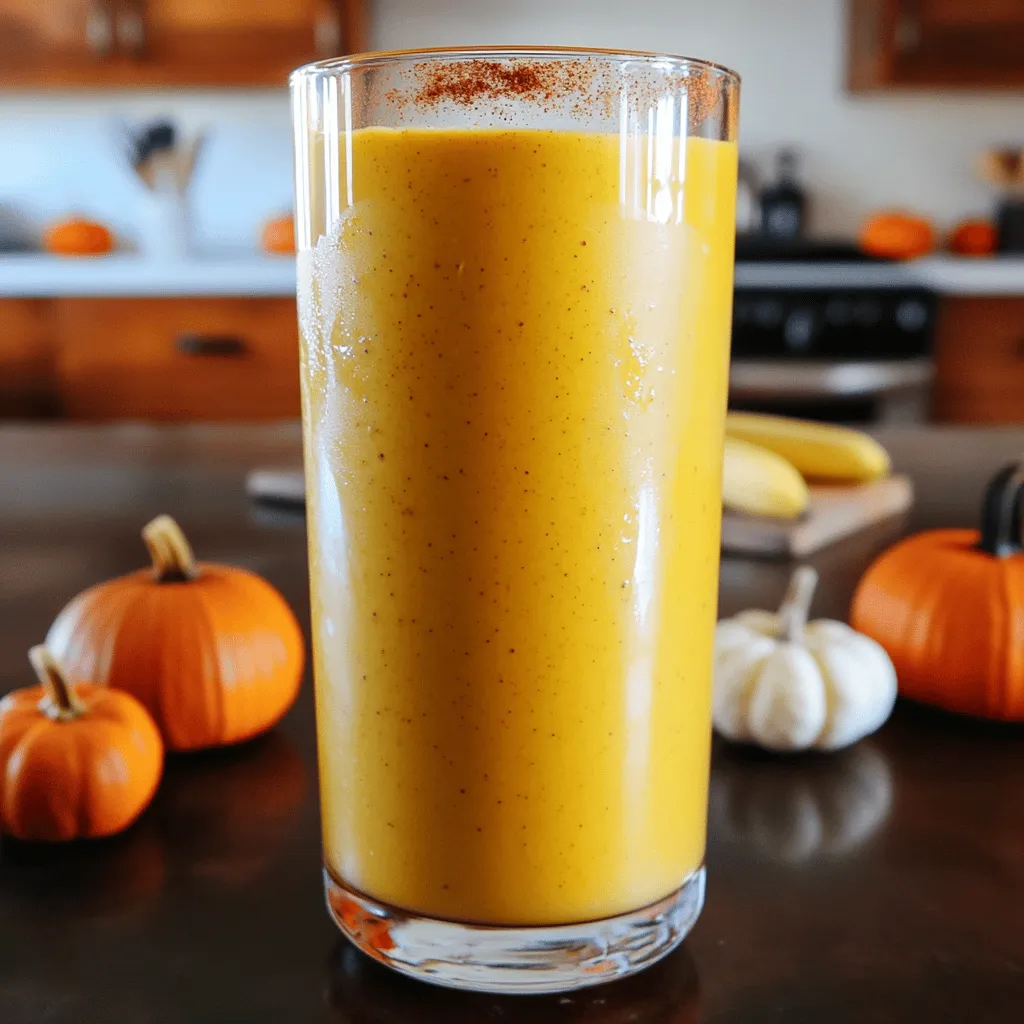
Looking for a tasty and healthy drink? This Creamy Pumpkin Protein Smoothie is just what you need! Packed with flavors and nutrients, it’s a perfect blend for a quick breakfast …

Read more

Categories Breakfast

Fluffy Pumpkin Biscuits Perfect for Any Occasion

August 15, 2025 by Chef Luca
To make fluffy pumpkin biscuits, gather these simple ingredients: - 2 cups all-purpose flour - 1 tablespoon baking powder - 1/2 teaspoon baking soda - 1/2 teaspoon salt - 1 teaspoon ground cinnamon - 1/2 teaspoon ground ginger - 1/4 teaspoon ground nutmeg - 1/4 cup cold unsalted butter, cubed - 3/4 cup pumpkin puree (canned or freshly made) - 1/4 cup milk - 2 tablespoons honey or maple syrup - 1 egg, lightly beaten (for egg wash) You can change some ingredients if needed. For a gluten-free option, use a gluten-free flour blend. If you don’t have pumpkin puree, you can use sweet potato puree. For dairy-free biscuits, replace the milk with almond milk or oat milk. You can also swap honey with agave syrup for a vegan version. Use dry measuring cups for flour. Spoon the flour into the cup, then level it off with a knife. This gives you the right amount. For liquids, use a clear measuring cup with marks. Always check at eye level for an accurate measurement. If you use cold butter, it helps the biscuits rise well. Cut it into small cubes for easy mixing. First, set your oven to 425°F (220°C). This step ensures your biscuits bake perfectly. Line a baking sheet with parchment paper. This keeps the biscuits from sticking. In a large bowl, whisk together: - 2 cups all-purpose flour - 1 tablespoon baking powder - 1/2 teaspoon baking soda - 1/2 teaspoon salt - 1 teaspoon ground cinnamon - 1/2 teaspoon ground ginger - 1/4 teaspoon ground nutmeg Mix until everything is well combined. Next, add 1/4 cup of cold, cubed unsalted butter. Use your fingers or a pastry cutter to mix until you see coarse crumbs. In another bowl, combine: - 3/4 cup pumpkin puree - 1/4 cup milk - 2 tablespoons honey or maple syrup Stir this mixture until it’s smooth. Then pour it into the flour mix. Stir gently but do not over-mix. It’s fine if a few lumps remain. Now it’s time to shape your biscuits. Transfer the dough onto a lightly floured surface. Pat it down gently to form a rectangle about 1 inch thick. Use a biscuit cutter or a floured glass to cut out biscuits. Place them on the prepared baking sheet with about an inch apart. Gather any scraps and shape more biscuits until all the dough is used. Before baking, brush the tops of the biscuits with a lightly beaten egg. This will give them a lovely golden color. Place the baking sheet in the oven and bake for 12-15 minutes. Keep an eye on them! They should turn golden brown and a toothpick should come out clean when inserted. Once done, remove them from the oven. Let the biscuits cool slightly on a wire rack before enjoying. To get fluffy pumpkin biscuits, use cold butter. Cold butter helps create layers. When you mix it in, stop when it looks like crumbs. Over-mixing will make them tough. Also, handle the dough gently. A light touch keeps your biscuits airy. To boost the flavor, use fresh spices. Fresh ground cinnamon, ginger, and nutmeg add warmth. You can try adding a pinch of cloves for extra depth. Honey or maple syrup sweetens the biscuits nicely. You can also switch the milk with buttermilk for a tangy kick. Avoid using warm ingredients. Warm butter or milk can ruin the texture. Don’t forget to preheat your oven. If it’s not hot enough, your biscuits won’t rise well. Lastly, don’t roll the dough too thin. Keep it about an inch thick to ensure they puff up nicely. {{image_2}} You can easily change the flavor of these biscuits. Try adding vanilla extract for a sweet touch. A splash of maple extract will give a warm flavor. You might also like to use different spices. Cardamom or allspice can add a nice twist. Experiment with what you like best! If you need a gluten-free version, replace all-purpose flour with a gluten-free blend. Look for a mix that contains xanthan gum. This will help the biscuits stay fluffy and hold their shape. Be sure to check the baking powder, as some brands may contain gluten. Add-ins can make these biscuits special. Try mixing in chopped nuts like walnuts or pecans for crunch. Dried fruit like cranberries or raisins can add sweetness. You can also fold in chocolate chips for a treat. Just remember to keep the total amount to about 1 cup so the dough stays light. After enjoying your fluffy pumpkin biscuits, let them cool completely. Place them in an airtight container to keep them fresh. You can also wrap them tightly in plastic wrap. Store them at room temperature for up to two days. If you want them to last longer, place them in the fridge. They can stay good there for about a week. When you’re ready to enjoy your biscuits again, reheating is easy. Preheat your oven to 350°F (175°C). Place the biscuits on a baking sheet. Heat them for about 5 to 10 minutes until warm. You can also use a microwave. Just heat them for 15 to 30 seconds. The microwave will make them soft, but they may lose some crispness. If you want to save biscuits for later, freezing works well. Wrap each biscuit in plastic wrap and place them in a freezer bag. Push out as much air as you can before sealing. You can freeze them for up to three months. To enjoy, thaw them in the fridge overnight, then reheat in the oven as mentioned above. This way, you can have fluffy pumpkin biscuits whenever you crave them! Yes, you can use fresh pumpkin. Start by peeling and cubing a sugar pumpkin. Boil or roast it until soft. Then, blend it until smooth. Fresh pumpkin gives a bright flavor. It may add moisture, so adjust the flour a bit if needed. To make these biscuits vegan, swap the butter for a plant-based option. Use coconut oil or vegan butter. For the milk, choose almond, soy, or oat milk. Omit the egg wash or use a mix of almond milk and a bit of maple syrup for a nice glaze. Your biscuits are done when they turn golden brown. Insert a toothpick in the center. If it comes out clean, they are ready. The tops should feel firm yet soft. Keep an eye on them in the last few minutes to avoid burning. This blog post covered the key steps to make great biscuits. We explored ingredients, measurements, and substitutions to help you get started. I shared tips for perfect texture and flavor, plus common mistakes to avoid. You also learned different variations and storage tips for leftovers. Remember, practice makes perfect when baking. Enjoy experimenting with flavors and variations, and soon you'll bake biscuits like a pro. Happy baking!

If you love the warm, cozy flavors of fall, you’ll adore these Fluffy Pumpkin Biscuits! They are soft, easy to make, and perfect for any gathering—whether it’s breakfast or a …

Read more

Categories Breakfast

Classic Pumpkin Spice Latte Simple and Cozy Recipe

August 15, 2025 by Chef Luca
To make a classic pumpkin spice latte, you need key ingredients. Here they are: - 1 cup brewed espresso or strong coffee - 1/2 cup milk (dairy or non-dairy) - 2 tablespoons pure pumpkin puree - 1 tablespoon maple syrup (or honey) - 1/2 teaspoon pumpkin pie spice (plus extra for garnish) - 1/4 teaspoon vanilla extract - Whipped cream (optional) - Cinnamon stick or star anise for garnish (optional) These ingredients create a rich, warm drink that feels like a cozy hug. You can switch out some ingredients if you want. Here are some ideas: - Use almond or oat milk instead of regular milk for a vegan option. - Try agave syrup if you don't have maple syrup. - Use a sugar-free pumpkin spice blend for less sugar. - If you want less caffeine, use decaf coffee or espresso. These alternatives help you make a drink that fits your taste. Choosing the right pumpkin puree is key for flavor. Here are my tips: - Look for 100% pure pumpkin puree, not pumpkin pie filling. - Check the label for no added sugars or spices. - Canned pumpkin is often easier and just as tasty. - If you prefer fresh, roast your pumpkin and blend it well. Using good pumpkin puree makes your latte taste great! Start by grabbing a small saucepan. Pour in 1/2 cup of milk and 2 tablespoons of pure pumpkin puree. Heat over medium heat. Use a whisk to mix them together. Keep whisking until it’s hot but not boiling. This helps blend the flavors well. Next, add 1 tablespoon of maple syrup, 1/2 teaspoon of pumpkin pie spice, and 1/4 teaspoon of vanilla extract. Continue whisking until it is smooth and well combined. While your milk mixture heats, it’s time for the coffee! Brew 1 cup of espresso or strong coffee. The choice is yours. If you like strong flavors, go for espresso. If you prefer a milder taste, regular coffee works great. Make sure it’s hot and ready for your latte! Now comes the fun part! Take a large mug and pour in the hot espresso. Carefully add the pumpkin milk mixture on top. It should look creamy and inviting. If you want to make it extra special, top it with whipped cream. Sprinkle a little extra pumpkin pie spice on top for a lovely finish. You can even add a cinnamon stick or a star anise for a cozy touch. Enjoy your warm, homemade pumpkin spice latte! To make great froth, use cold milk. Cold milk froths better than warm milk. Pour your milk into a small saucepan with pumpkin puree. Heat it slowly over medium heat. Whisk it constantly until it’s hot but not boiling. This keeps the milk smooth. For a creamier froth, use whole milk or oat milk. If you want a thicker foam, try using a frother. You can adjust the sweetness of your latte. Maple syrup adds a warm flavor. Honey is another great option. If you want less sugar, try stevia or monk fruit. For spice levels, add more or less pumpkin pie spice. You can even mix in a dash of cayenne for a kick. Always taste as you go to find your perfect blend. If you love chocolate, add a spoon of cocoa powder. This gives a rich taste. Nutmeg adds a warm, earthy flavor. A sprinkle on top makes your latte fancy. You could also try flavored syrups, like vanilla or hazelnut, for more fun. Experiment with different toppings too, like a sprinkle of cinnamon or a drizzle of caramel. Let your taste guide you! {{image_2}} To make an iced version, brew your espresso first. Let it cool. Mix the pumpkin, milk, syrup, and spices in a shaker. Fill a glass with ice. Pour the espresso over the ice. Add the pumpkin mixture on top. Stir well to combine. Enjoy this cool treat on warm days. You can easily make a vegan version. Use non-dairy milk like almond, oat, or soy. Replace honey with maple syrup for sweetness. The rest of the recipe stays the same. This way, you still get all the cozy flavors without dairy. There are many milk options for your latte. Almond milk gives a nutty taste. Oat milk adds creaminess. Coconut milk brings a tropical vibe. Each choice changes the flavor a bit. Feel free to experiment and find your favorite! To store leftover pumpkin puree, place it in a clean, airtight container. You can keep it in the fridge for up to one week. For longer storage, freeze it. Use freezer-safe bags or containers. Label them with the date. You can freeze pumpkin puree for up to six months. When you're ready to use it, thaw it in the fridge overnight. When reheating your pumpkin spice latte, use a small saucepan. Heat it over low to medium heat. Stir gently to avoid burning. You want it warm but not boiling. If you have a microwave, you can use it too. Heat in short bursts, stirring in between. This method keeps the flavors fresh and the milk smooth. To keep your pumpkin pie spice fresh, store it in a cool, dark place. Use a tightly sealed container. Ground spices lose their flavor over time. Try to use them within six months for the best taste. If you have whole spices, they last longer. Grind them as needed for maximum flavor. Yes, you can! If you do not have espresso, use strong coffee instead. The taste will still be rich and cozy. Brew your favorite coffee and follow the same steps. Just remember to keep the flavors balanced. You want the pumpkin and spices to shine through. A homemade Pumpkin Spice Latte has around 200-300 calories. The exact count varies based on your ingredients. If you use whole milk and whipped cream, it will be higher. Switch to non-dairy milk or skip the cream to lower the count. You can still enjoy a tasty drink with fewer calories. To make a healthier Pumpkin Spice Latte, swap out some ingredients. Use almond or oat milk instead of whole milk. This choice cuts calories and fat. You can replace maple syrup with a sugar-free sweetener. Also, add a little more pumpkin puree for fiber. These simple changes keep the flavor while making it better for you. You now have all the tools to make a great Pumpkin Spice Latte at home. We discussed key ingredients, step-by-step instructions, and tips for customization. You learned about variations and how to store extra ingredients. Embrace your creativity in making this drink. Experiment with flavors or adjust sweetness to your liking. With these tips, you’ll craft a perfect latte every time. Enjoy every sip of your homemade treat.

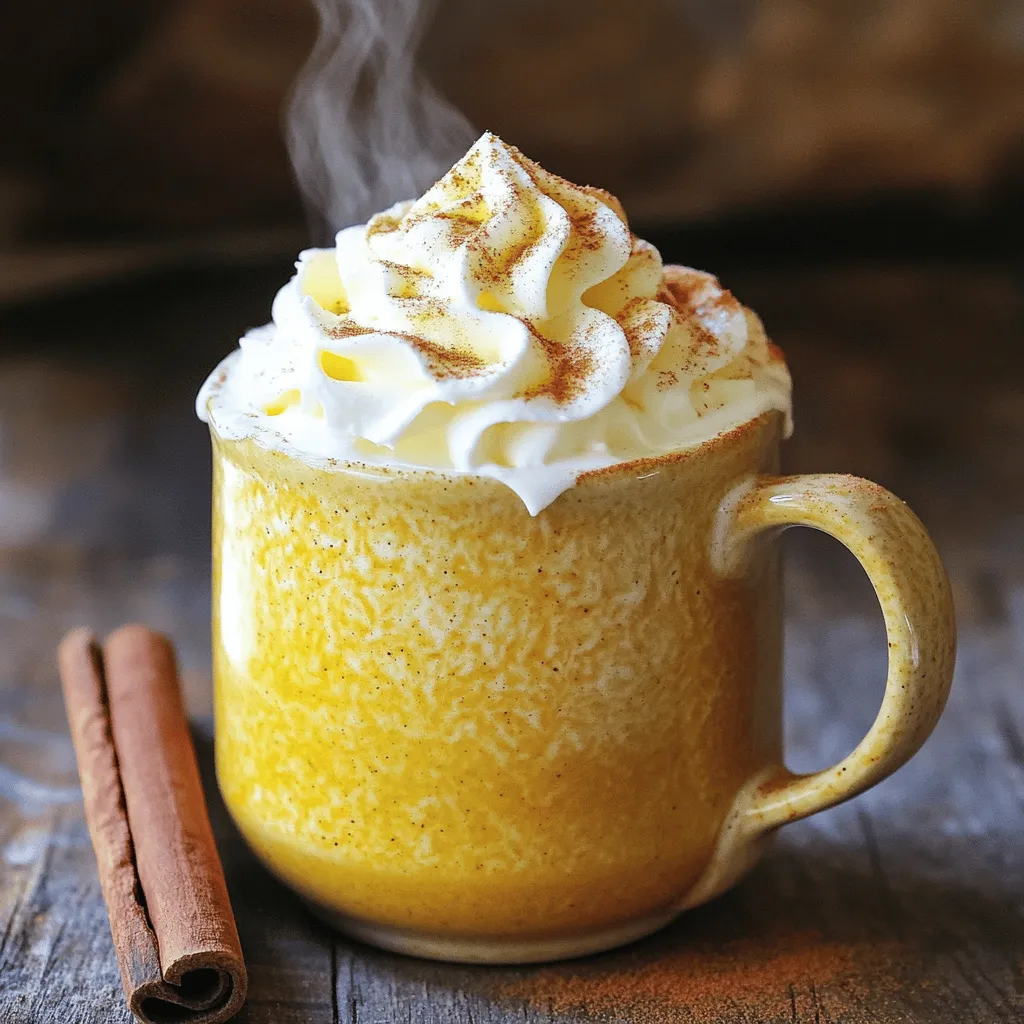
Fall is here, and that means it’s time for a Classic Pumpkin Spice Latte! This simple recipe warms your soul with rich pumpkin and cozy spices. You don’t need a …

Read more

Categories Breakfast

Apple Pie Cheesecake Bites Delightful Dessert Treat

August 15, 2025 by Chef Luca
- 8 oz cream cheese - 1 cup apples, peeled and finely chopped - 1 cup graham cracker crumbs The cream cheese forms the base of our cheesecake bites. It gives them that rich and creamy texture. The apples add a fresh crunch and a sweet flavor, making each bite special. The graham cracker crumbs create a delicious crust that holds everything together. - 4 tablespoons unsalted butter - 1/2 cup sugar Unsalted butter helps bind the graham cracker crust. It also adds a nice richness. Sugar sweetens the cheesecake filling and balances the flavors. - 1 teaspoon vanilla extract - 1 teaspoon ground cinnamon - 1 tablespoon lemon juice - 1/4 cup brown sugar Vanilla extract adds depth to the cheesecake. Ground cinnamon brings warmth and pairs well with the apples. Lemon juice brightens the flavors and keeps the apples fresh. Brown sugar gives a caramel-like taste that enhances the overall dessert. These ingredients work together to create a tasty treat. You can enjoy them at any gathering or just for yourself! Start by preheating your oven to 350°F (175°C). This temperature helps the bites bake evenly. While the oven heats, line a mini muffin tin with mini cupcake liners. Lining the tin makes it easy to remove the bites after baking. Next, mix the graham cracker crumbs and melted butter in a bowl. Stir until the crumbs are fully coated. Take about one tablespoon of this mixture and press it into the bottom of each cupcake liner. This forms the tasty crust for your bites. In a large mixing bowl, beat the softened cream cheese and sugar together. Mix until it becomes smooth and creamy. Then, add the vanilla extract and egg. Blend everything well. Be sure to scrape down the sides of the bowl. This step ensures all ingredients combine evenly. Now, take a separate bowl to prepare the apple mixture. Combine the chopped apples, ground cinnamon, lemon juice, and brown sugar. Stir until the apples are well coated with the spices and sugar. This mixture adds a delicious, fruity flavor to your bites. To assemble, spoon about a tablespoon of the cream cheese filling into each crust. Then, top with a heaping teaspoon of the apple mixture. Use a toothpick or skewer to swirl the apple mixture into the cheesecake. This creates a lovely marbled effect. Bake in the preheated oven for 15-18 minutes. Check for doneness; the cheesecake should be set but still slightly jiggly in the center. Once done, remove from the oven and let cool for about 10 minutes. Afterward, transfer them to a wire rack to cool completely. Refrigerate for at least 2 hours before serving. To ensure even baking, arrange the muffin tin in the center of your oven. This helps heat circulate well. Rotate the tin halfway through baking for consistent results. To know when they are done, look for a slight jiggle in the center. The edges should be set but not overcooked. If they puff up and look firm, they are likely overbaked. For a cute presentation, serve these bites on a lovely platter. Drizzle caramel sauce on top for added sweetness. Sprinkling cinnamon enhances the apple pie flavor and looks great. Pair these bites with whipped cream or vanilla ice cream. The cold creaminess contrasts well with the warm spices. To keep your cheesecake bites fresh, store them in an airtight container in the fridge. This helps maintain their creamy texture. They last up to a week in the fridge. If you want to keep them longer, freezing is a good option. {{image_2}} You can make these Apple Pie Cheesecake Bites fit different diets easily. For a gluten-free version, use gluten-free graham crackers. Many brands offer tasty options that work well for the crust. If you want vegan alternatives for cream cheese, try using cashew cream or tofu. Both give a creamy texture. You can mix them with a bit of lemon juice to add tang. This way, everyone can enjoy these bites! Get creative with flavors! You can swap apples for other fruits. Try pears or even berries. Each fruit brings its own twist to the cheesecake bites. Adding spices can also boost flavor. Besides cinnamon, consider nutmeg or allspice. A hint of ginger can give a warm kick. These variations make each batch new and exciting! To store leftover Apple Pie Cheesecake Bites, place them in an airtight container. This keeps them fresh and tasty. You can also use plastic wrap if you don't have a container. They will stay good in the fridge for about 4 to 5 days. Make sure they are cool before storing to avoid extra moisture. You can freeze these bites after baking. Just let them cool completely first. Then, wrap each bite in plastic wrap. Place them in a freezer-safe bag or container. They can last in the freezer for up to 2 months. To enjoy them, take out what you need and let them thaw in the fridge overnight. You can also warm them up in the oven for a few minutes if you prefer them warm. Look for a slight jiggle in the center. The edges should firm up while the middle is soft. This means they are set but not overcooked. You can also insert a toothpick into the center. If it comes out clean or with a few crumbs, they are ready. Yes, you can prep these bites in advance. You can make the filling and crust the day before. Just keep them stored in the fridge. Bake them on the day you plan to serve. This keeps them fresh and tasty. If you want a different taste, try Greek yogurt or ricotta cheese. Both can give a nice texture. You can also use vegan cream cheese for a dairy-free option. Each alternative will change the flavor a bit, so choose what you like best. This blog post covered how to make delicious cheesecake bites. We explored key ingredients like cream cheese, apples, and graham crackers. You learned essential baking steps, tips for even baking, and storage ideas. In conclusion, these cheesecake bites are fun to make and easy to share. Feel free to experiment with flavors and variations. Enjoy your tasty treats and impress family and friends with your baking skills!

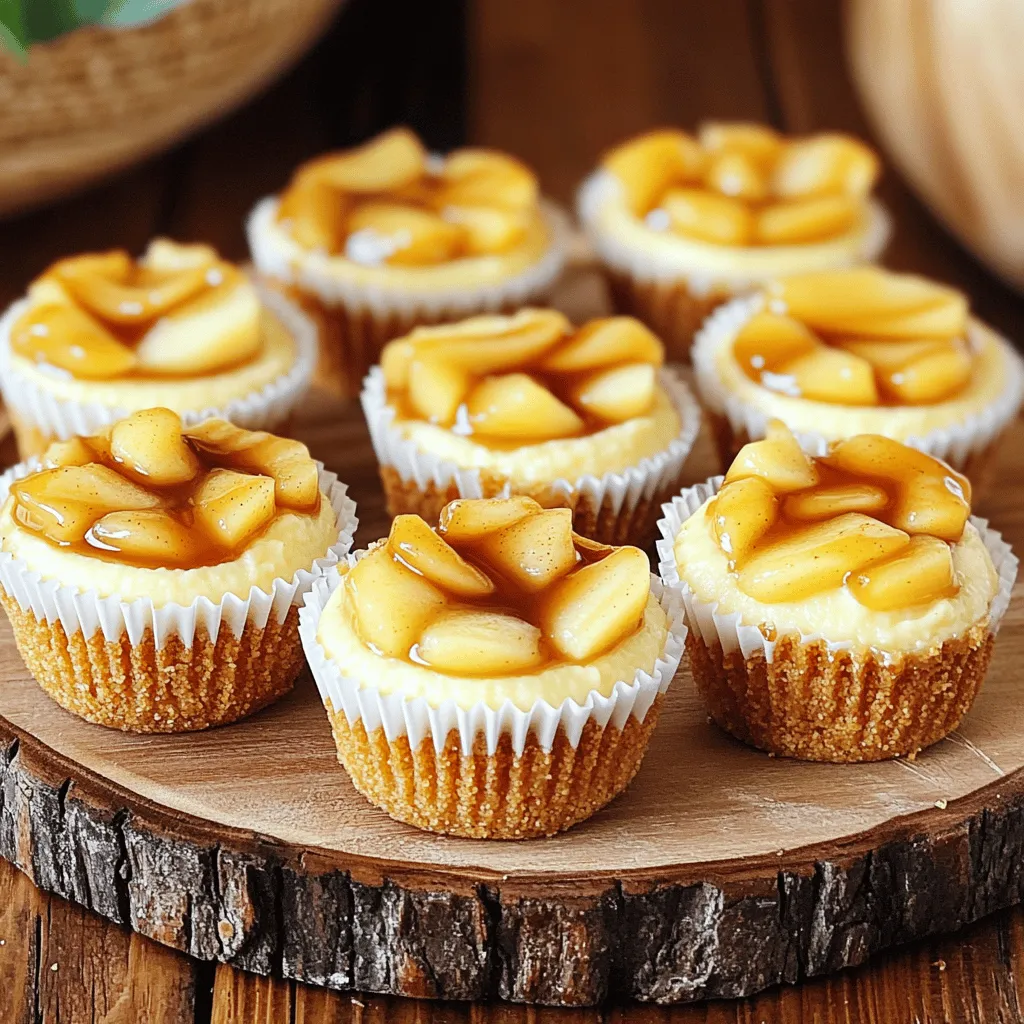
Craving a sweet twist on a classic dessert? Let’s dive into the world of Apple Pie Cheesecake Bites! These little delights combine creamy cheesecake with spiced apples in a perfect …

Read more

Categories Desserts

Butter Mushroom Pot Pie Savory Comfort Food Delight

August 15, 2025 by Chef Luca
- 2 cups mushrooms, sliced (preferably a mix of cremini and shiitake) - 1 medium onion, diced - 2 cloves garlic, minced - 1 cup carrots, diced - 1 cup celery, diced - 1 cup frozen peas - 3 tablespoons unsalted butter - 3 tablespoons all-purpose flour - 2 cups vegetable broth - 1 cup heavy cream (or coconut cream for a dairy-free option) - 1 teaspoon thyme - Salt and pepper to taste - 1 sheet puff pastry, thawed - 1 egg (for egg wash) First, always clean your mushrooms gently with a damp cloth. This helps keep them fresh. Next, chop the onion, garlic, carrots, and celery into small pieces. This allows them to cook evenly. For the garlic, press it with a knife before mincing. This releases more flavor. When dicing the carrots and celery, aim for uniform size. This ensures they soften at the same rate. It’s best to thaw the puff pastry in the fridge overnight. This keeps it easy to handle. If you need a dairy-free option, use coconut cream instead of heavy cream. For gluten-free, choose a gluten-free flour blend in place of all-purpose flour. You can also swap the puff pastry with a gluten-free crust. If you want a vegan version, replace the butter with olive oil and the egg with a flax egg. Feel free to mix in your favorite veggies, like spinach or bell peppers, to the filling. Start by gathering your ingredients. You will need: - 2 cups mushrooms, sliced (cremini and shiitake work best) - 1 medium onion, diced - 2 cloves garlic, minced - 1 cup carrots, diced - 1 cup celery, diced - 1 cup frozen peas - 3 tablespoons unsalted butter - 3 tablespoons all-purpose flour - 2 cups vegetable broth - 1 cup heavy cream (or use coconut cream for dairy-free) - 1 teaspoon thyme - Salt and pepper to taste - 1 sheet puff pastry, thawed - 1 egg (for egg wash) Preheat your oven to 400°F (200°C). This step ensures the pot pie cooks evenly and gets that golden crust. In a large skillet, melt the butter over medium heat. Add the diced onion, carrots, and celery. Sauté for about 5 minutes until softened. This builds the base flavor. Next, stir in the minced garlic and sliced mushrooms. Cook for another 5 minutes. The mushrooms will release moisture and brown nicely. Sprinkle the flour over the mixture. Stir well to combine, cooking for 2 more minutes to create a roux. This step thickens your filling. Gradually pour in the vegetable broth while stirring. Follow with the cream and allow the mix to simmer for 5 minutes until it thickens. Add the frozen peas, thyme, salt, and pepper. Mix well and remove from heat. Let it cool slightly before you add it to your pie. Roll out the puff pastry on a floured surface. Cut it to fit over your pie dish. Spoon the mushroom filling into the dish. Cover it with the puff pastry and seal the edges. Cut small vents in the top for steam to escape. Brush the pastry with beaten egg for a golden finish. Bake in the preheated oven for 25-30 minutes. Keep an eye on it. You want the pastry to be puffed and golden brown. Remove it from the oven and let it cool for a few minutes before serving to avoid burns. Serve it in individual bowls, and garnish with fresh thyme for a beautiful touch. Enjoy your Butter Mushroom Pot Pie! To make a great filling, use fresh mushrooms. I like cremini and shiitake. Slice them thinly for even cooking. Start by sautéing onions, carrots, and celery in butter. This gives the filling a rich base. Cook these until they soften, about five minutes. Next, add garlic and mushrooms. Cook until mushrooms brown and moisture leaves, about five more minutes. Sprinkle flour over the mix and stir well. This thickens the filling. Gradually add vegetable broth and cream. Let the mix simmer until it thickens, about five minutes. Don't forget to add peas, thyme, salt, and pepper for flavor. Allow it to cool slightly before using. For a golden puff pastry, start with a thawed sheet. Roll it out on a floured surface to fit your dish. Cut small vents on top to let steam escape. This helps the pastry rise and stay flaky. Brush the pastry with a beaten egg. This gives a shiny, golden finish when baked. Bake at 400°F (200°C) for 25-30 minutes. Keep an eye on it to avoid burning. Avoid using old or soggy mushrooms, as they can ruin the taste. Don't skip the cooling step for the filling. If it's too hot, the pastry will become soggy. Make sure to seal the edges of the pastry well. If not sealed, the filling can leak out. Lastly, remember to keep an eye on bake time. Overbaking can lead to a dry pot pie. {{image_2}} You can easily make this pot pie fully vegetarian. Instead of using heavy cream, use coconut cream or a mix of cashew cream and vegetable broth. These options keep your filling rich and creamy. You can also add more veggies like bell peppers or zucchini for extra flavor and texture. Using different mushrooms can change the taste of your pot pie. Cremini and shiitake mushrooms work well together, but try adding portobello or oyster mushrooms for a unique twist. Each type brings its own flavor. Mix and match to find your favorite combo. If you need a gluten-free version, swap out the all-purpose flour for a gluten-free blend. You can also use a gluten-free puff pastry. Many stores sell frozen options that work great. Always check the labels to make sure they fit your needs. Store any leftover Butter Mushroom Pot Pie in an airtight container. Place it in the fridge. It will stay fresh for about 3 to 4 days. For best taste, let it cool before sealing. Avoid leaving it out at room temperature. This helps keep the filling creamy and tasty. When you are ready to enjoy your leftovers, reheat the pot pie in the oven. Preheat your oven to 350°F (175°C). Cover the pie with foil to keep it from browning too much. Heat for about 15 to 20 minutes. Check if it is hot all the way through. If you want a crispier crust, remove the foil for the last 5 minutes. To freeze the pot pie, let it cool completely. Wrap it well in plastic wrap. Then, place it in a freezer-safe bag or container. It can last up to 2 months in the freezer. When you are ready to eat, thaw it overnight in the fridge. Reheat it as mentioned above for the best taste. This way, you can enjoy this savory delight anytime! To make Butter Mushroom Pot Pie dairy-free, you can swap heavy cream for coconut cream. Coconut cream gives a creamy texture without dairy. Use a plant-based butter instead of unsalted butter. This keeps the rich flavor while making it suitable for dairy-free diets. Yes, you can use different types of pastry for your pot pie. Puff pastry works well for its flaky texture. You can also try pie crust or biscuit dough for a different bite. If you want to be unique, use phyllo dough for a lighter, crispier top. Several sides go great with Butter Mushroom Pot Pie. A fresh green salad adds a nice crunch. Roasted veggies can bring extra flavor to your meal. You could also serve it with mashed potatoes for a comforting touch. In this article, we explored the key ingredients and tips for making a Butter Mushroom Pot Pie. You learned about ingredient prep, cooking methods, and common mistakes to avoid. We also discussed tasty variations and how to store leftovers or freeze for later. Cooking can be fun and rewarding. With these tips, I believe you will create a delightful dish that everyone will love. Enjoy your cooking journey!

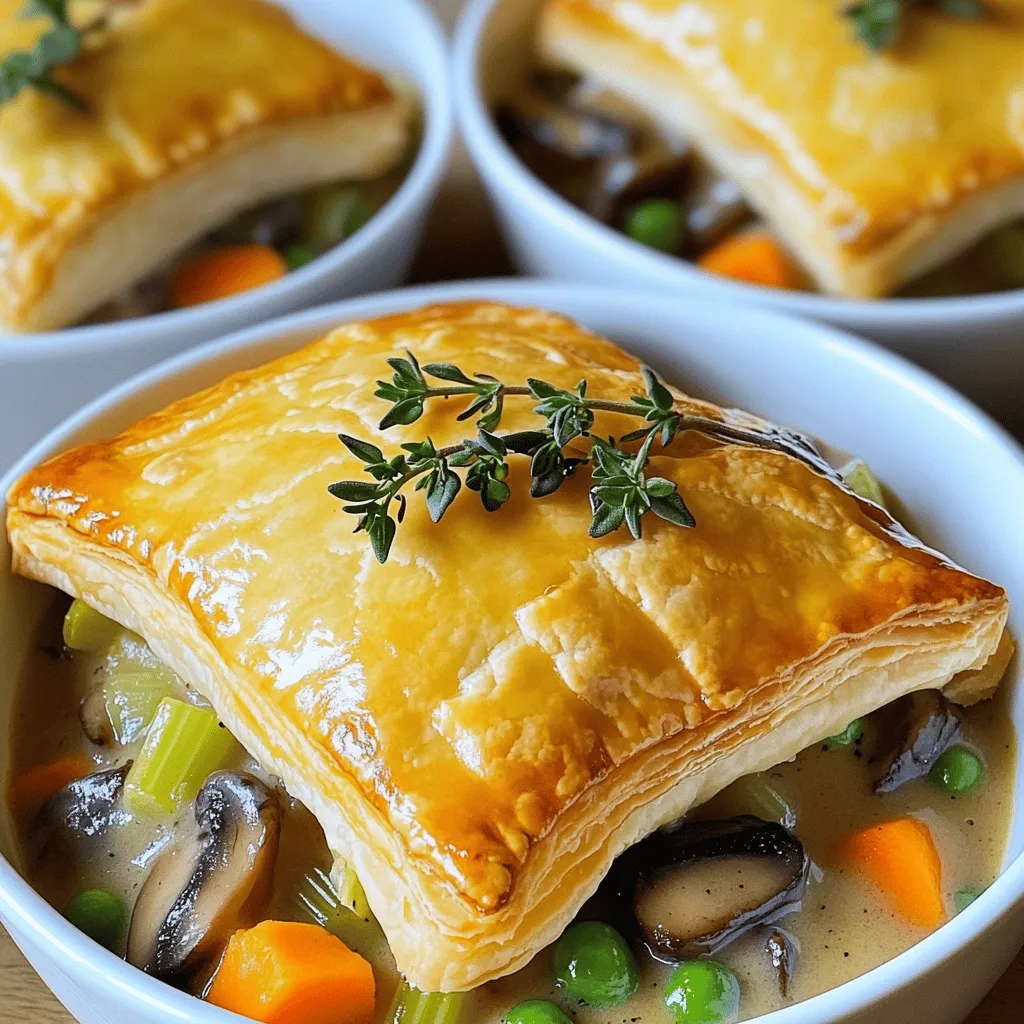
Craving something warm and hearty? You’re in the right place! My Butter Mushroom Pot Pie is a savory hug in a dish, perfect for any season. Packed with rich flavors …

Read more

Categories Dinner

Amish Applesauce Cake Simple and Delicious Treat

August 15, 2025 by Chef Luca
- 2 cups unsweetened applesauce - 1 cup granulated sugar - 1/2 cup brown sugar, packed - 1/2 cup vegetable oil - 3 large eggs These ingredients make the cake moist and sweet. The unsweetened applesauce brings a natural flavor. Both sugars add sweetness and a delightful texture. The oil keeps the cake tender, while the eggs help it rise. - 2 cups all-purpose flour - 1 teaspoon baking soda - 1 teaspoon baking powder - 1 teaspoon ground cinnamon - 1/2 teaspoon ground nutmeg - 1/2 teaspoon salt These dry ingredients are key to the cake's structure. The flour provides the base, while the baking soda and powder help it rise. Ground cinnamon and nutmeg add warm spices, making every bite flavorful. Salt balances the sweetness. - 1 cup walnuts, chopped - 1/2 cup raisins Add-ins can enhance the cake’s texture and taste. Walnuts give a satisfying crunch, while raisins add sweetness. You can mix and match these options based on your taste. They make the cake even more special and fun. To make Amish applesauce cake, start by preheating your oven to 350°F (175°C). This step is key to ensuring even baking. Next, take a 9x13 inch baking pan and grease it with butter or oil. Then, dust it lightly with flour. This helps the cake come out easily after baking. Now, let’s mix the ingredients. In a large bowl, combine the unsweetened applesauce, granulated sugar, brown sugar, and vegetable oil. Mix these well until the sugars blend into the applesauce. Add the eggs, one by one, mixing well after each egg. You want a smooth mixture. In another bowl, whisk together the flour, baking soda, baking powder, ground cinnamon, nutmeg, and salt. Gradually add this dry mix to your wet ingredients. Stir until just combined; be careful not to overmix. If you like, fold in chopped walnuts and raisins for extra flavor. Once your batter is ready, pour it into the greased baking pan. Spread it out evenly with a spatula. Now, place the pan in the preheated oven. Bake the cake for 30 to 35 minutes. To check if it’s done, insert a toothpick into the center. If it comes out clean, your cake is ready! After baking, let the cake cool in the pan for about 10 minutes. Then, transfer it to a wire rack to cool completely. This step helps maintain the cake's moistness and flavor. Enjoy your delicious Amish applesauce cake! To get the best texture, do not overmix your batter. Mix just until the dry ingredients blend with the wet ones. This will help keep your cake light and fluffy. To check if your cake is done, use a toothpick. Insert it in the center. If it comes out clean, your cake is ready. For a lovely presentation, serve slices on a rustic wooden board. Dust the cake with powdered sugar. Garnish with thin apple slices for a charming touch. This cake pairs well with a scoop of vanilla ice cream or a dollop of whipped cream. The cold cream contrasts well with the warm cake. If you want a dairy-free option, use almond milk or coconut milk instead of regular milk. You can also use applesauce to replace oil for a lighter version. For sugar alternatives, try honey or maple syrup. Adjust the amount as needed, since these sweeteners can be sweeter than sugar. {{image_2}} You can change the flavor of Amish applesauce cake easily. Adding different spices makes a big difference. Try mixing in some ground ginger or allspice for a warm kick. You can also use more cinnamon for a classic taste. Incorporating citrus zest brightens the cake. Grate some lemon or orange peel into the batter. It adds freshness and a nice aroma. A hint of citrus works well with the sweet applesauce. The type of applesauce can change the cake's taste. You can use sweetened applesauce for a sweeter result. Or try spiced applesauce for added flavor. Each type gives the cake a unique twist. Nut alternatives are easy, too. If you don't like walnuts, use pecans or almonds. You can also leave out the nuts for a nut-free version. This keeps the cake light and fluffy. For a gluten-free version, swap all-purpose flour with gluten-free flour. Make sure to check the flour blend you use. This keeps the cake soft and tasty without gluten. If you want to make it vegan, replace the eggs. Use flax eggs or applesauce instead. You can also switch the vegetable oil for a plant-based option. This way, everyone can enjoy this delicious cake. To keep your Amish applesauce cake fresh, store it at room temperature. Place it in an airtight container. This way, it stays moist and tasty. If you live in a very warm area, consider refrigeration. Just cover it well to prevent it from drying out. You can freeze this cake for long-term storage. First, let the cake cool completely. Then, wrap it tightly in plastic wrap. After that, place it in a freezer-safe bag or container. When you're ready to eat it, take it out and thaw it in the fridge overnight. You can also reheat it in the oven at a low temperature for a few minutes. When stored at room temperature, the cake lasts about 3 days. In the fridge, it can stay good for up to a week. If you freeze it, the cake remains fresh for about 3 months. Always check for any signs of spoilage before eating. Can I use store-bought applesauce? Yes, you can use store-bought applesauce. It saves time and still tastes great. Just make sure it is unsweetened. This keeps the sugars balanced in the cake. How can I make the cake more moist? To make the cake more moist, add an extra 1/4 cup of vegetable oil. You can also try adding 1/4 cup of yogurt. These additions help keep the cake soft and tender. Is this cake suitable for those with nut allergies? If you have nut allergies, skip the walnuts in the recipe. The cake will still taste delicious without them. You can also add other textures like chocolate chips if desired. Can I make this cake without eggs? Yes! You can replace each egg with 1/4 cup of applesauce or 1/4 cup of mashed banana. This makes the cake vegan and still tasty. What to do if the cake comes out dry? If the cake is dry, you might have overbaked it. Next time, check it a few minutes early. You could also add a simple syrup to the top for added moisture. How to fix a sunken cake? If your cake sinks, it may have too much moisture or not enough baking powder. Ensure you measure the ingredients carefully. For a quick fix, use whipped cream on top to hide the sinkhole. This blog covers all you need to make a delicious Amish applesauce cake. We discussed the key ingredients, from applesauce to ground spices, and walked through each baking step. You learned tips for perfect texture and explored various ways to customize the cake. Don’t forget the storage tips to keep your cake fresh. Baking is fun and rewarding. Enjoy your cake creation, and share it with loved ones!

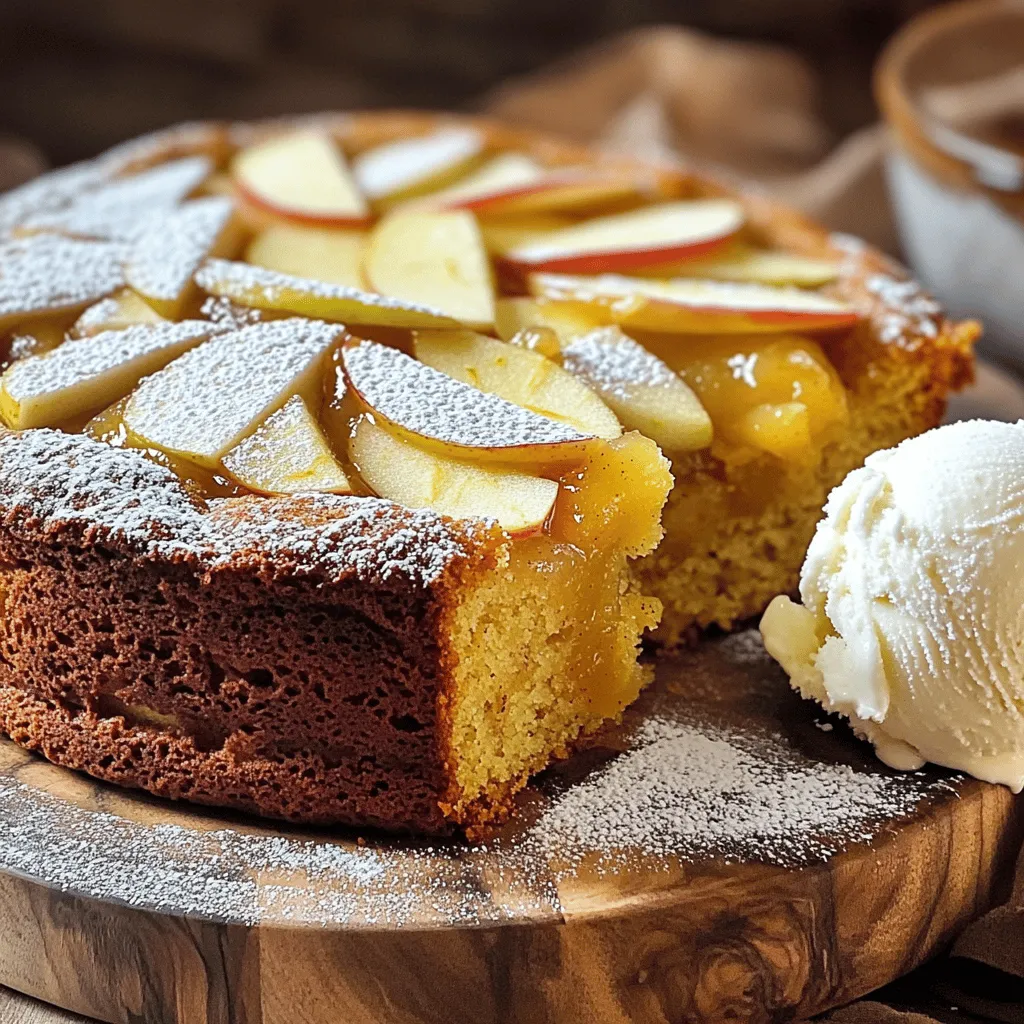
Craving a warm, homey dessert that brings comfort to your kitchen? You’re in luck! My Amish Applesauce Cake is the perfect blend of sweet and spice, making it a simple …

Read more

Categories Desserts

Maple Glazed Apple Fritters Tasty and Simple Treat

August 15, 2025 by Chef Luca
- 2 medium apples (Granny Smith or Honeycrisp), peeled and diced - 1 cup all-purpose flour - 1/2 cup granulated sugar - 1/4 teaspoon baking powder - 1/4 teaspoon baking soda - 1/2 teaspoon cinnamon - 1/4 teaspoon nutmeg - 1/4 teaspoon salt - 1 large egg - 1/2 cup milk - 1/4 cup maple syrup (plus more for glazing) - Vegetable oil for frying - Powdered sugar for dusting I love using Granny Smith or Honeycrisp apples. Granny Smith gives a tart flavor that balances the sweet glaze. Honeycrisp adds a crunchy texture and sweetness. Pick apples that feel firm. Avoid ones with bruises or soft spots. All-purpose flour works best for these fritters. It gives them a nice texture and helps them hold their shape when frying. If you want a lighter fritter, you can mix in some cake flour. This will make them airy and soft. If you need a gluten-free option, use a blend of gluten-free all-purpose flour. Look for a brand that has xantham gum added. This helps mimic the texture of regular flour and keeps the fritters from falling apart. You can swap maple syrup for honey or agave syrup in the glaze. Both give a different but tasty flavor. You can also use powdered sugar with a splash of milk for a simple glaze. Just mix until smooth, and drizzle over the fritters! First, let’s start with the apples. I like to use Granny Smith or Honeycrisp apples. They add a nice tartness. Peel the apples and dice them into small pieces. Aim for about half an inch in size. This way, they cook evenly in the fritters. Next, we prepare the dry ingredients. In a mixing bowl, combine the following: - 1 cup all-purpose flour - 1/2 cup granulated sugar - 1/4 teaspoon baking powder - 1/4 teaspoon baking soda - 1/2 teaspoon cinnamon - 1/4 teaspoon nutmeg - 1/4 teaspoon salt Stir these together until they mix well. This ensures that the flavors blend nicely. Now, let’s mix the wet ingredients. In another bowl, whisk together: - 1 large egg - 1/2 cup milk - 1/4 cup maple syrup Pour the wet mixture into the dry mixture. Mix gently until just combined. Be careful not to overmix; this helps the fritters stay light and fluffy. After that, fold in the diced apples. This step is key. It helps to evenly distribute the apples, giving each bite a burst of flavor. Next, we need to fry the fritters. Heat vegetable oil in a frying pan or deep fryer over medium heat. The oil should reach about 350°F (175°C). Use enough oil to fully submerge the fritters. Once the oil is ready, drop spoonfuls of batter into the hot oil. Do not overcrowd the pan. Fry each fritter for about 3-4 minutes on each side. Look for a golden brown color to know when they are done. After frying, place the fritters on a paper towel-lined plate. This will help drain extra oil. Enjoy the process, and get ready for a tasty treat! To get your fritters just right, keep these tips in mind: - Preventing oil splatter: To avoid mess, use a deep pan or fryer. Heat the oil slowly and avoid adding too many fritters at once. This keeps the oil at a steady temperature. - Tips for achieving golden-brown fritters: Fry at 350°F (175°C). This temperature cooks the fritters evenly. Check for a golden color on both sides. They should take about 3-4 minutes per side. The glaze can make your fritters shine. Here’s how to get it right: - Consistency of the maple glaze: Mix powdered sugar with maple syrup until smooth. Aim for a thick but pourable glaze. Adjust with more syrup or sugar for the right texture. - Methods for even glaze distribution: Drizzle the glaze over warm fritters. Use a spoon for control. Make sure to cover each fritter for a sweet finish. How you serve your fritters can enhance the experience: - Pairing fritters with beverages: These fritters go well with coffee, tea, or cider. The flavors complement each other nicely. - Serving fritters warm vs. cold: Warm fritters are best. They keep the glaze soft and gooey. Cold fritters can be tasty too, but lose that fresh warmth. {{image_2}} You can make your fritters even more exciting! Try adding nuts or raisins to the batter. Nuts give a nice crunch, while raisins add a sweet chewiness. You can also switch up the spices. Instead of cinnamon and nutmeg, try using cardamom or ginger. These spices can bring a new flavor twist to your fritters. The glaze is just the start! You can try other glaze ideas too. For example, a vanilla glaze or a caramel drizzle would taste amazing. Dusting the fritters with cocoa powder can add a rich flavor. You can also use crushed nuts or coconut flakes for a fun topping. These options will make your fritters unique and tasty. Want a healthier treat? You can cut down on sugar. Use less granulated sugar in the batter and glaze. Another option is to bake the fritters instead of frying them. Preheat your oven to 375°F (190°C) and place the fritters on a lined baking sheet. Bake for about 15-20 minutes, or until golden brown. This way, you can enjoy your sweet treat with fewer calories! To keep your fritters fresh, store them in an airtight container. Place parchment paper between layers to avoid sticking. Refrigerate them for up to three days. When you're ready to enjoy, reheat them in the oven at 350°F for about 10 minutes. This keeps them crispy and warm. Freezing fritters is simple. First, let them cool completely. Then, wrap each fritter in plastic wrap. Place them in a freezer bag or container. You can freeze them for up to three months. When you want to eat them, thaw overnight in the fridge. Reheat in the oven at 350°F until warm, about 10-15 minutes. Homemade fritters stay fresh for about three days in the fridge. If they sit longer, check for signs of spoilage. Look for a sour smell or mold. If they feel hard or dry, they may not taste good. Always trust your senses when it comes to food safety. To check if your fritters are done, look for a golden-brown color. This should take about 3-4 minutes on each side. You can also use a meat thermometer. The inside should reach 200°F (93°C). If you cut one open, it should look cooked. No raw batter should be visible. Yes, you can bake the fritters. Preheat your oven to 375°F (190°C). Line a baking sheet with parchment paper. Drop spoonfuls of batter onto the sheet. Bake for about 15-20 minutes. Flip them halfway through for even cooking. Baking won't give you the same crunch, but they will still taste great! If your batter feels thick, add a little more milk. Start with one tablespoon at a time. Mix gently until it reaches the right consistency. You want it to drop easily from a spoon but still hold its shape. If it’s too thin, add a bit more flour. We covered everything you need to make tasty apple fritters. I shared the best ingredients, tips for frying, and serving ideas. You can even switch things up with variations and healthier versions. Remember, the right apples and cooking techniques make a big difference. You can enjoy these fritters warm or cold, and they store well for future treats. Get ready to impress your friends and family with your new skills!

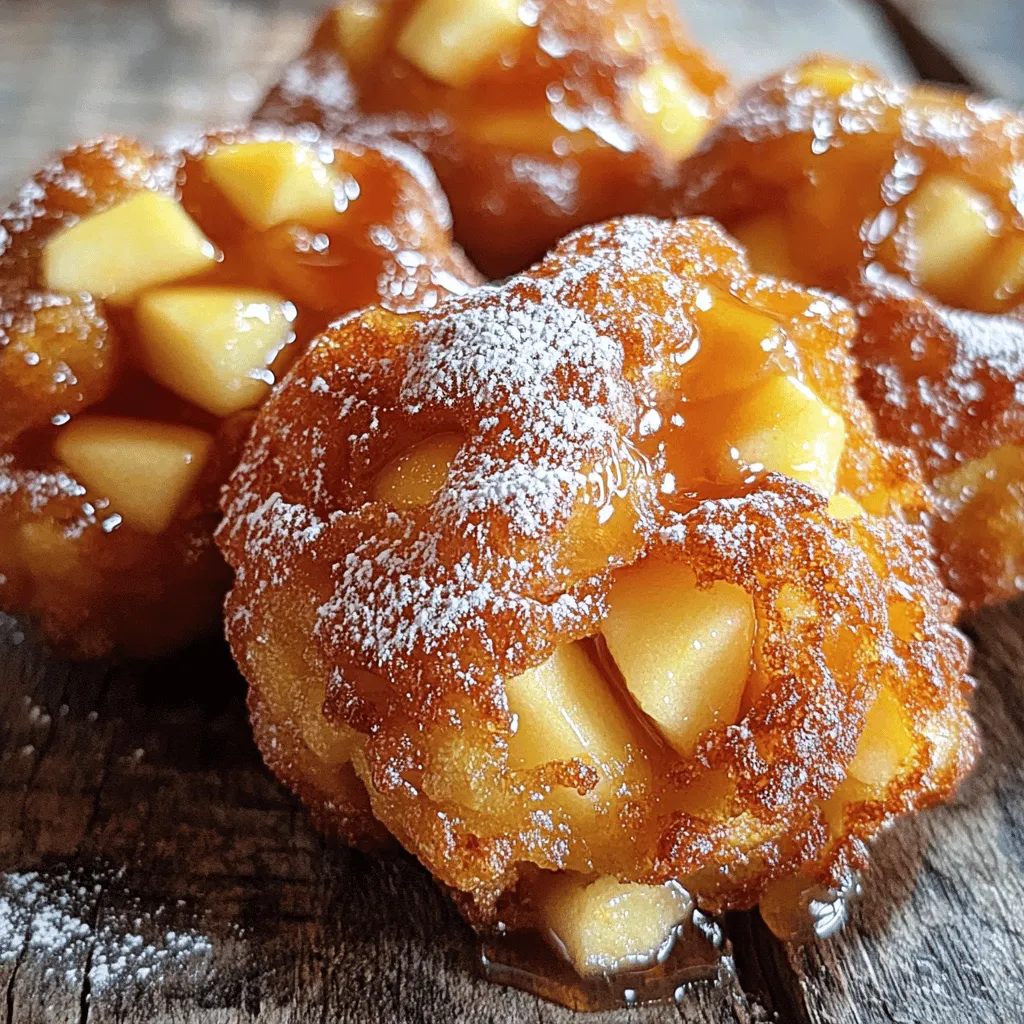
Craving a sweet treat that’s both delightful and easy to make? You’re in the right place! In this blog, I’ll guide you through making Maple Glazed Apple Fritters that are …

Read more

Categories Desserts
Older posts
Newer posts
← Previous Page1 … Page43 Page44 Page45 … Page122 Next →

STIRRED RECIPES

Where every dish begins with a stir! 🍲✨

PAGES

Home About Contact Privacy Policy Terms & Conditions Cookie Policy GDPR Policy Copyright Policy Disclaimer

CATEGORIES

Appetizers Desserts Salads Breakfast Dinner

Contact

  • Pinterest
  • Mail
Copyright © 2026 Stirred Recipes. All rights reserved.