Spiced Apple Cider Donuts Flavorful and Simple Recipe
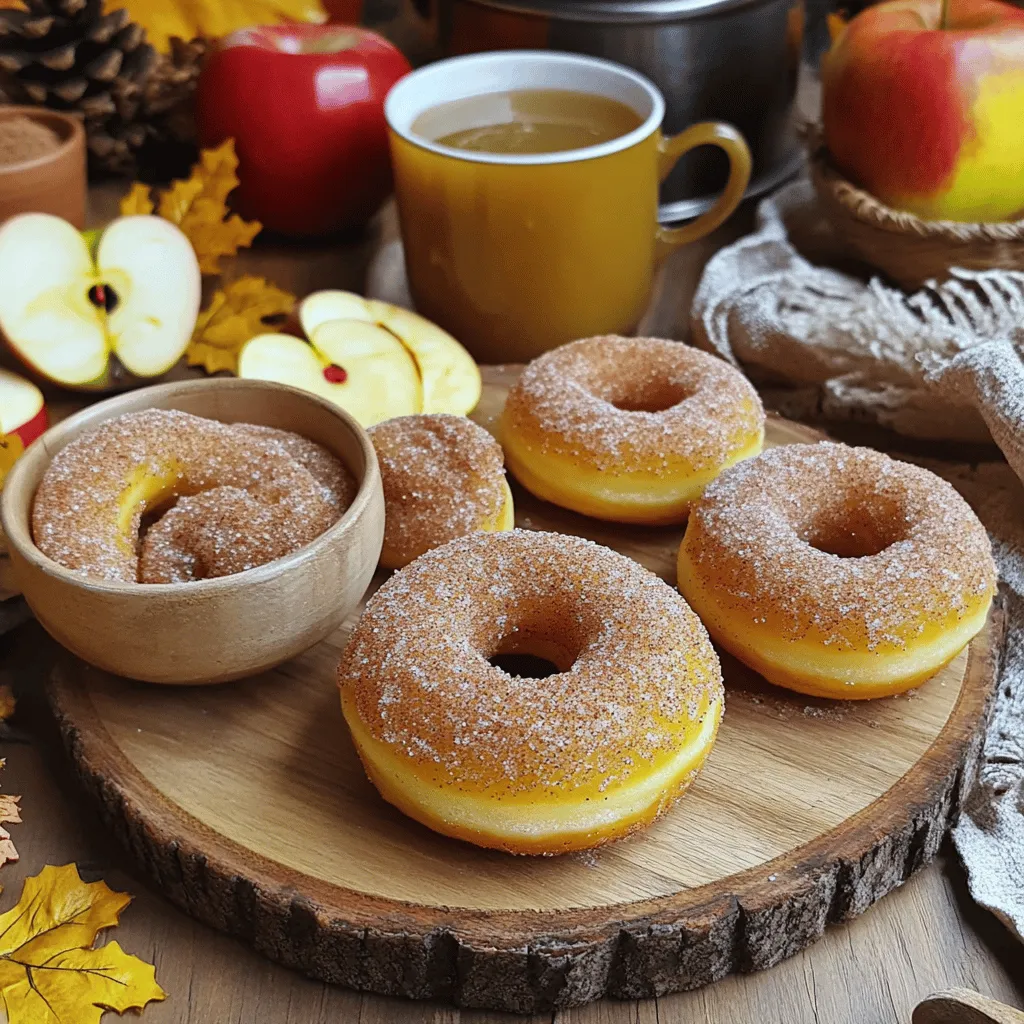
Fall is here, and what better way to celebrate than with warm, spiced apple cider donuts? These treats are easy to make and bursting with flavor. In this post, I’ll …
Fall is here, and what better way to celebrate than with warm, spiced apple cider donuts? These treats are easy to make and bursting with flavor. In this post, I’ll …
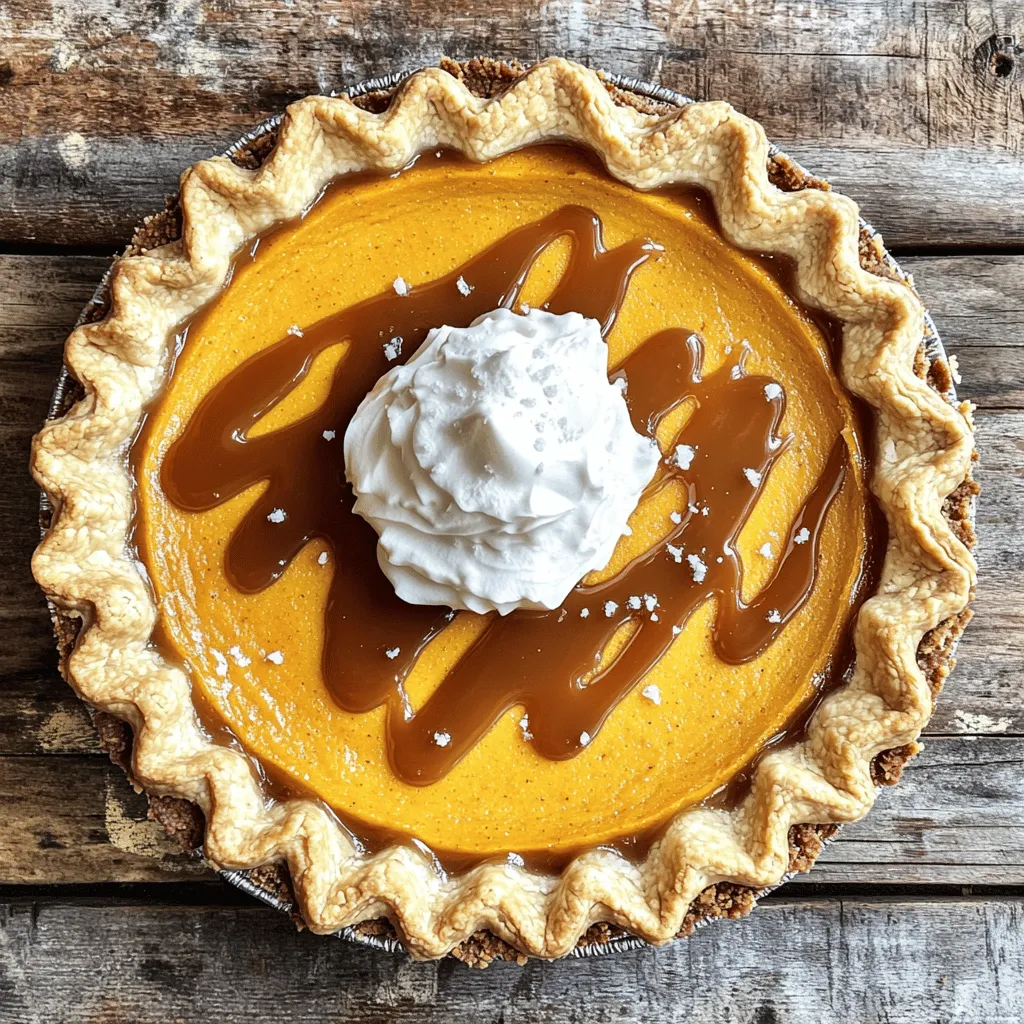
Get ready for the ultimate fall treat: Salted Caramel Pumpkin Pie! This dish blends sweet and salty flavors in a pumpkin base, making it the perfect dessert for any autumn …
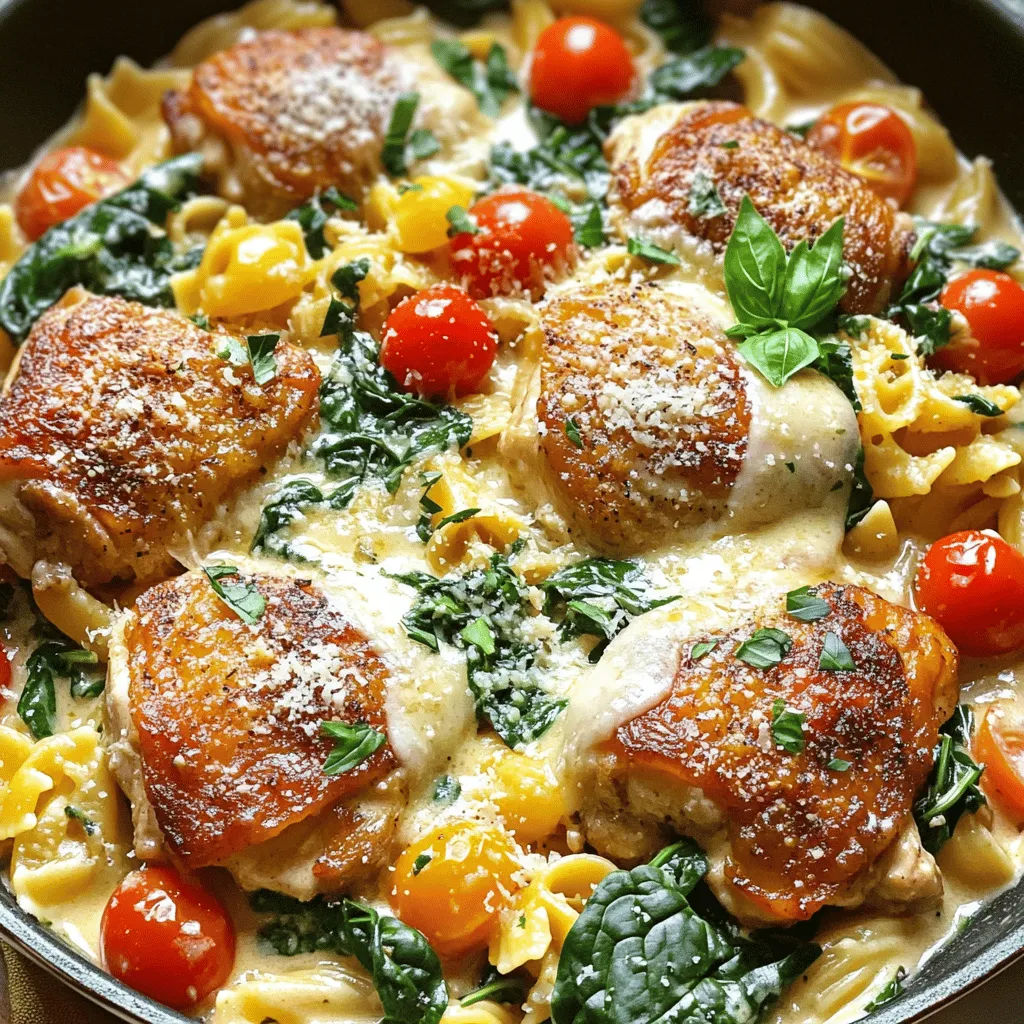
Ready for a simple and tasty dinner? One Pot Creamy Tuscan Chicken is your answer! This delightful weeknight meal combines juicy chicken, rich cream, and fresh veggies, all cooked in …
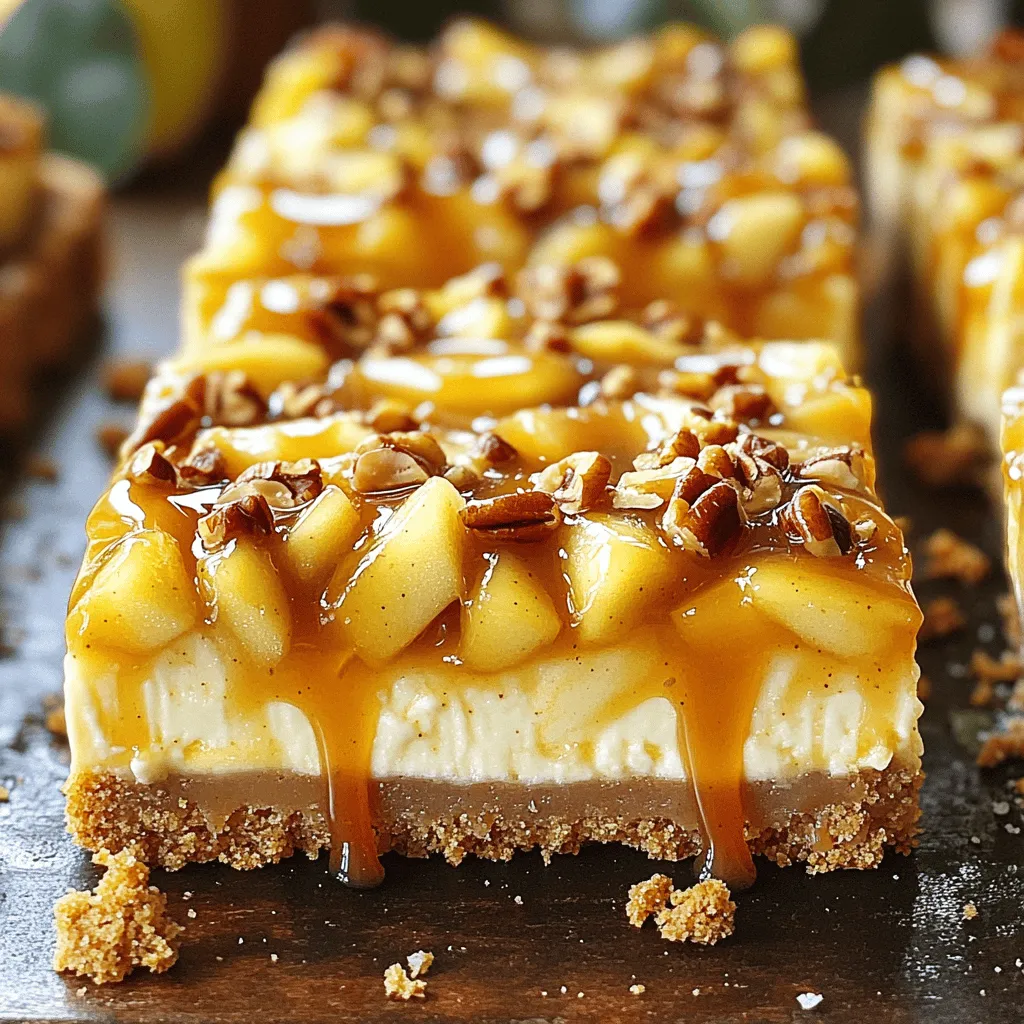
Looking for a sweet treat that combines creamy cheesecake and the fall flavor of apples? You’re in the right place! These Caramel Apple Cheesecake Bars are a delicious way to …

Are you ready to whip up a delicious treat that’s both simple and tasty? Maple Glazed Carrot Cupcakes blend the sweet goodness of maple syrup with the warmth of spices …
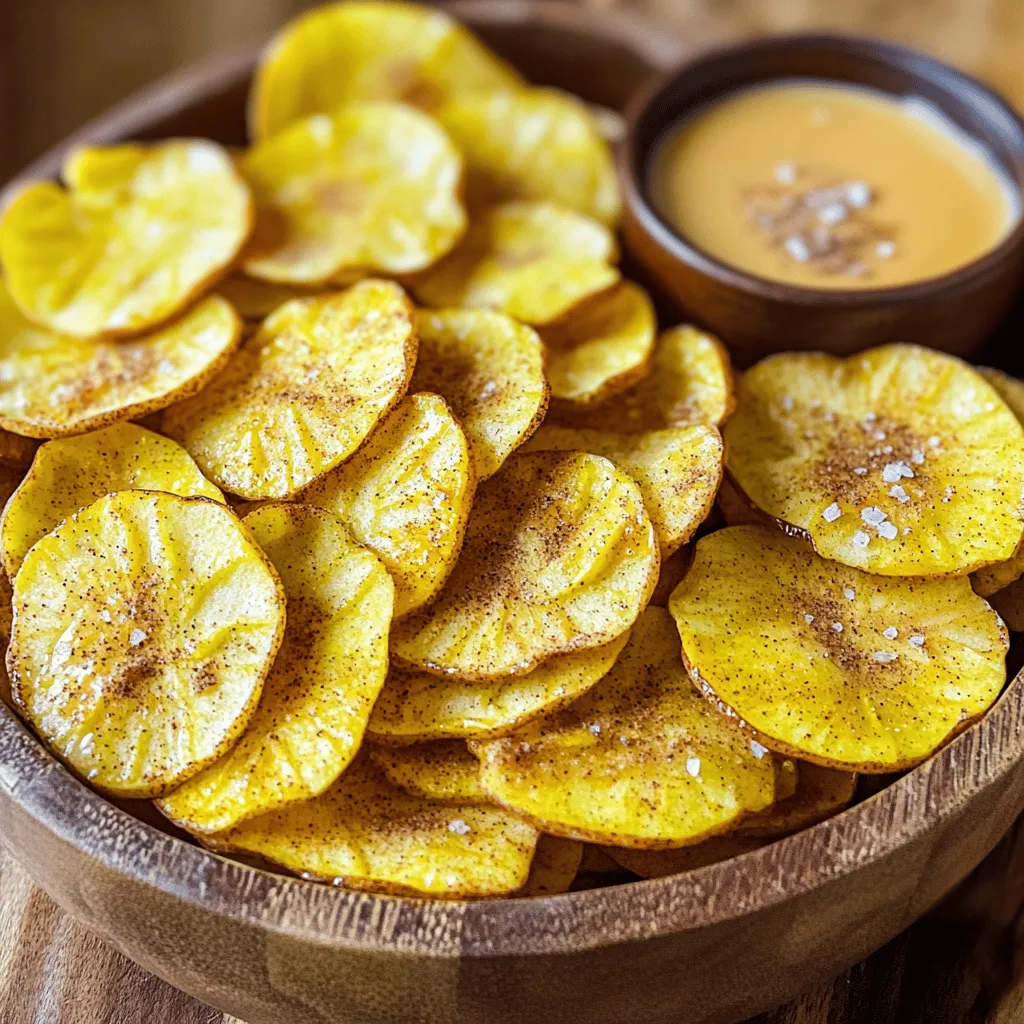
Looking for a fun and healthy snack? Let’s make Air Fryer Apple Chips! They’re crunchy, delicious, and packed with flavor. With just a few simple ingredients like apples, cinnamon, and …
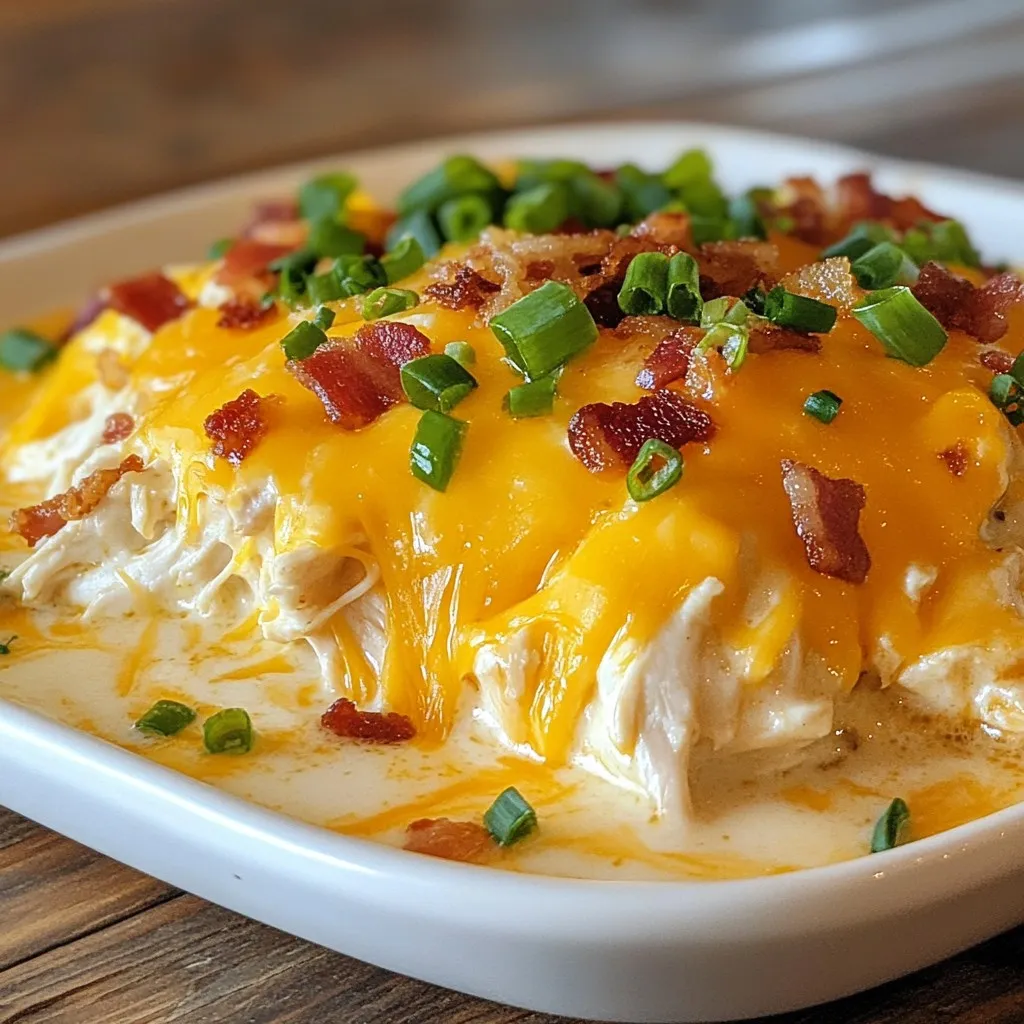
Looking for a dish that’s cheesy, creamy, and oh-so-comforting? Let me introduce you to Slow Cooker Crack Chicken! This easy recipe combines tender chicken, rich flavors, and just the right …
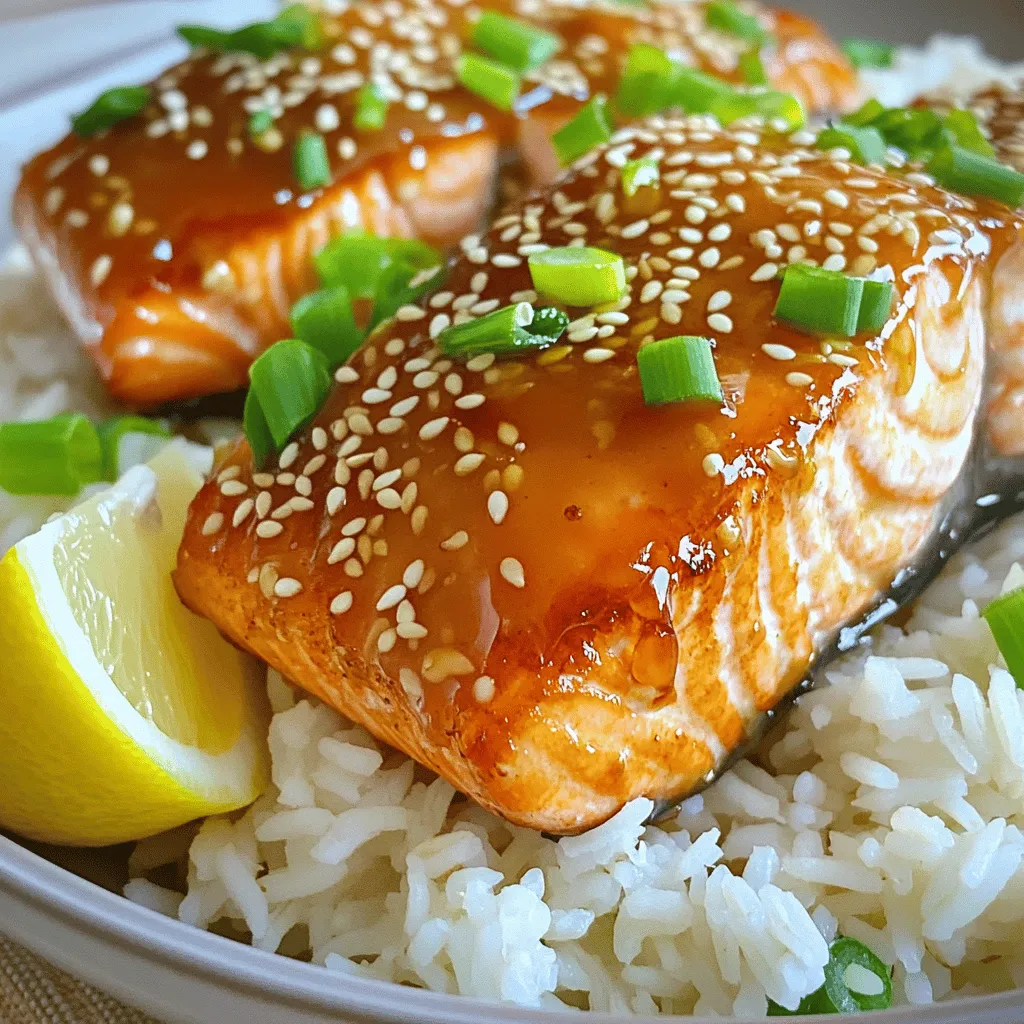
Are you ready to whip up a meal that’s both simple and packed with flavor? This Air Fryer Honey Garlic Salmon dish checks all the boxes. It’s quick, tasty, and …

If you’re craving an easy and tasty dessert, you’ll love these No-Bake Oreo Cheesecake Bars! With just a few simple ingredients, you can whip up a creamy, delightful treat that’s …
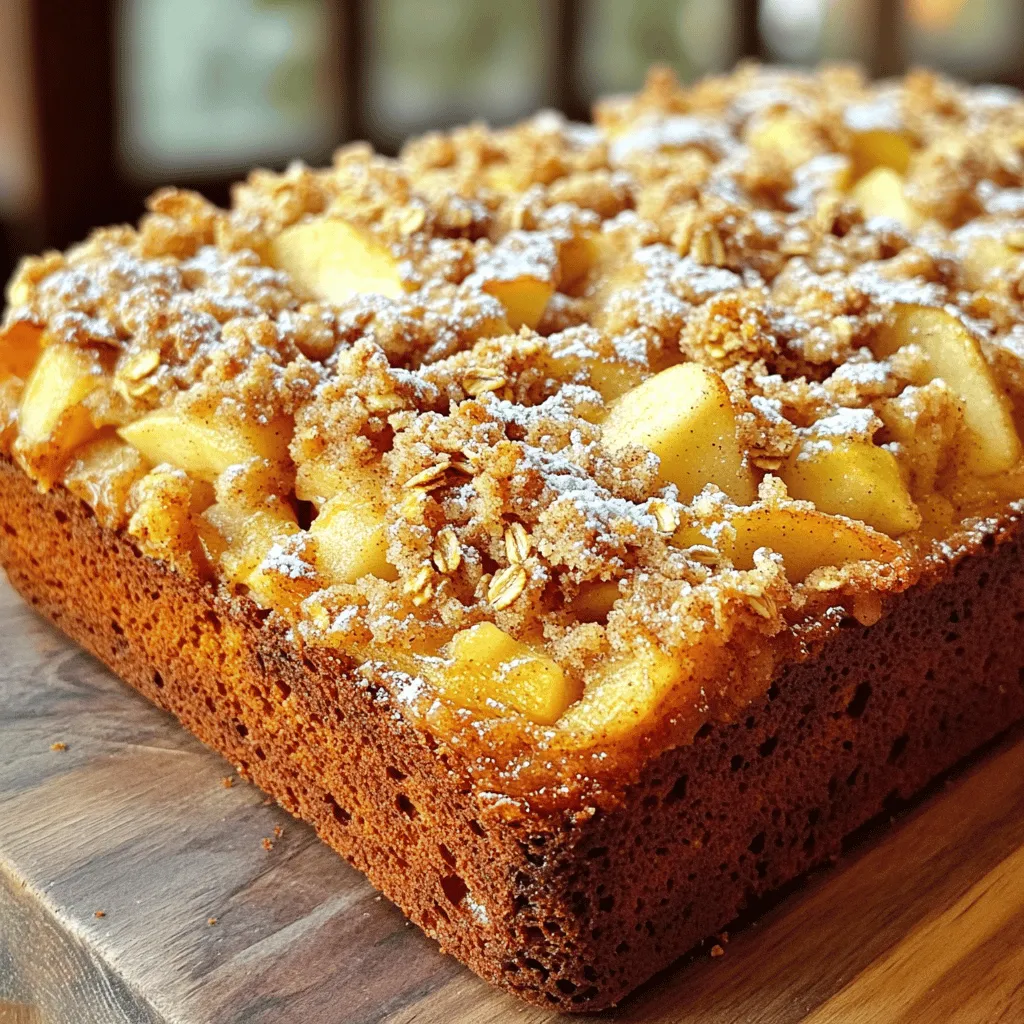
Get ready to delight your taste buds with my simple Cinnamon Apple Bread recipe! This soft, warm bread blends sweet apples and spicy cinnamon, making it the perfect treat. Whether …