Caramel Pecan Pie Cheesecake Bars Irresistible Treat
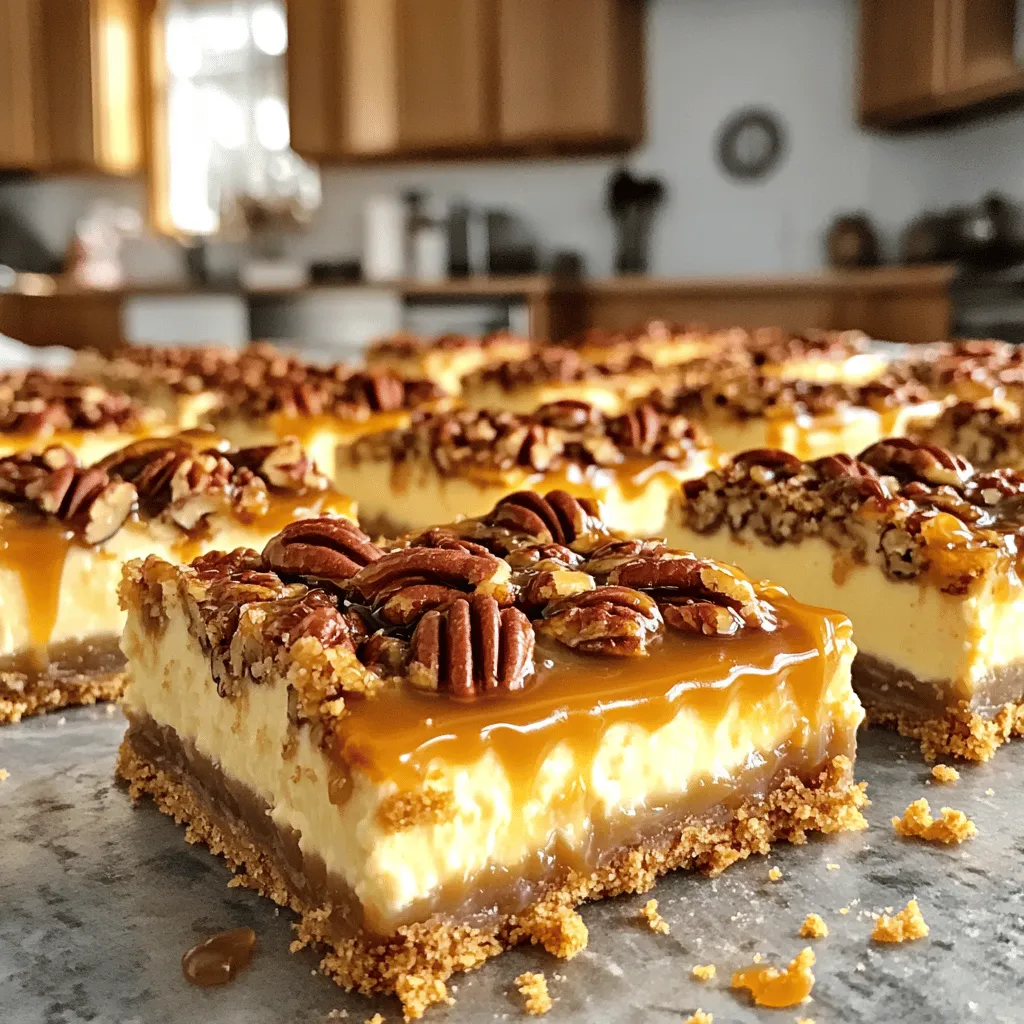
Get ready to indulge in an irresistible treat that combines two classic desserts: pecan pie and cheesecake! My Caramel Pecan Pie Cheesecake Bars are creamy, crunchy, and oh-so-delicious. With layers …